This document covers personal account settings management, including updating account name and password, managing personal signatures, two-step verification, viewing login records, and notification settings.
1. Updating Account Name and Password
You can securely update your display name and login password through the Account Settings page in Nota Sign. This guide outlines the steps to manage your personal credentials and ensure account security.
1.1. Access the Account Management Page
-
Log in to your Nota Sign account.
-
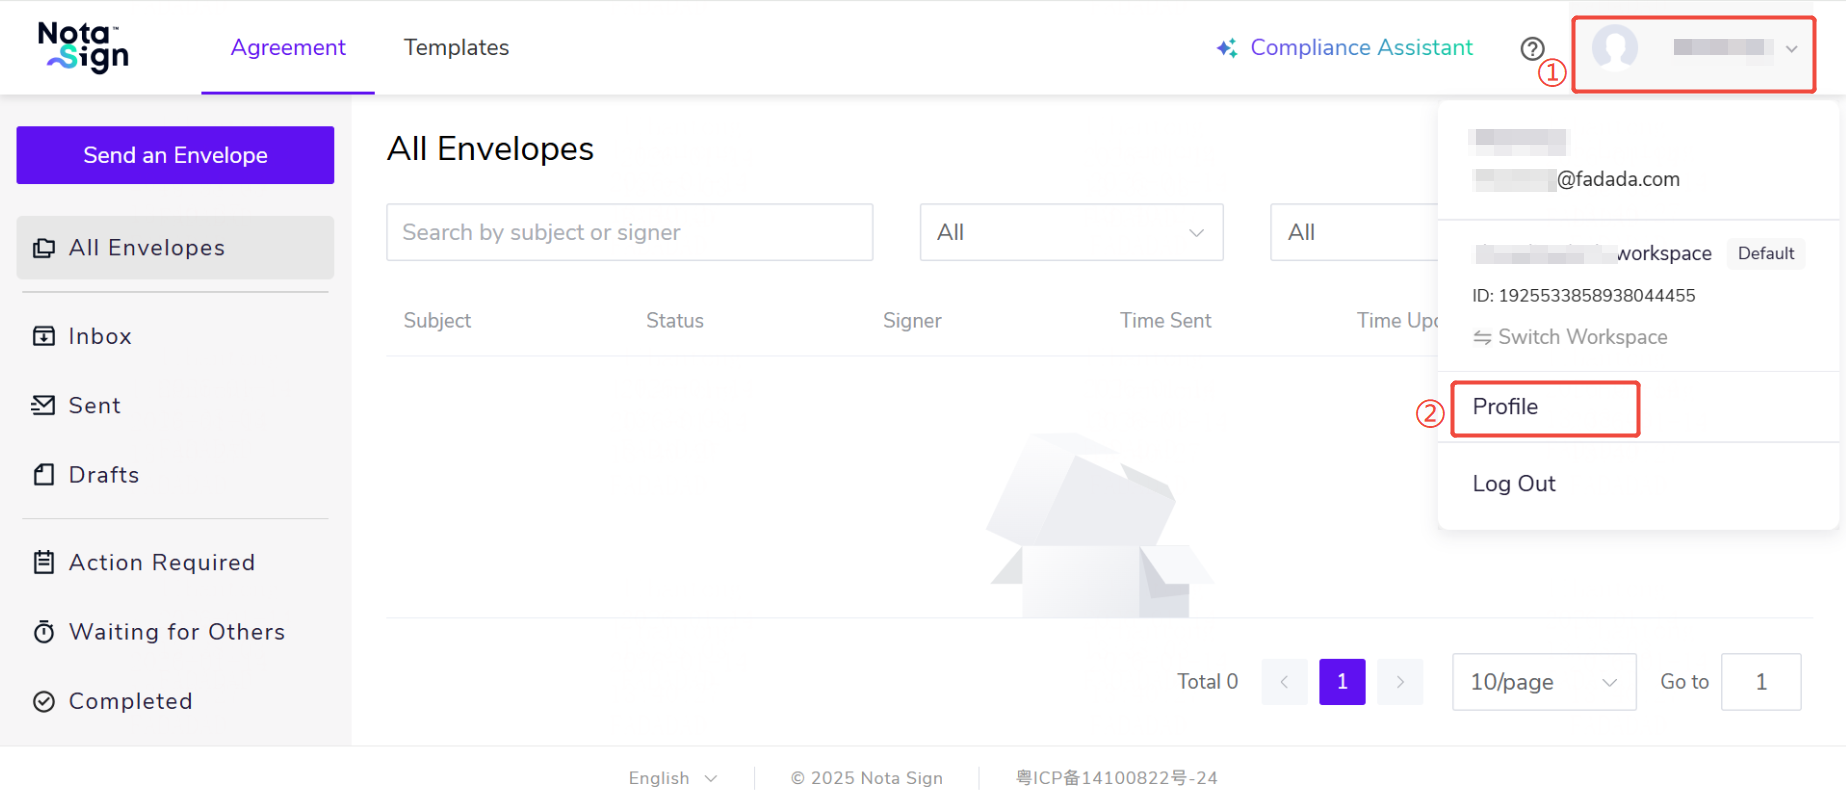
Click your profile avatar in the top-right corner.
-
From the dropdown menu, select Manage Profile.
-
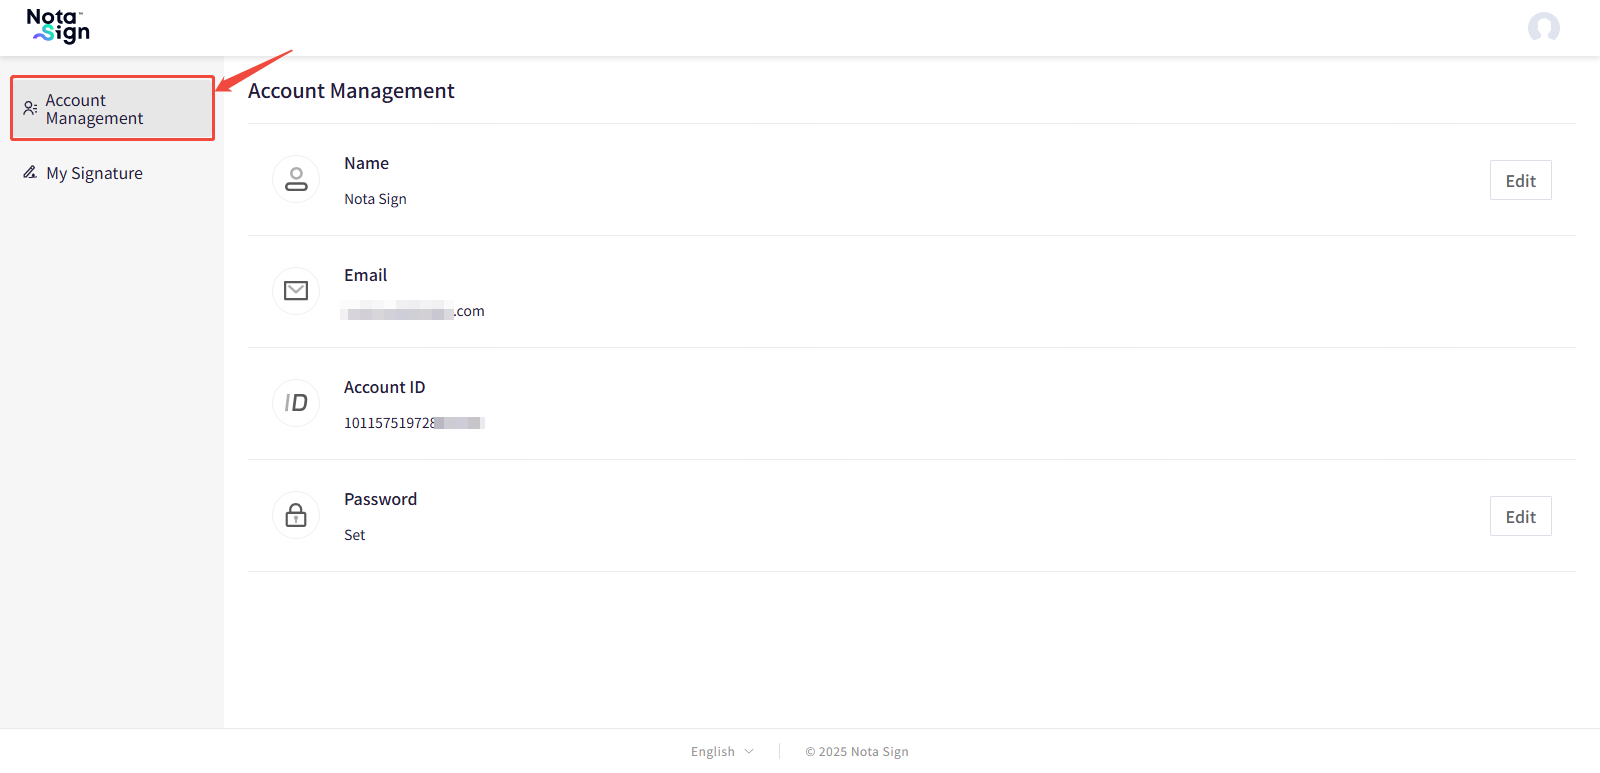
In the left-hand navigation panel, click Account Management.
1.2. Change Display Name
To update the name that appears on your envelopes and communications:
-
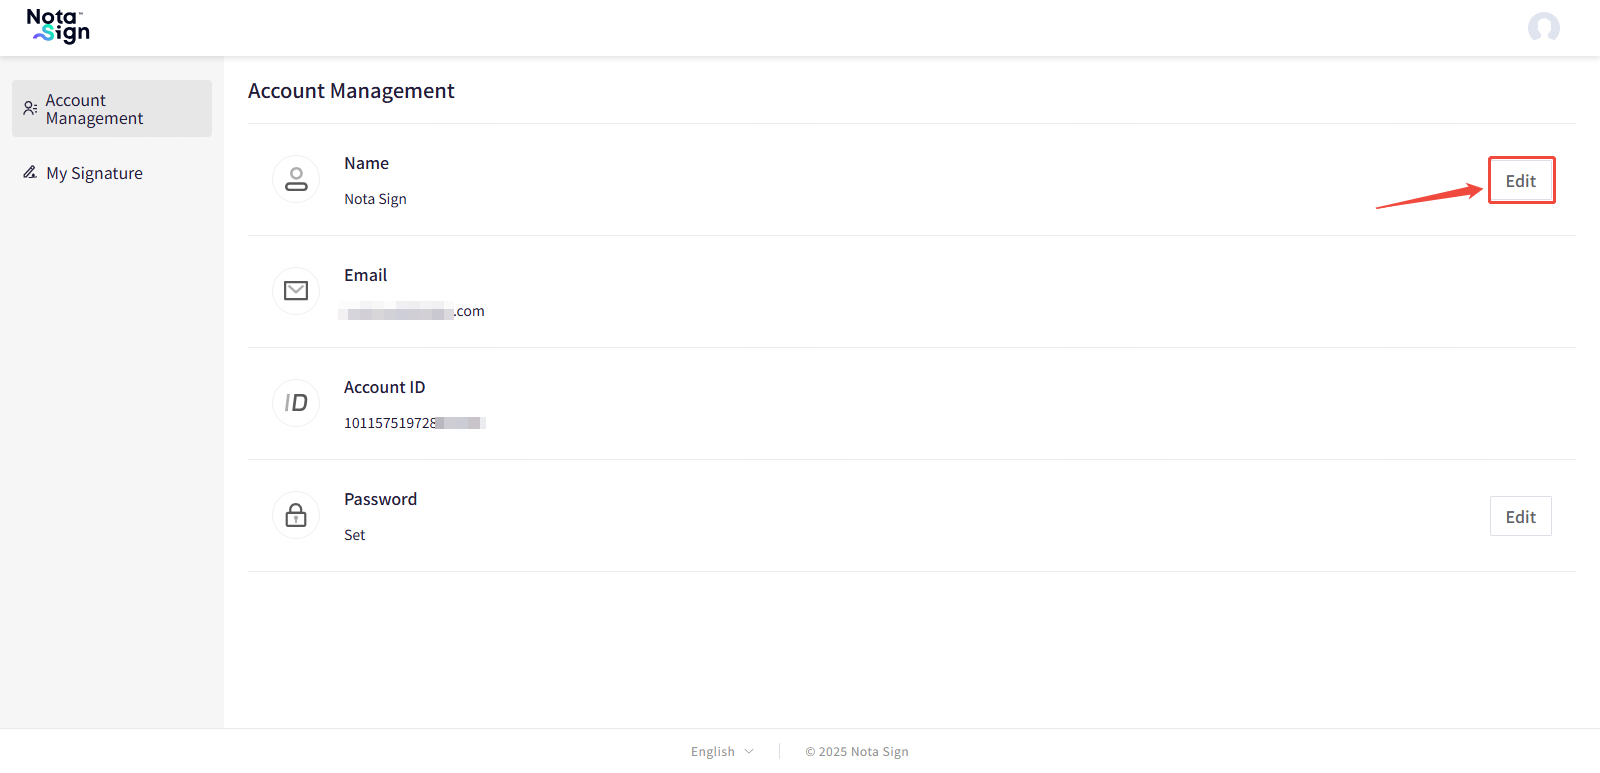
In the Account Name section, click the Edit button.
-
Enter your new display name.
-
Click Confirm to save the change.
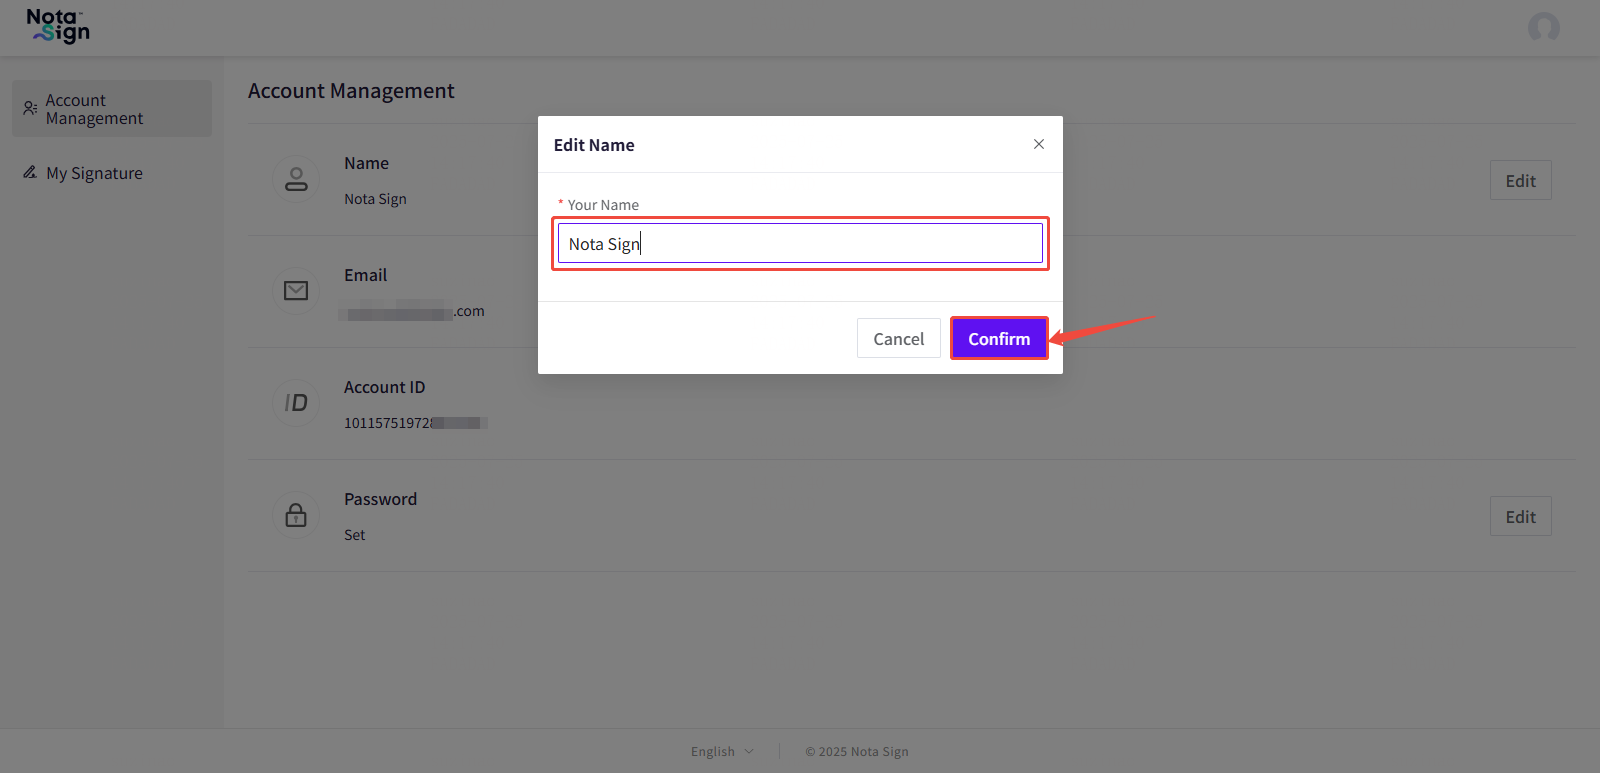
✅ Note: Your new display name will be shown in all future actions you initiate. Past activities will retain the original name and are not retroactively updated.
1.3. Change Password
To maintain the security of your account, it is recommended to update your password regularly.
-
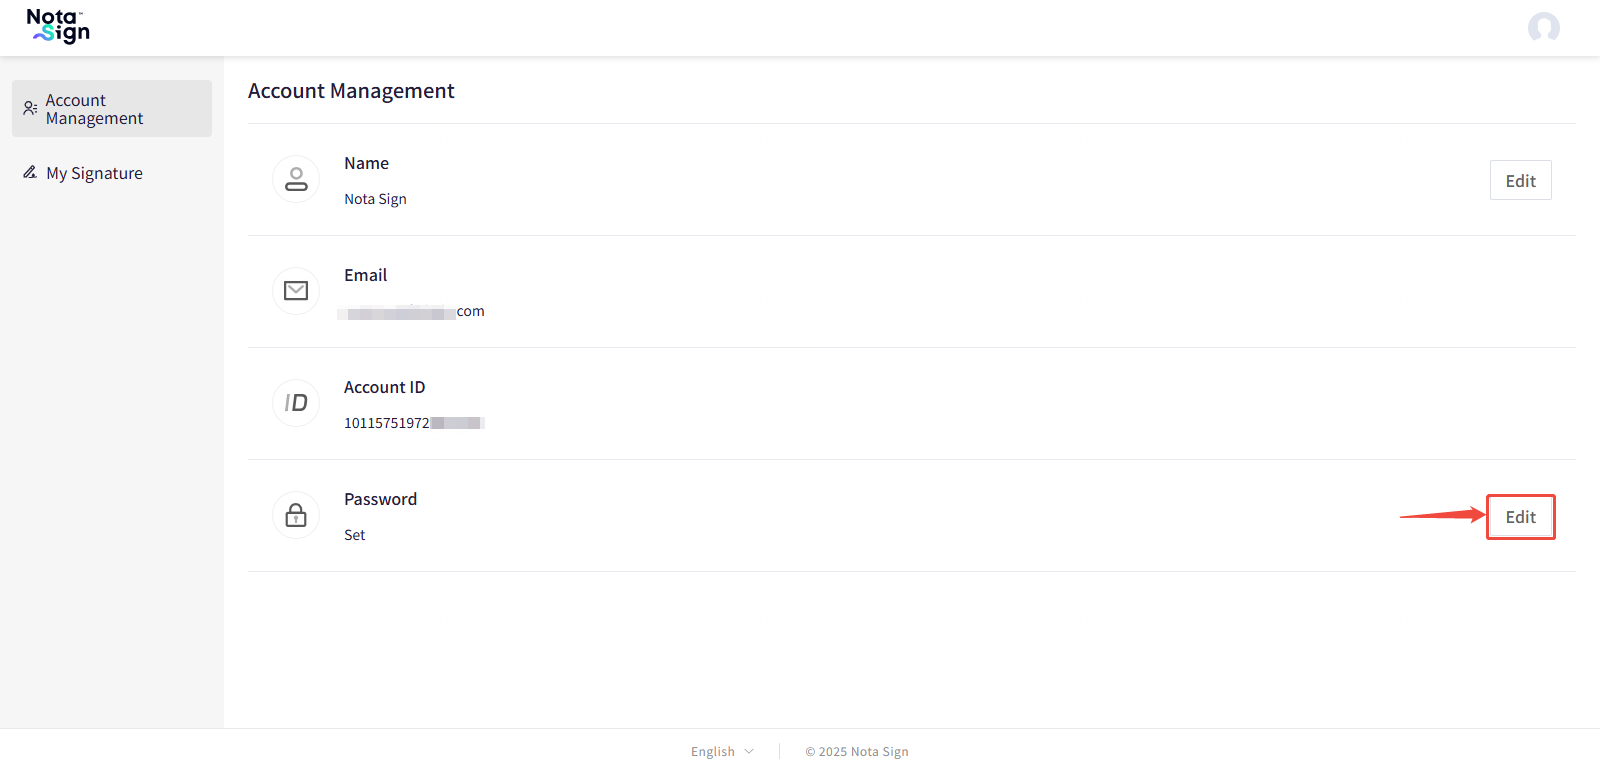
In the Password section, click the Edit button.
-
A verification code will be sent to your registered email address.
-
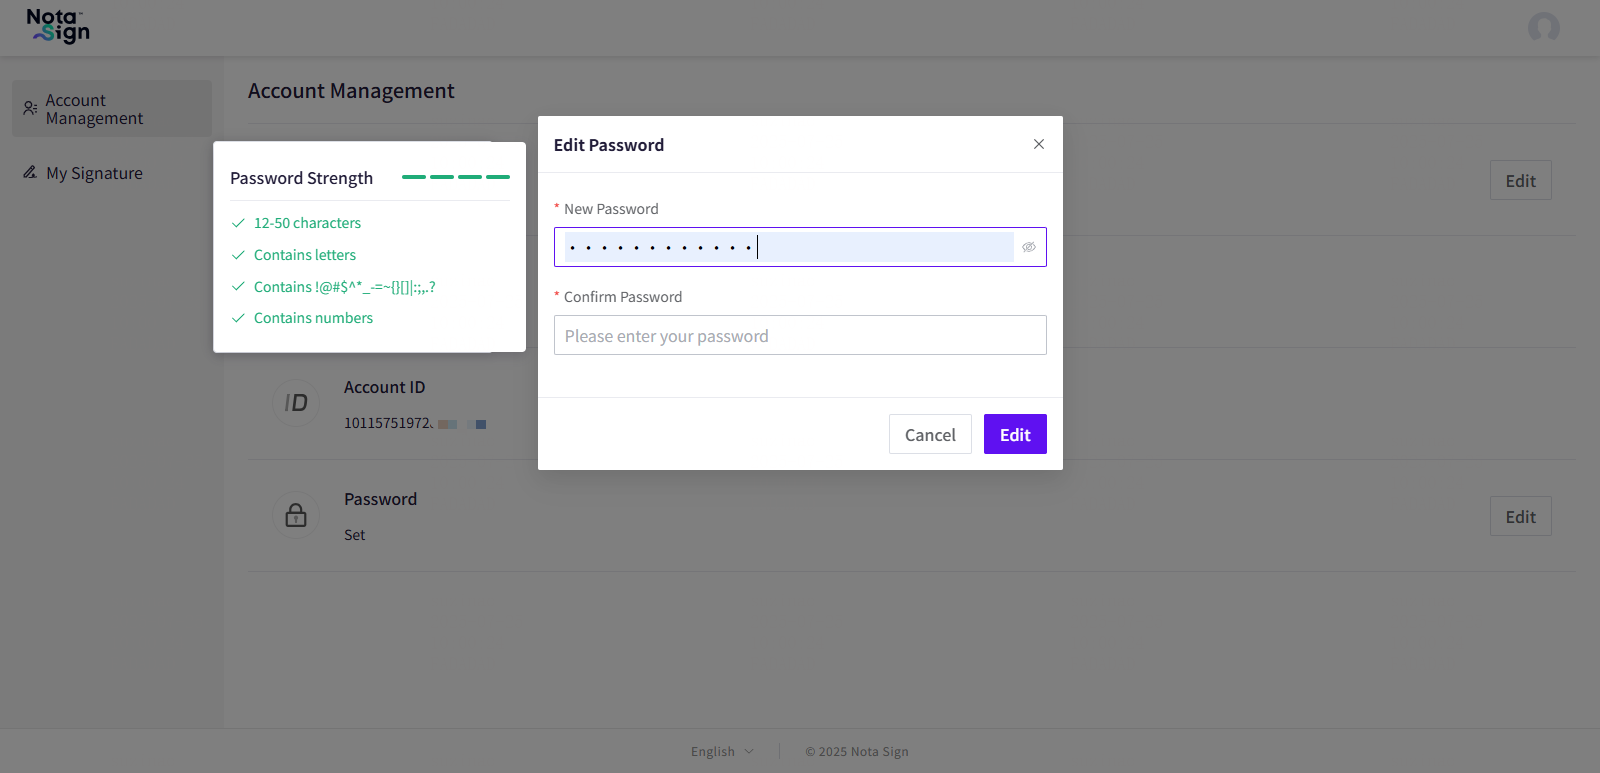
Enter the verification code, followed by your new password.
-
Click Edit to confirm and apply the changes.
Password Requirements:
- Length: 12 to 50 characters
- Must include at least one letter
- Must include at least one number
- Must include at least one special character (e.g., ! @ # $ ^ * _ - = ~ { } [ ] | : ; , . ?)
2. Managing Personal Signature
You can easily create, edit, or delete your electronic signatures through the My Signature page in Nota Sign. This guide outlines the steps to manage your signatures for seamless document signing.
2.1. Access the Signature Management Page
-
Log in to your Nota Sign account.
-
Click your profile avatar in the upper-right corner of the dashboard.
-
From the dropdown menu, select Manage Profile.
-
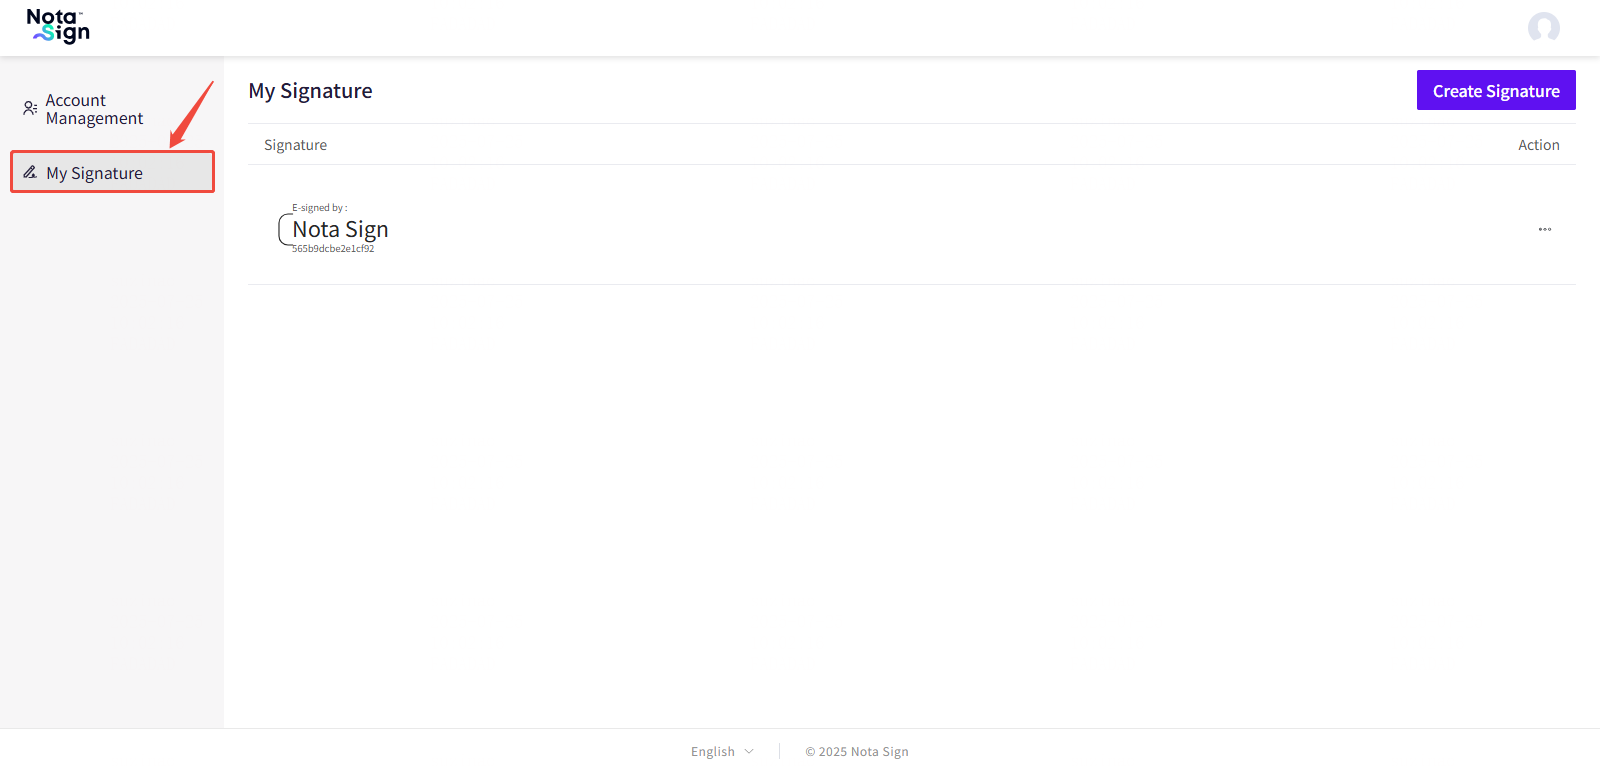
In the left navigation panel, click My Signature to open the signature management interface.
2.2. Add a New Signature
You can create a signature in multiple formats depending on your preferences.
To add a signature:
-
Click Add Signature in the top-right corner.
-
Enter your desired signature text.
-
Choose a signature style from the available options.
-
Click Confirm to save the signature.
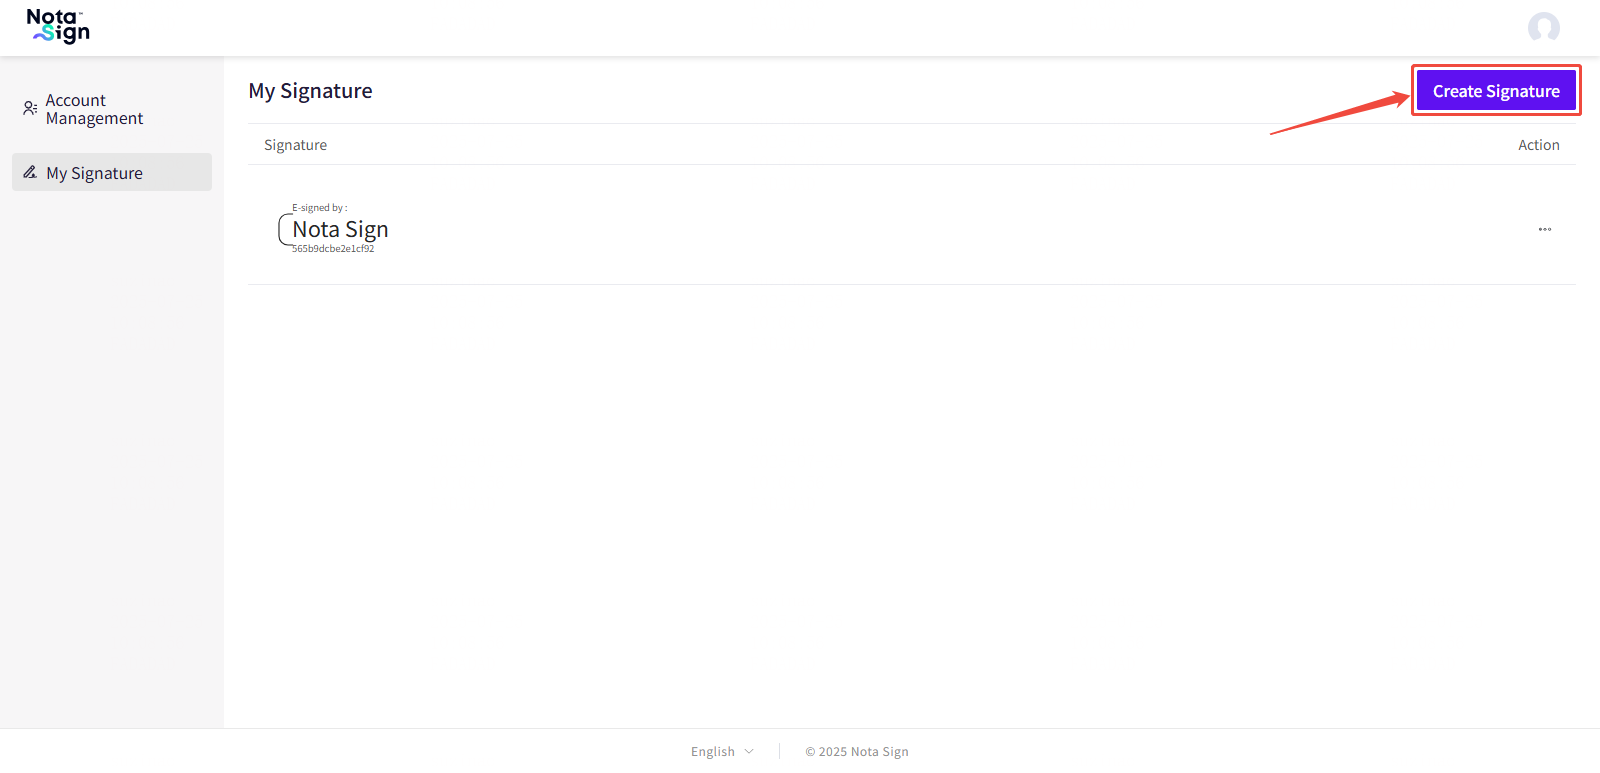
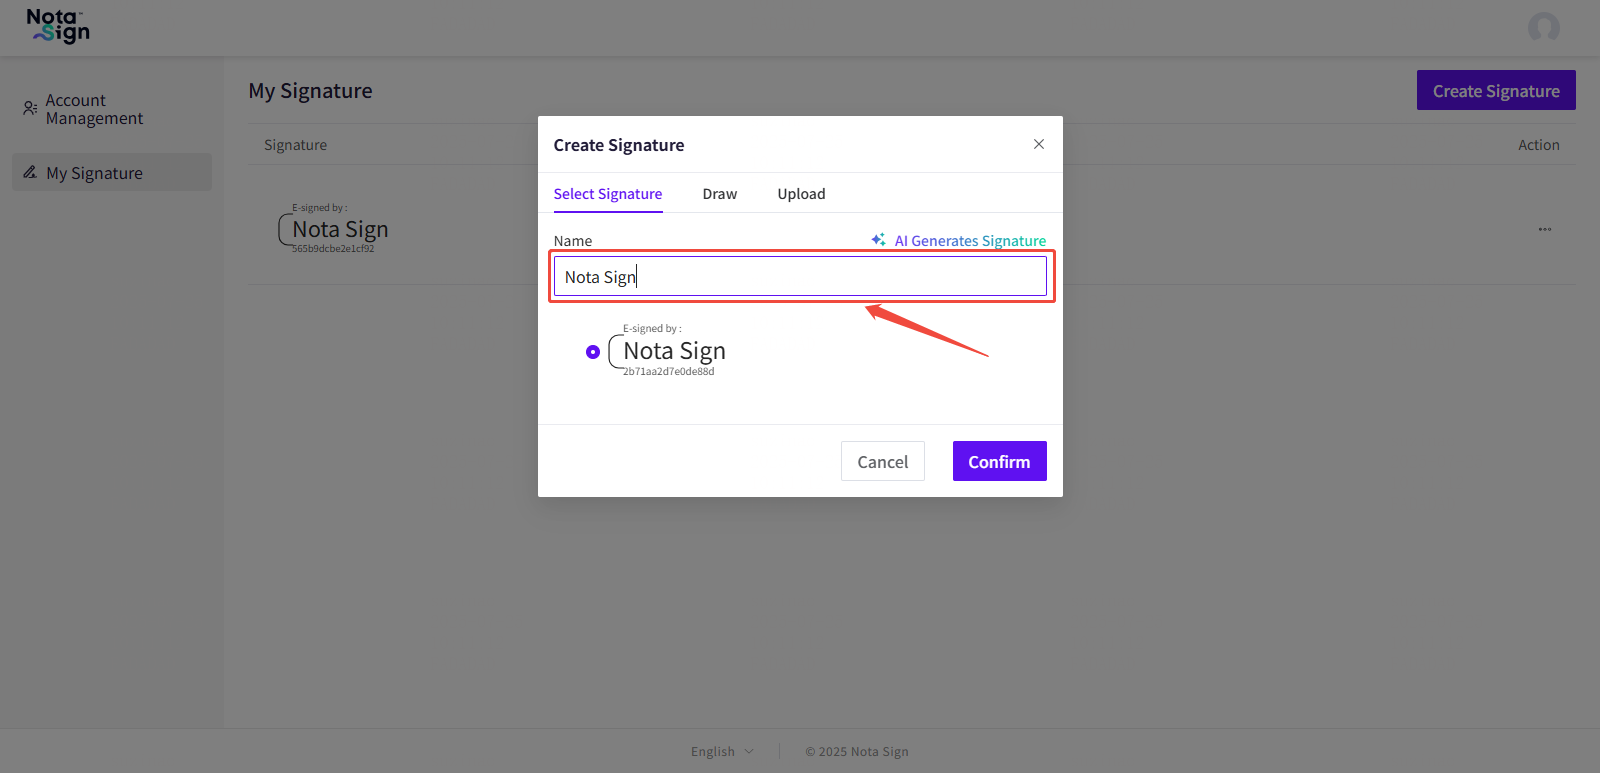
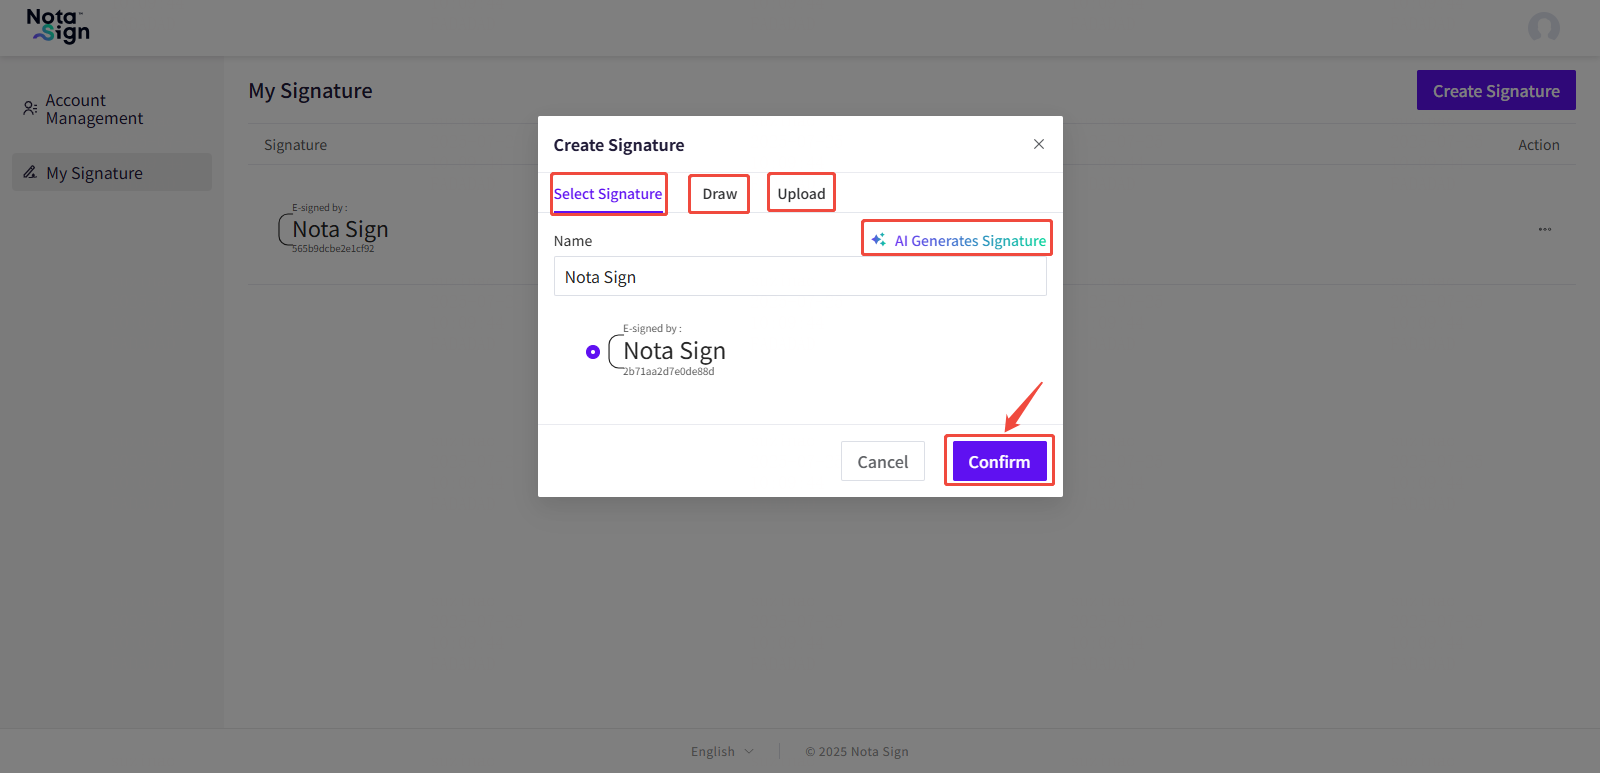
Supported Signature Styles:
- Default Style: A system-generated font-based signature.
- Drawn Signature: Handwritten using your mouse, stylus, or touchpad.
- Image Upload: Upload an image file of your physical signature.
- AI-Generated: Create a custom signature using AI-generated styling based on your input.
2.3. Delete an Existing Signature
To remove a signature you no longer use:
- Locate the target signature in your signature list.
- Click the Action menu (⋯) next to the signature.
- Select Delete from the dropdown options.
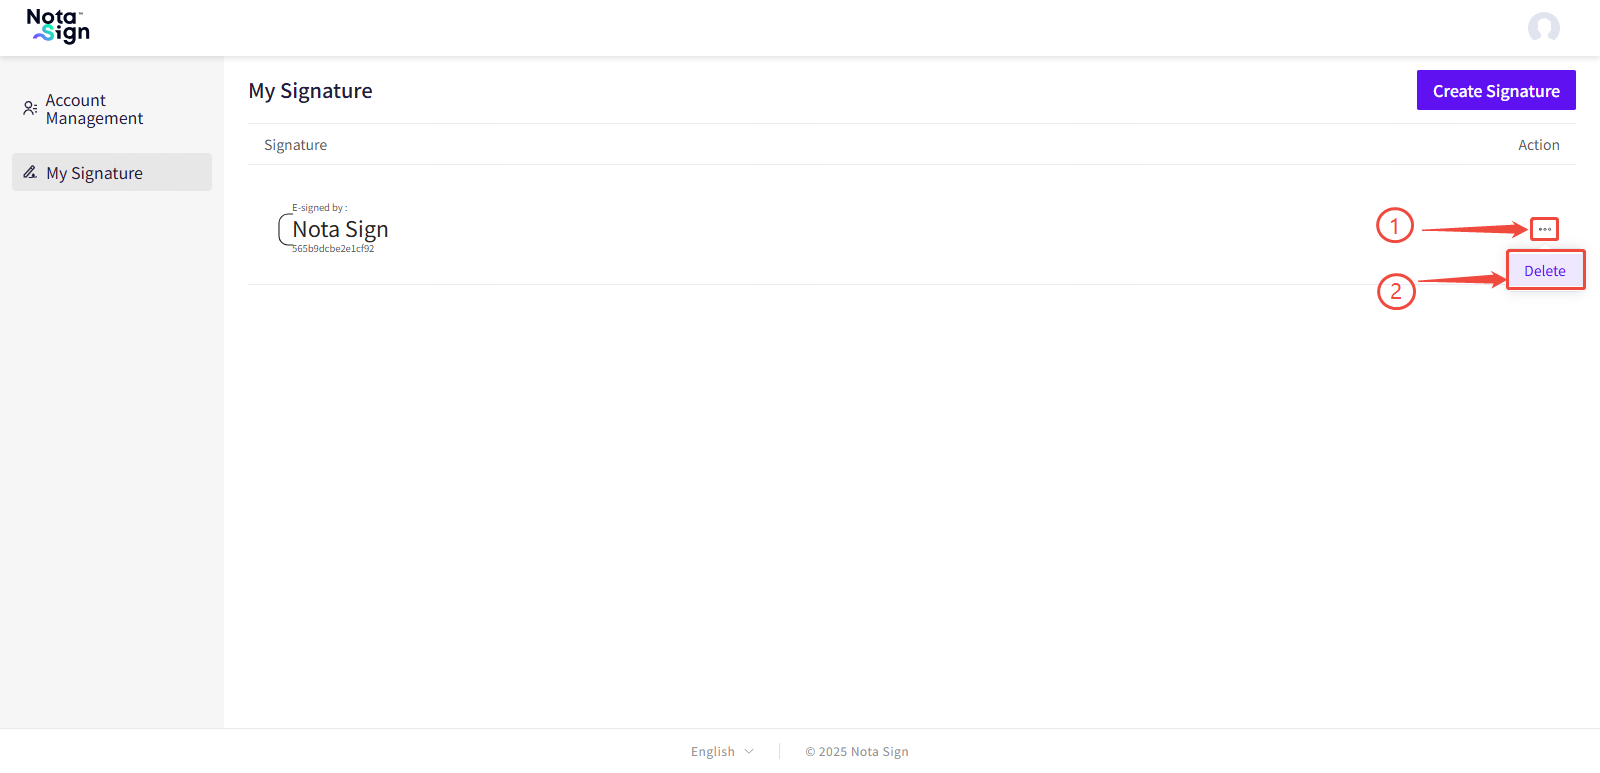
⚠️ Note: Deleting a signature will not impact documents that have already been signed. However, the deleted signature will no longer be available for use in future signing workflows.
3. Enabling Two-Step Verification
3.1. Log in to the Nota Sign, click the profile avatar in the upper-right corner, and select Profile;
3.2. Select Security, then click Two-Step Verification;
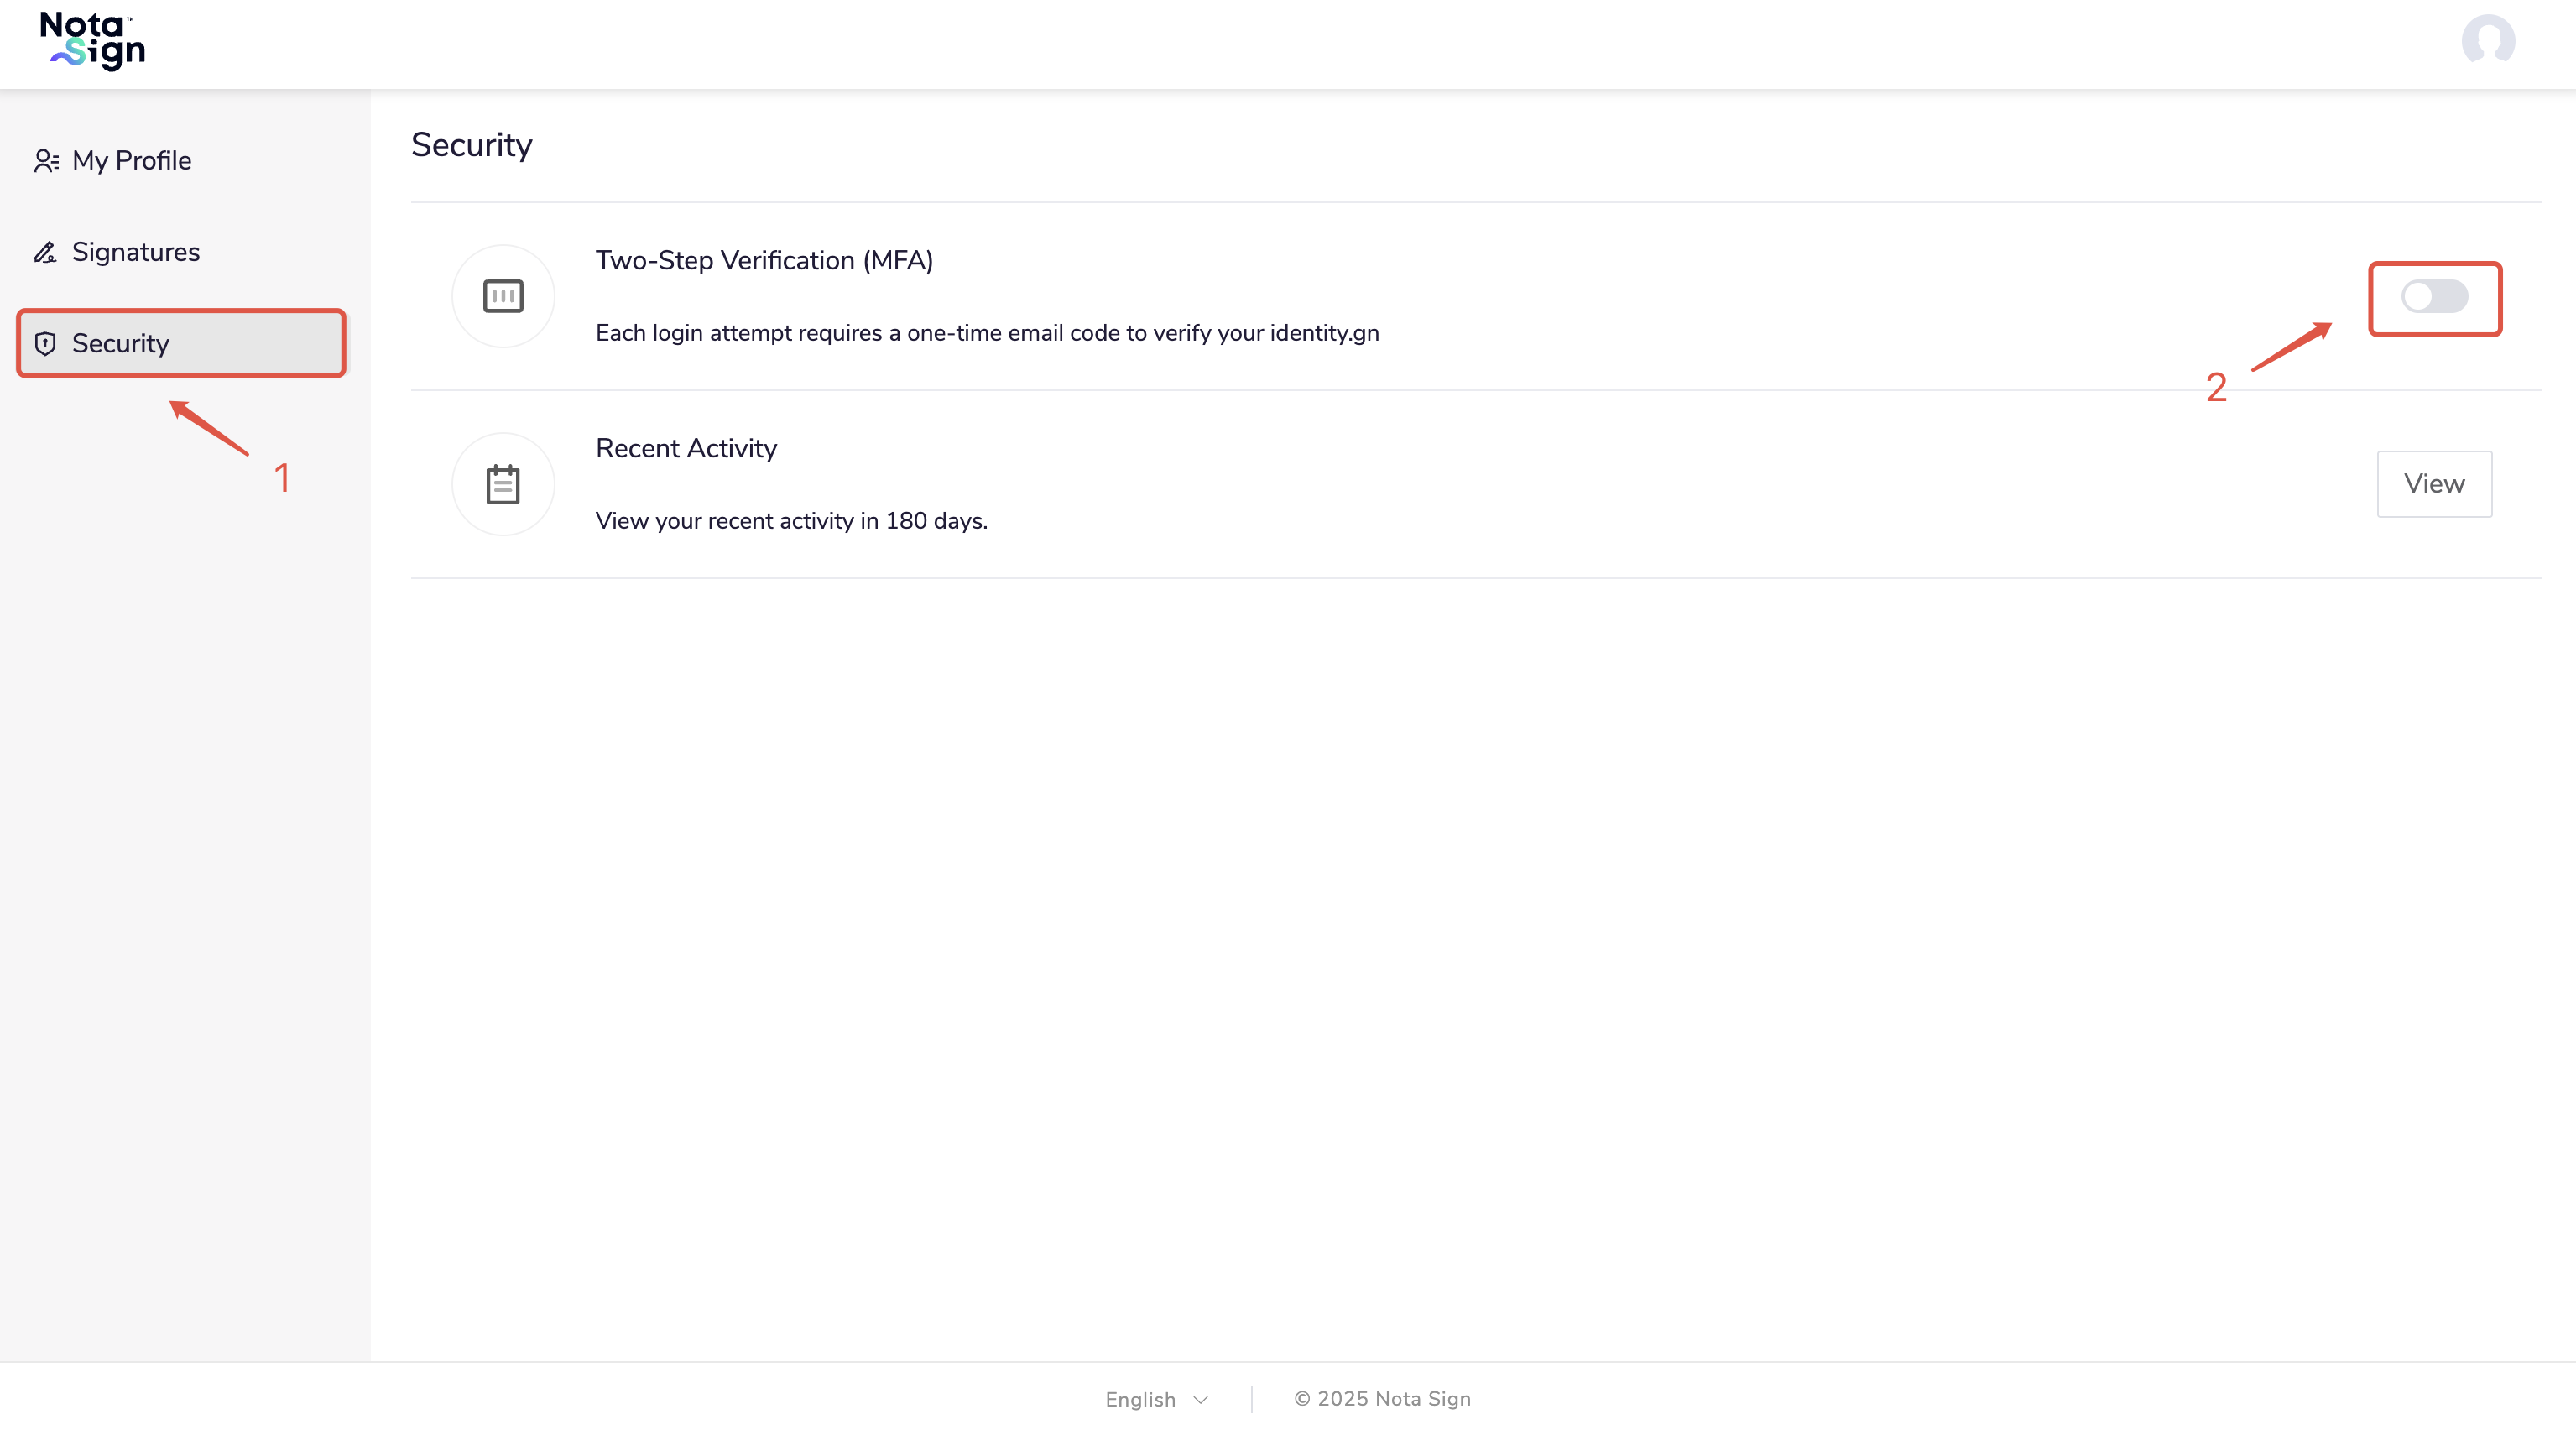
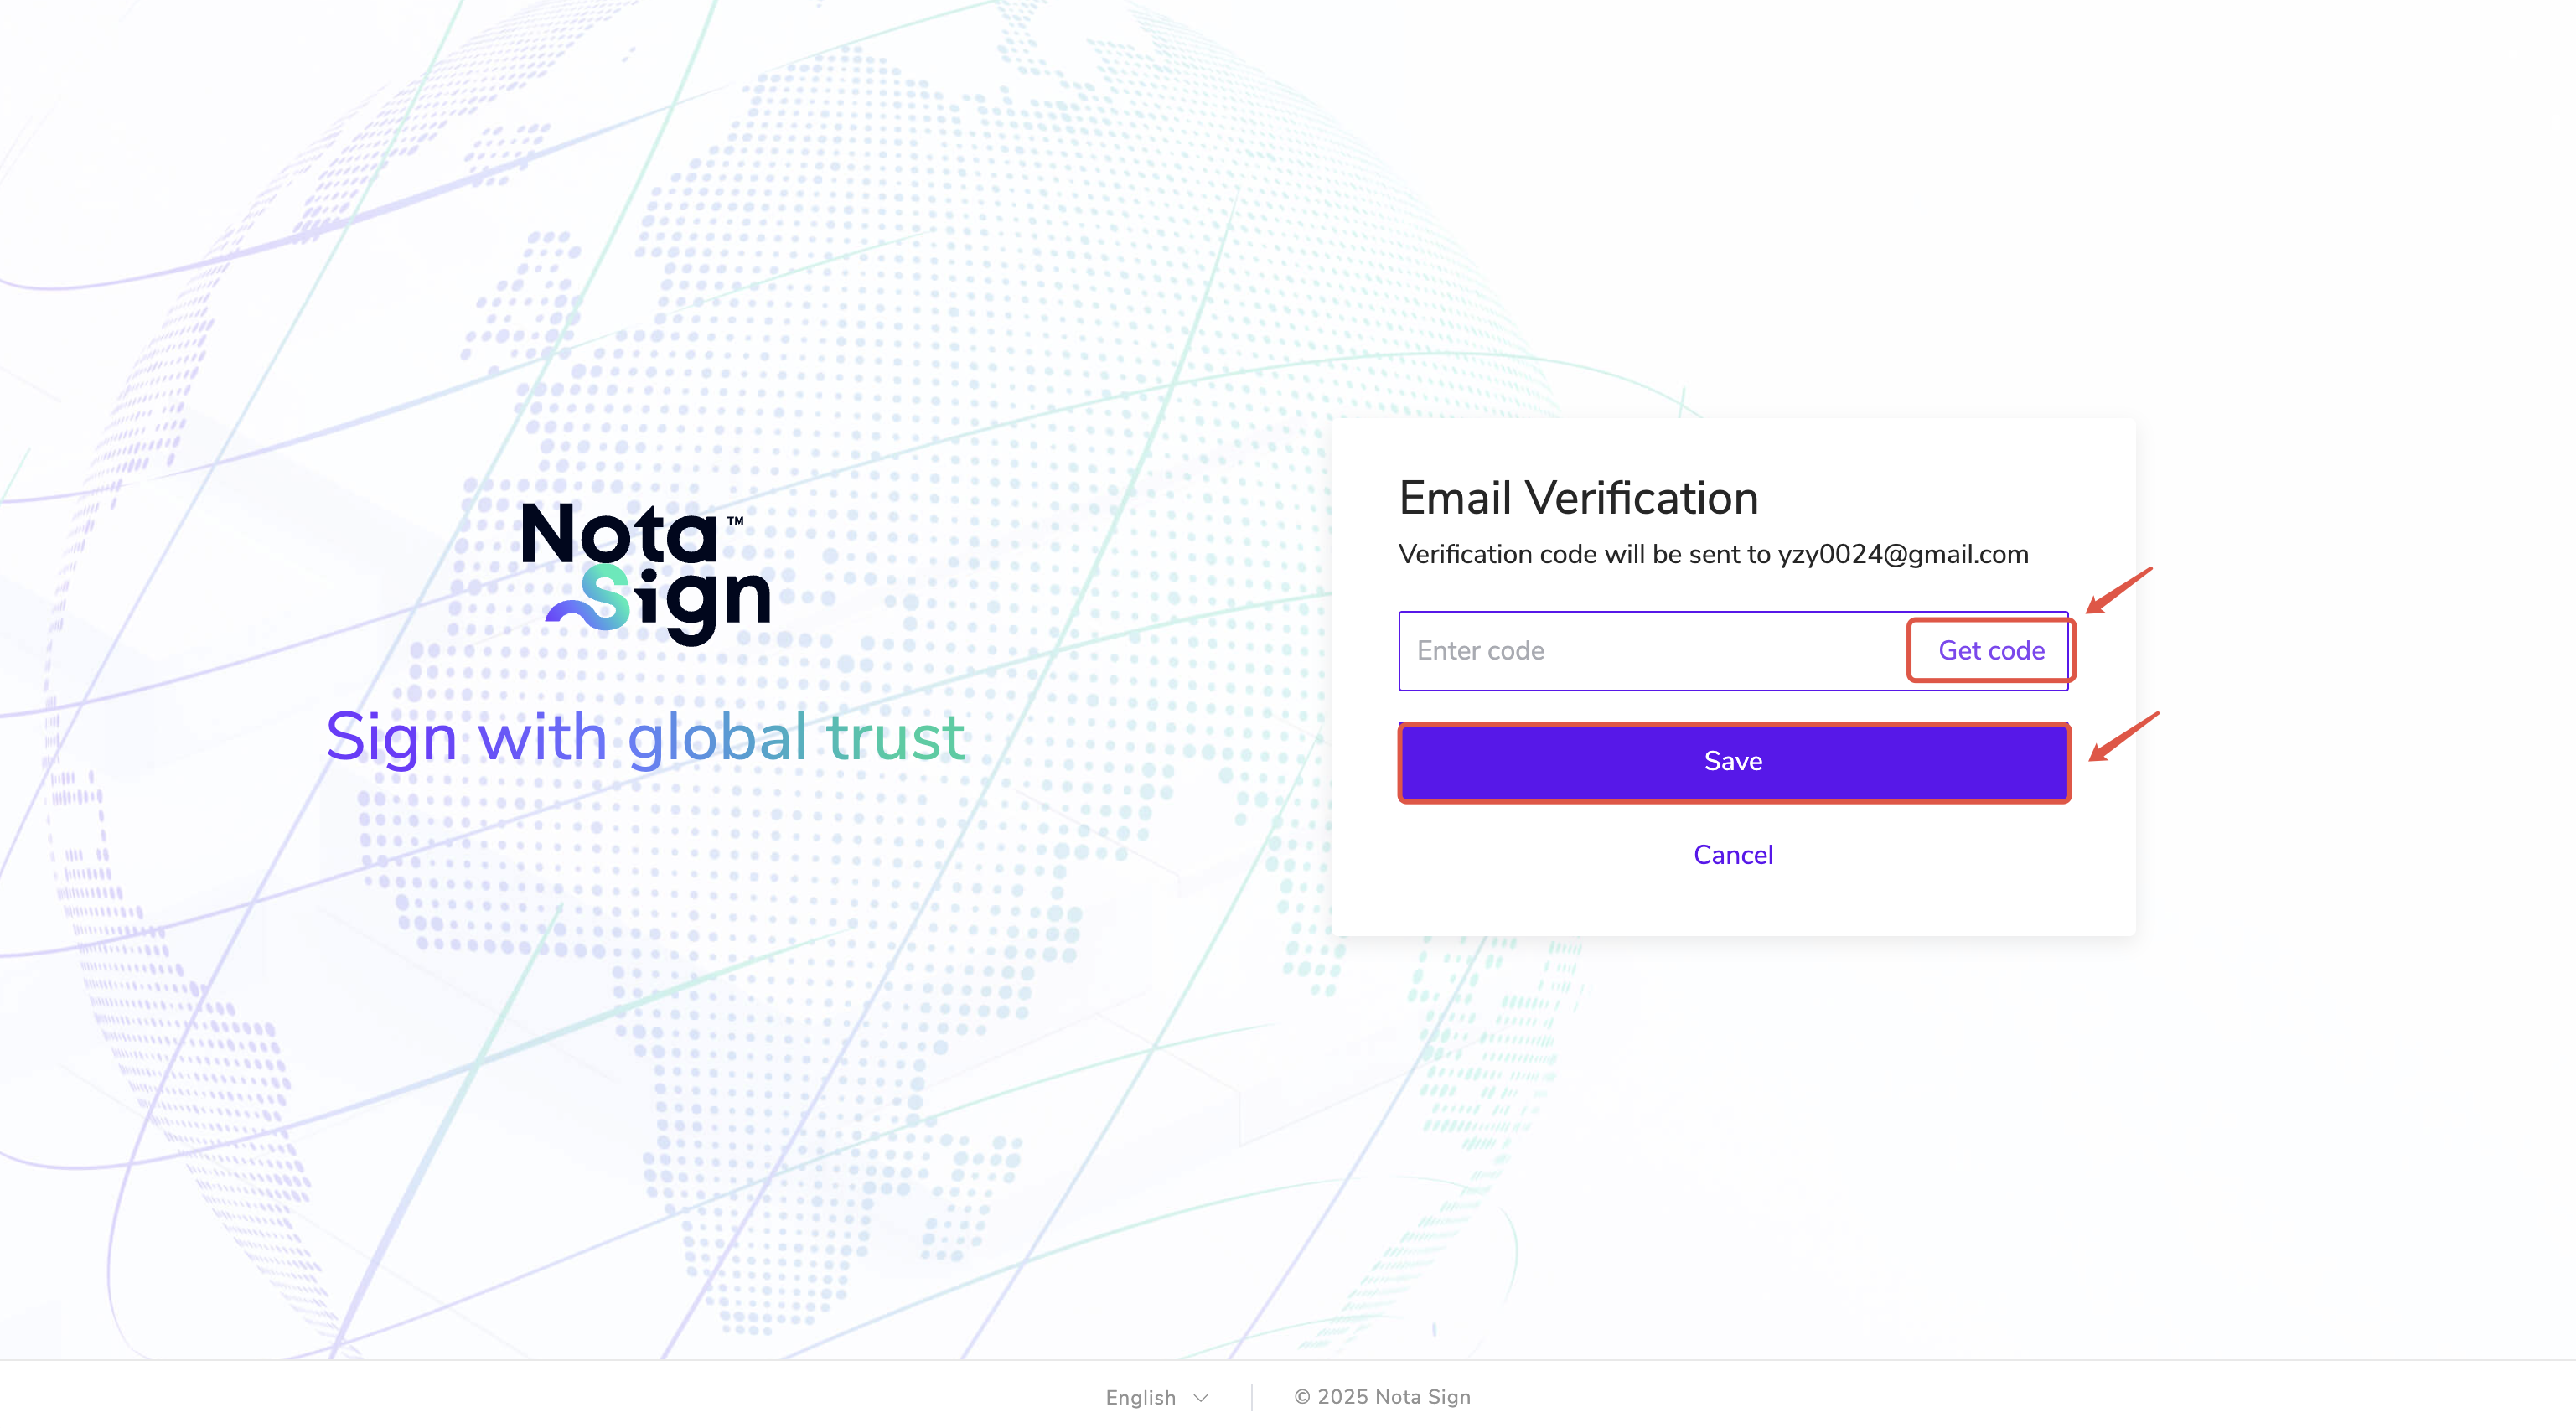
3.3. After enabling, you will be required to enter your account and password at login, and then verify with a code sent to your email.
4. Viewing Account Login Records
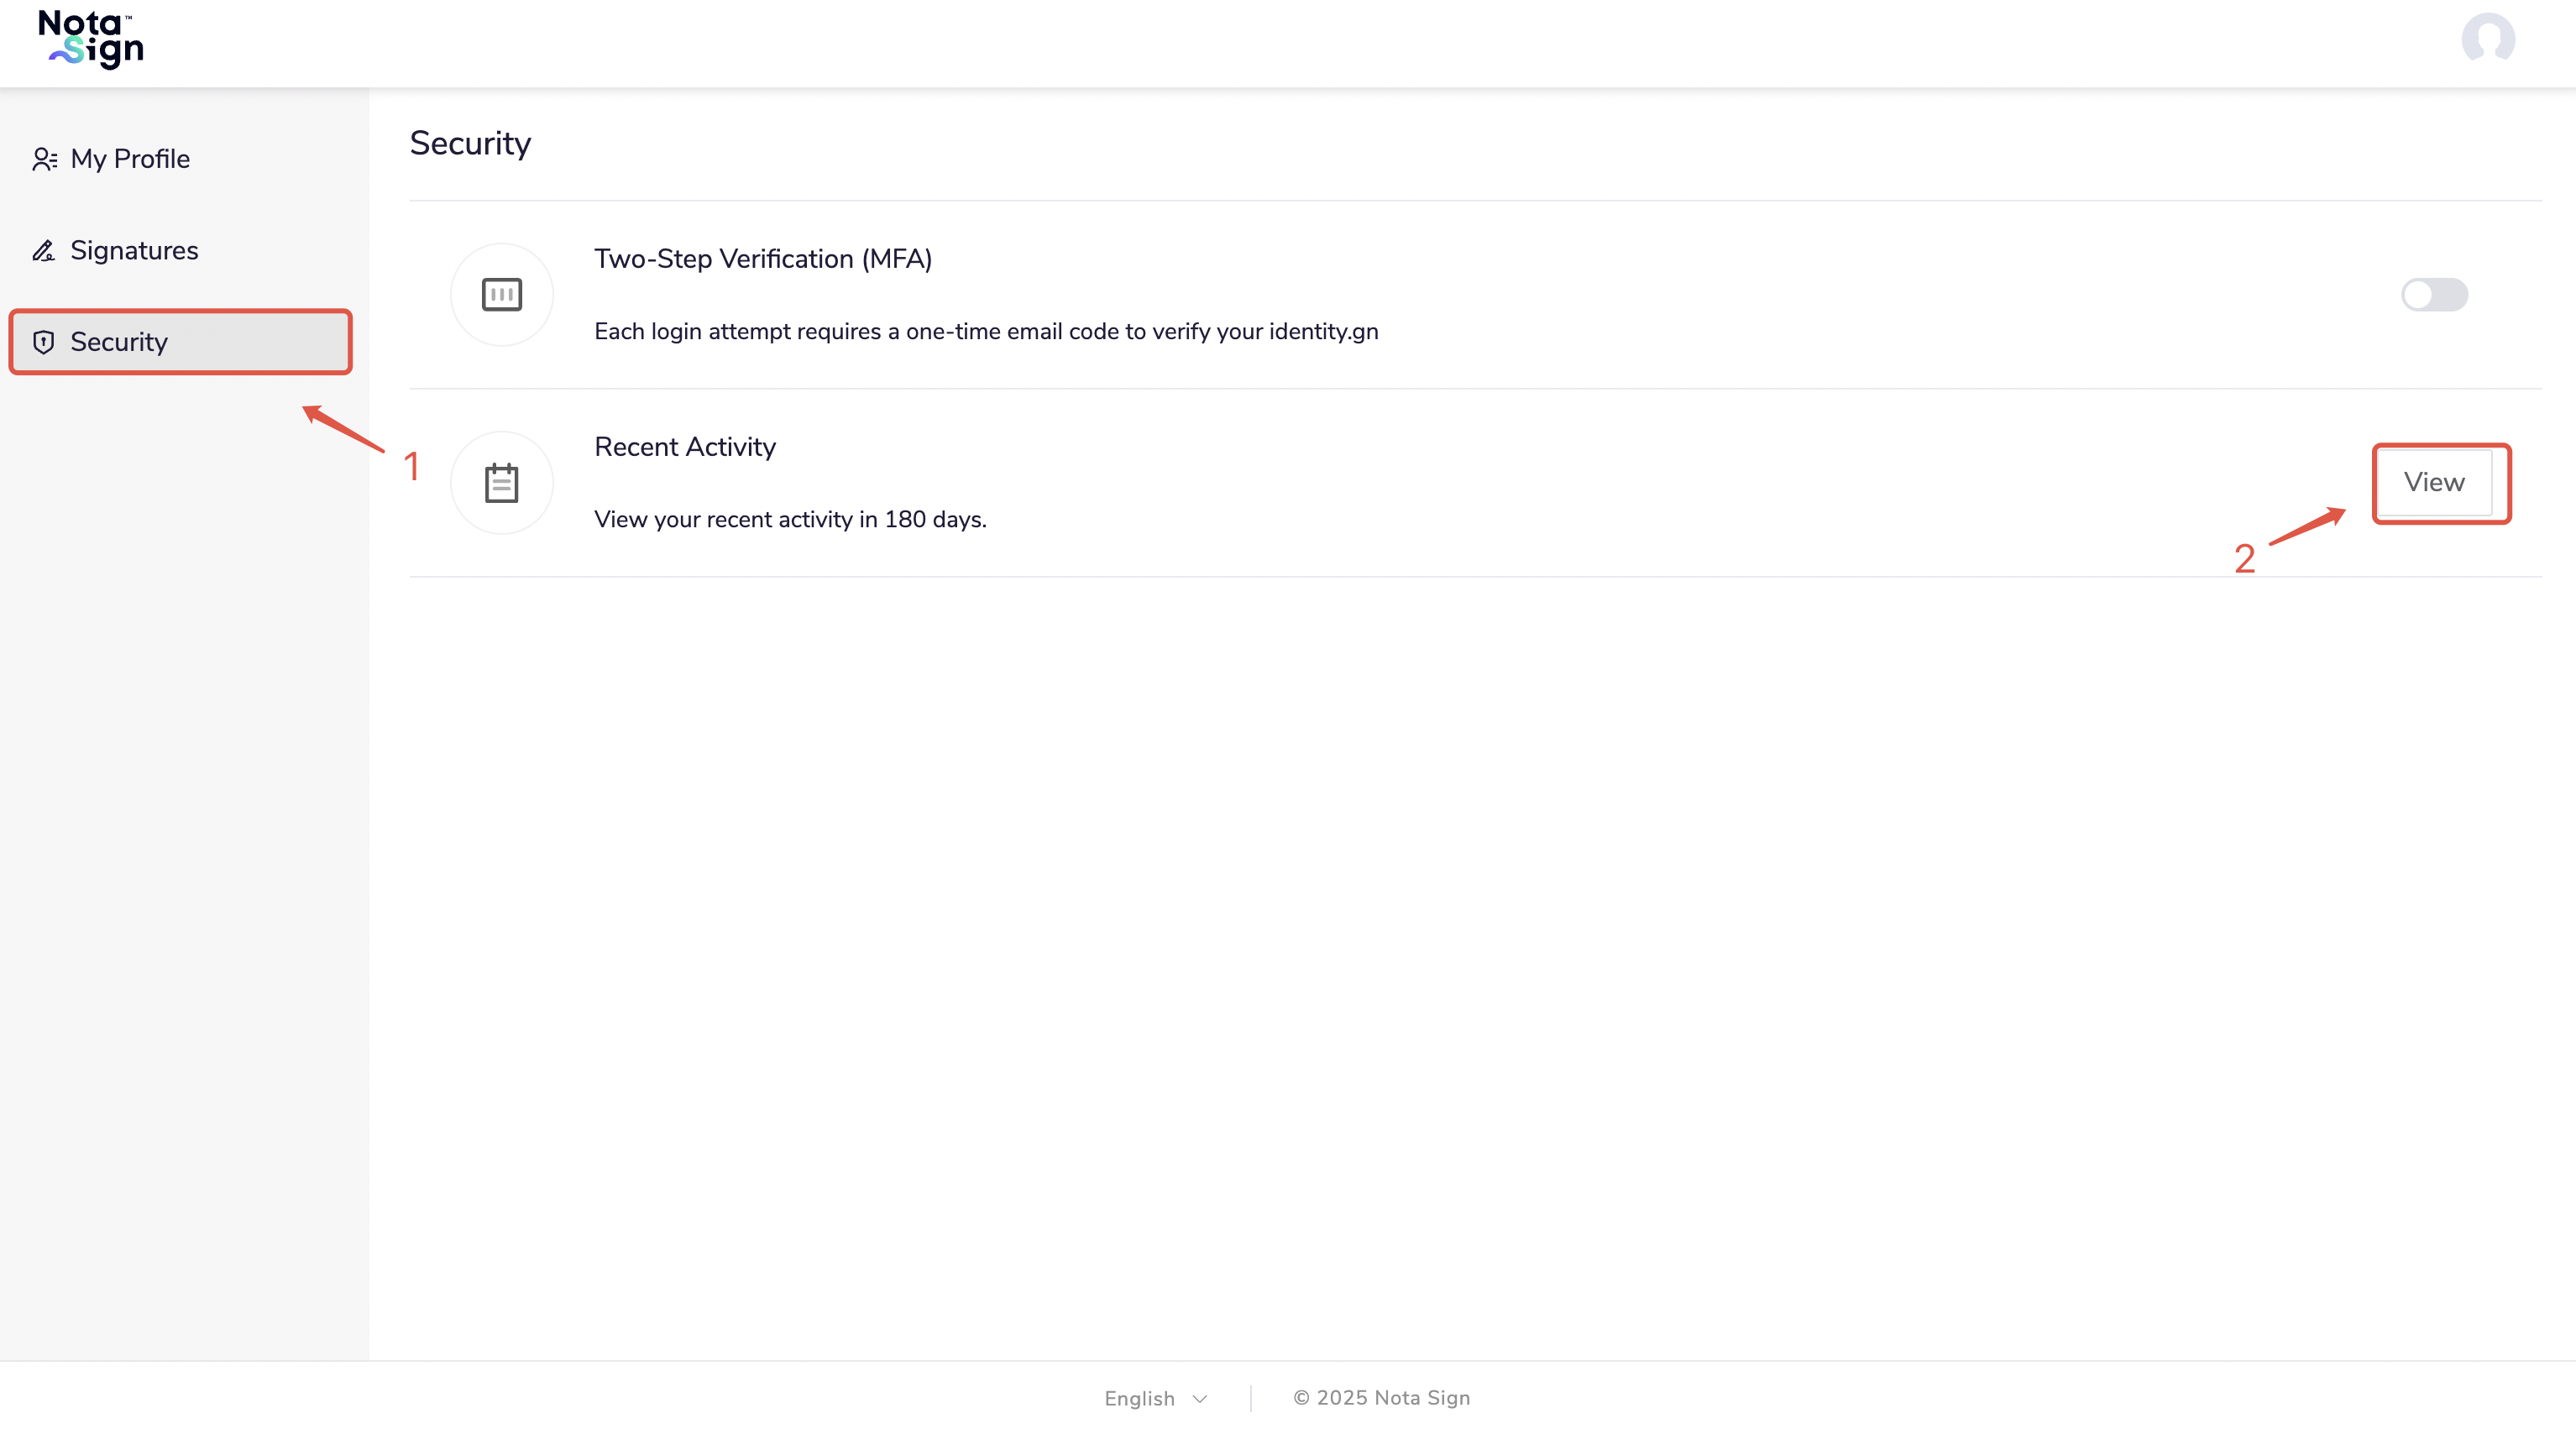
4.1. Log in to the Nota Sign, click the profile avatar in the upper-right corner, and select Profile;
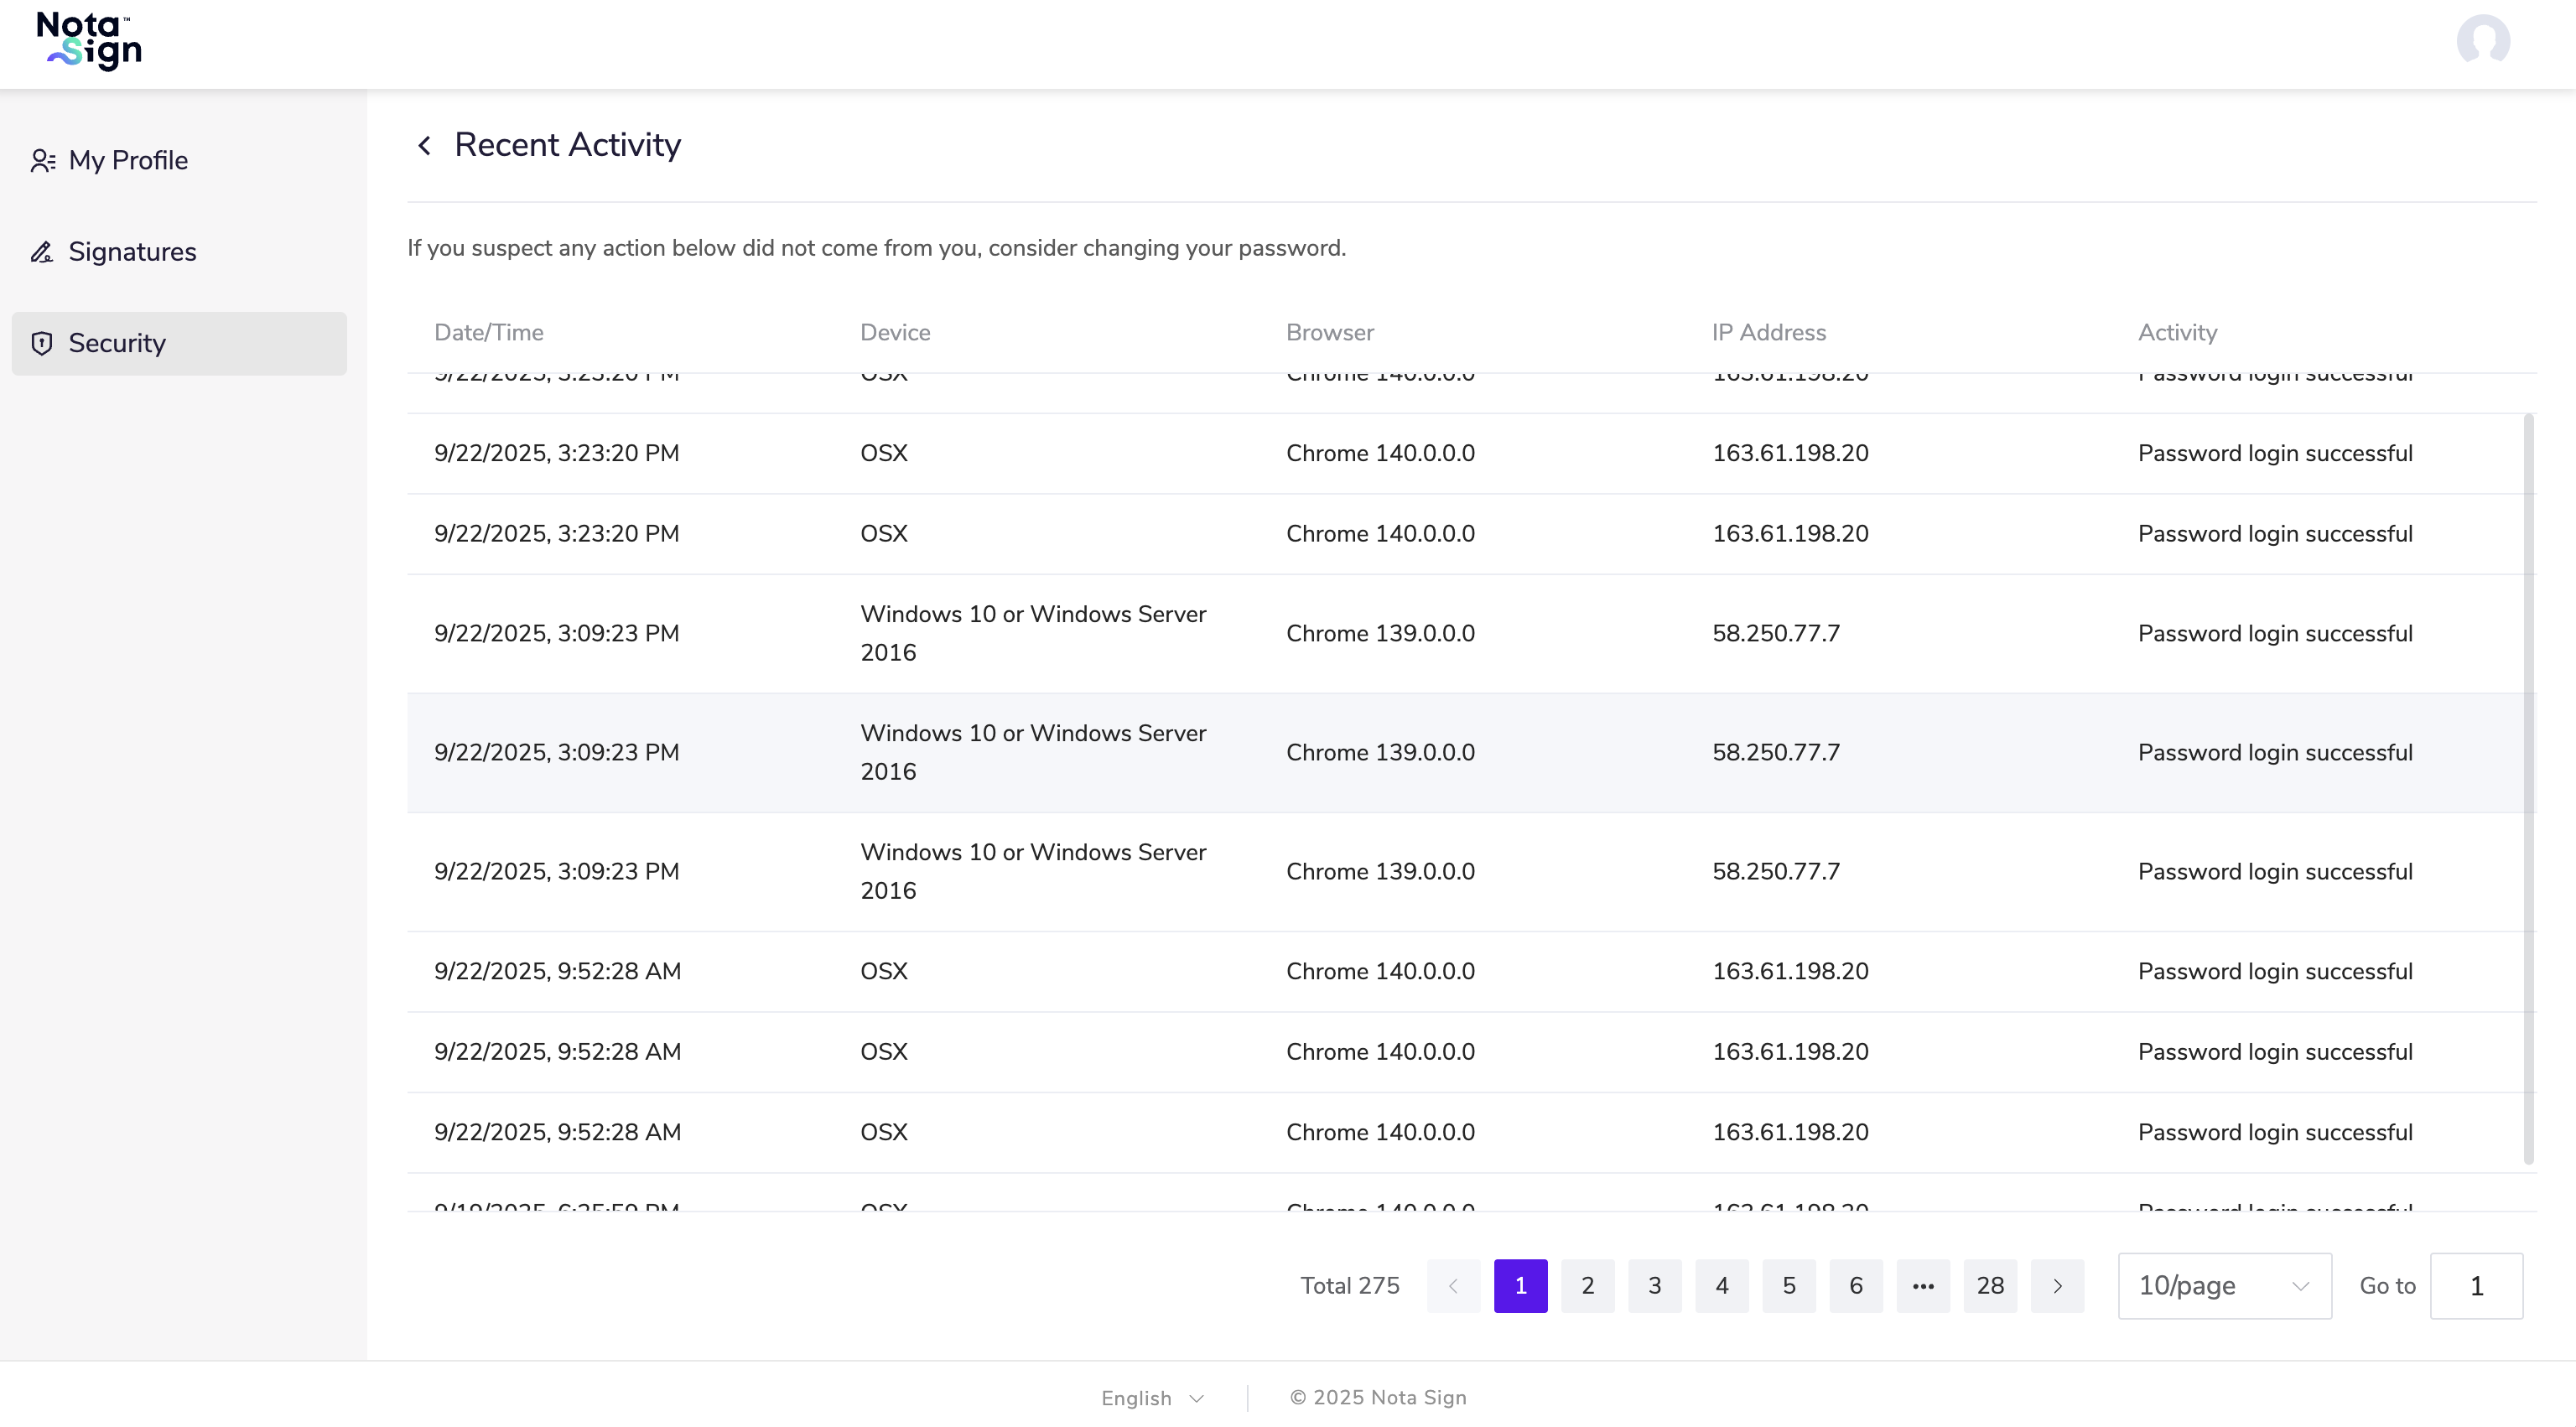
4.2. Click Security, then click View to check login details.
5. Notification Settings
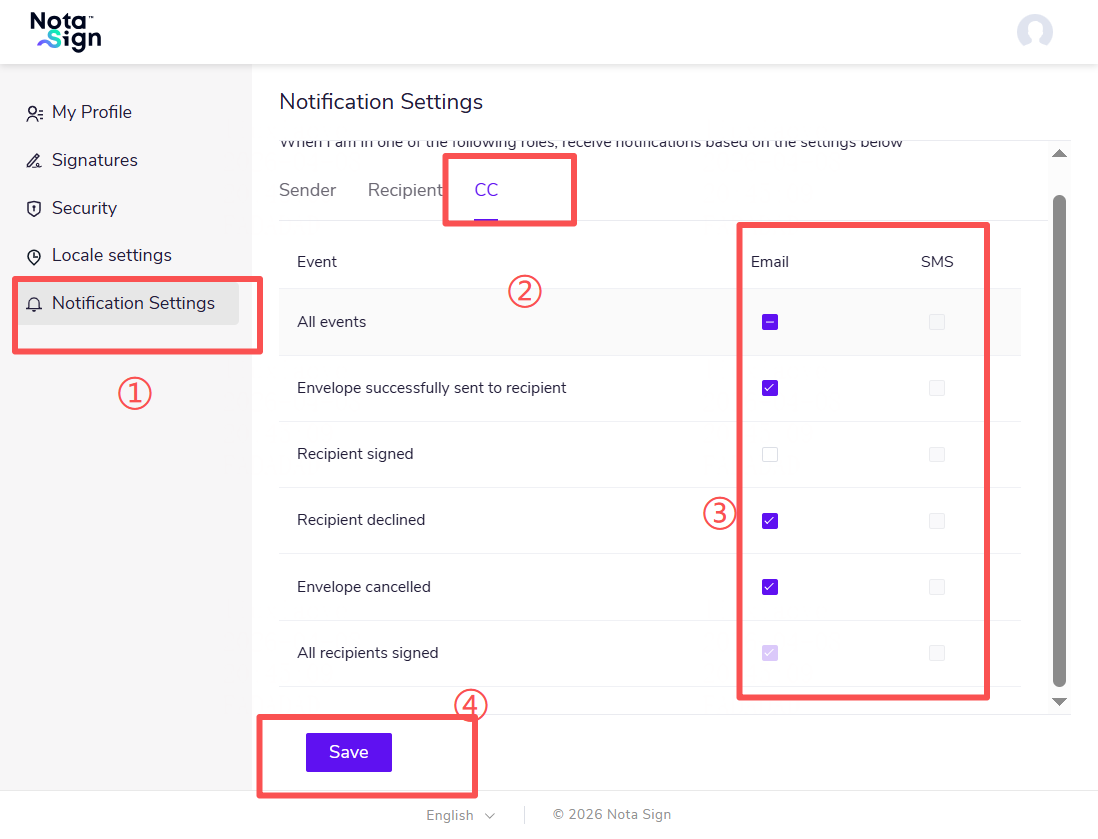
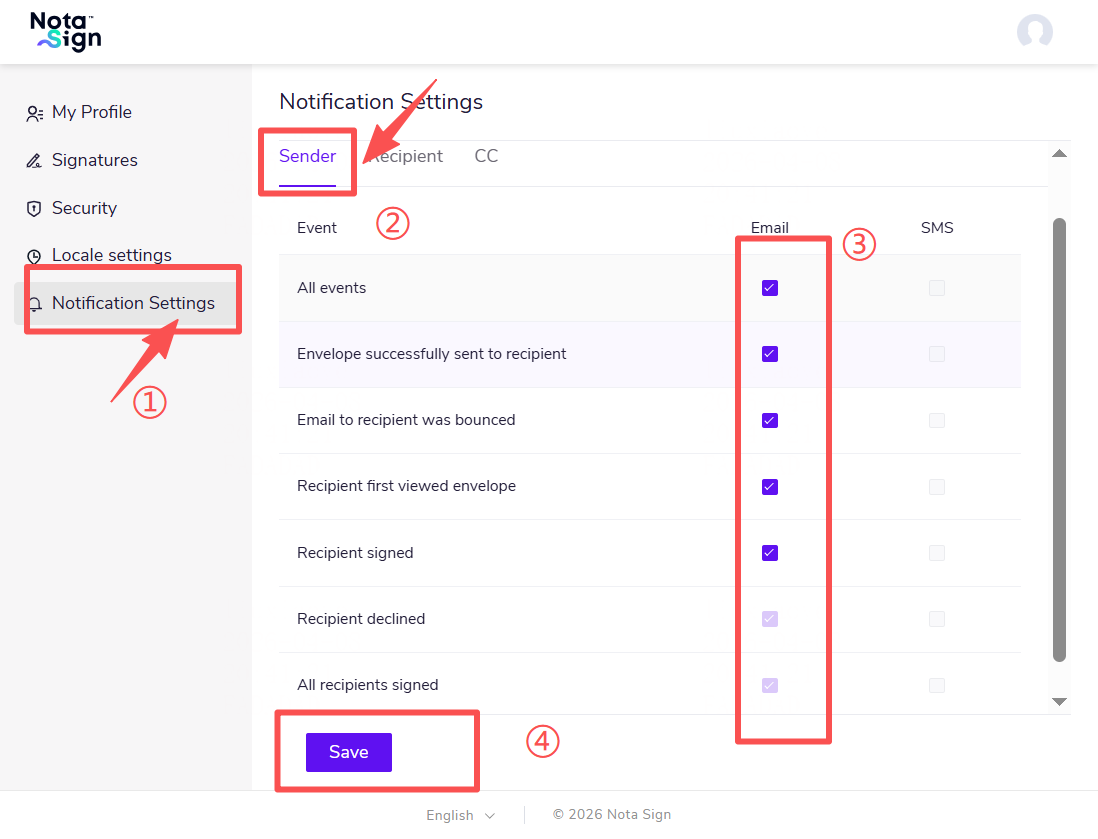
On the Personal Center page, there is a “Notification Settings” section used to configure the user’s global notification preferences across spaces. Currently, only envelope-related message notification settings are provided.
Three main types of notifications are available: 1. Notifications received when the user is the sender; 2. Notifications received when the user is the recipient; 3. Notifications received when the user is the CC’d person.
5.1. When the user is the sender, all SMS channels are disabled, and all email channels are checked by default. Except for the two scenarios [Recipient Rejects] and [All Recipients Completed Signing], users can freely choose whether to check or uncheck each option.
5.2. When the user is the recipient, both SMS and email channels are checked by default. Users can freely choose whether to check or uncheck each option.
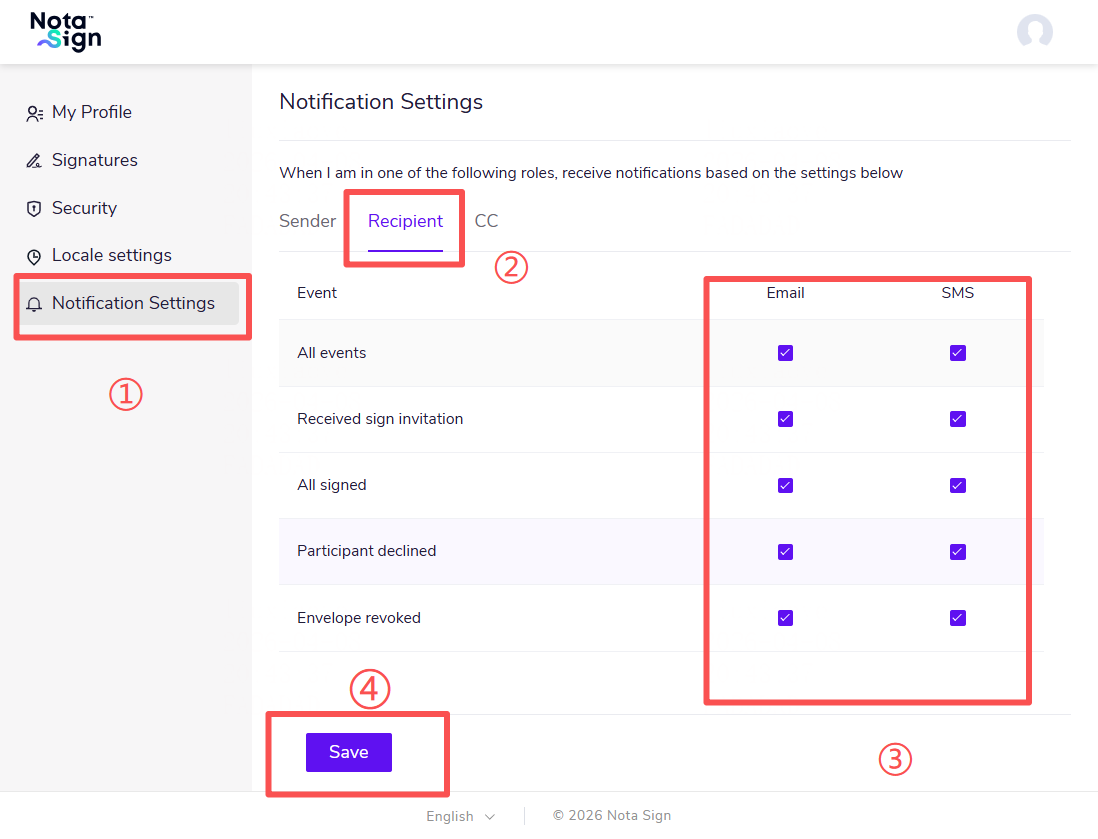
5.3. When the user is the recipient, both SMS and email channels are checked by default. Users can freely choose whether to check or uncheck each option.