
1. What is Single Sign-on?
Single Sign-On (SSO) is an enterprise-level identity authentication mechanism that allows users to log in once through the company’s unified identity authentication system and then access multiple trusted business systems and applications without repeatedly entering usernames and passwords.
With SSO enabled in Nota Sign, employees can log in directly using their enterprise accounts without creating or remembering new platform credentials. Once users are logged in to internal enterprise systems (such as email, portals, or HR systems), they can seamlessly access the Nota Sign SaaS platform, improving user experience while ensuring identity verification meets enterprise security requirements.
1.1. Typical Use Cases
Enterprises typically use SSO in the following scenarios:
-
Centralized Identity Management: By integrating with mainstream Identity Providers (IdPs) such as Microsoft Entra ID, Okta, Authing, or Alibaba Cloud IDaaS via the SAML 2.0 protocol, enterprises can connect Nota Sign to their existing authentication framework for unified identity authentication and centralized management.
-
Enhanced Security: Minimizes repeated use of accounts and passwords, and when combined with multi-factor authentication and other security strategies, reduces potential risks.
-
Improved User Experience: Employees can access Nota Sign directly with their enterprise account without re-entering credentials across different systems.
-
Personnel Change Management: When an employee leaves the organization, simply removing the account from the IdP automatically revokes access to Nota Sign, reducing additional maintenance work.
2. Nota Sign SSO Feature Support
-
Multiple IdP Integration: Compatible with mainstream identity providers via the SAML 2.0 standard (e.g., Microsoft Entra ID, Okta, Authing, Alibaba Cloud IDaaS).
-
Enterprise Domain Configuration: Supports binding enterprise domains for domain-based authentication.
-
SSO Mapping: After the administrator sends the workspace invitation, members who are invited can access the workspace via SSO login. Domain users who have not been invited cannot access it directly.
-
Flexible Login Options: Depending on administrator settings, users may log in via SSO or continue using their existing Nota Sign credentials.
-
Audit and Compliance: All SSO login events are traceable, meeting enterprise security and compliance requirements.
3. Configuring SSO for Nota Sign
To enable Single Sign-On (SSO) for your organization in Nota Sign, please follow the steps below:
3.1. Register an Account
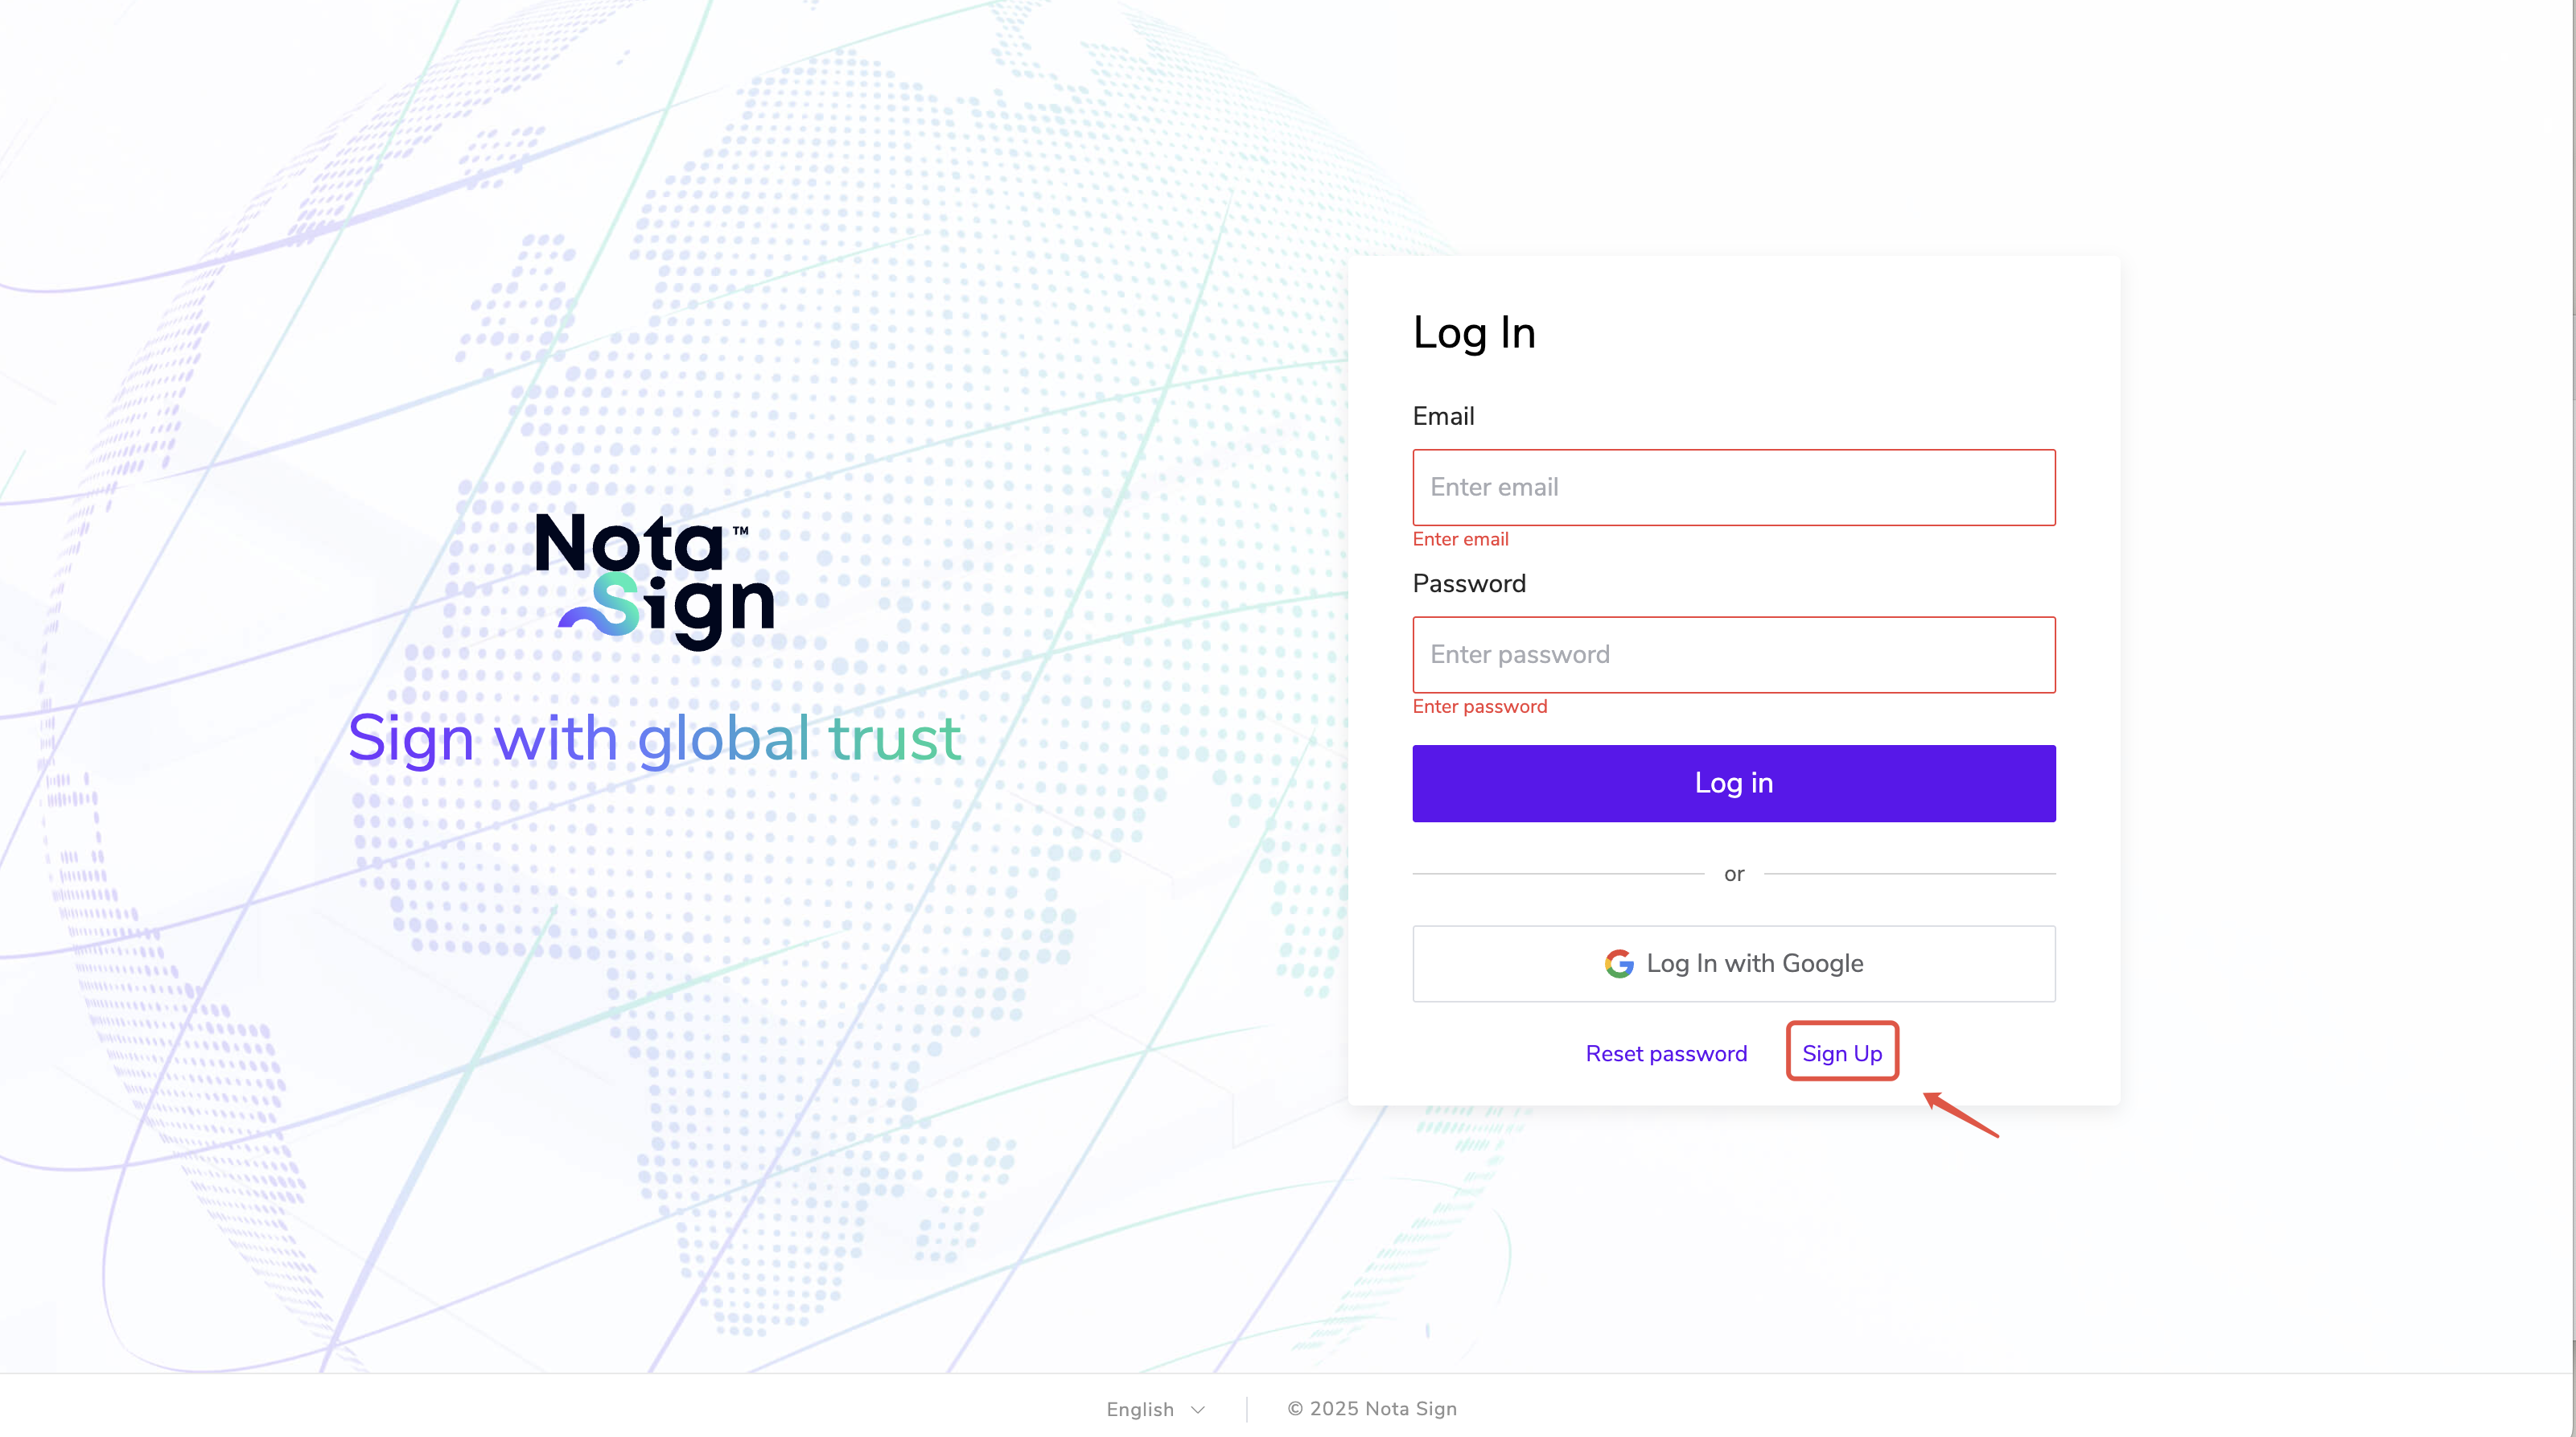
Go to the Nota Sign registration page and register an enterprise administrator account.
3.2. Activate Subscription
Contact Us to activate the SSO subscription package according to your enterprise requirements. Once the subscription is activated, the administrator will gain access to SSO configuration permissions.
3.3. Configuring SSO on the Identity Provider (IdP) Side (Microsoft Example)
Notes:
-
Nota Sign supports integration based on the SAML 2.0 protocol.
-
Currently, login accounts cannot be automatically synchronized between the IdP and SP. You must manually add them in the Fadada SaaS Console.
-
You must have administrative permissions for your internal unified login system (IdP).
The following steps use Microsoft Azure as an example to demonstrate how to configure SSO:
3.3.1. Create a SAML Application
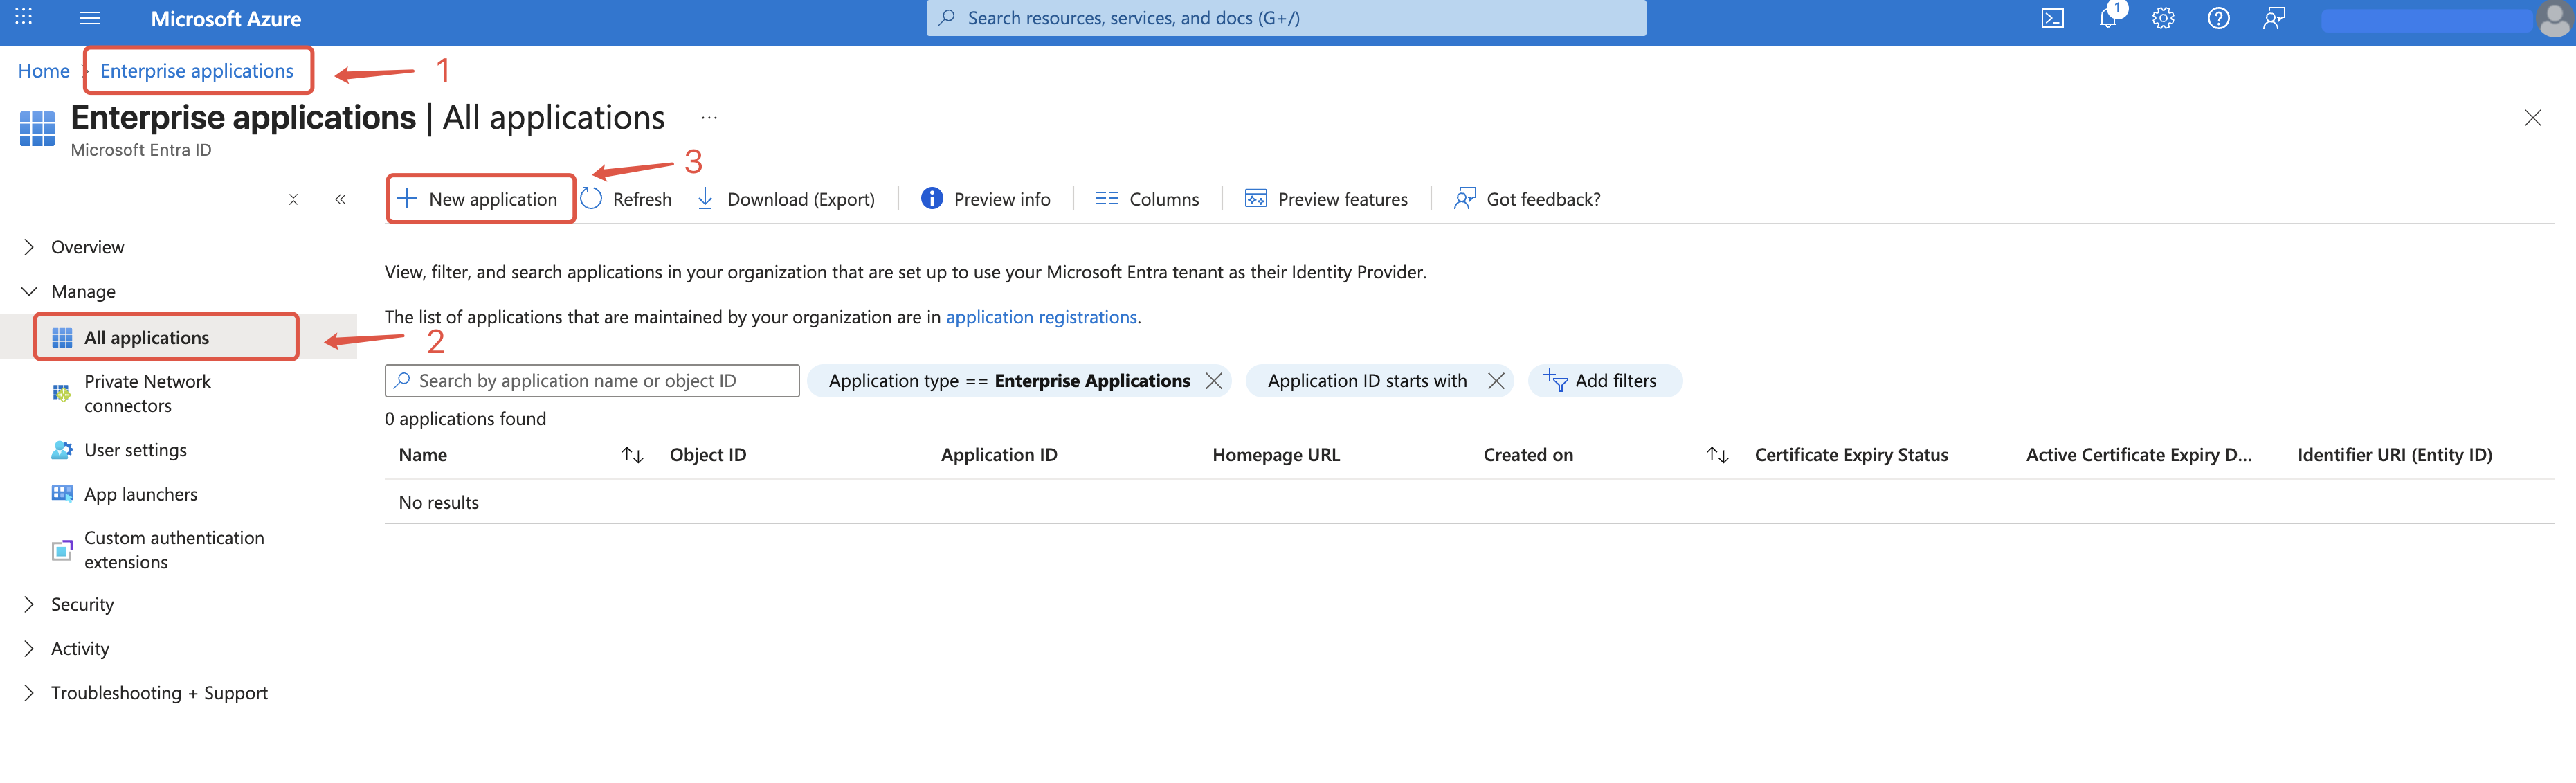
- Log in to the IdP.
- Go to Enterprise Applications and click New Application.
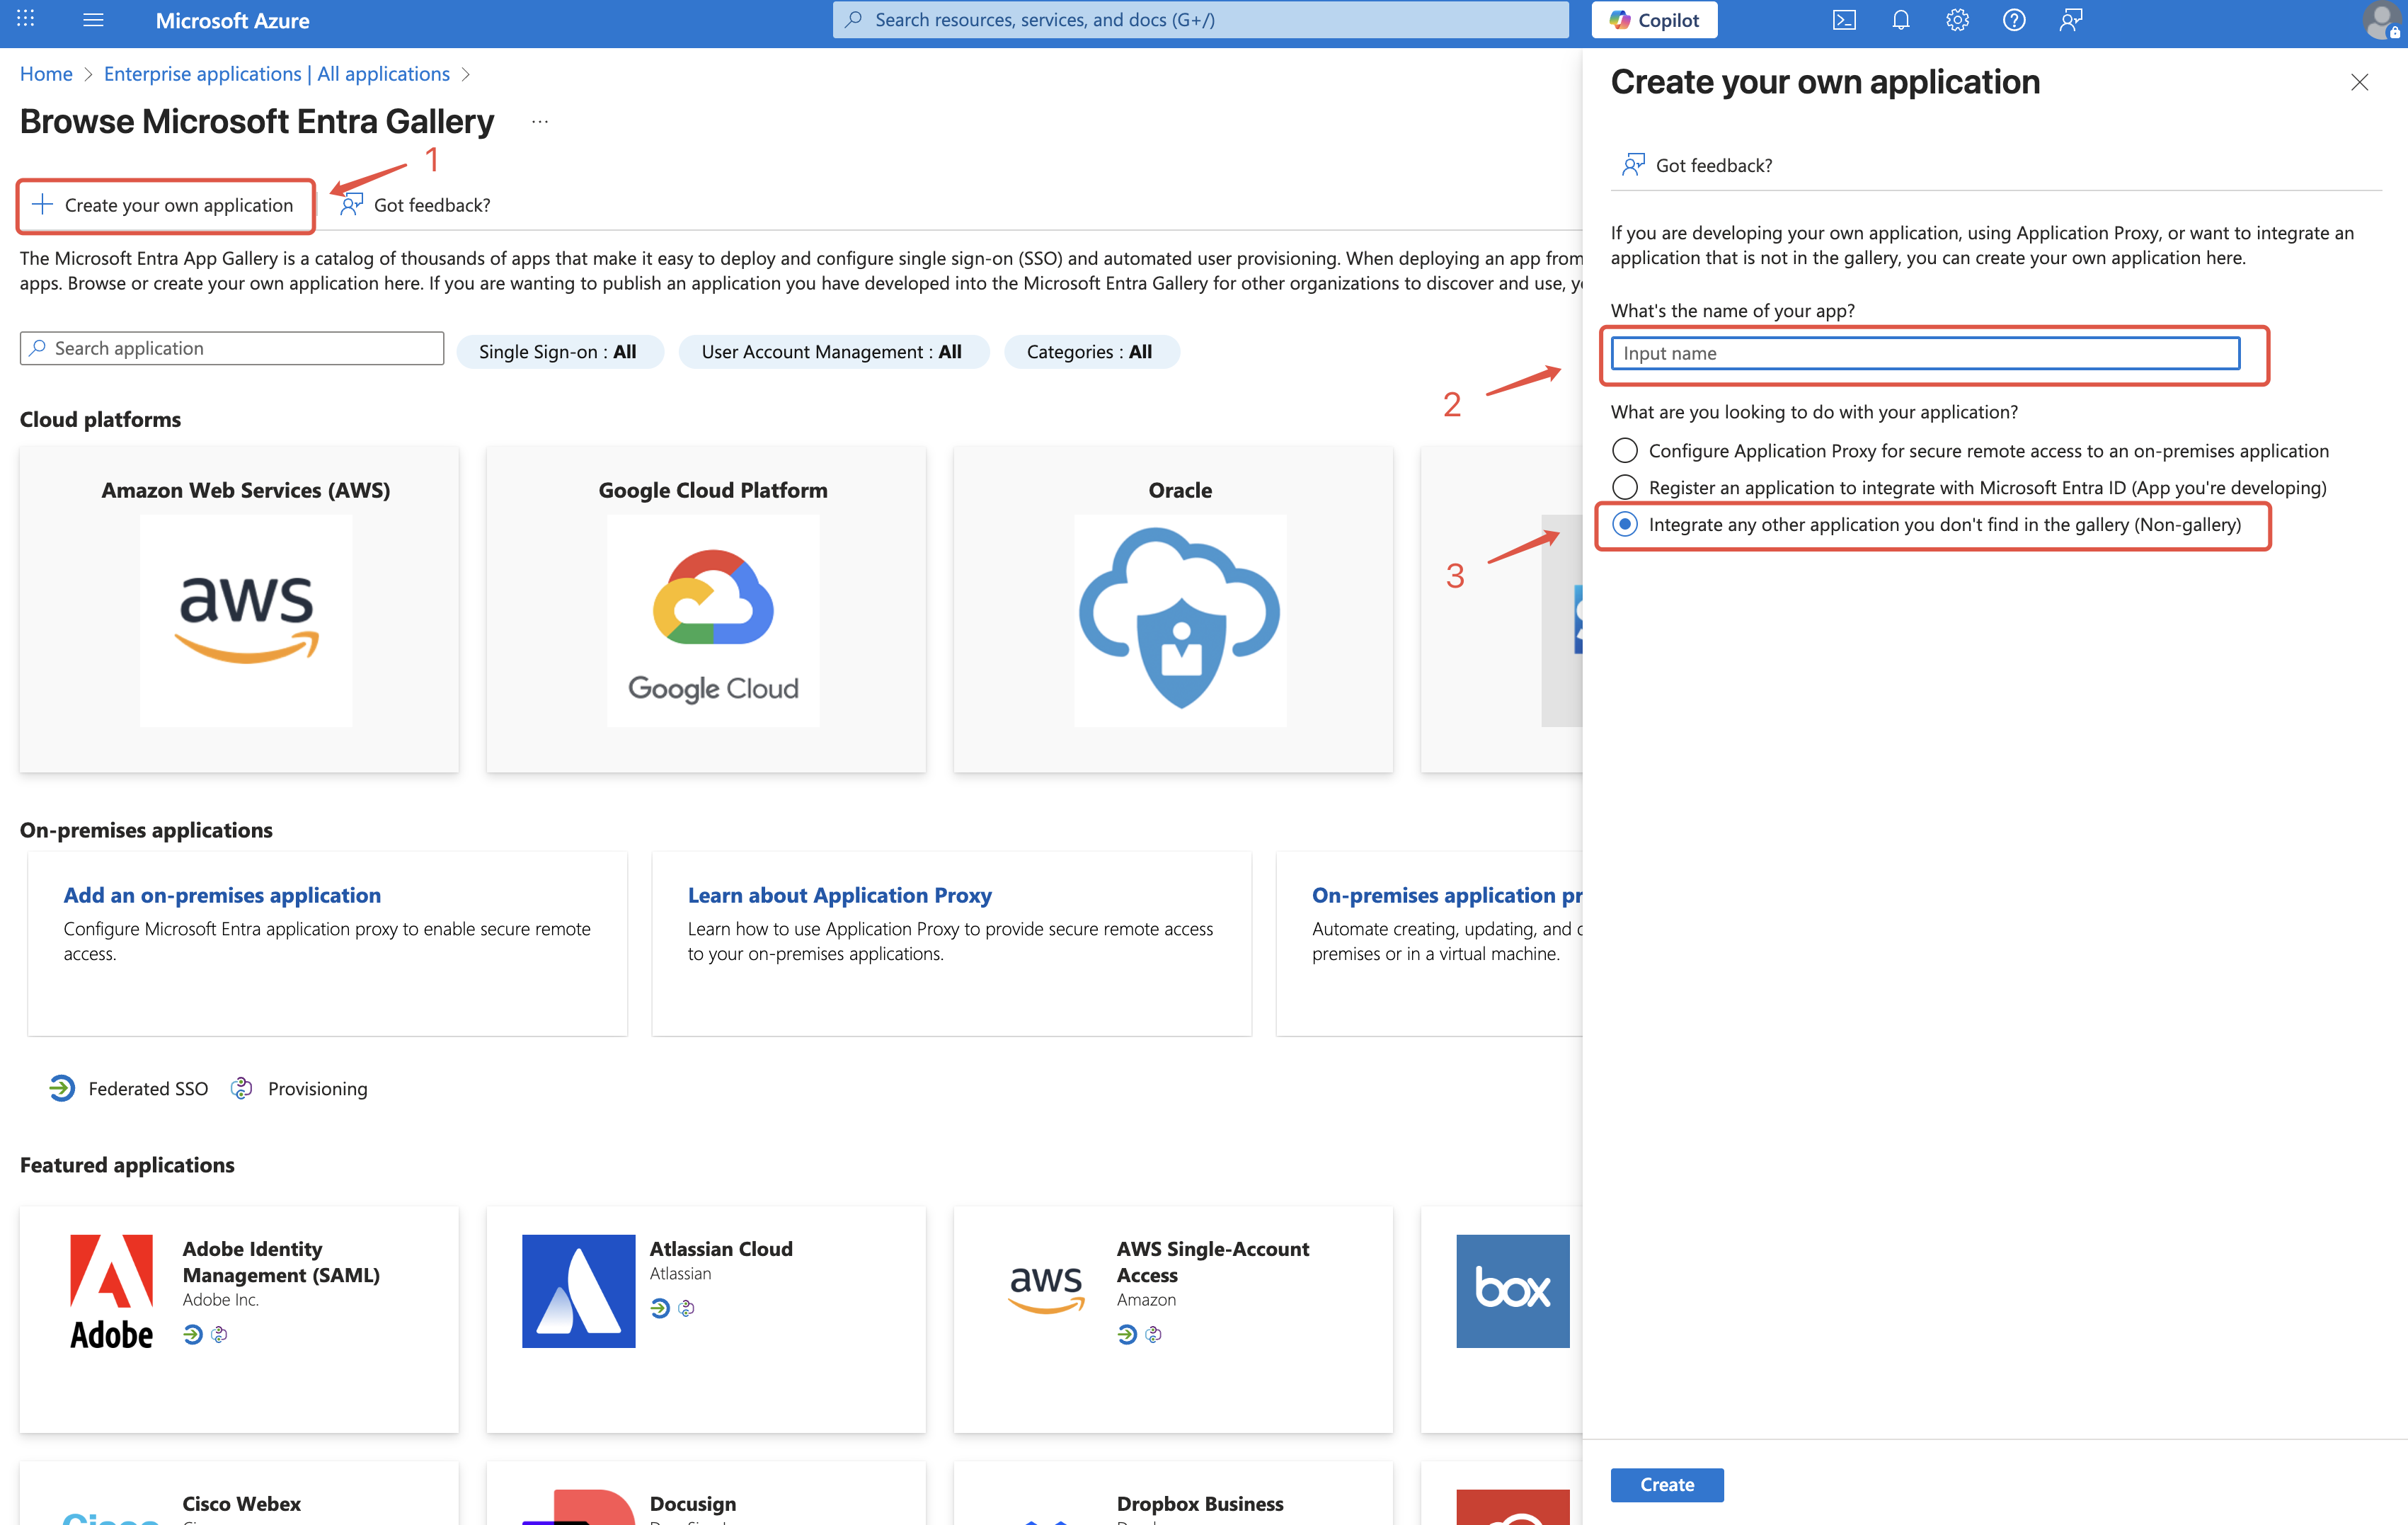
- Click Create your own application.
- Enter an application name. It is recommended to use the enterprise name for easier identification.
- Check Integrate any other application you don’t find in the gallery (non-gallery).
3.3.2. Obtain SAML Application Configuration
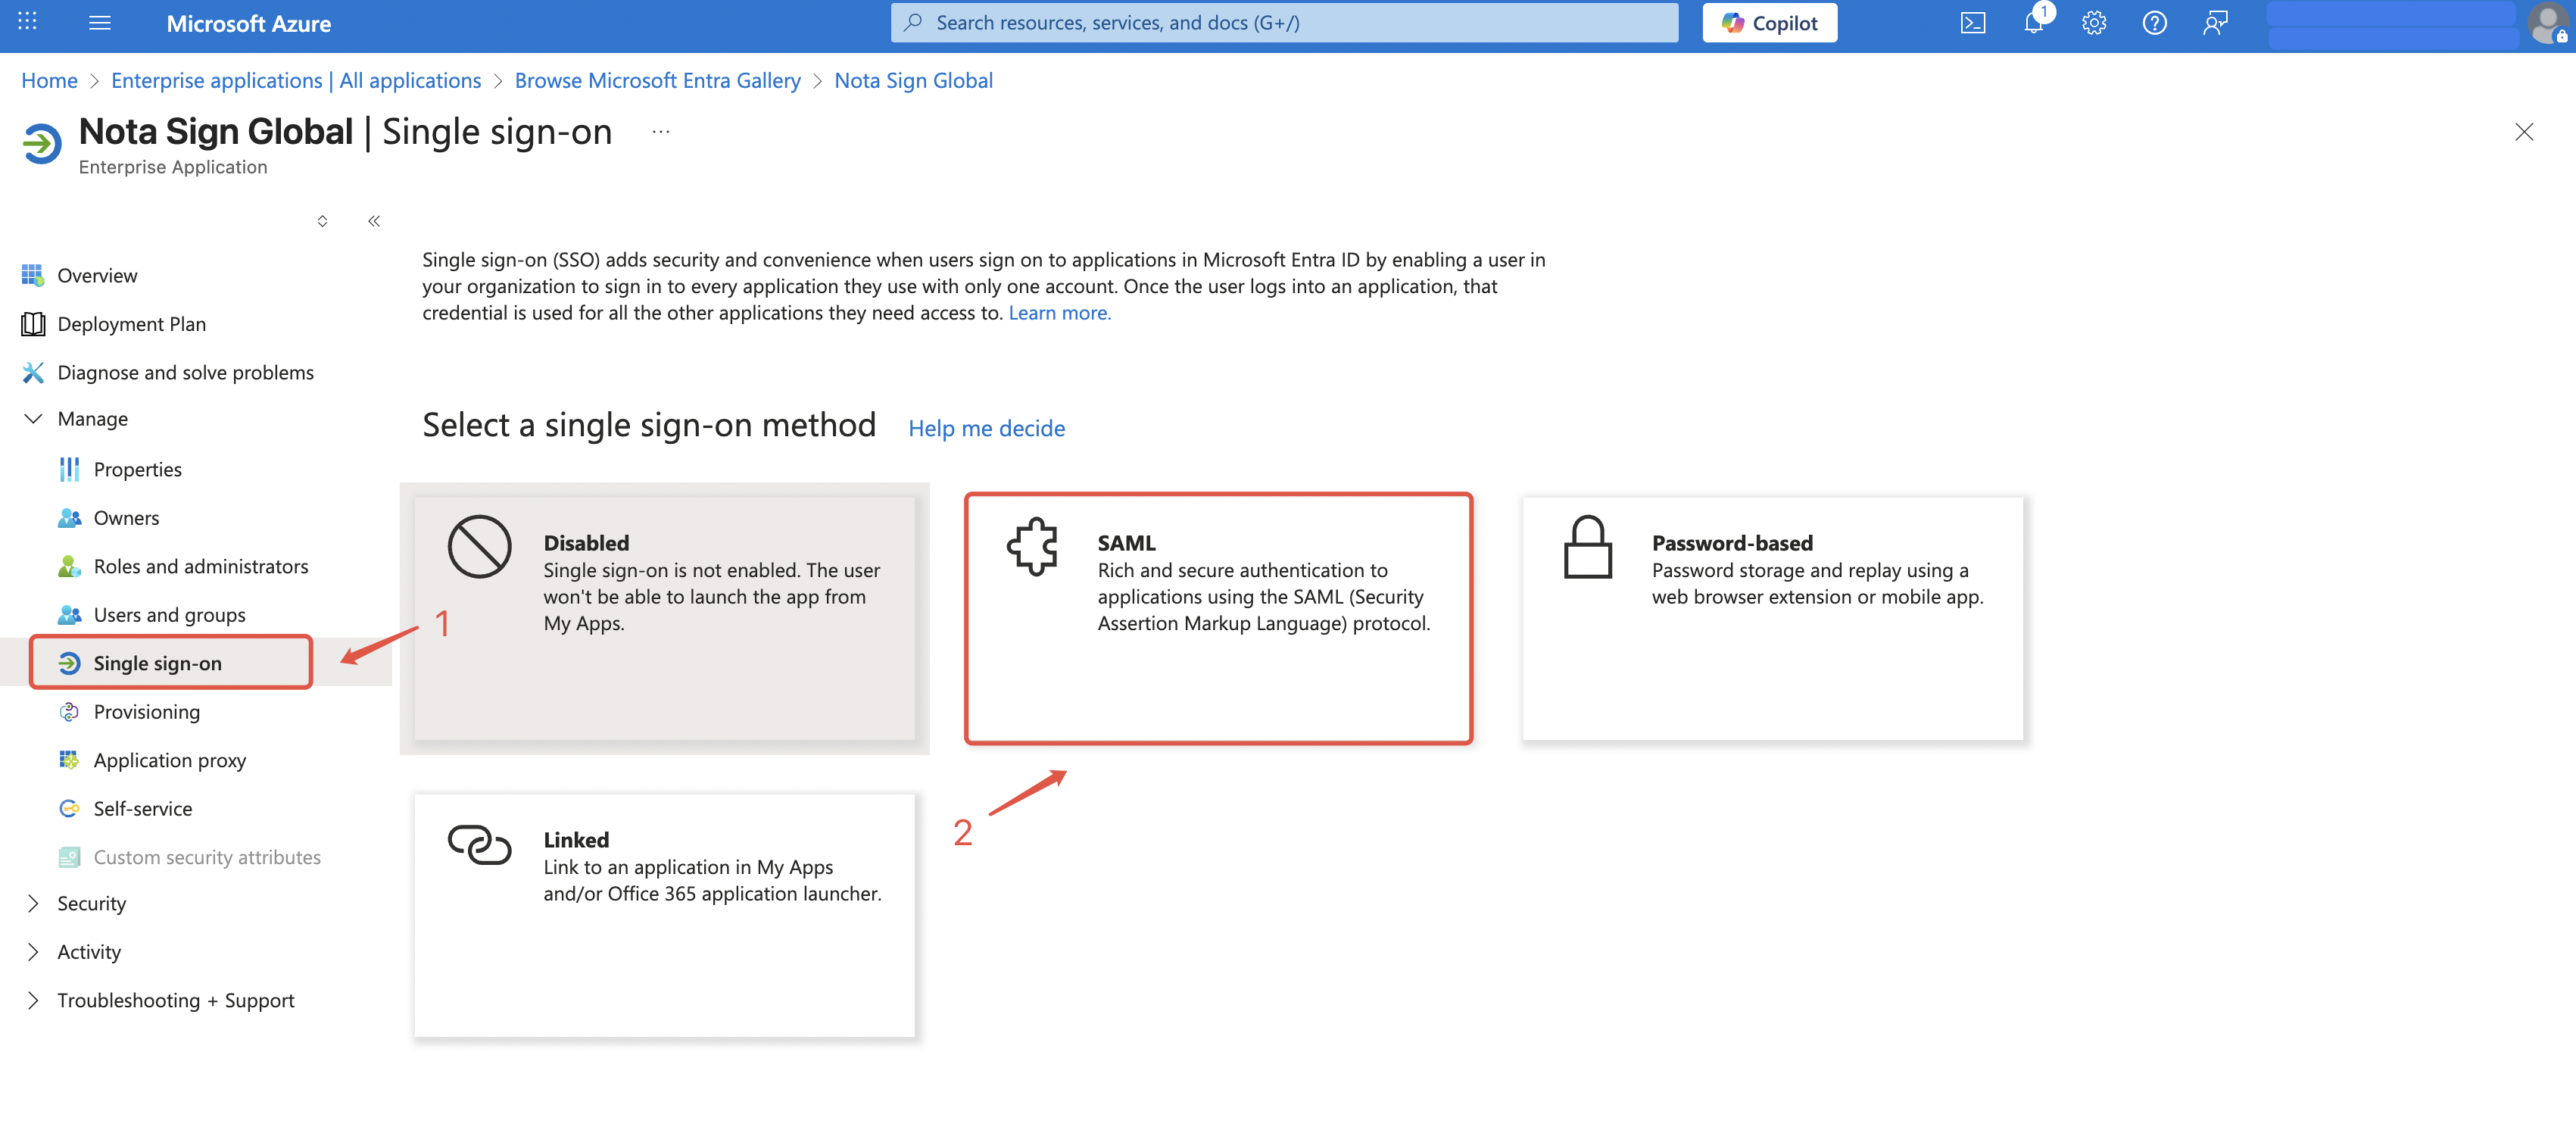
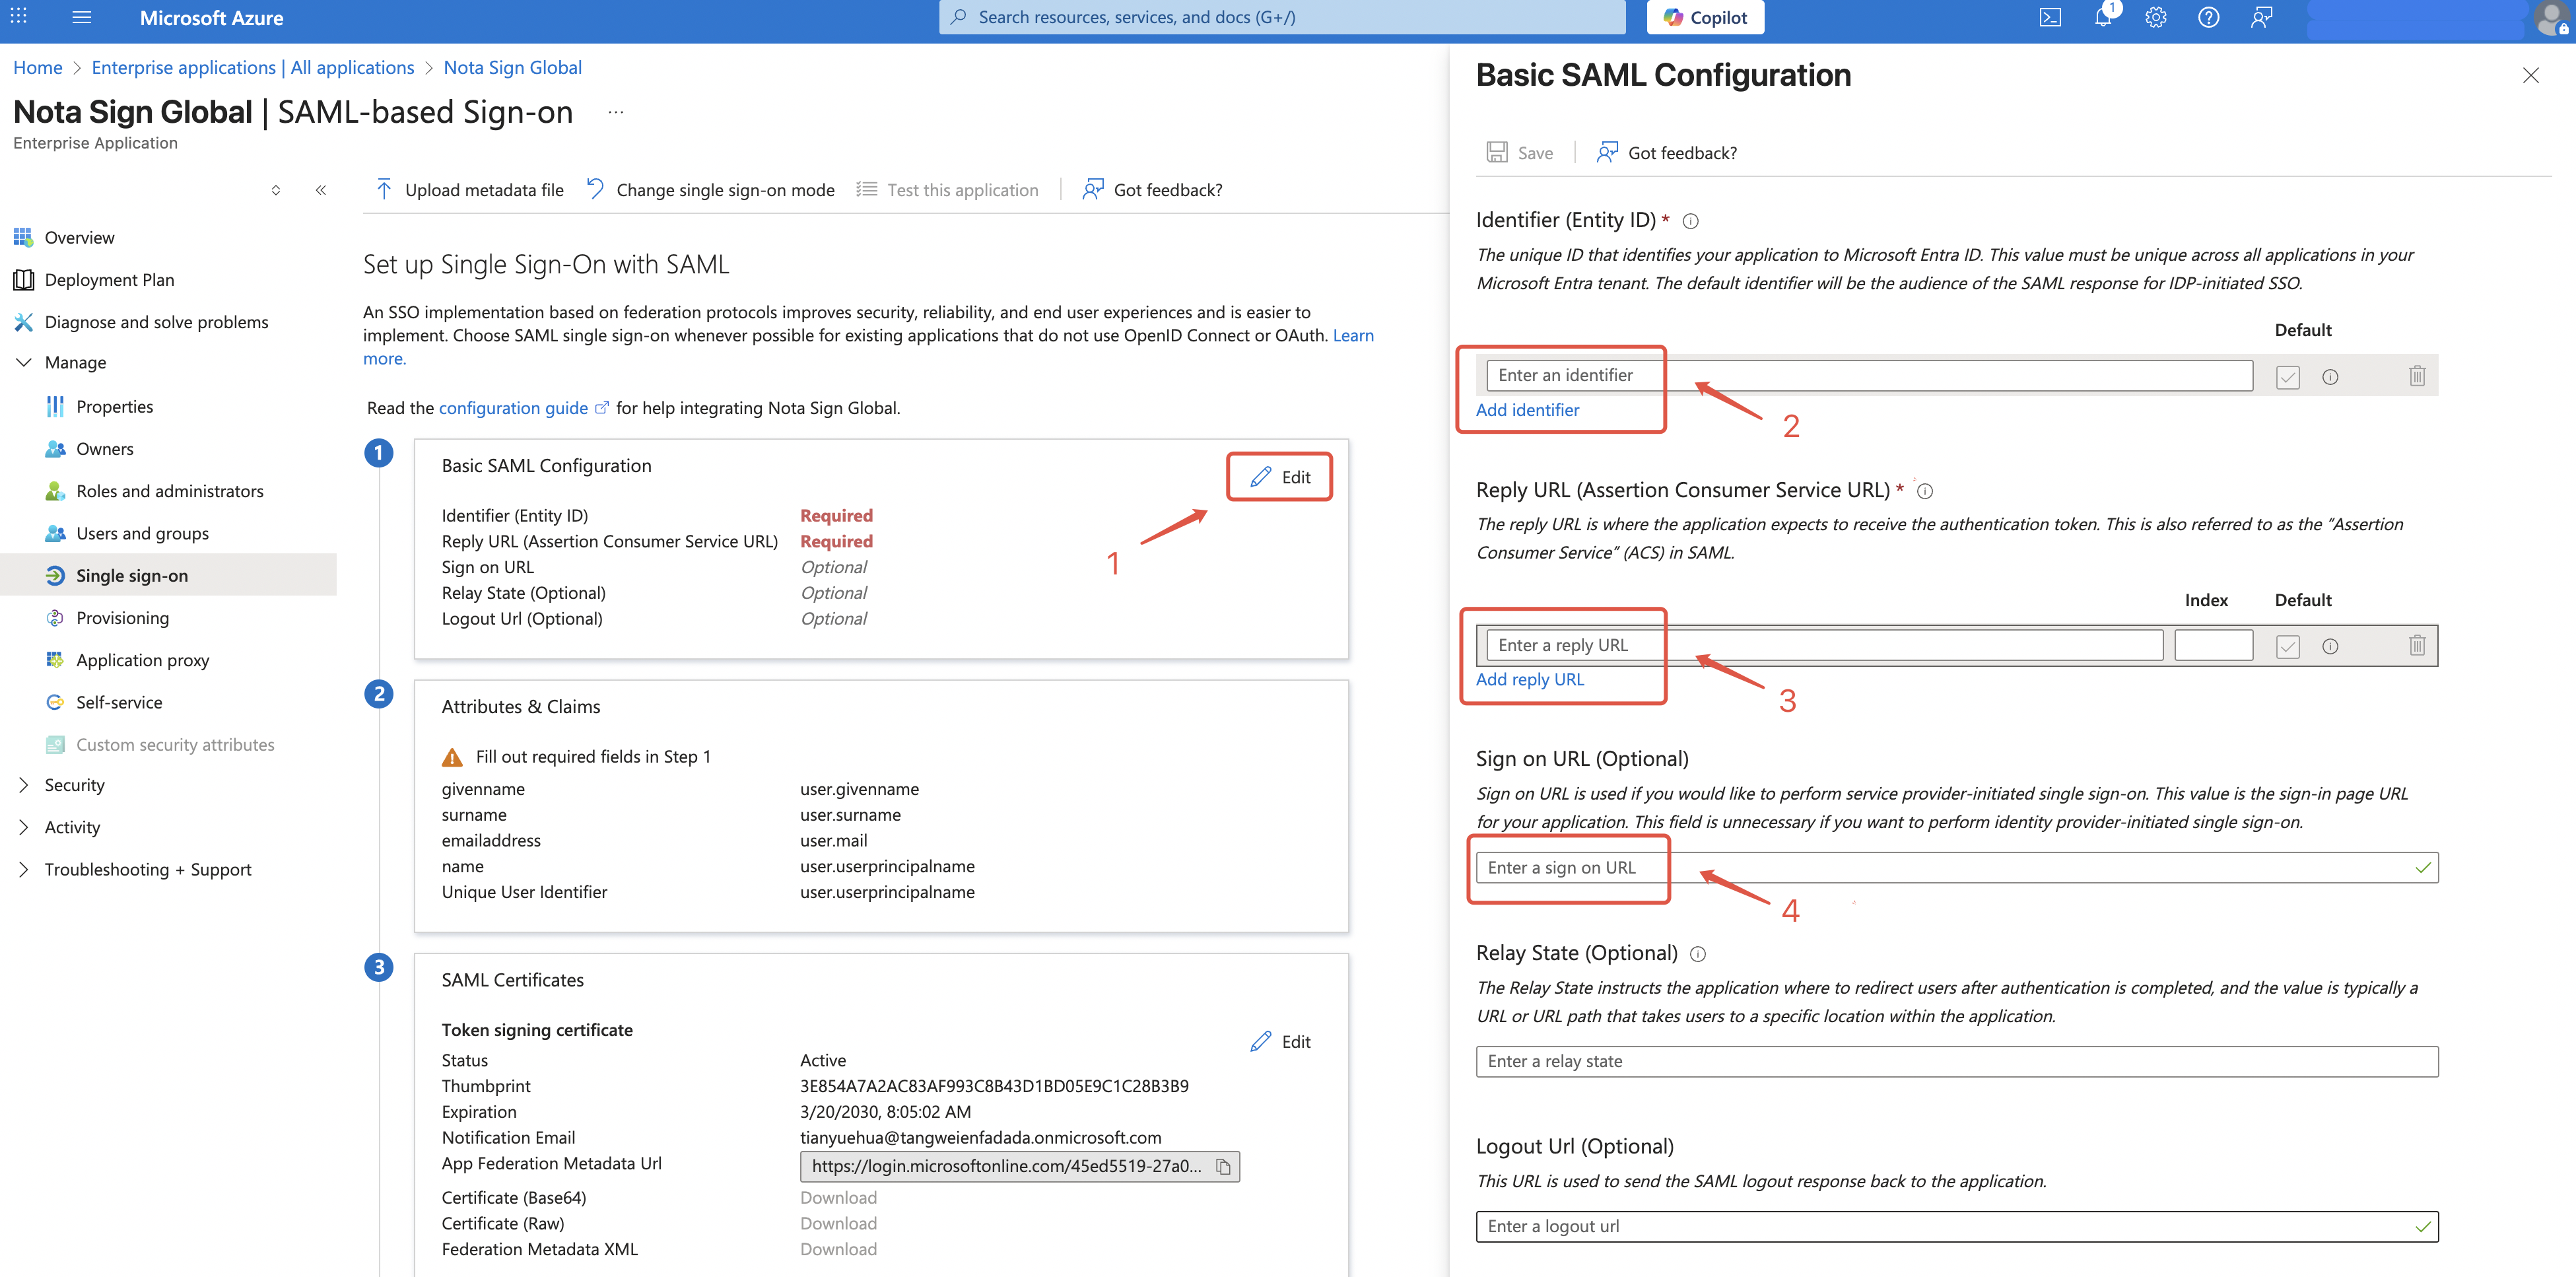
- Open the created application and go to Single sign-on from the left menu.
- Select SAML login.
- Copy the SP Entity ID, SP Callback URL (Reply URL/ACS URL), and Login URL back into the SAML application configuration.
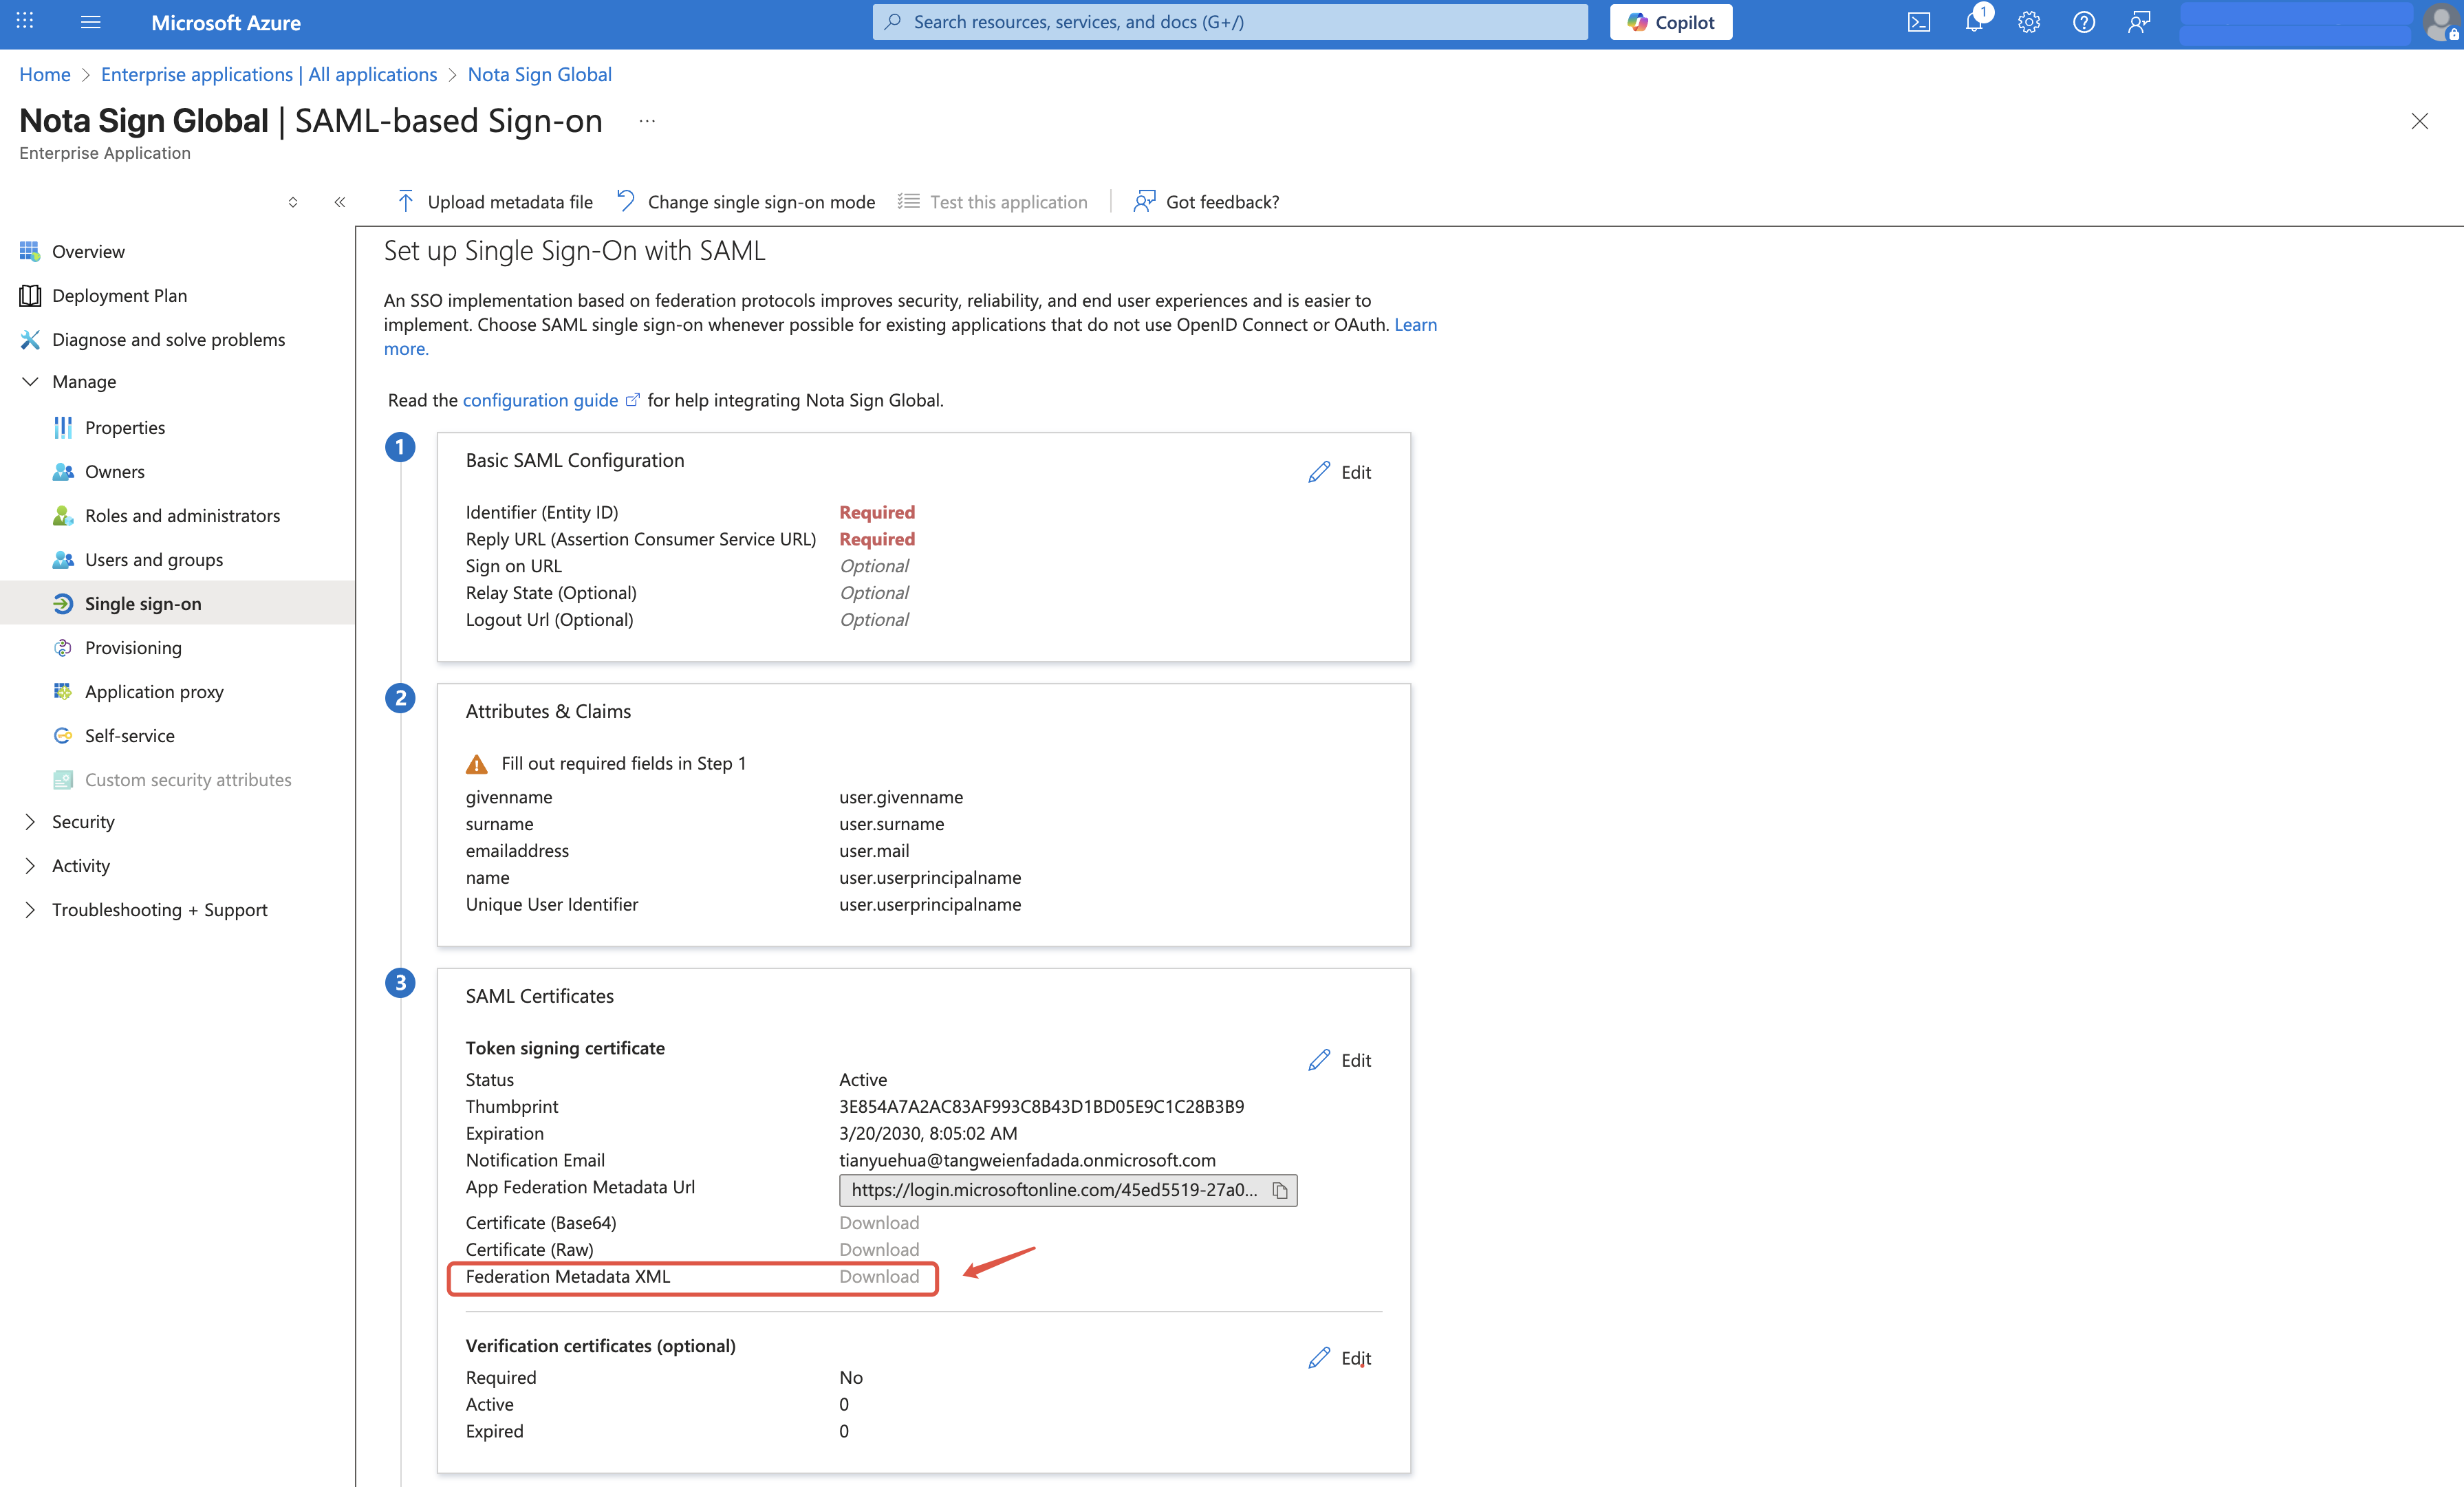
3.3.3. Download Metadata File
Download the Federation Metadata XML file of the SAML application.
3.4. Configuring IdP in Nota Sign
You must have Nota Sign (SP) administrator permissions.
3.4.1. How to Configure an IdP
- Log in to your Nota Sign and click Global Settings.
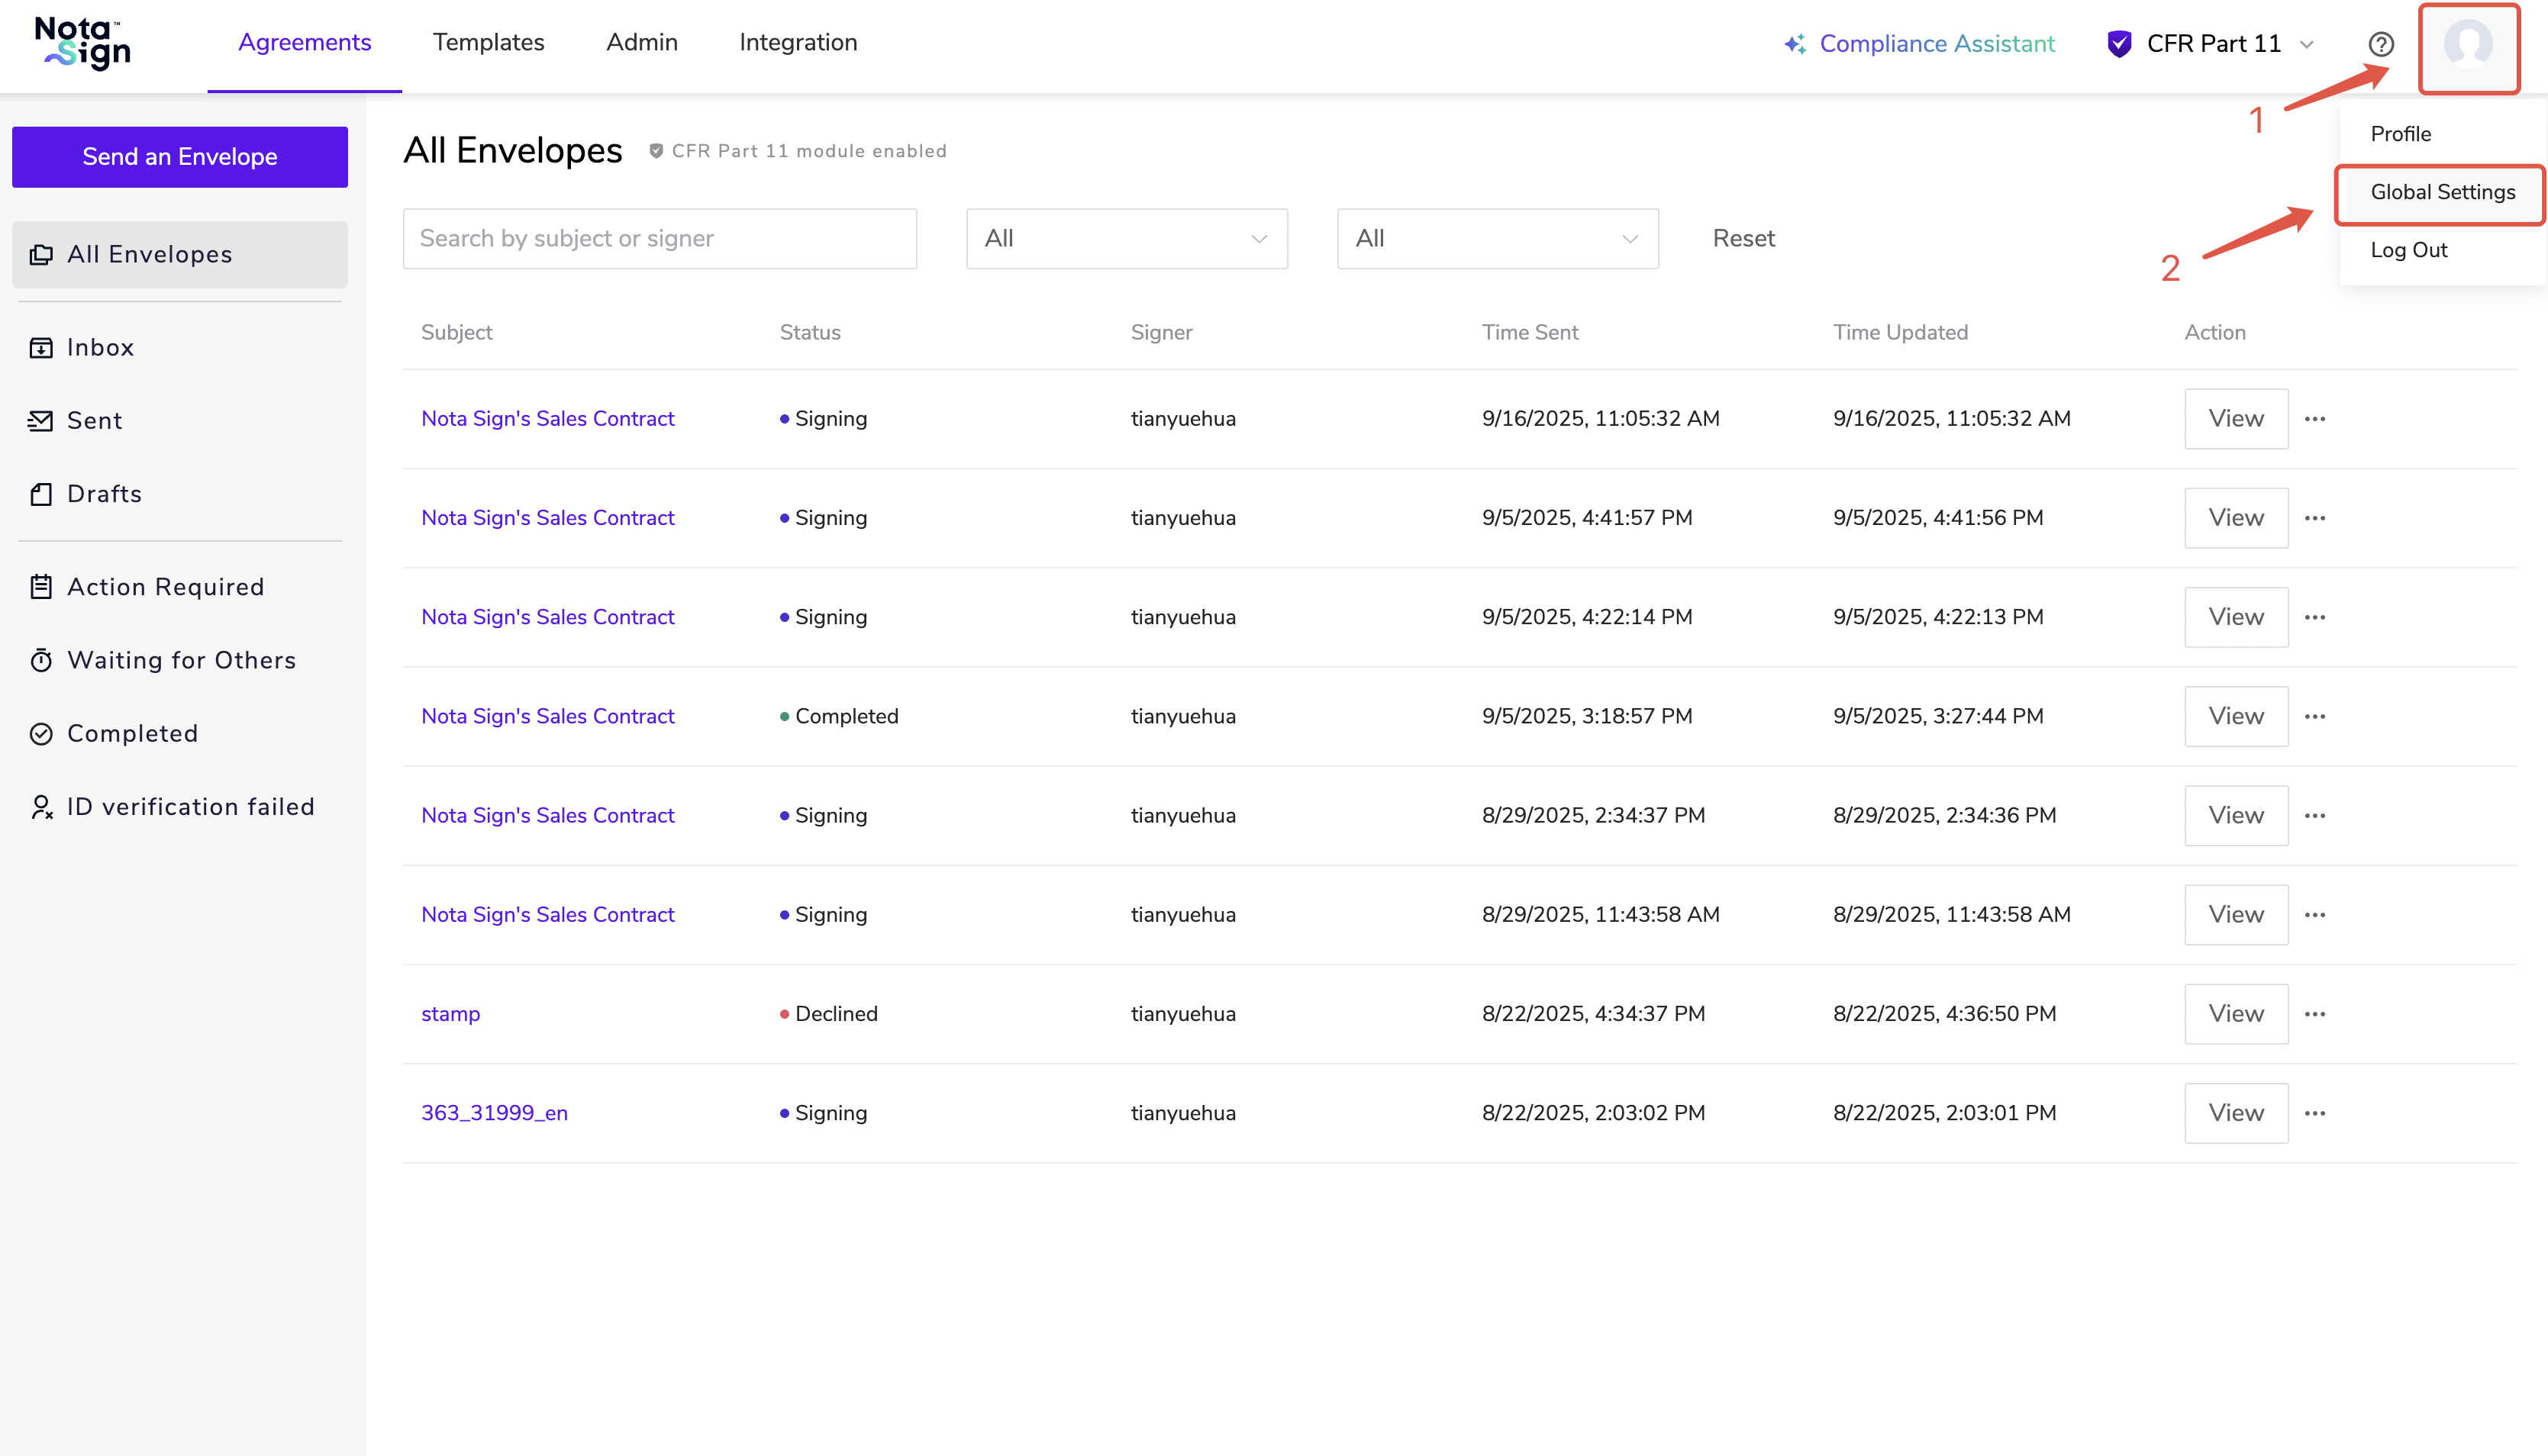
- Click Identity Providers and select Add Identity Provider.

- Enter the IdP name and select the protocol type (currently only SAML 2.0 is supported), then click Save.

- Upload the downloaded metadata file, or manually enter IdP information, then click Save to complete the binding.

3.4.2. How to Disable an IdP
- Log in to your Nota Sign and click Global Settings.
- Click Identity Providers, select the IdP you wish to disable, and click its corresponding Manage Settings.

- Click the Enabled button.

- After disabling the IdP, you may delete it from the Identity Providers page.

3.5. Configuring Enterprise Domain
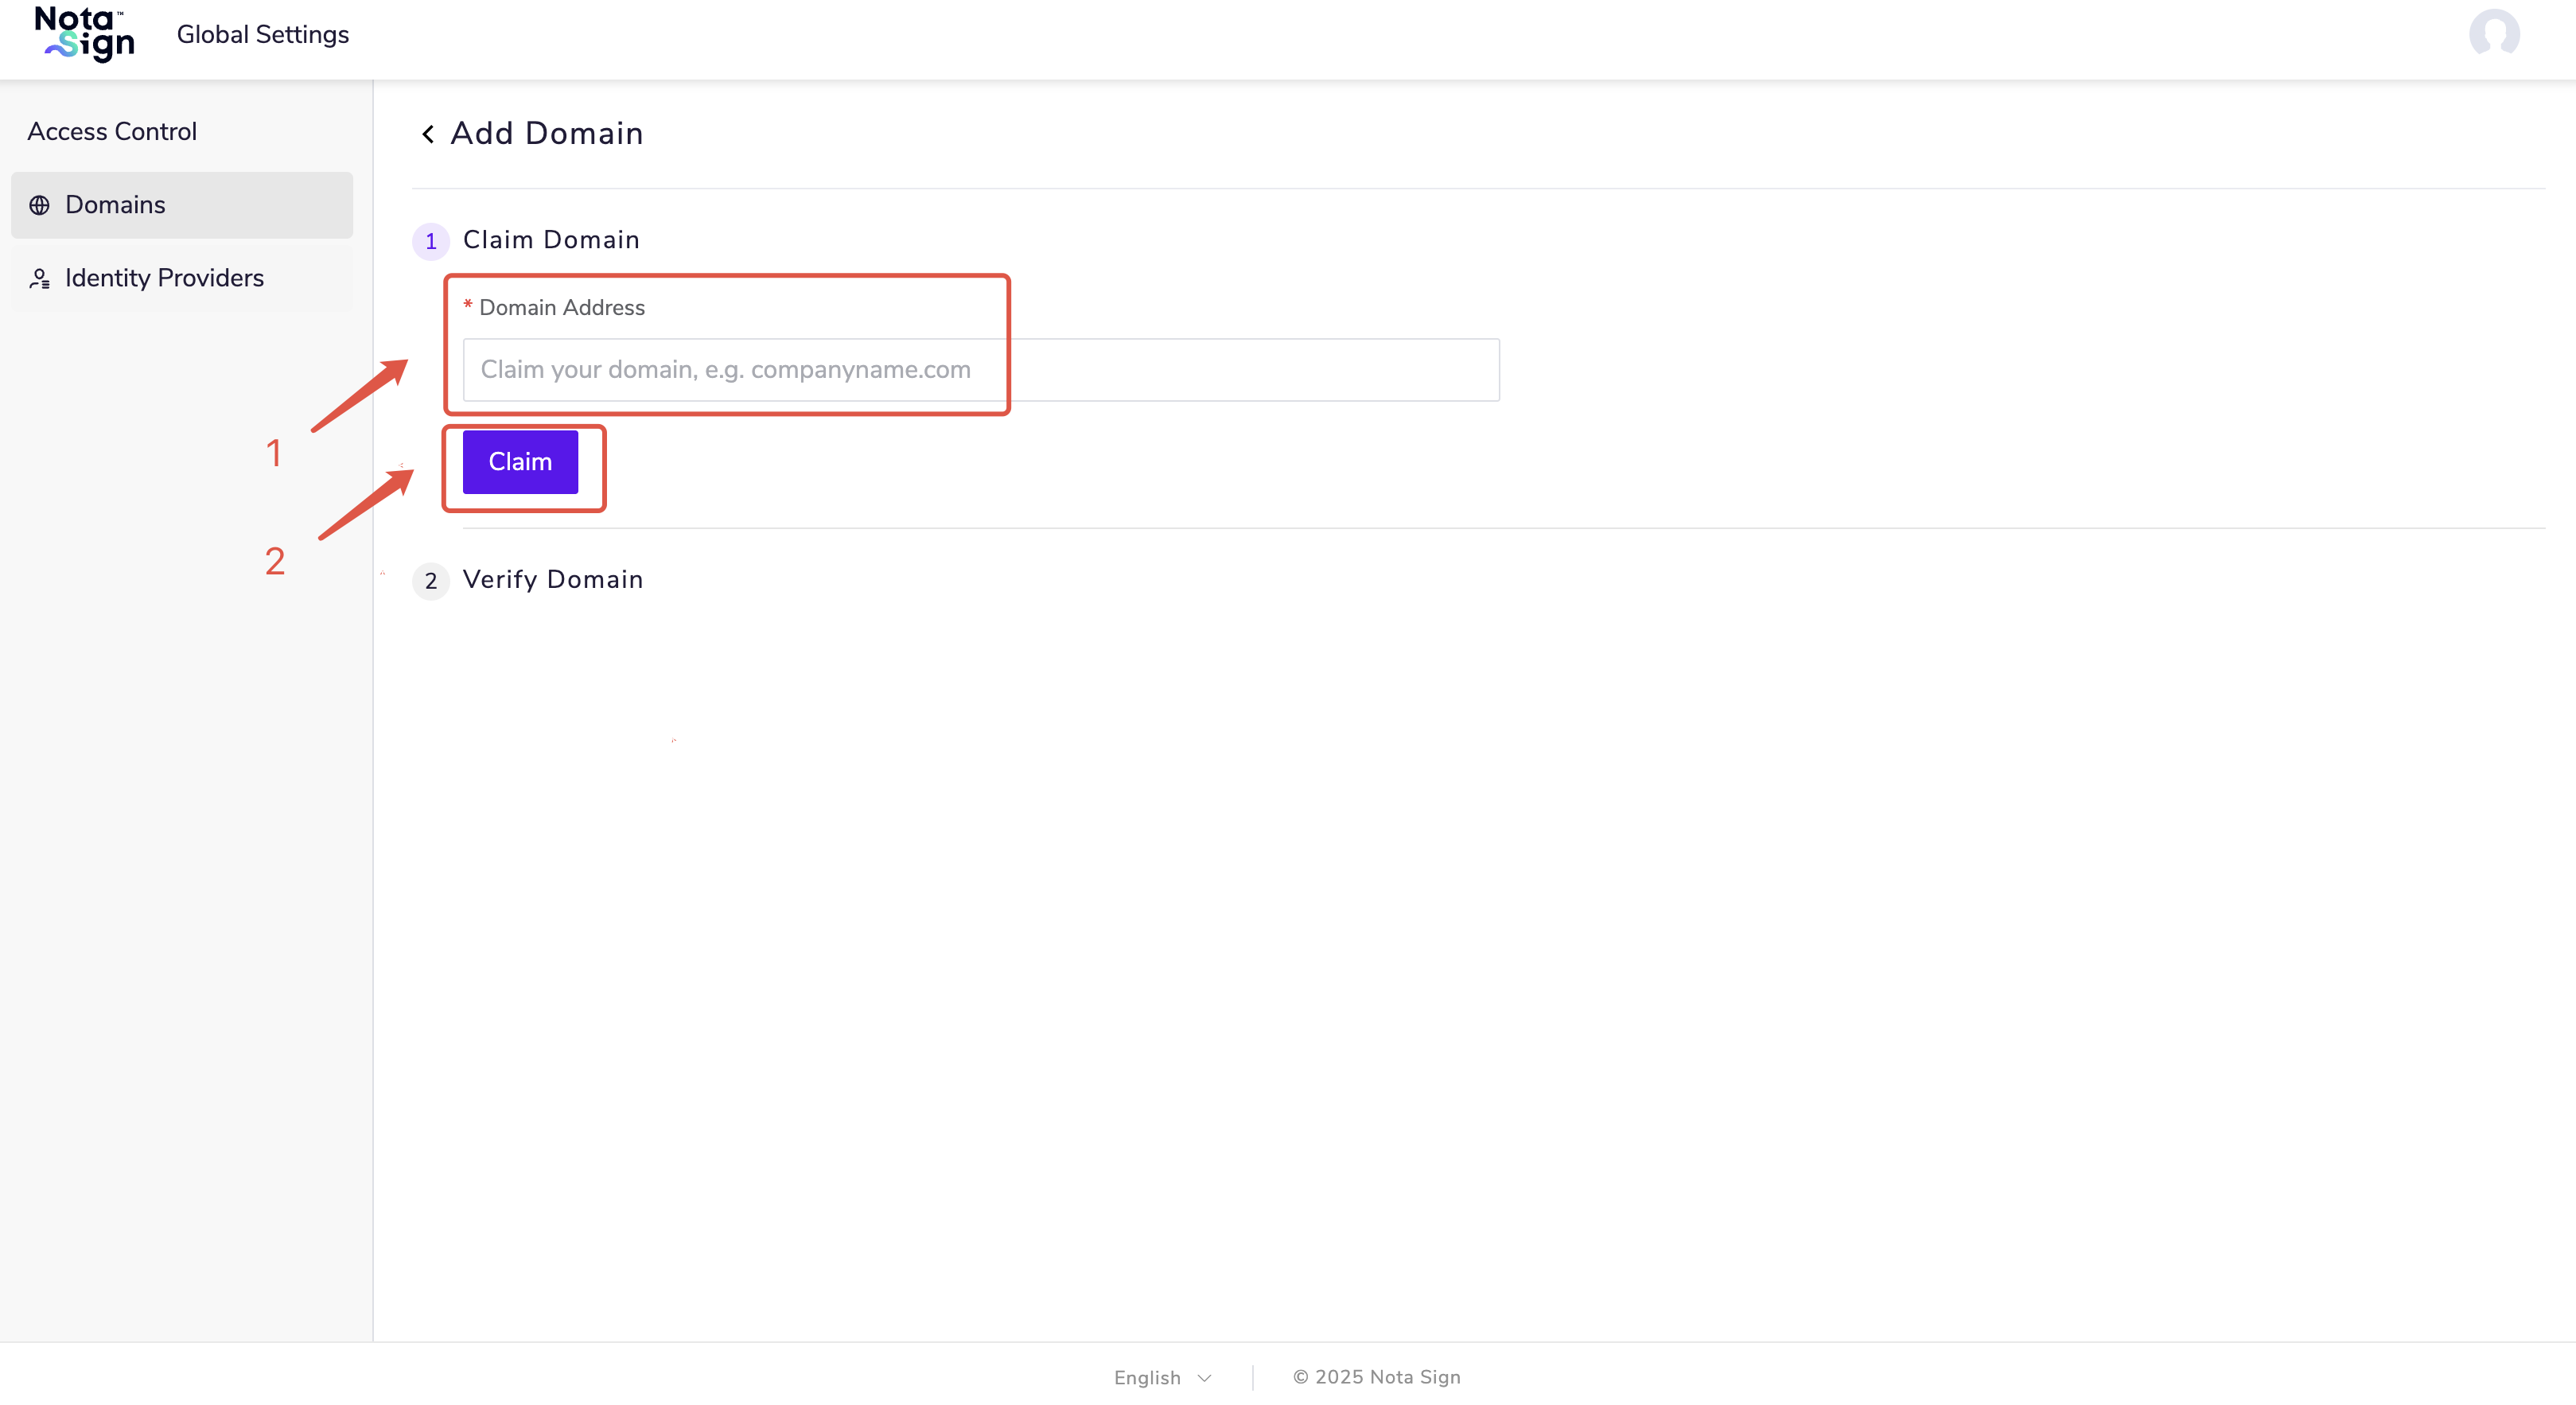
3.5.1. Add a Domain
- Log in to the Nota Sign and click Global Settings.
- Click Domains, then select Add Domain.
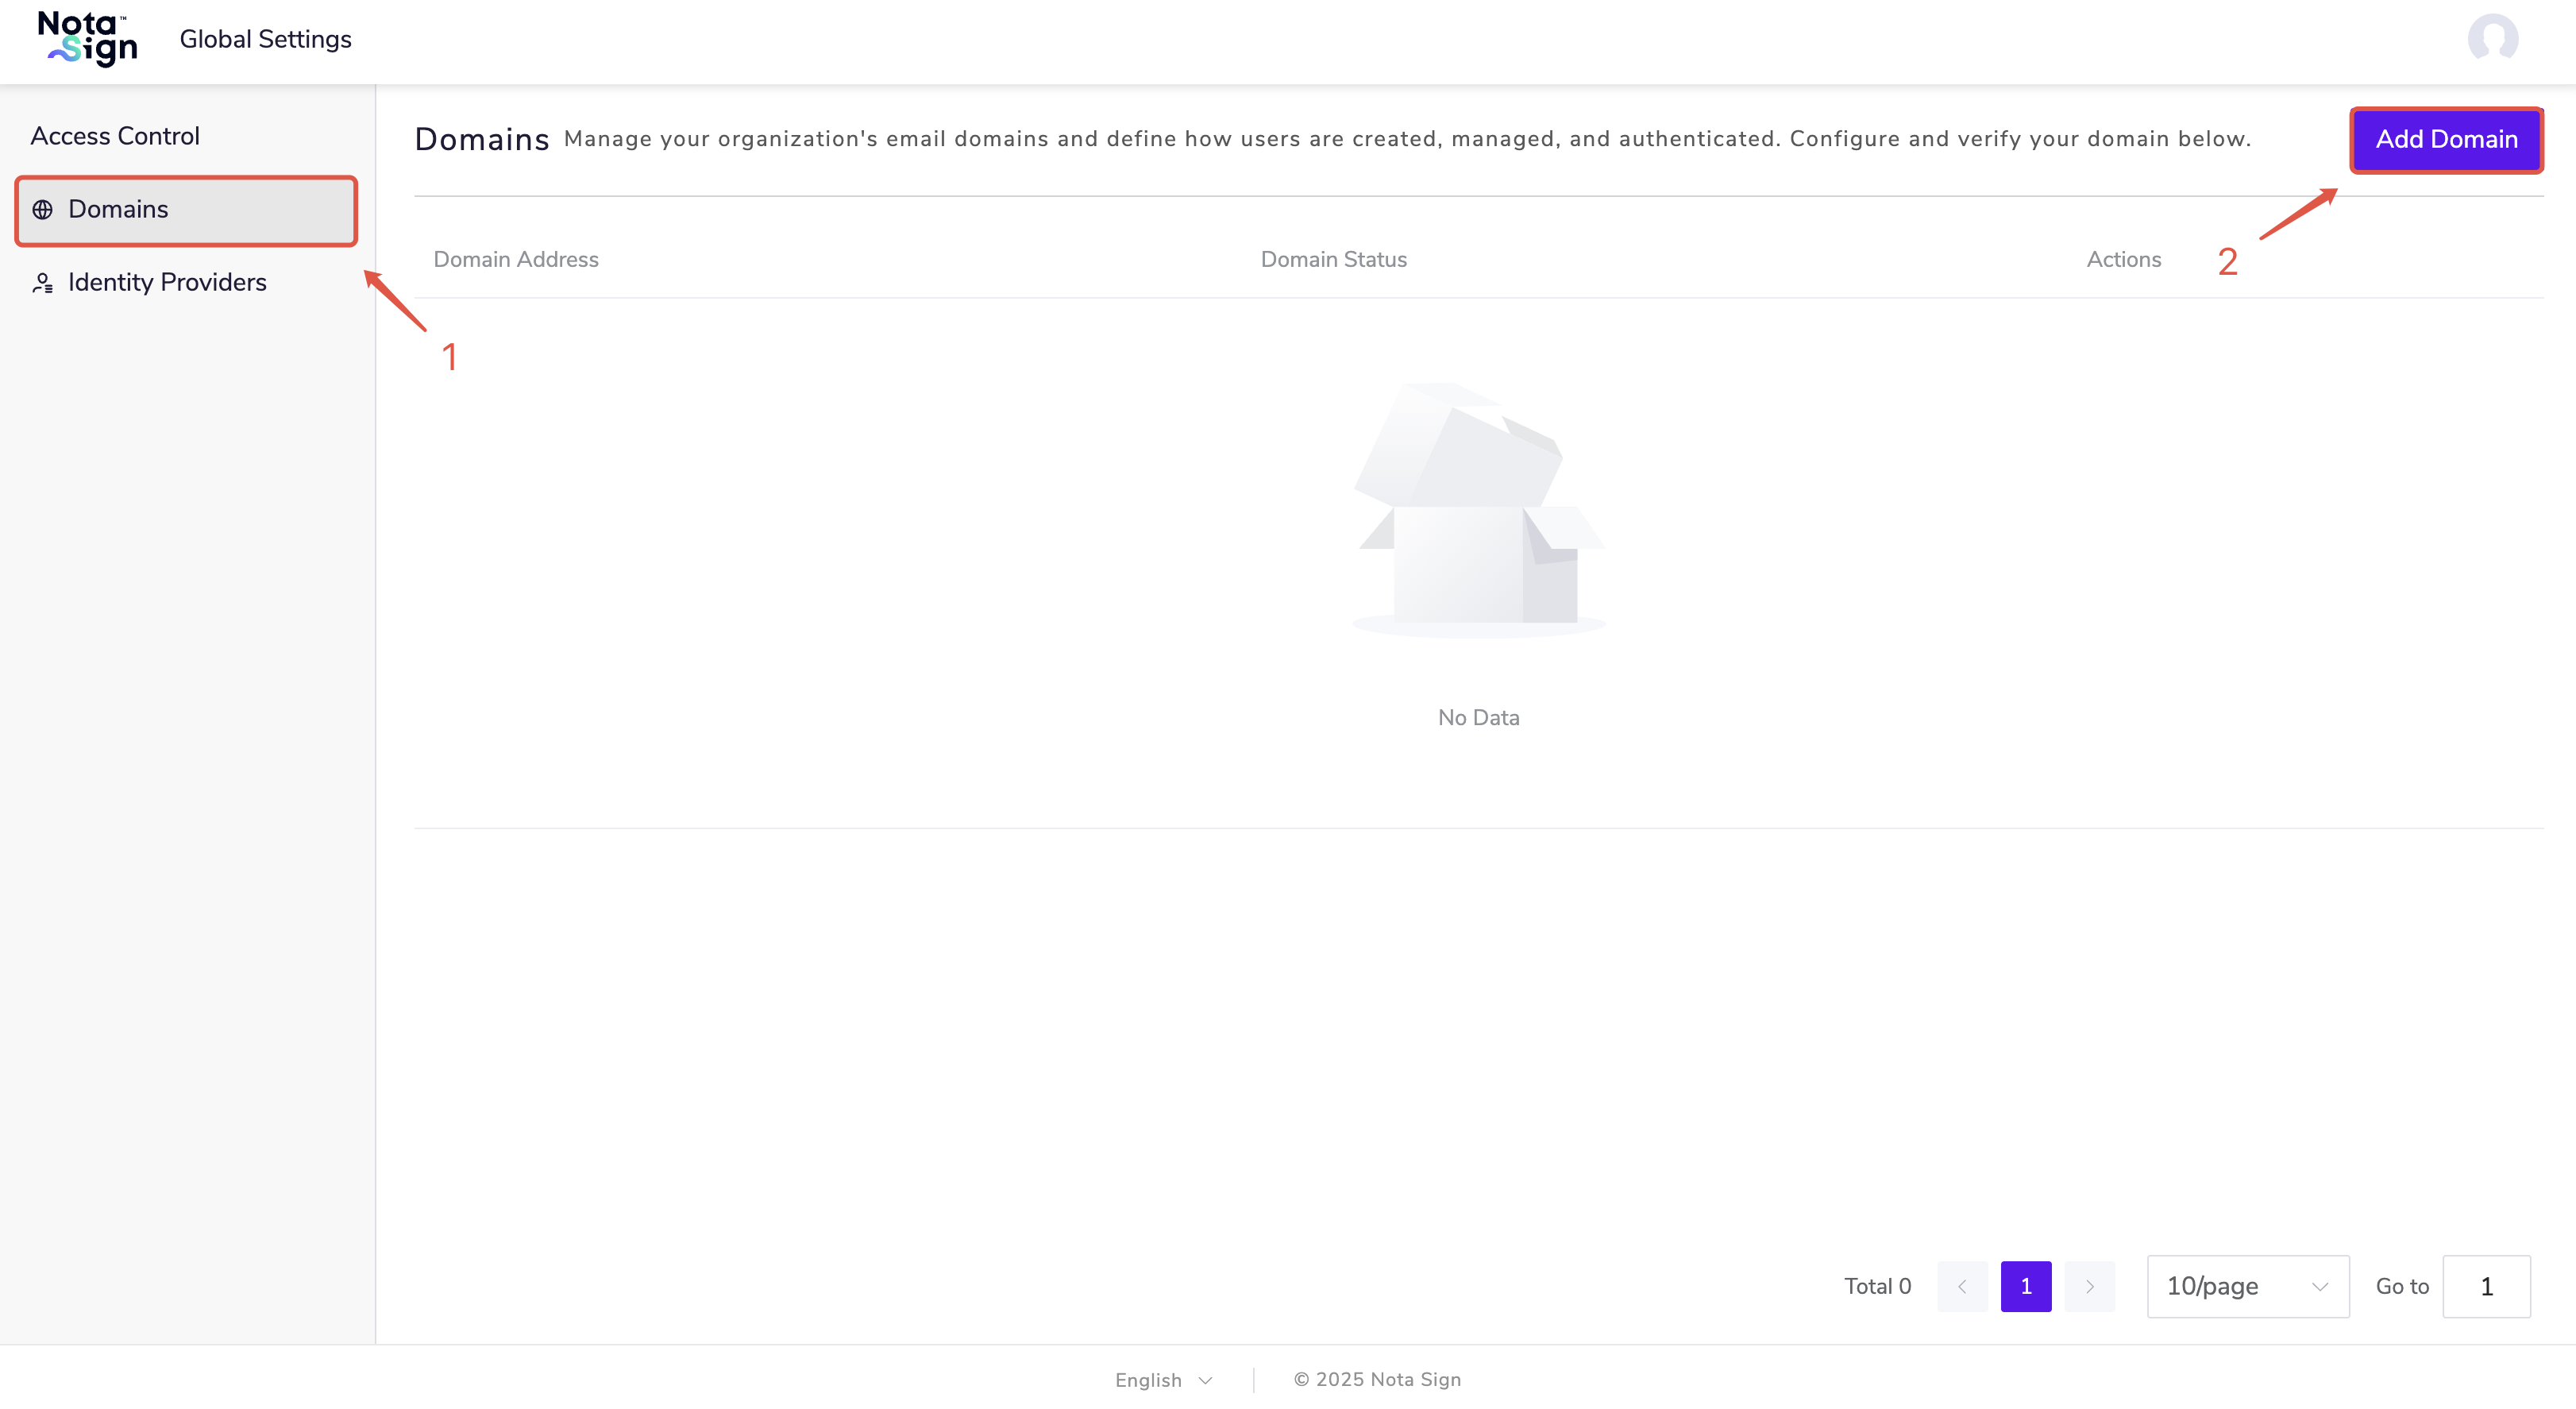
- Enter the domain address and click Claim.
3.5.2. Verify the Domain
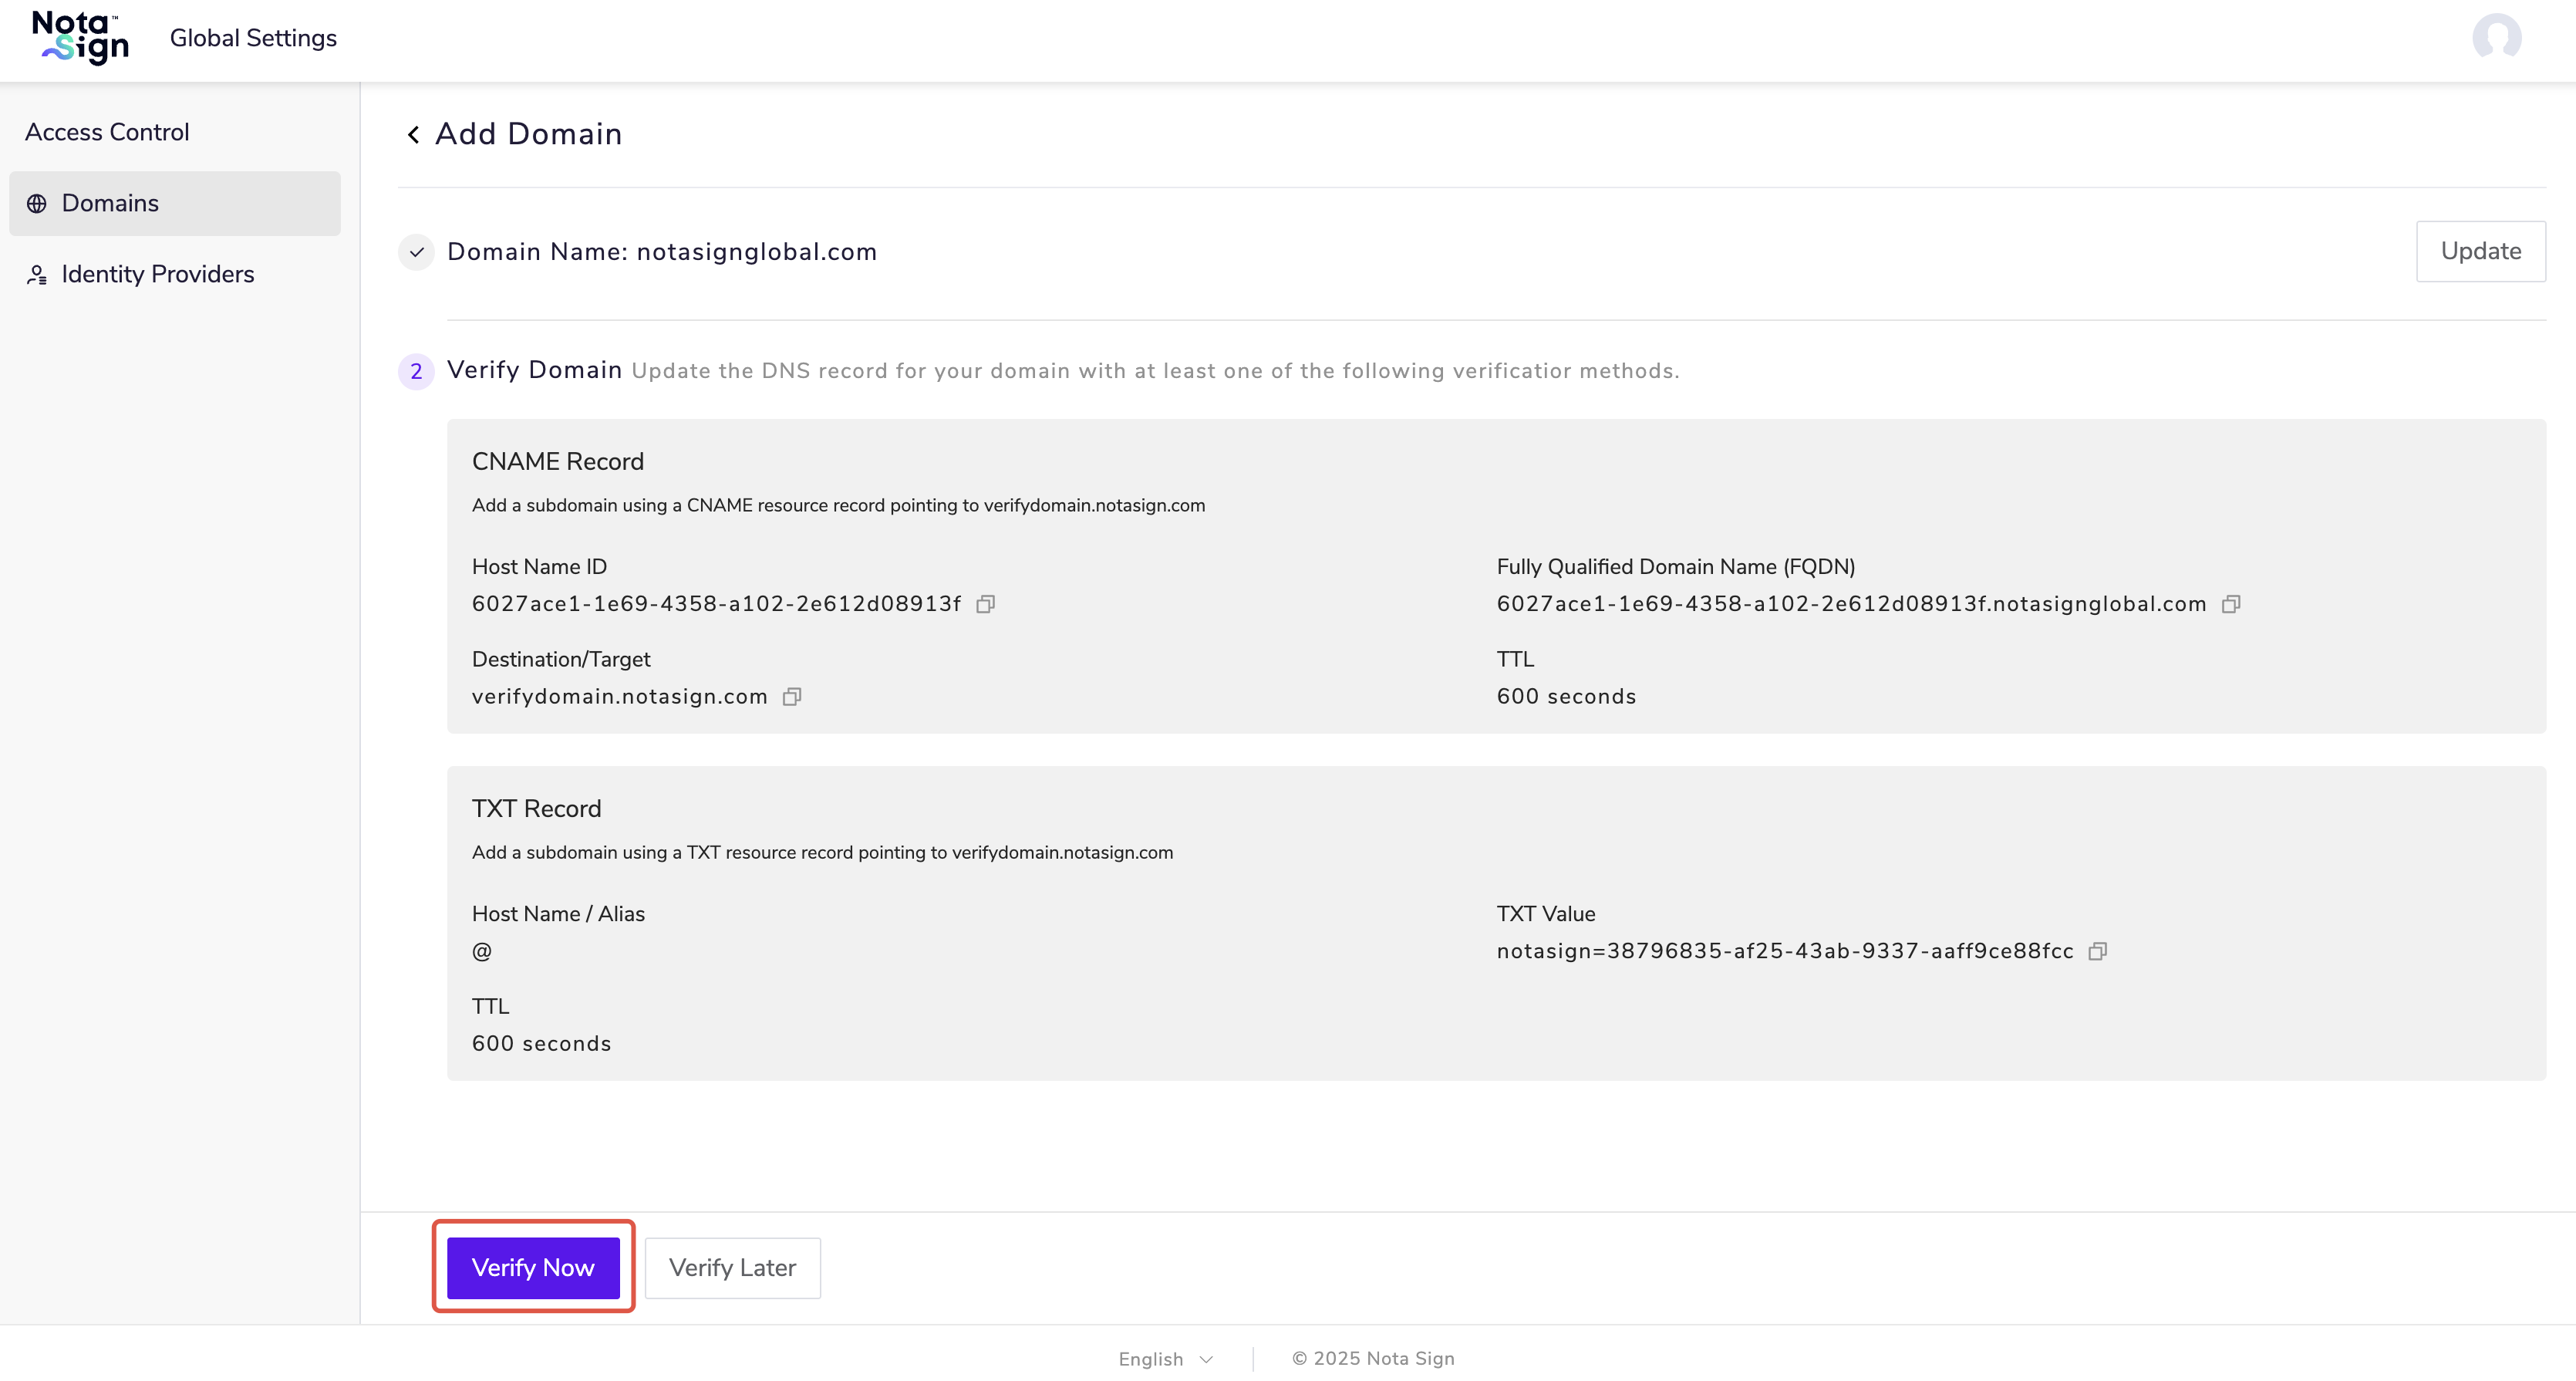
- In your domain provider’s DNS configuration, add any one of the verification values provided by the system to complete domain ownership verification.
- Click Verify Now.
3.6. Configuring SSO Mapping
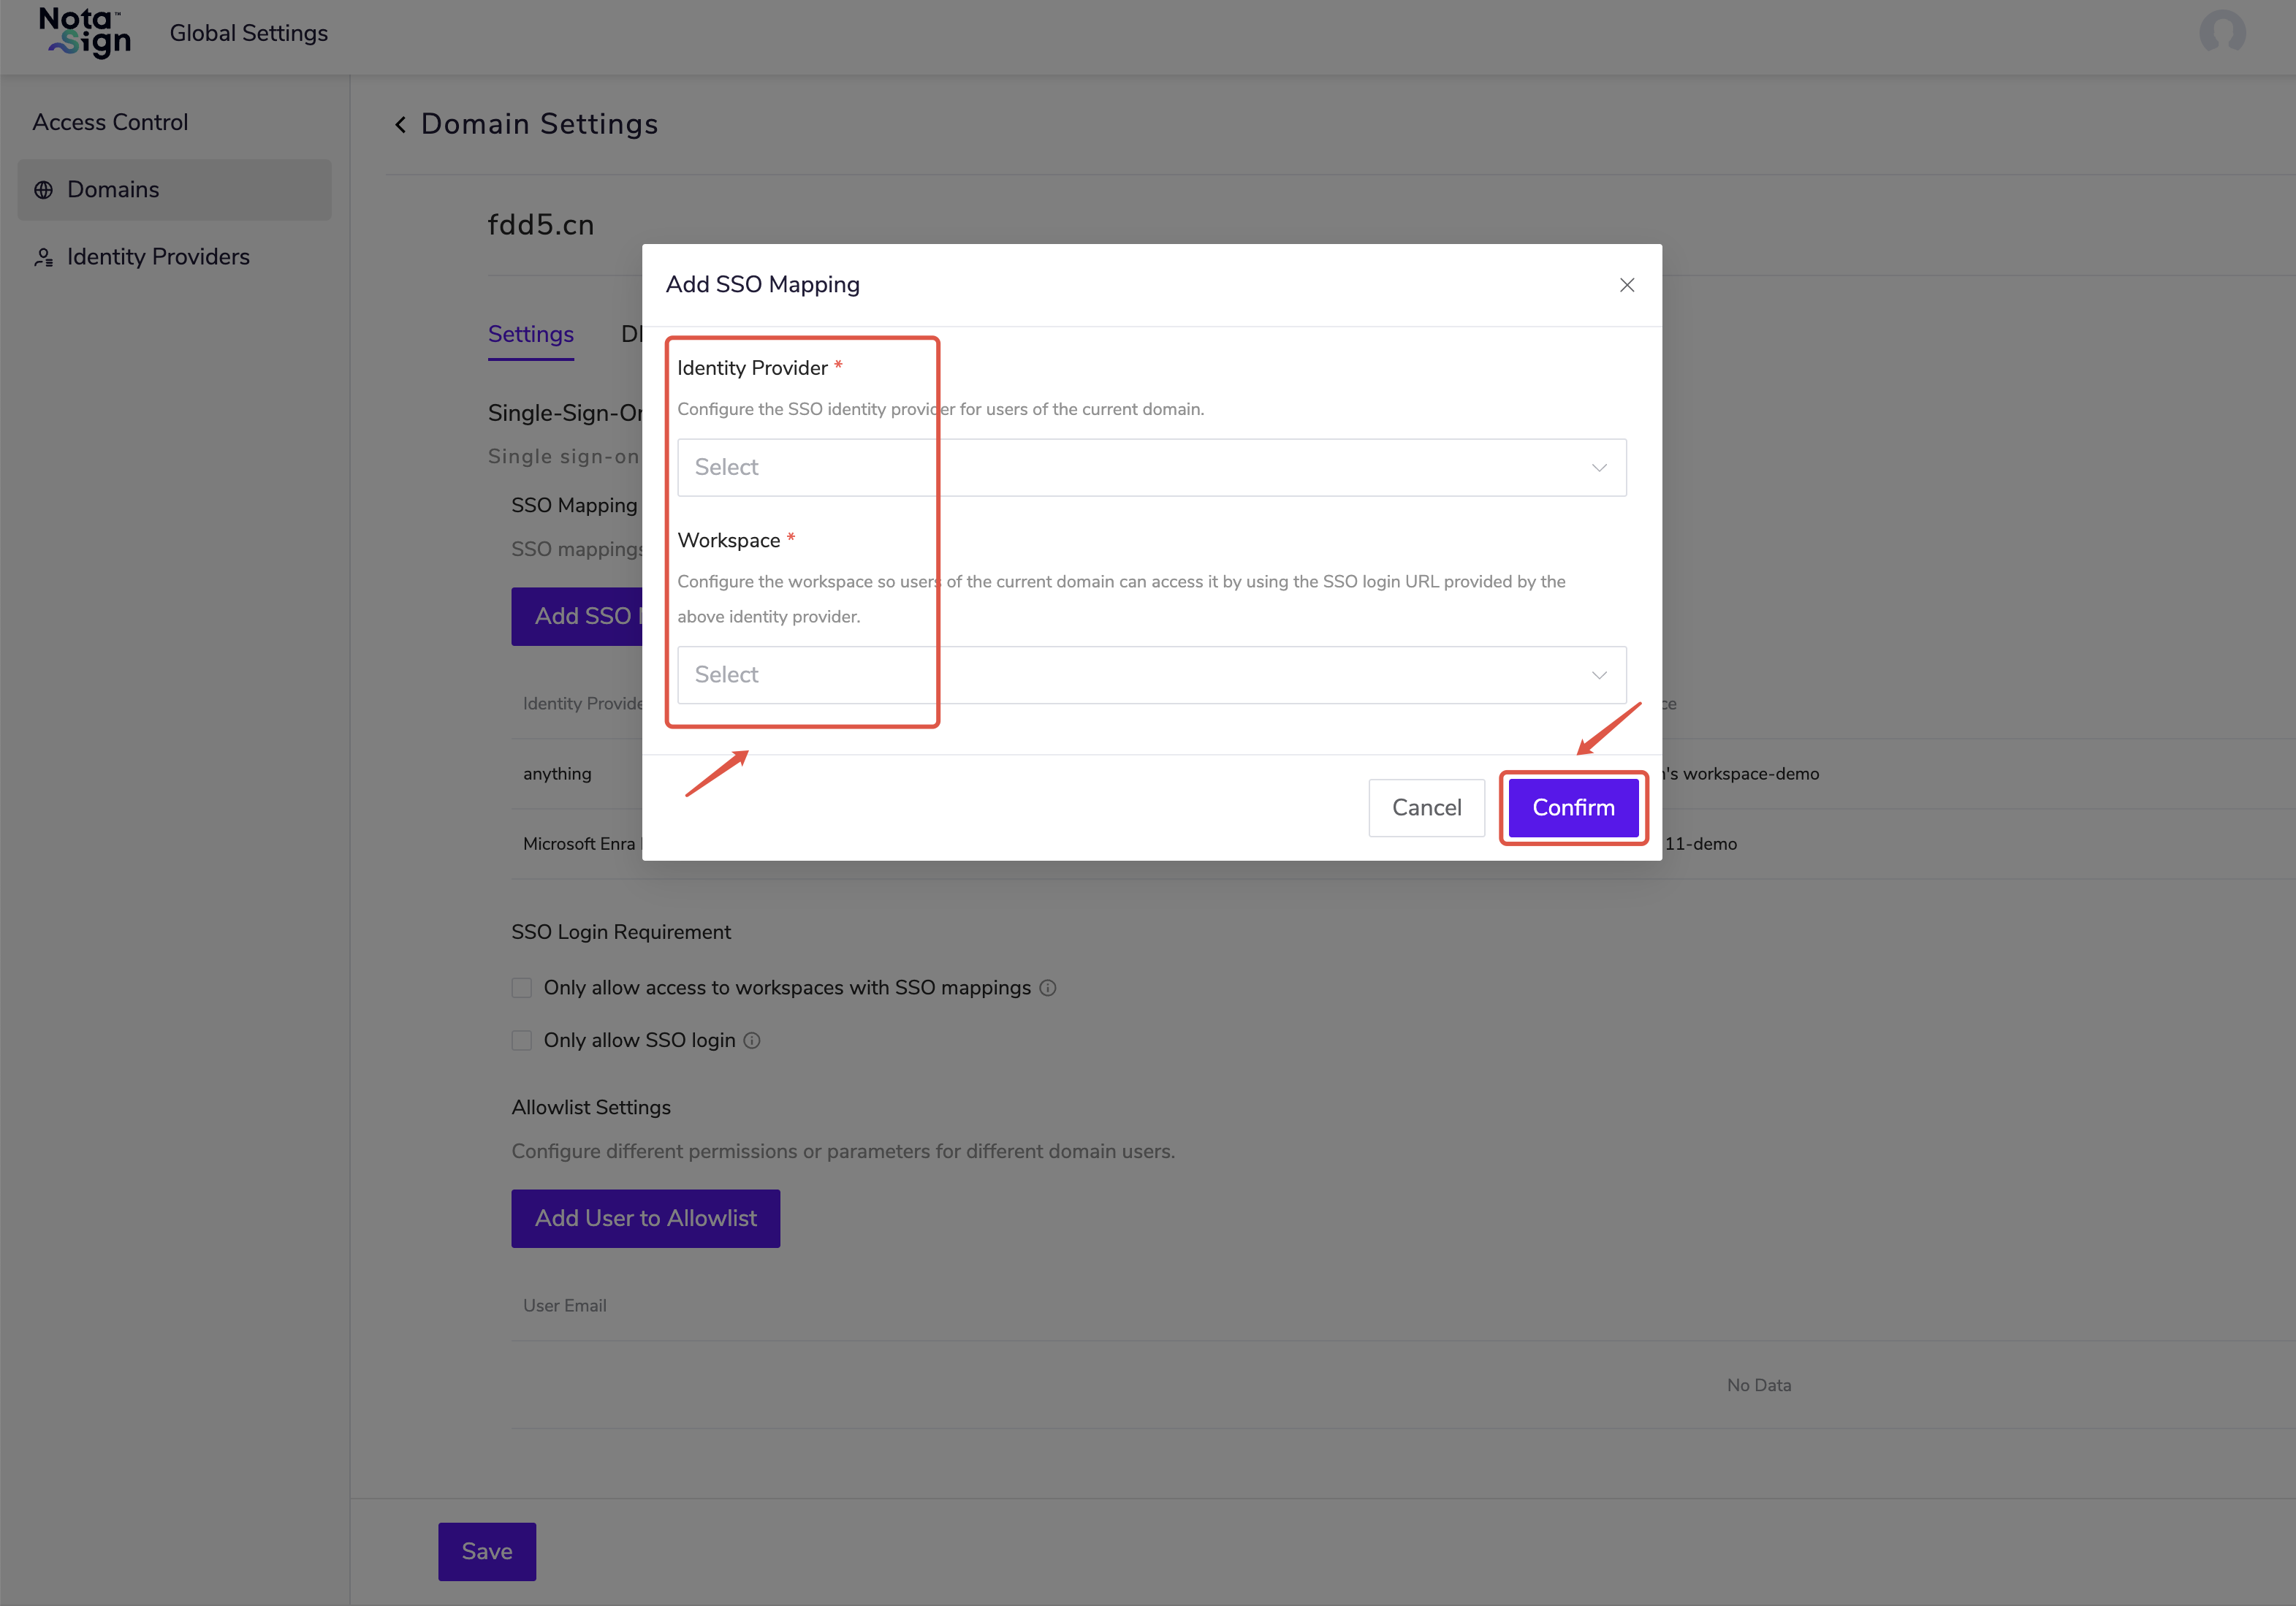
After configuring SSO mapping, invited domain users can access the workspace via the SSO login URL.
3.6.1. Automatic Mapping Configuration:
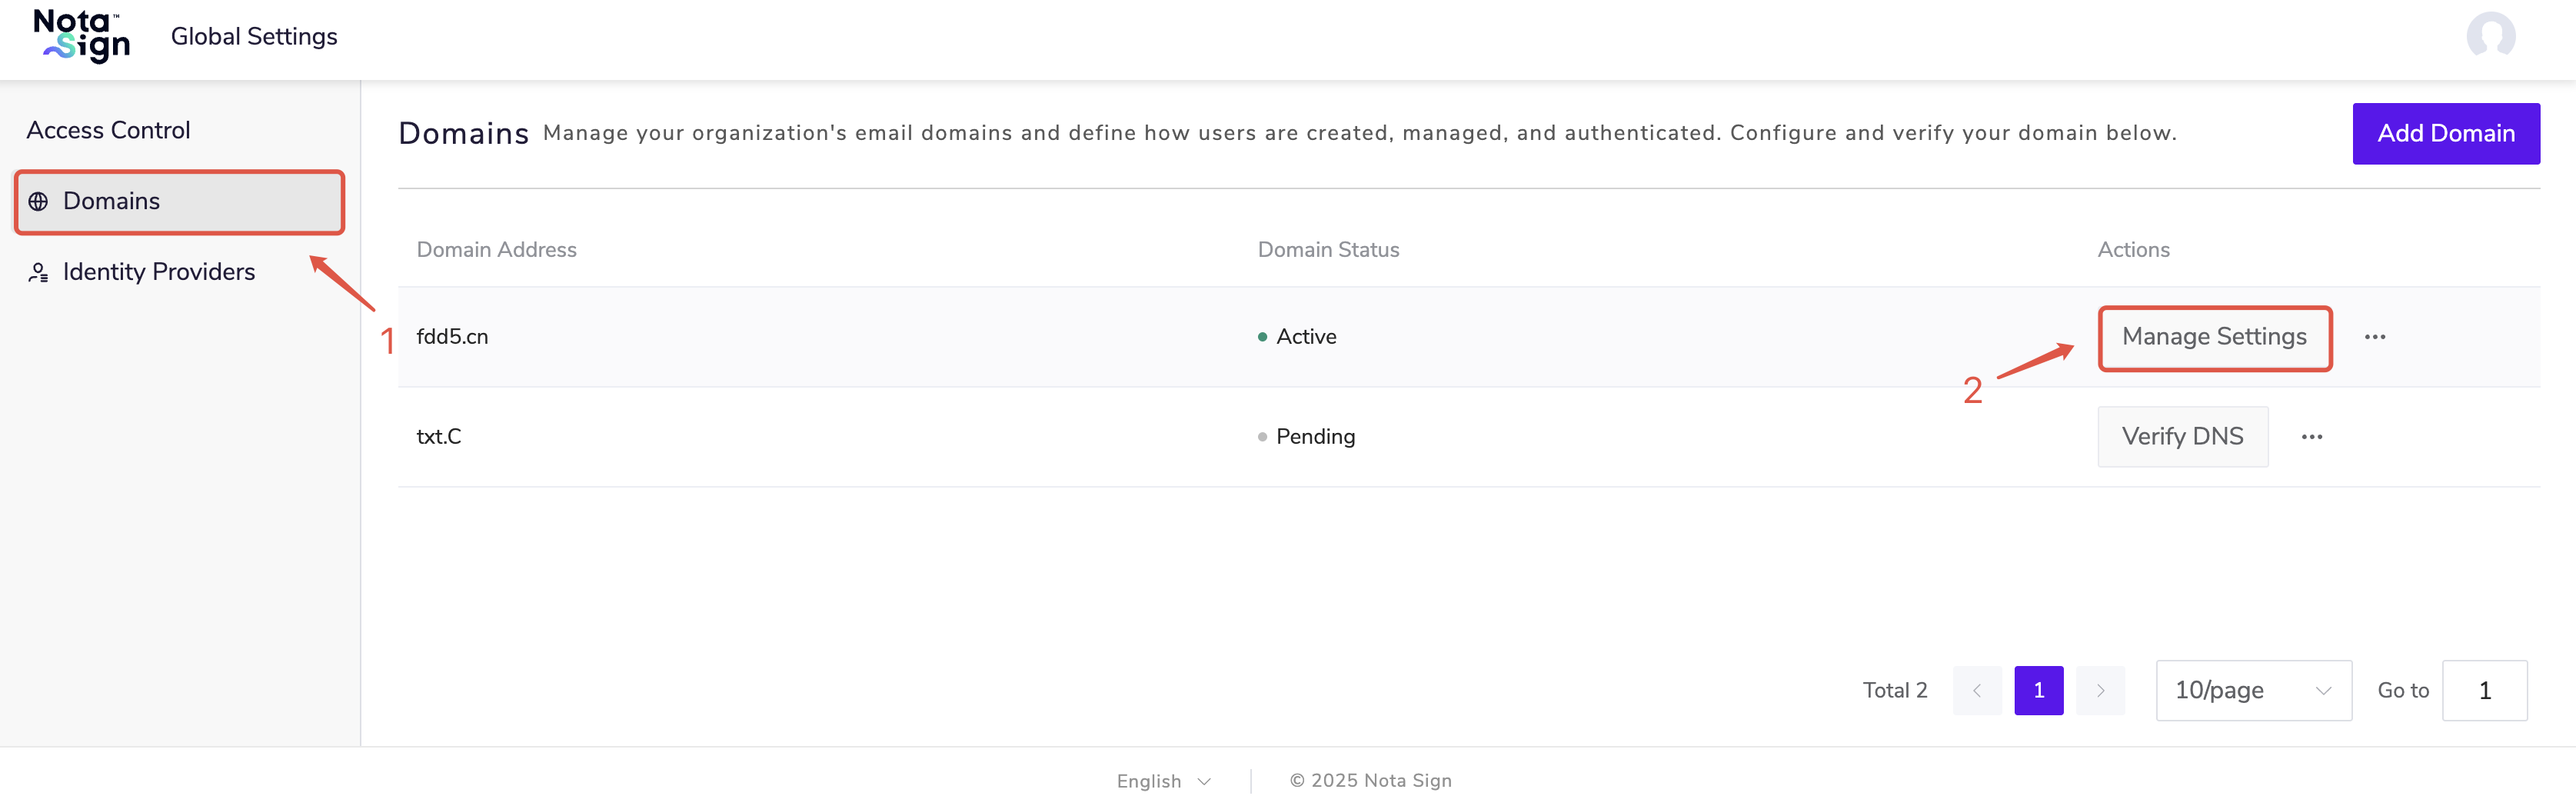
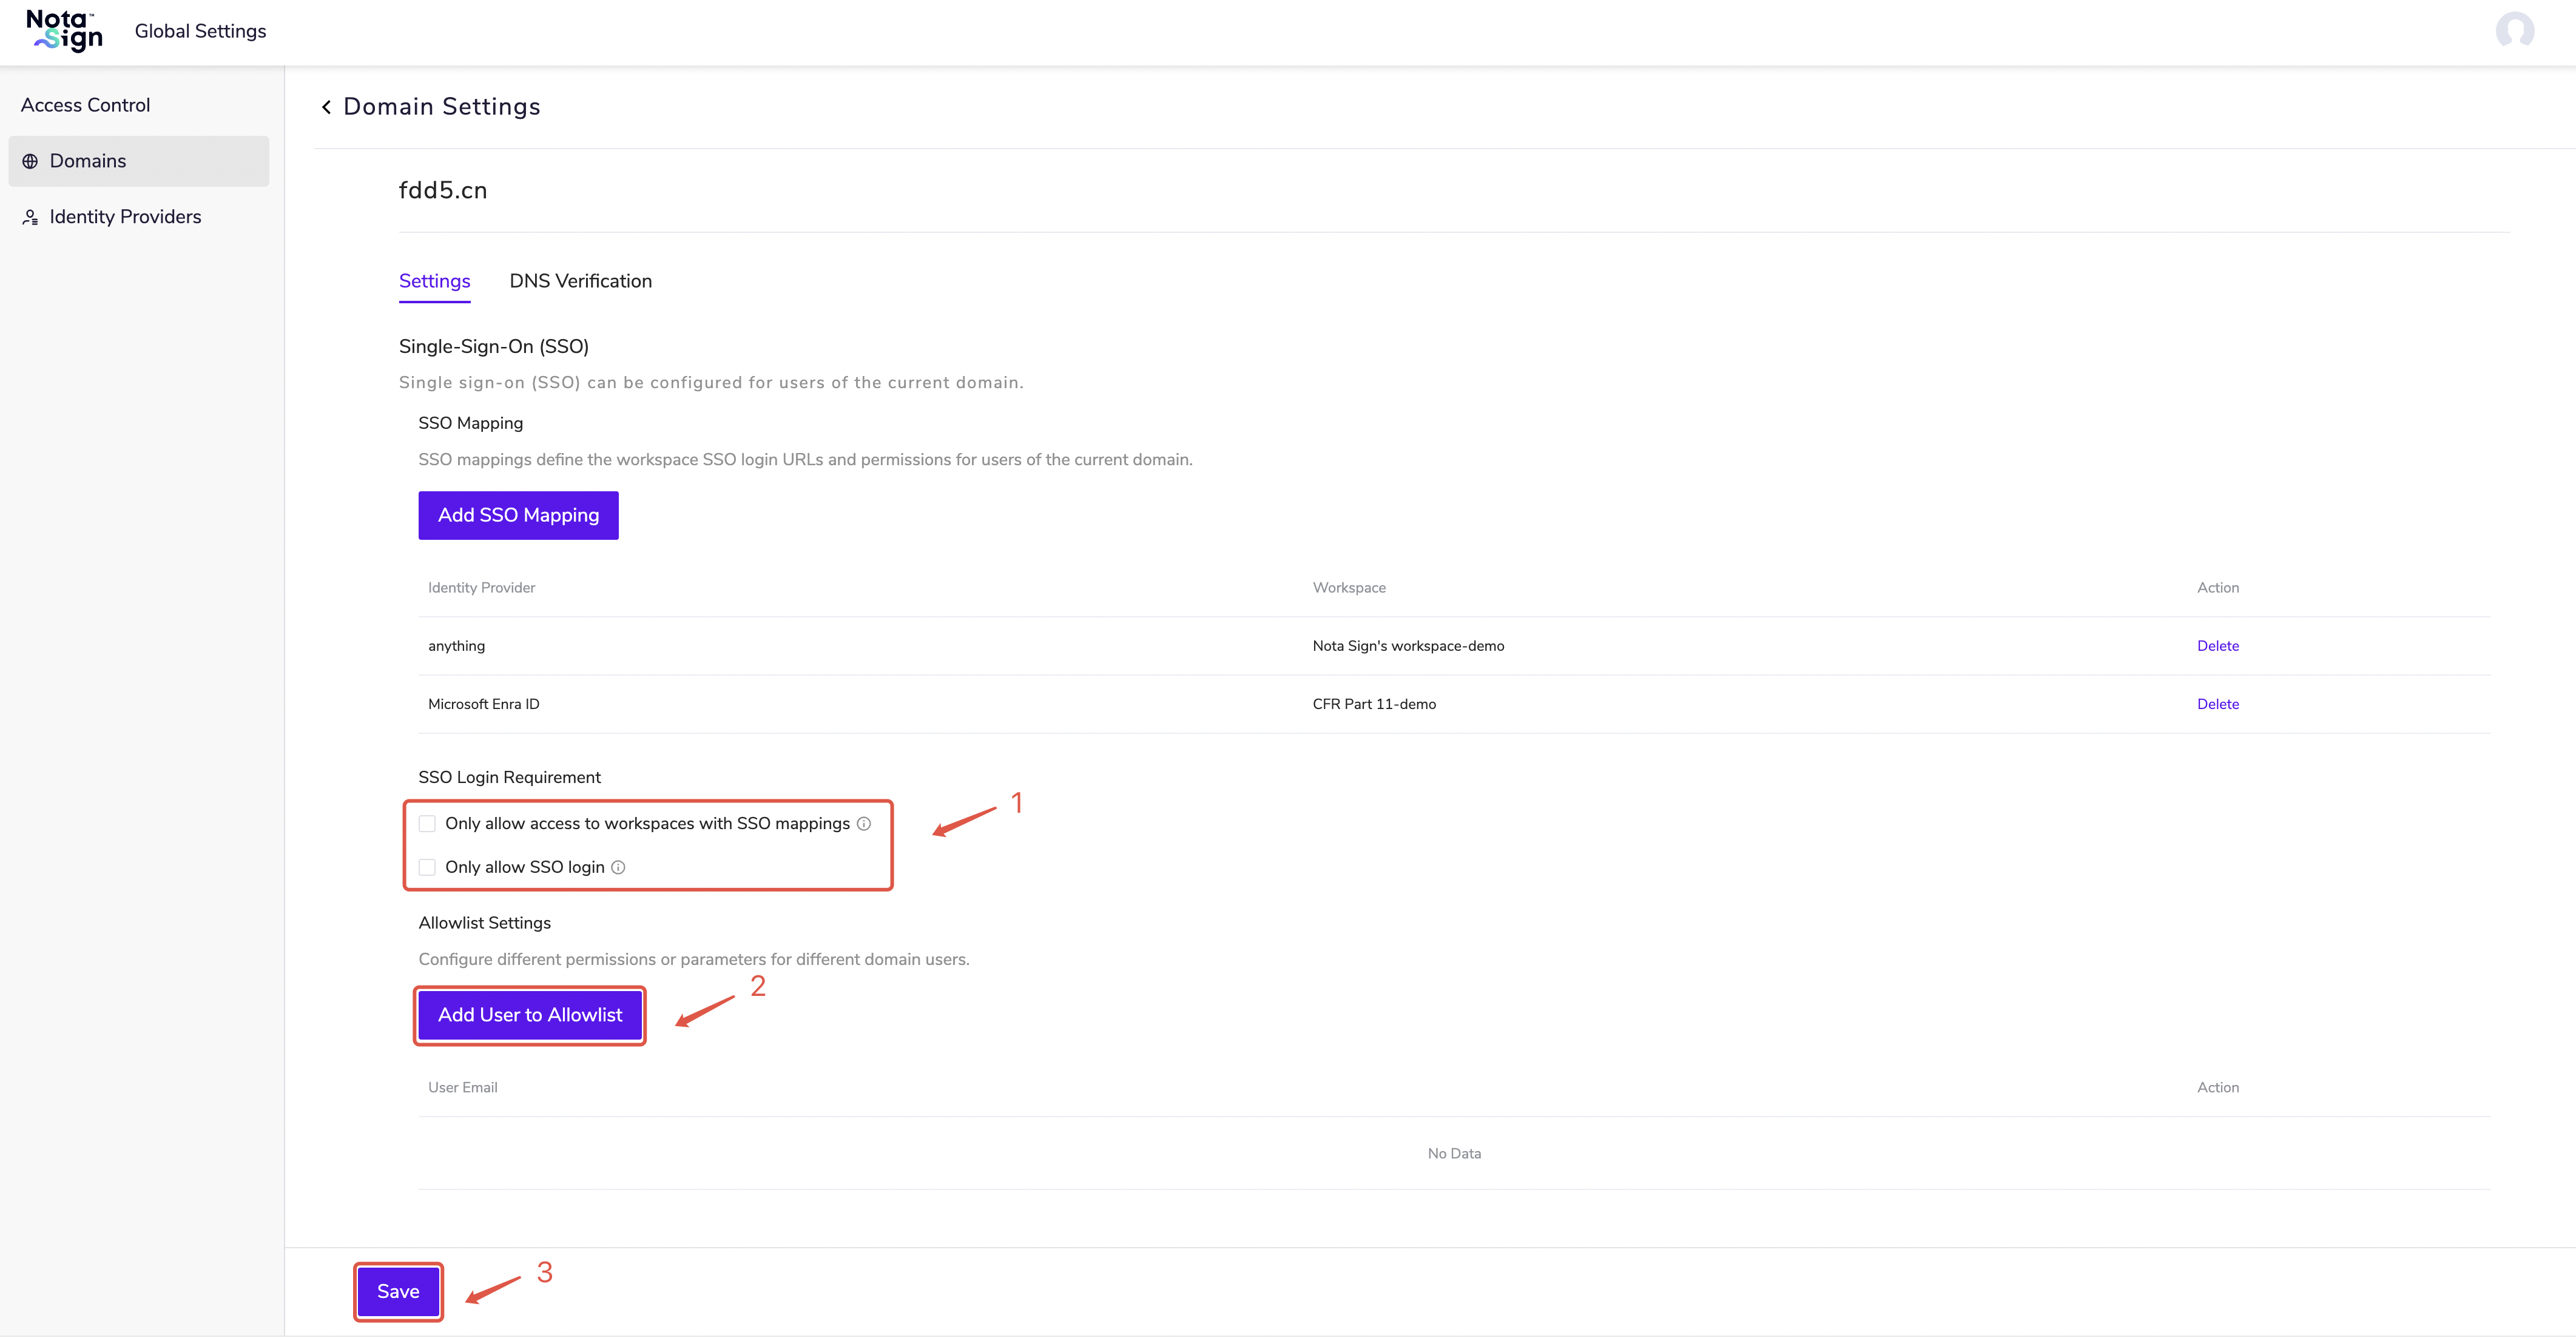
- Log in to your Nota Sign and click Global Settings;
- On the Domains page, click Manage Settings;
- On the Settings page, select Add SSO Mapping, and define the default workspace for members logging in under different IdP domains;
-
Based on your requirements, select whether to Only allow access to workspace with SSO mappings or Only allow SSO login;
-
Click Add User to Allowlist to configure login permissions for specific users under the IdP domain;
-
Click Save to complete the configuration.
The administrator sends invitations to domain users within the corresponding workspace. Domain users who have not been invited do not have permission to access the workspace. When users log in via SSO, the system will automatically create a Nota Sign account for them.
When users log in via SSO, the system will automatically create a Nota Sign account for them, and based on the mapping, assign them to the designated workspace with default roles (e.g., Administrator, Sender).
If Only allow access to workspace with SSO mappings is checked, members will not be able to access their personal workspace.
If Only allow SSO login is checked, members will no longer be able to log in to Nota Sign using username and password.
3.7. SSO User Login and Signing
3.7.1. Login to the Nota Sign Platform
This section applies to SSO users log in to the Nota Sign platform. After the administrator sends the invitation to join the workspace, members can check the system email and join.
- Open the SSO login page. Choose the login method.
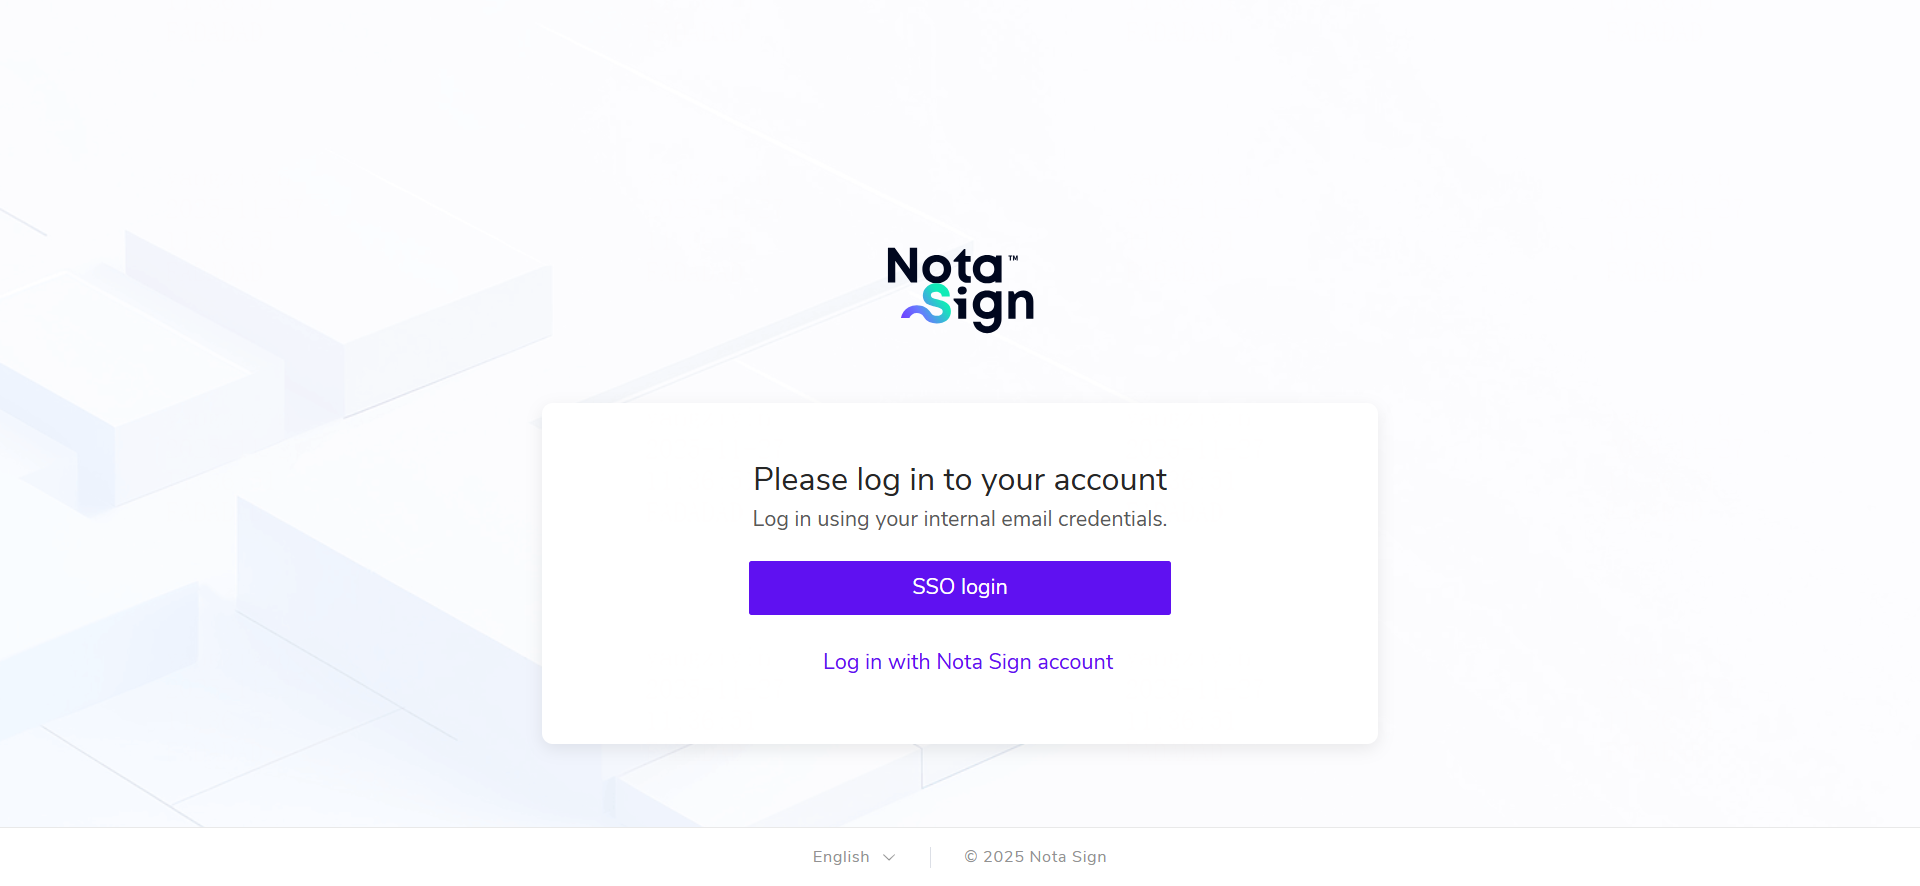
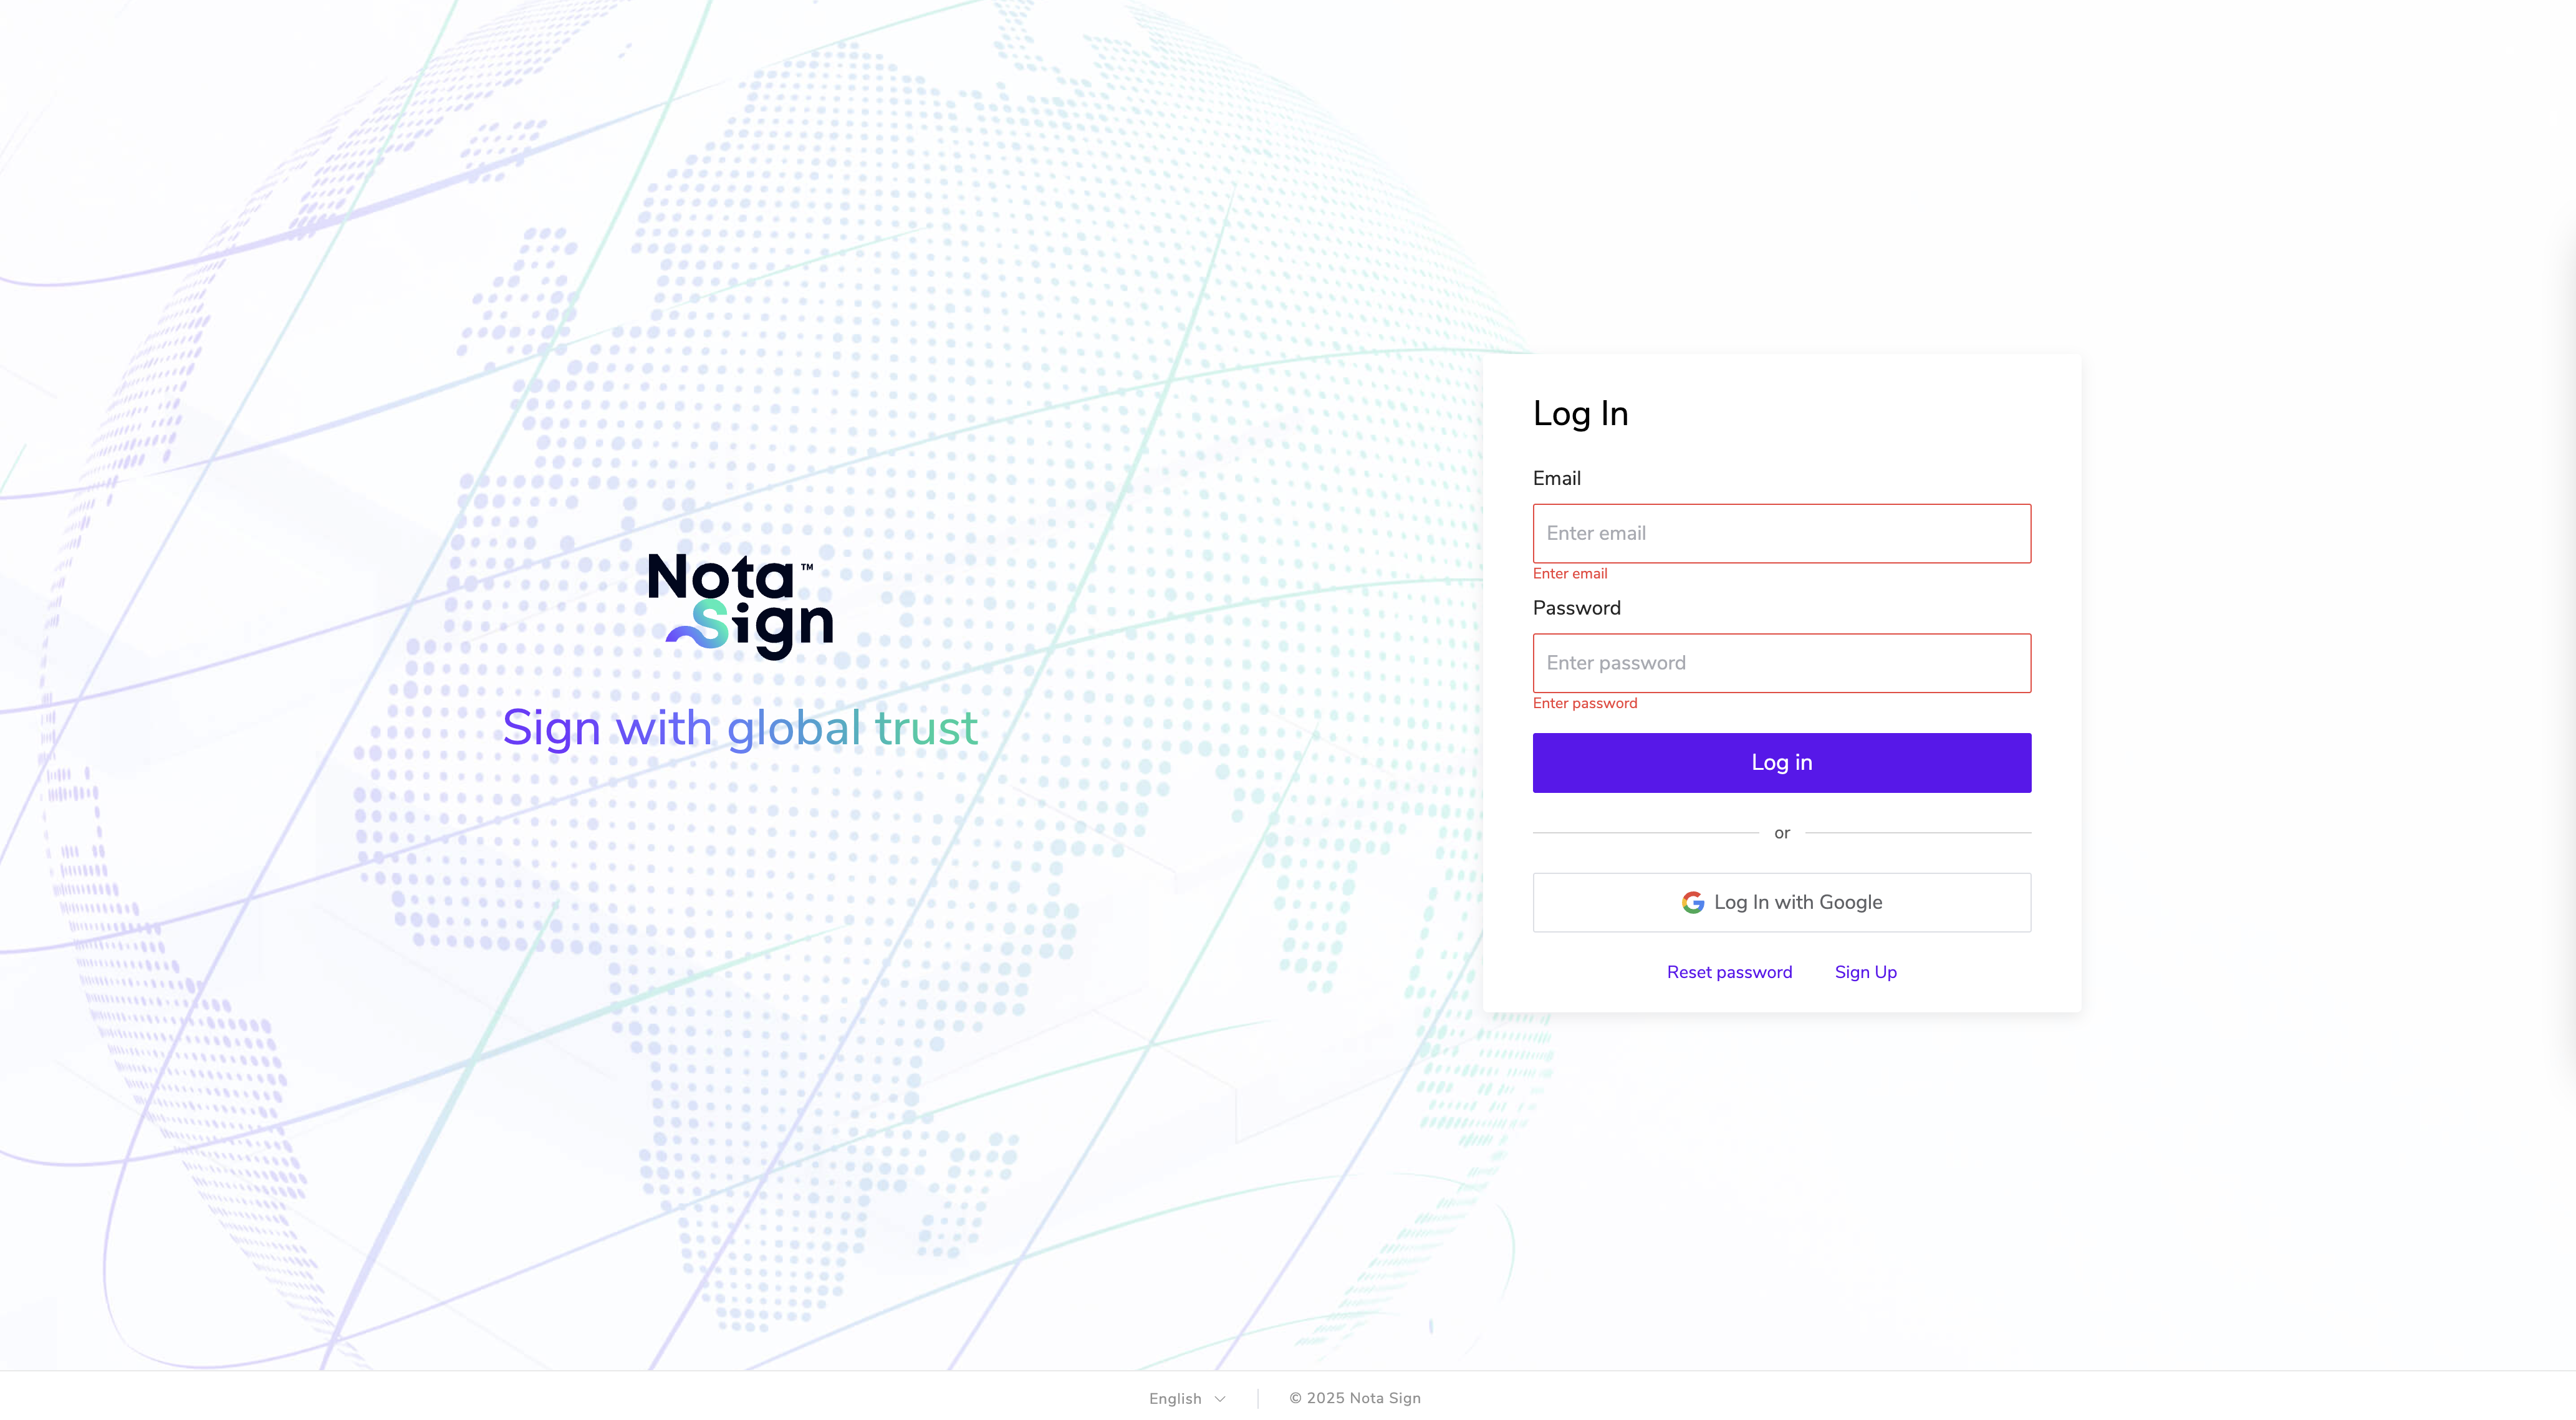
Method 1: Log in with Nota Sign Account
Open the Nota Sign Login Page and log in directly using your email and password.
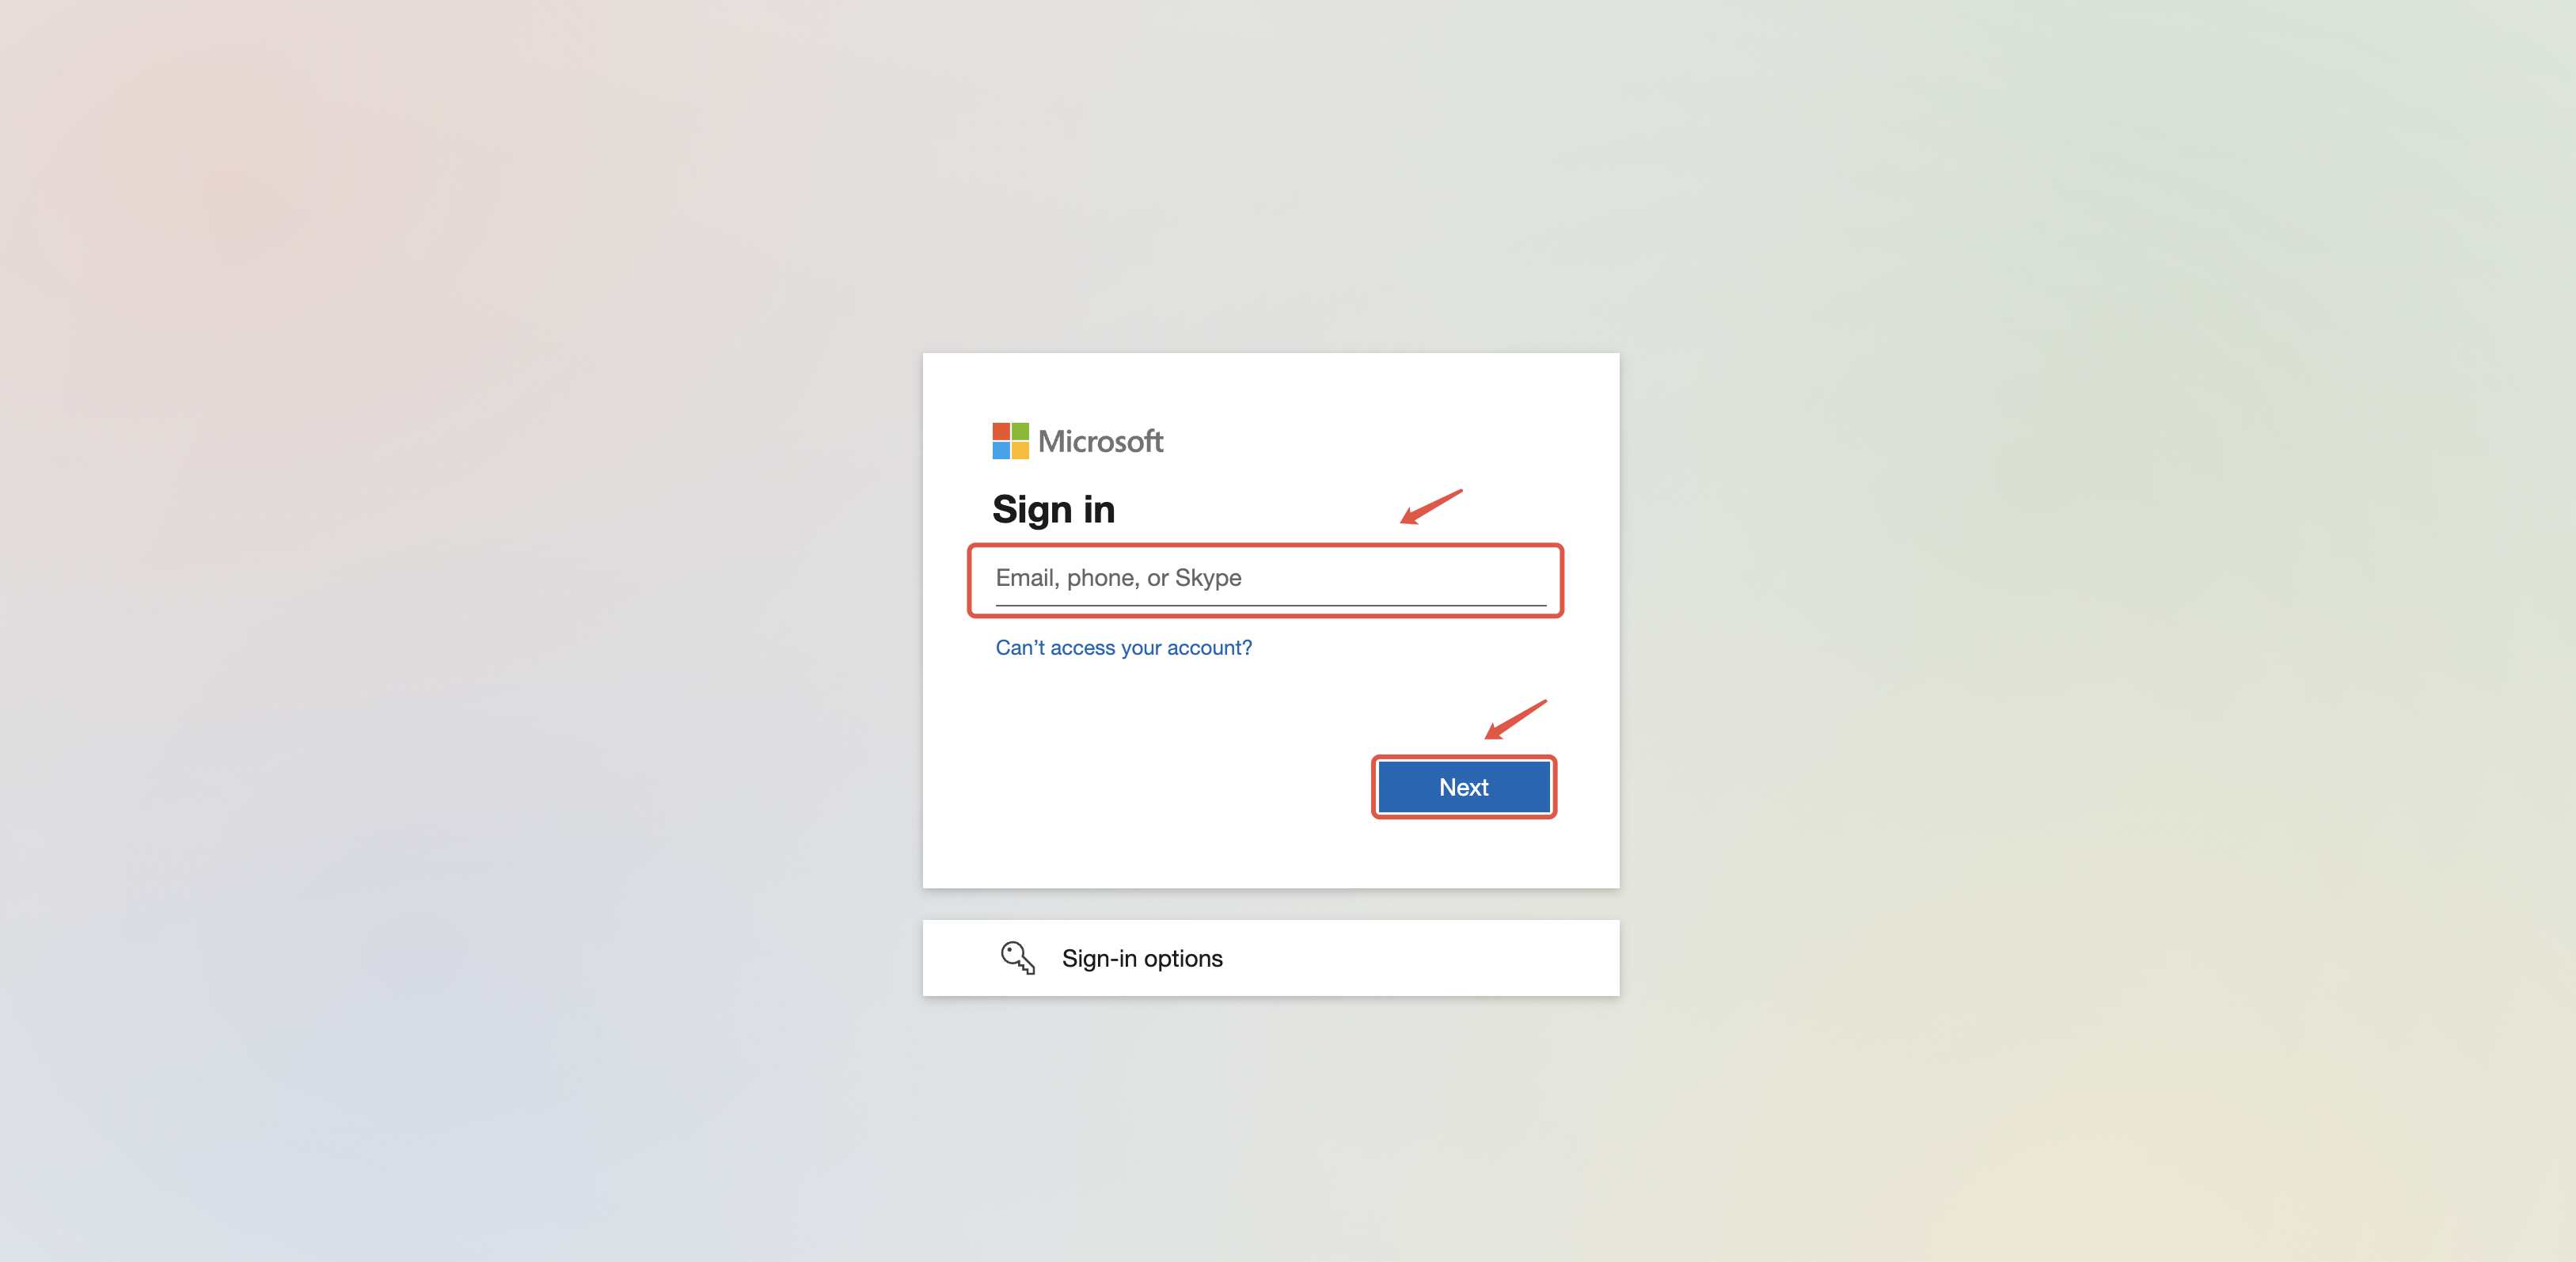
Method 2: Log in via SSO
Access through a third-party login URL (e.g., Microsoft), enter your account and password, click Login, and enter the workspace.
– When SSO mapping has been established and the administrator has not selected SSO login only, members can choose to log in either via SSO or with their Nota Sign account and password; When the administrator has enabled [SSO login only], users can log in only via SSO.-
3.7.2. Recipients Sign via SSO
Recipients can click the signing link in the email and proceed according to the following scenarios:
The sender and recipient belong to different domains
- The recipient can choose to log in via SSO or by using their Nota Sign account and password.
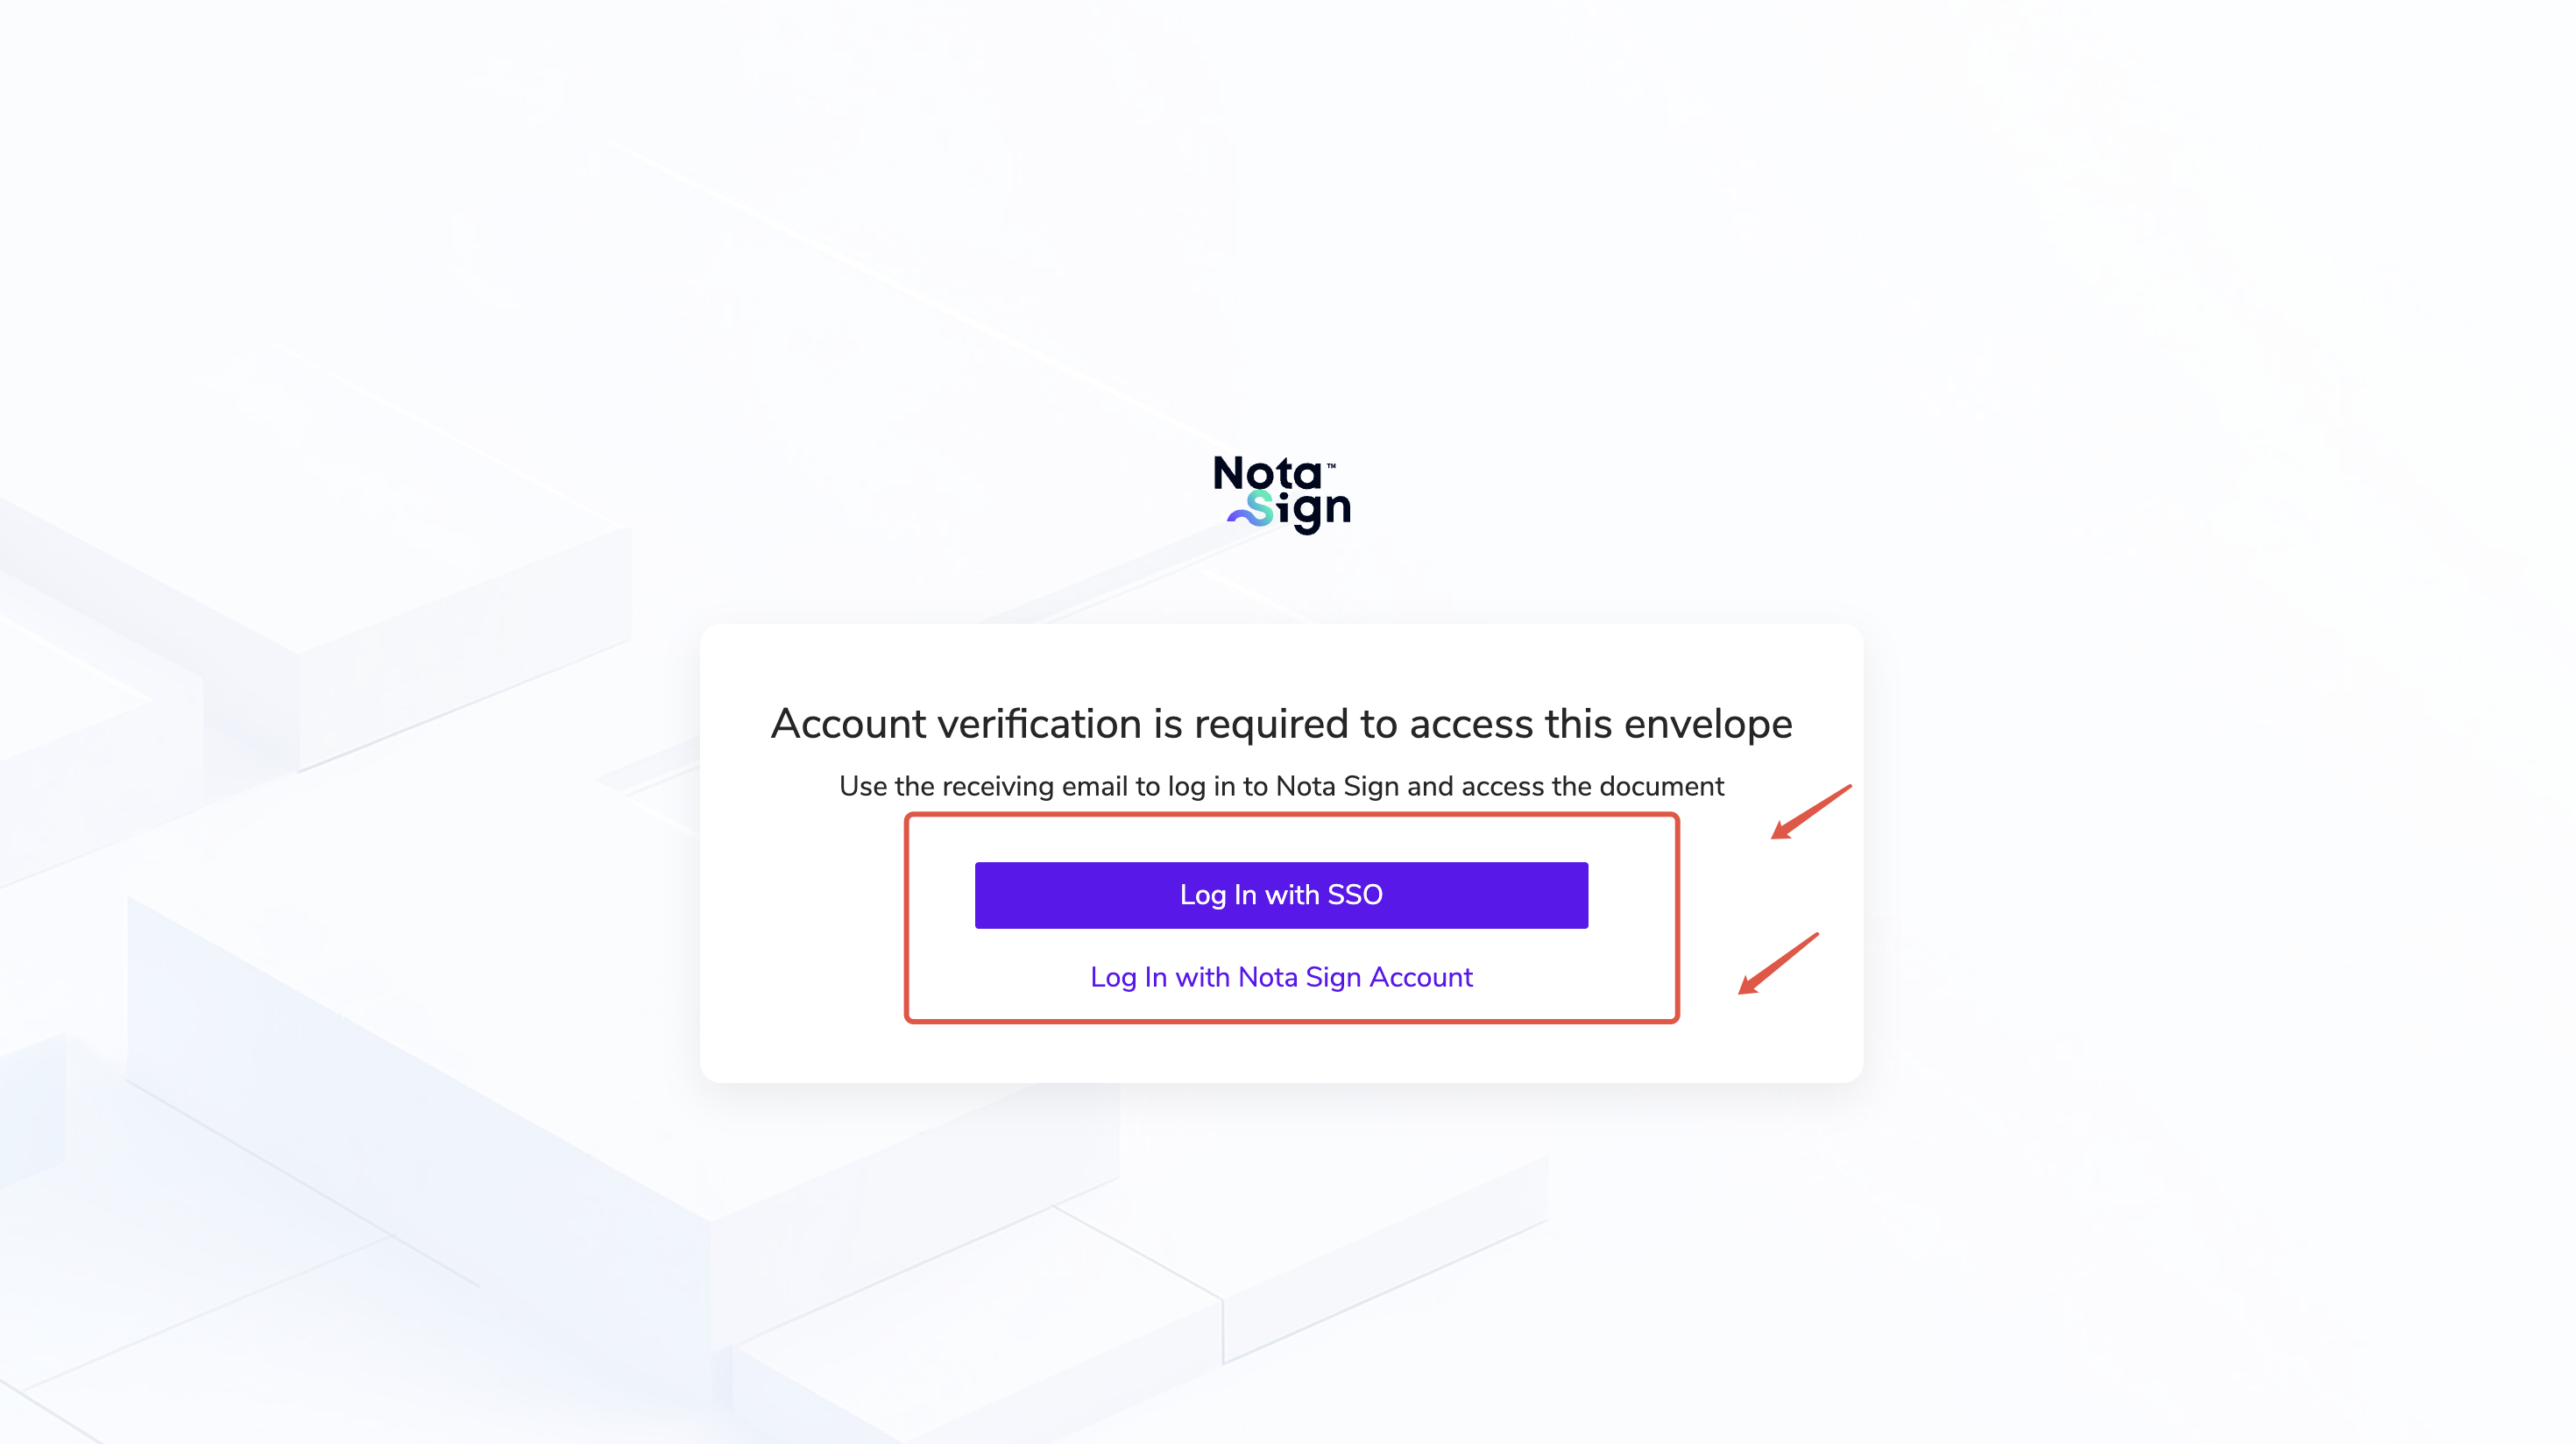
- If SSO login is selected and the recipient is allowed to access multiple workspaces, select the target workspace and click Log in.
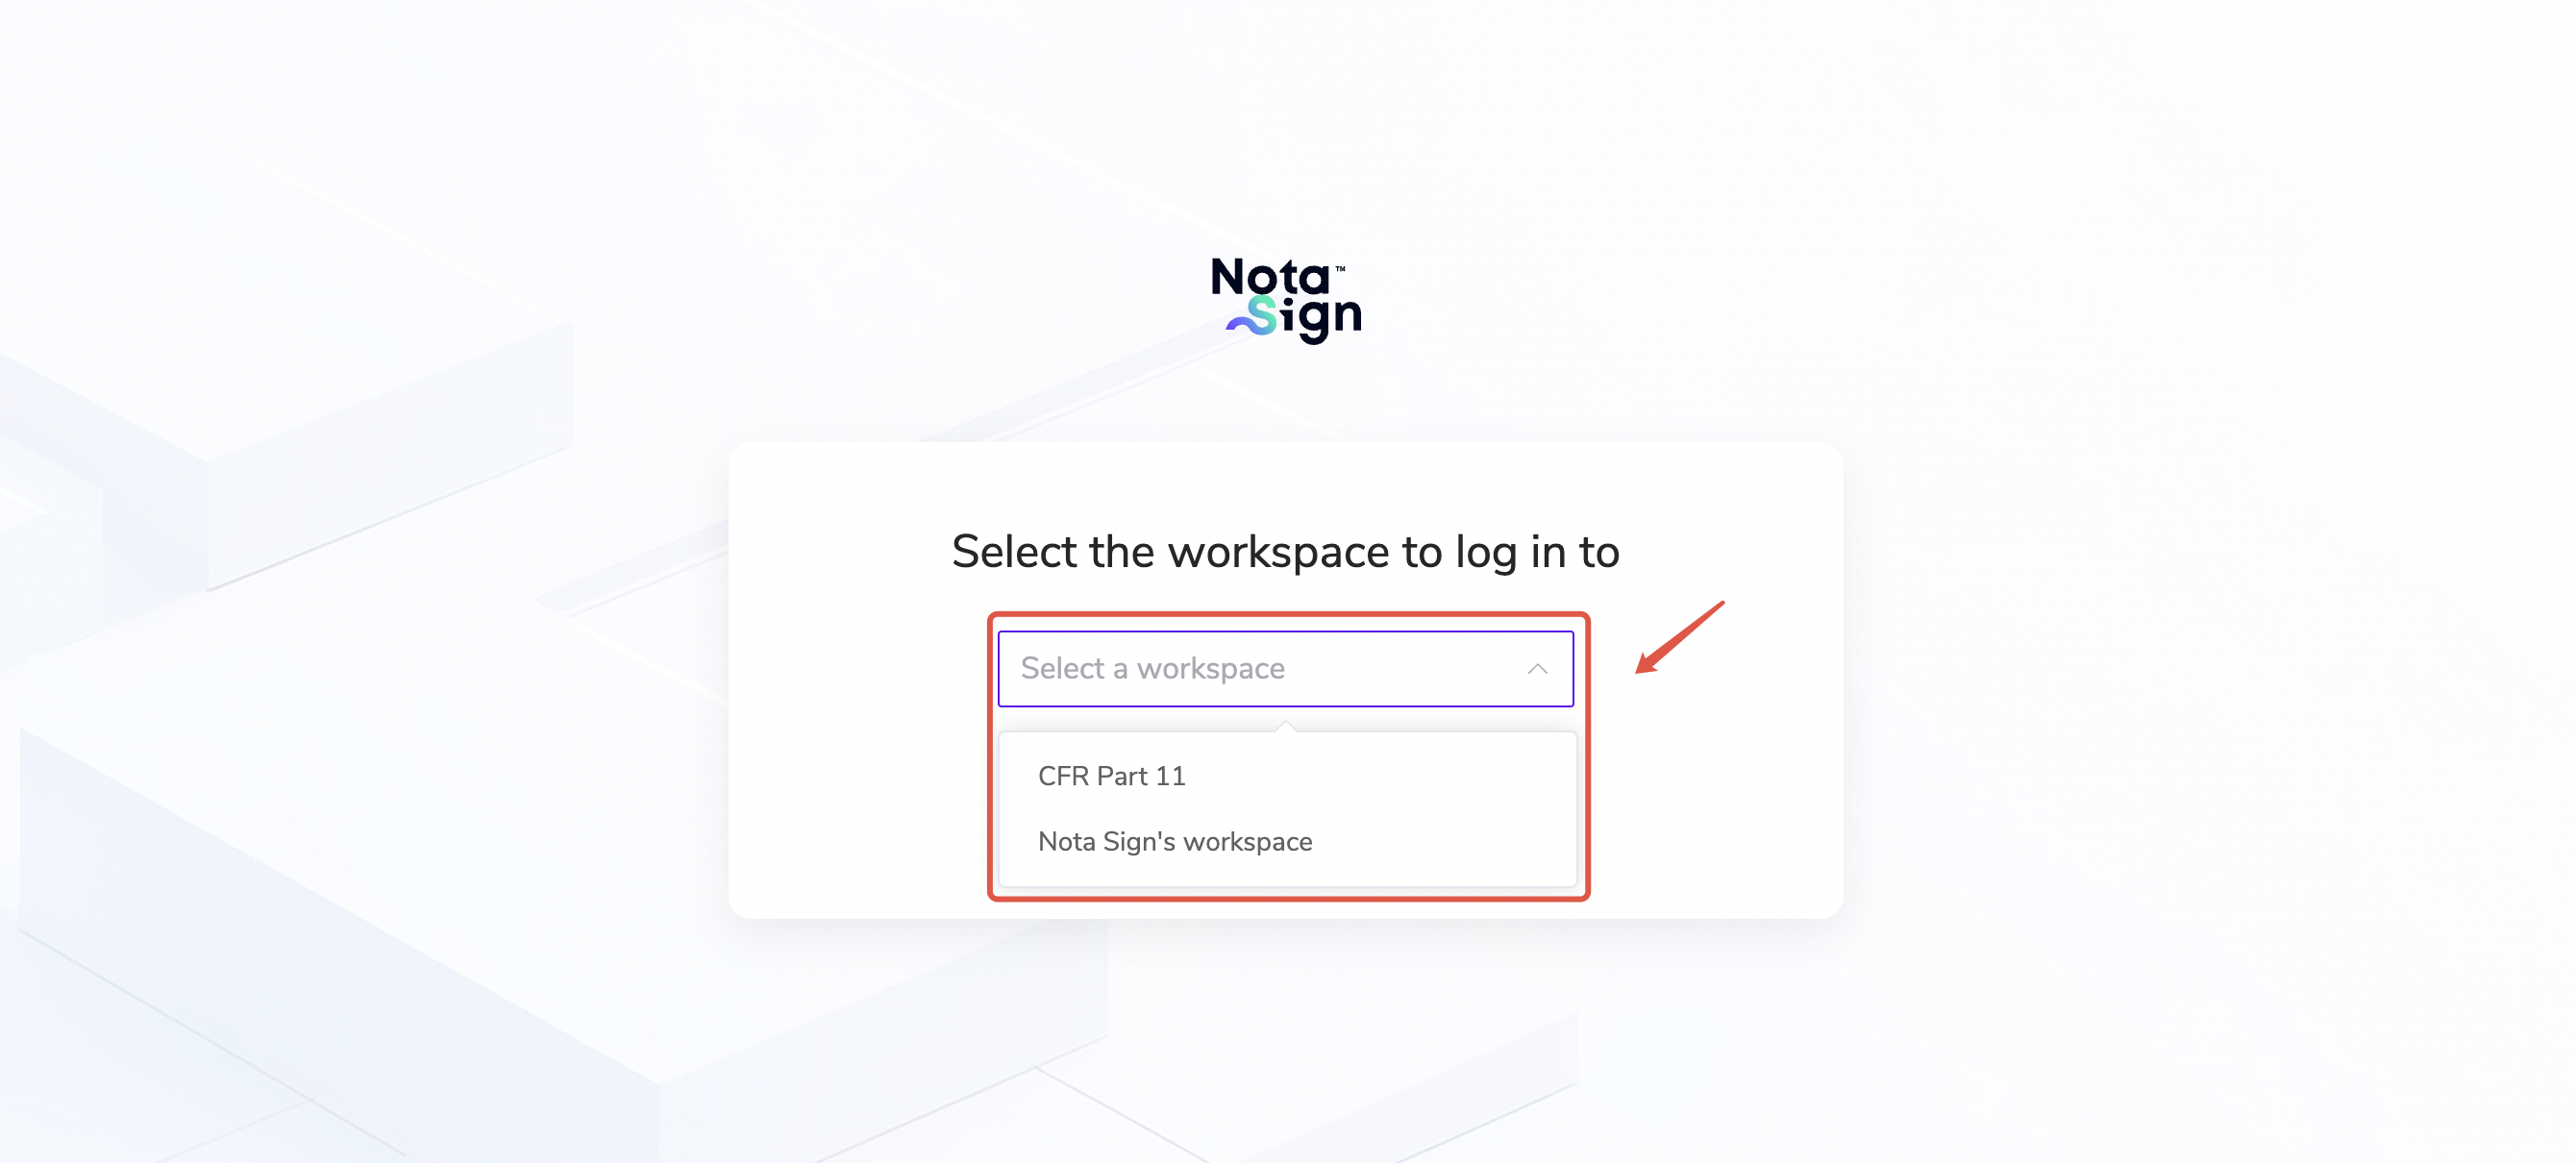
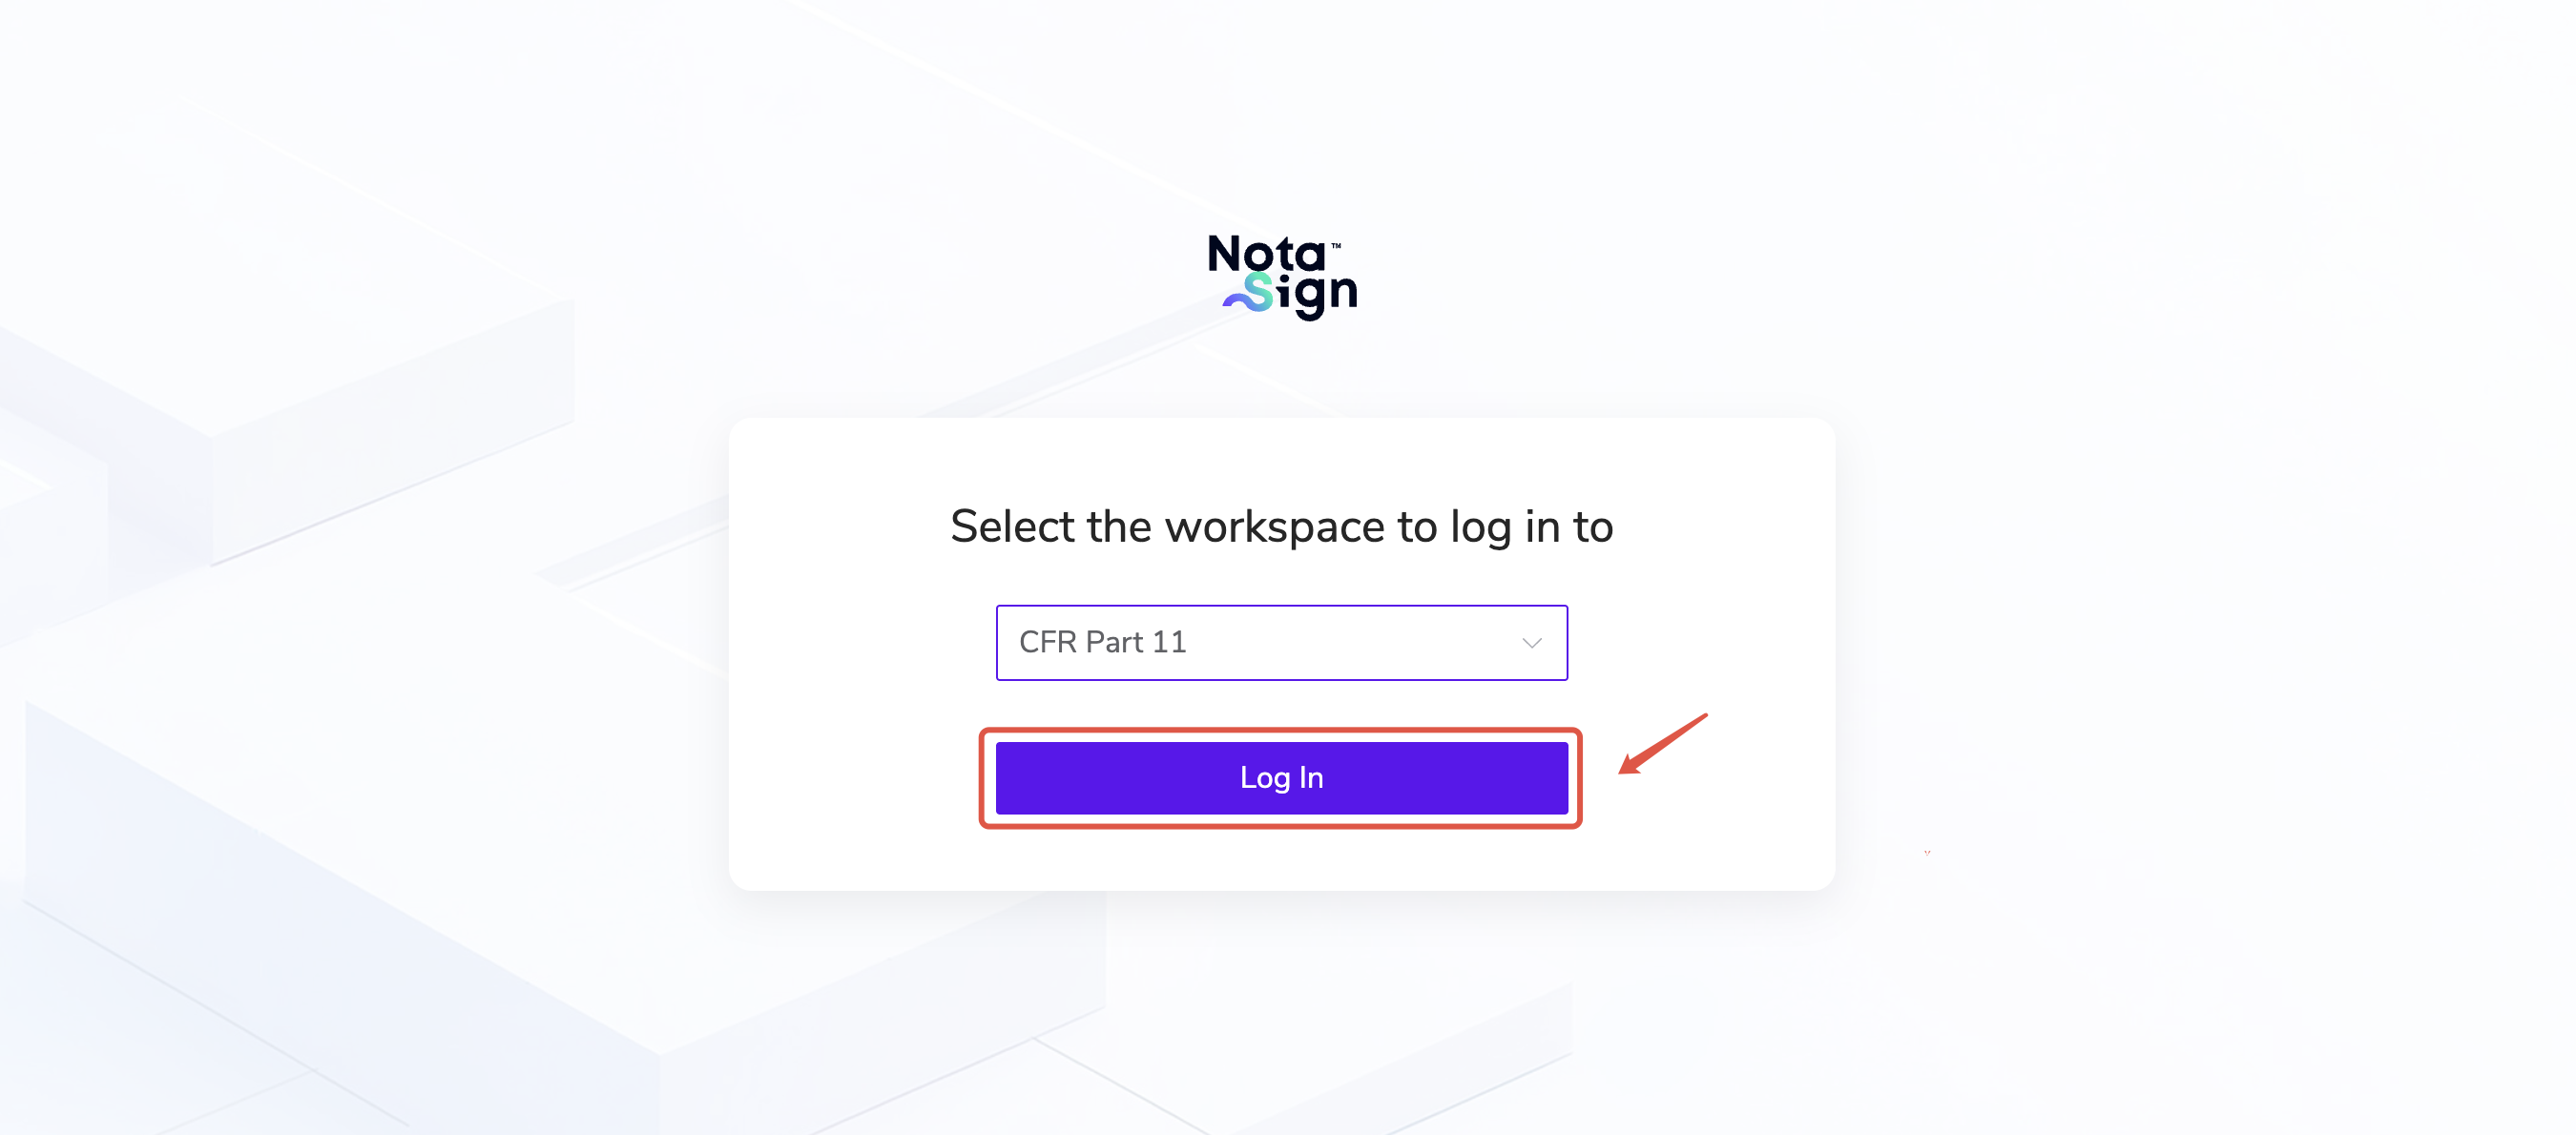
- The page will redirect to the third-party login (e.g., Microsoft). Enter the account and password, then click Next to access the signing page.
The sender and recipient belong to the same domain
- The recipient can choose to log in via SSO or by using their Nota Sign account and password.
- If SSO login is selected, they will directly enter the corresponding workspace under the same domain as the sender.
- The page will redirect to the third-party login (e.g., Microsoft). Enter the account and password, then click Next to access the signing page.
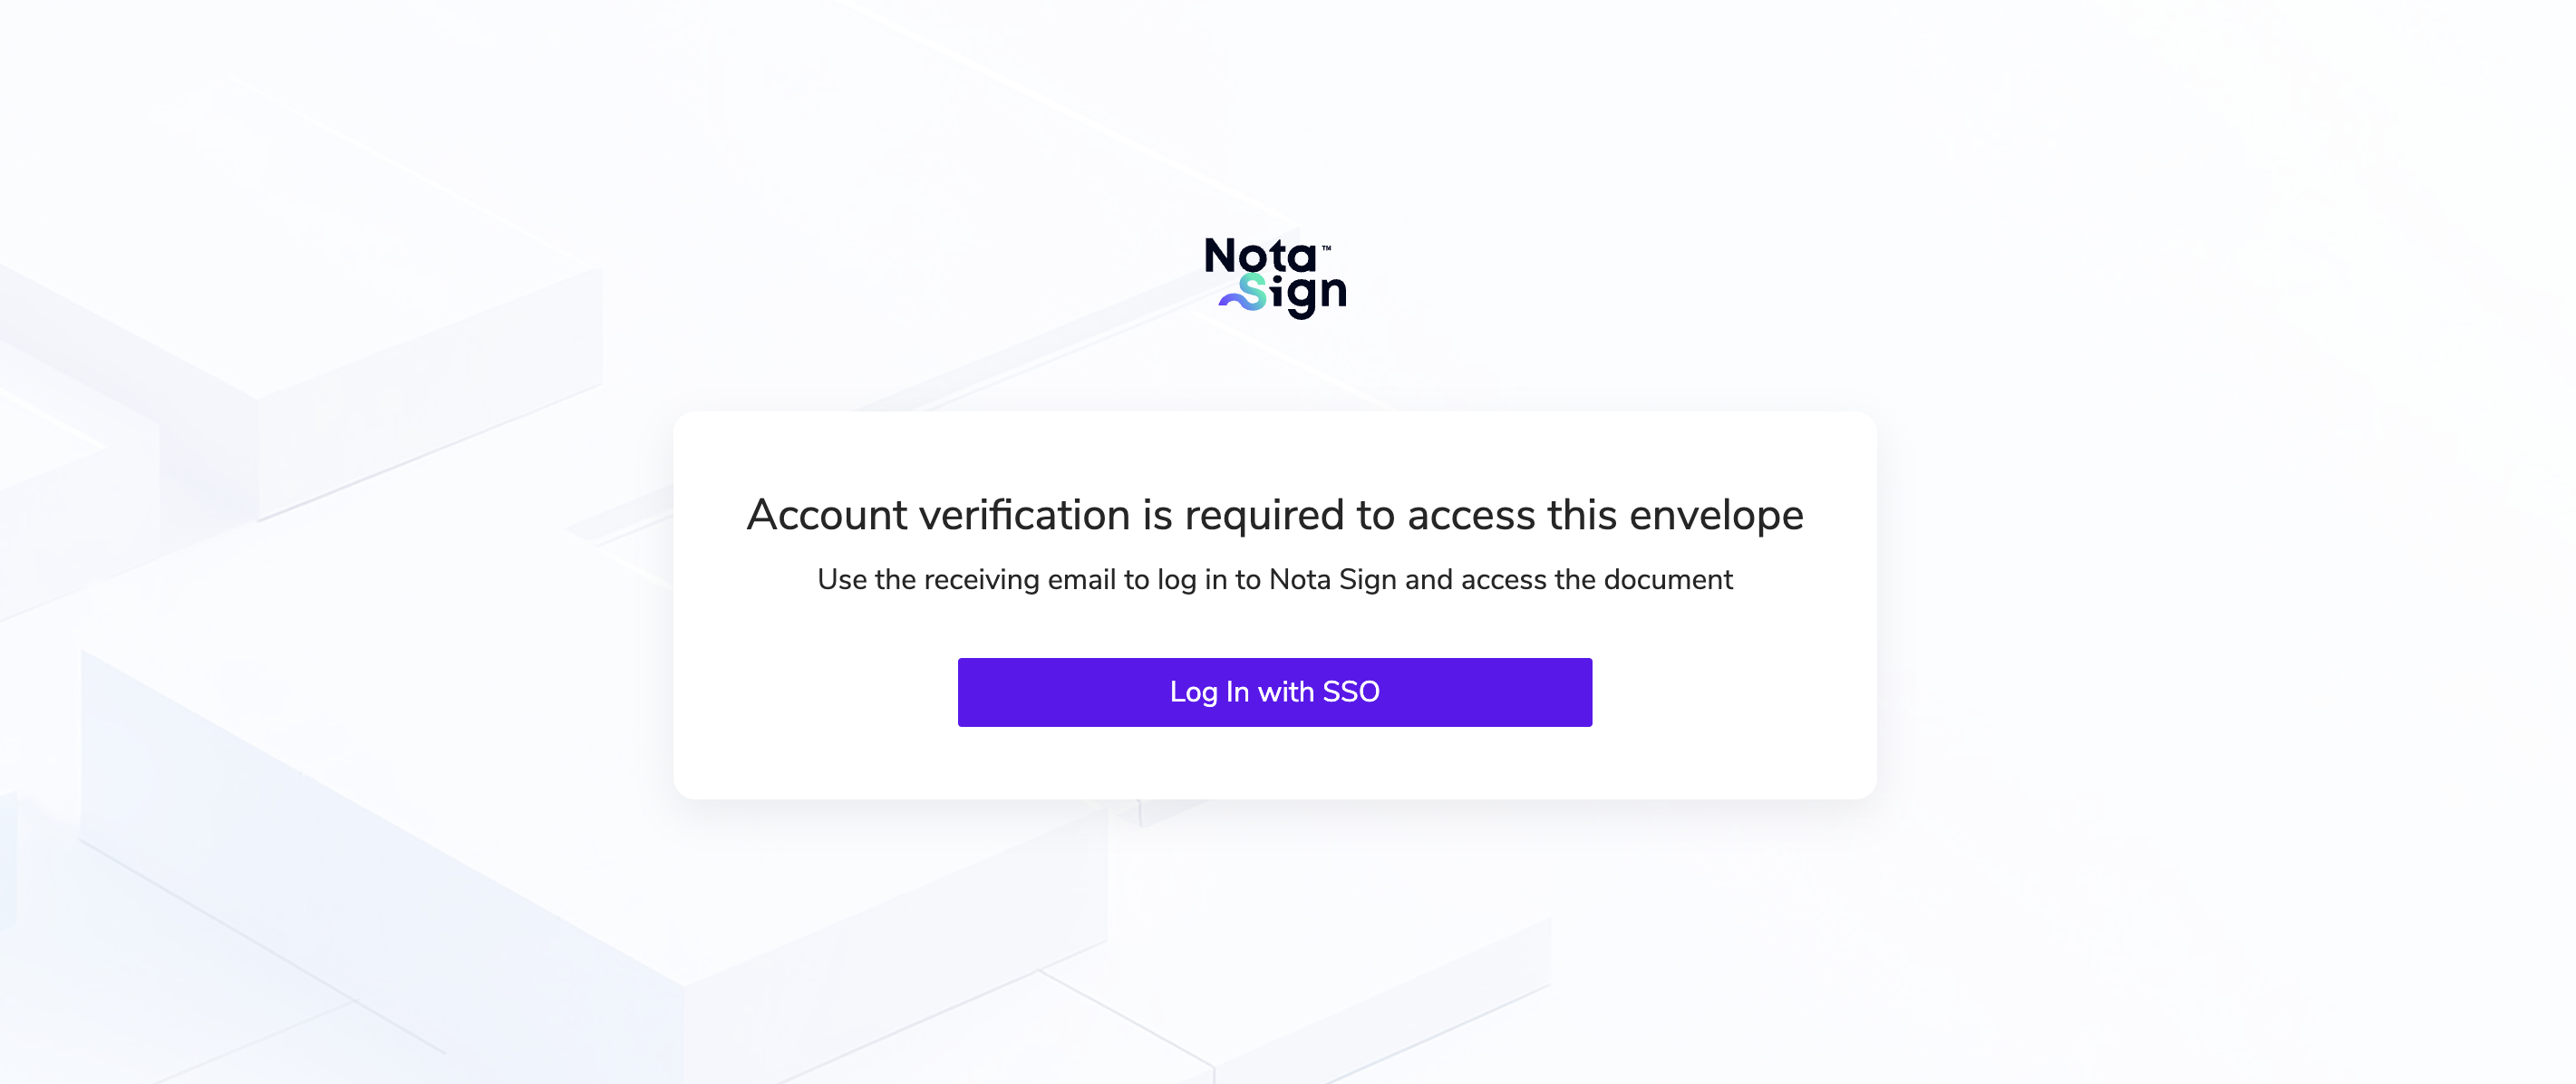
⚠️ Note: If the recipient’s workspace administrator has selected SSO login only, the recipient will not be able to log in using their Nota Sign account and password.
3.8. Verify Configuration
- Log in using an enterprise domain account via the IdP.
- After successful verification, the invited users will be redirected and logged in to Nota Sign without re-entering a password.
- It is recommended that administrators test the configuration with a pilot account before rolling it out to all users.
Once the above steps are completed, enterprise users can securely access Nota Sign through the enterprise IdP’s SSO mechanism, enabling unified account and permission management.