
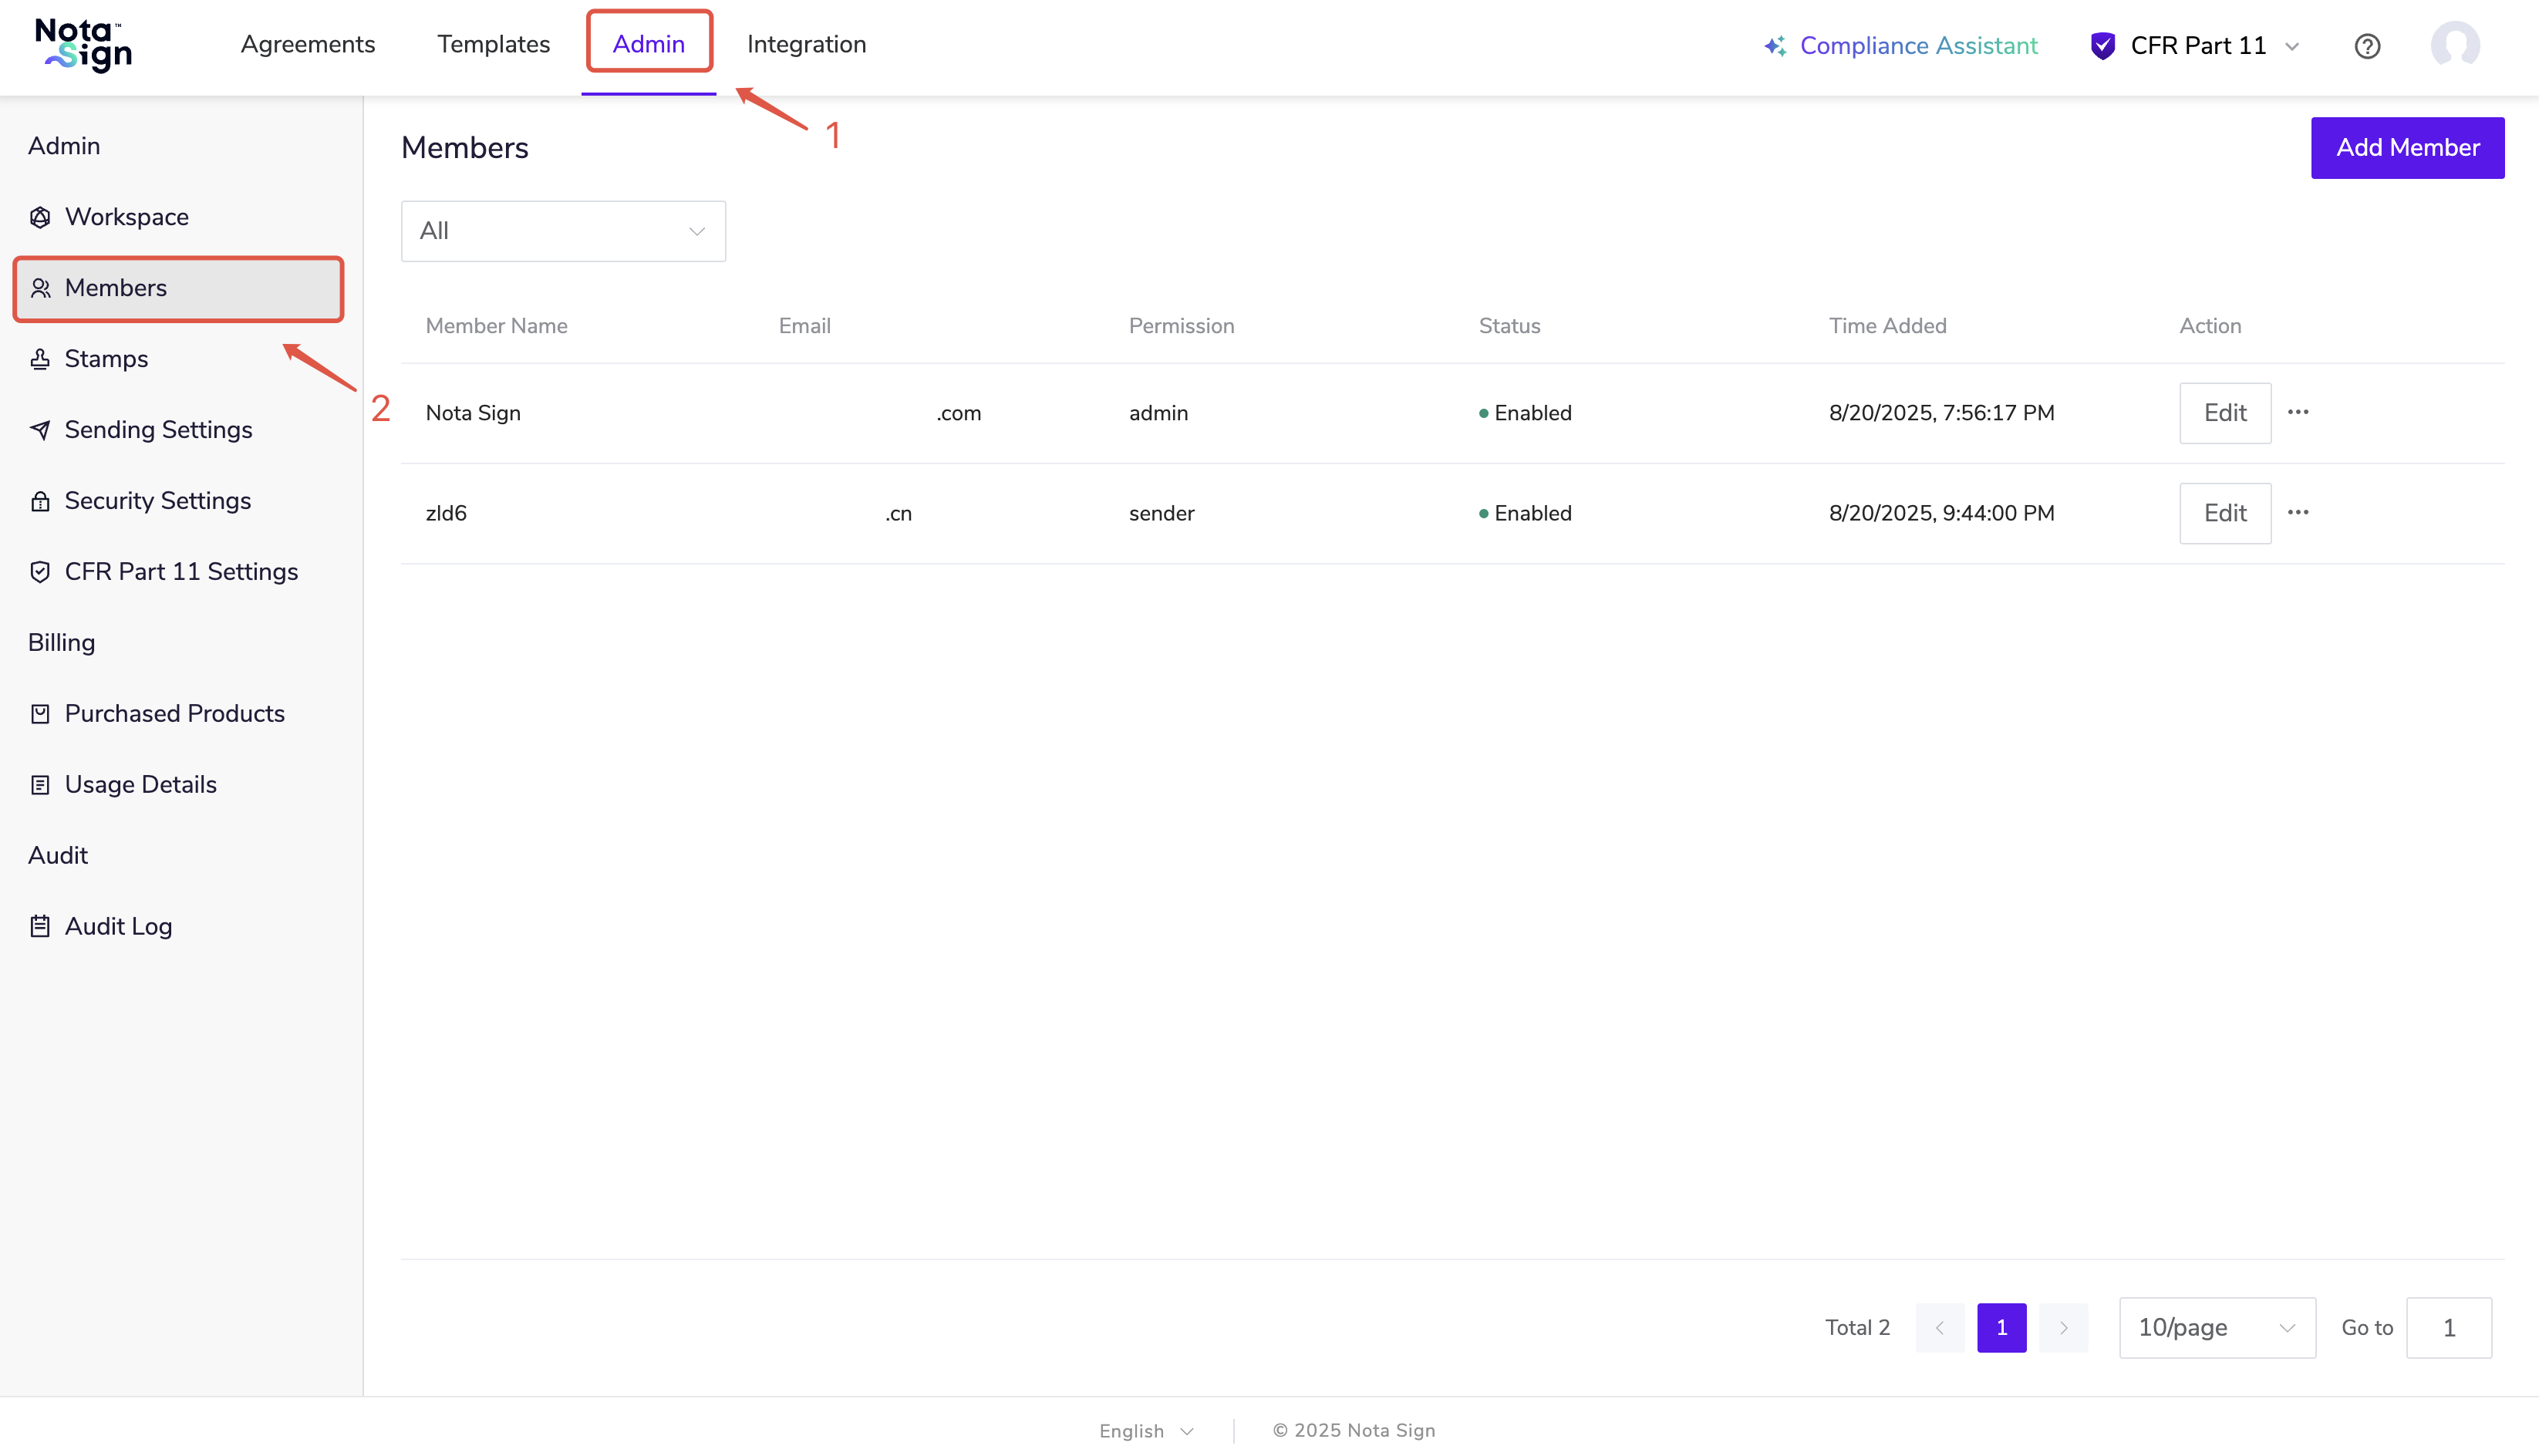
1, Enter the member management page
- Log in to the Nota Sign workbench;
- Click on ‘Manage’ in the top navigation bar to enter the management console;
- Click on ‘Member Management’ in the left menu bar to enter the member management page.
2, Edit member permissions
To adjust the permission level of existing members:
Operation Steps
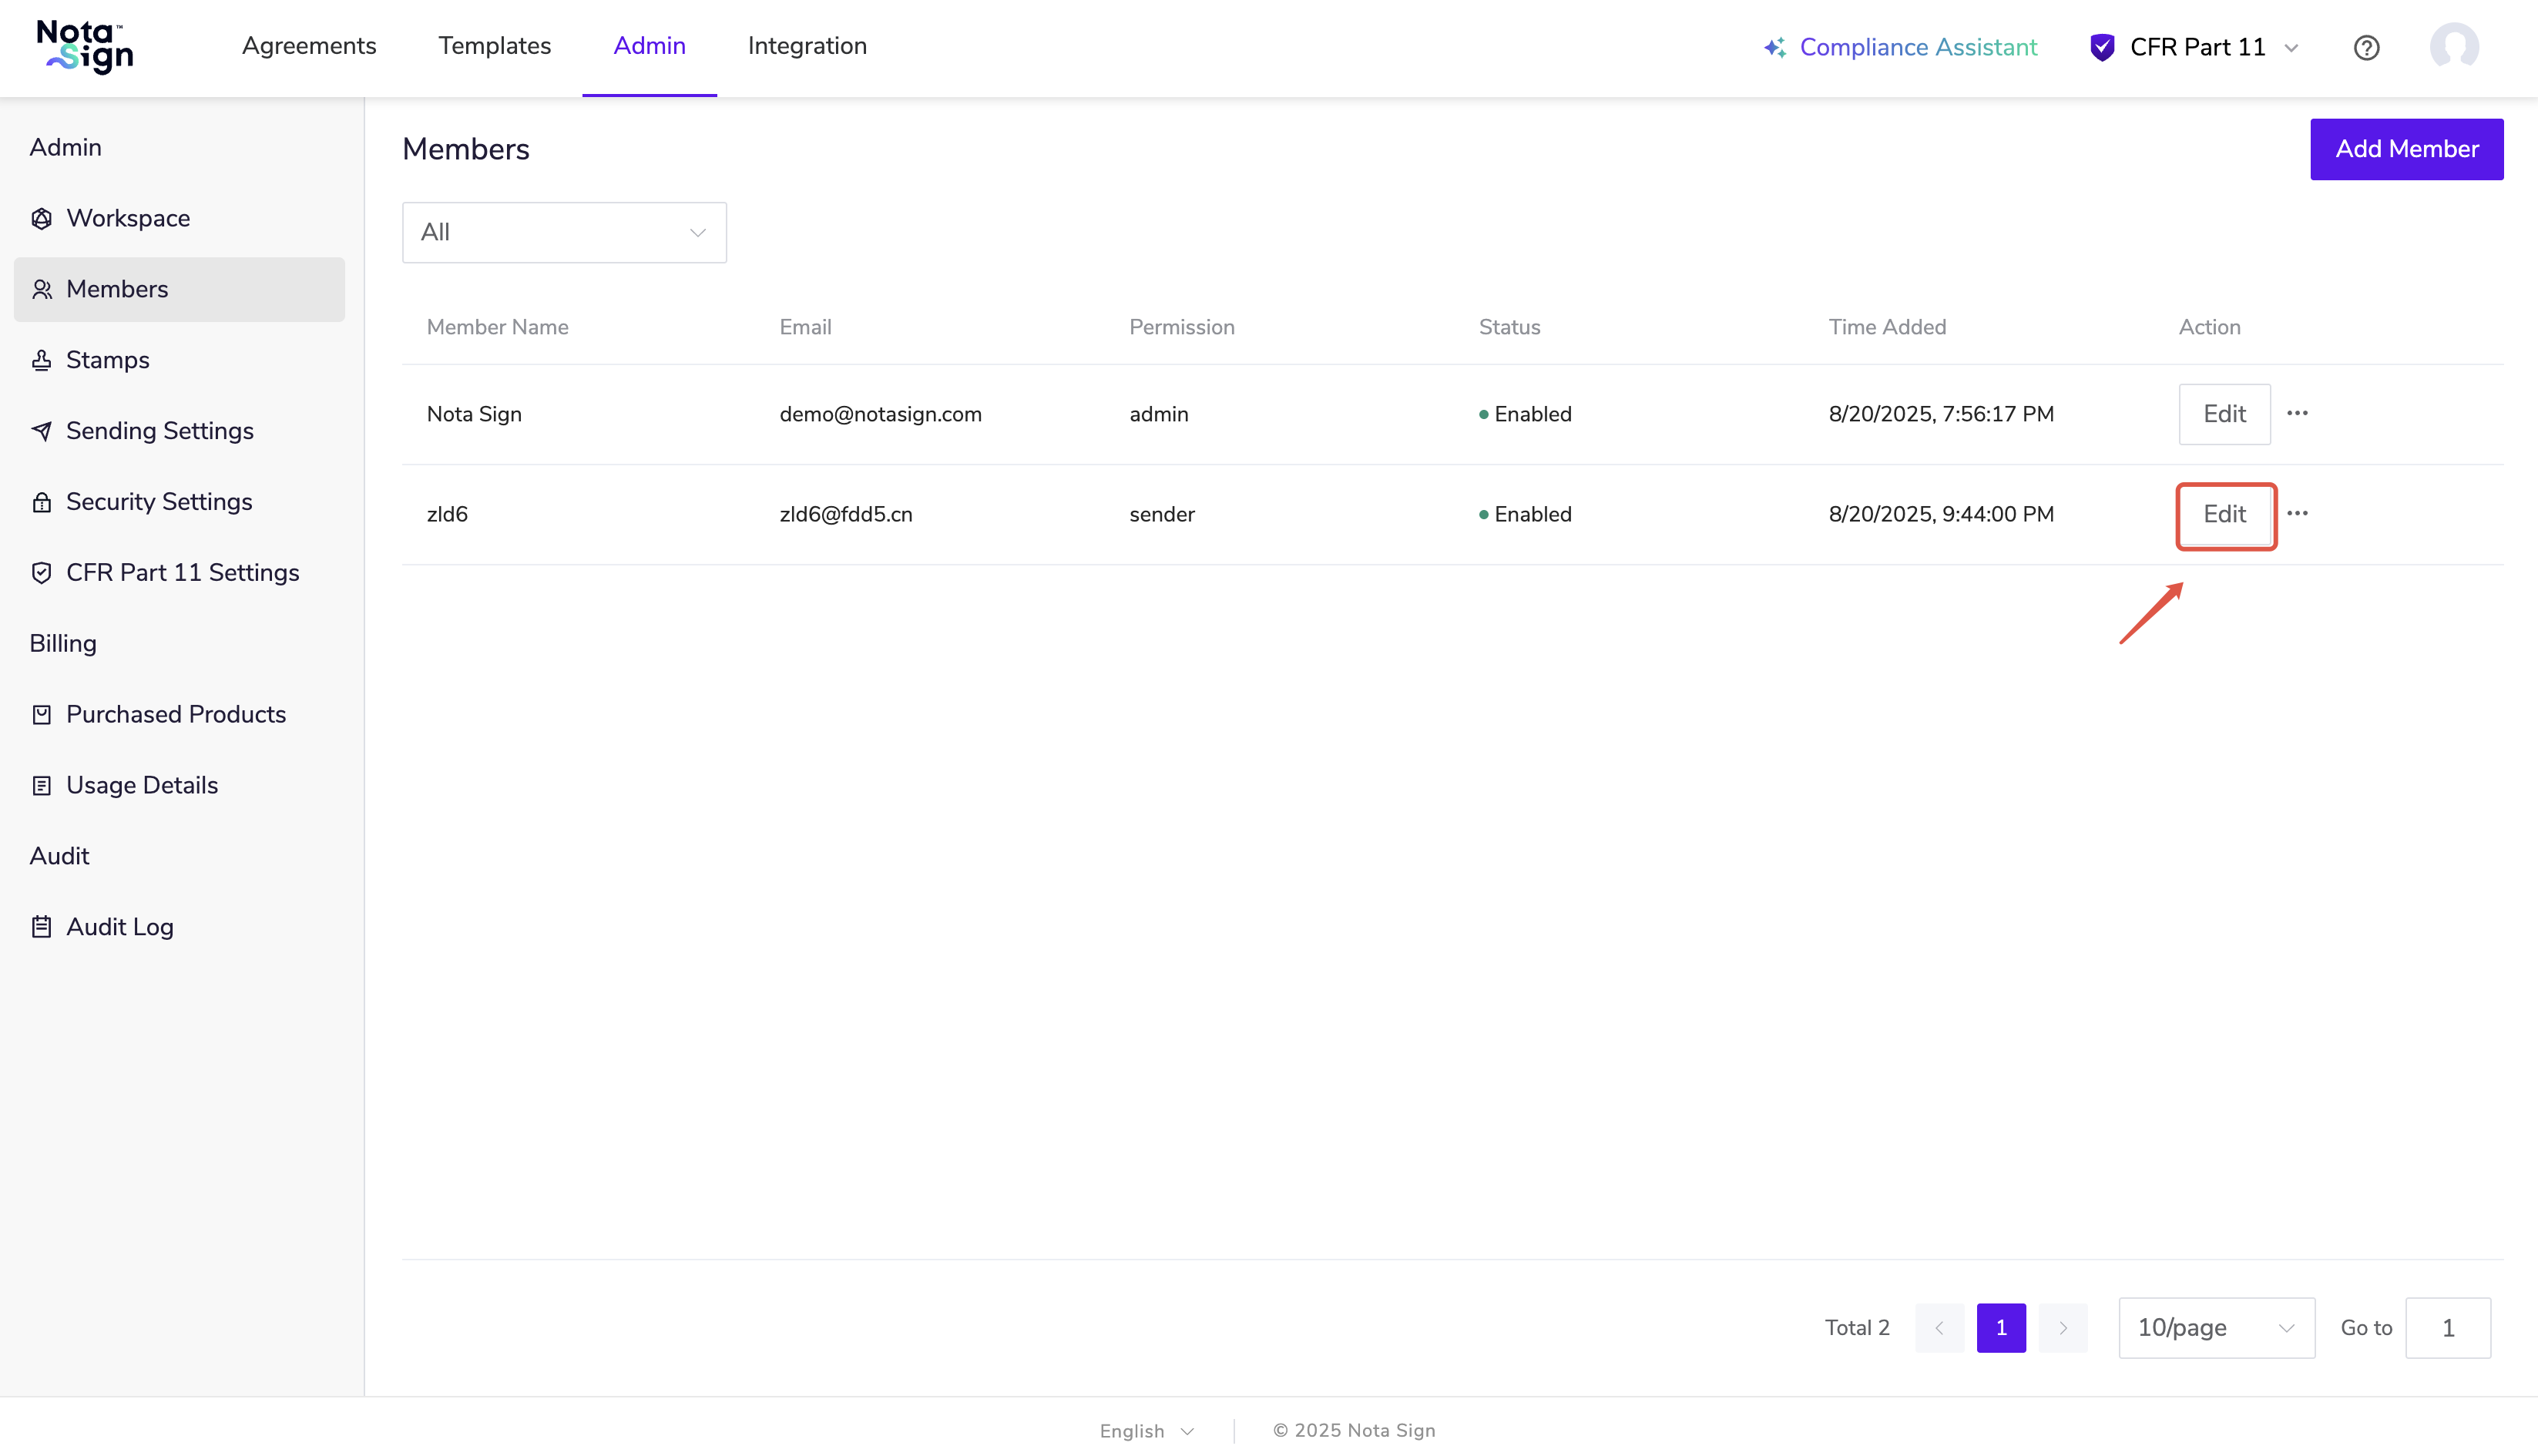
- In the member list, click the [Edit] button to the right of the target member:
- In the pop-up ‘Edit Members’ settings window, click on’ Permissions’:
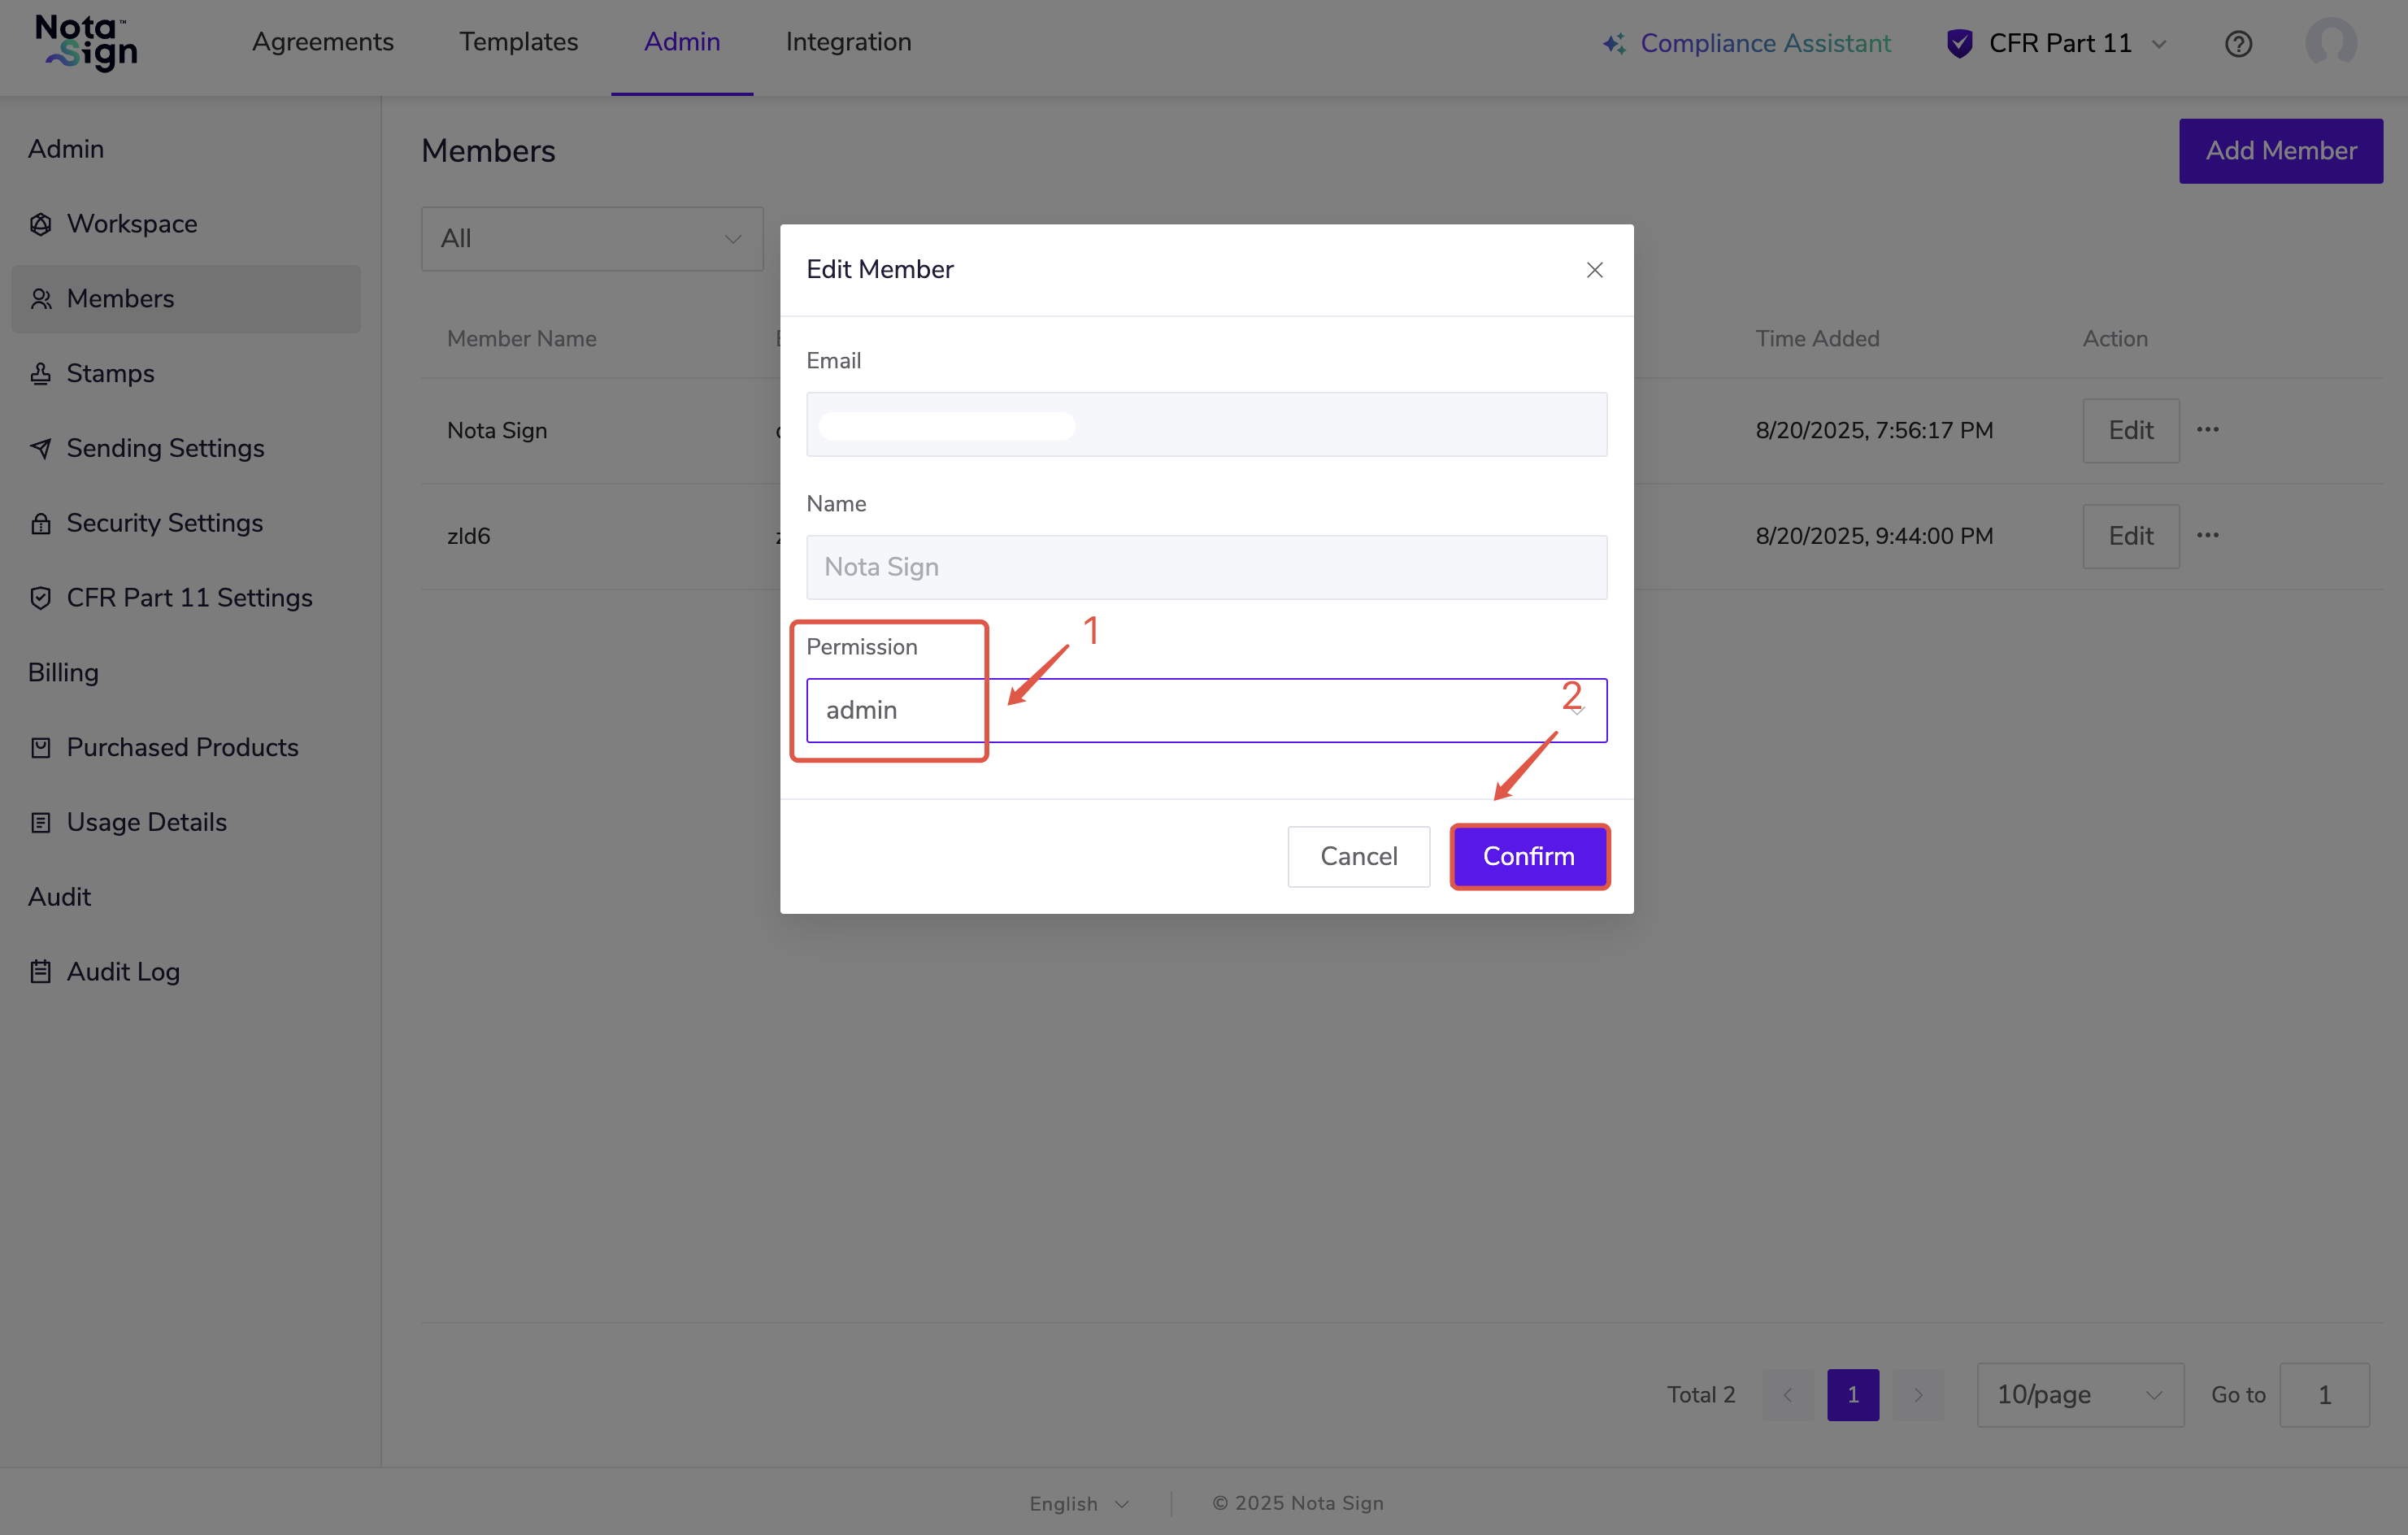
- Select the corresponding permission type and click [OK] to complete the setting.
Permission Description:
-Administrator: * * has full control permissions, including: managing workspace members, viewing purchased products, viewing product usage, viewing audit logs, managing integrated applications, etc;
-Sender: * * has permission to send signing requests and use templates, but does not have access to member management and integrated configuration functions.
3, Deactivate members
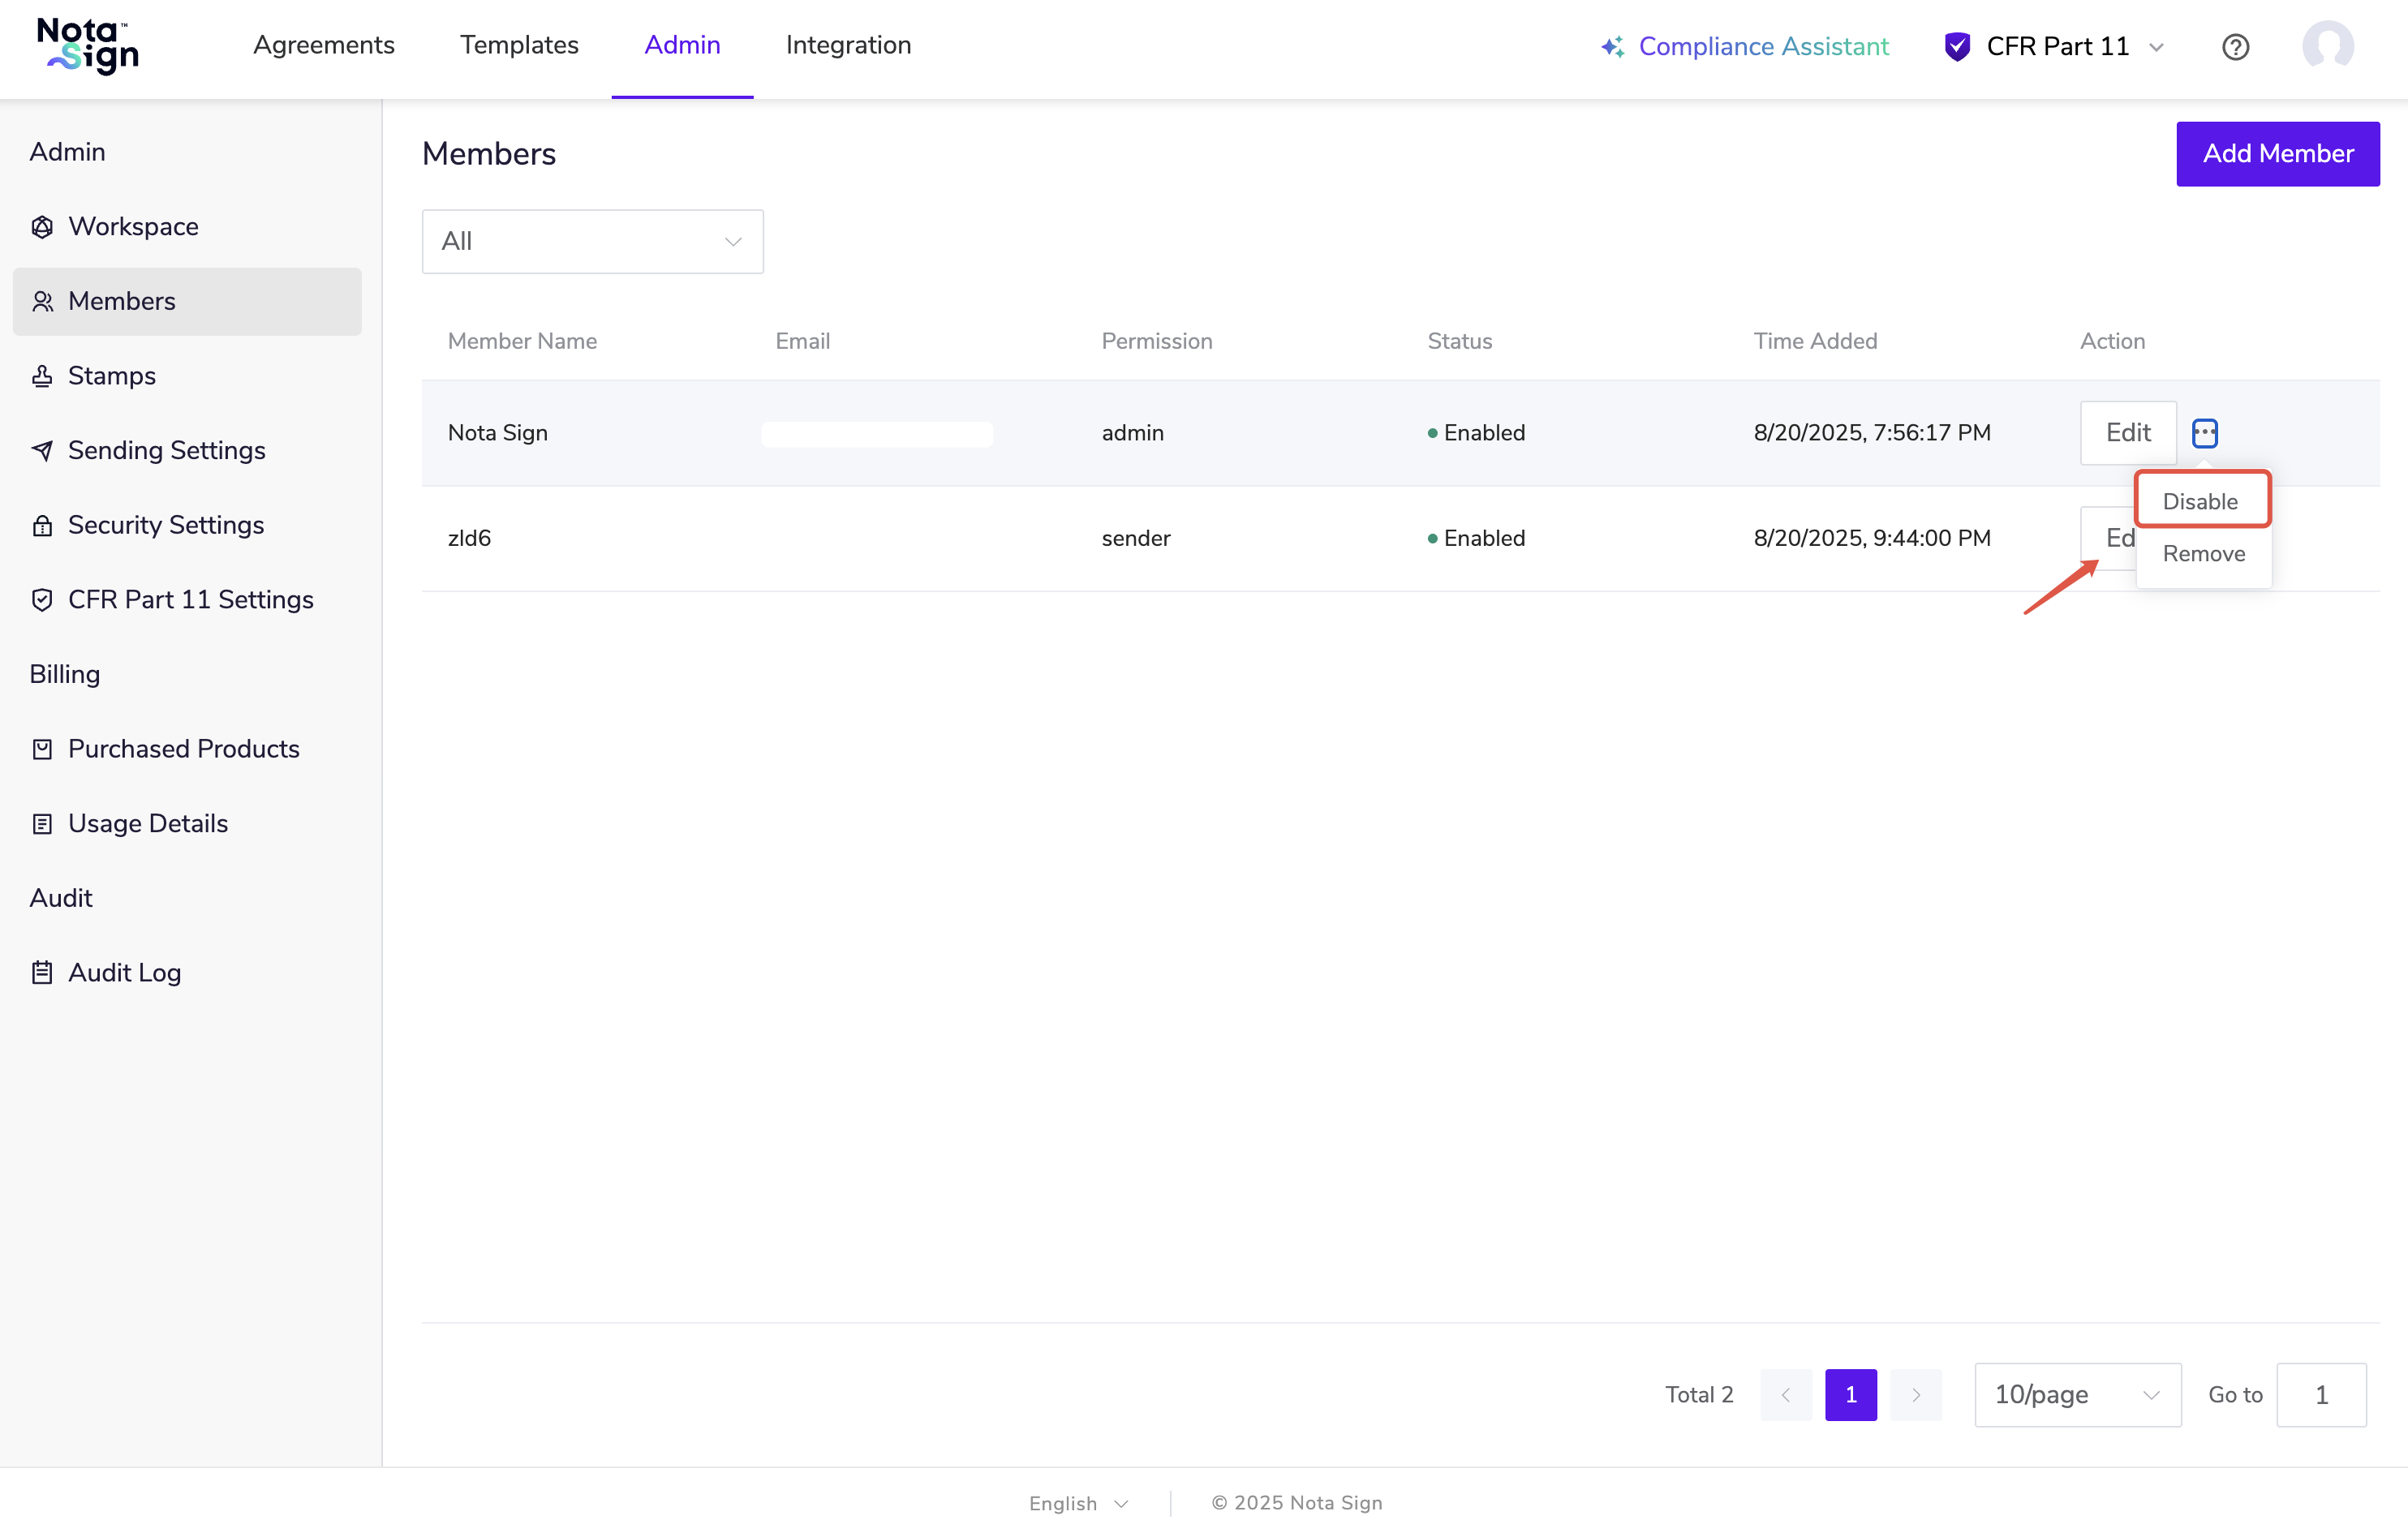
- In the user list, click the [… ] operation button on the far right of the target user;
- Click on ‘Deactivate’ in the drop-down menu and confirm to deactivate the member.
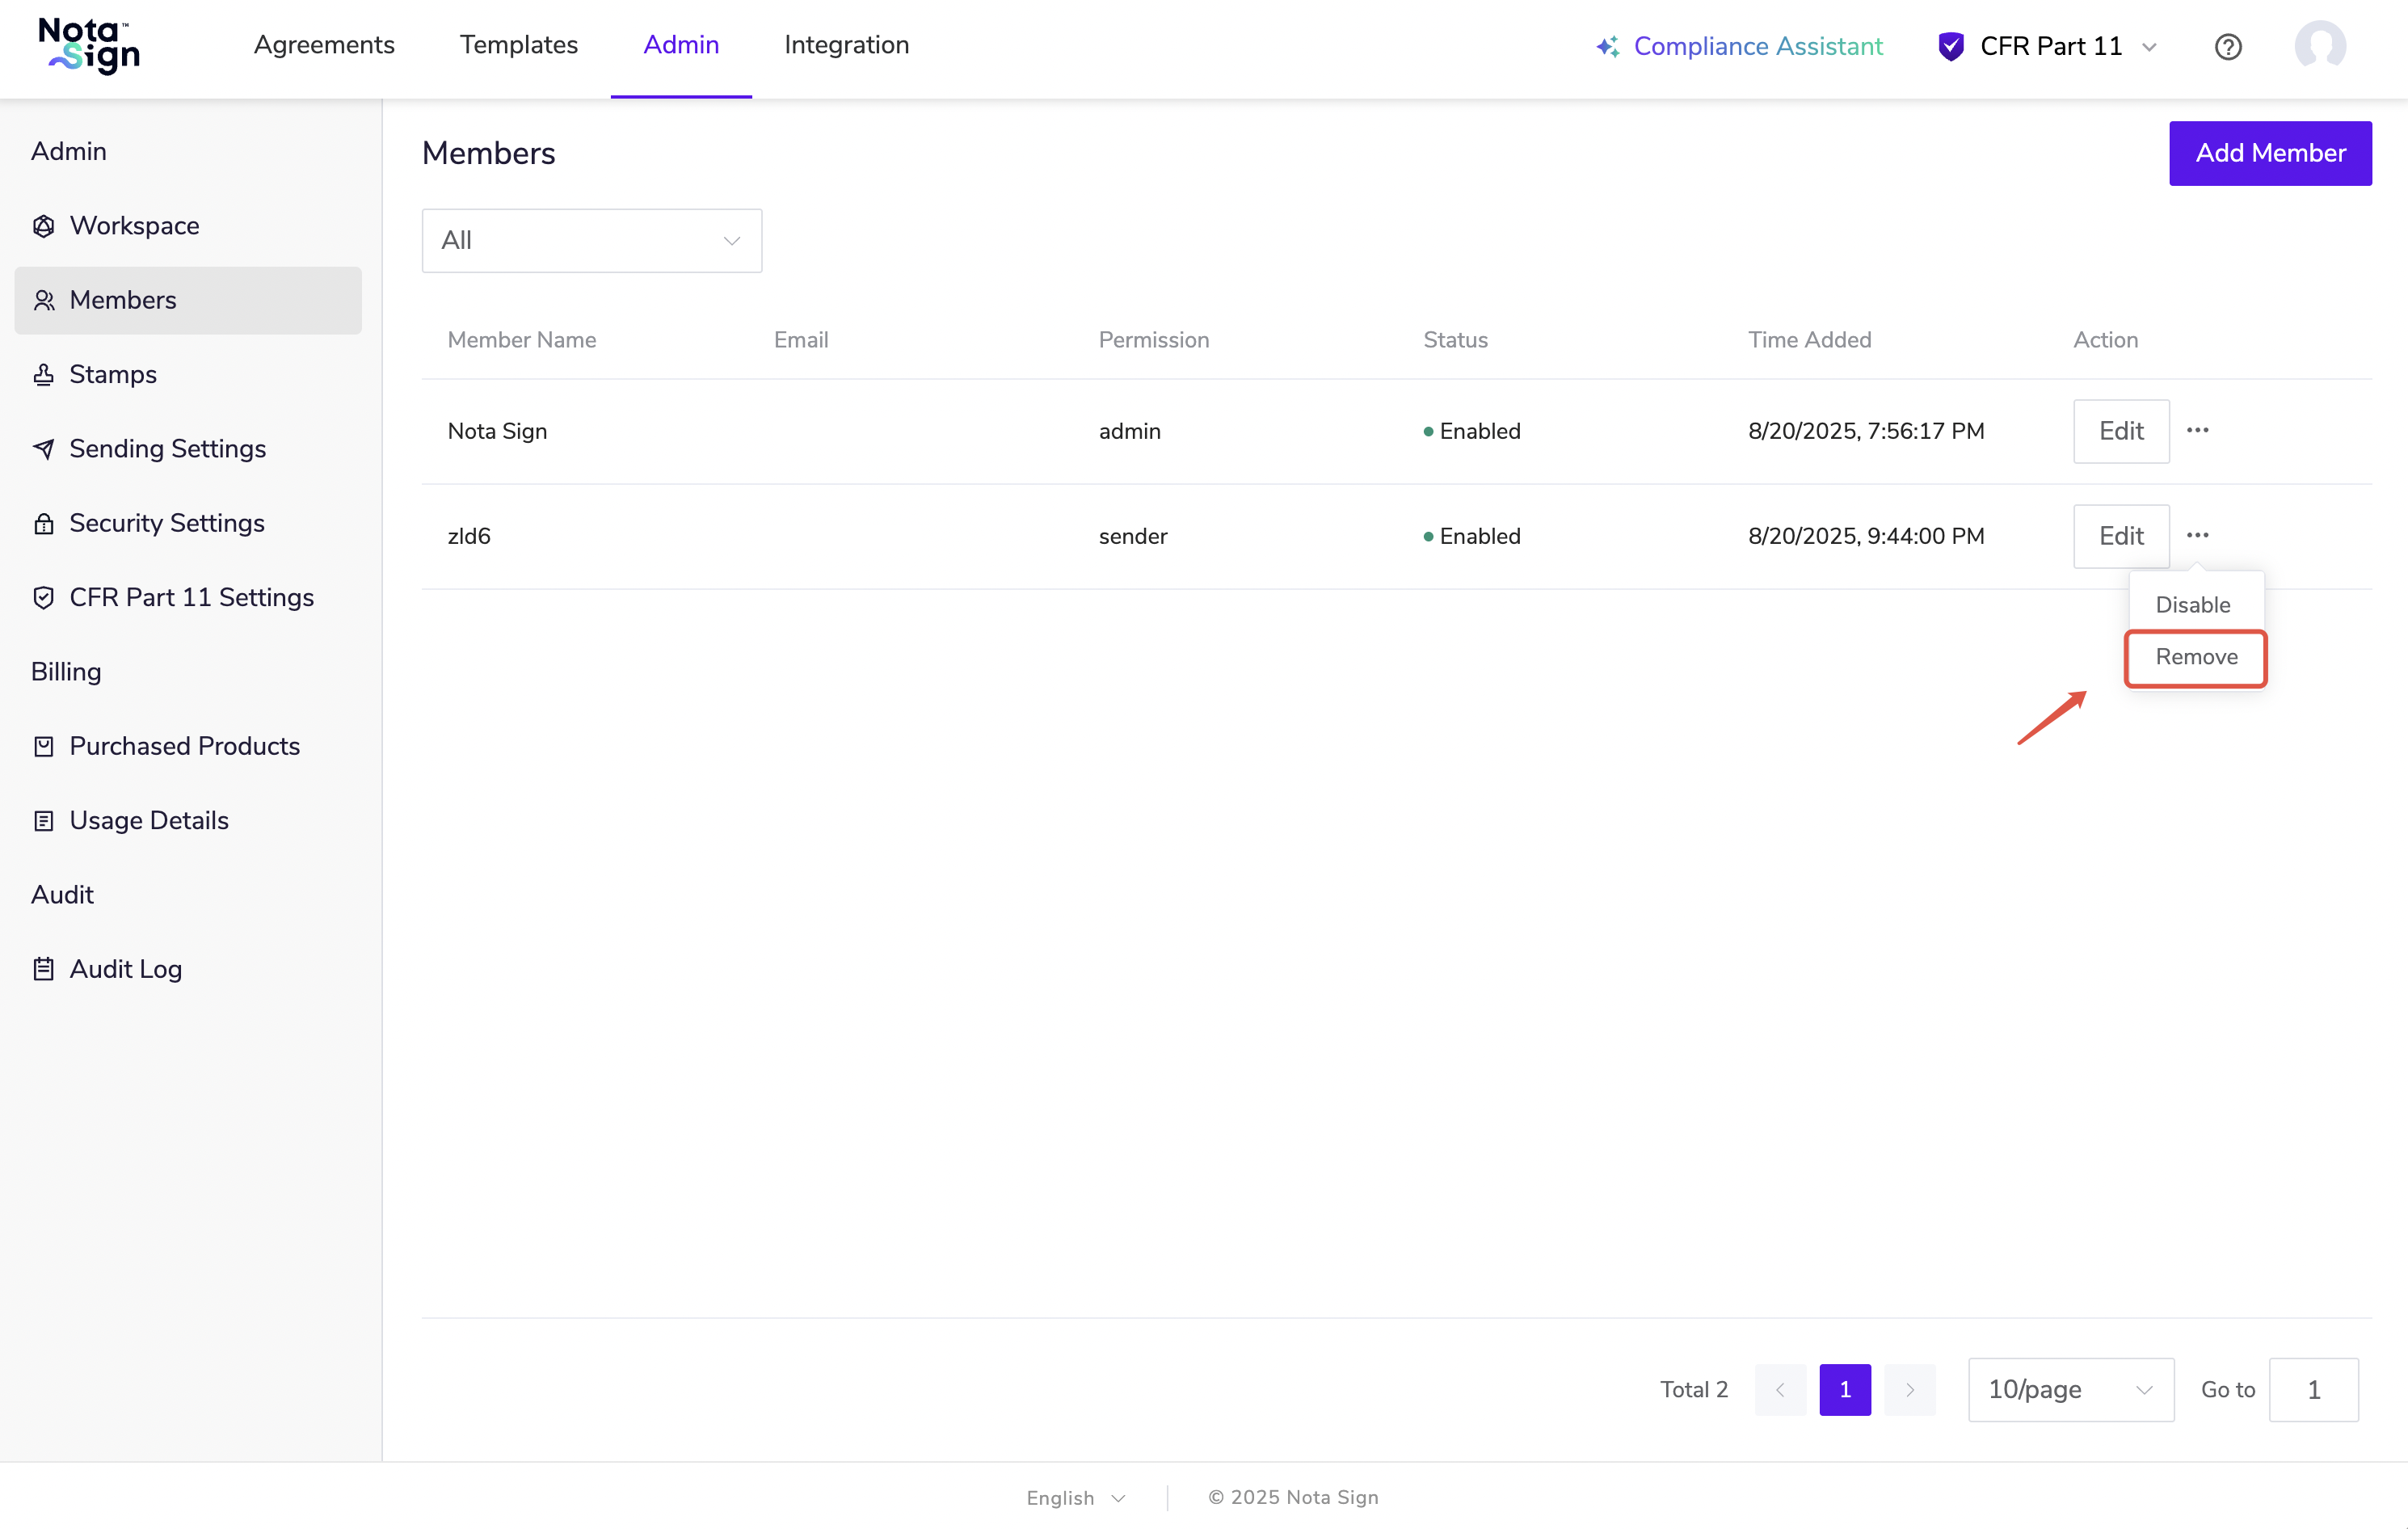
4, Delete member
- In the user list, click the [… ] operation button on the far right of the target user;
- Click [Remove] in the drop-down menu, confirm to delete the member.
5, Transfer Super Administrator Privileges
This feature is used when the workspace’s Super Administrator needs to change. For example, an IT staff member or external contractor may serve as the Super Administrator during initial workspace setup, then hand over to the company’s business owner once the workspace is in regular use. A handover may also be needed when the current Super Administrator leaves the organization and another employee takes over.
Only the current Super Administrator can initiate the transfer. The receiving member must belong to the same workspace, have an “Enabled” status, and hold the Admin role.
Operation Steps:
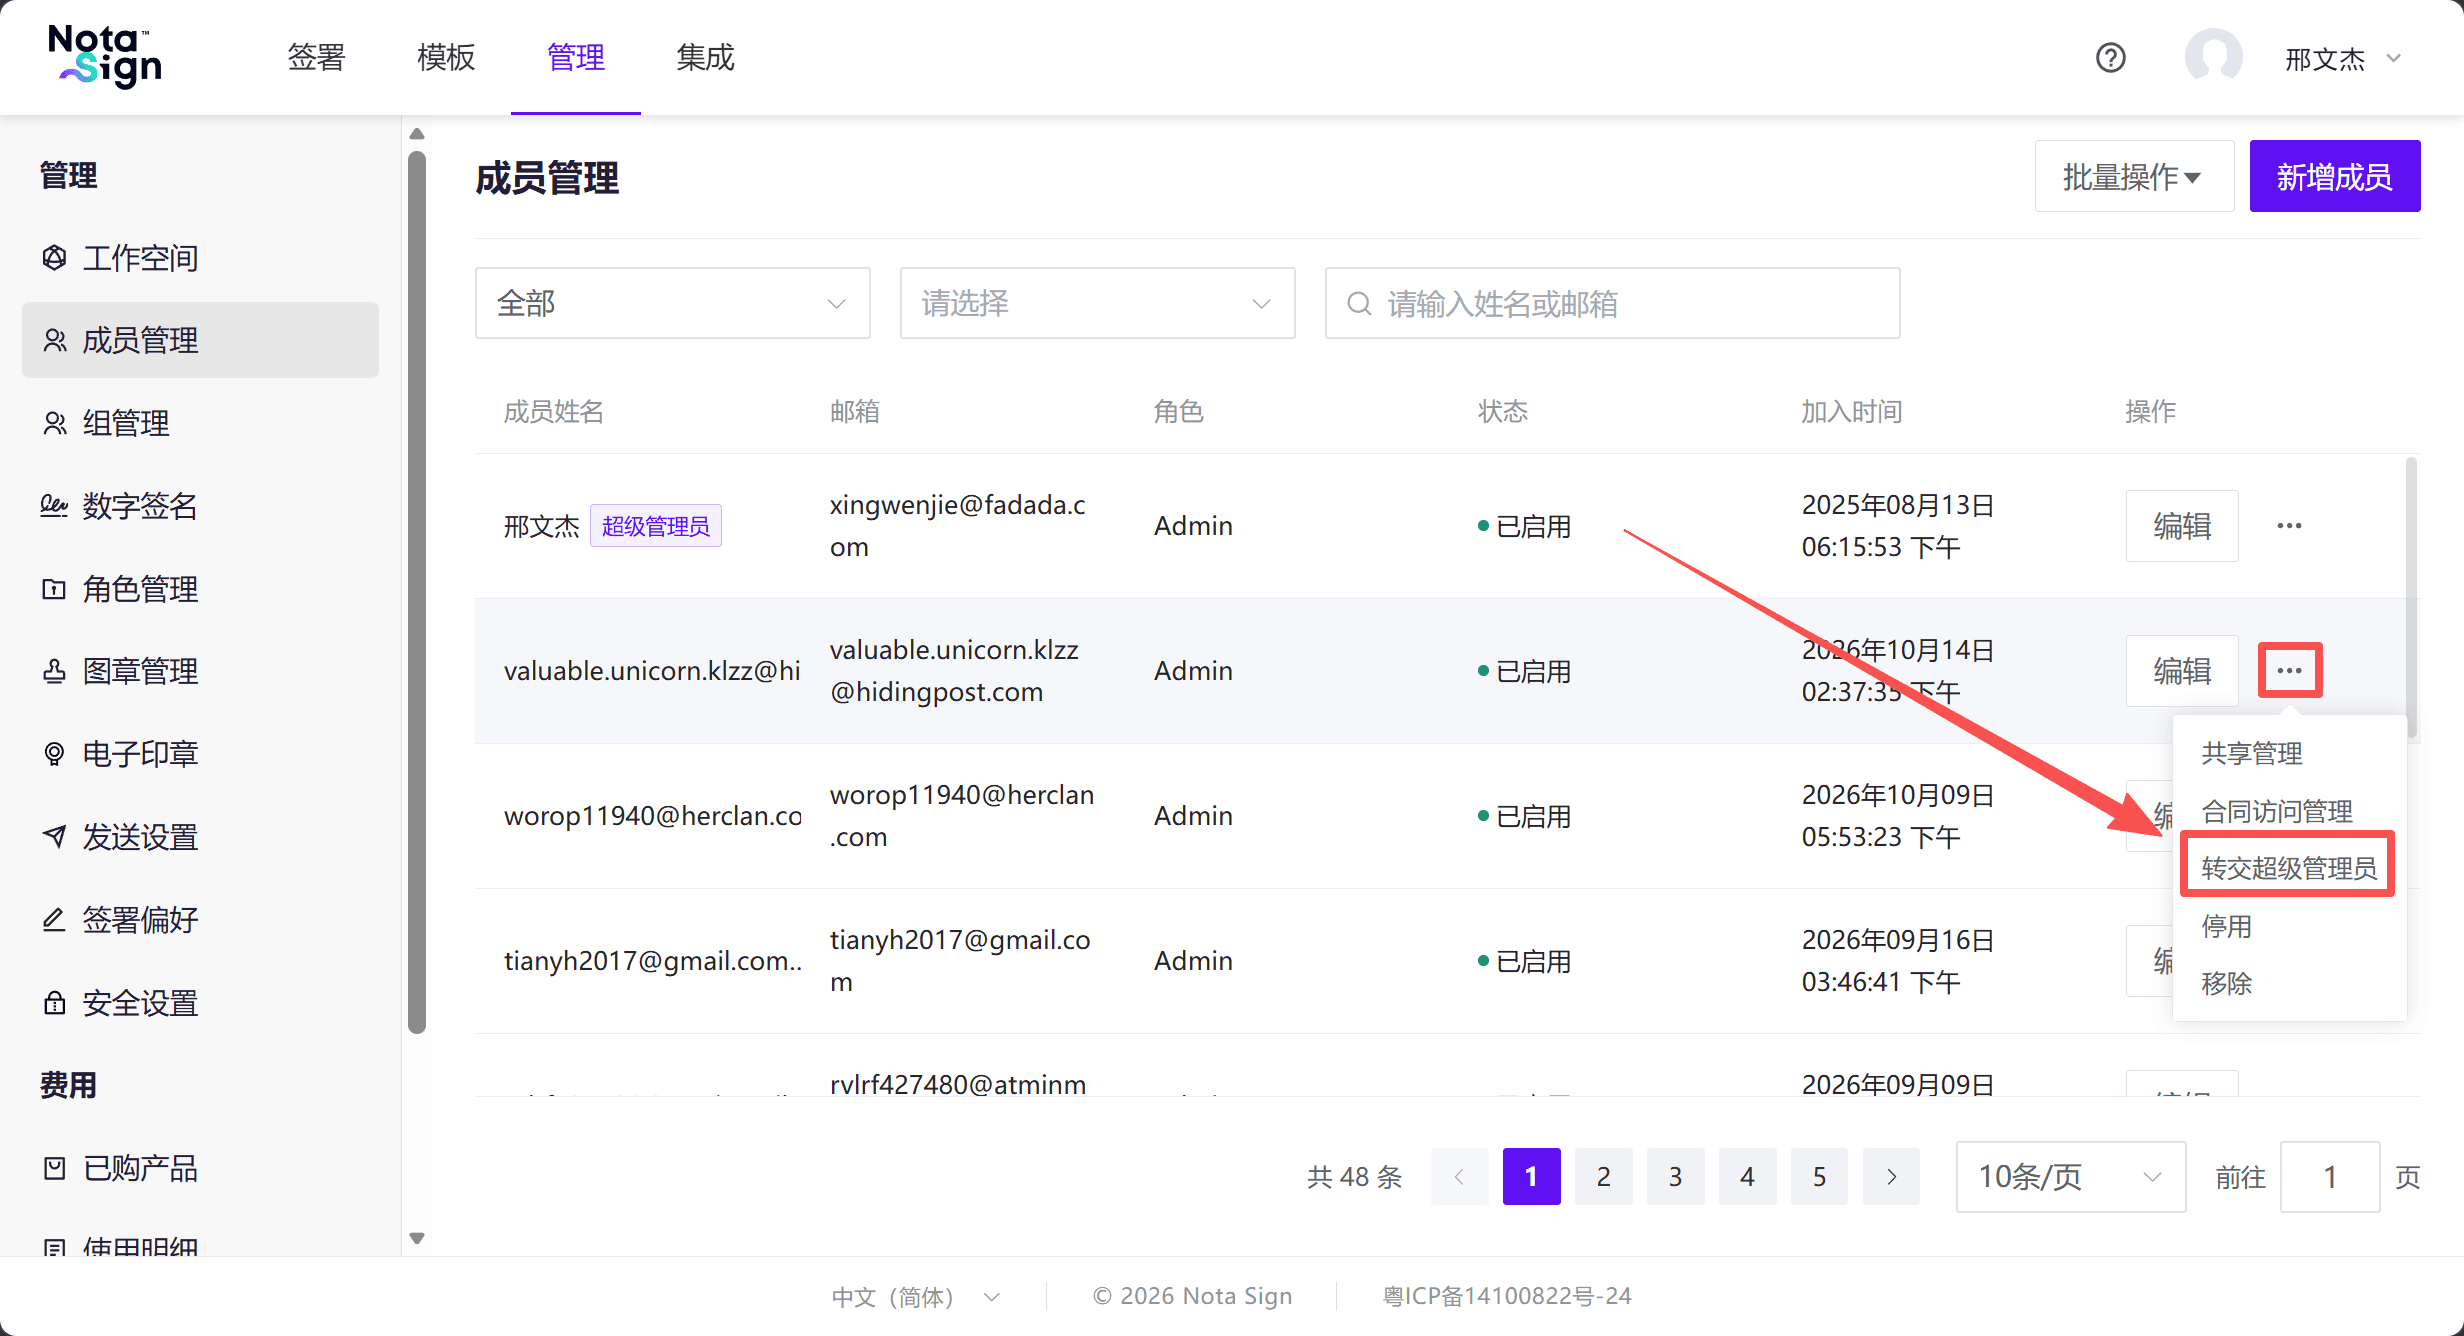
- Log in with the current Super Administrator account and select [Members] from the left menu. Click the […] button on the far right of the target user and select [Transfer Super Administrator] from the drop-down menu.
- In the [Verify Account] dialog, click [Send Verification Code]. Check the email address linked to the current Super Administrator’s account for the verification code.
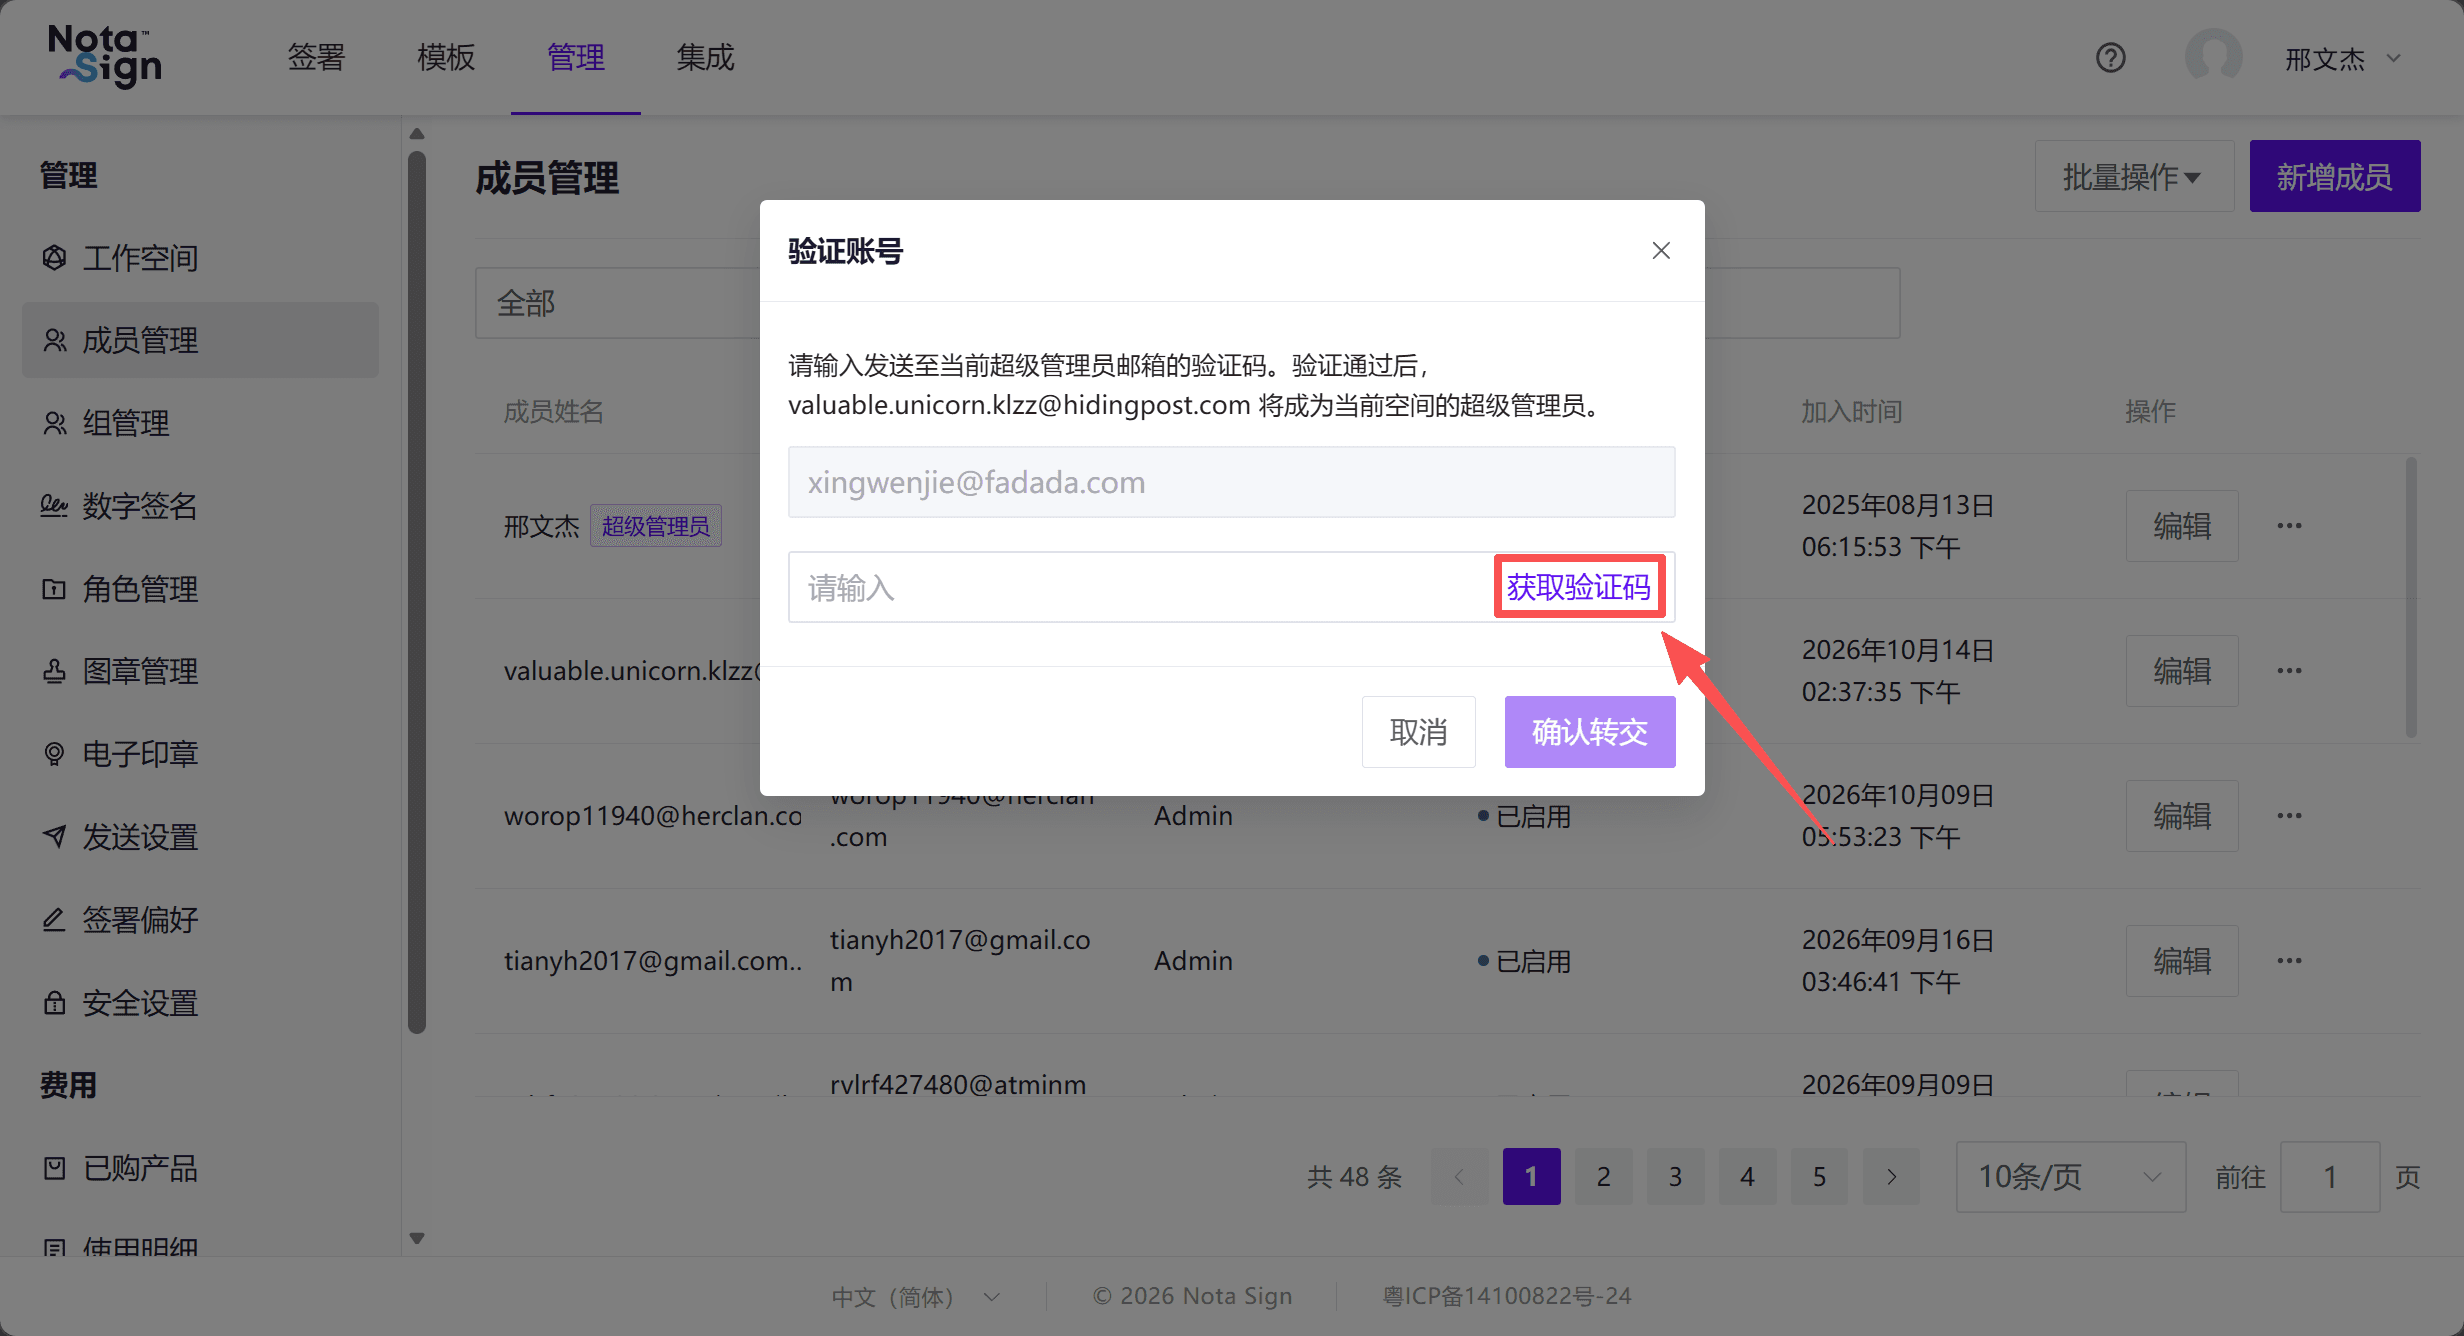
- Enter the verification code and click [Confirm Transfer]. The transfer is completed once verification succeeds.
Note:
After the transfer, the previous Super Administrator retains the Admin role but no longer has privileges exclusive to the Super Administrator.
If the SSO subscription belongs to the current workspace, the SSO service and permission to manage [Global Settings] are also transferred to the new Super Administrator.