
I. Feature Overview
Administrators can share a member’s envelopes with other members within the same workspace, making it convenient for business owners, legal teams, quality personnel, or audit leads to view and manage relevant envelopes.
Member sharing supports the following access permissions:
- [View Only]: Allows viewing the envelope list and details, downloading envelopes, and viewing history records;
- [View and Manage]: In addition to view permissions, allows performing corrections, reminders, and revocations based on the envelope status.
Administrators can set sharing permissions as permanent or specify an expiration date. After the authorization expires or is revoked, the authorized member will no longer be able to access the corresponding envelopes.
💡 Notes:
- Member sharing only applies to members within the same workspace.
- The sharing scope only includes envelopes, not drafts, templates, electronic seals, stamps, or folders.
- Sharing does not change the envelope’s sender, signers, approvers, reviewers, or CC recipients.
- Authorized members cannot initiate, sign, reject, approve, or confirm viewing on behalf of other members.
II. Step-by-Step Instructions
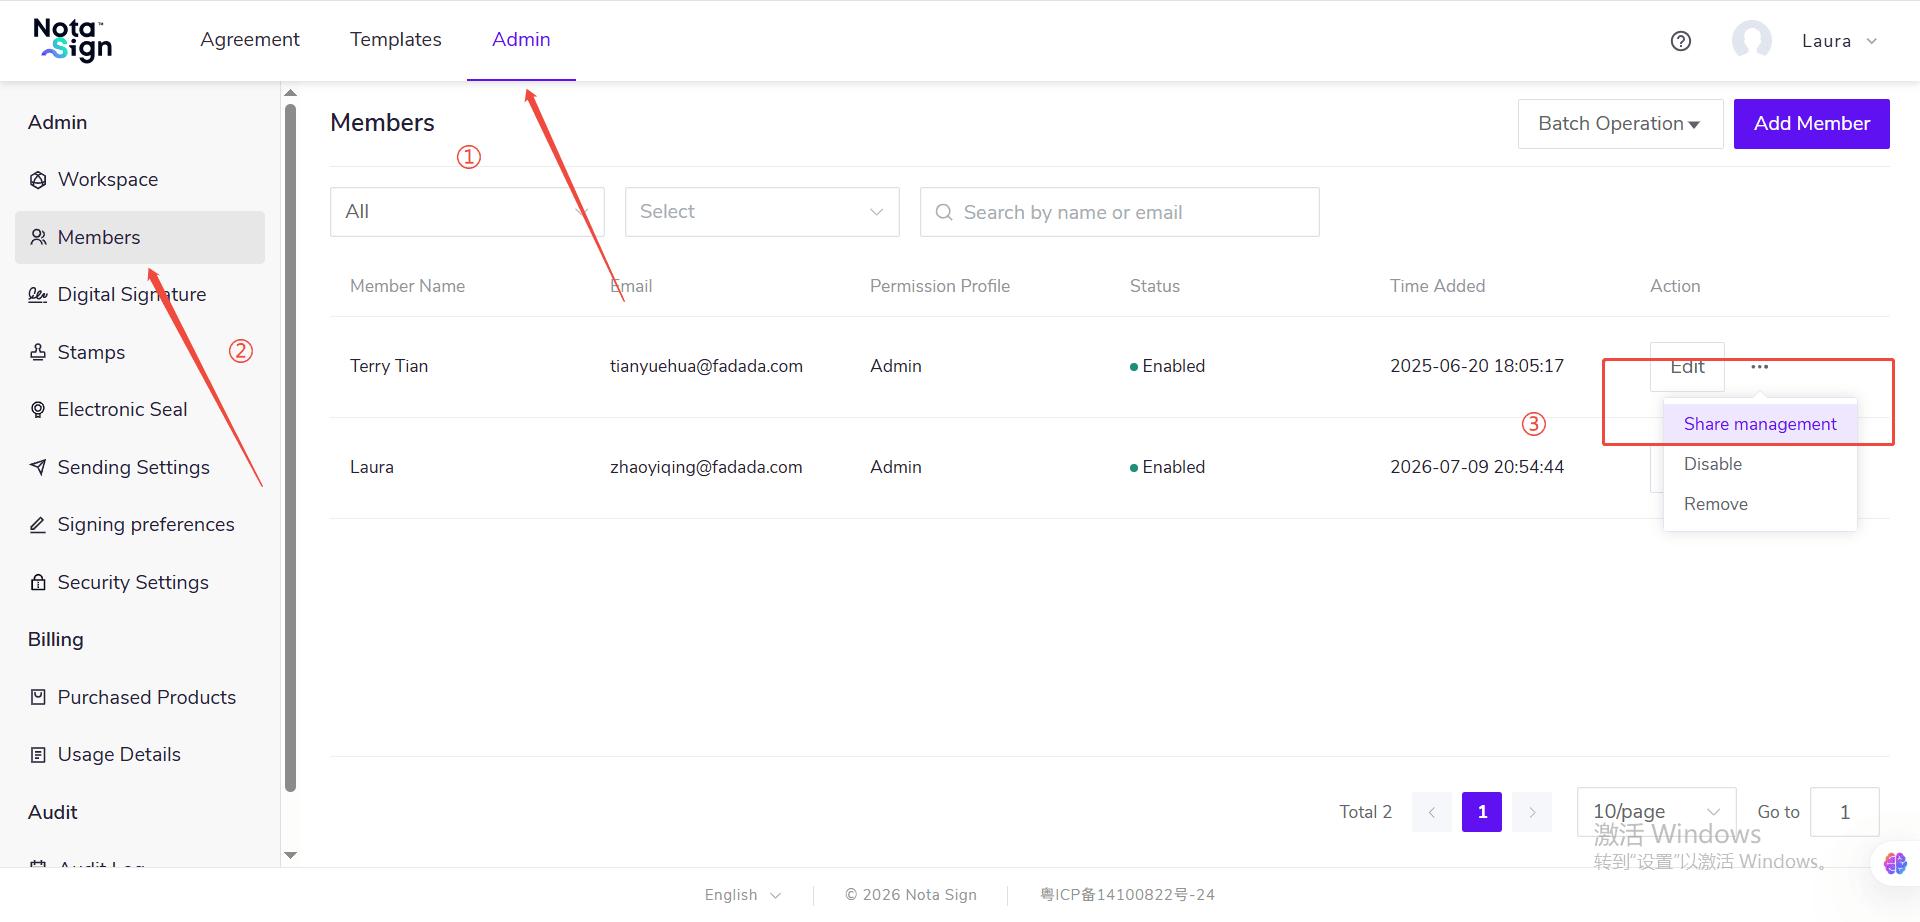
(1) Log in to the Nota Sign workspace and go to [Manage] → [Member Management]. (2) Find the member for whom you need to configure sharing permissions, click [···] in the member’s action column, and select [Sharing Management].
 (3) On the sharing management page, select the tab you need to configure:
- [Shared by Member]: Configure which members the current member shares their envelopes with;
- [Shared to Member]: Configure which members share their envelopes with the current member.
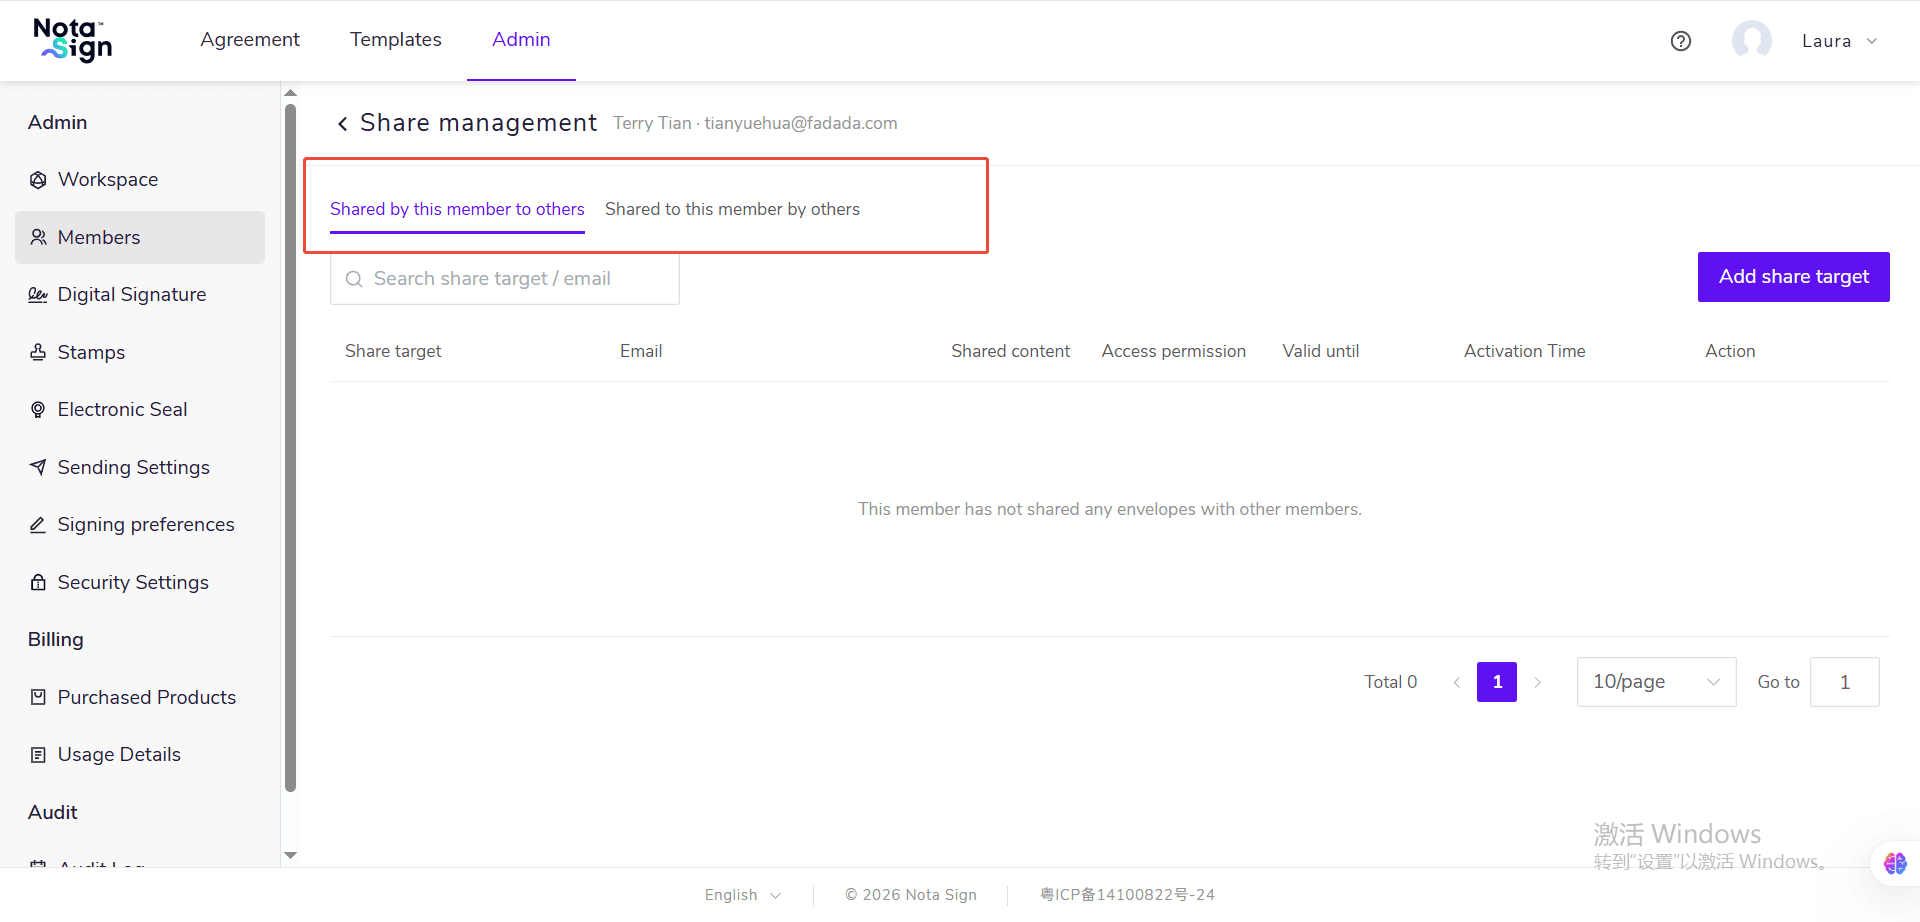
(4) To share the current member’s envelopes with other members, go to the [Shared by Member] tab and click [Add Sharing Recipient].
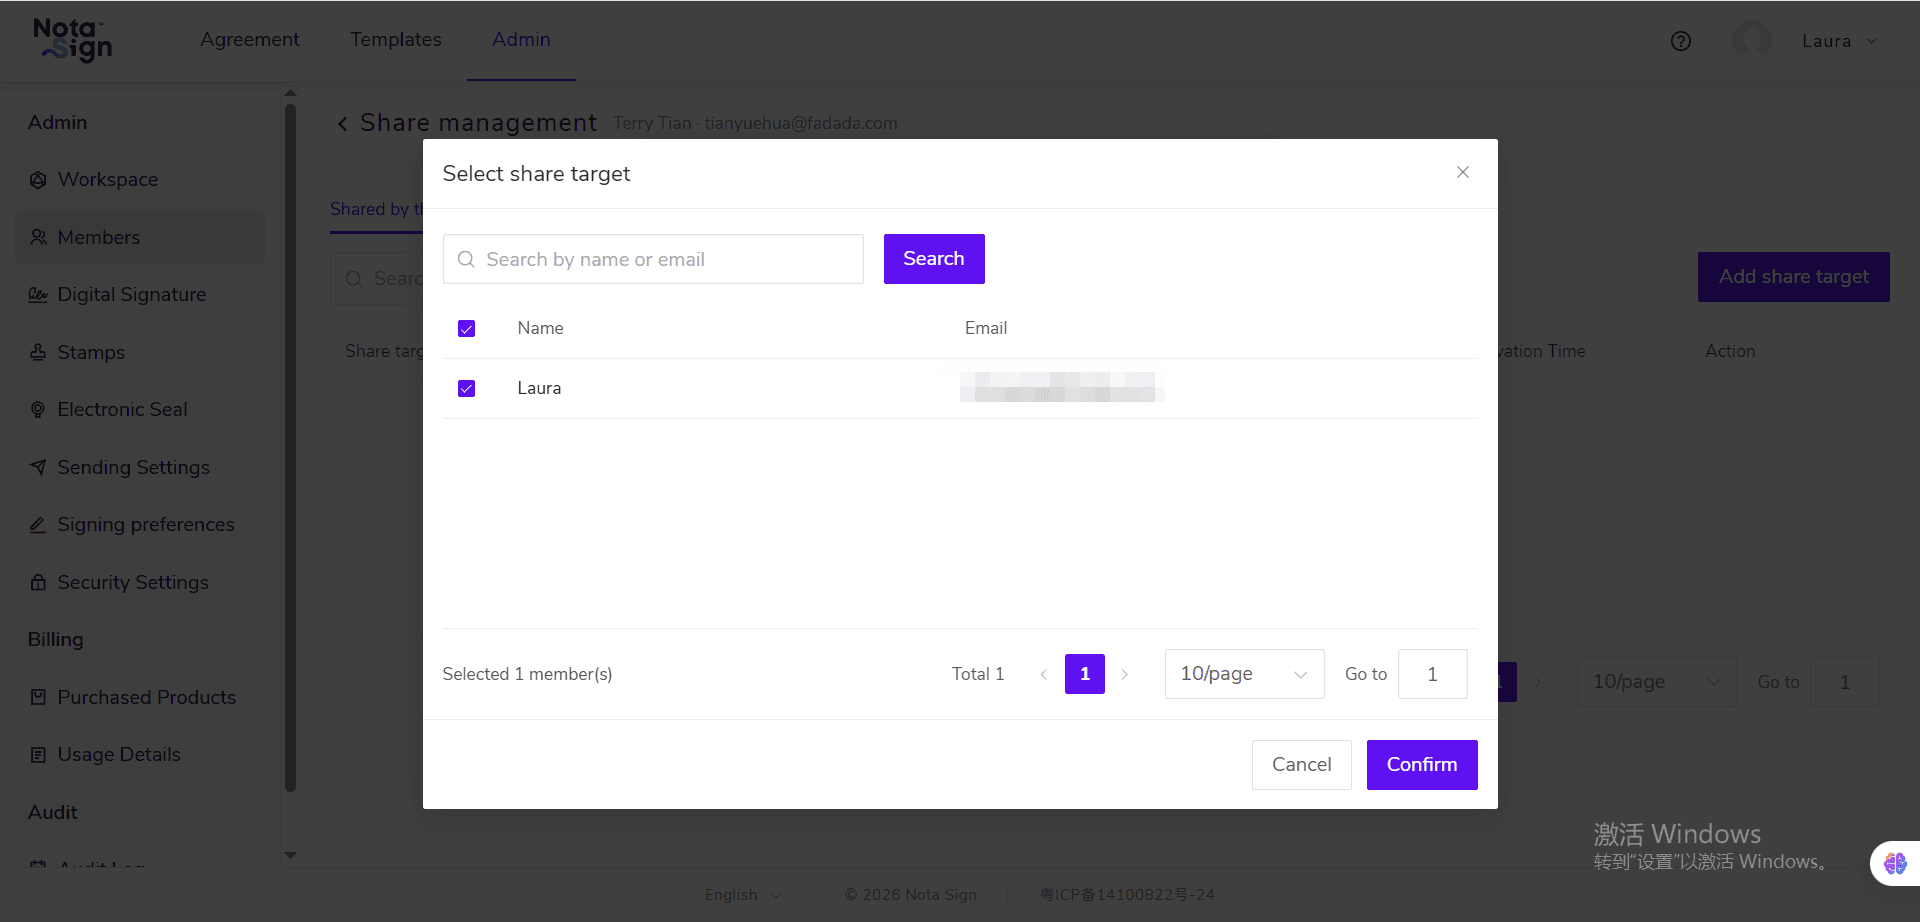
(5) Click [Select Members], search for members by name or email, check one or more sharing recipients, and click [Confirm].
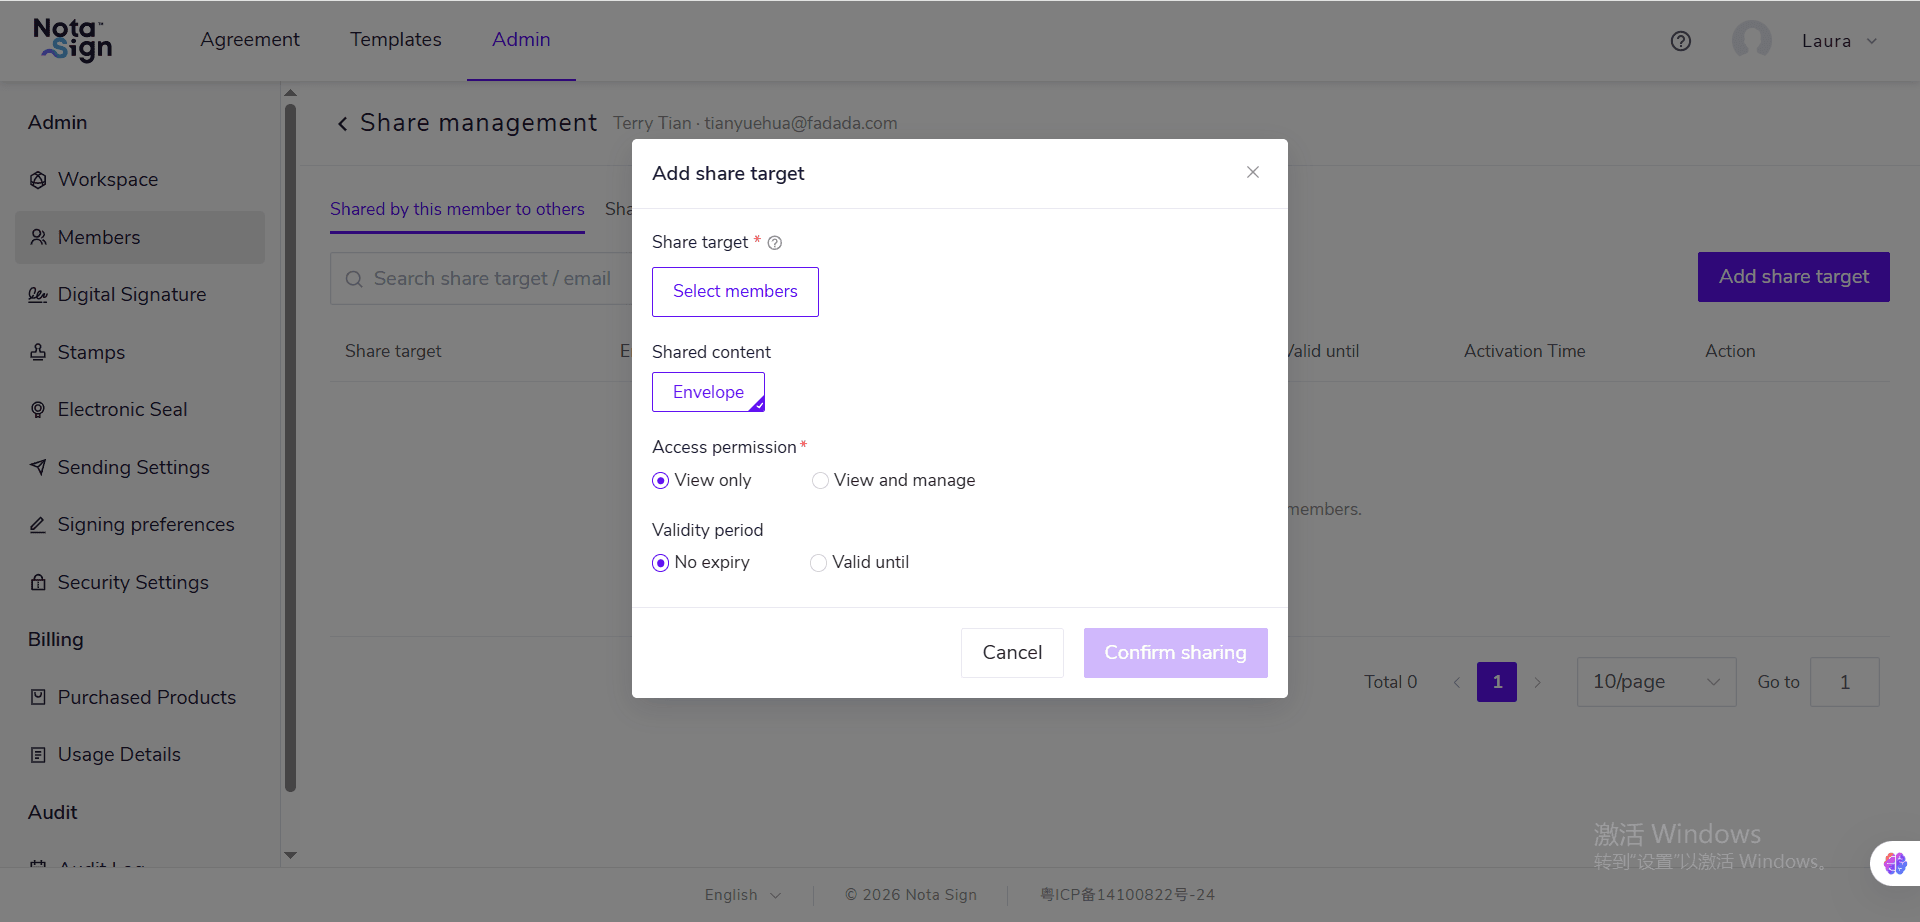
(6) Set the access permission:
- Select [View Only], and authorized members can view, download envelopes, and view history records;
- Select [View and Manage], and authorized members can also perform corrections, reminders, and revocations based on the envelope status.
(7) Set the sharing validity period:
- Select [Permanent], and the sharing permission remains effective until the administrator actively revokes it;
- Select [Valid Until], and set the expiration date for the sharing permission.
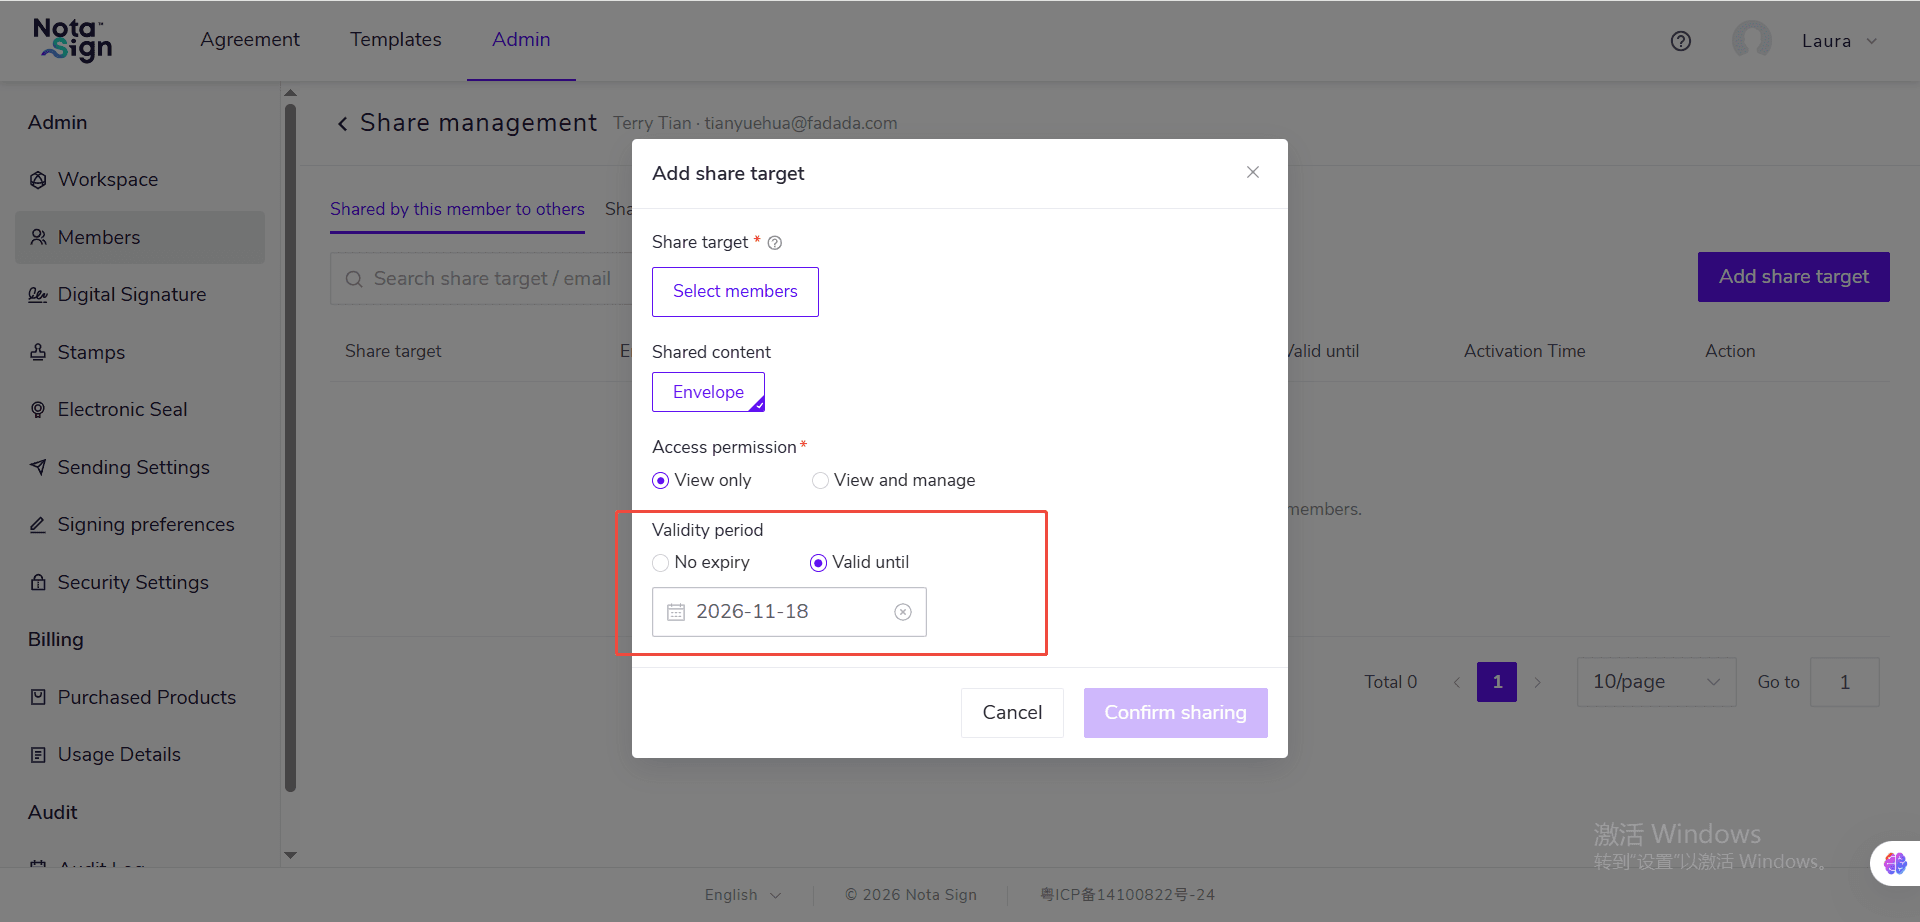
💡 When [Valid Until] is selected, the system defaults to a date 90 days later. Administrators can modify the date, but the expiration date must be later than the current date.
(8) Click [Confirm Sharing]. The authorization takes effect immediately upon successful creation and will appear in both:
- The current member’s [Shared by Member] list;
- The authorized member’s [Shared to Member] list.
(9) To configure other members to share envelopes with the current member, go to the [Shared to Member] tab, click [Add Sharing Source], then select the sharing source, access permission, and validity period, and finally click [Confirm Sharing]. (10) To modify an existing sharing arrangement, click [Edit] in the list.
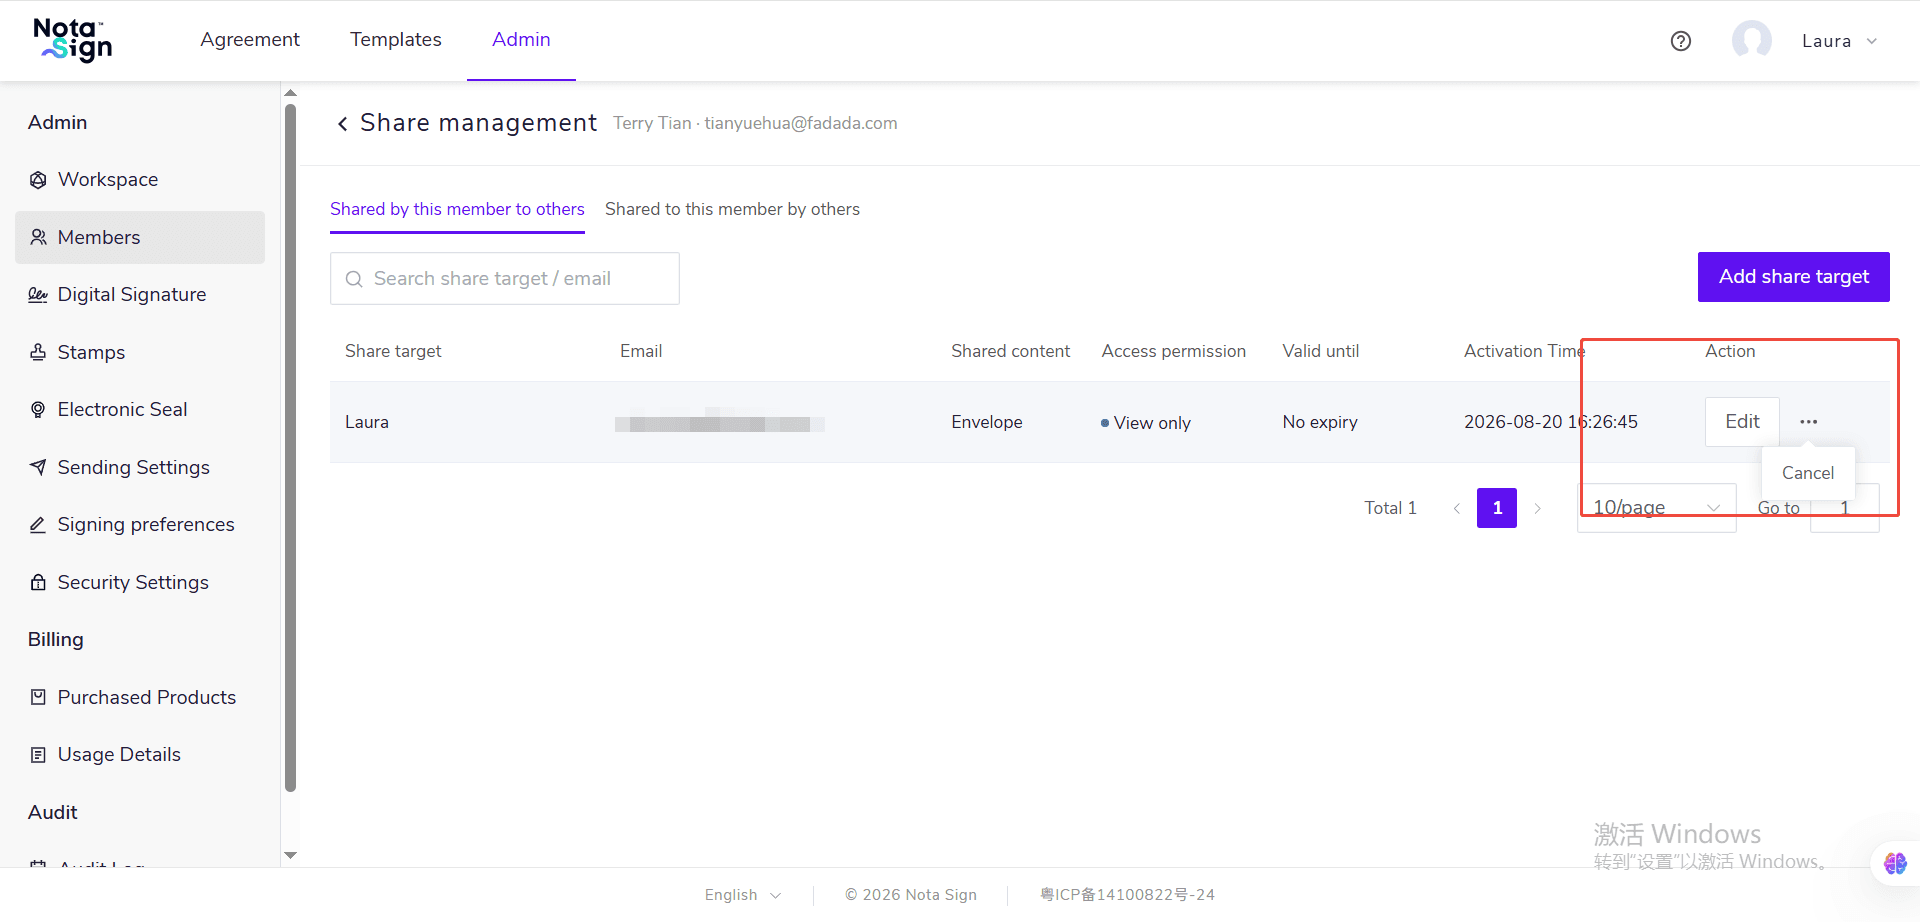
① When editing, only the access permission and validity period can be modified. The sharing source or sharing recipient cannot be changed. If you need to change either party, please revoke the original authorization first and then create a new one. ② To cancel sharing: Click [Revoke] in the [Shared by Member] list; click [Remove] in the [Shared to Member] list. ③ After a member is deactivated, their sharing configurations are not automatically deleted, but the member cannot log in to the workspace or access shared envelopes. After the member is reactivated, sharing permissions that are still within their validity period will be restored.