
1. Overview
Administrators can create groups by department or project, manage group members, and share a member’s envelopes with a group so that its members can view and manage the shared envelopes.
For example, create a Legal group and add the relevant members, then share a business user’s envelopes with that group without configuring access for each person. When team membership changes, update the group members accordingly.
2. Create and Manage Groups
1. Create a Group
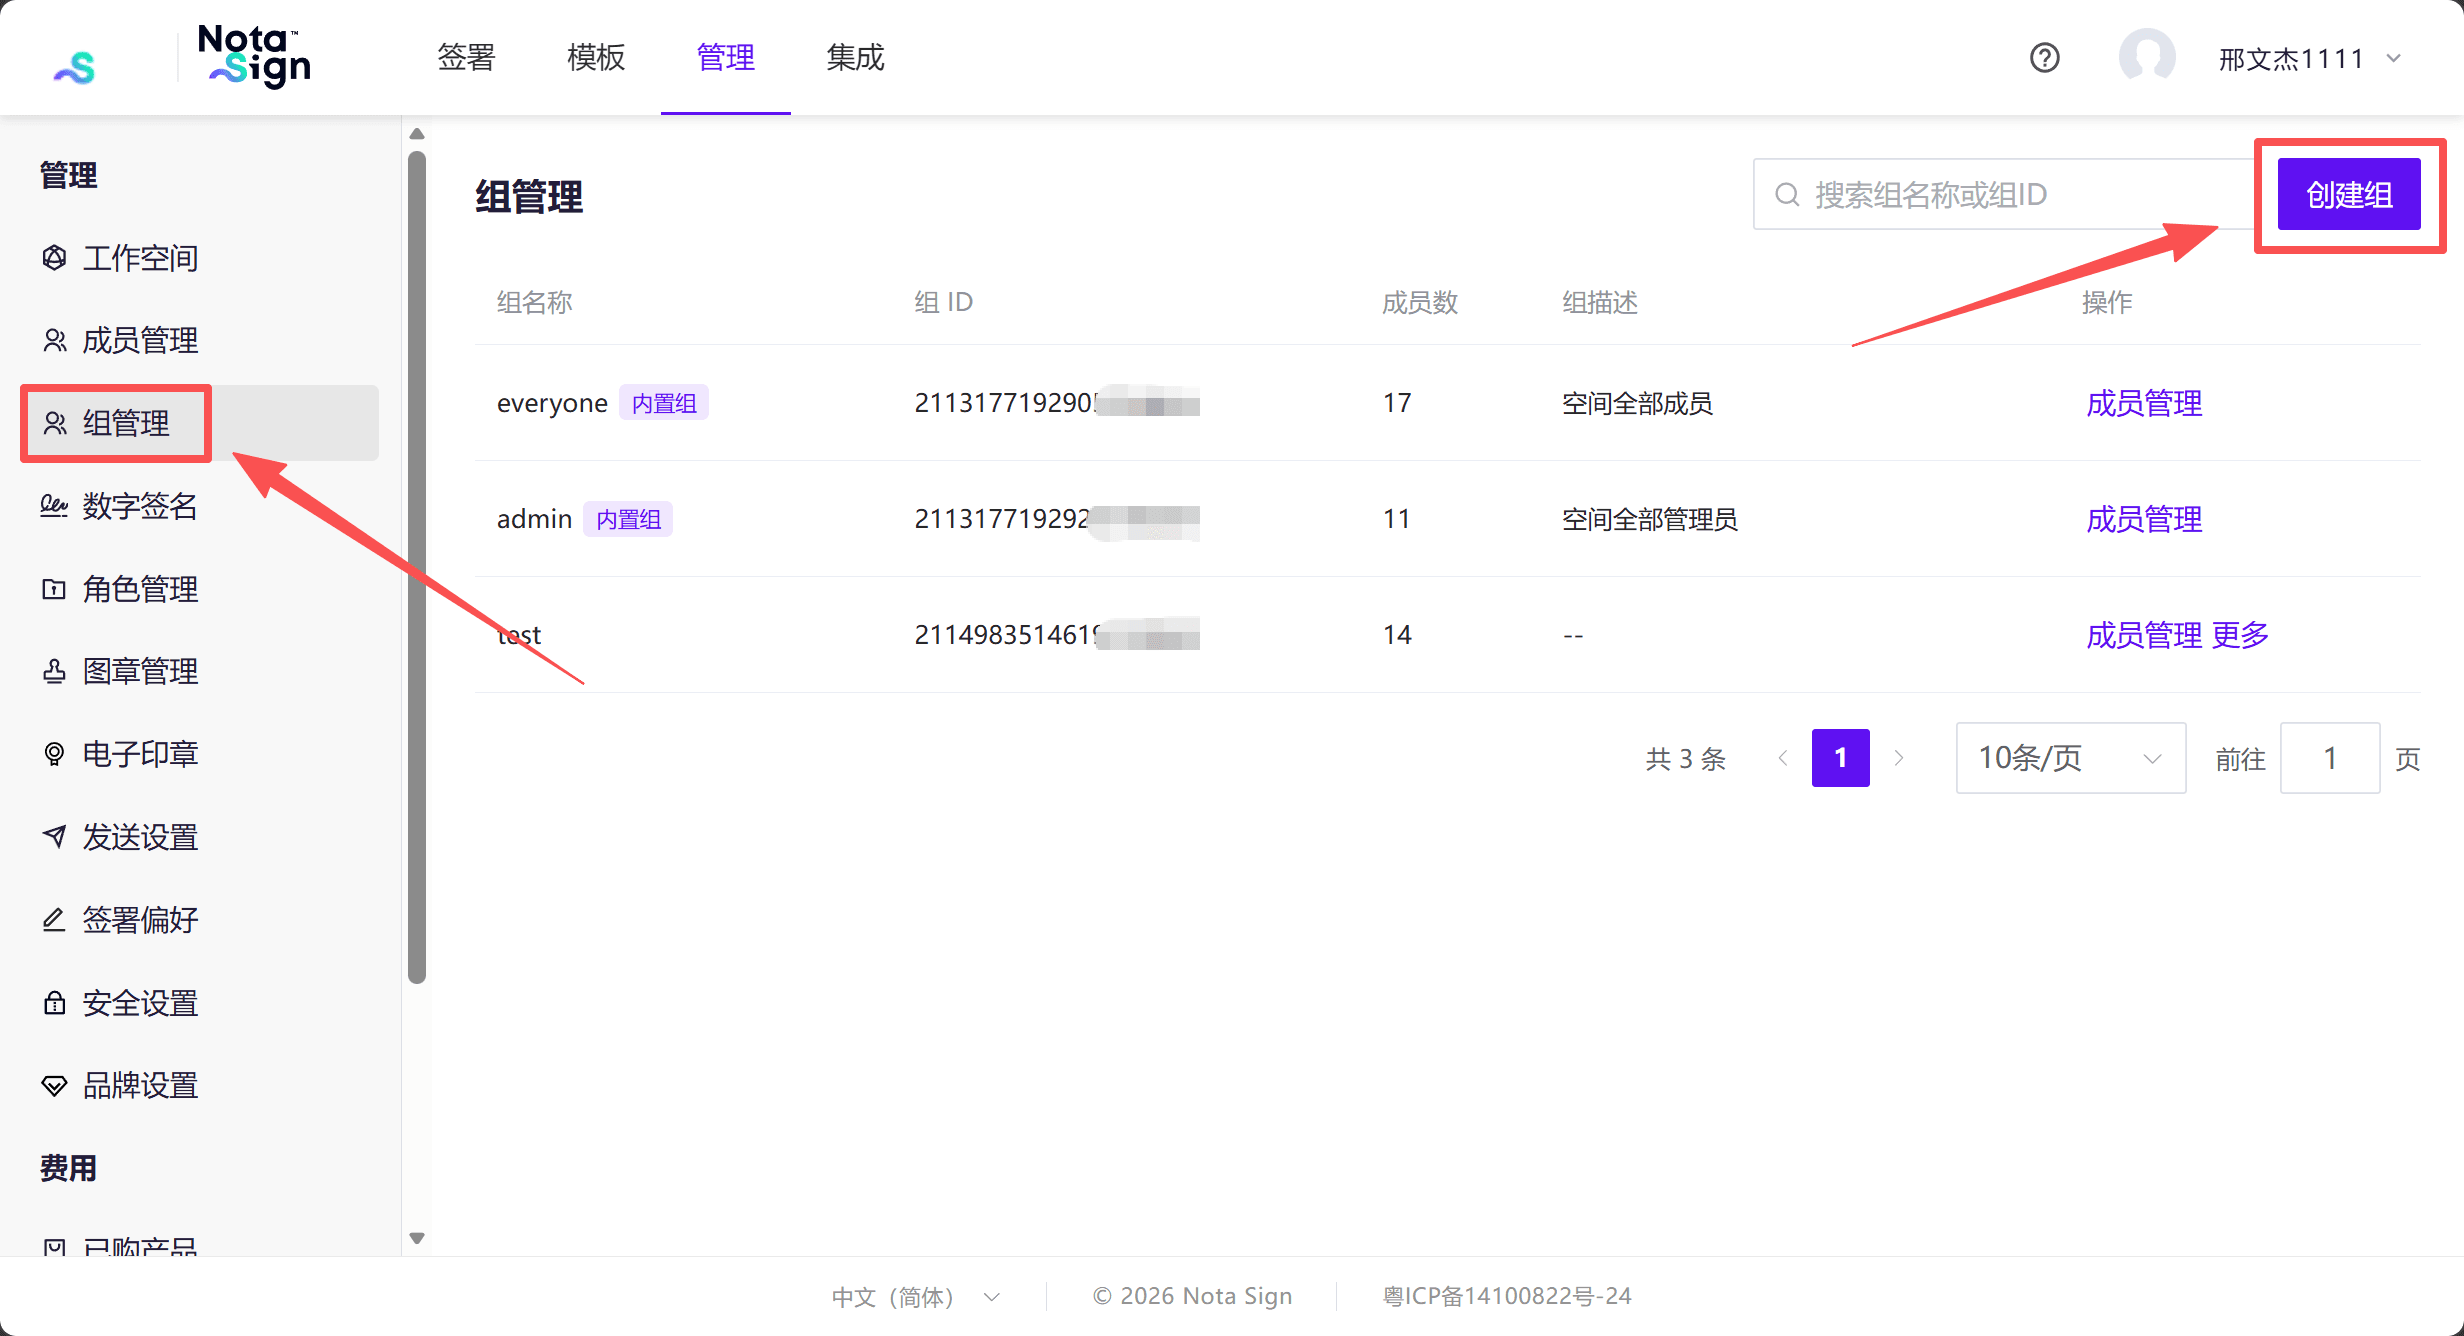
- Log in to the Nota Sign workspace and go to [Admin] → [Group Management].
- Click [Create Group] in the upper-right corner.
- Enter a group name and, optionally, a description.
- Click [Create].
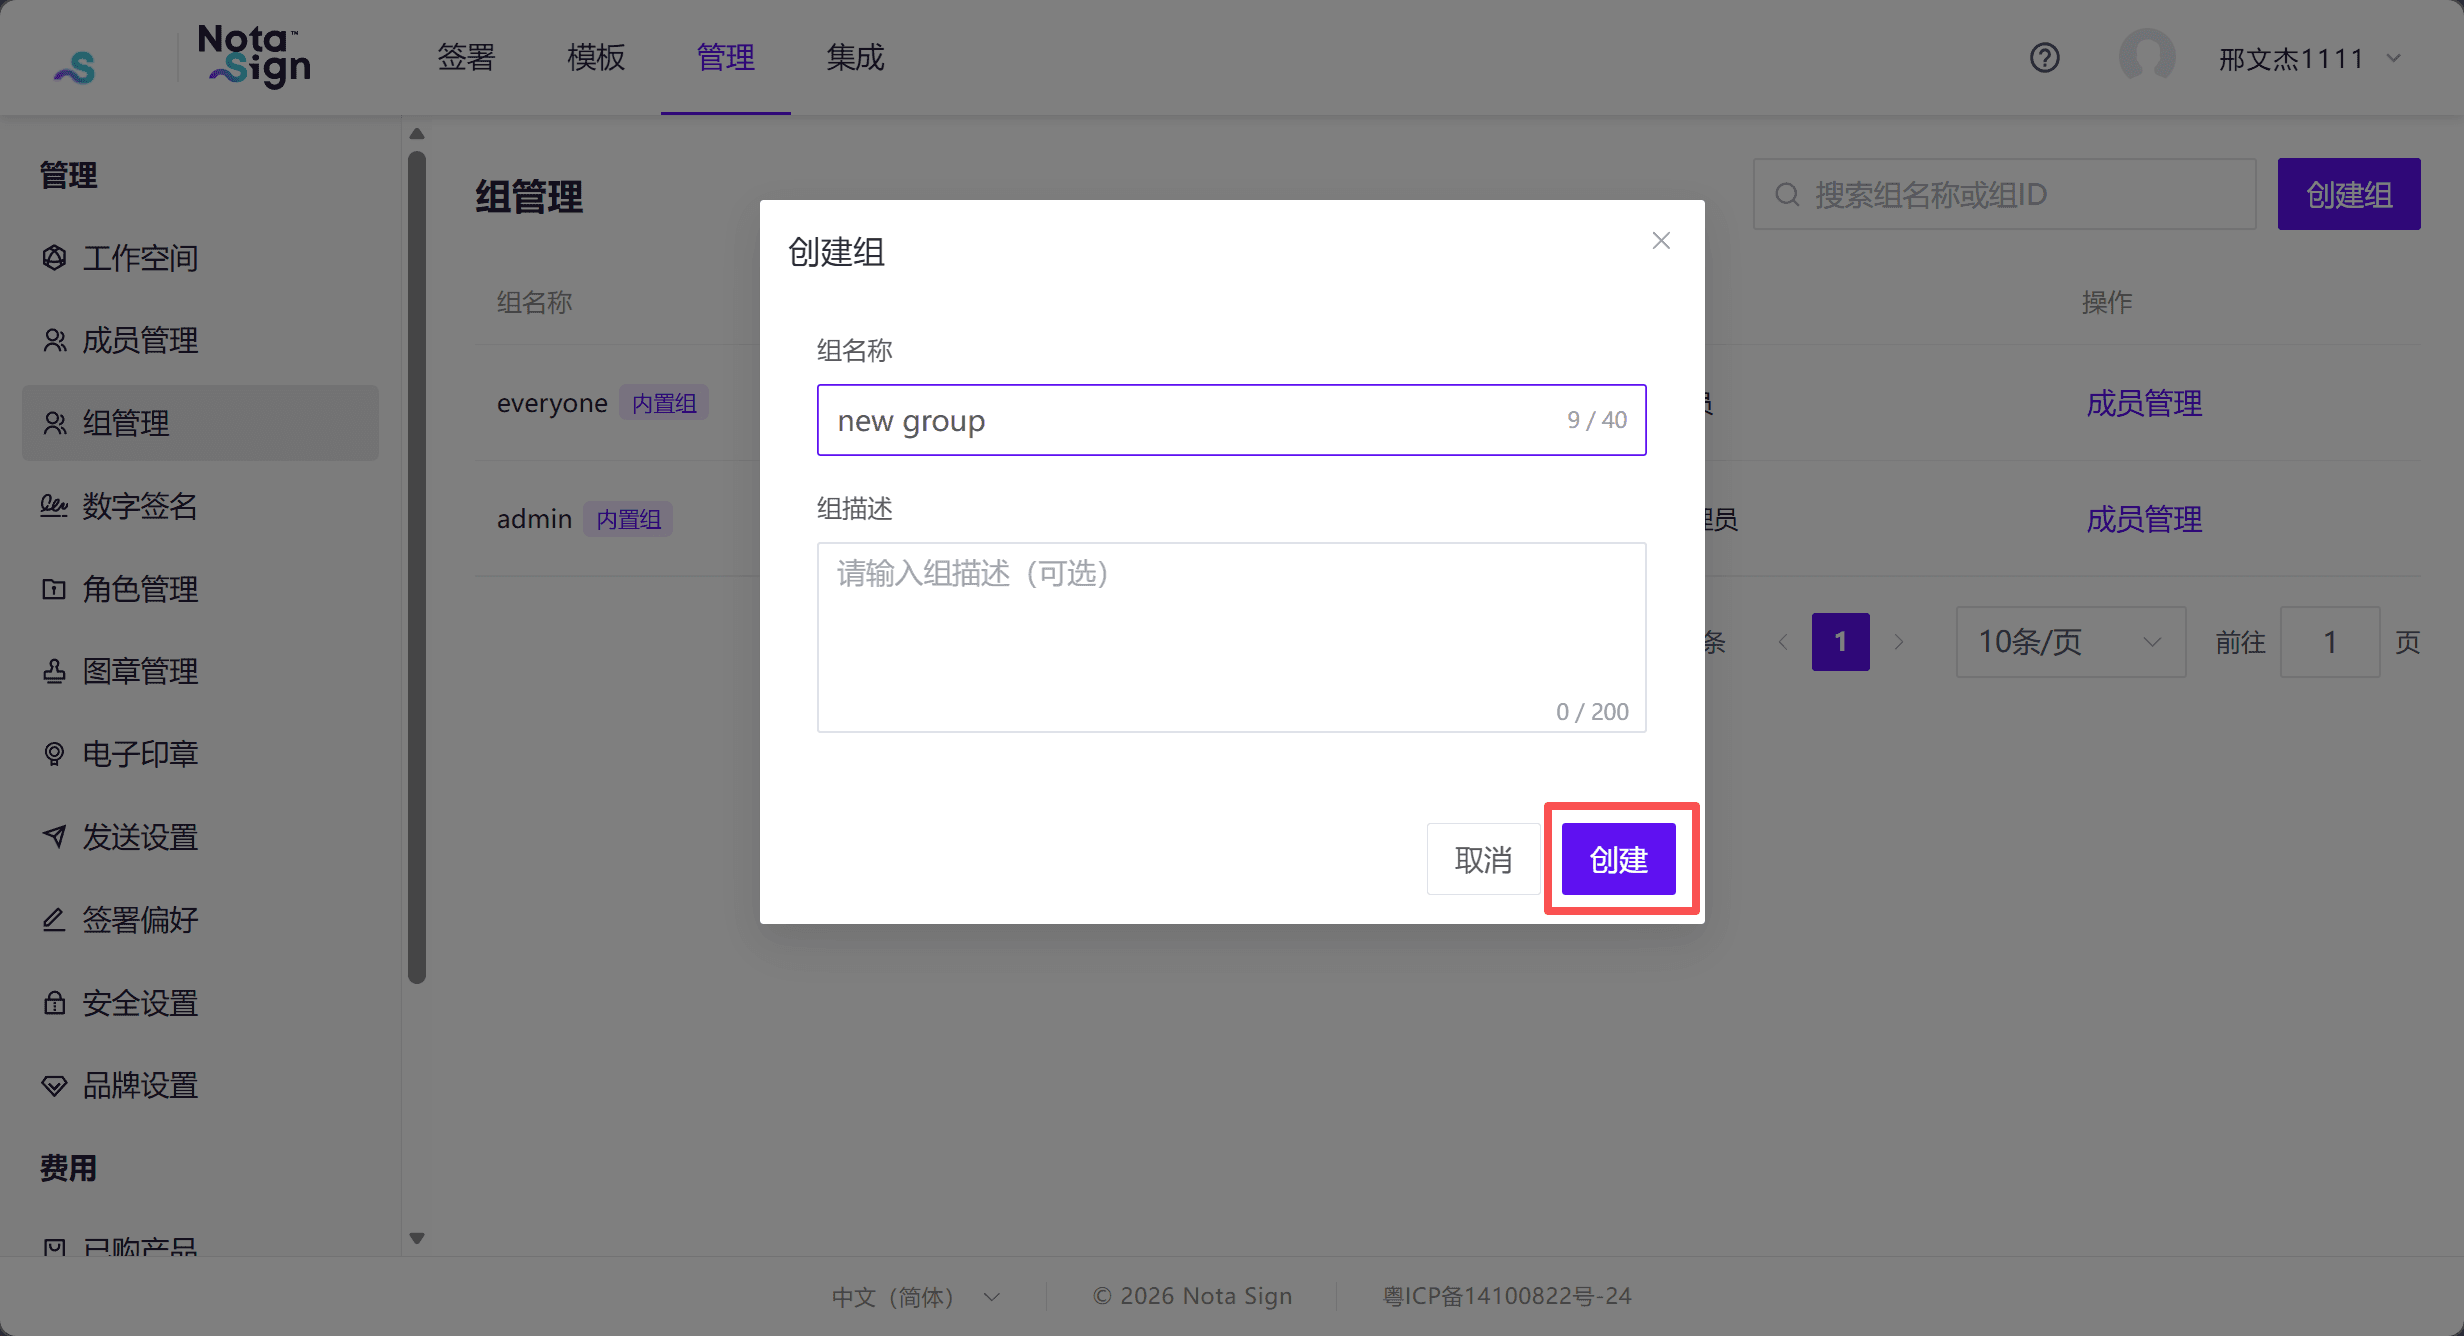
Note: The group name is required, must be unique within the current workspace, and can contain up to 40 characters. The description is optional and can contain up to 200 characters.
2. Add and Remove Group Members
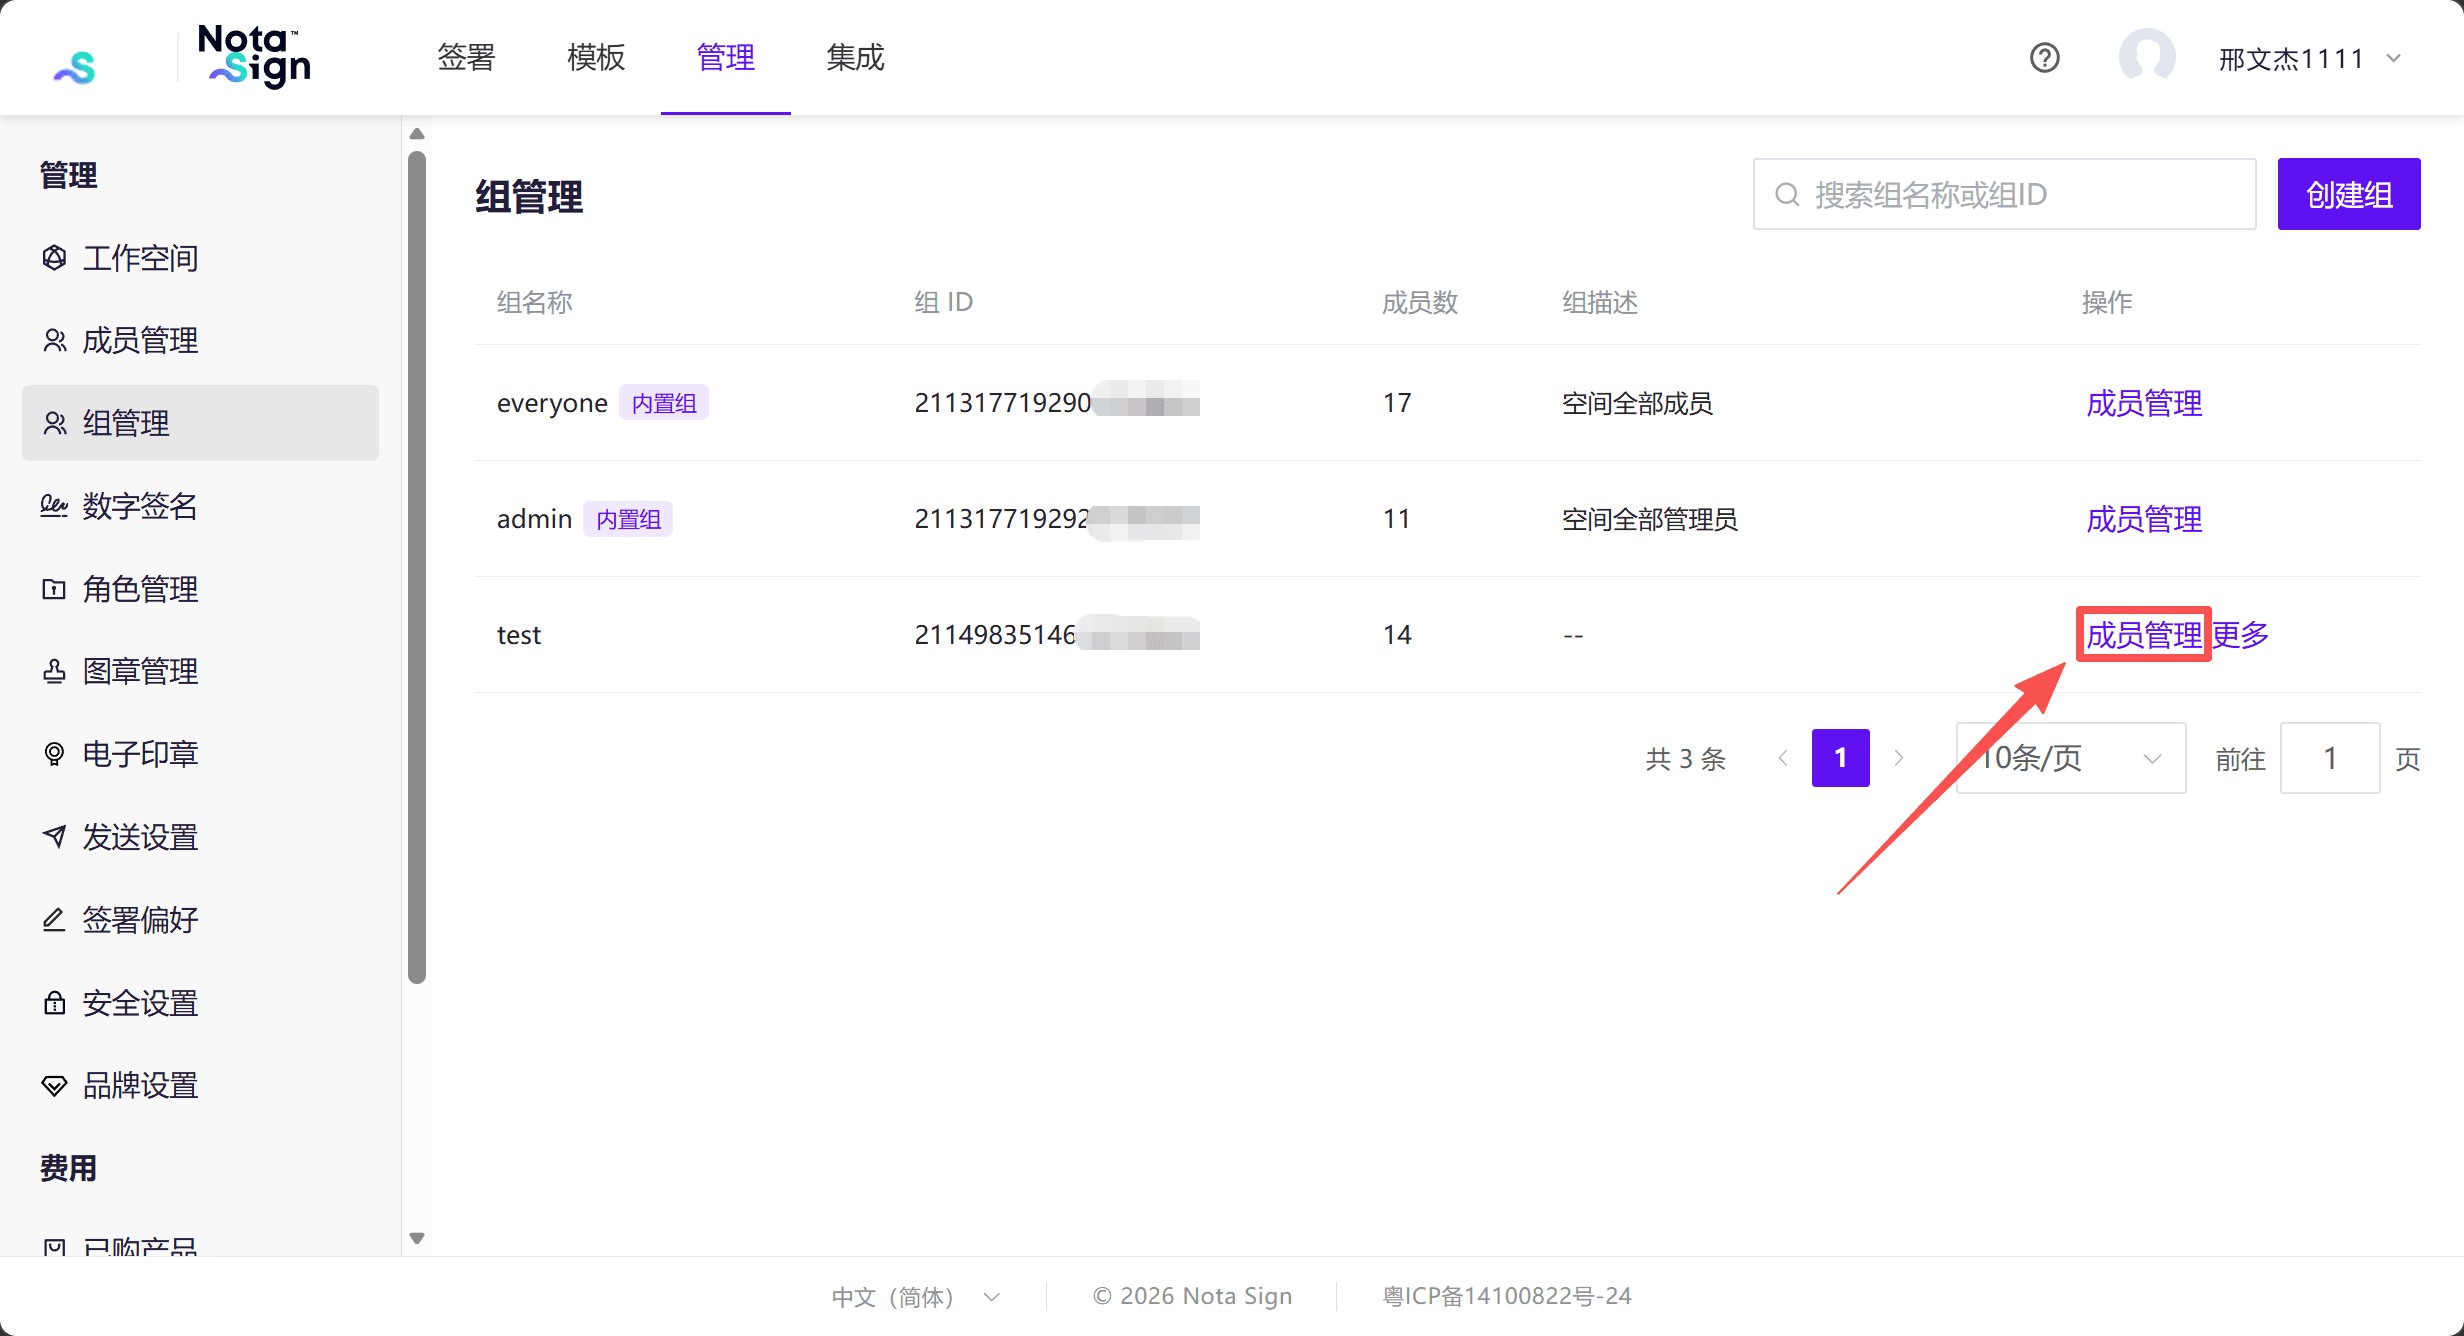
- In the group list, click [Member Management] next to the group.
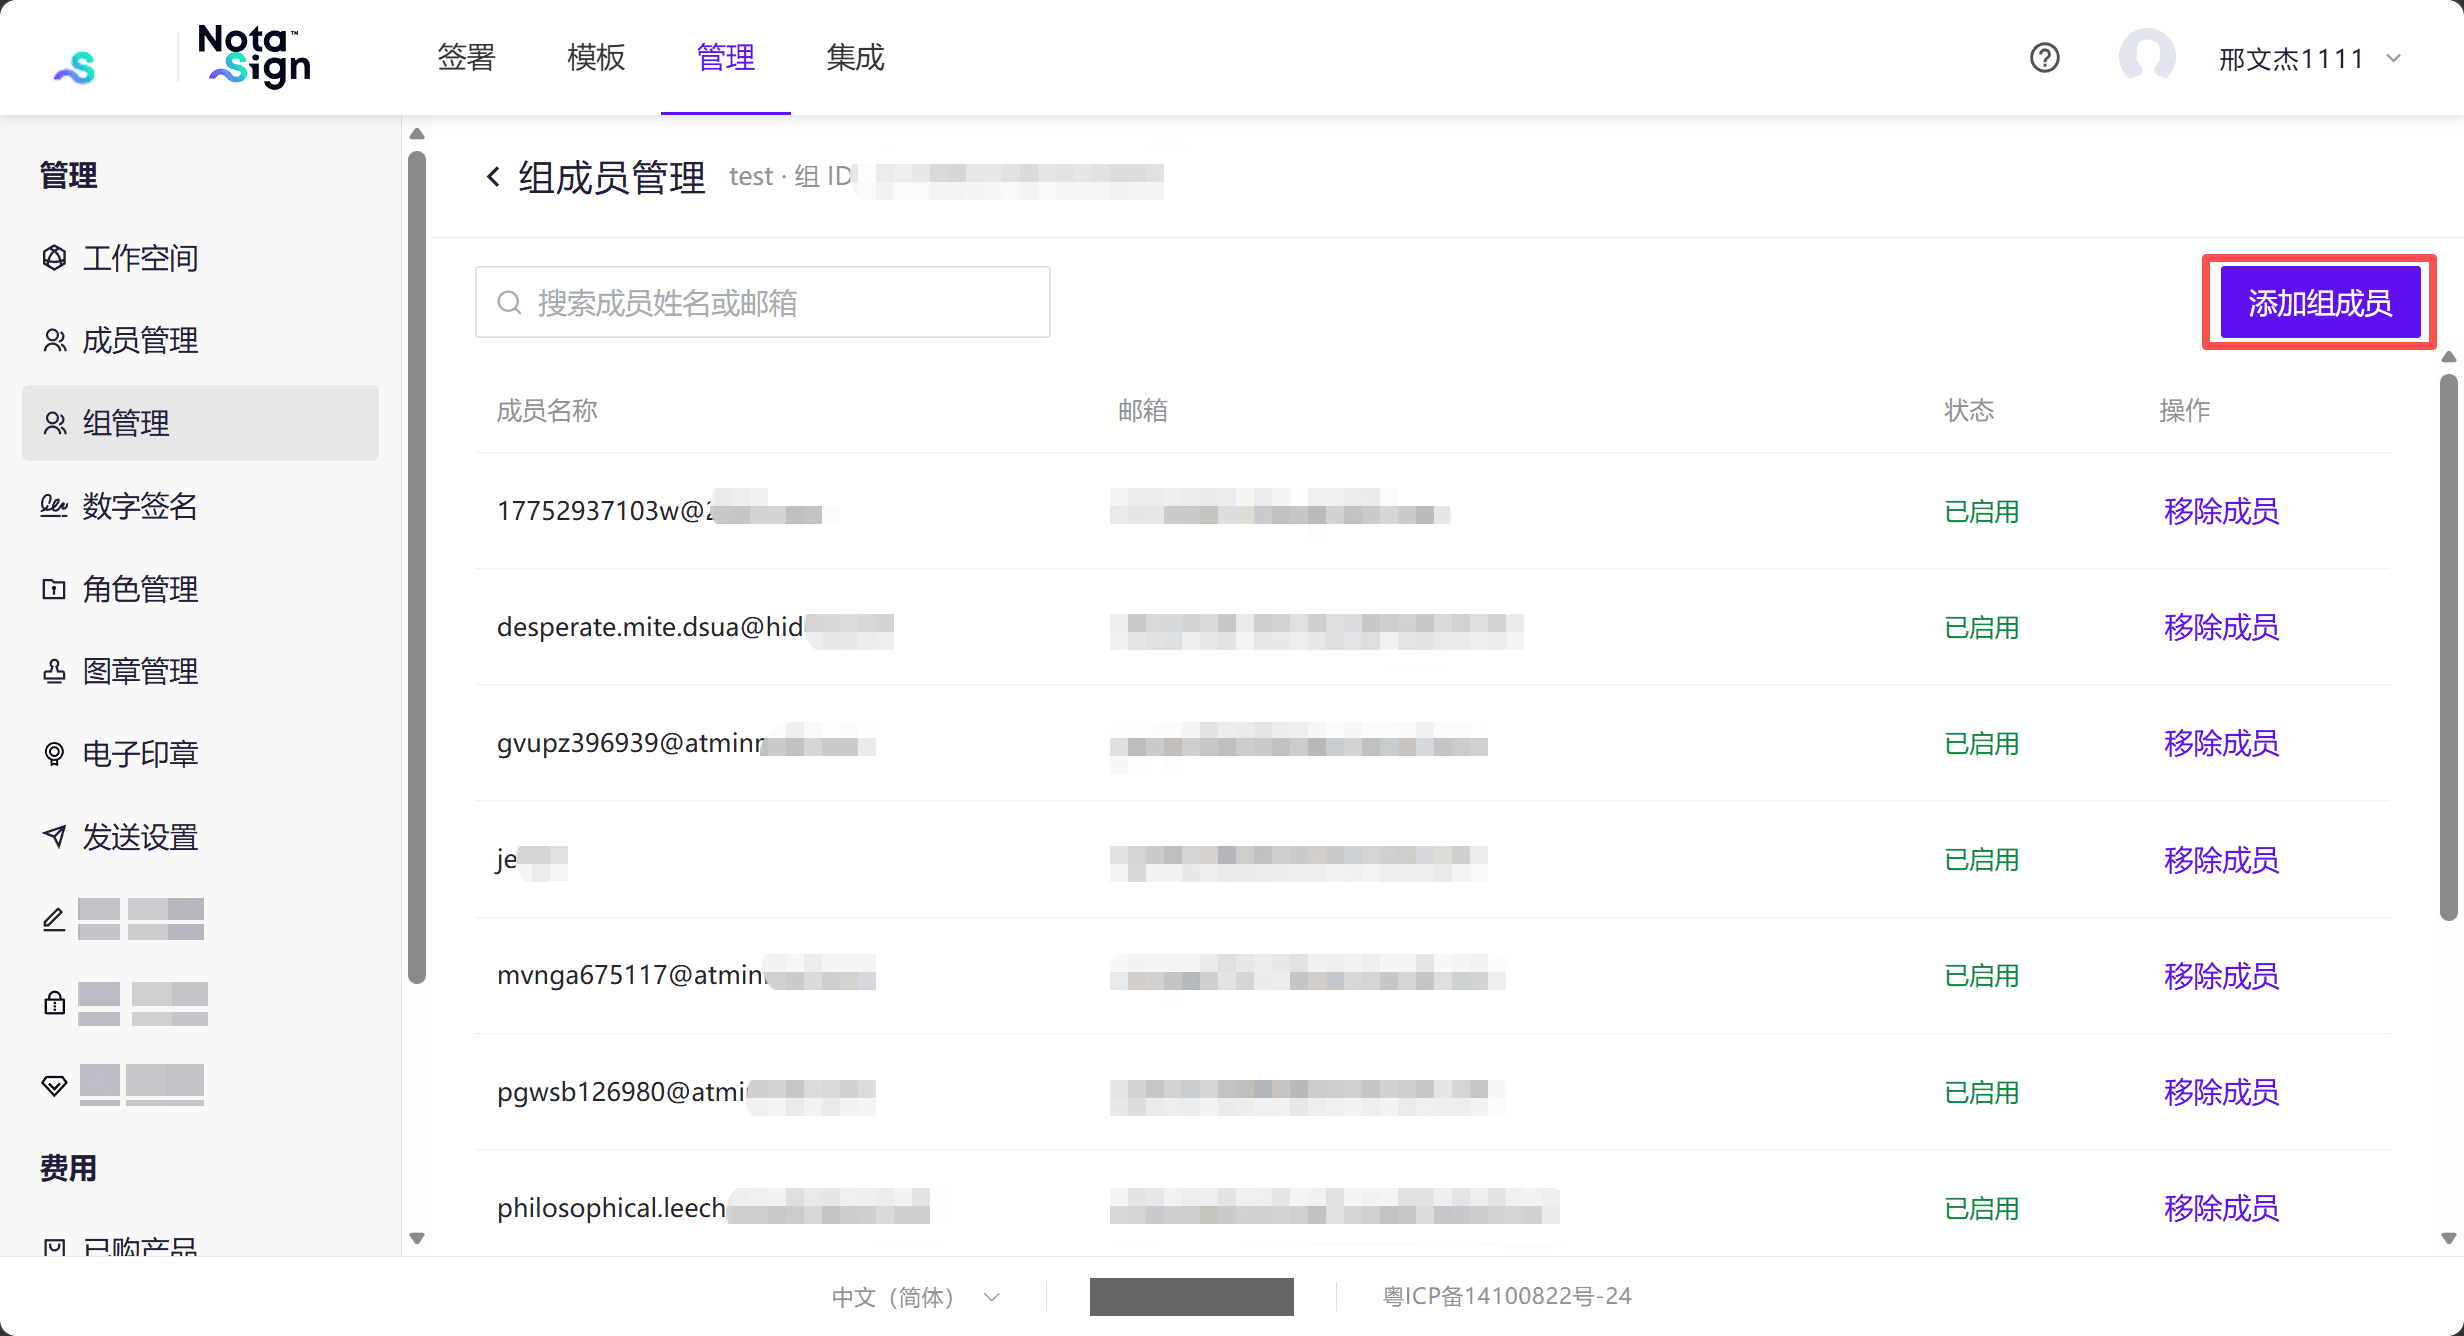
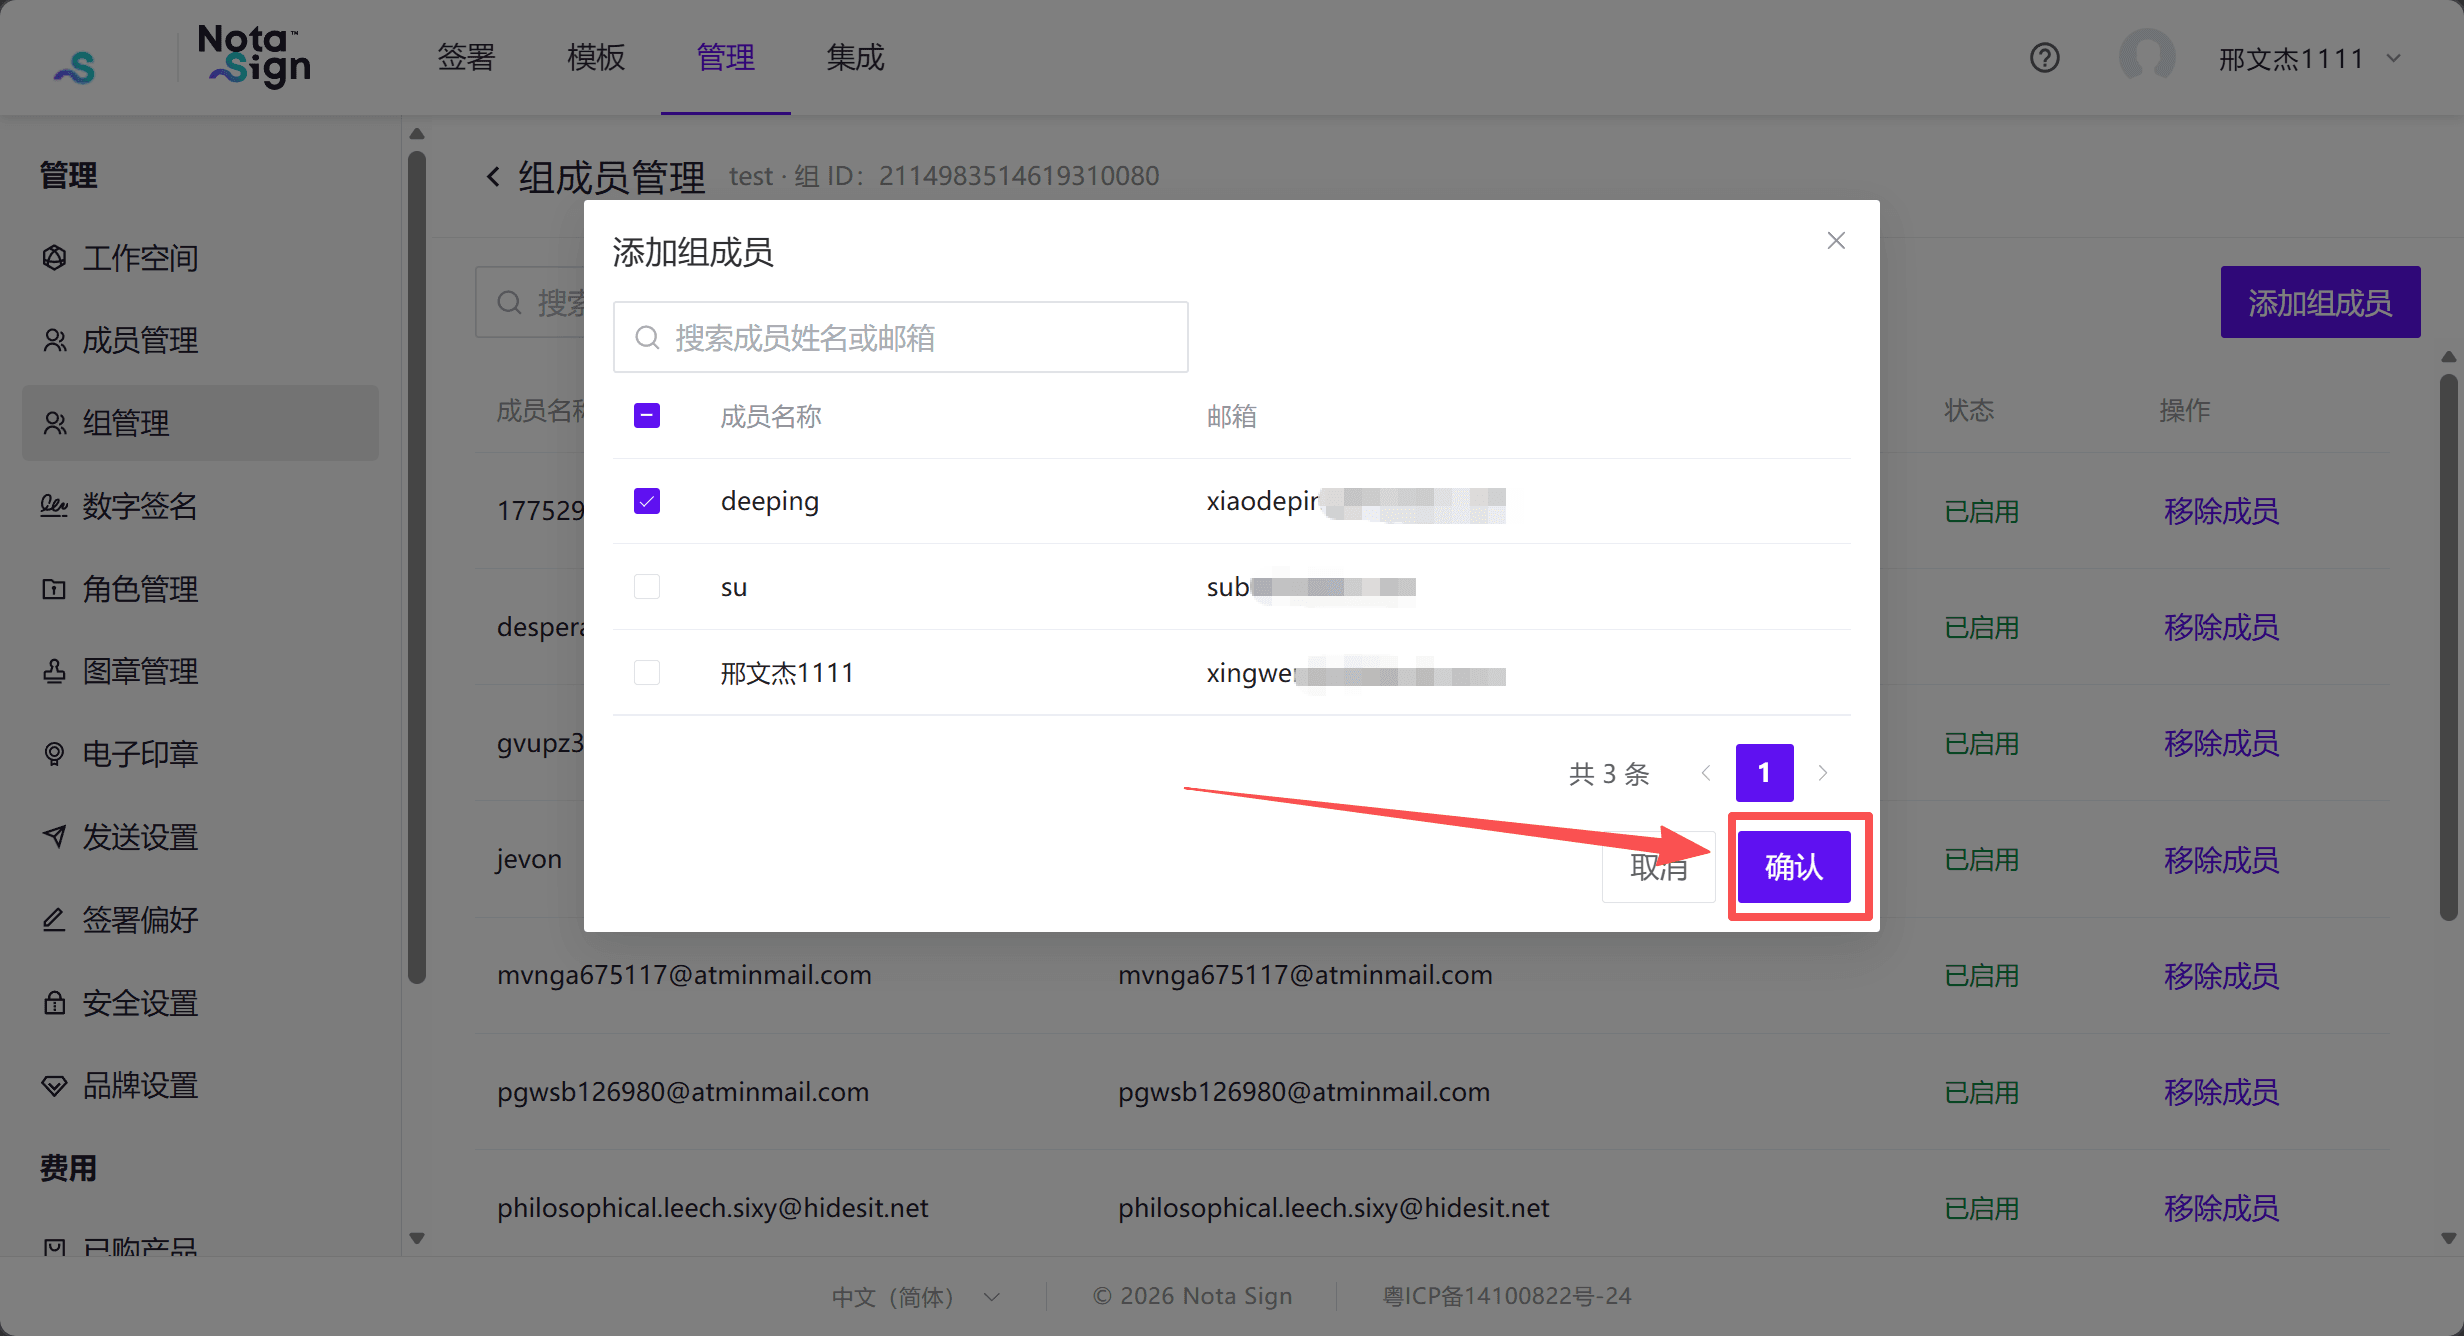
- Click [Add Group Members] and search by name or email address.
- Select the members to add and click [Confirm].
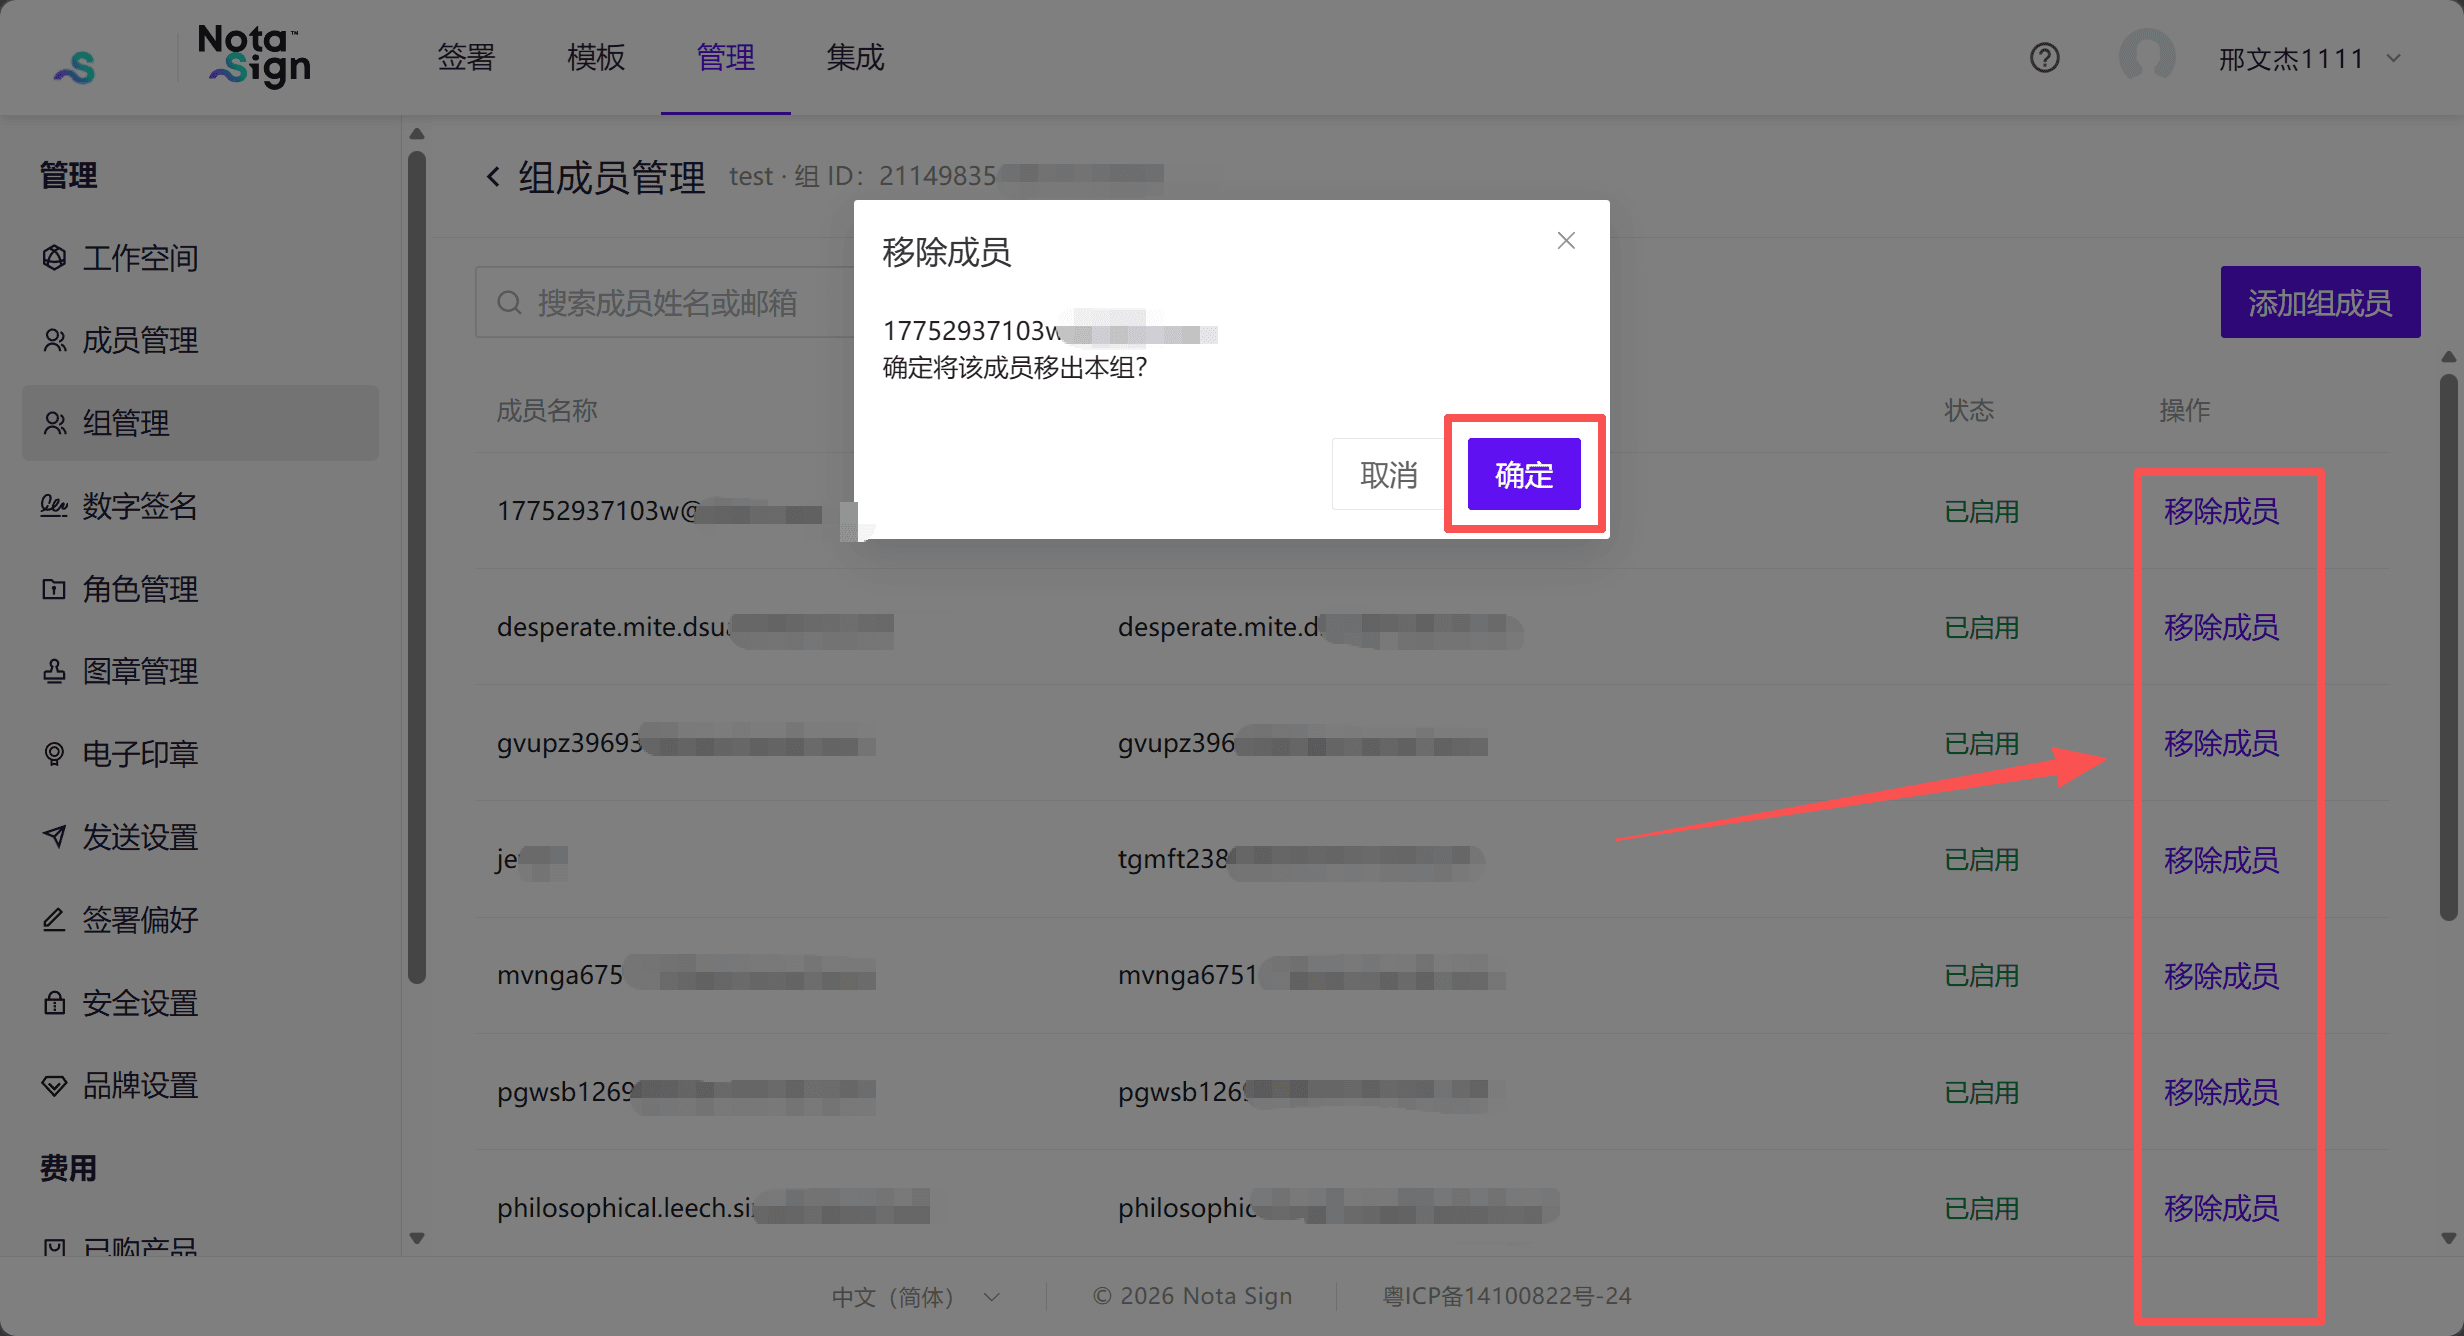
- To remove a member, click [Remove Member] next to that member and confirm.
Note: When adding a member in [Member Management], administrators can also select one or more regular groups in the [Group] field.
3. Edit and Delete Groups
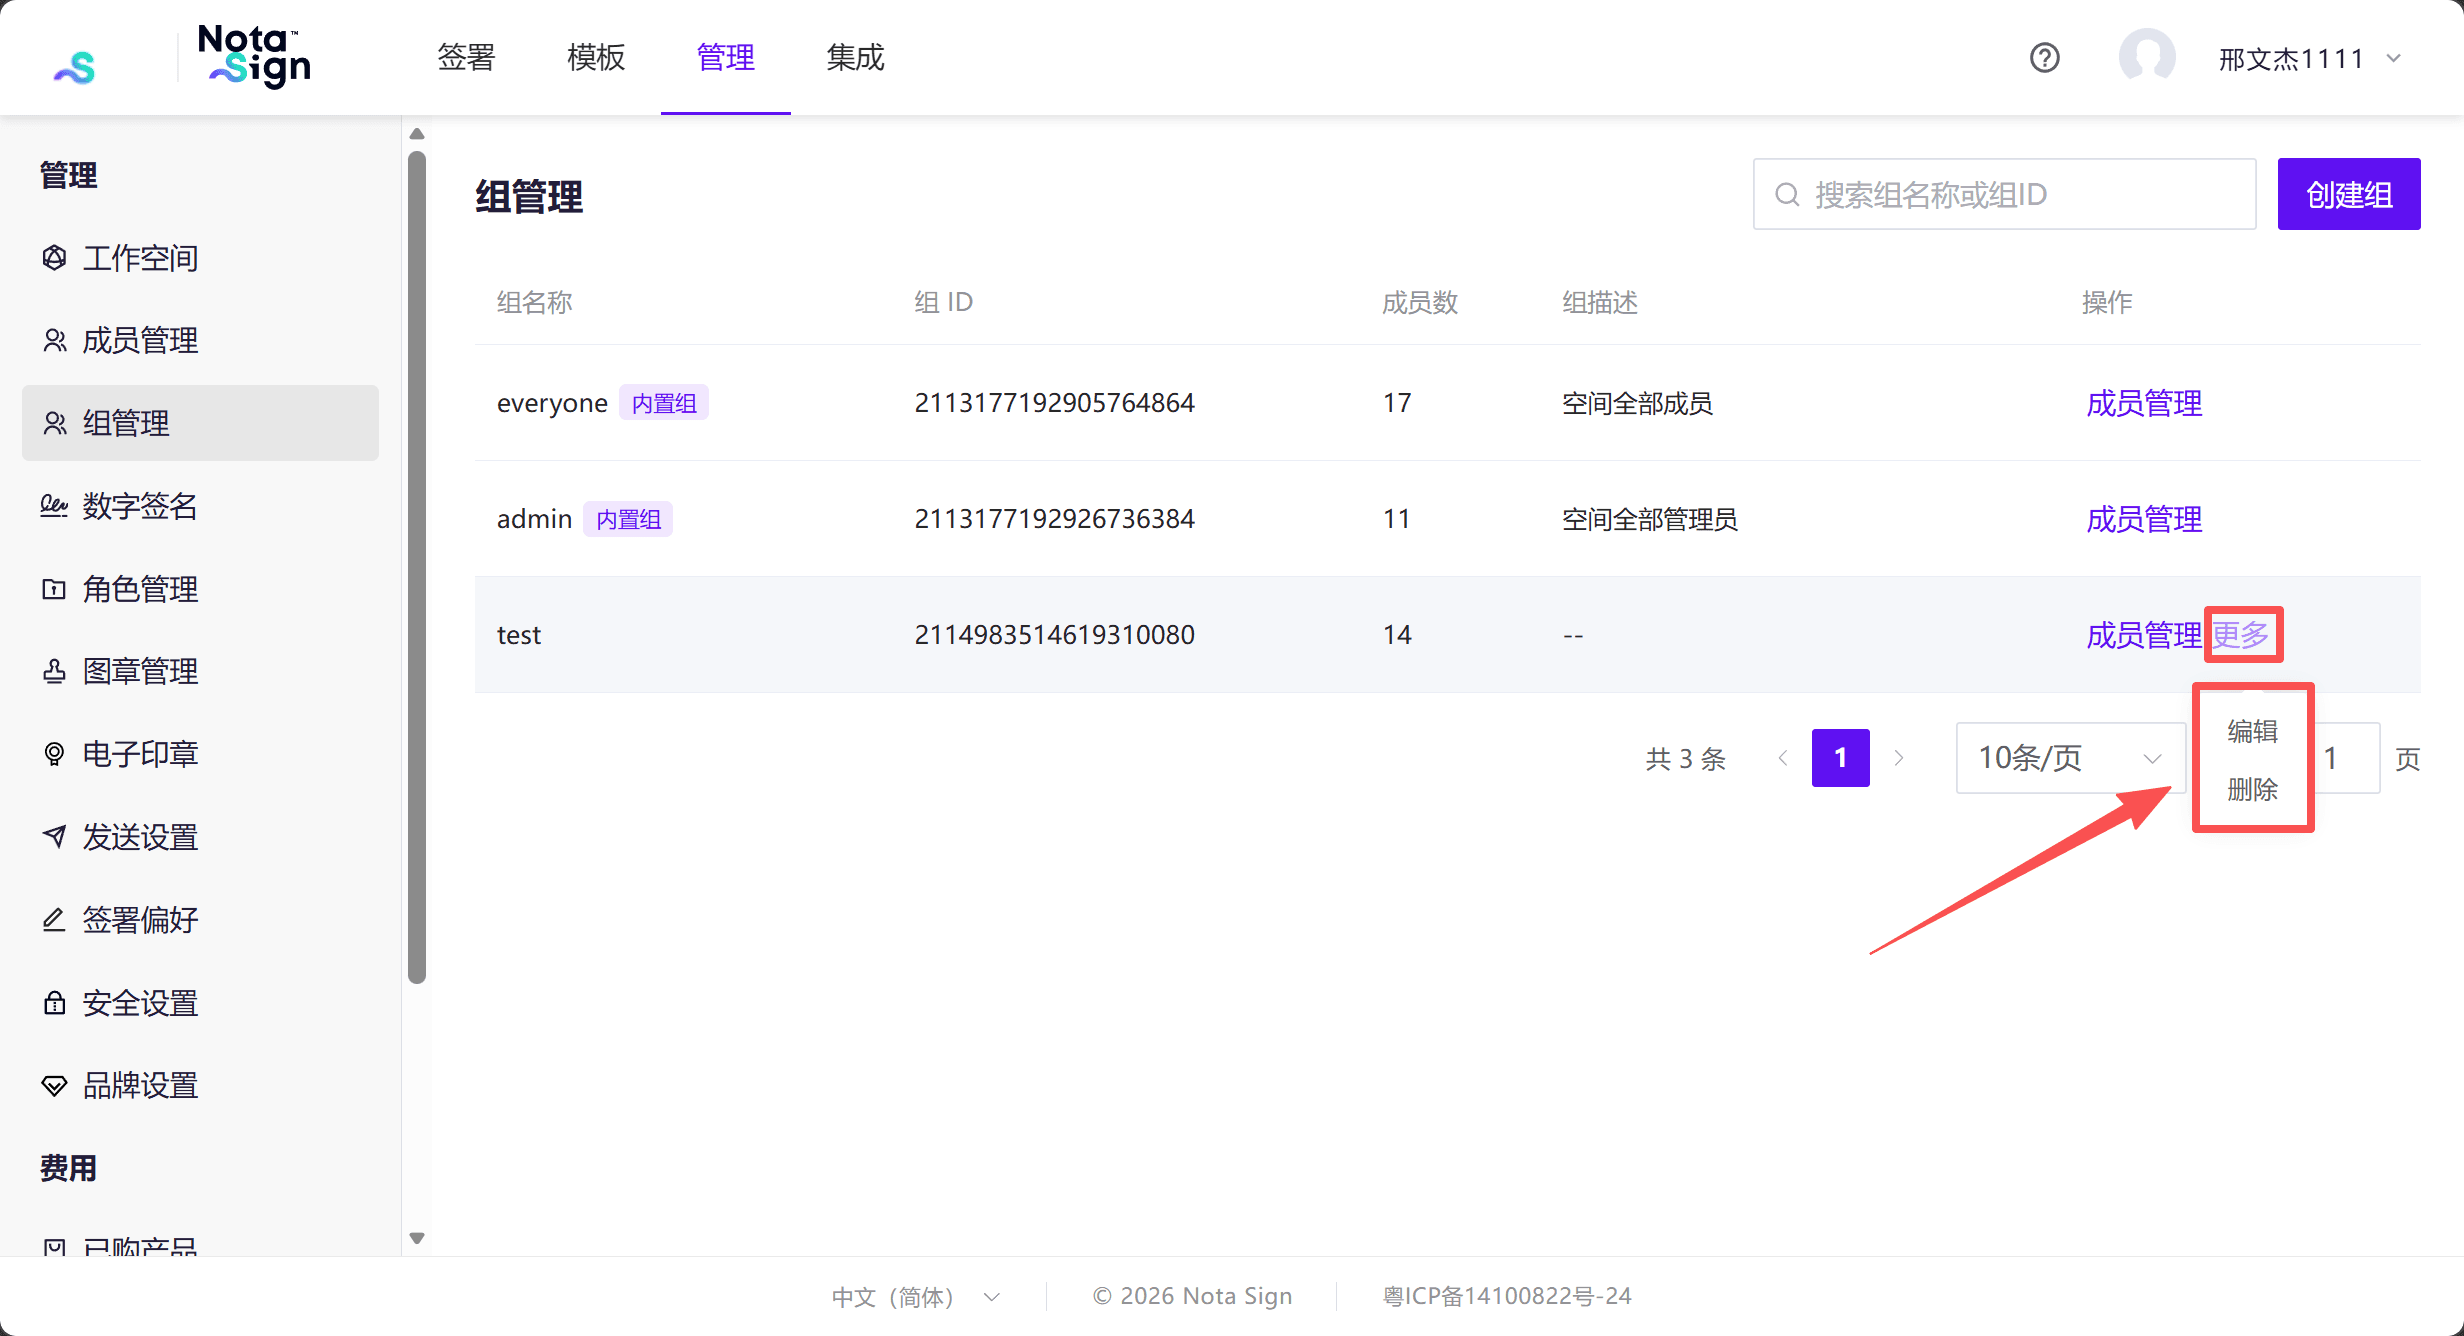
In the group list, click [More] next to the group to open the menu containing [Edit] and [Delete].
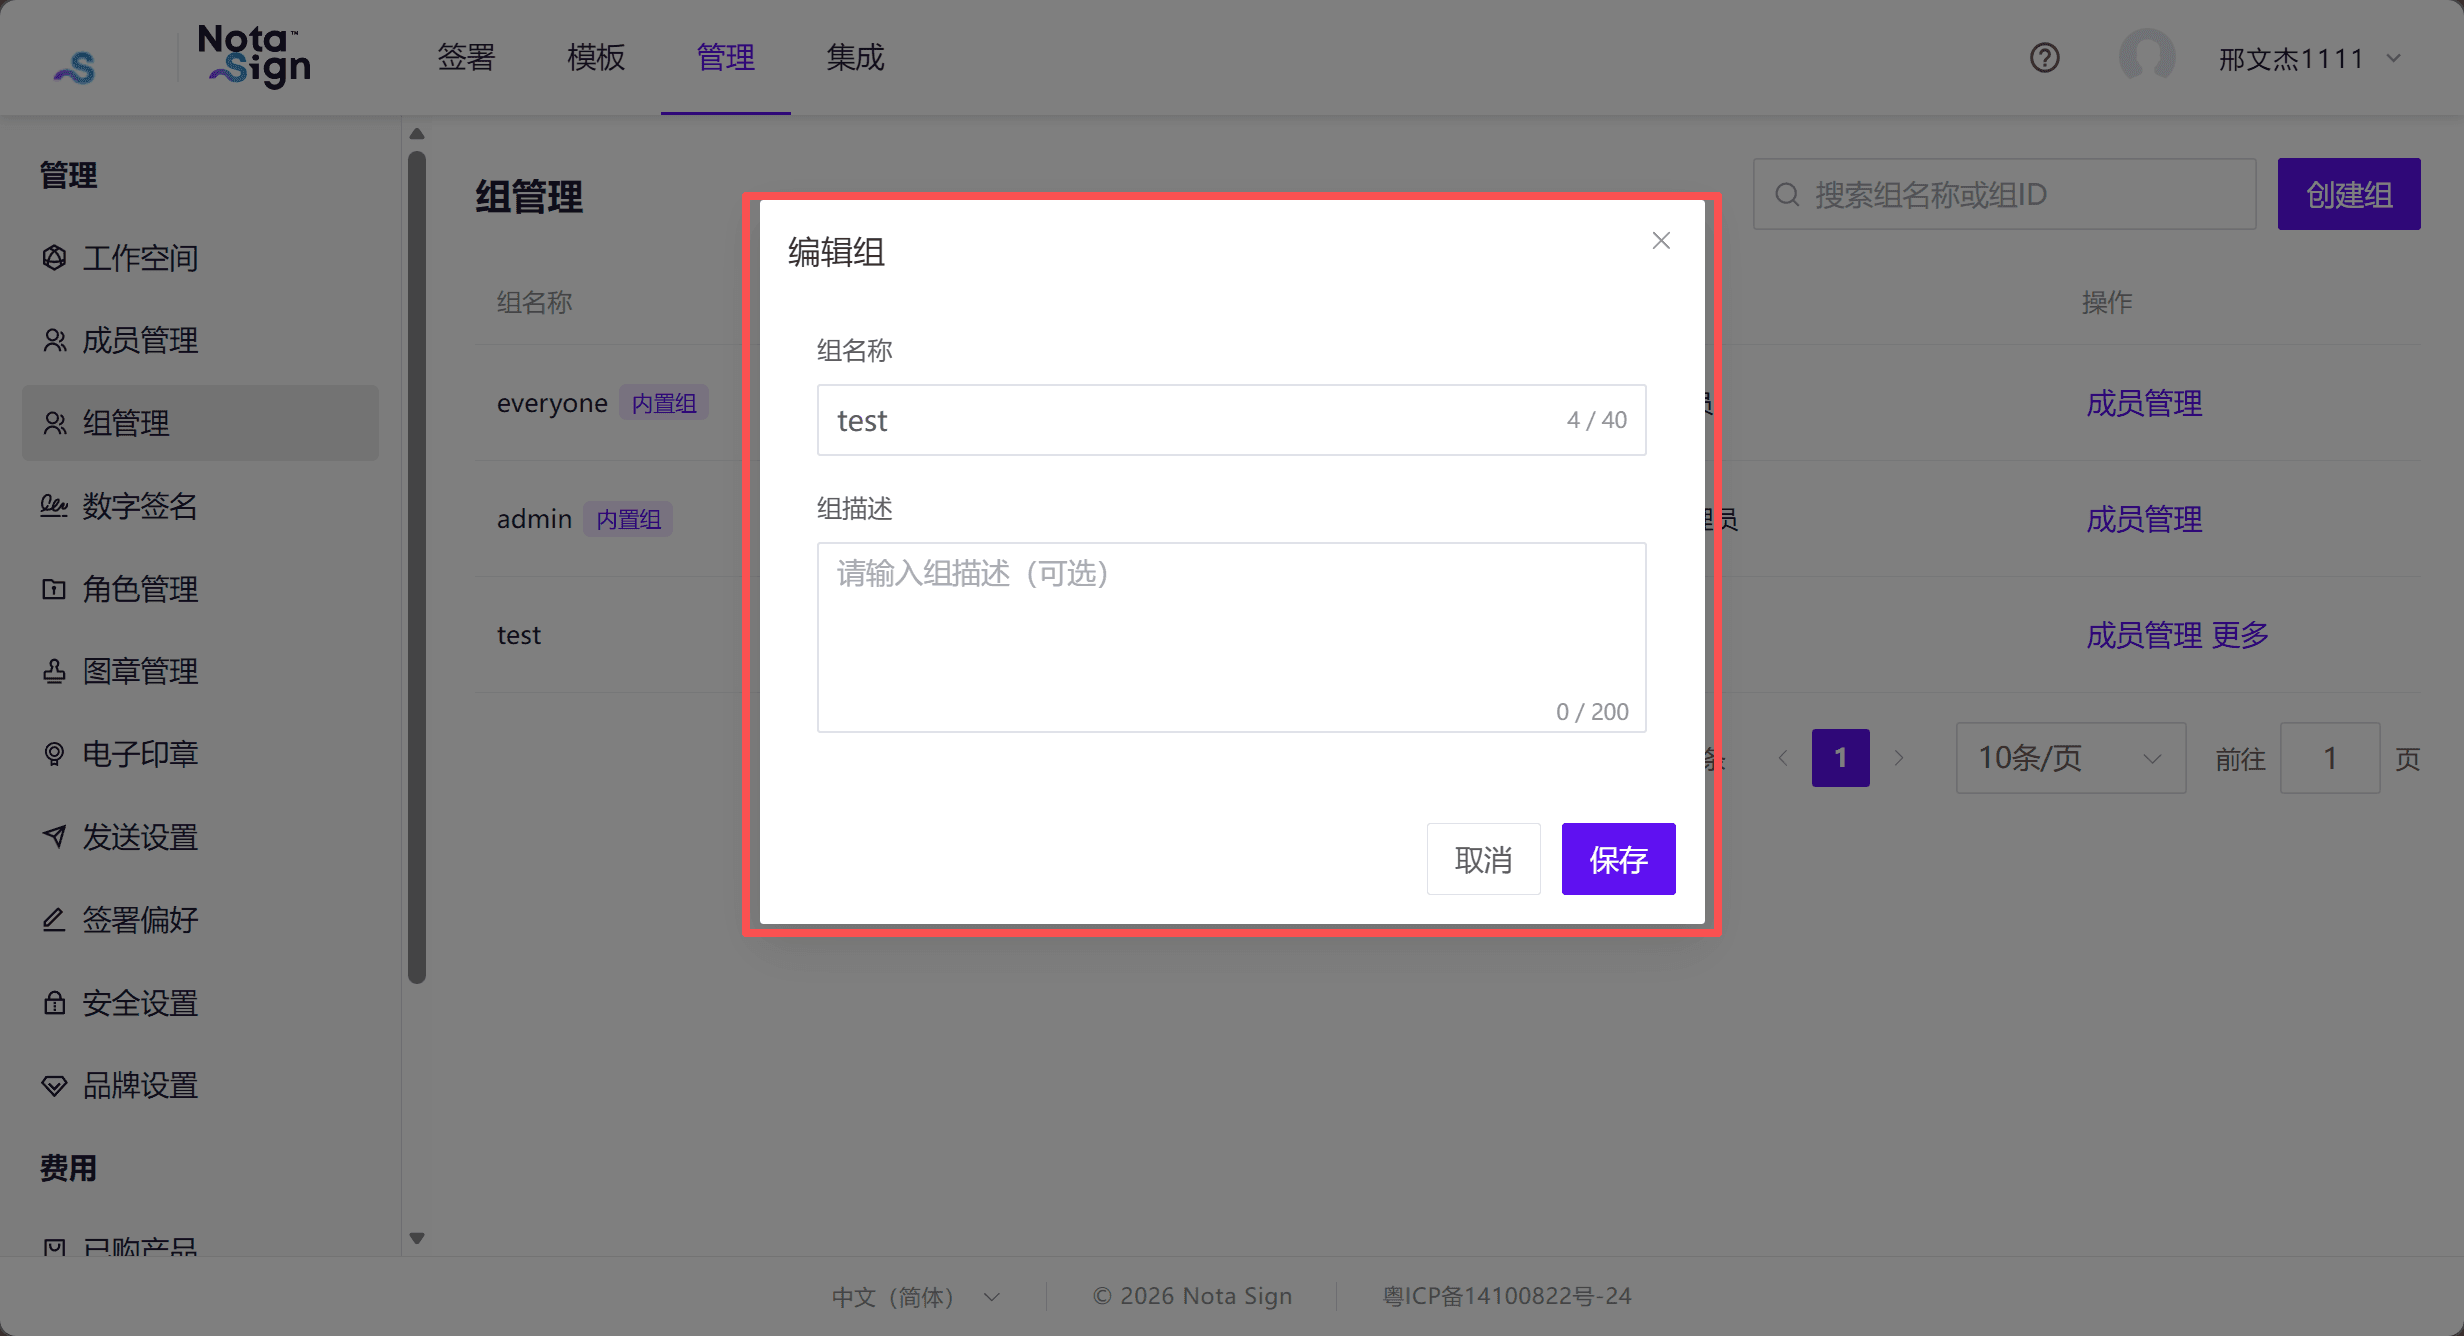
- Edit a group: Click [Edit], update the group name or description, and click [Save].
- Delete a group: Remove all group members first. Click [Delete], review the message, and click [Confirm Delete].
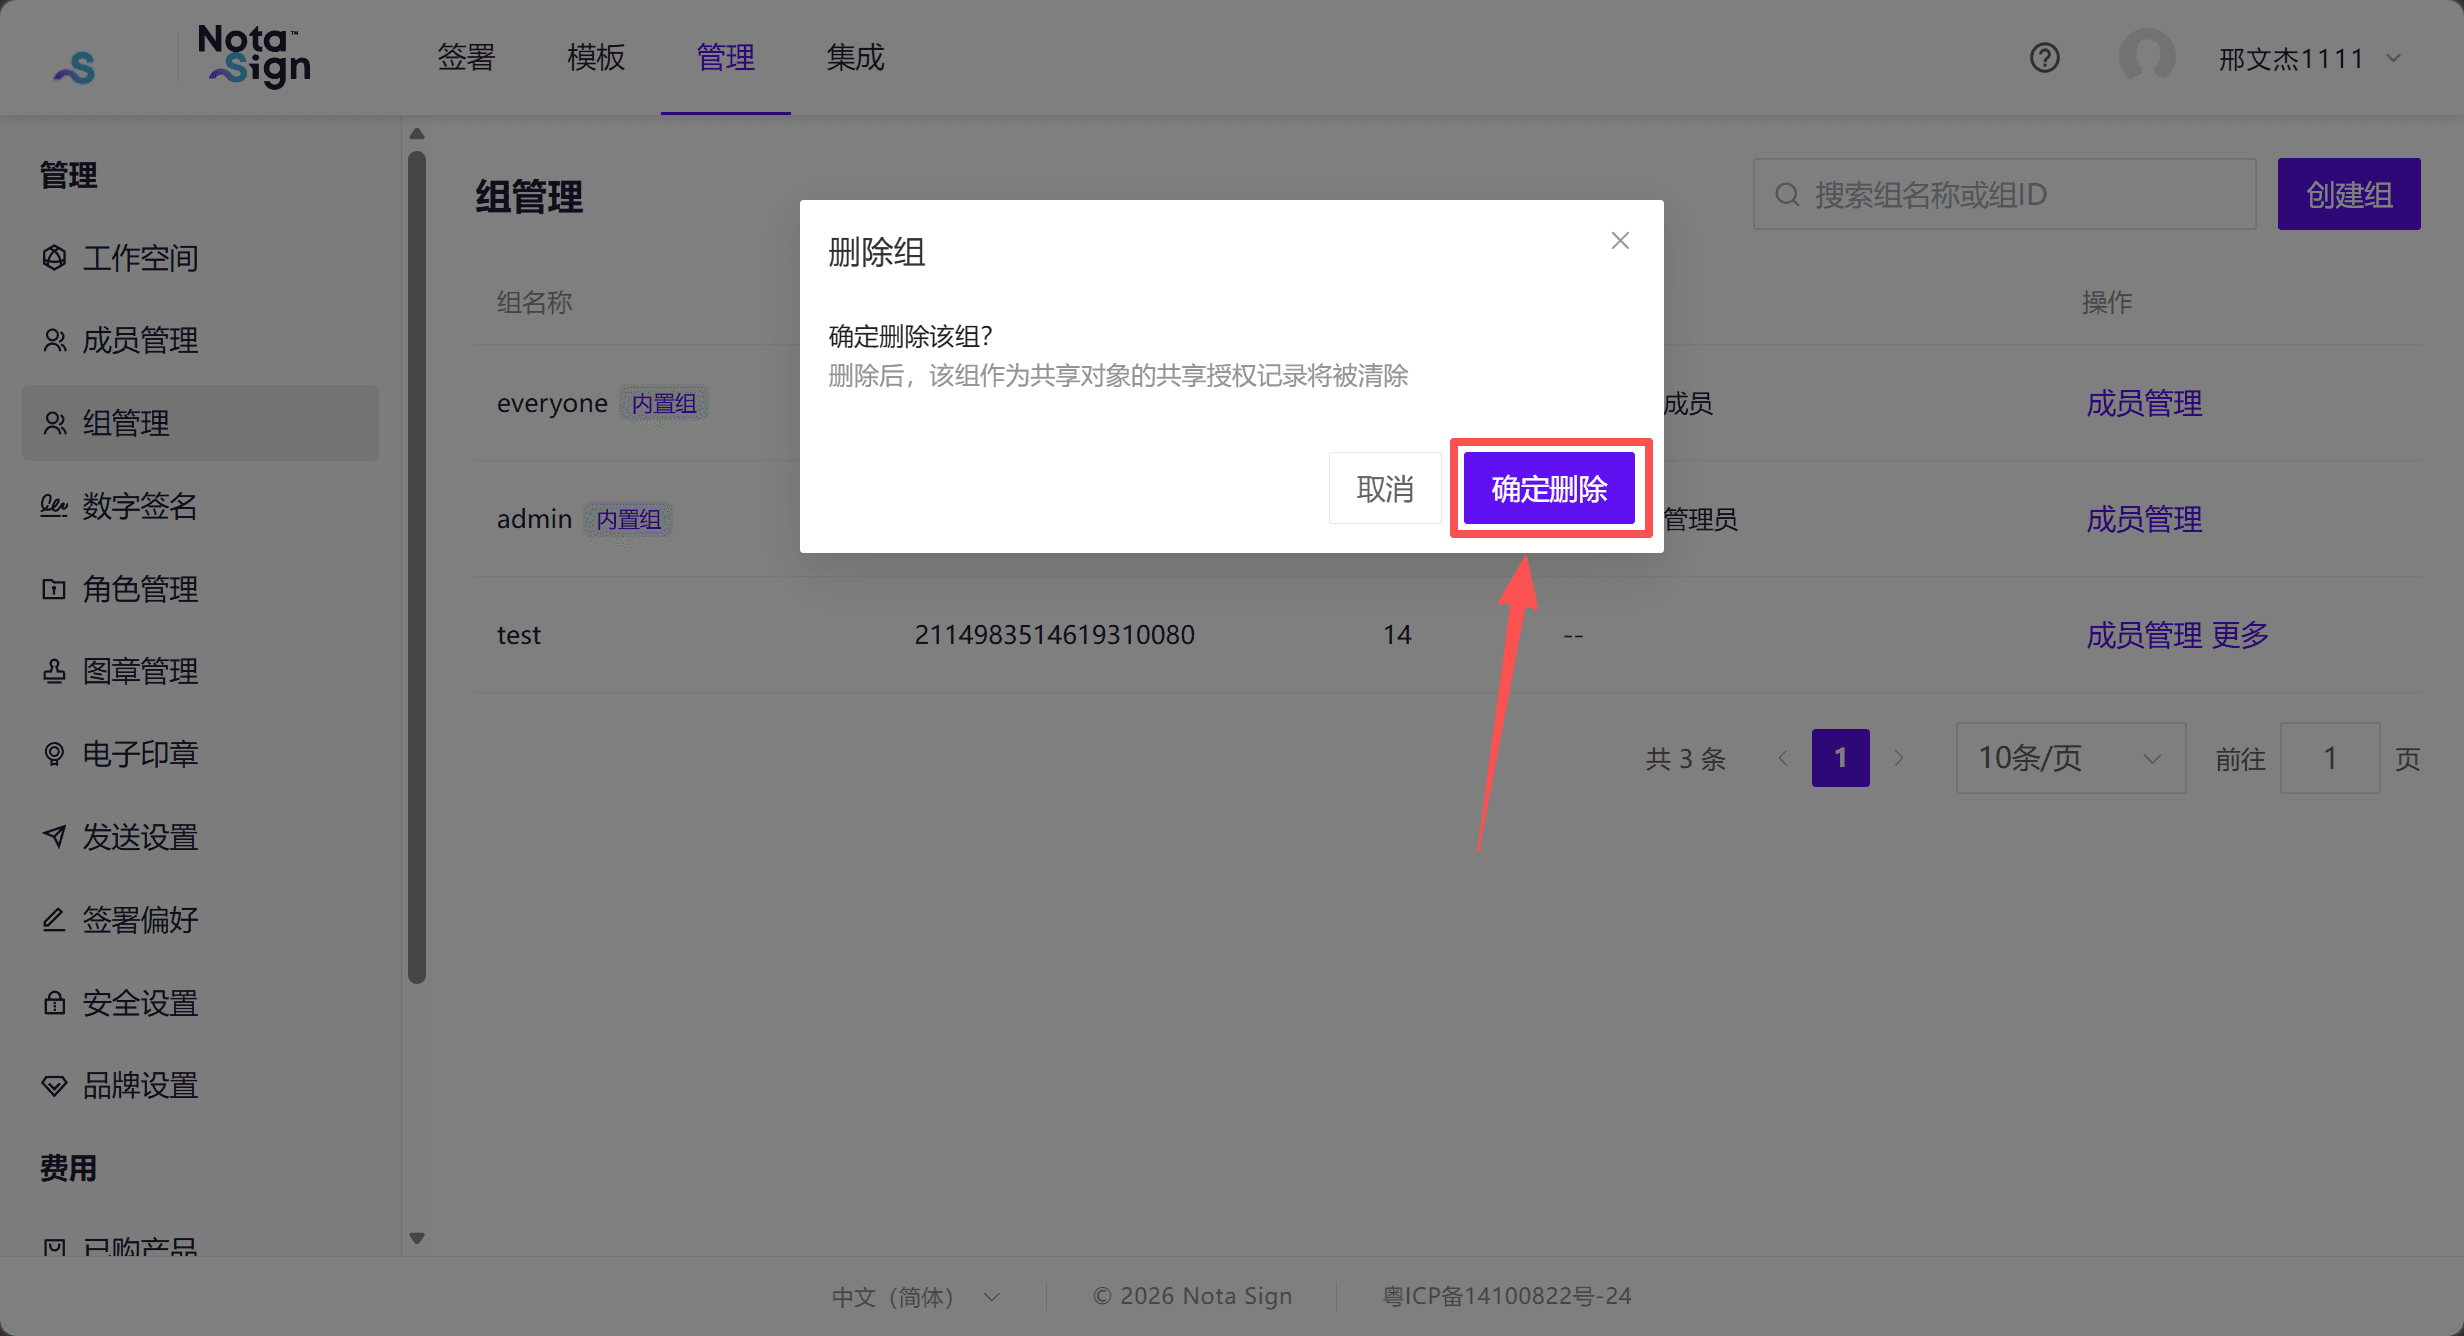
Note: Deleting a group removes the sharing authorizations granted to that group. Envelopes and member accounts are not affected.
4. View Built-in Groups
The system automatically maintains two built-in groups:
- everyone: Includes all members of the current workspace.
- admin: Includes members with the Admin role in the current workspace.
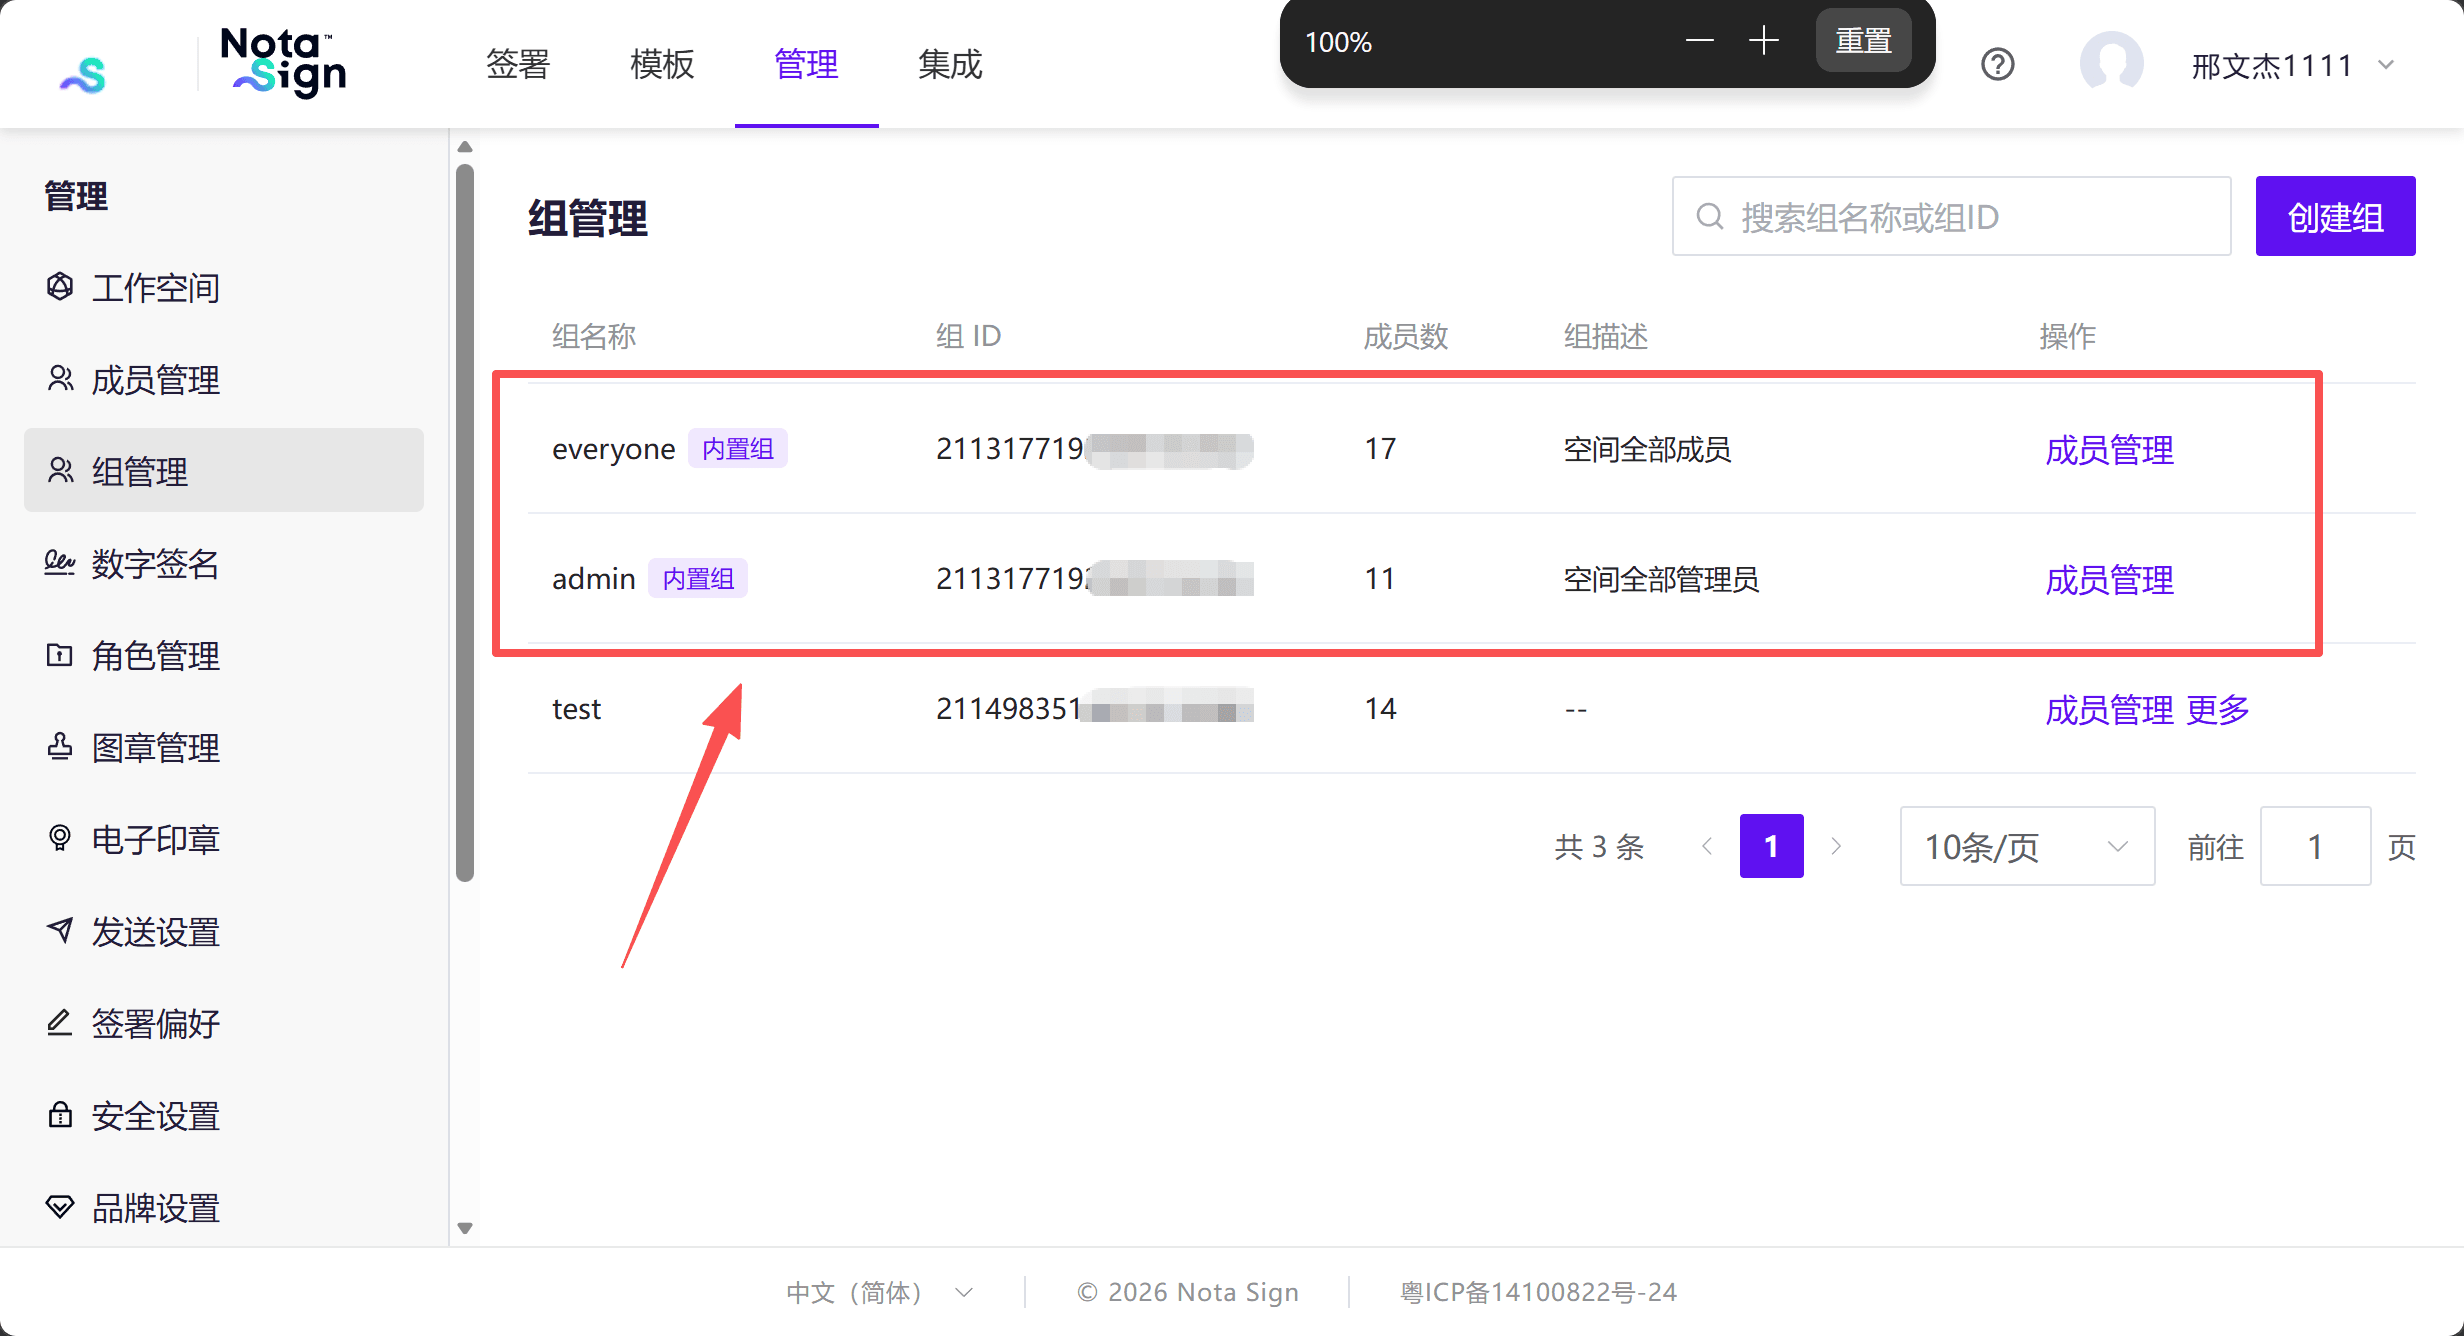
Administrators can click [Member Management] to view built-in group members, but cannot edit or delete these groups, or manually add or remove their members.
3. Share a Member’s Envelopes with a Group
1. Select Sharing Recipients
- Go to [Admin] → [Member Management].
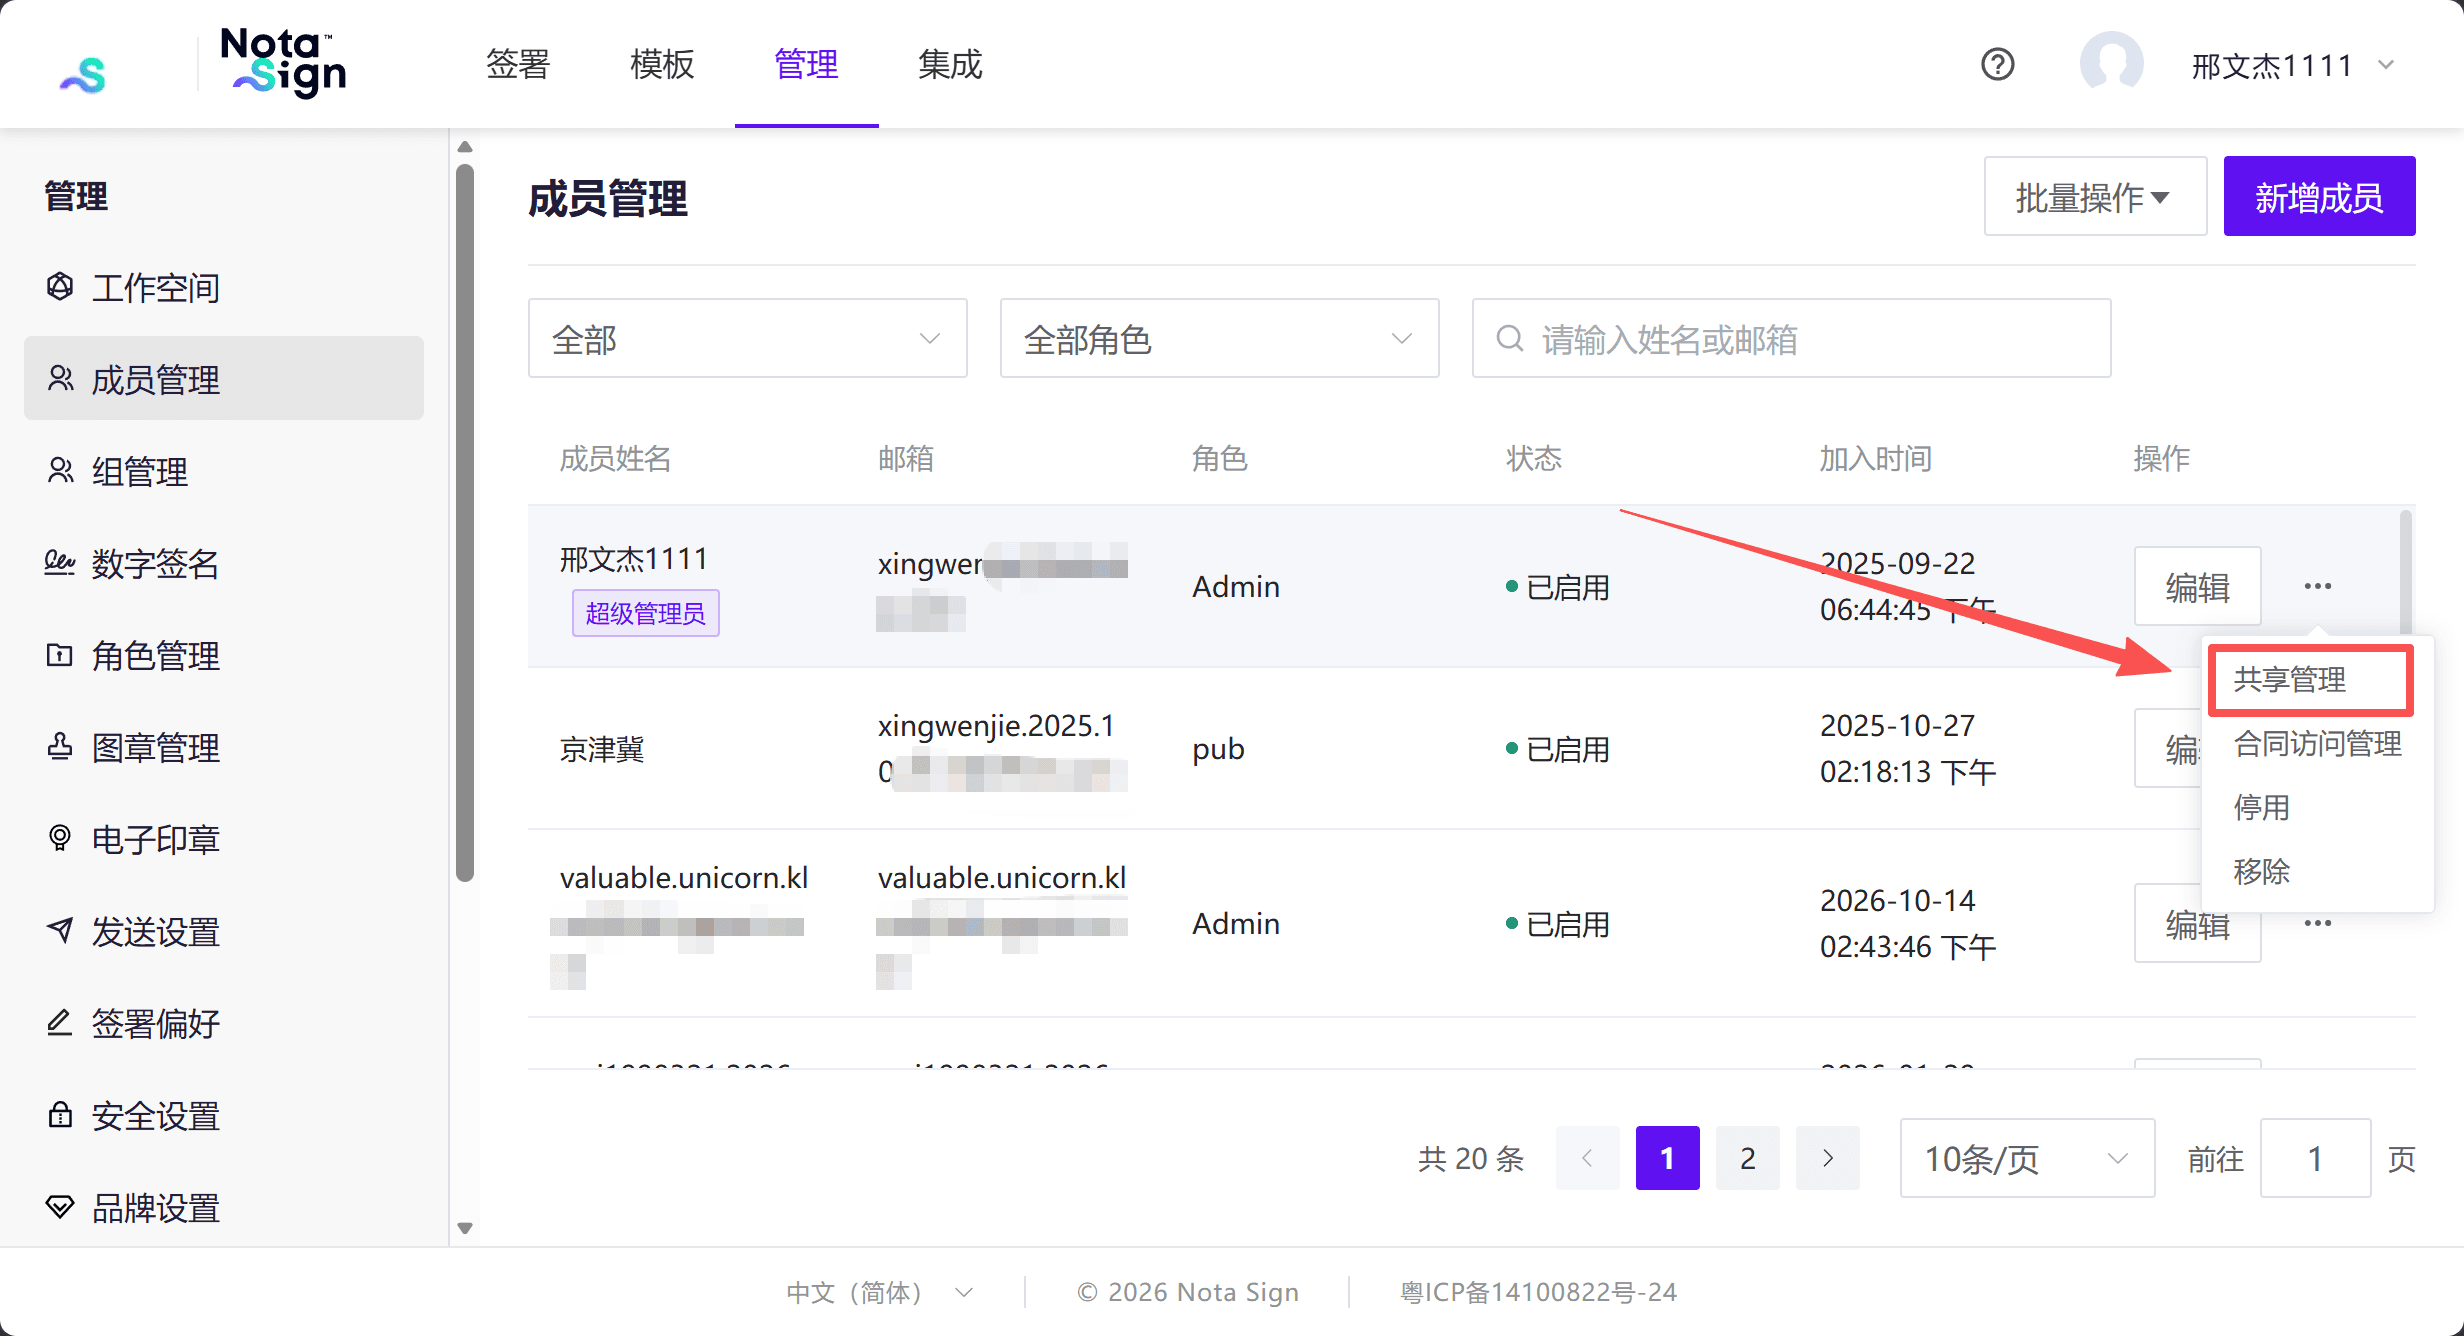
- Find the member whose envelopes you want to share, then click […] → [Sharing Management] in the action column.
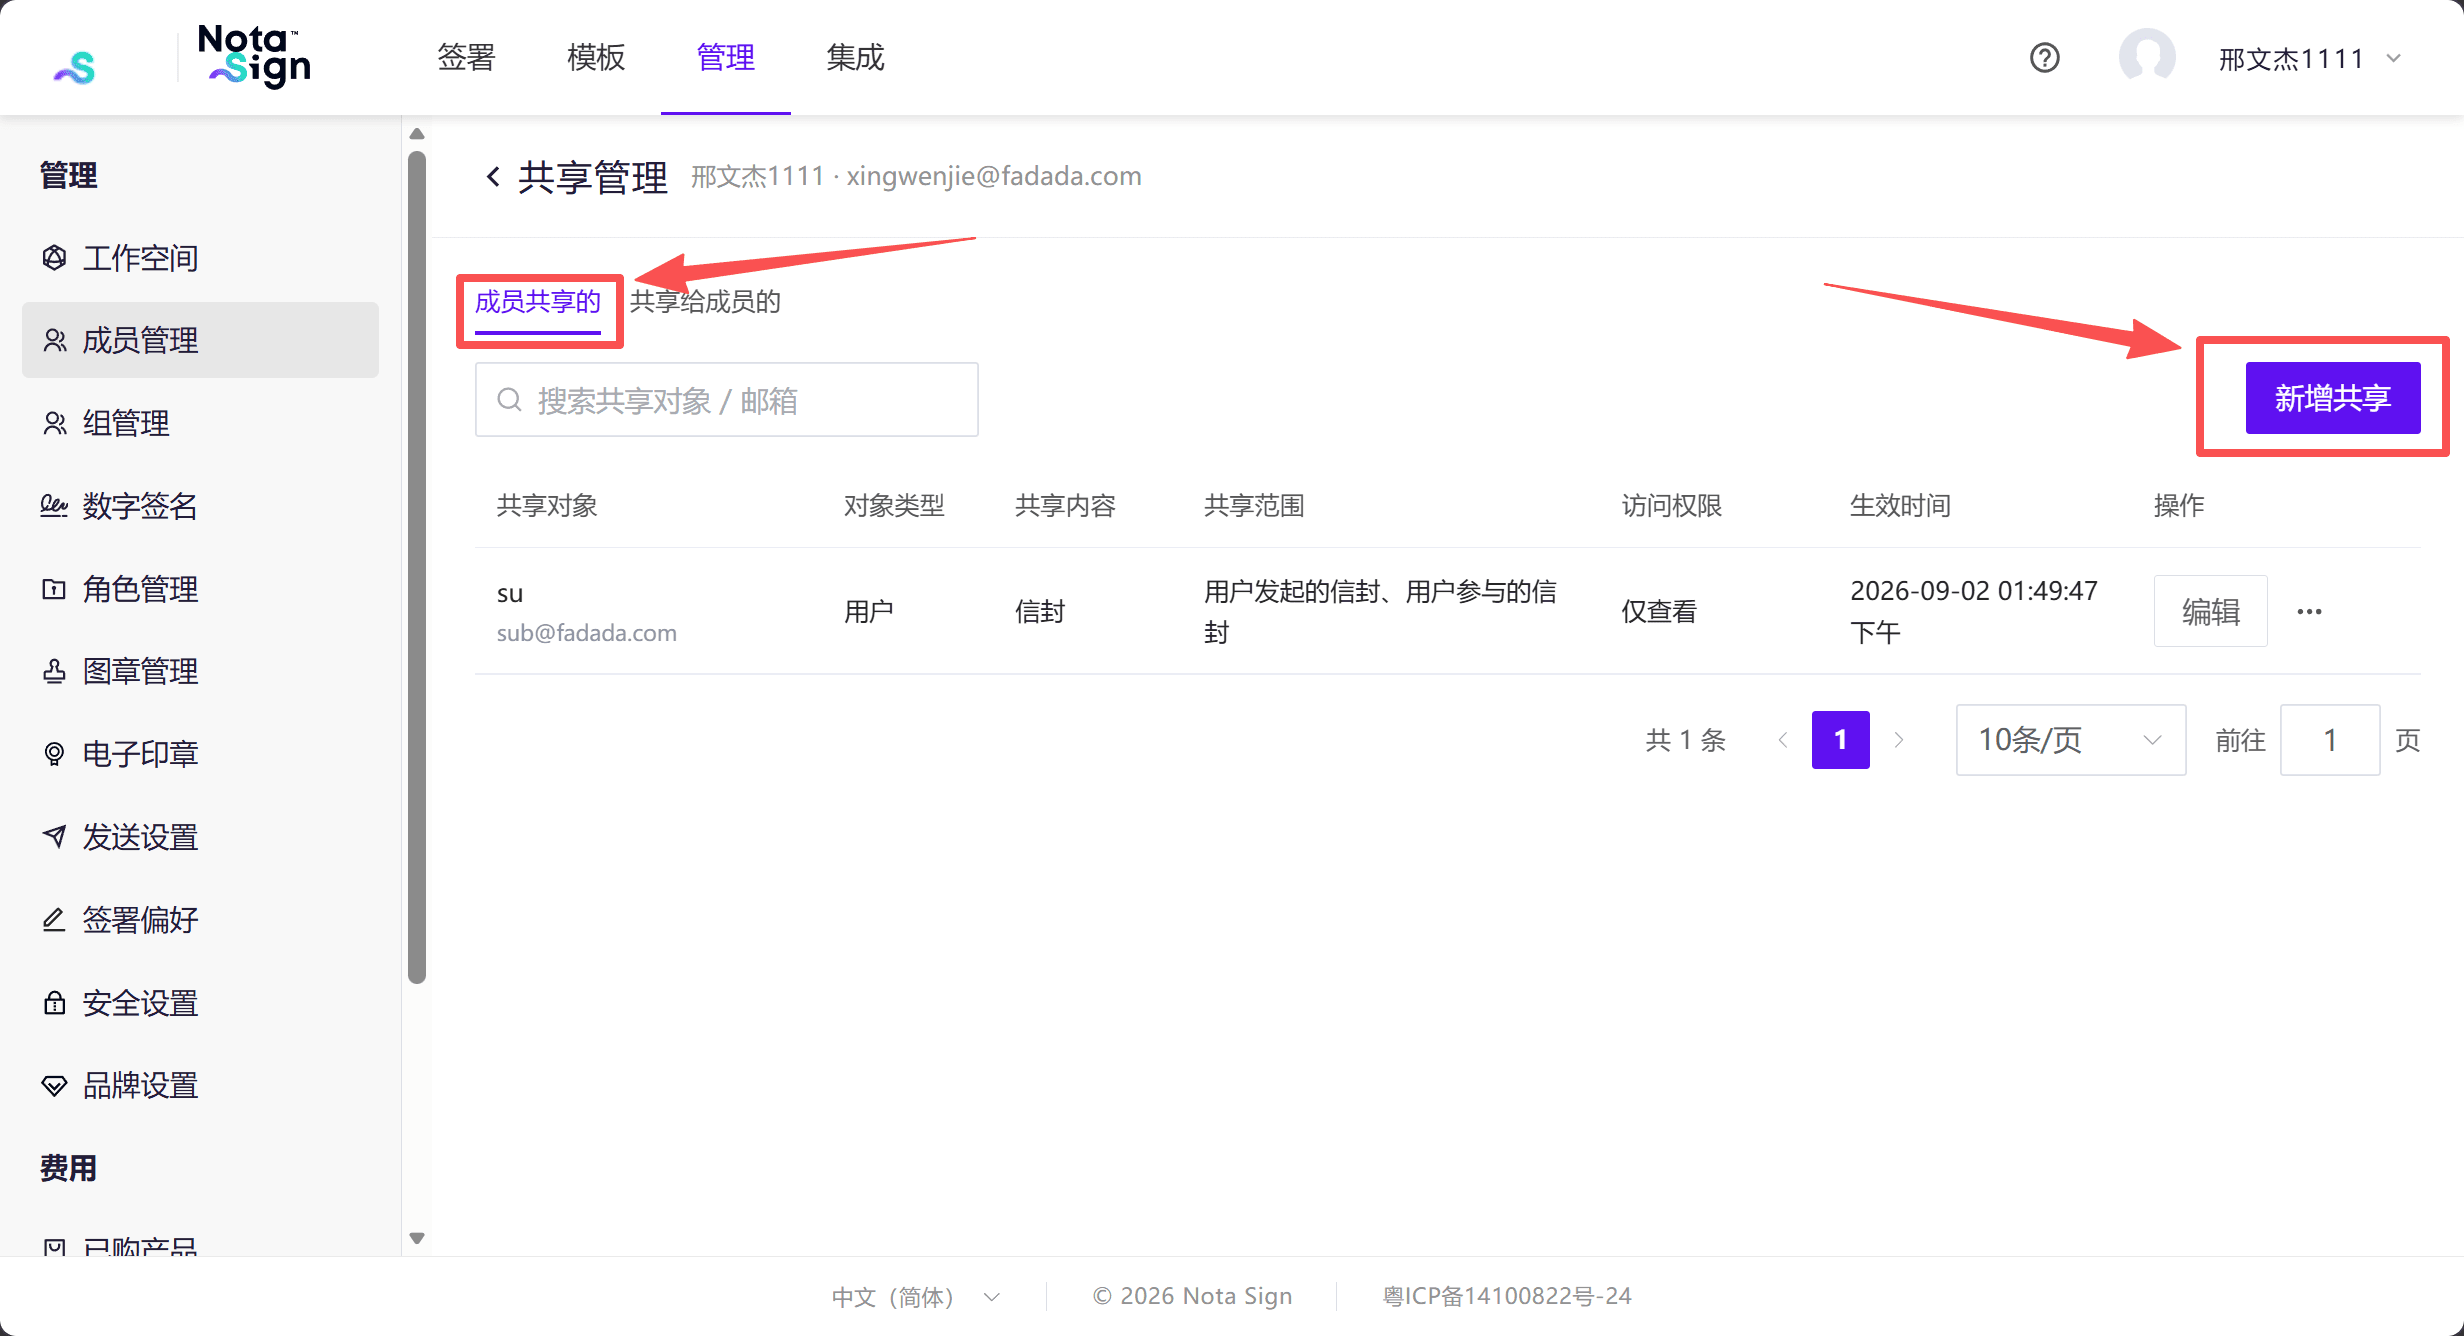
- Open the [Shared by Member] tab and click [Add Sharing].
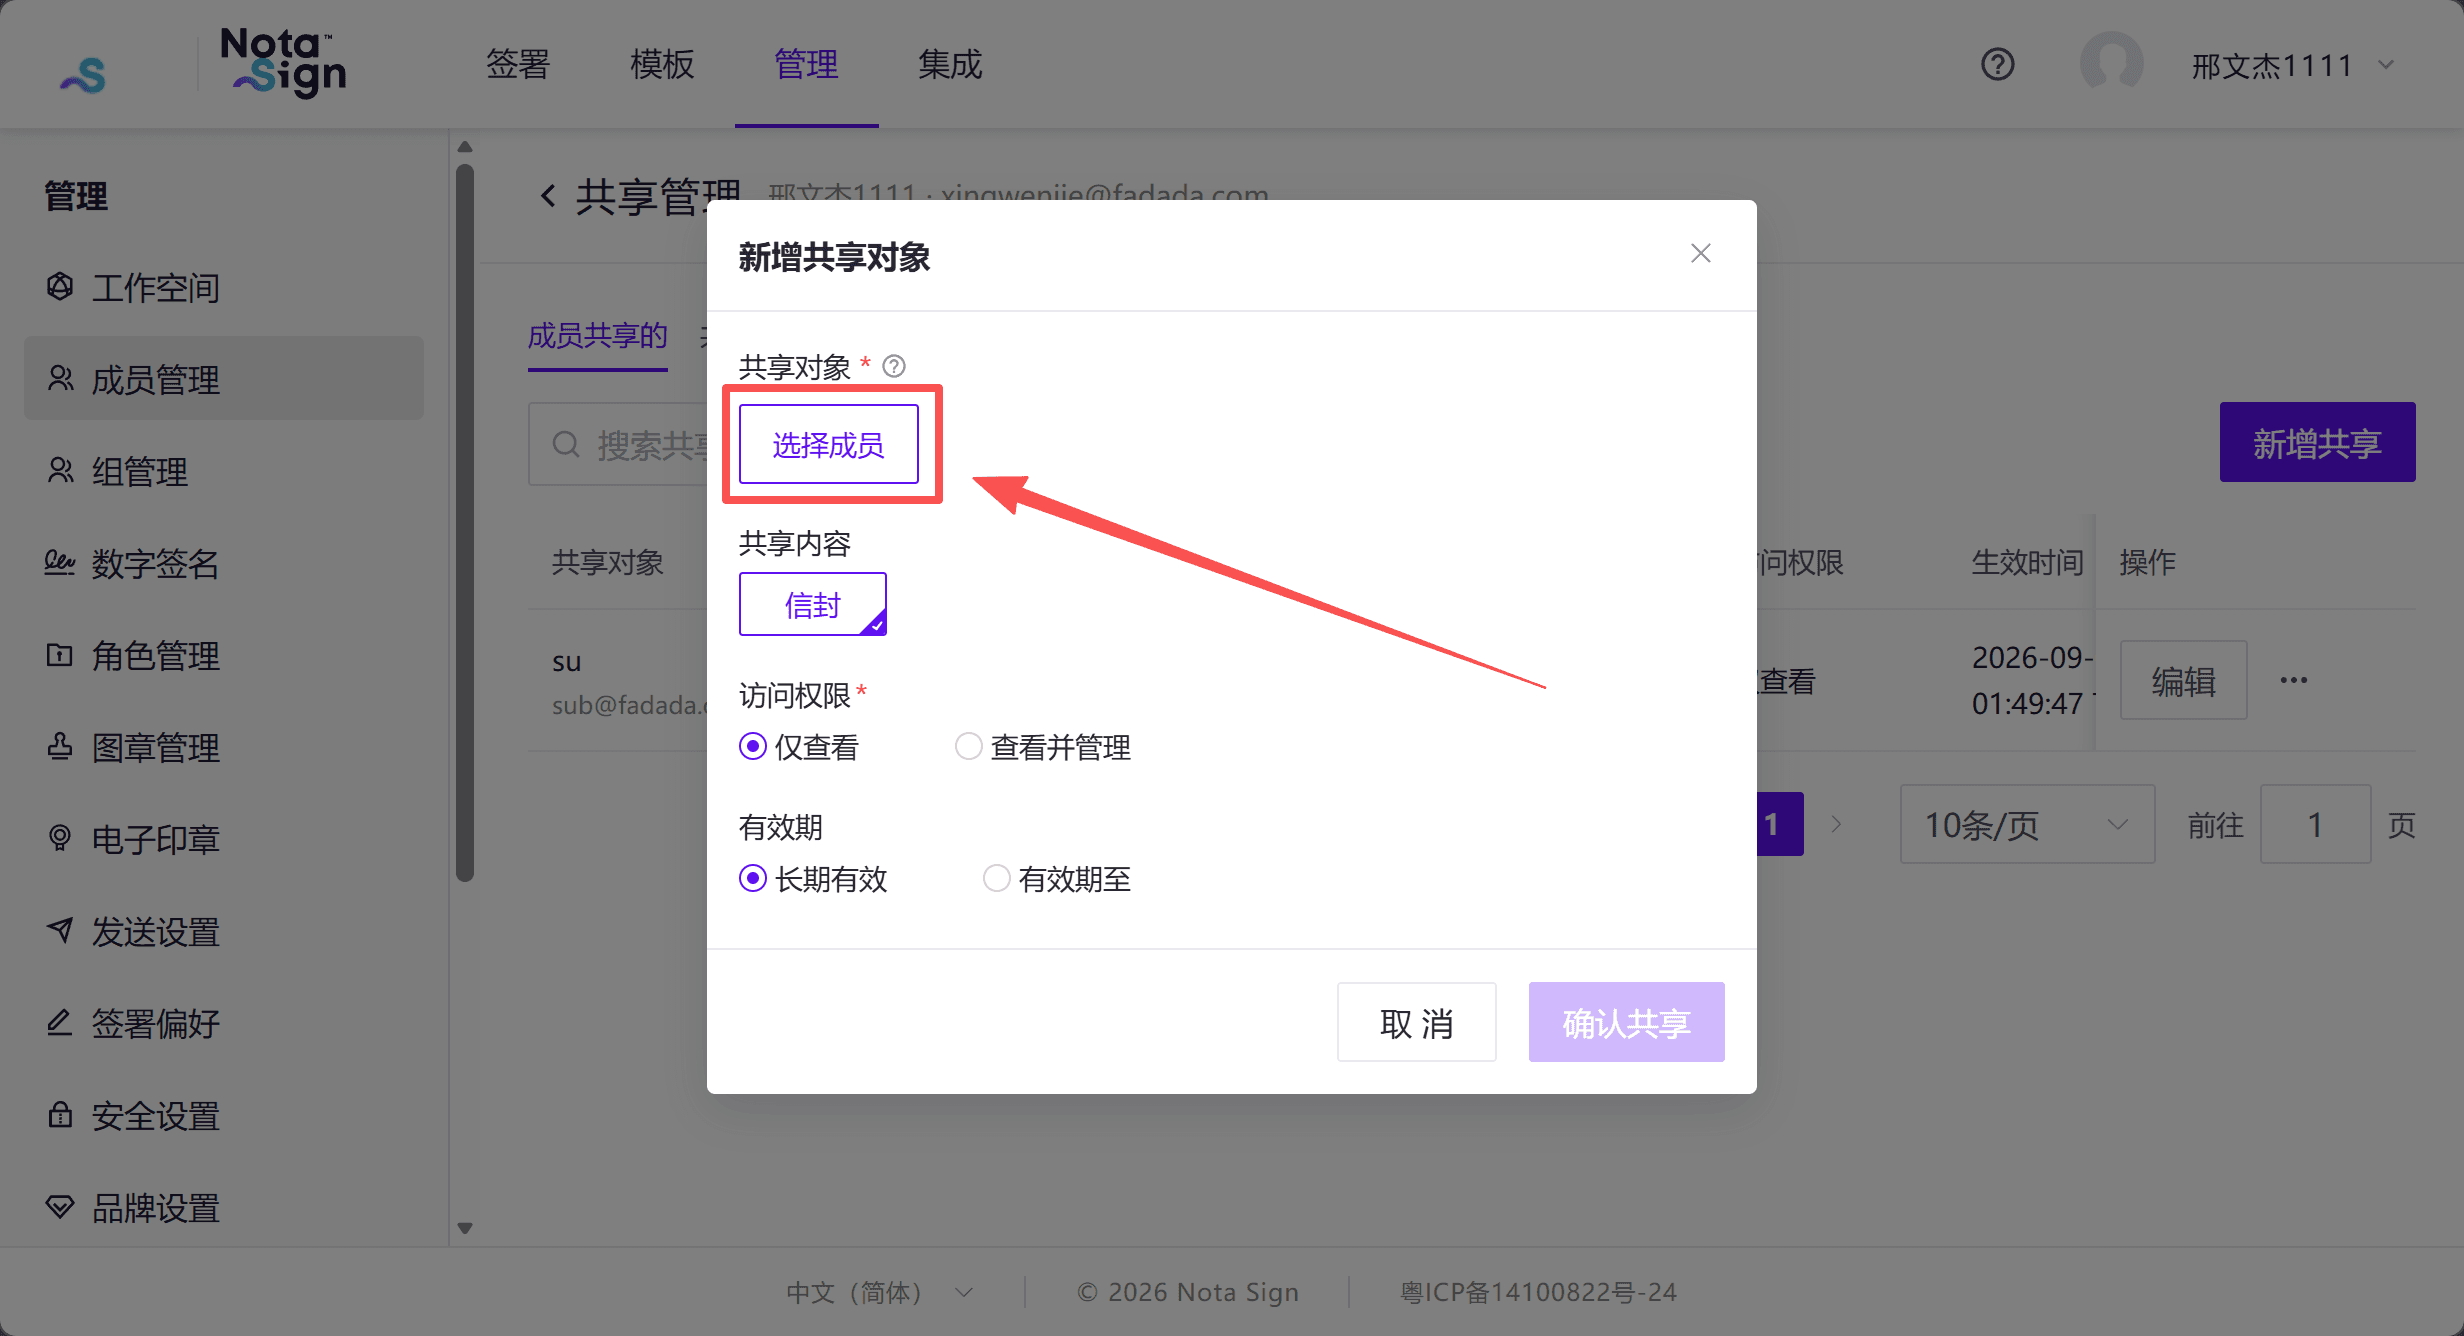
- Click [Select Members] to select sharing recipients.
- In the sharing recipient dialog, switch to the [Groups] tab. Search for and select one or more groups, then click [Confirm].
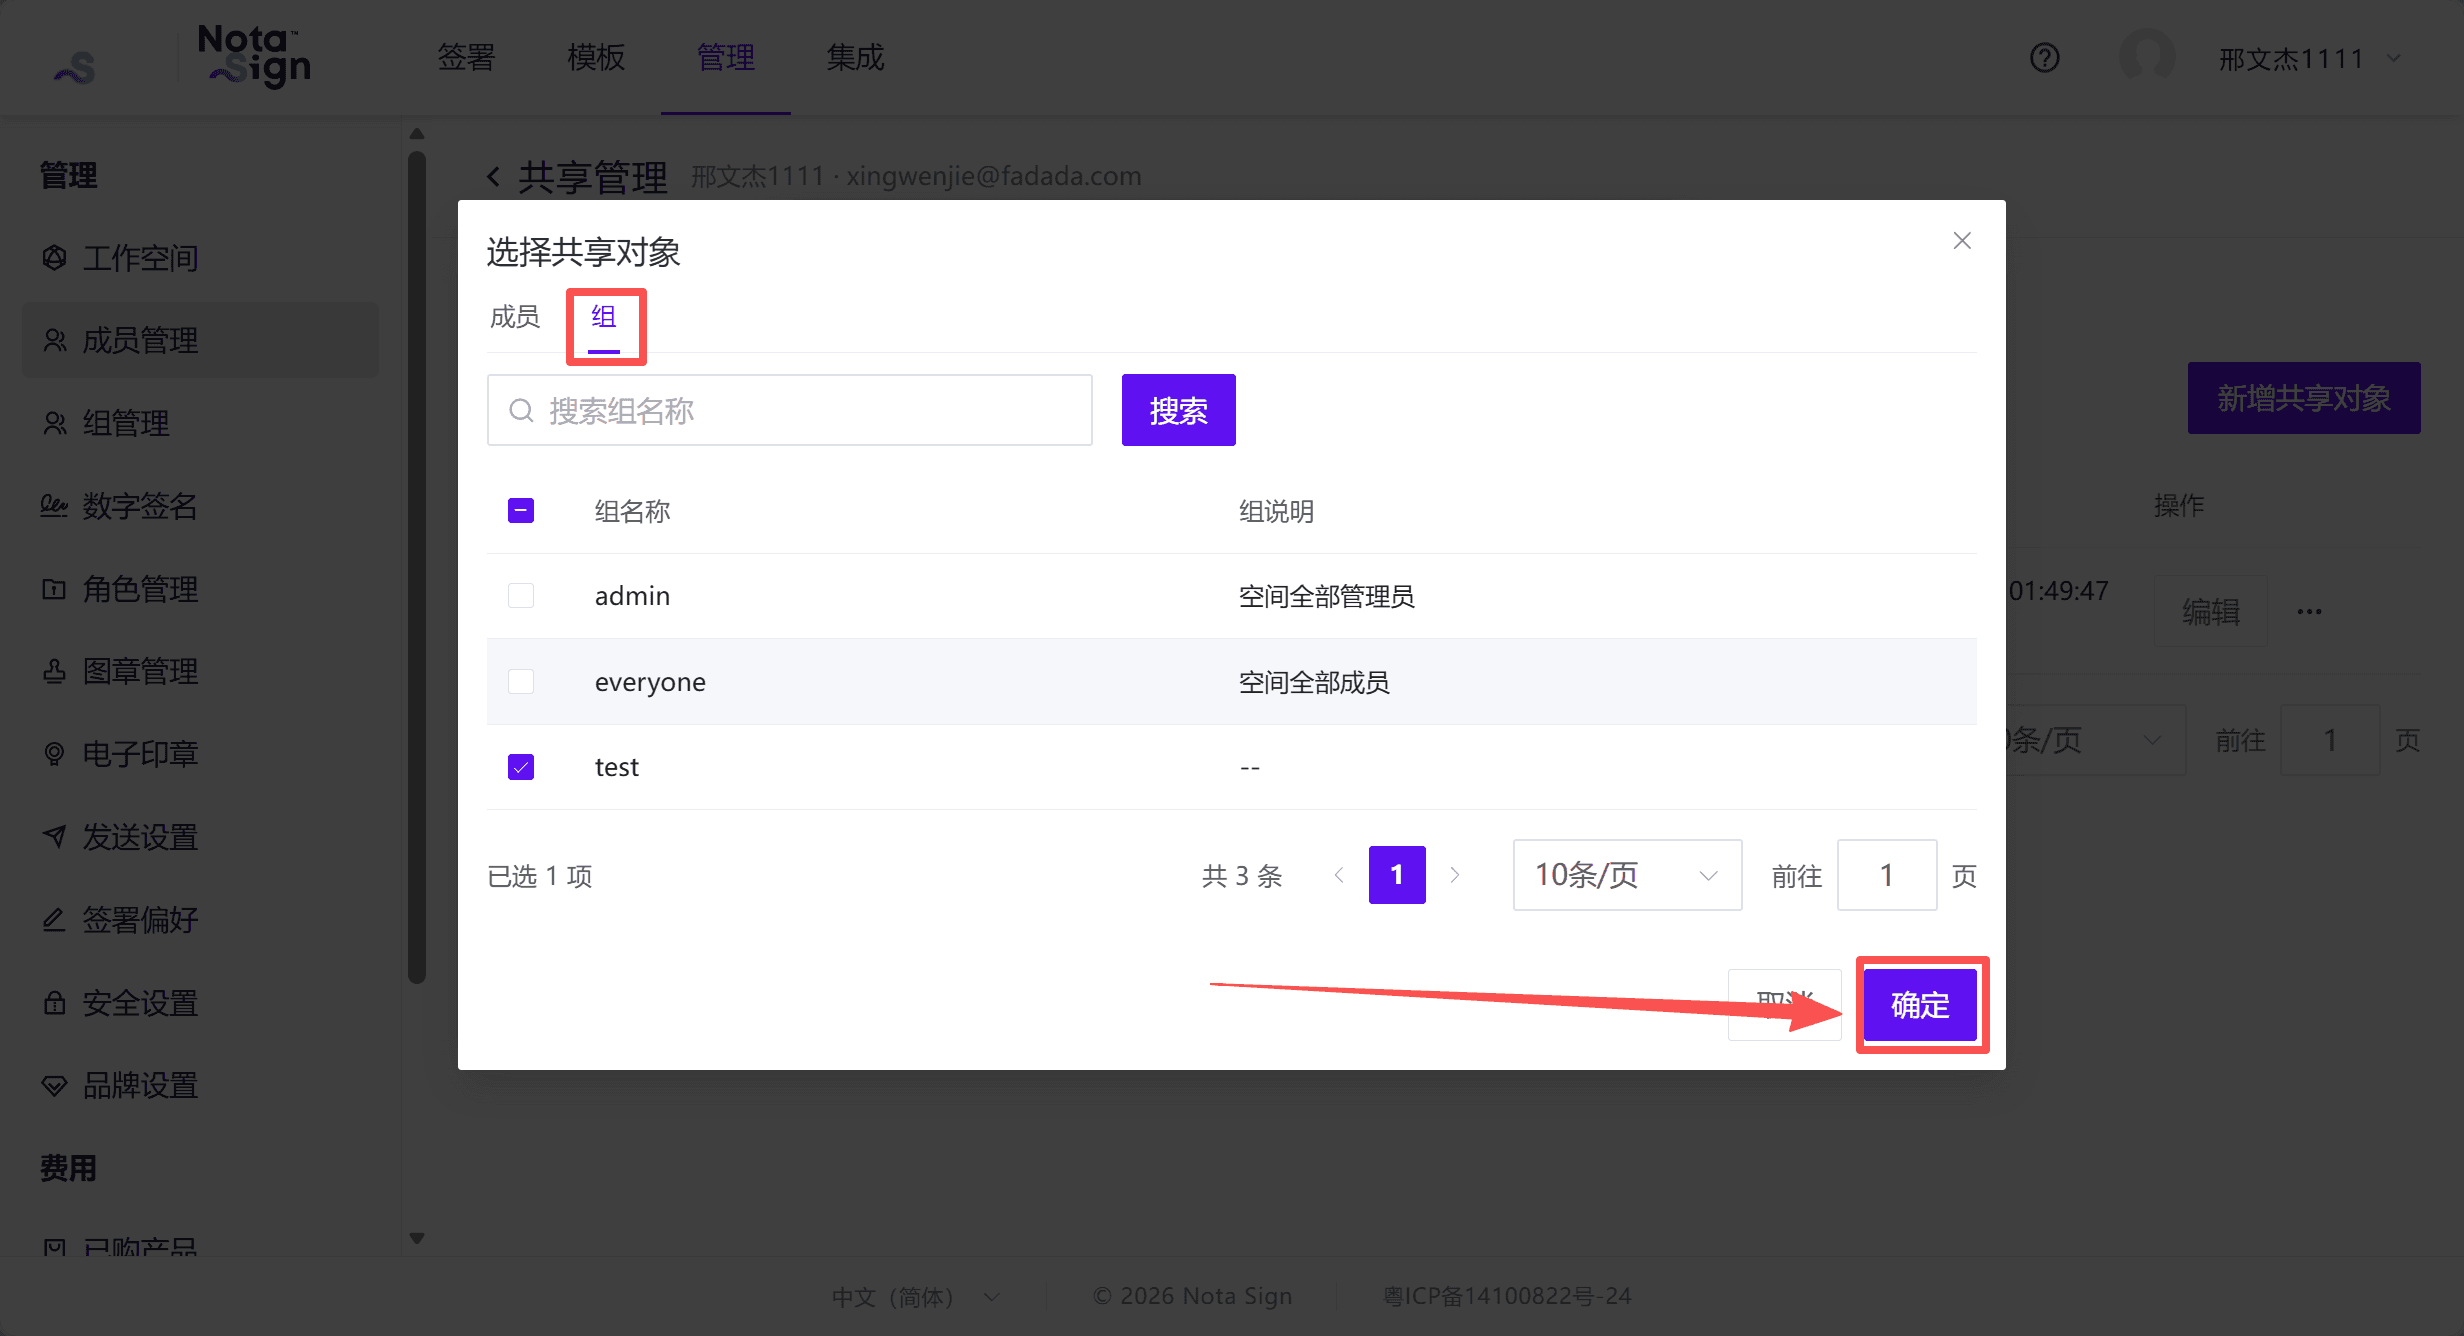
Note: You can select regular and built-in groups in the current workspace. Groups already granted sharing access by this member are not listed again.
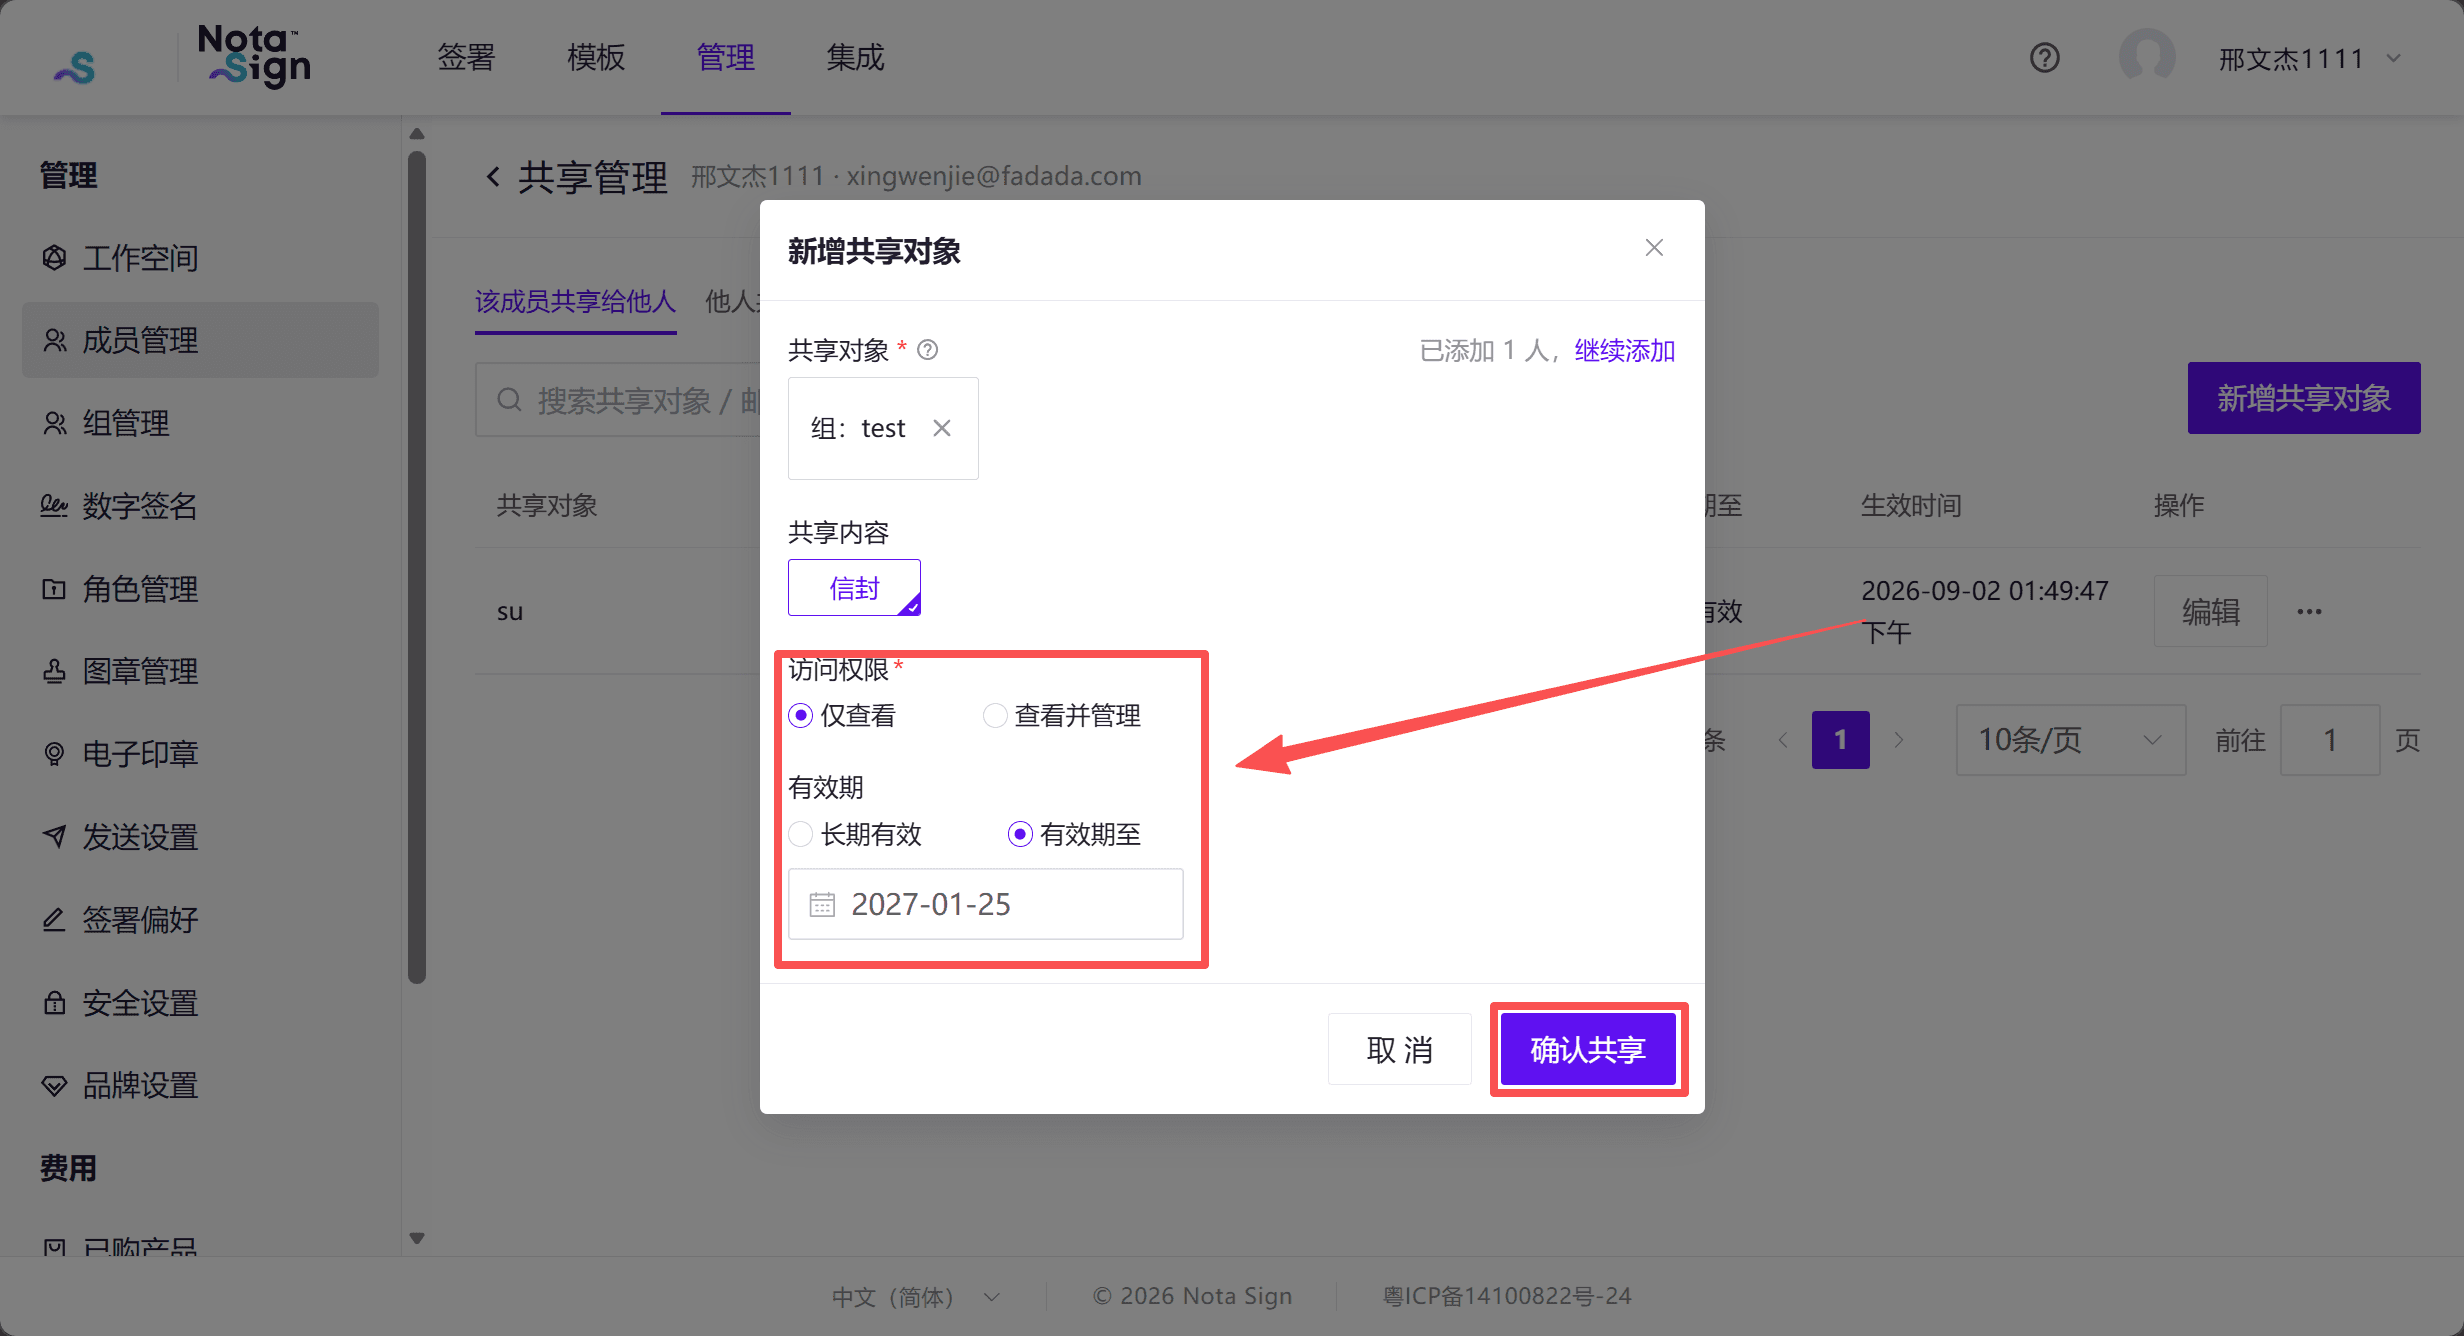
- Set the access permission:
- [View Only]: View the envelope list and details, download envelopes, and view history.
- [View and Manage]: Also correct, remind, and void envelopes, depending on their status.
- Select [Never Expires], or set an end date using [Valid Until].
- Check the selected groups, access permission, and validity period, then click [Confirm Sharing].
Once sharing is configured, group members can select the member sharing the envelopes under [View Scope] in the signing list and access the shared envelopes with the configured permissions.
2. Edit and Revoke Sharing
In the [Shared by Member] list, you can edit or revoke a sharing record:
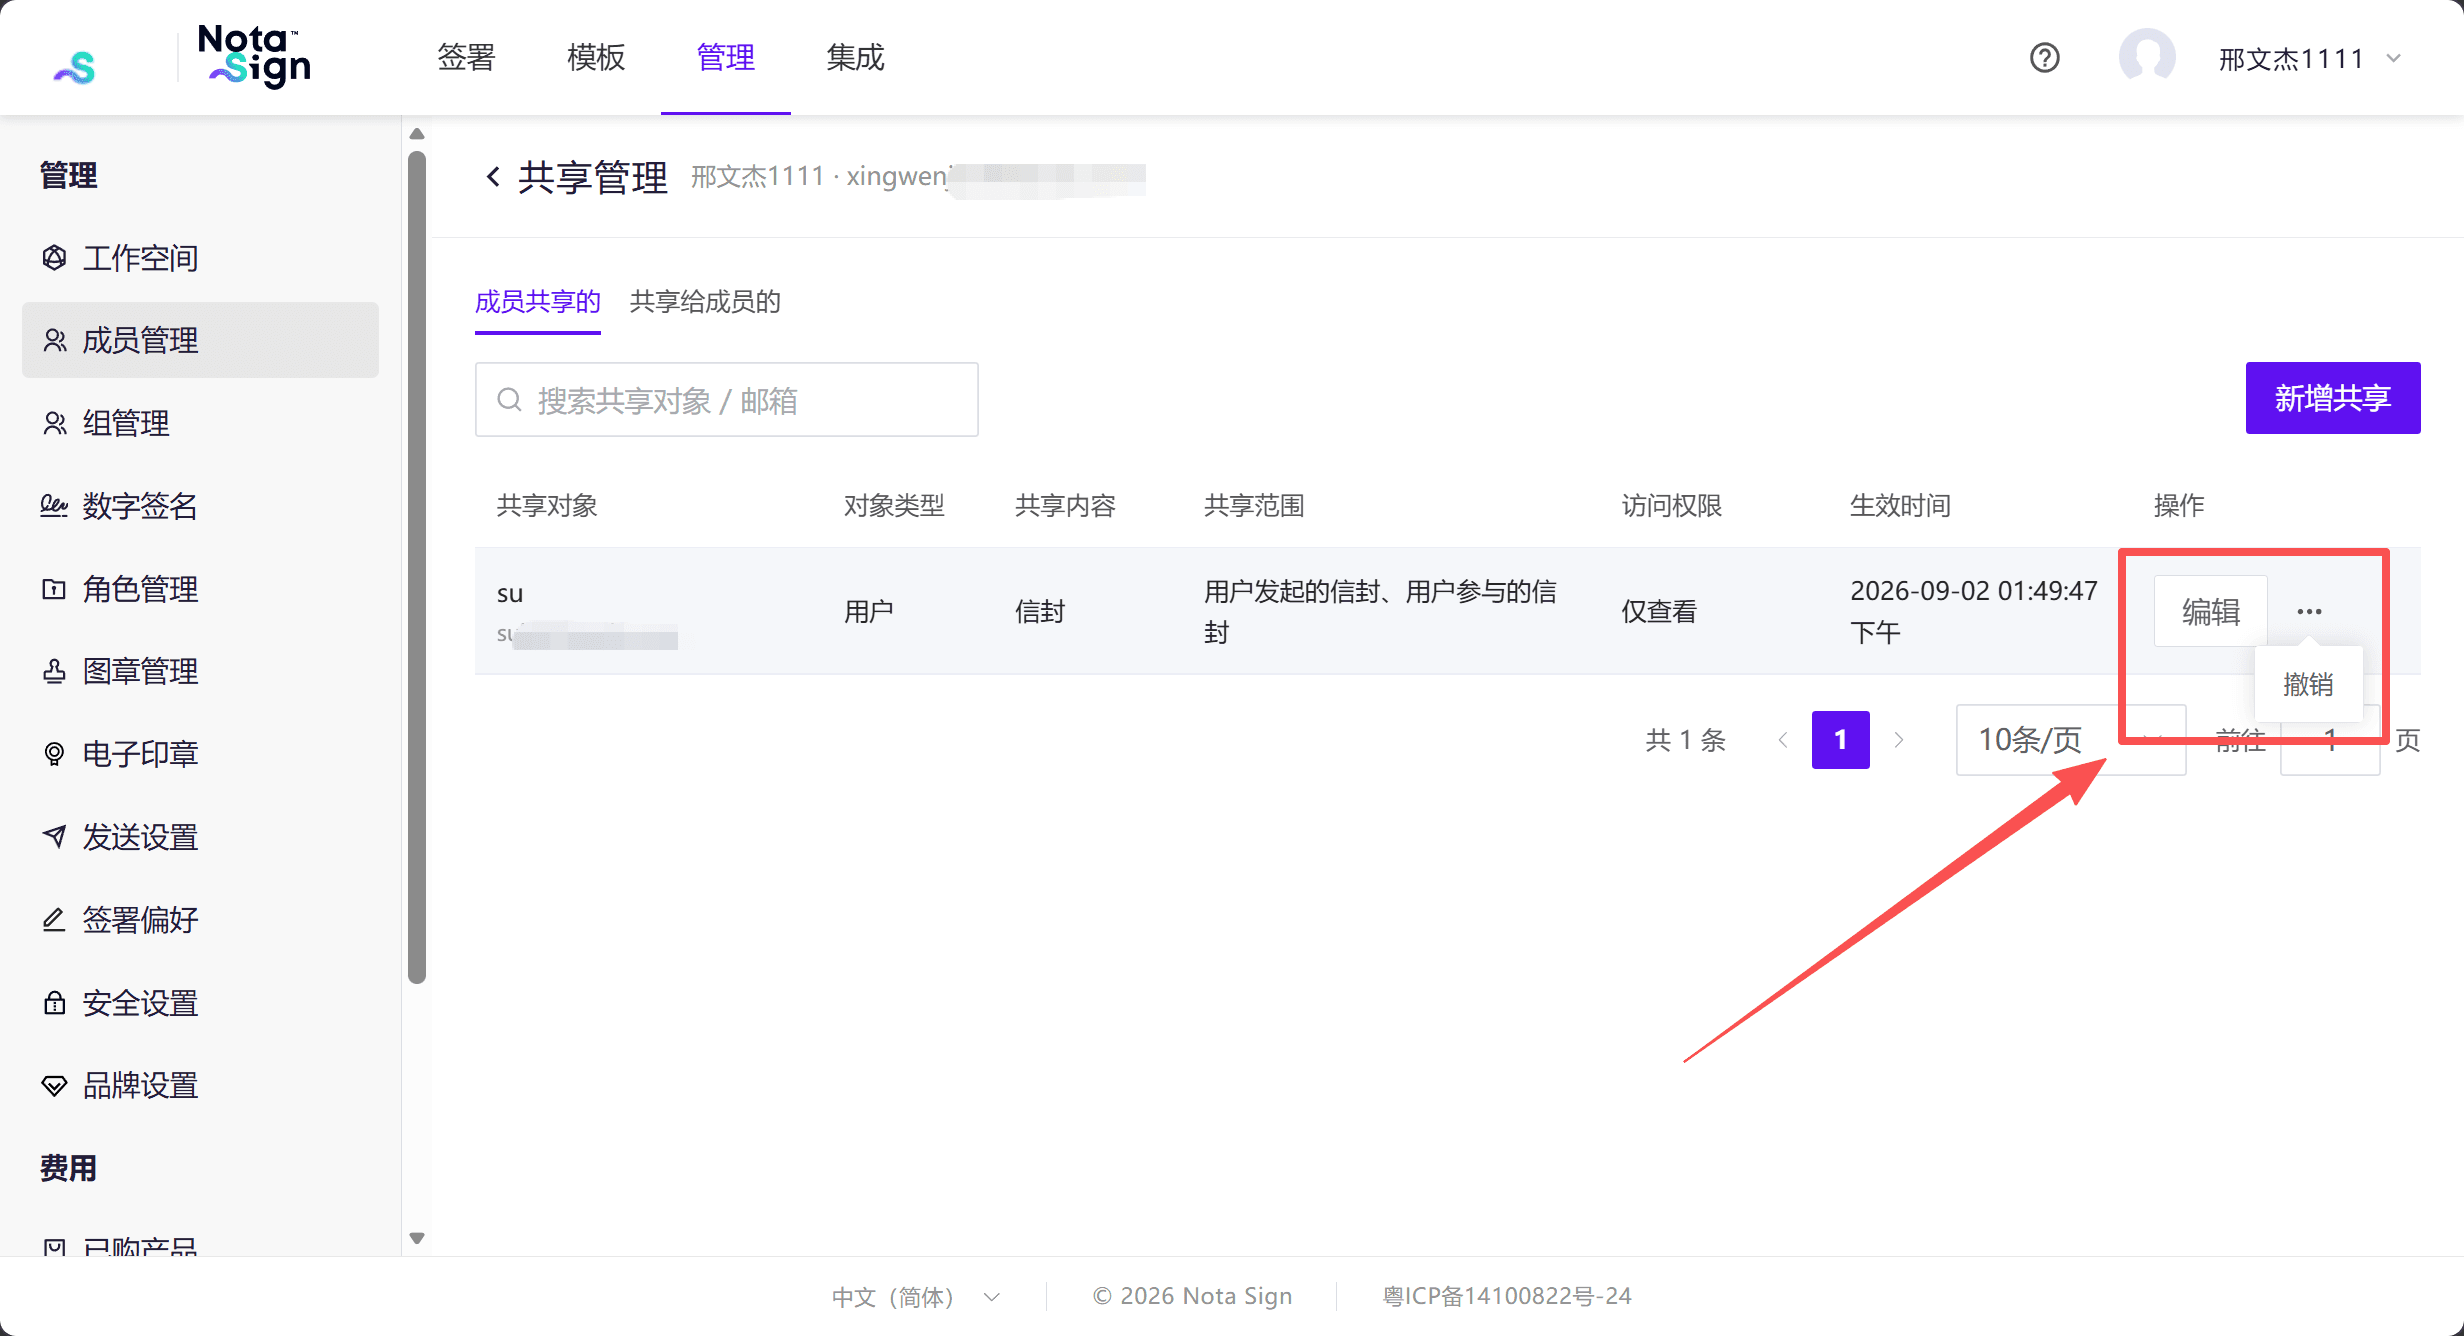
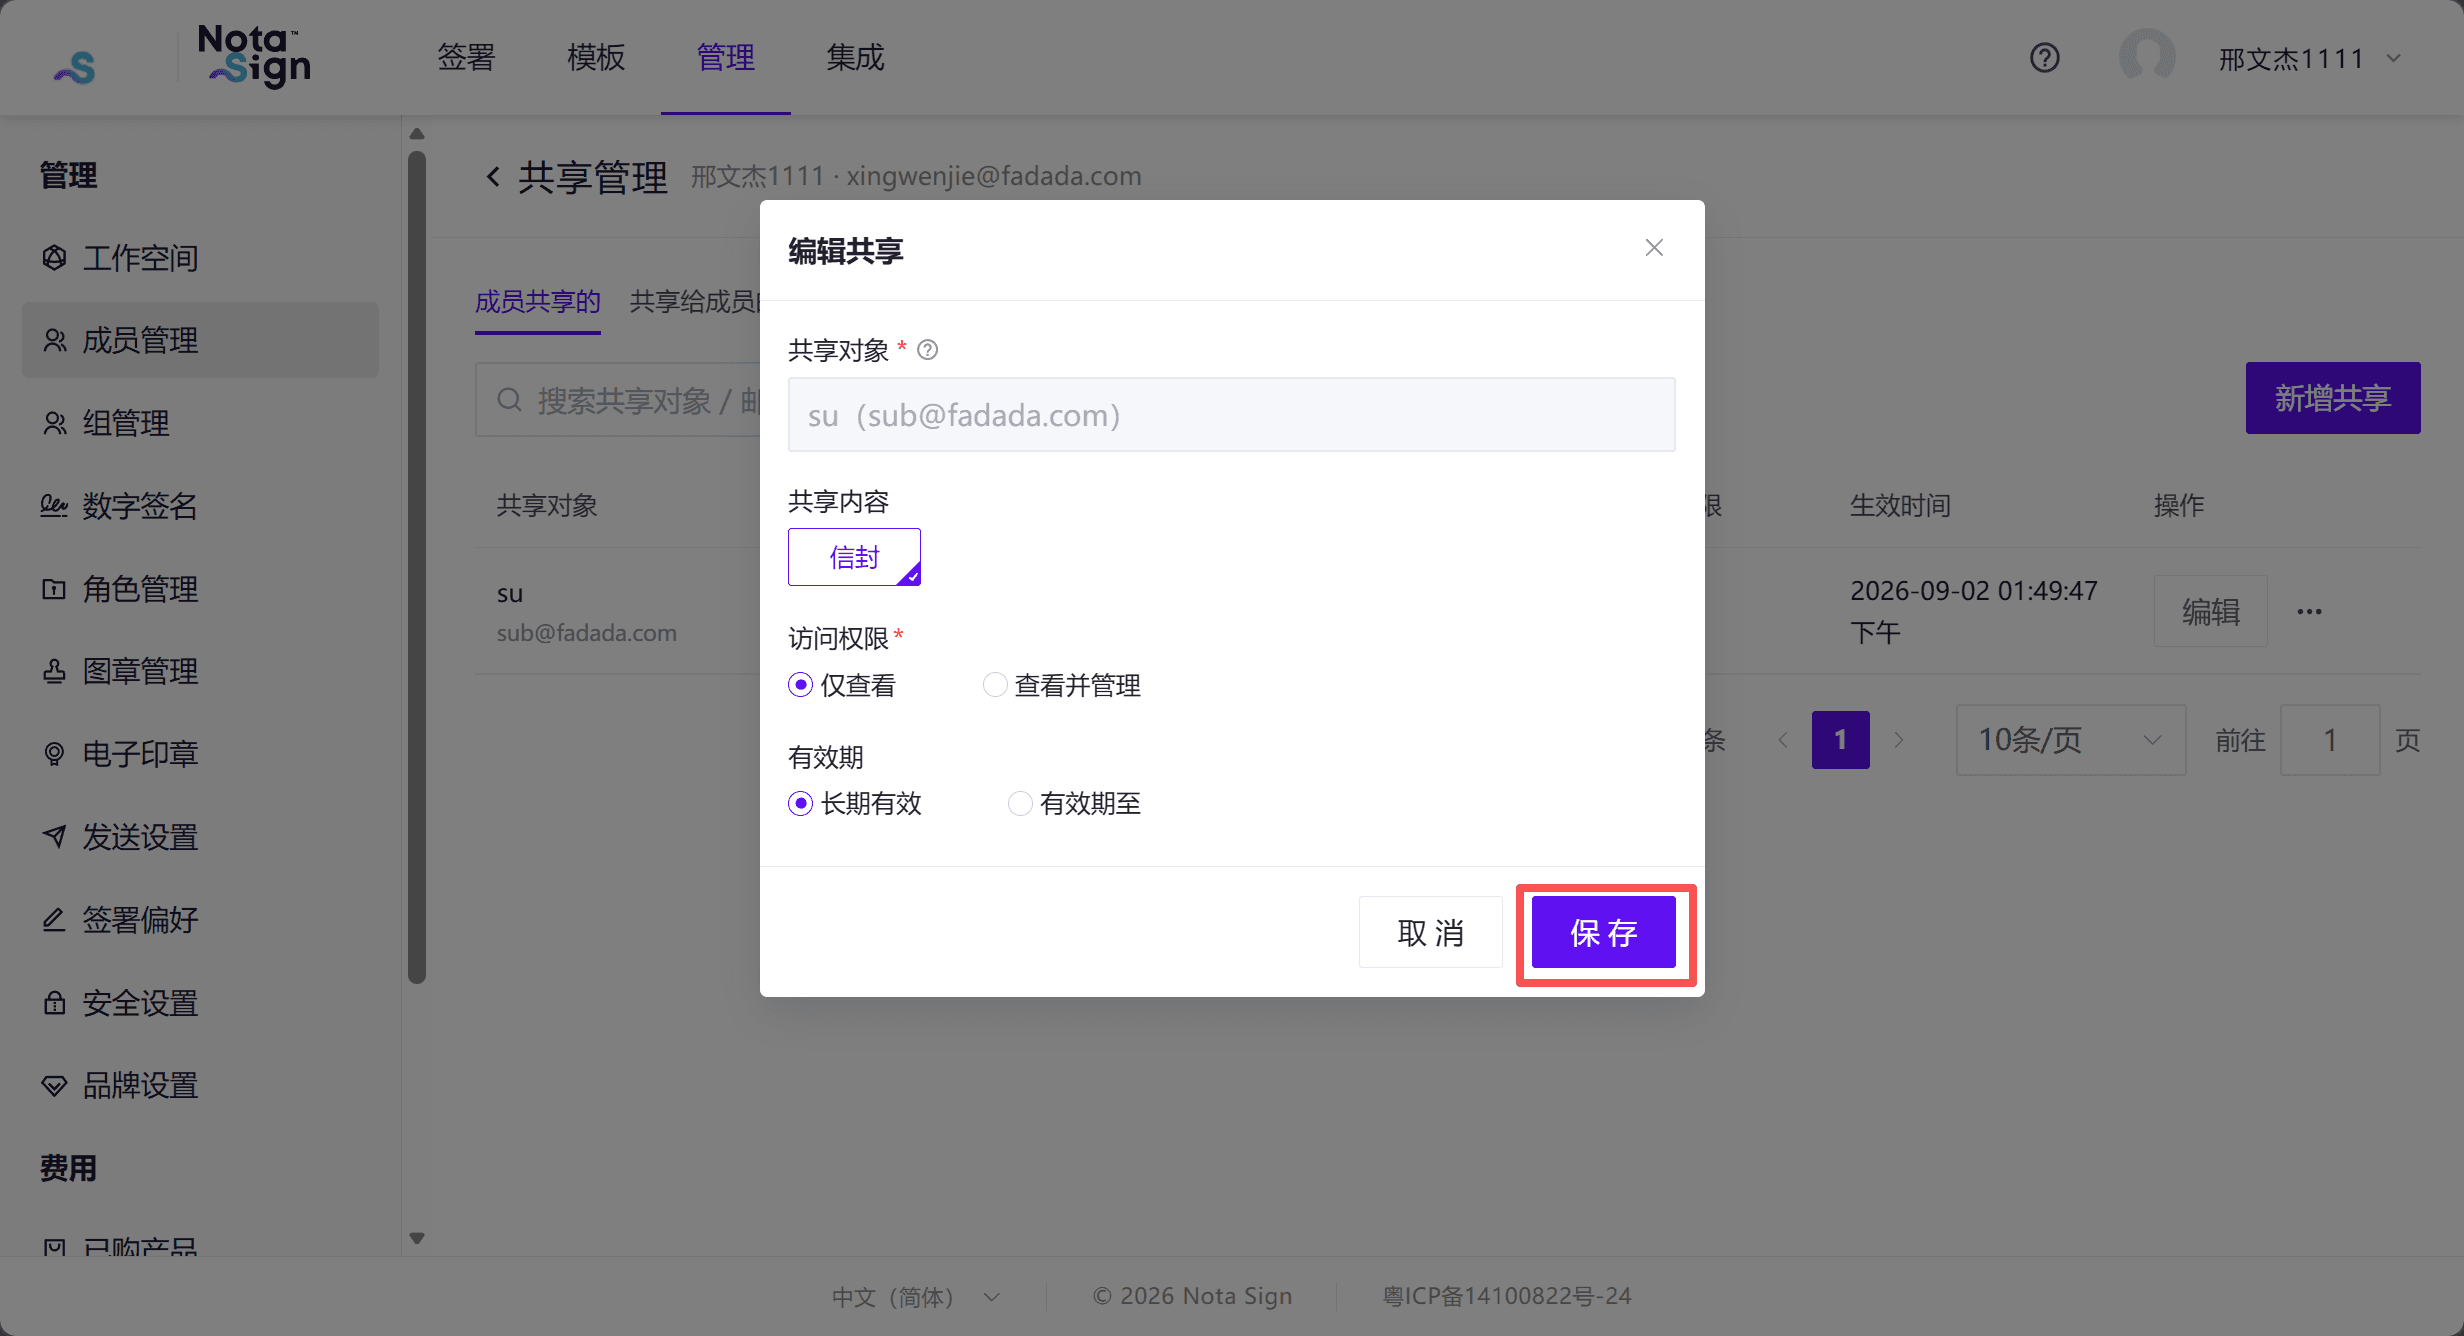
- Click [Edit], adjust the access permission or validity period, and click [Save]. The sharing recipient cannot be changed. To select a different group, revoke the existing authorization and create a new one.
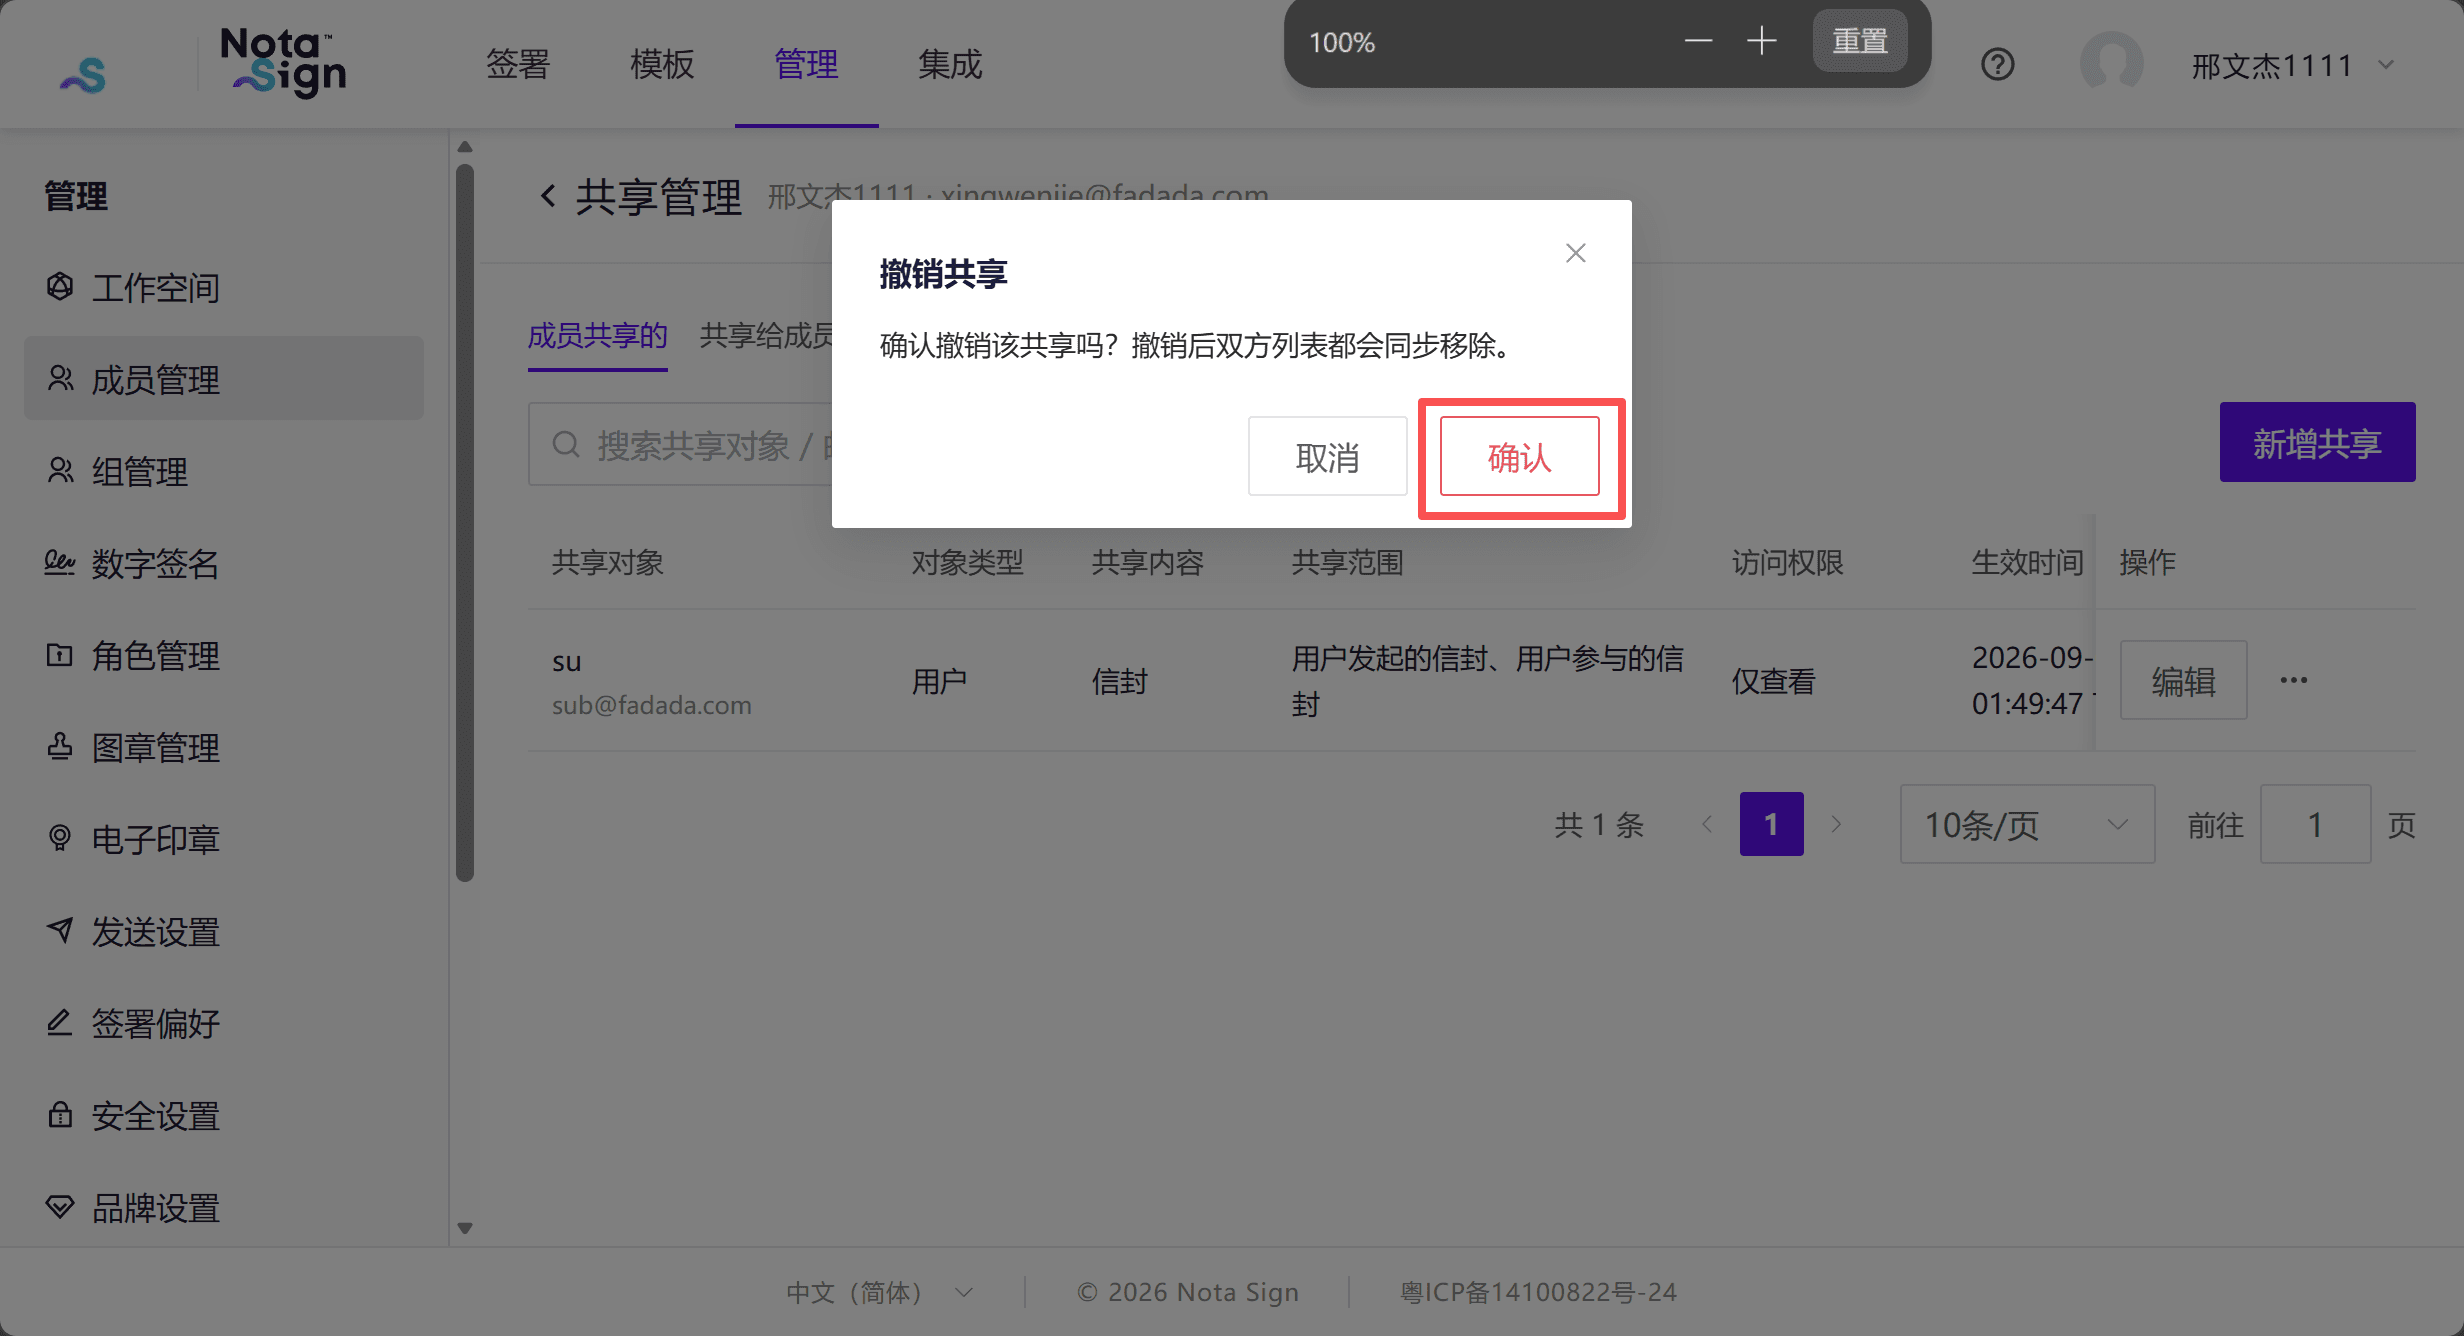
- Click […] → [Revoke] and confirm to revoke the group’s sharing authorization.
4. Notes
- Creating groups, managing group members, and configuring sharing require the relevant management permissions.
- Members immediately receive the sharing access granted to a group when they join it, and lose that access when removed. Access granted directly or through other groups is not affected.
- Sharing covers envelopes only, not drafts, templates, electronic seals, stamps, or folders. It does not change envelope participants or allow recipients of sharing access to sign or approve on another person’s behalf.
- You can share an individual member’s envelopes with a group. Sharing all group members’ envelopes with other members at once is not supported.