
1. Feature Overview
Role management is used to control the operational permissions of different members within a workspace.
Administrators can create different roles based on actual business needs and configure corresponding Admin Permissions and User Permissions for each role. After members are assigned to the corresponding roles, they will be able to use the relevant functions based on the permissions configured for the role.
Nota Sign provides the following two types of permissions:
- Admin Permissions: Used to control which workspace functions members can manage, such as User Management, Workspace Settings, Security Settings, Seal Management, etc.
- User Permissions: Used to control members’ operational permissions in day-to-day business, such as Sending Envelopes, Signing Envelopes, Correcting Envelopes, etc.
The system provides Admin and Sender as built-in roles, and also supports administrators in creating custom roles based on actual needs.
2. Step-by-Step Instructions
2.1 Creating a Role
- Click [Manage] in the top navigation bar, then go to [Role Management];
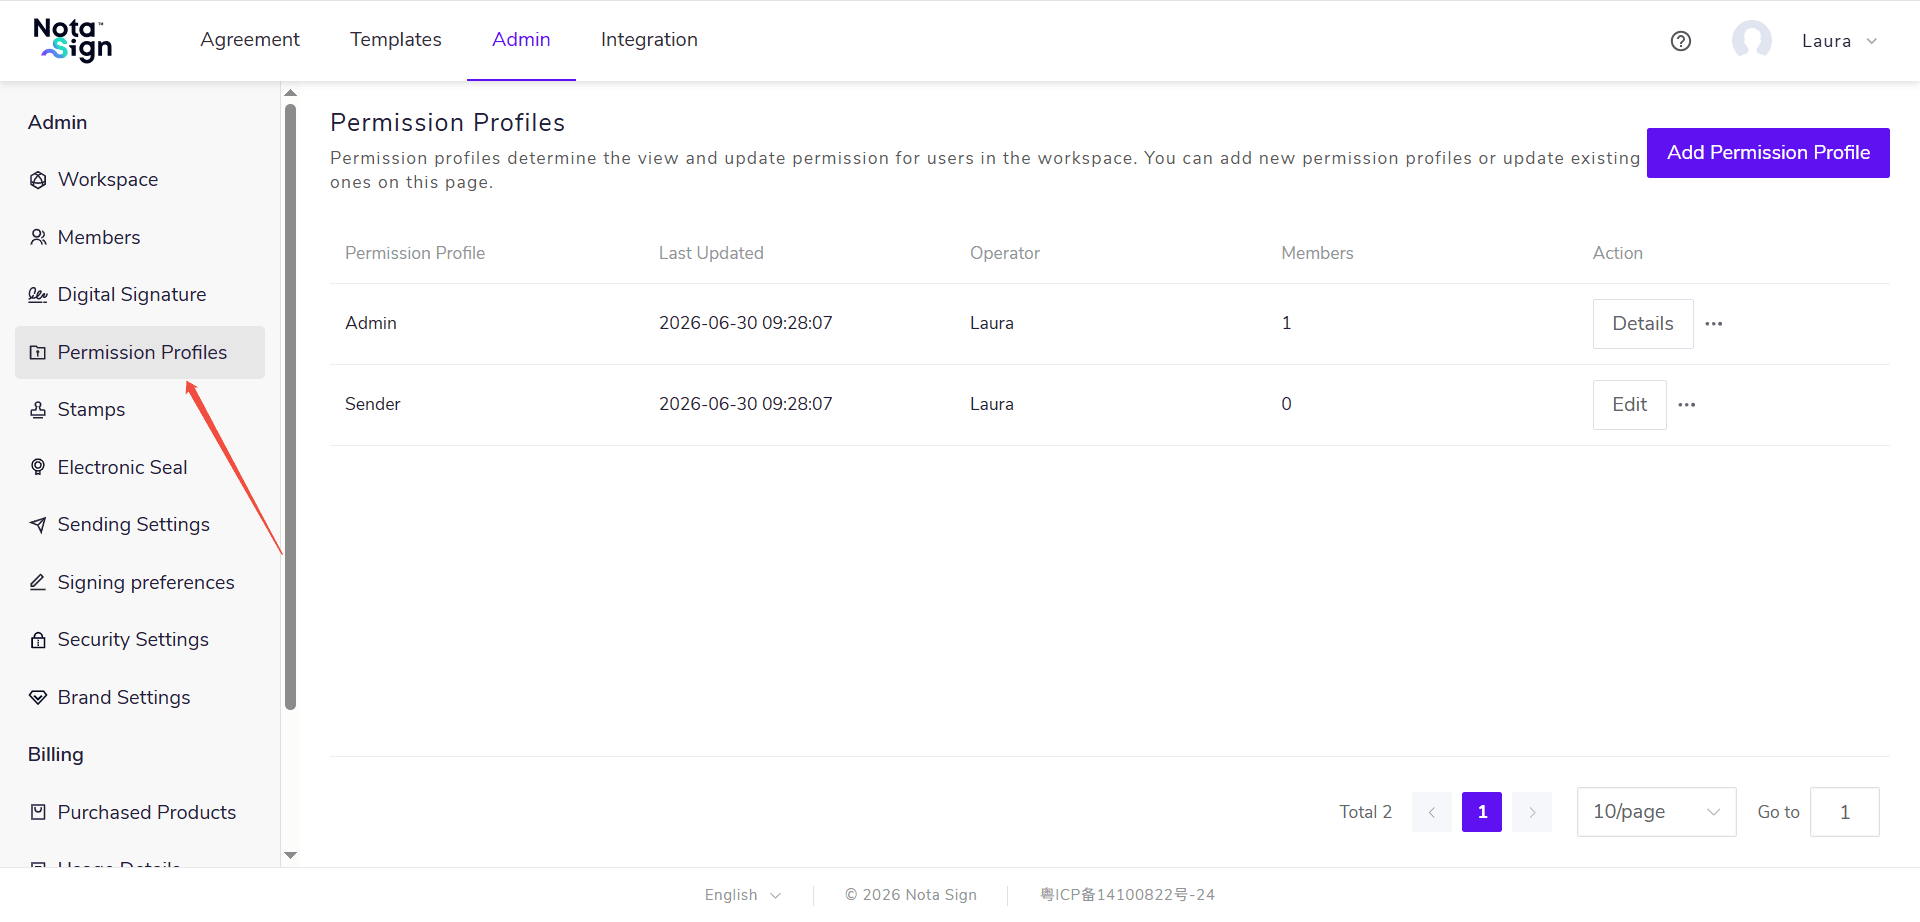
- Click [Add Role] in the upper-right corner;
- Enter a role name;
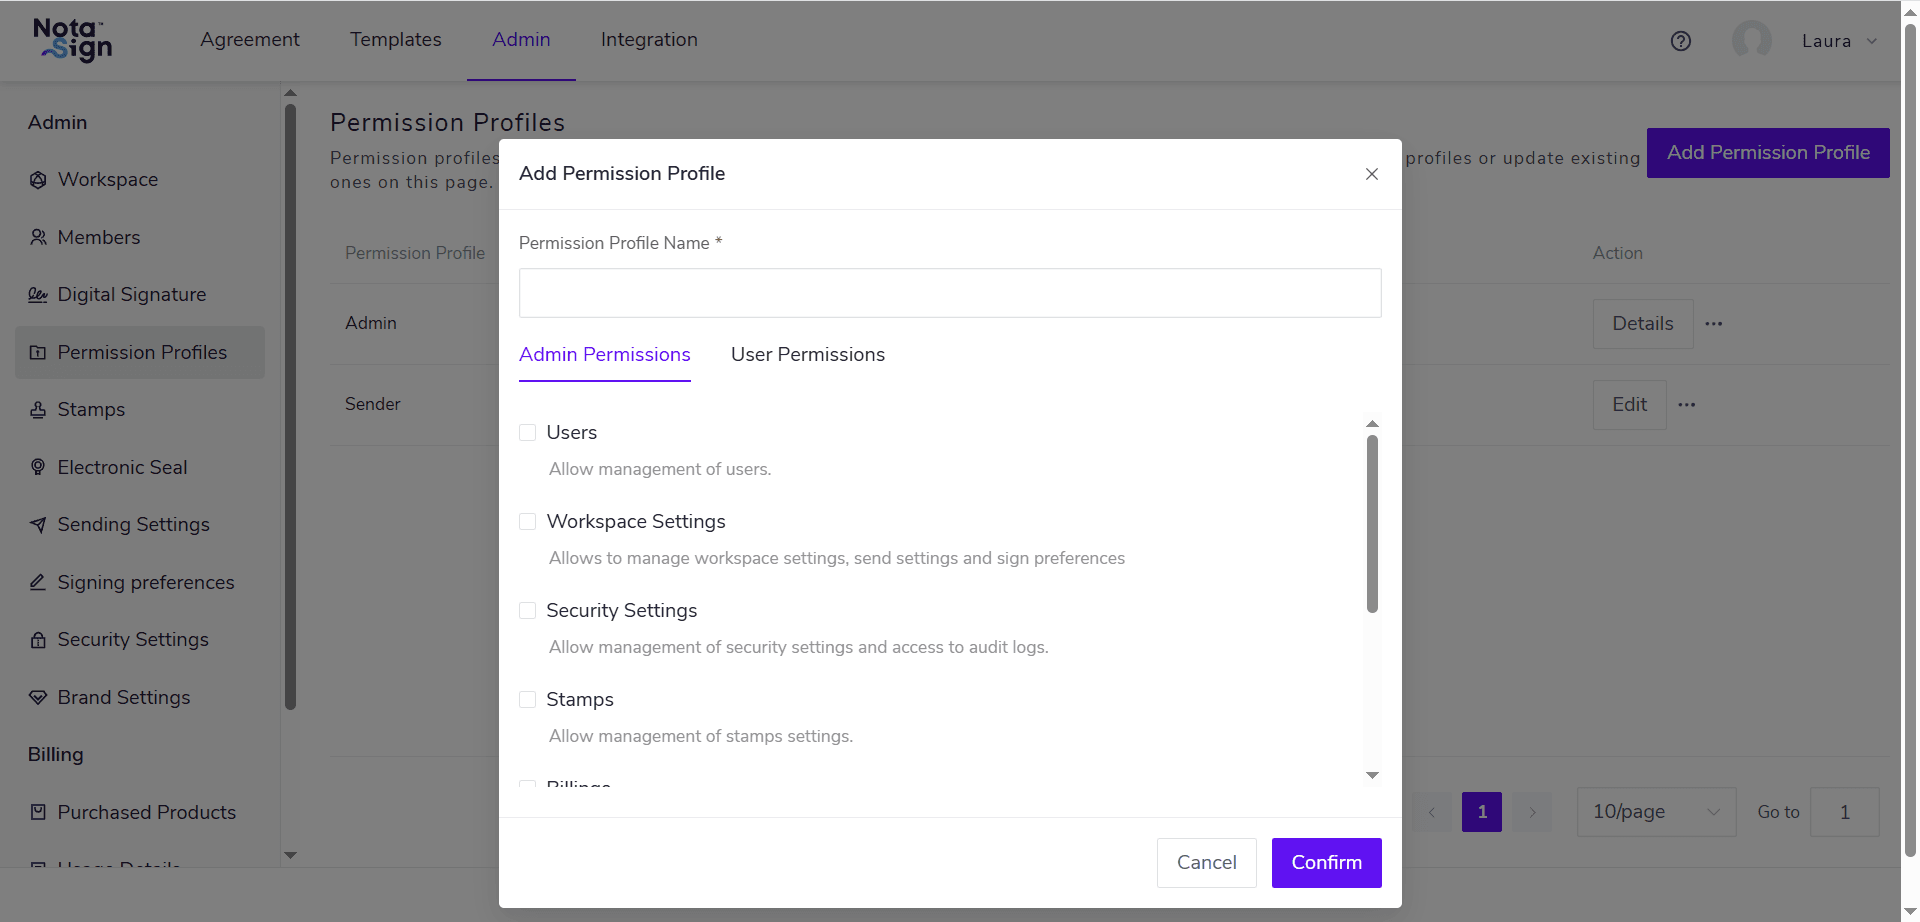
- Based on actual needs, check the permissions to be granted to the role in [Admin Permissions] and [User Permissions];
- After completing the permission configuration, click [Confirm] to create the role.
2.2 Configuring Role Permissions
When creating or editing a custom role, you can configure corresponding permissions based on members’ responsibilities.
(1) Admin Permissions
Admin permissions control which workspace functions members can manage, including User Management, Workspace Settings, Security Settings, Seal Management, etc.
Simply check the corresponding permissions based on actual management needs.
(2) User Permissions
User permissions control which business operations members can perform.
Check the corresponding permissions based on actual business needs, for example:
- Send Envelopes;
- Sign Envelopes;
- Correct Envelopes;
- Other user permissions provided on the page.
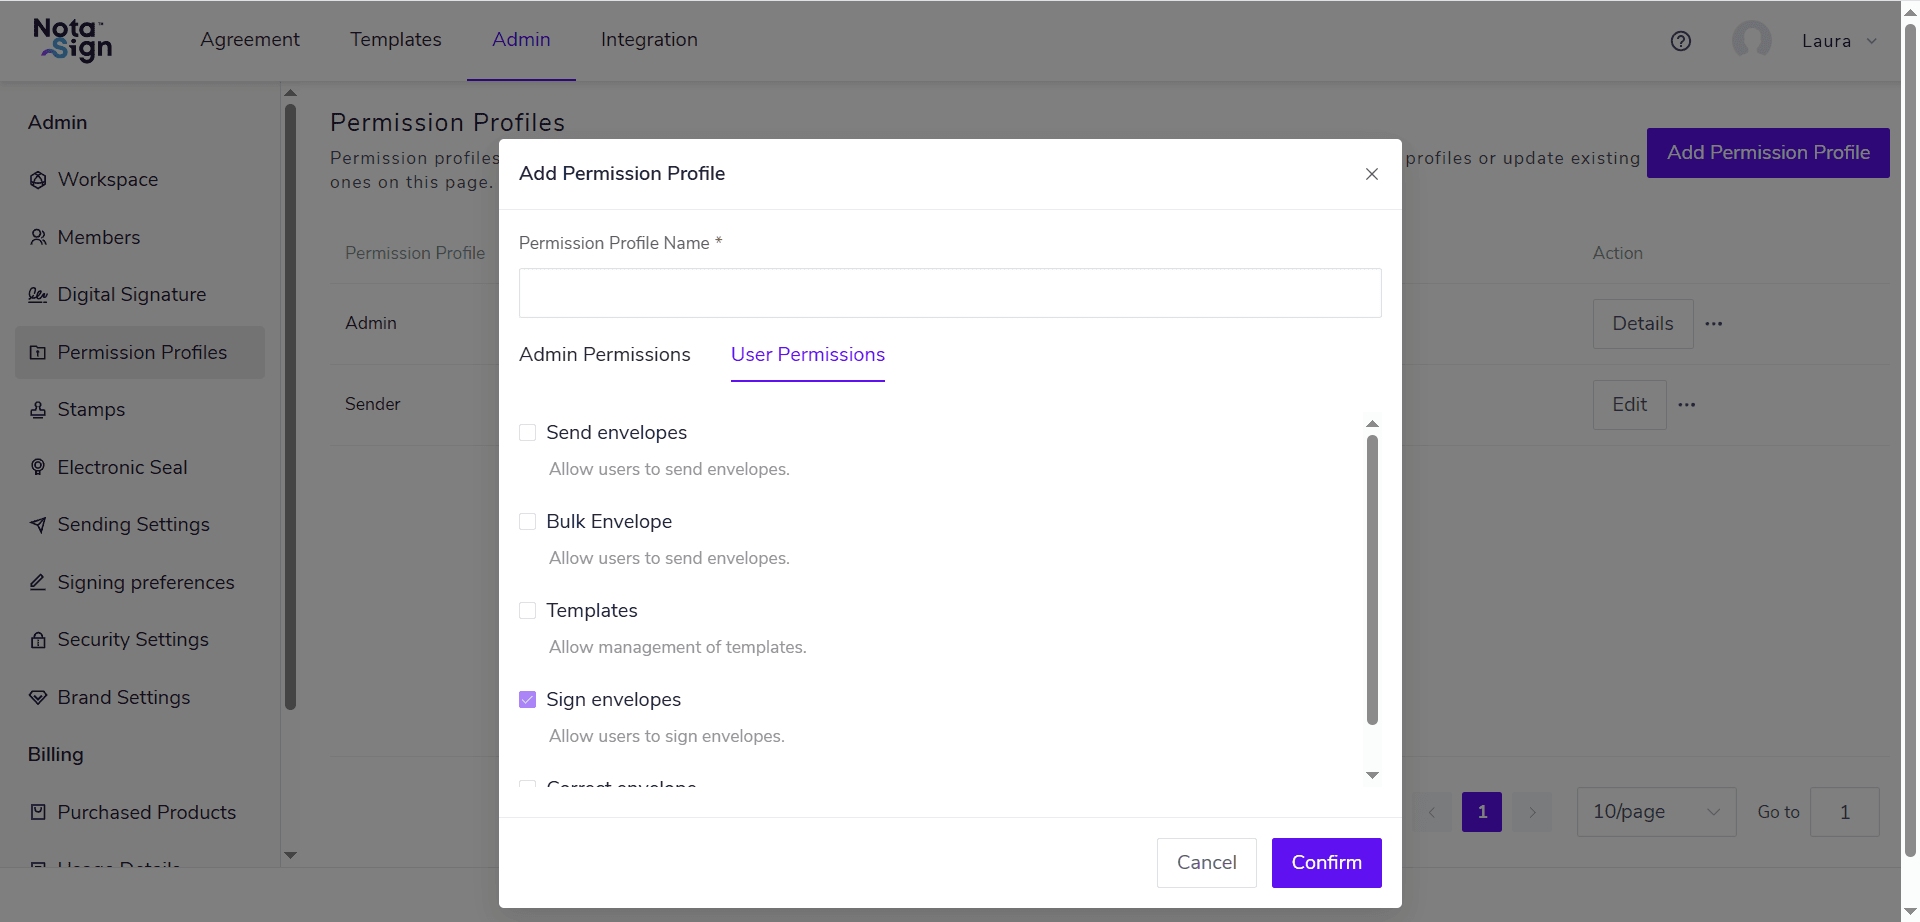
Among these, the [Correct Envelopes] permission controls whether members can perform correction operations on eligible envelopes. After checking [Correct Envelopes], members under this role can correct envelopes within their permission scope. After canceling this permission, members will not be able to perform envelope corrections, and the [Correct] entry will not be displayed in the envelope’s more operations.
2.3 Editing a Role
- Go to [Manage] > [Role Management];
- Find the custom role that needs to be modified and click [Edit];
- Modify the role name or permission configuration as needed;
- Click [Confirm] to save the changes.
After saving, the new permission configuration will be applied to the members under this role.
2.4 Viewing Role Members
On the [Role Management] page, you can view the number of members under different roles.
Enter the details page of the corresponding role to further view the members under that role and perform member management based on actual needs.
2.5 Deleting a Role
For custom roles that are no longer needed, you can find the corresponding role on the [Role Management] page and delete it through the more operations menu.