
1. Initiate Signing on Desktop
-
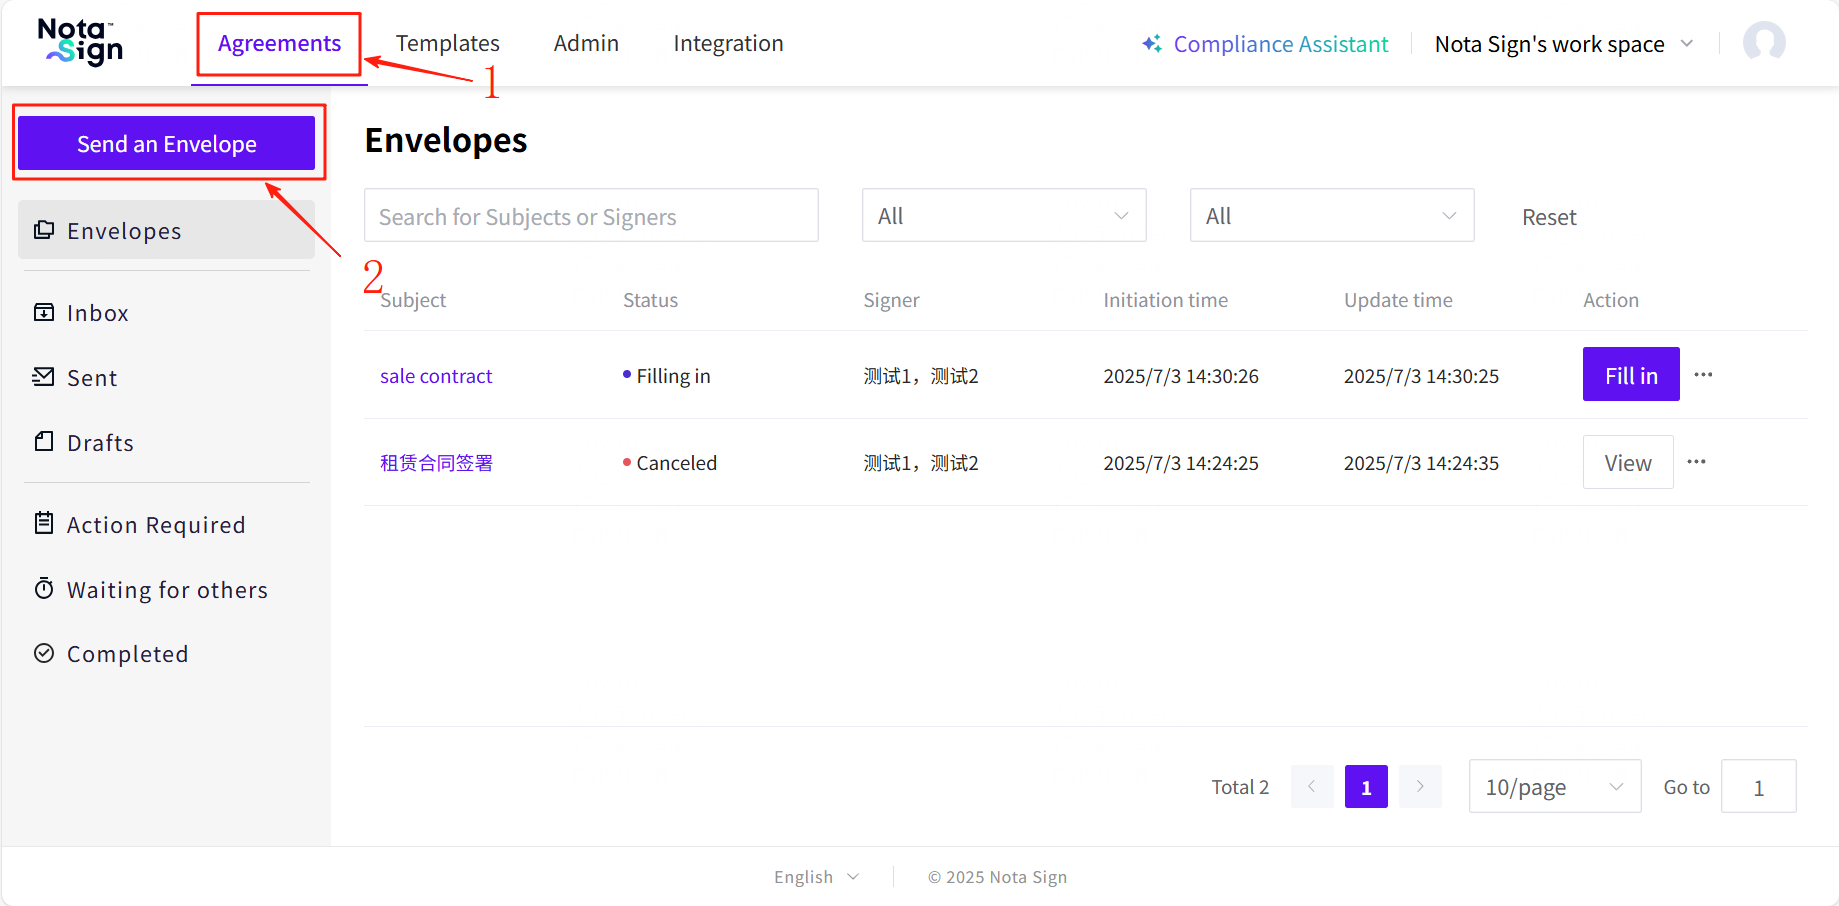
Log in to the Nota Sign and click Agreements page;
-
Click Send an Envelope at the upper-left corner.
1.1. Upload Documents
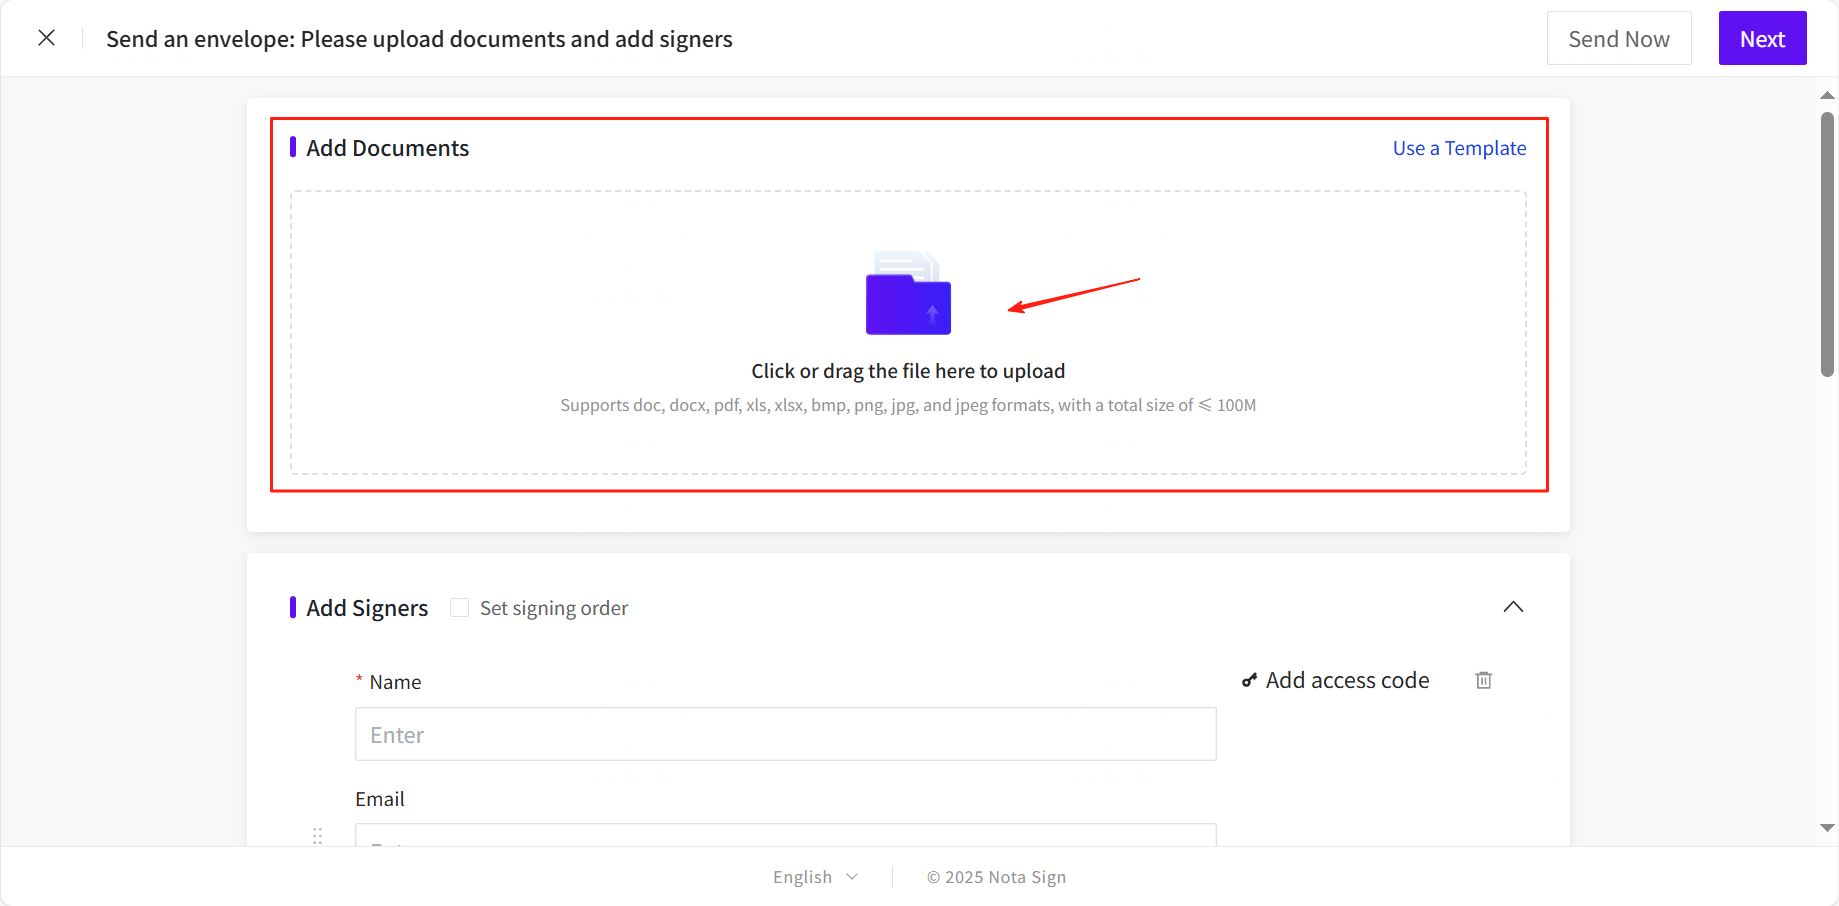
Upload files to your envelope:
-
Click or drag and drop files into the Add Documents area.
-
You can upload multiple files, up to a total size of 100 MB, in common formats such as PDF, Word, Excel, PNG, JPG, and more.
1.2. Add and Configure Recipients
Add Recipients
-
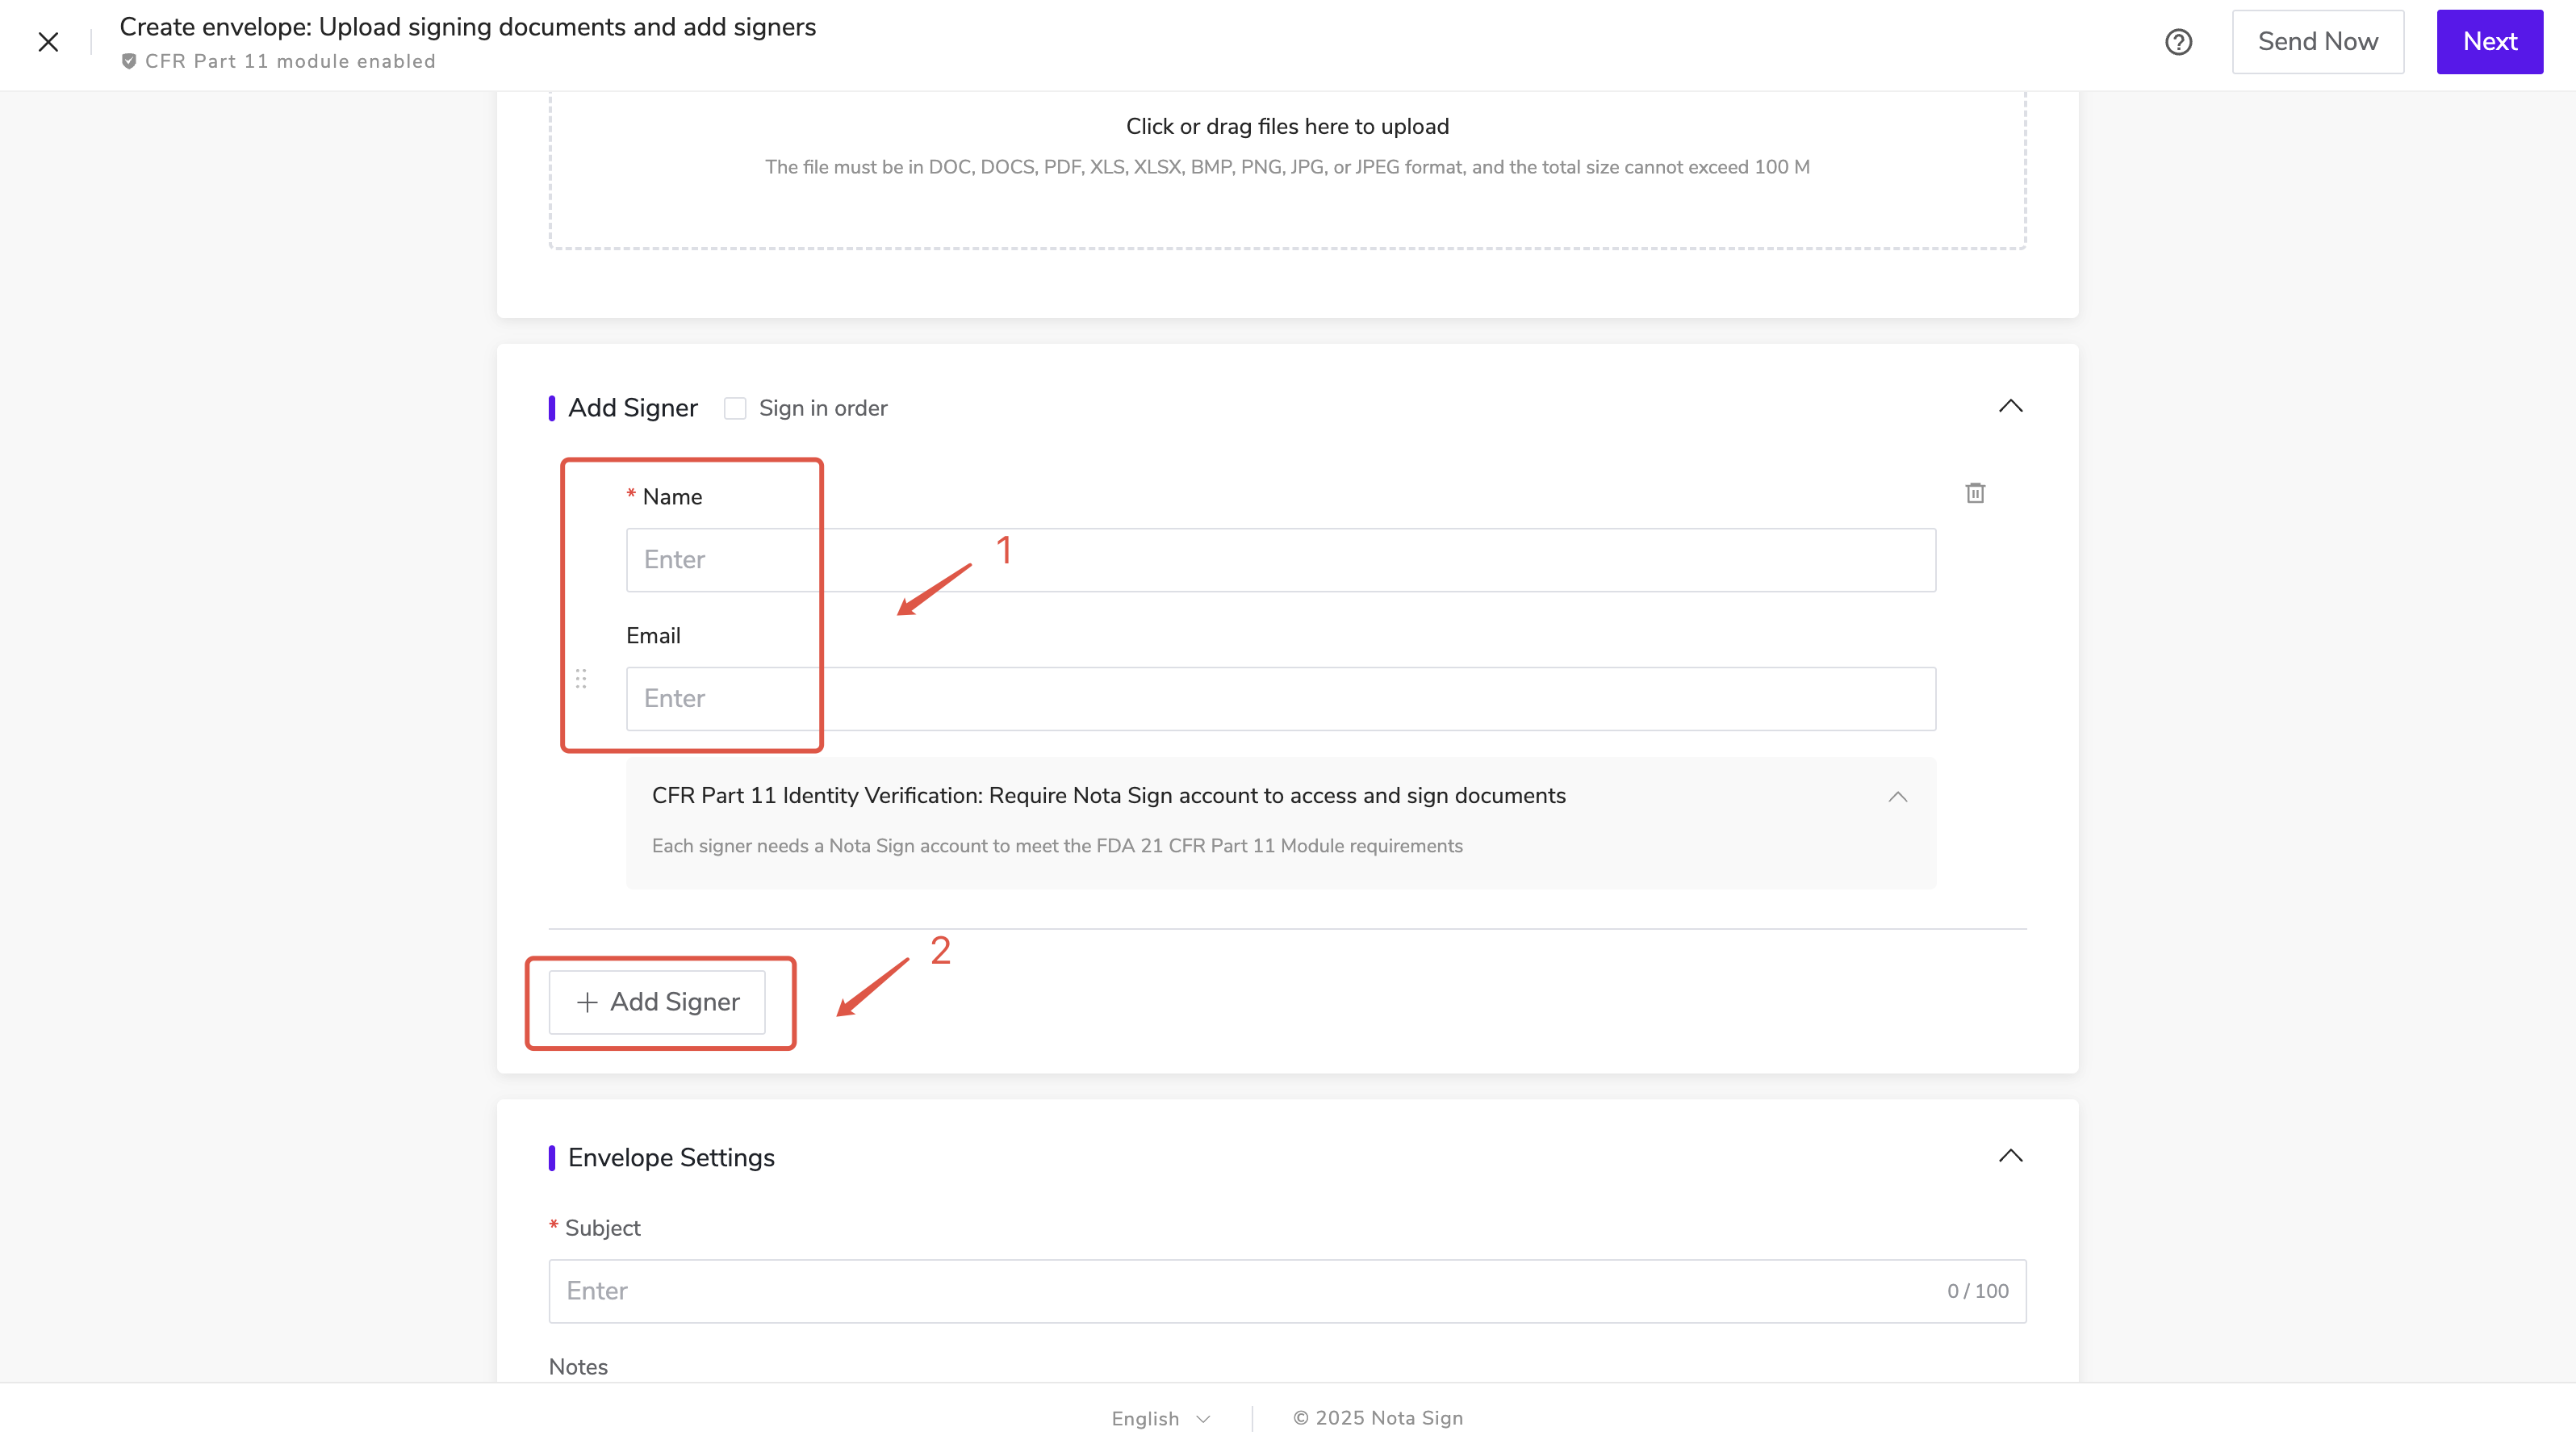
Enter the Name and Email Address of each recipient.
-
Click Add Signer to include additional participants.
-
To remove a signer, click the delete icon on the top-right of the recipient card.
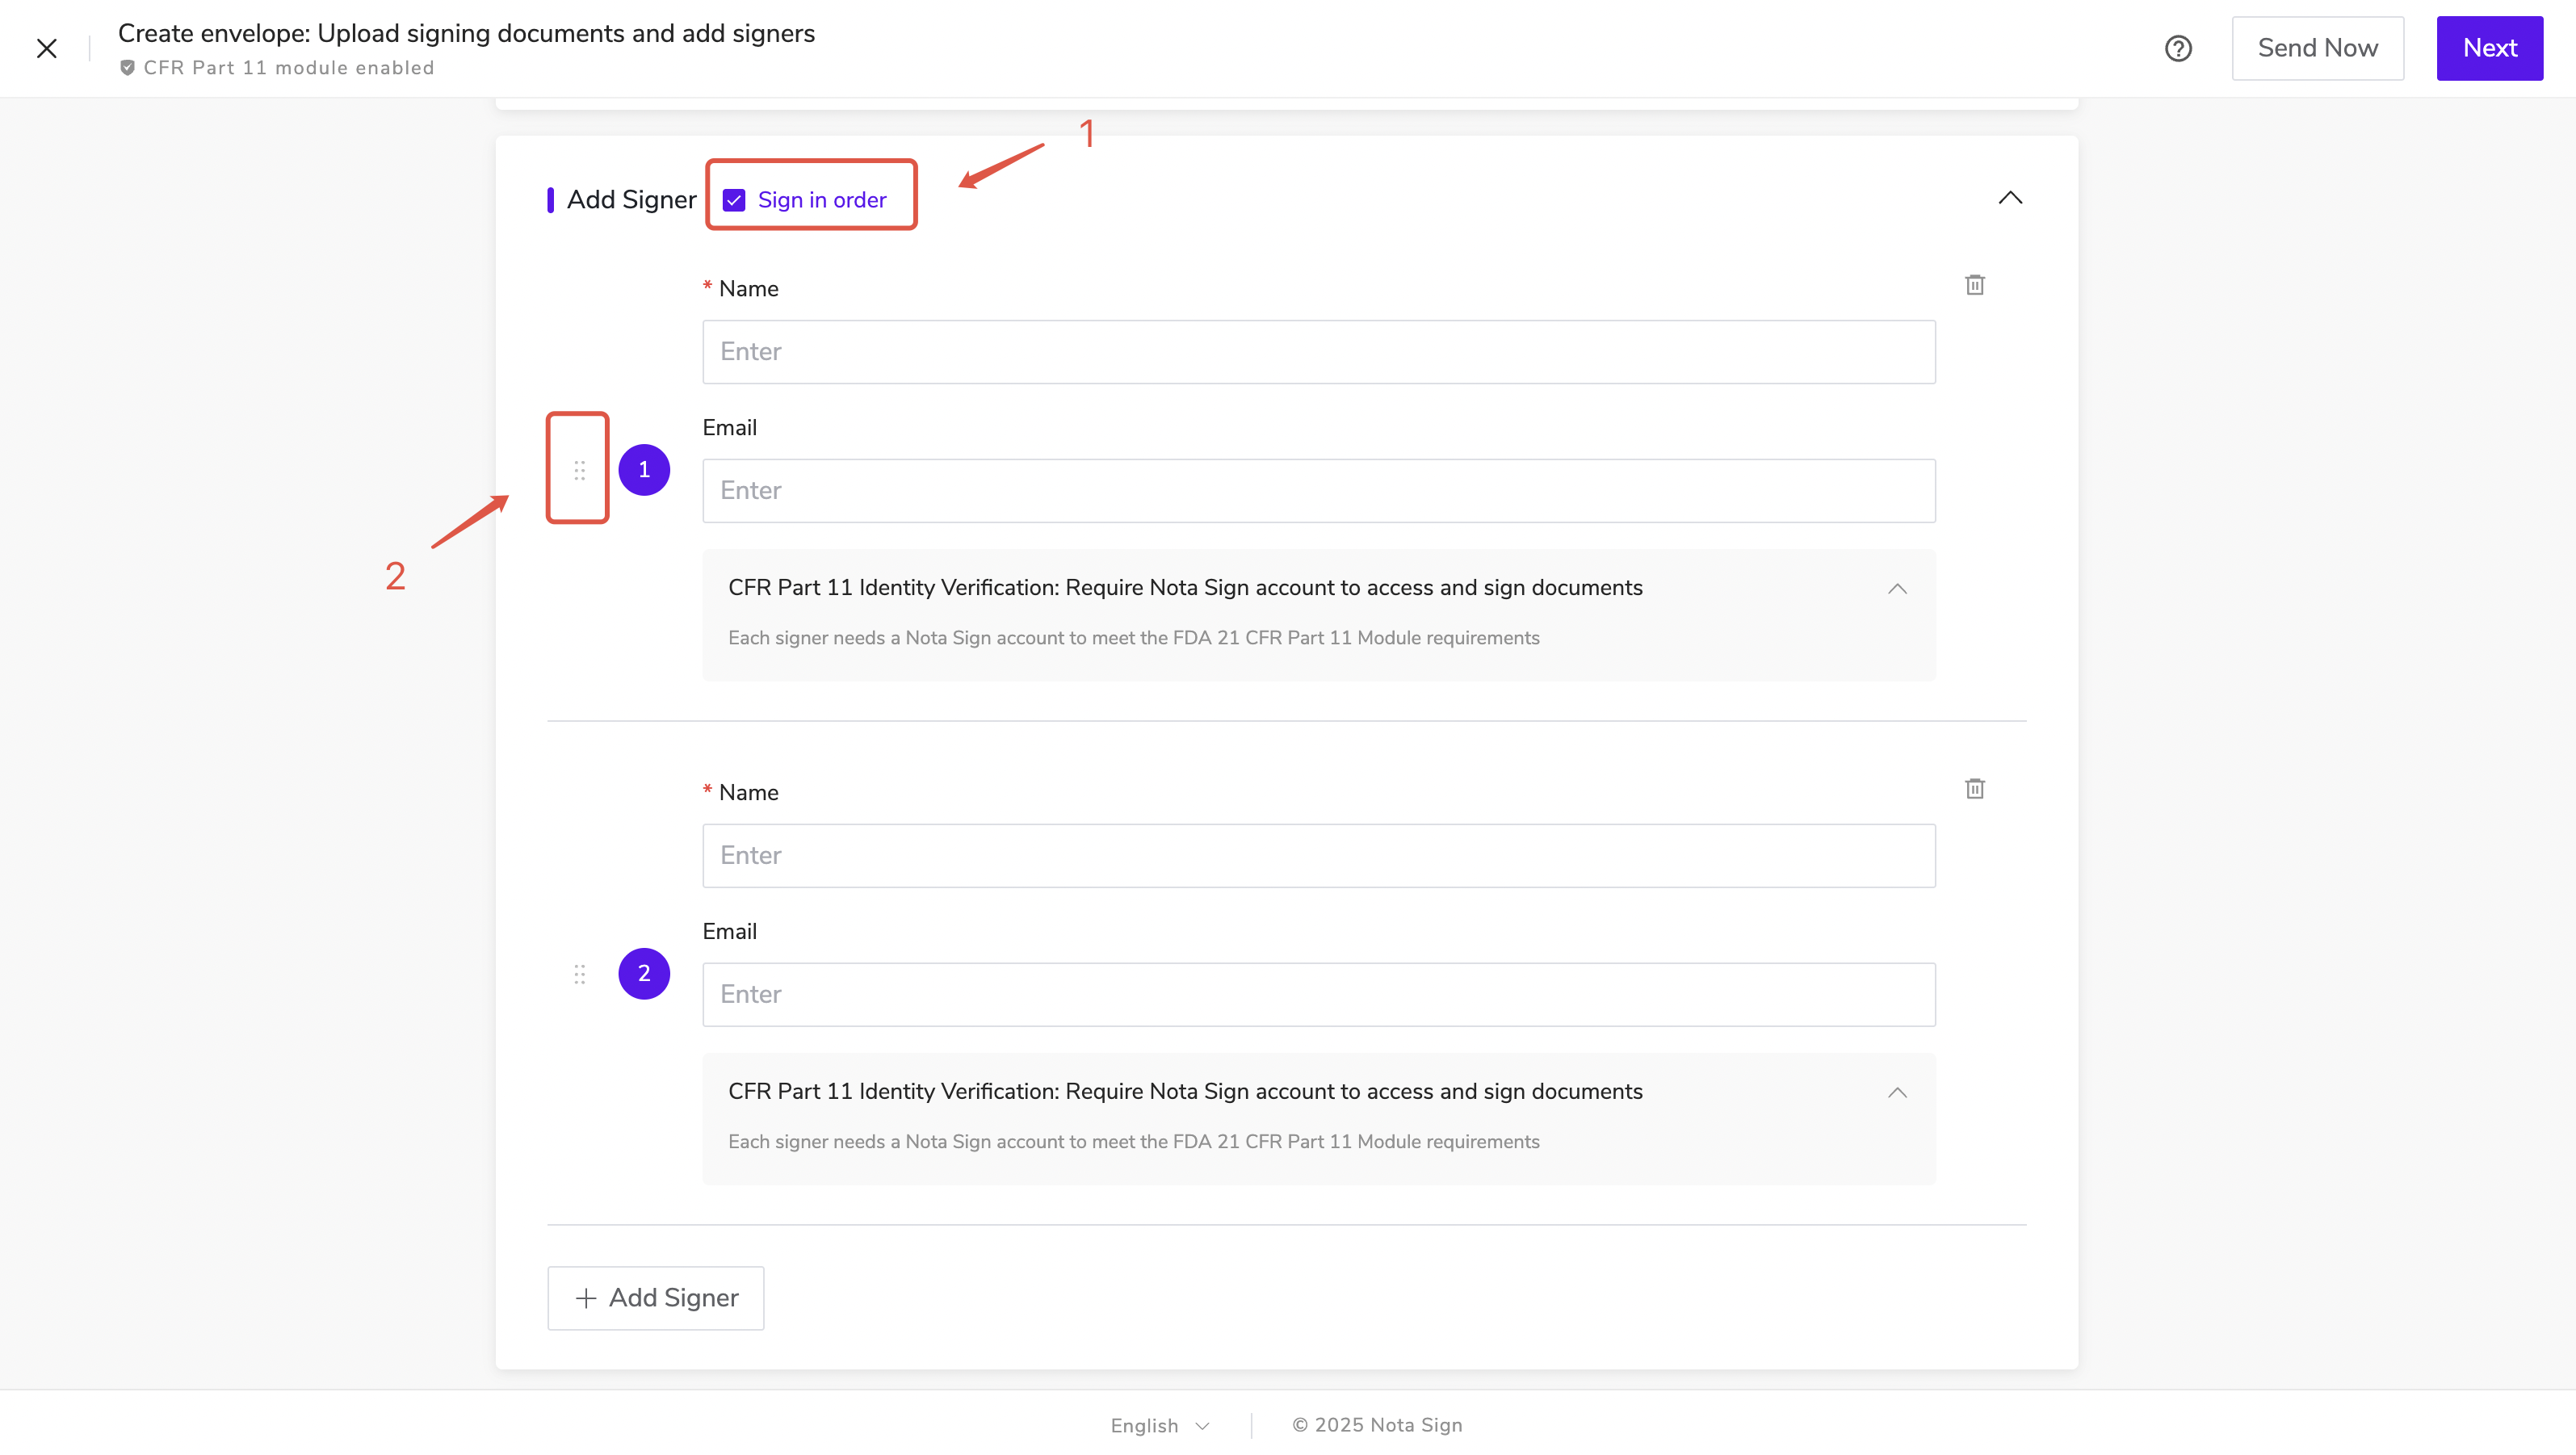
Signing Order: Enable if signers must sign in a specific sequence.
-
Select Sign in Order.
-
Drag and drop signers to arrange the desired order.
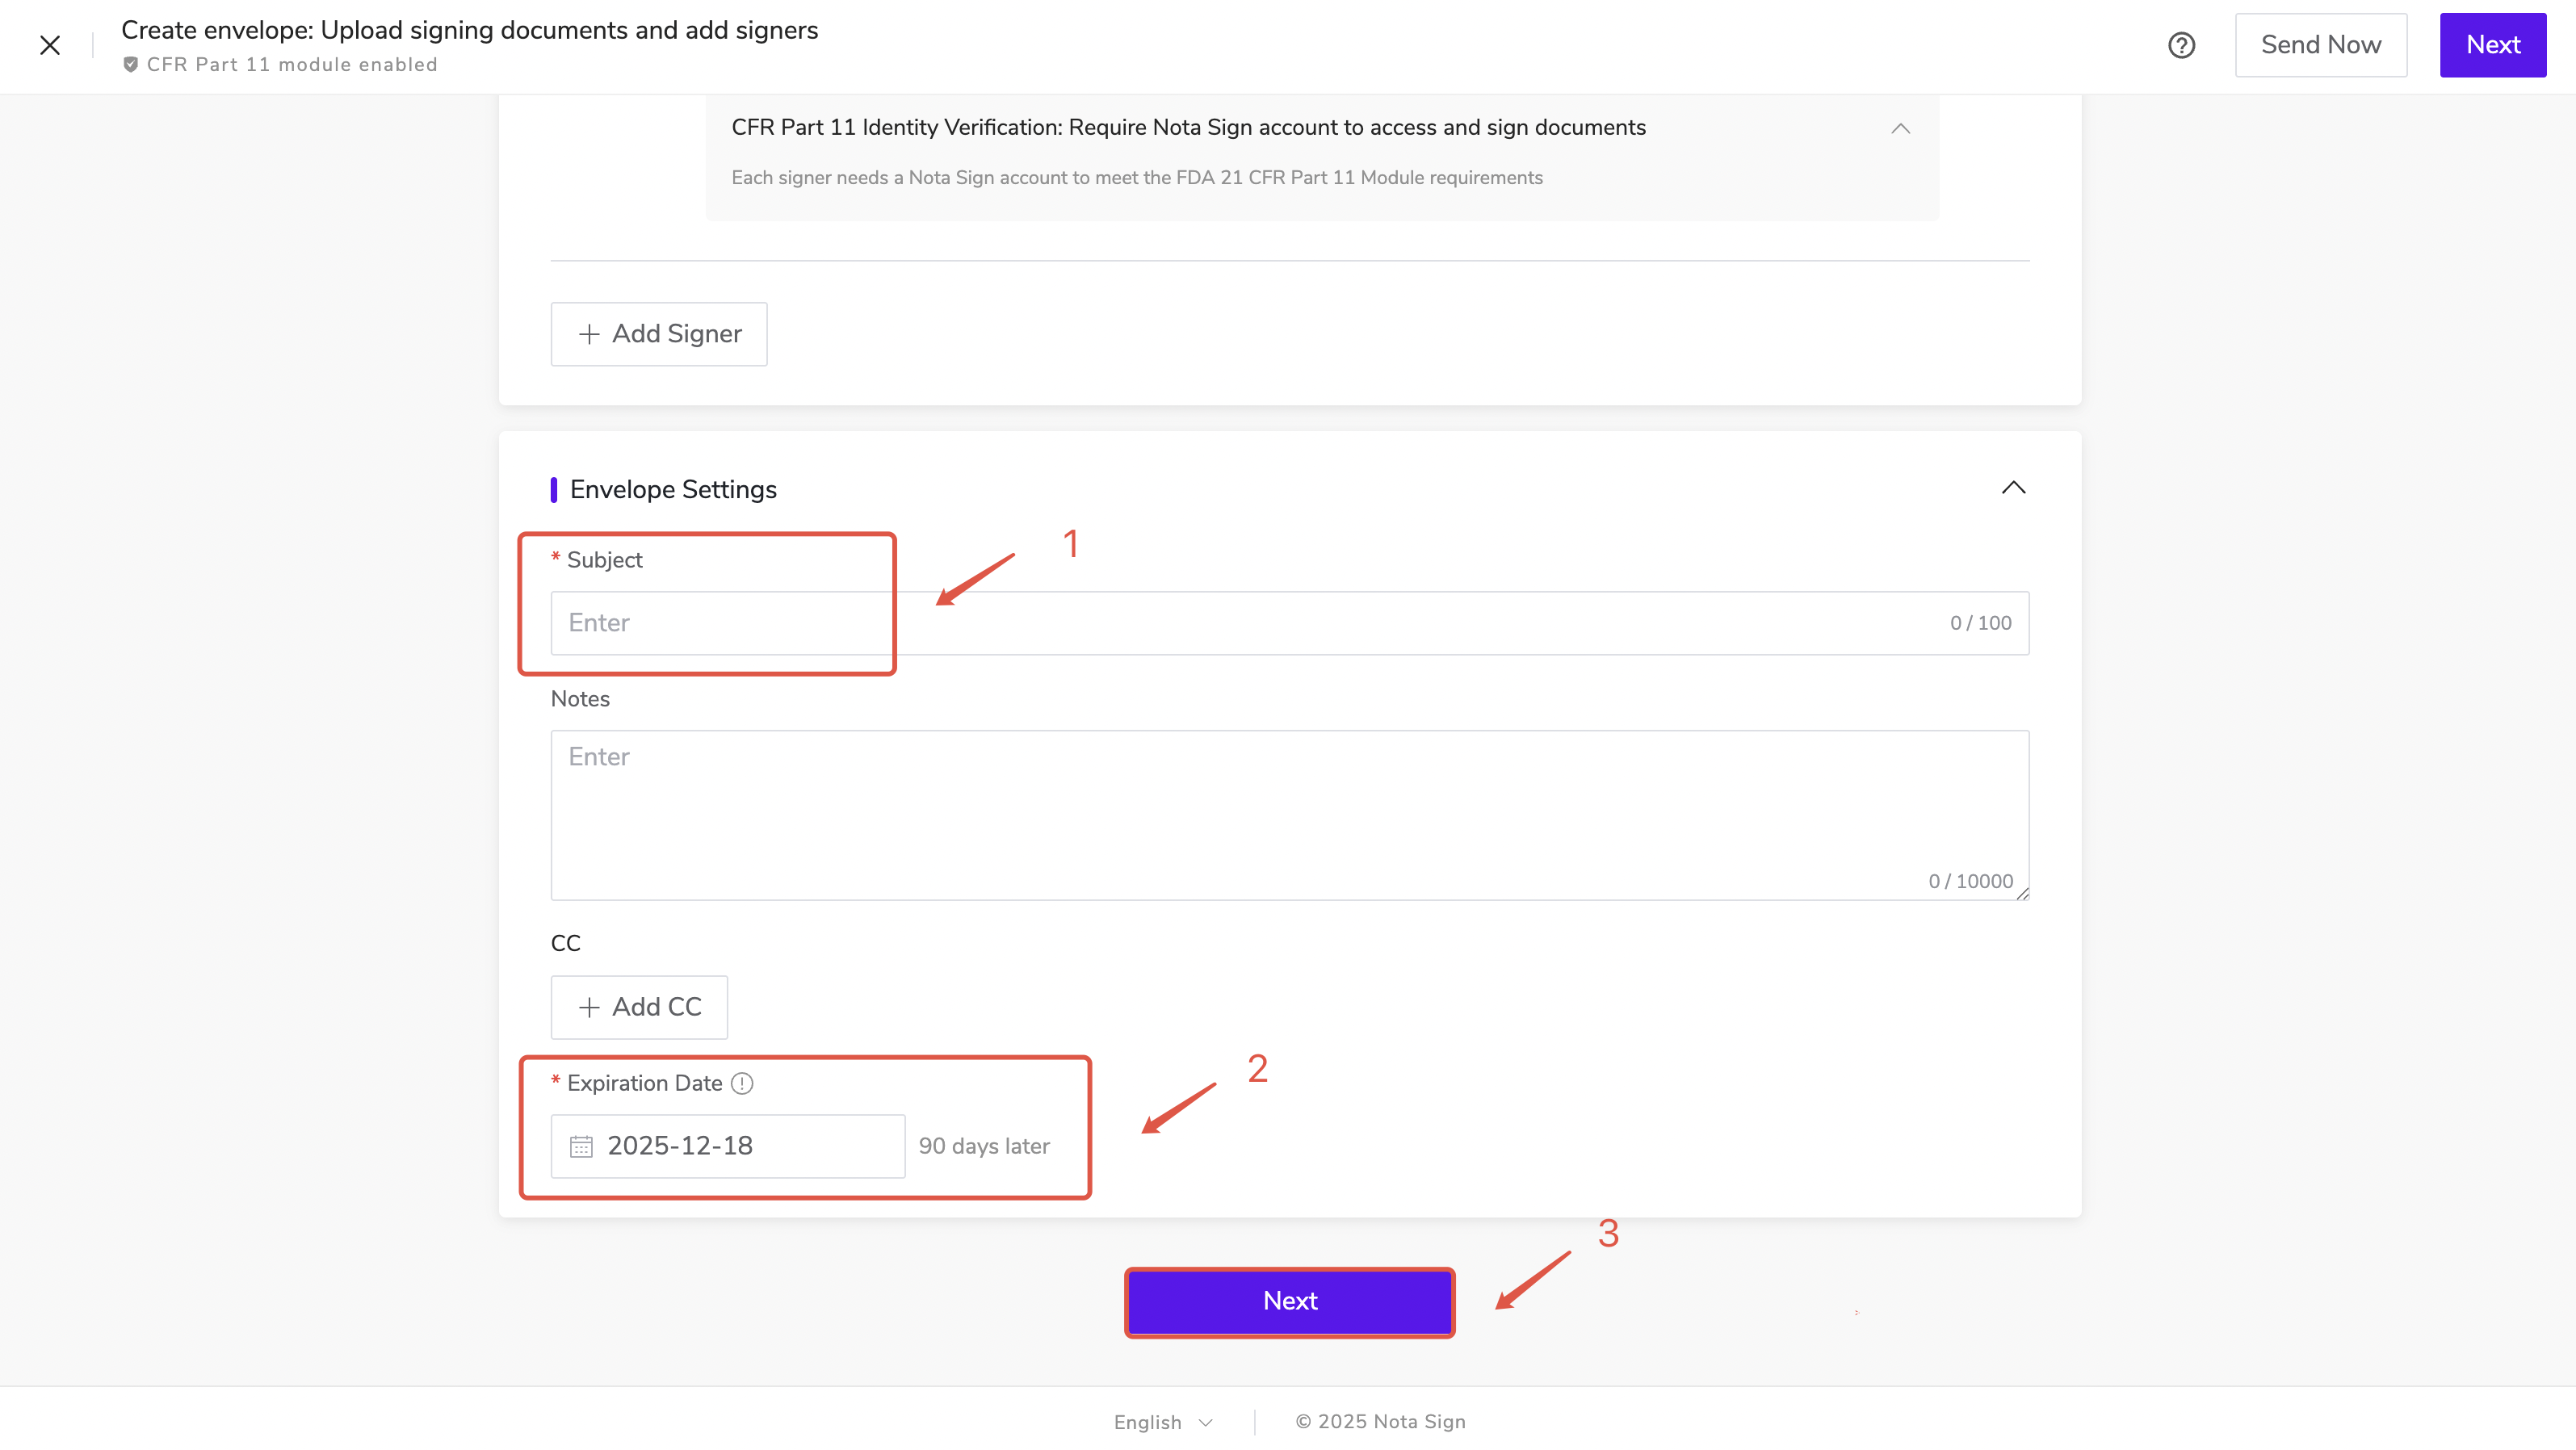
1.3. Set Envelope Details
-
Envelope Subject: Automatically populated from the document name; you may edit it.
-
Expiration Date: Specify a signing deadline (defaults to 90 days from envelope creation).
Optional Fields:
-
Add Message: Internal message shown in the envelope summary.
-
Add CC : Include observers who will be notified upon envelope completion.
- Click Next to proceed to the control settings page.
1.4. Configure Fields
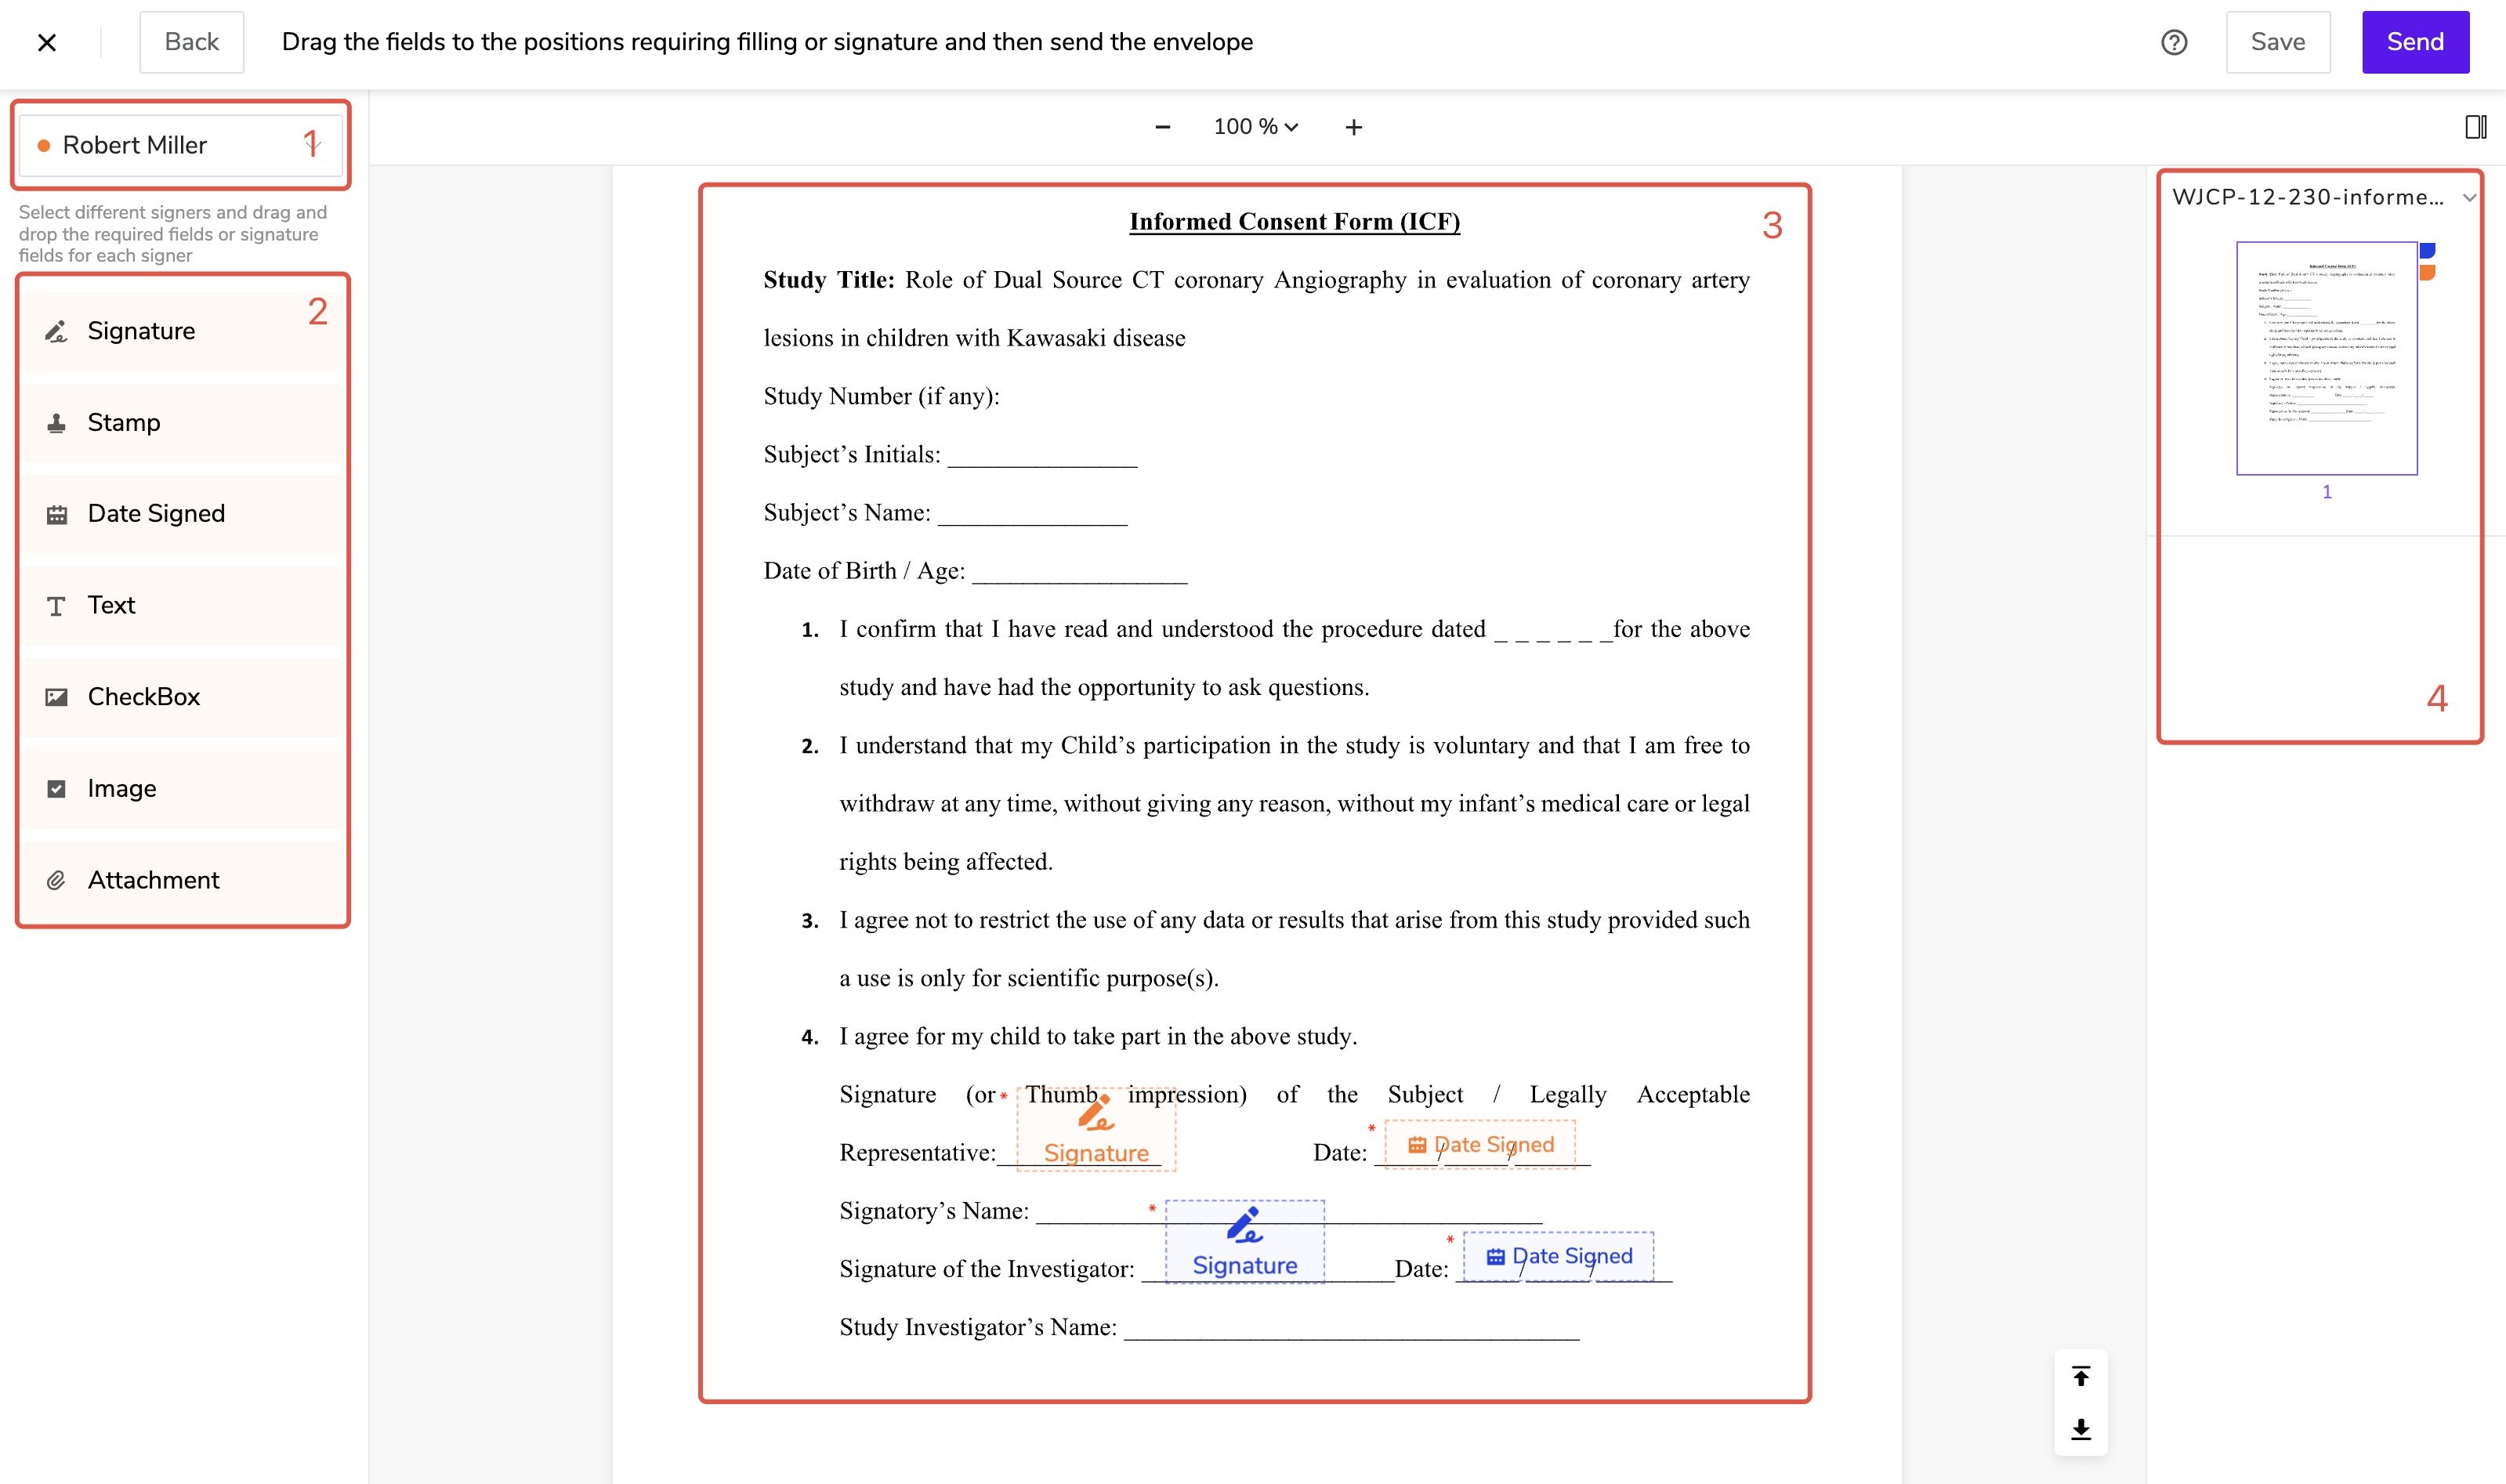
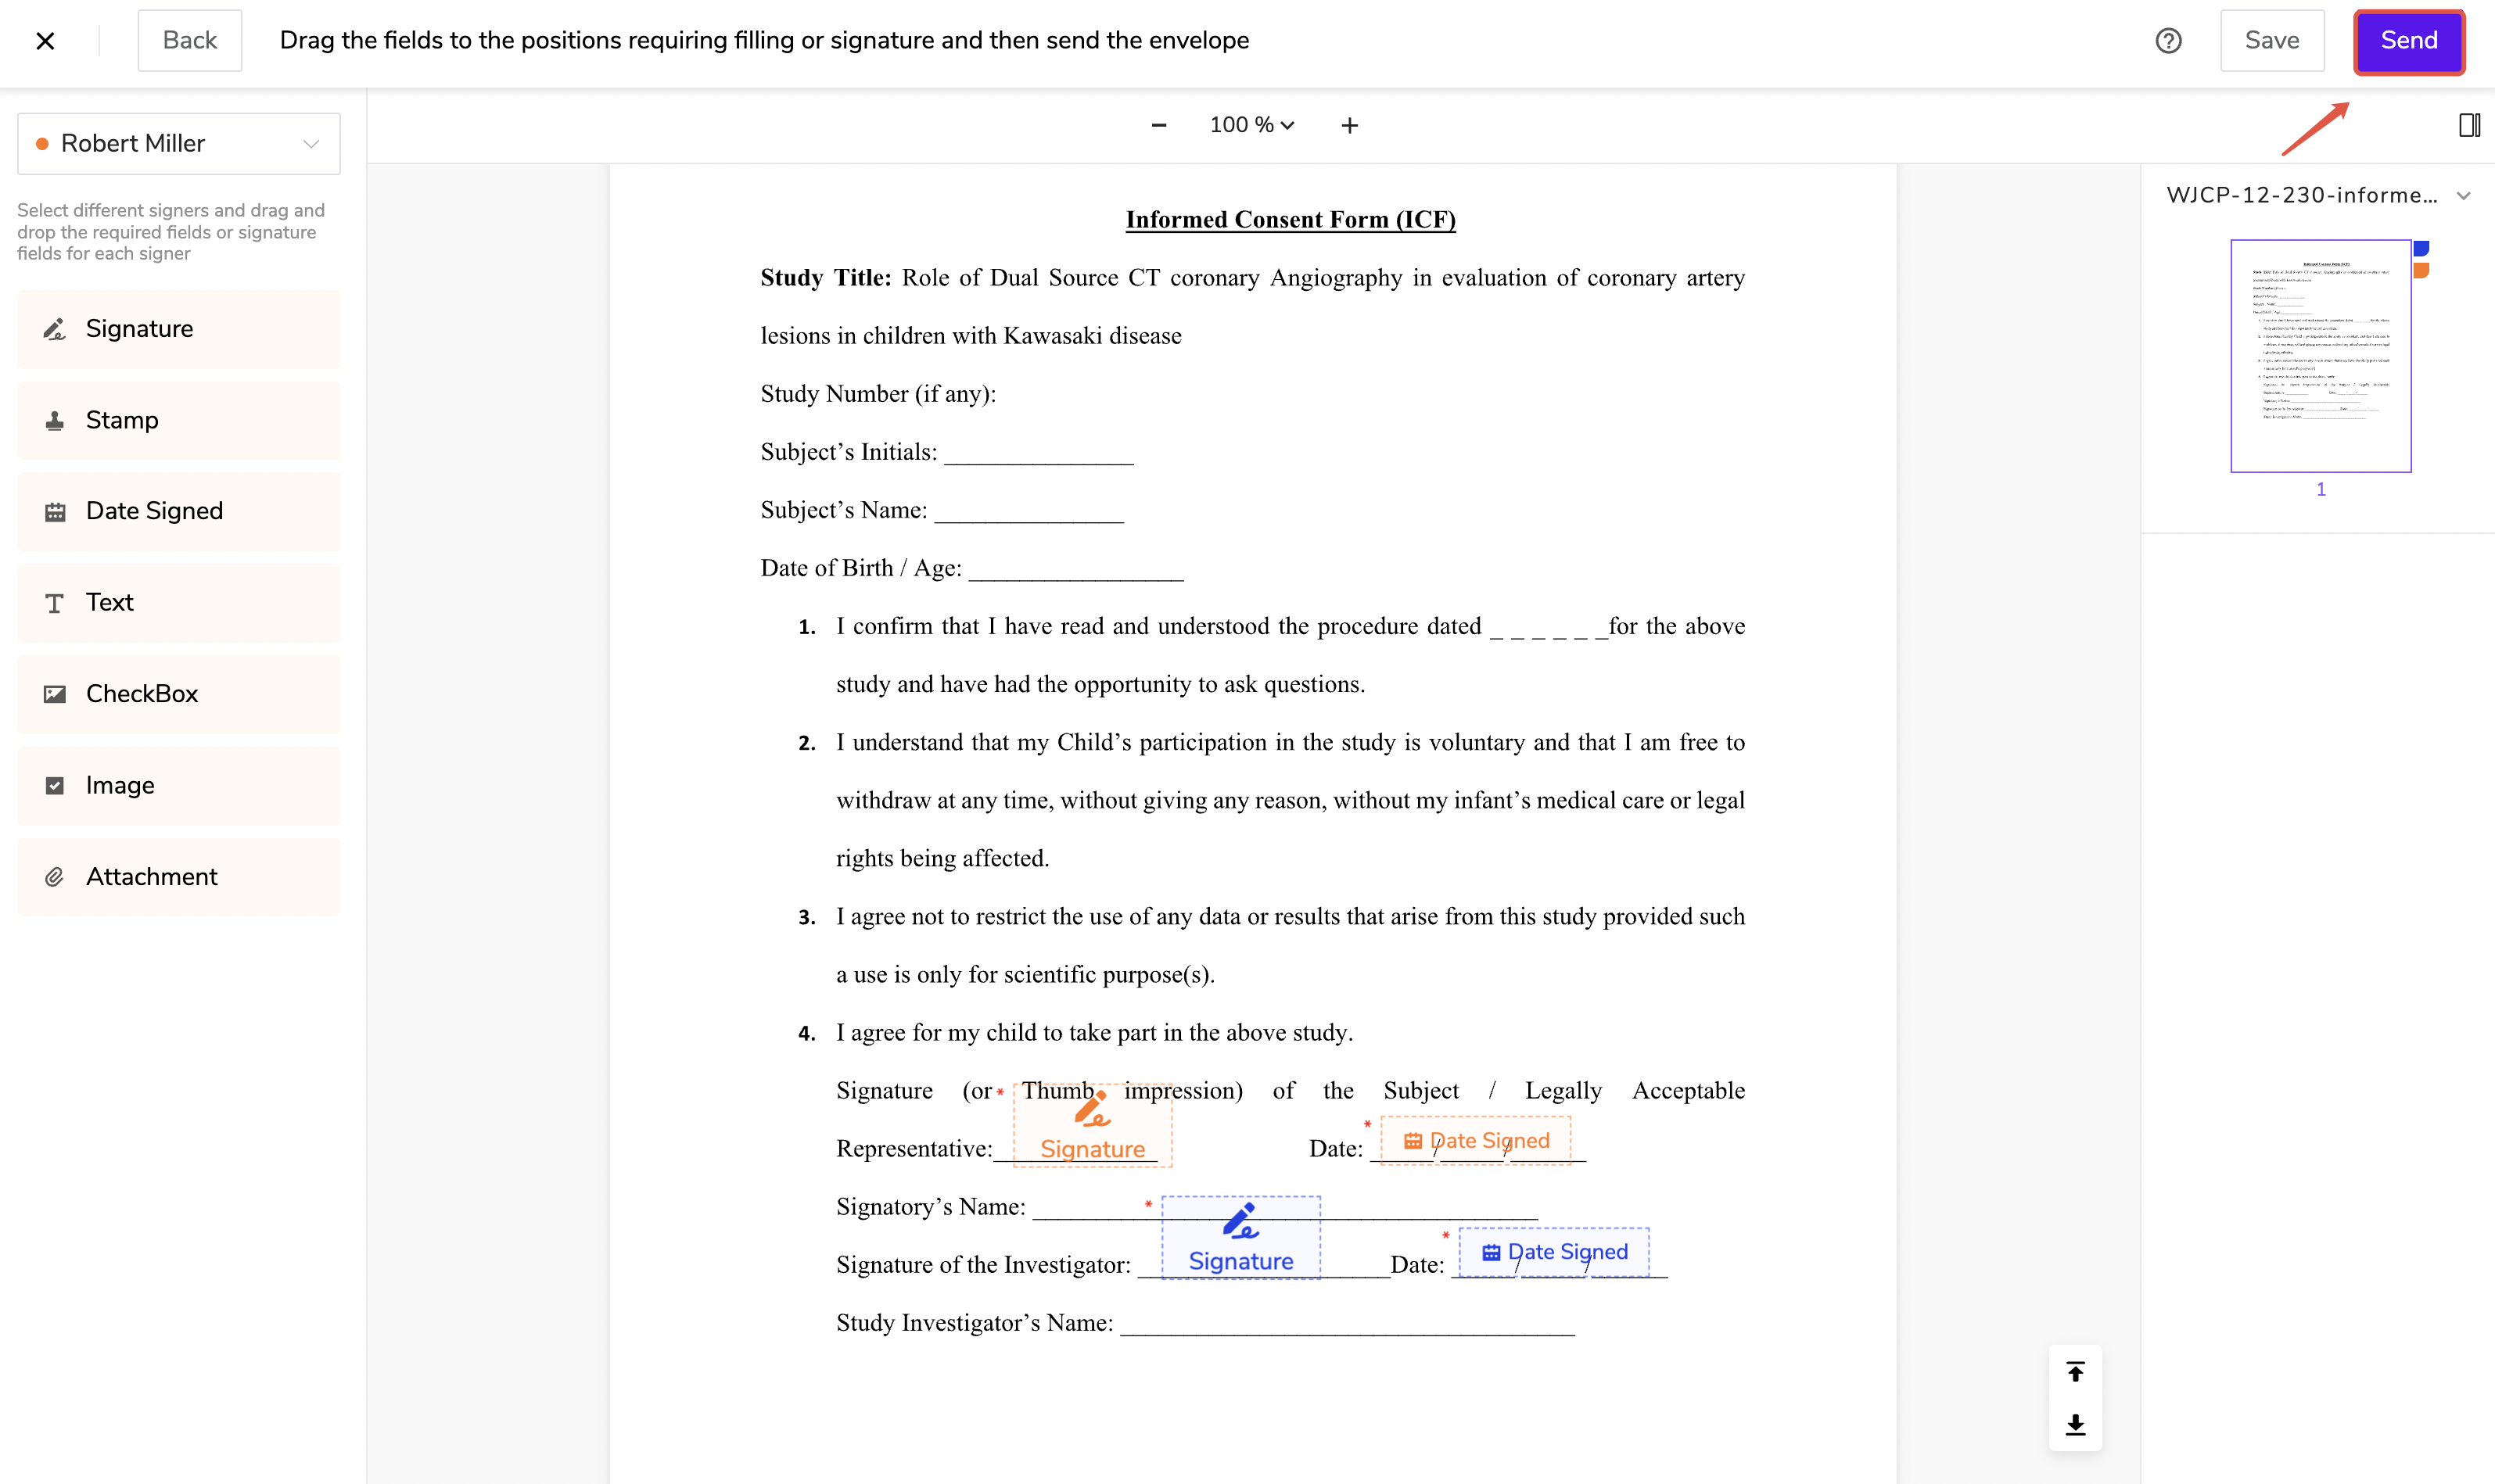
You will be taken to the Signature Configuration page, which includes the following panels:
-
Participant List: Select a signer to configure their fields.
-
Field Toolbar: Drag-and-drop fields (signature, text, checkbox, etc.) onto the document.
-
Document Preview Area: Review the uploaded document and place fields.
-
Document Navigator: Navigate through multiple uploaded files.
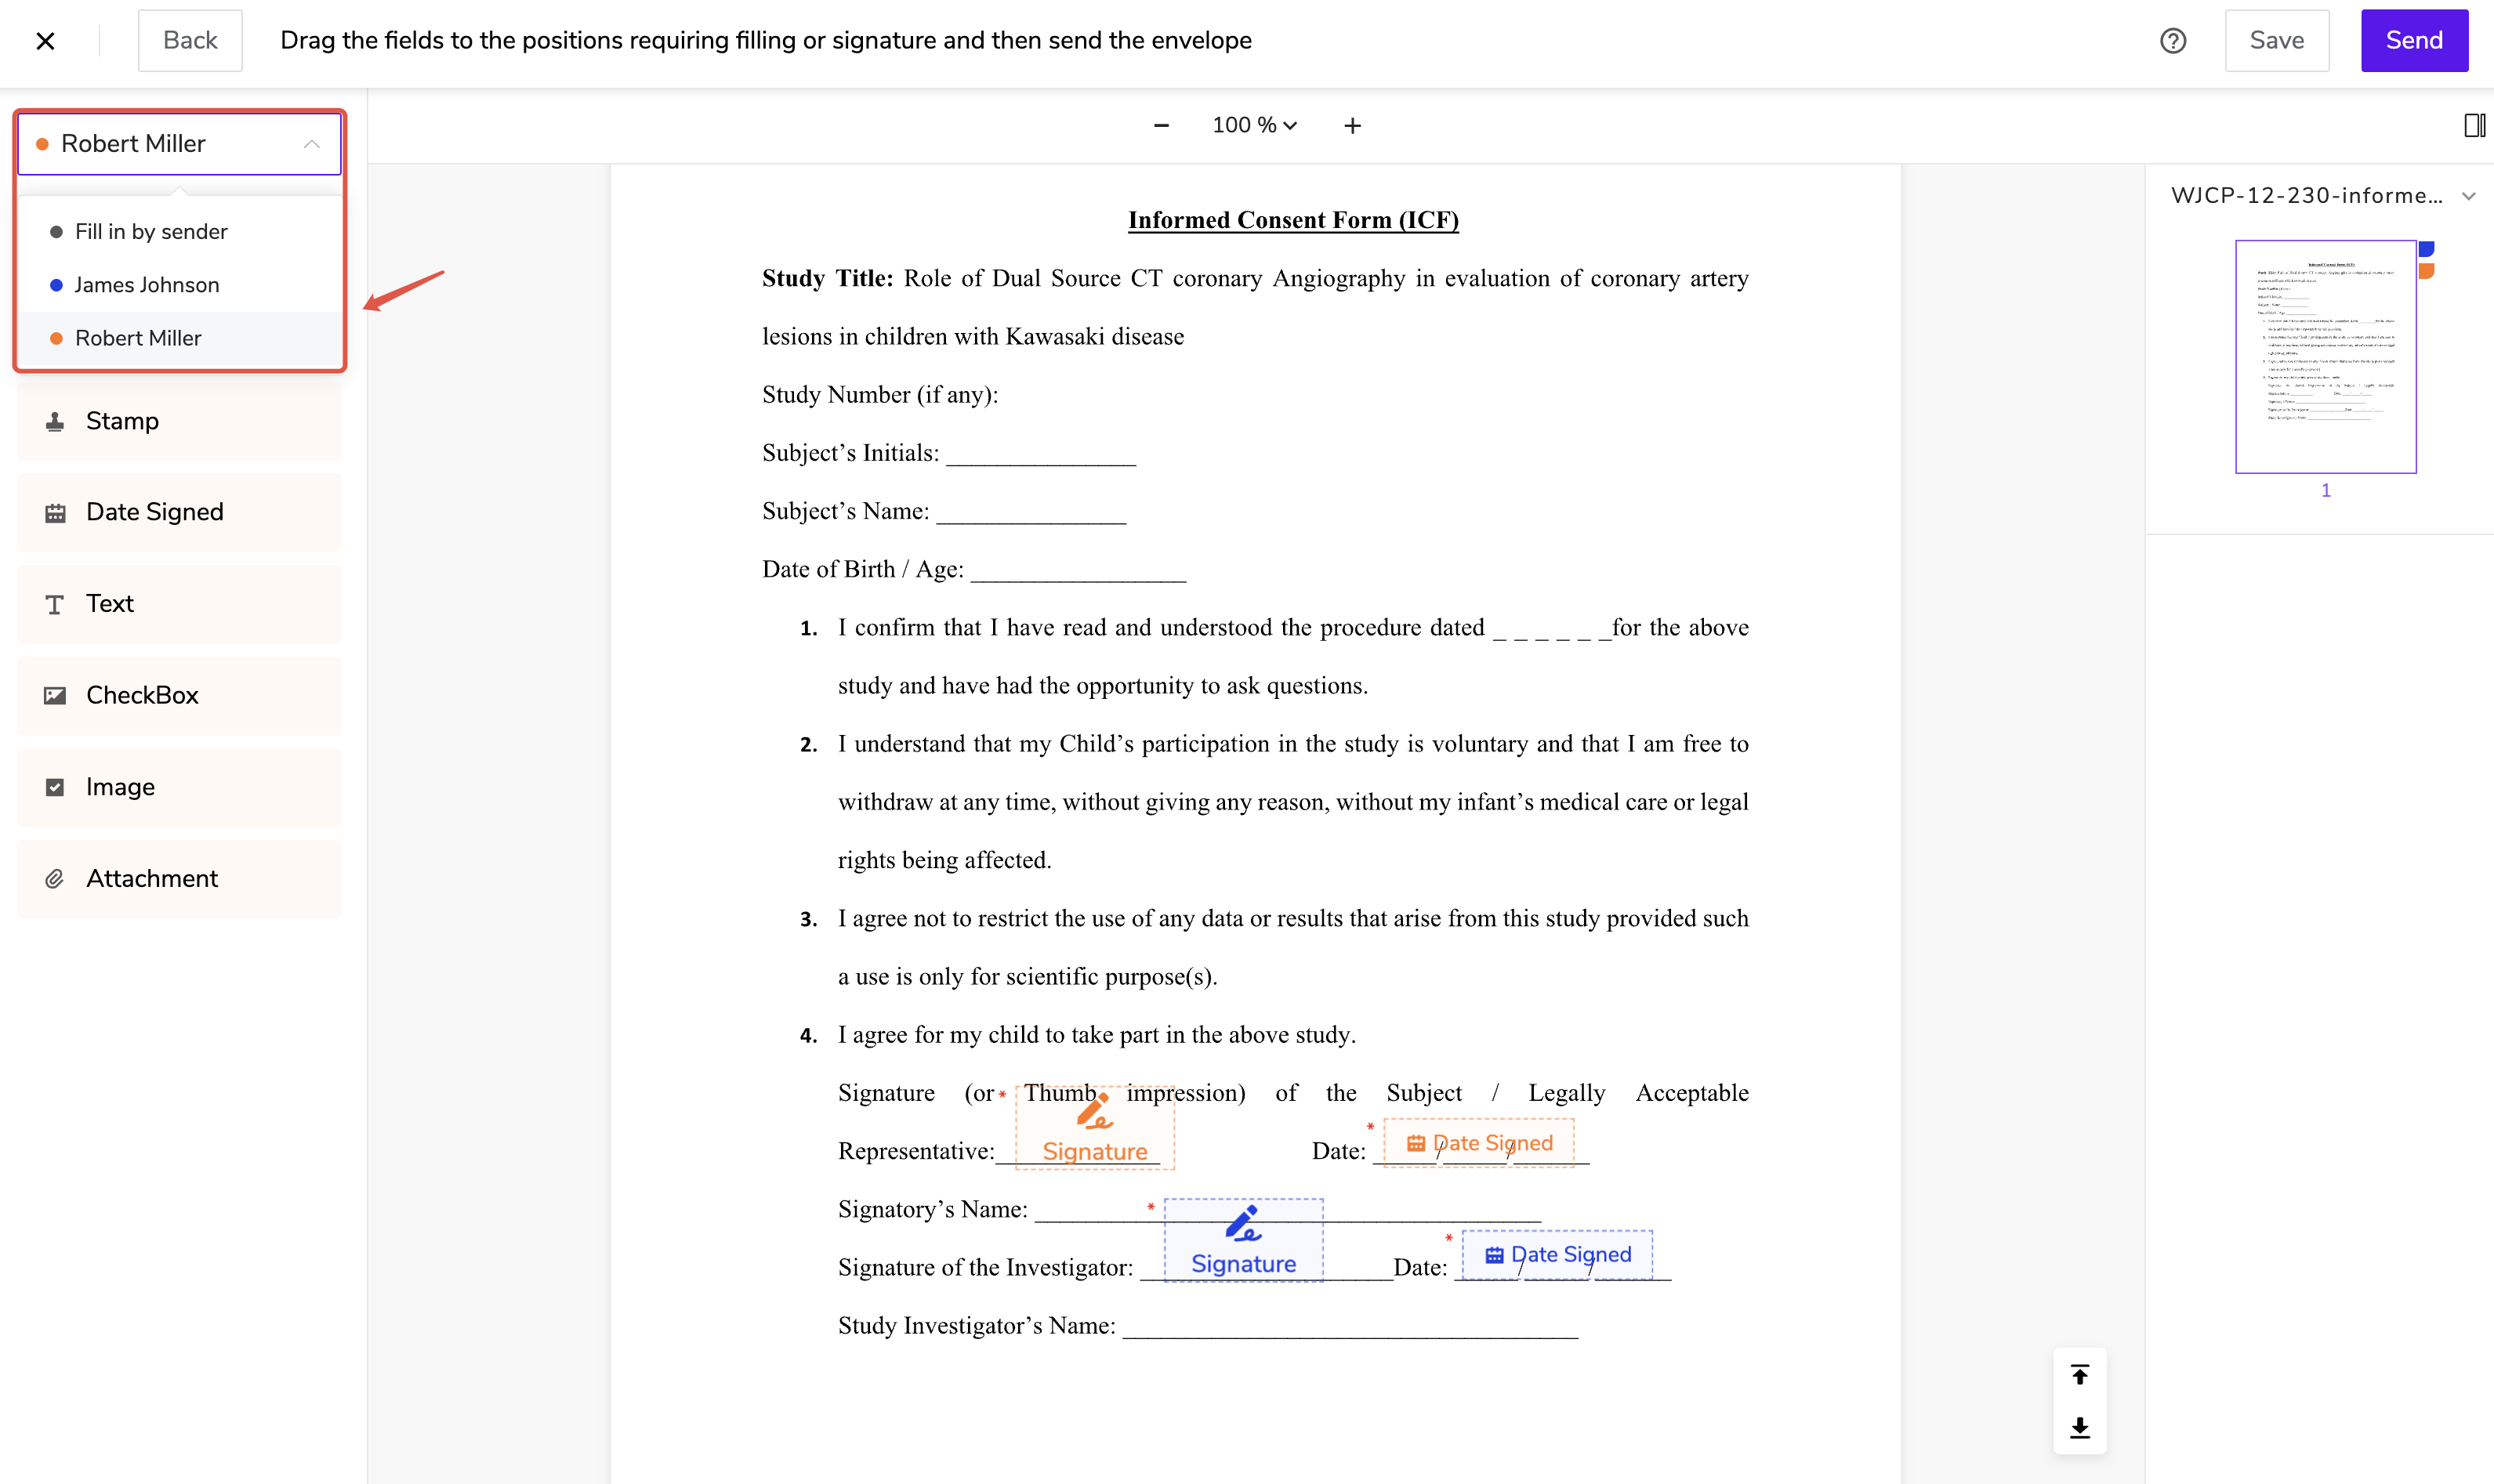
 Steps:
- Use the dropdown to select a signer.
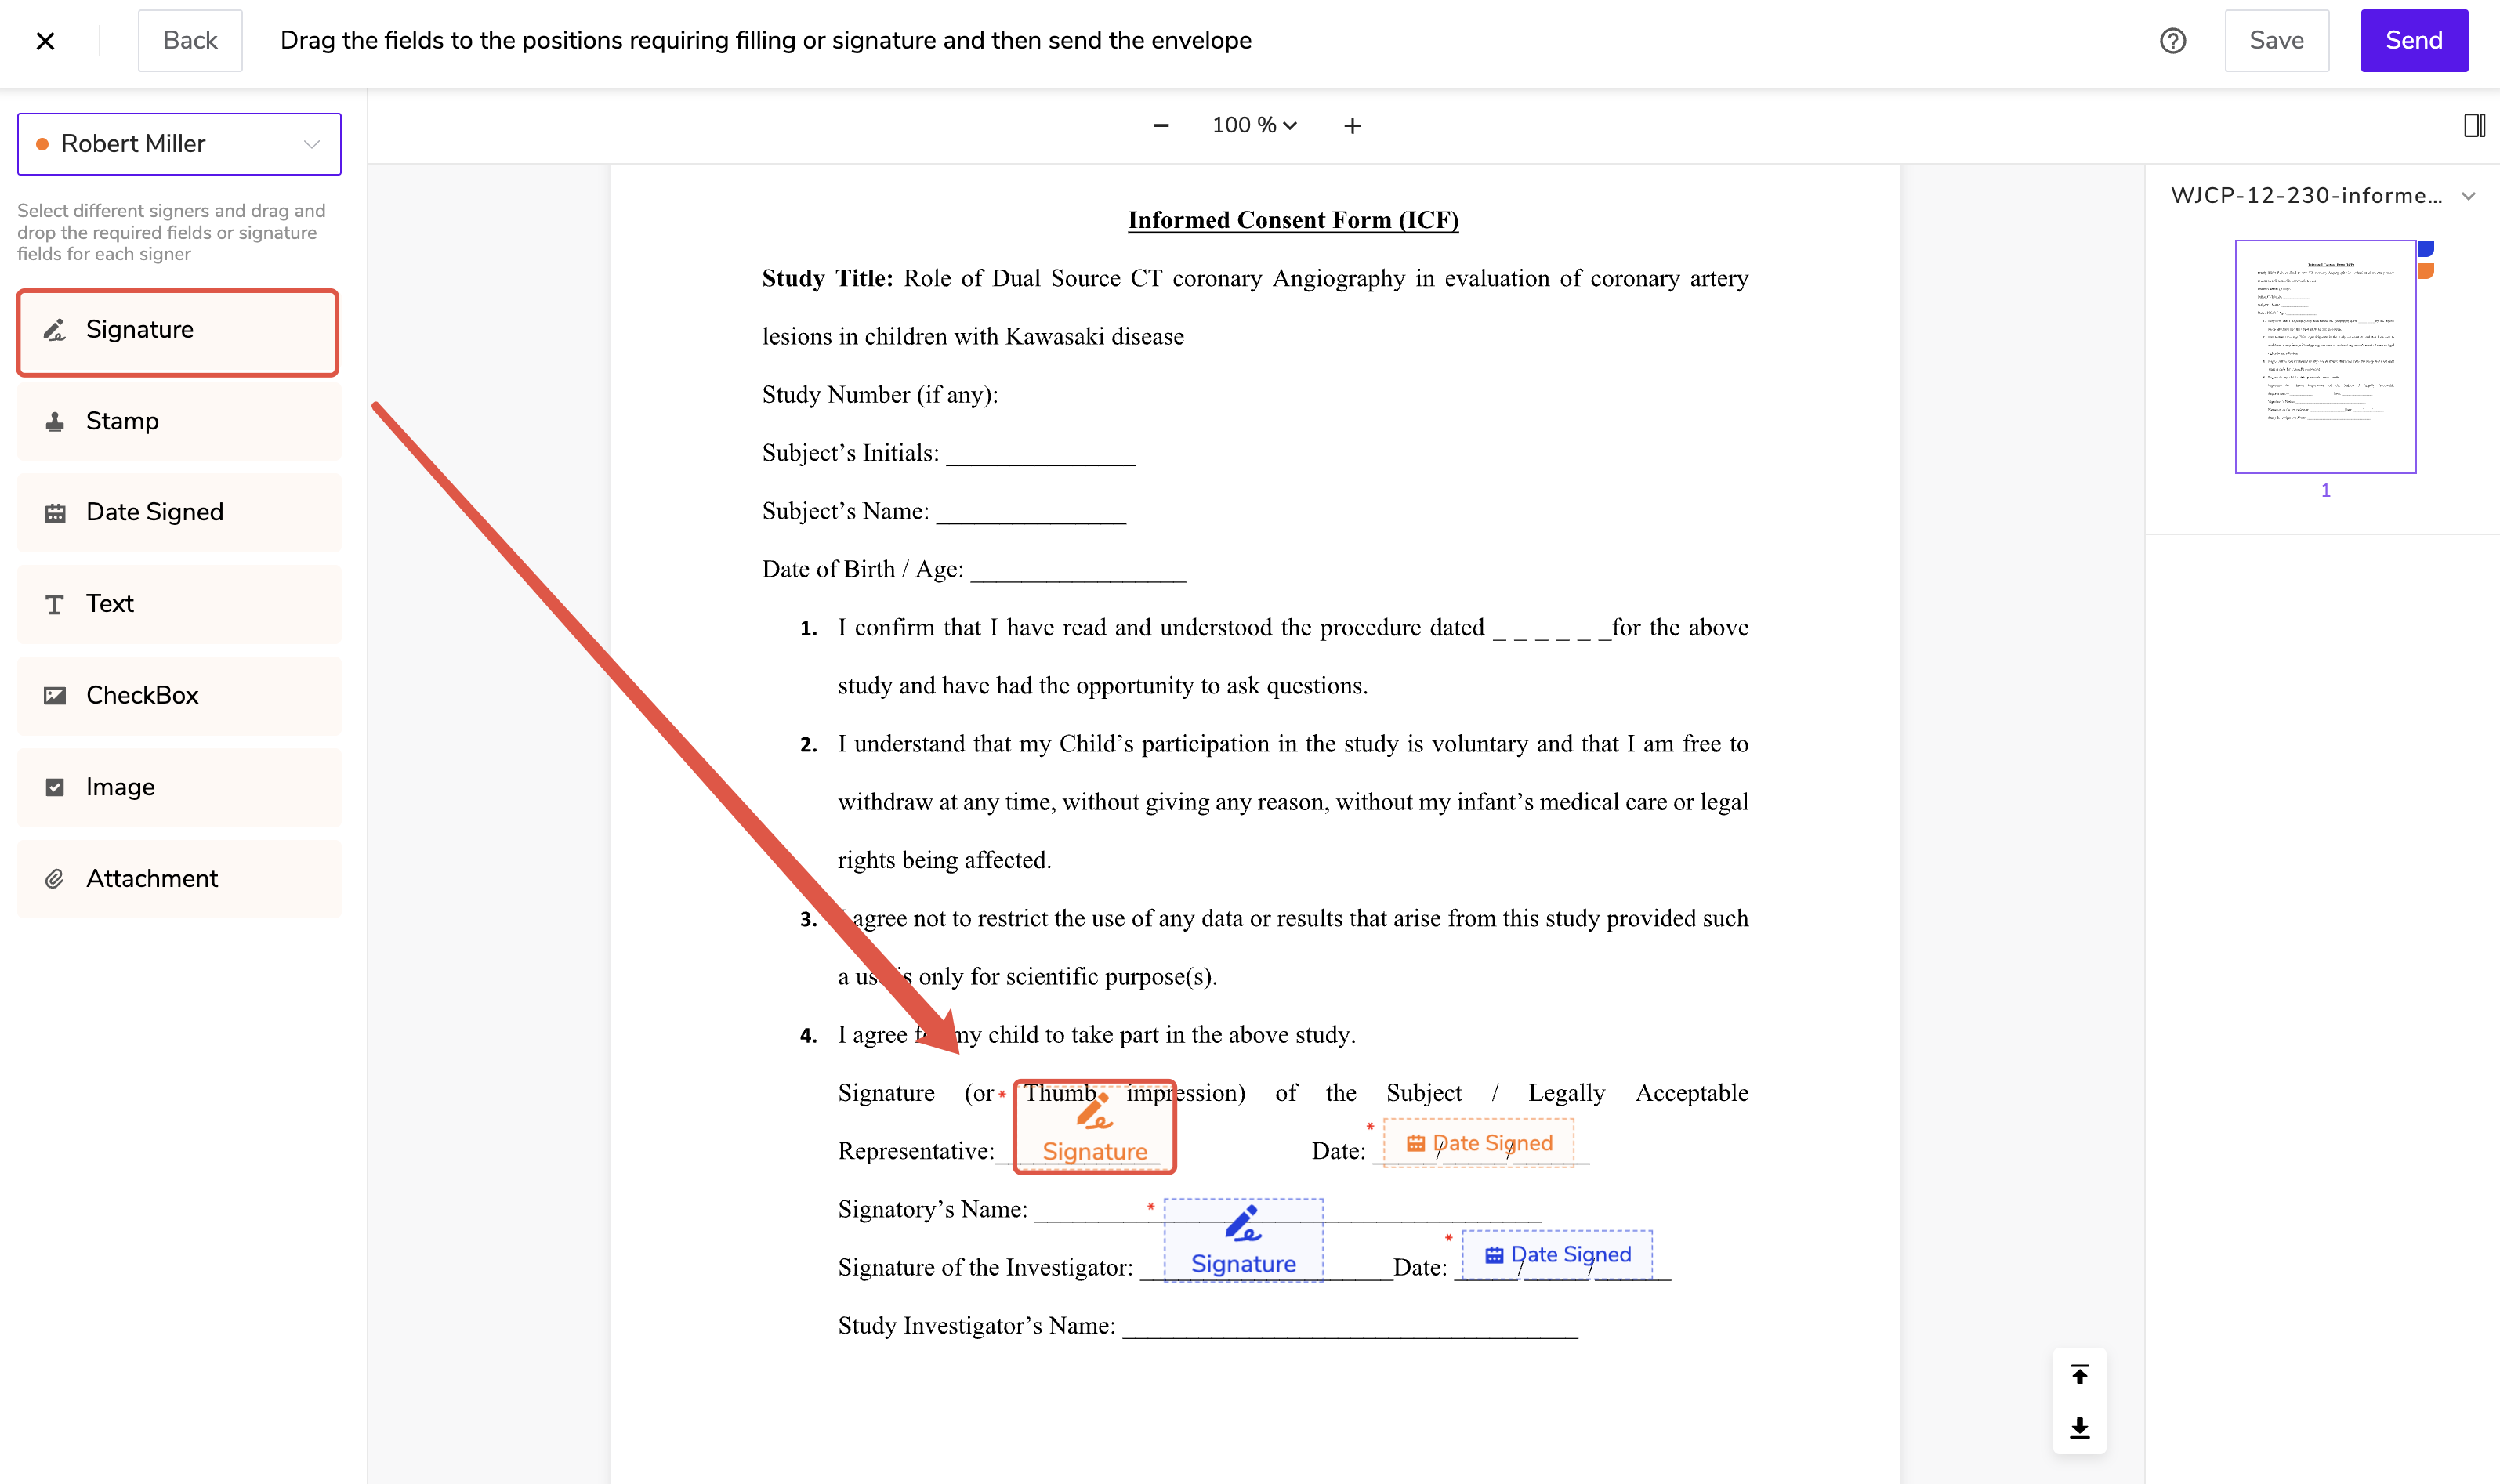
- Drag the required fields onto the document:
-
Signing Fields: Signature, stamp, date.
-
Input Fields: Text fields, checkboxes, image uploads, attachments.
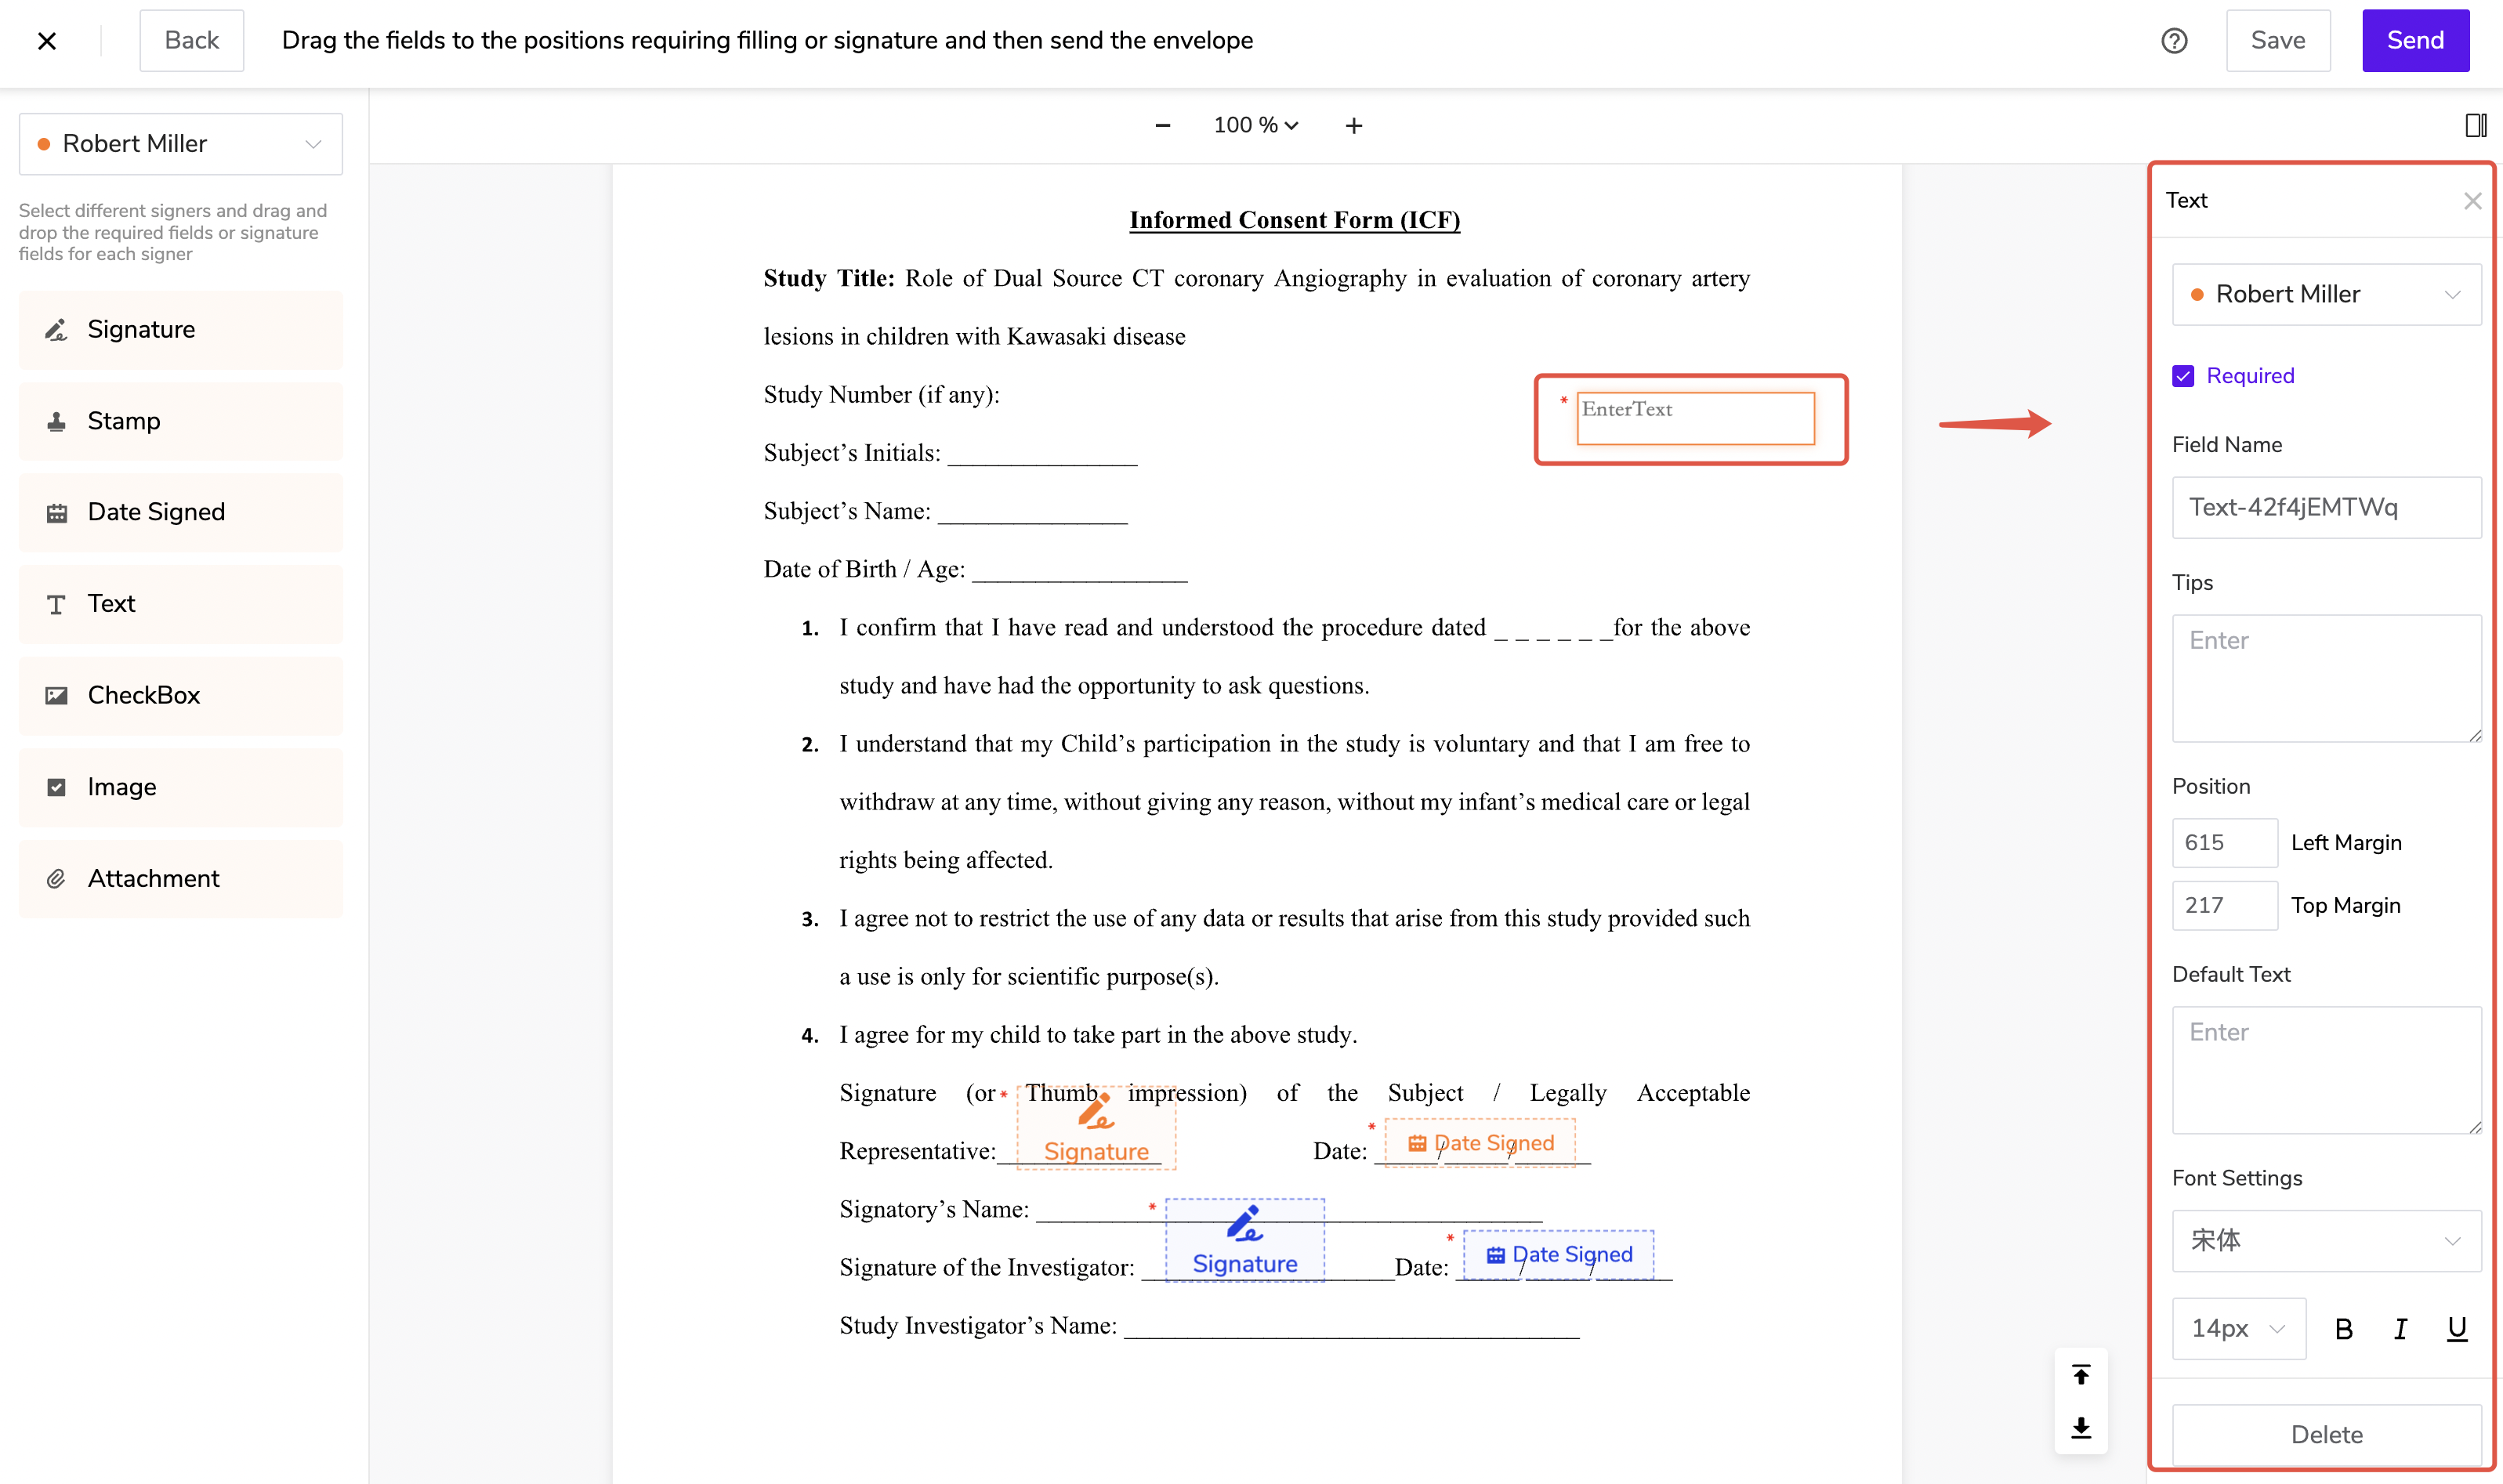
⚠️ Important: When using a Text Field, the assigned recipient must complete the required field before the signing process can proceed. Please ensure that all required text fields are properly filled by each designated signer to avoid delays in workflow progression.
- Customize each field:
-
Assign to signers.
-
Mark as required.
-
Add labels, hints, default text,and formatting.
1.5. Send the Envelope
When all fields are configured, click Send.
All signers will receive an email notification inviting them to complete the signing process.
💡 Tips: Once successfully sent, one envelope credit will be deducted.