
To improve sender efficiency and reduce the cost of repeatedly creating envelopes, we provide the Batch Send feature. Senders can generate and send multiple signing envelopes at once through batch import or batch configuration, meeting the needs of enterprises in large-scale contract, agreement, and document signing scenarios.
Video Tutorial:
I. Creating a Batch Send Task
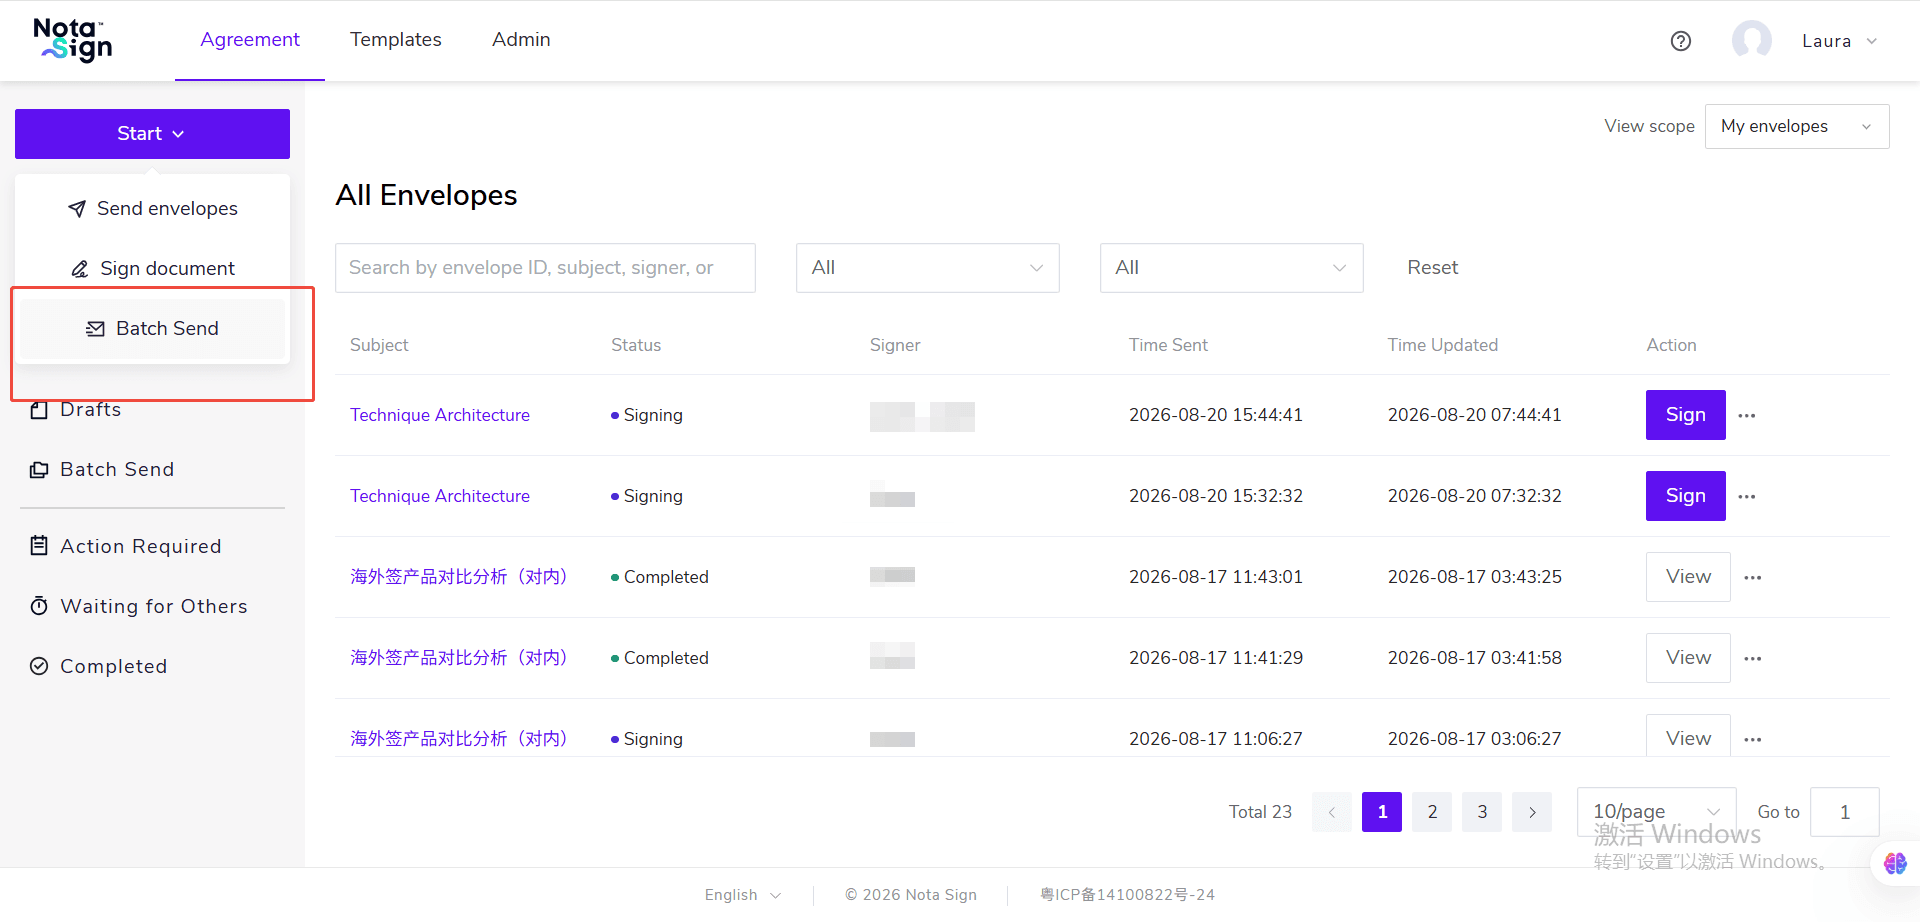
1. If you have subscribed to Nota Sign Professional Edition, a [Batch Send] button will appear in “Workspace - Sign - Initiate.” Click it to enter the batch send task creation interface.
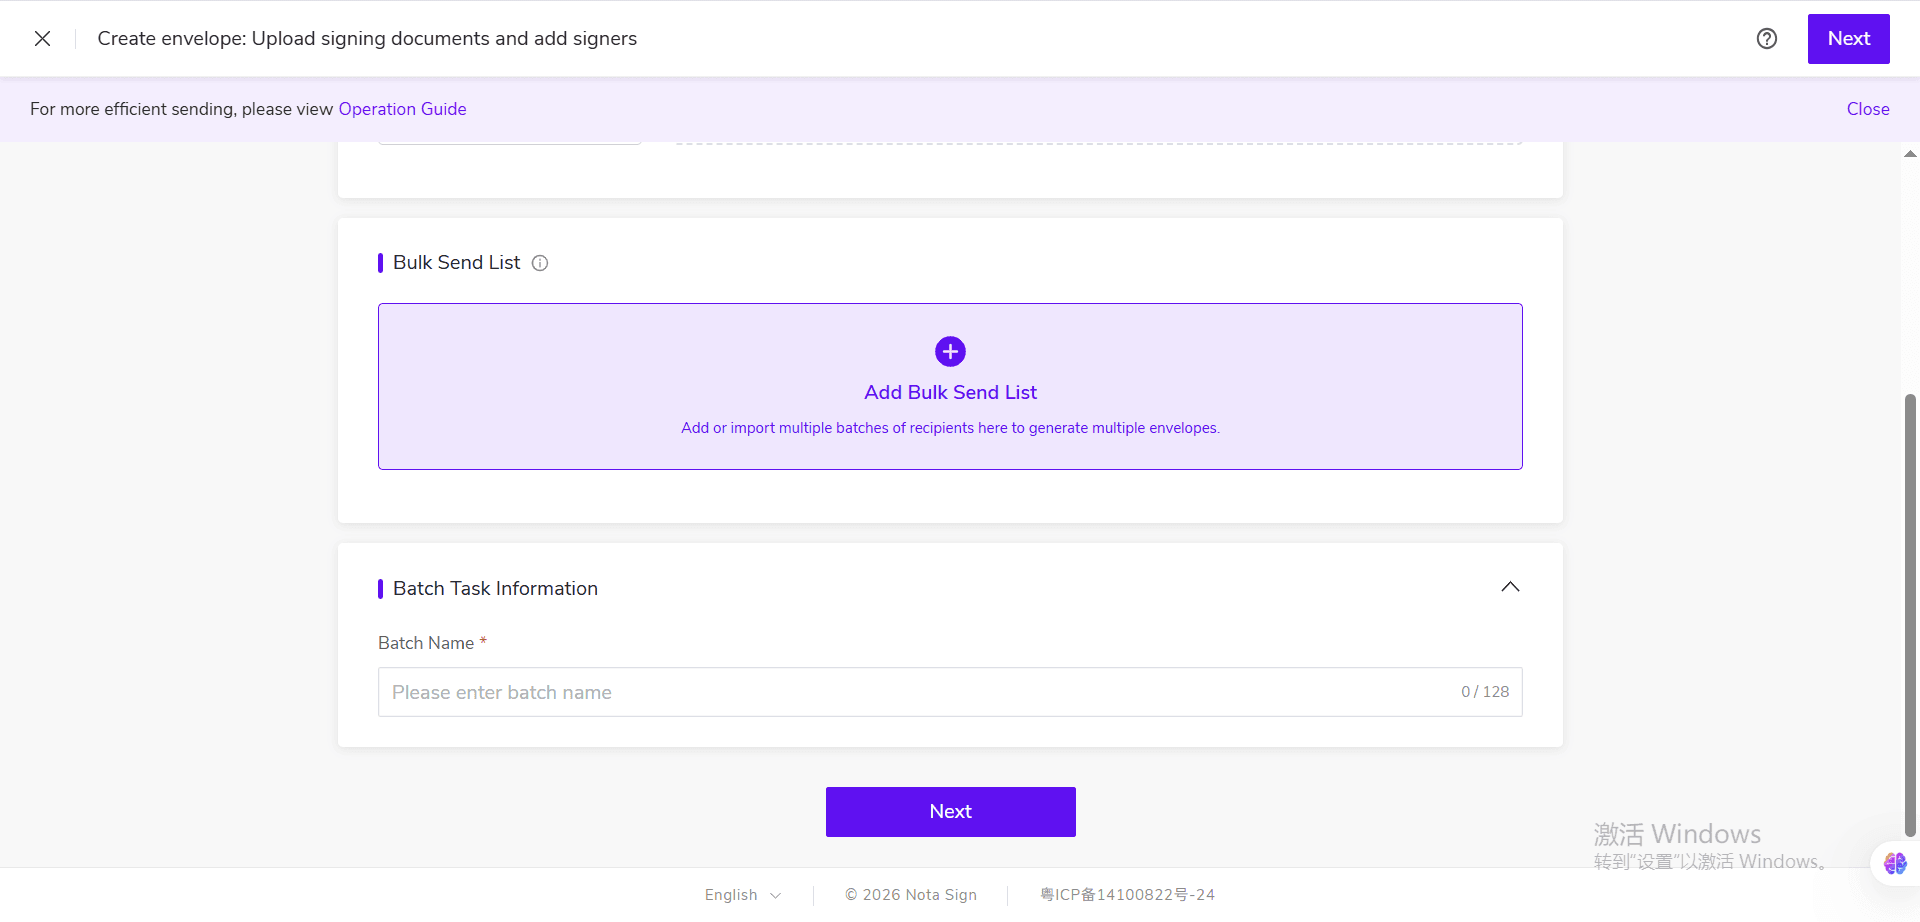
2. After entering, upload the documents to be signed or reference an existing batch send template.
After the batch task is initiated, the system will add the uploaded documents to each envelope generated in the manifest and send them to the corresponding recipients.
3. Click [Batch Send Manifest] to maintain the differentiated data for each envelope.
Each row in the batch send manifest represents one envelope to be sent. The following information can be maintained:
- Envelope basic information;
- Batch roles and recipient information;
- CC recipients;
- Sender-pre-filled fields.
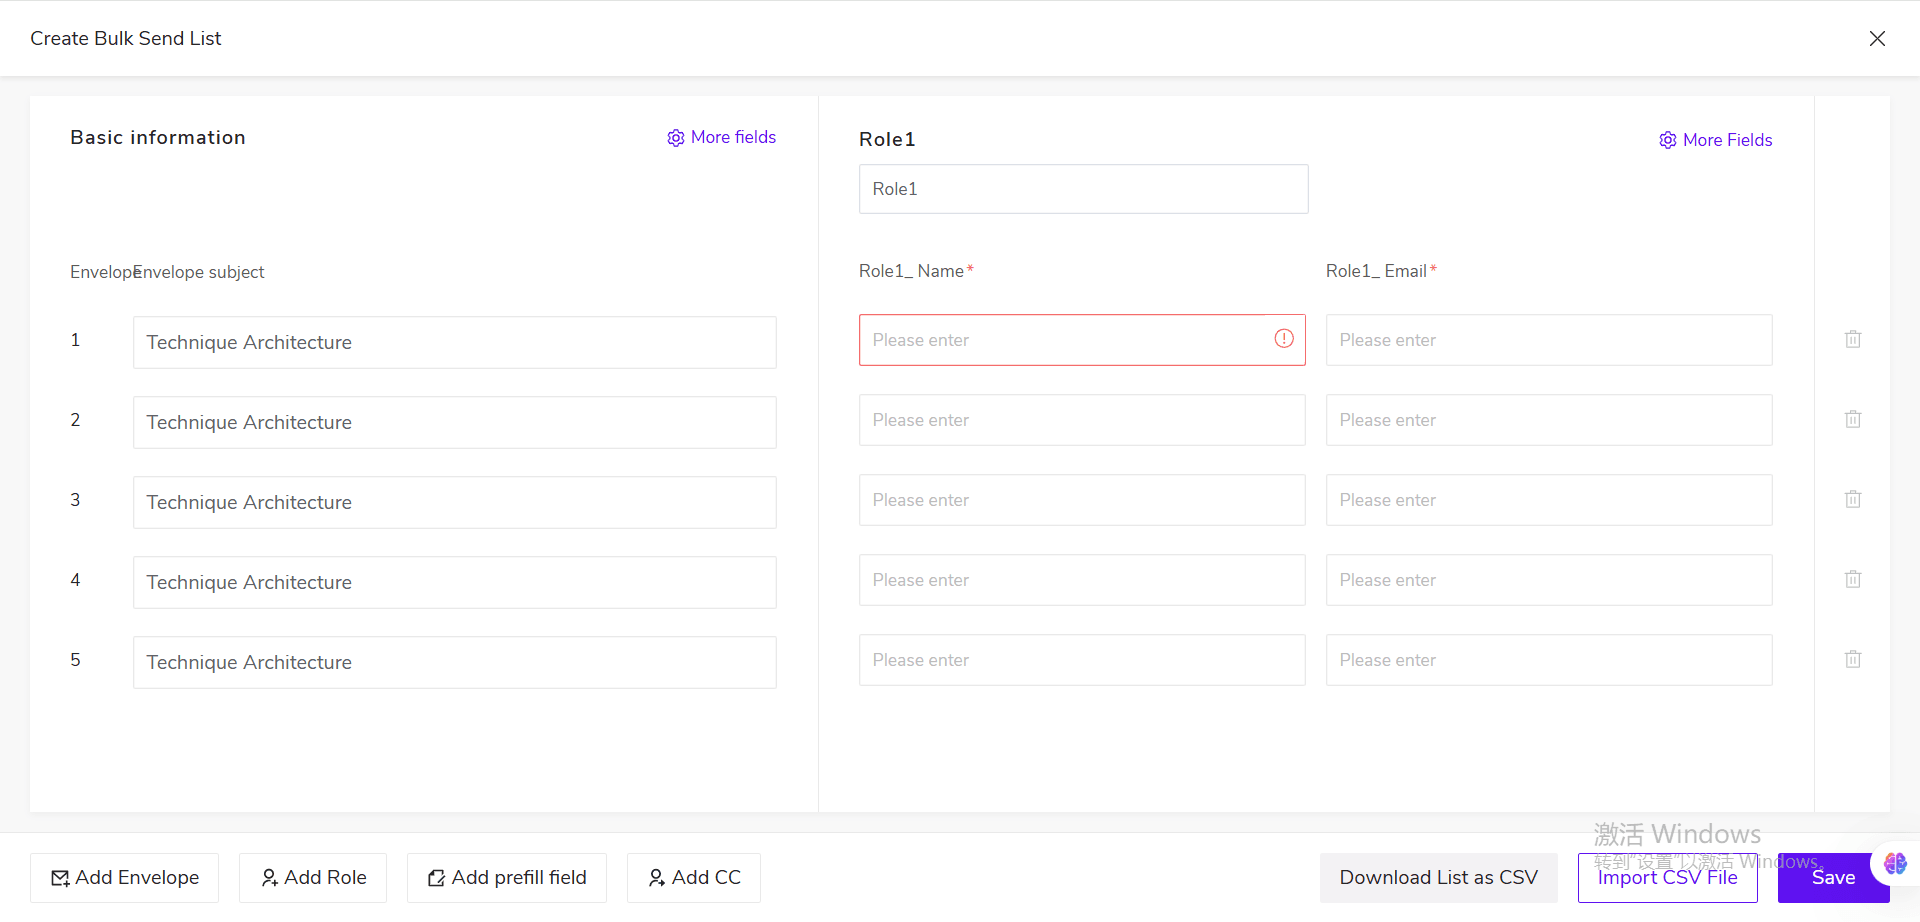
4. Set the basic information for each envelope.
When creating a new manifest, the basic information defaults to displaying [Envelope Subject].
To set additional information, click [More Fields] in the basic information section and check:
- Remarks;
- Valid Until;
- Reminder Frequency.
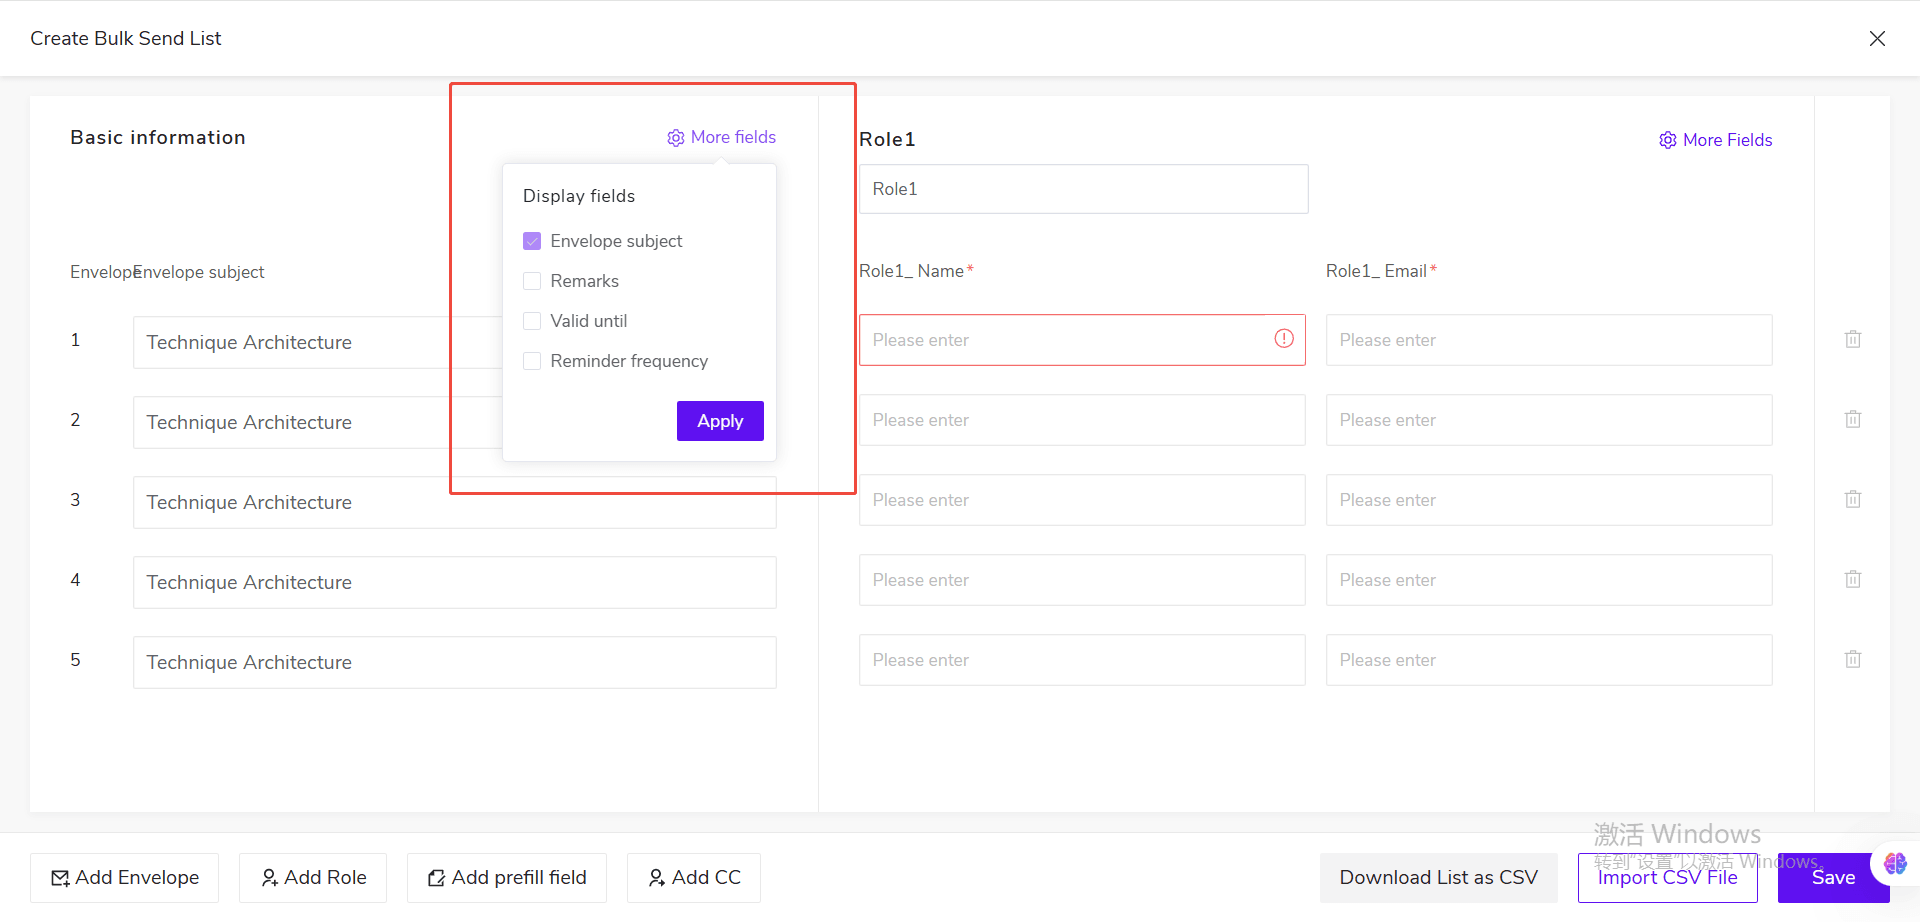
After clicking [Apply], the corresponding fields will be displayed in the manifest, allowing you to enter different content for different envelopes.
💡 Notes:
- If the remarks field is not added, the system uses the default remarks.
- The validity period defaults to the 90th day after the task creation date.
- The reminder frequency defaults to [None].
- Reminder frequency can be set to None, Daily, Every Two Days, Every Three Days, Every Five Days, or Weekly.
5. Add and set up batch roles.
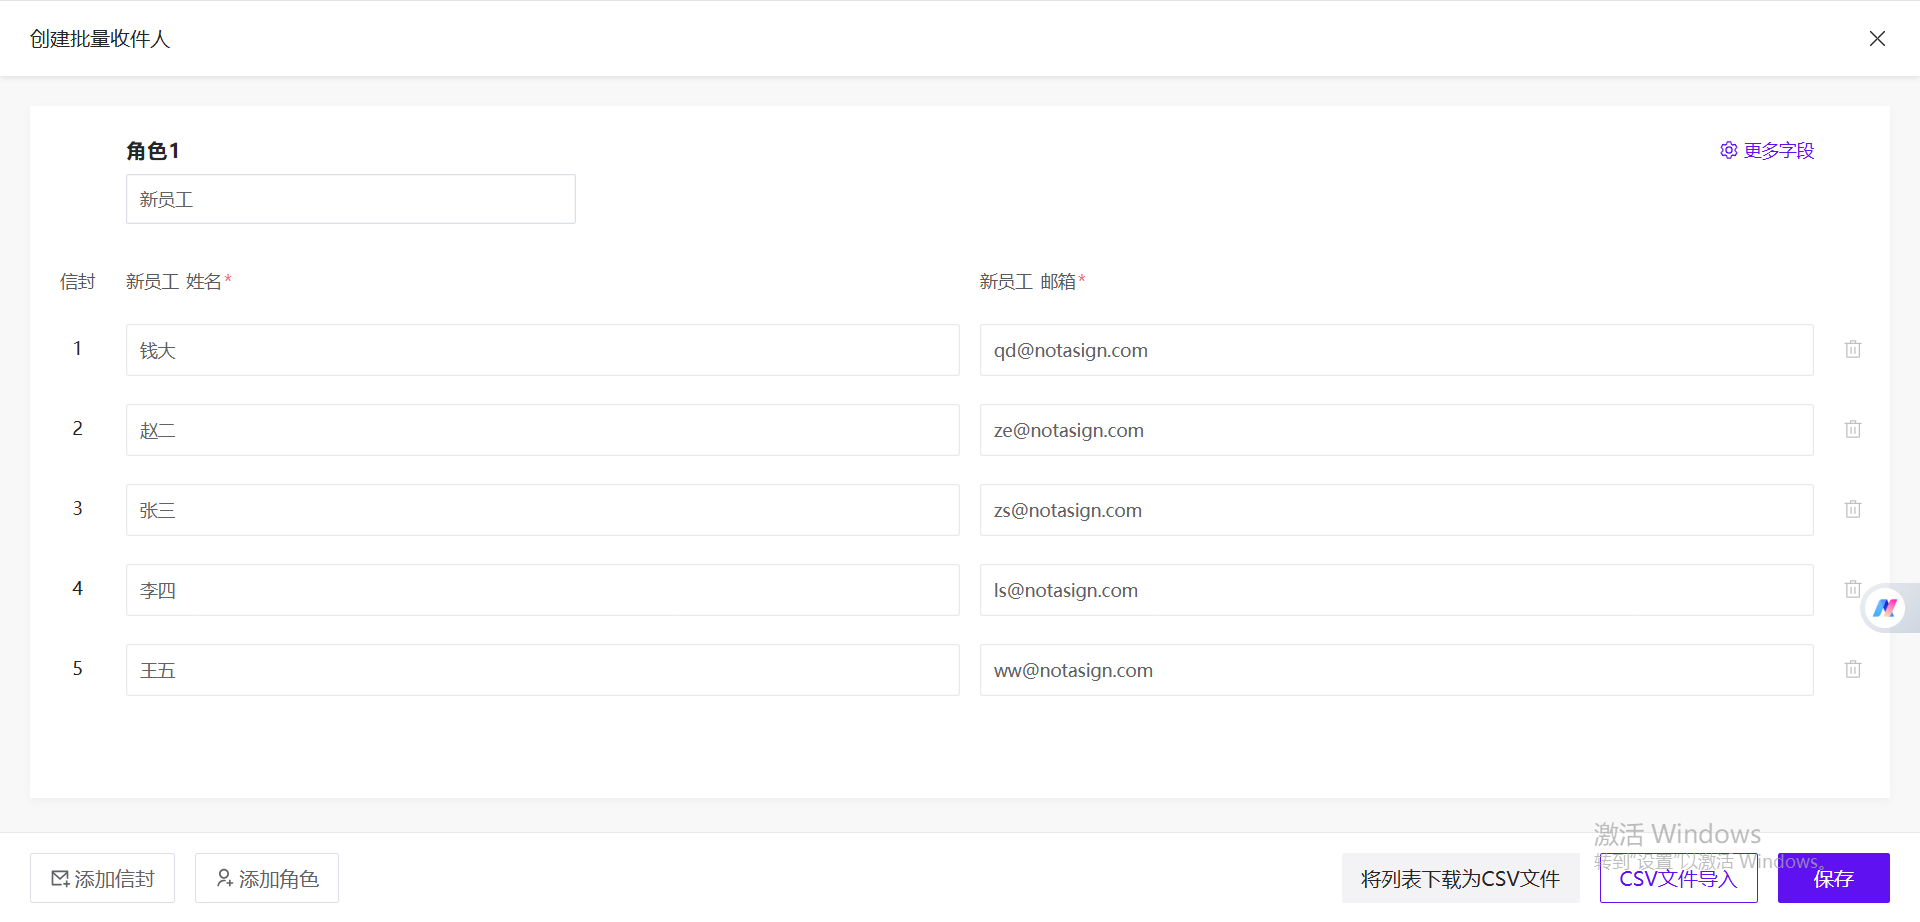
If different envelopes need to be sent to different recipients, you can add batch roles in the manifest and fill in the name and email for each role.
* For example, in a new employee onboarding scenario where HR needs to send contracts to 1,000 employees, you can add 1,000 envelopes, set the new employees as a role, and configure the recipient information for that role in each envelope.
-
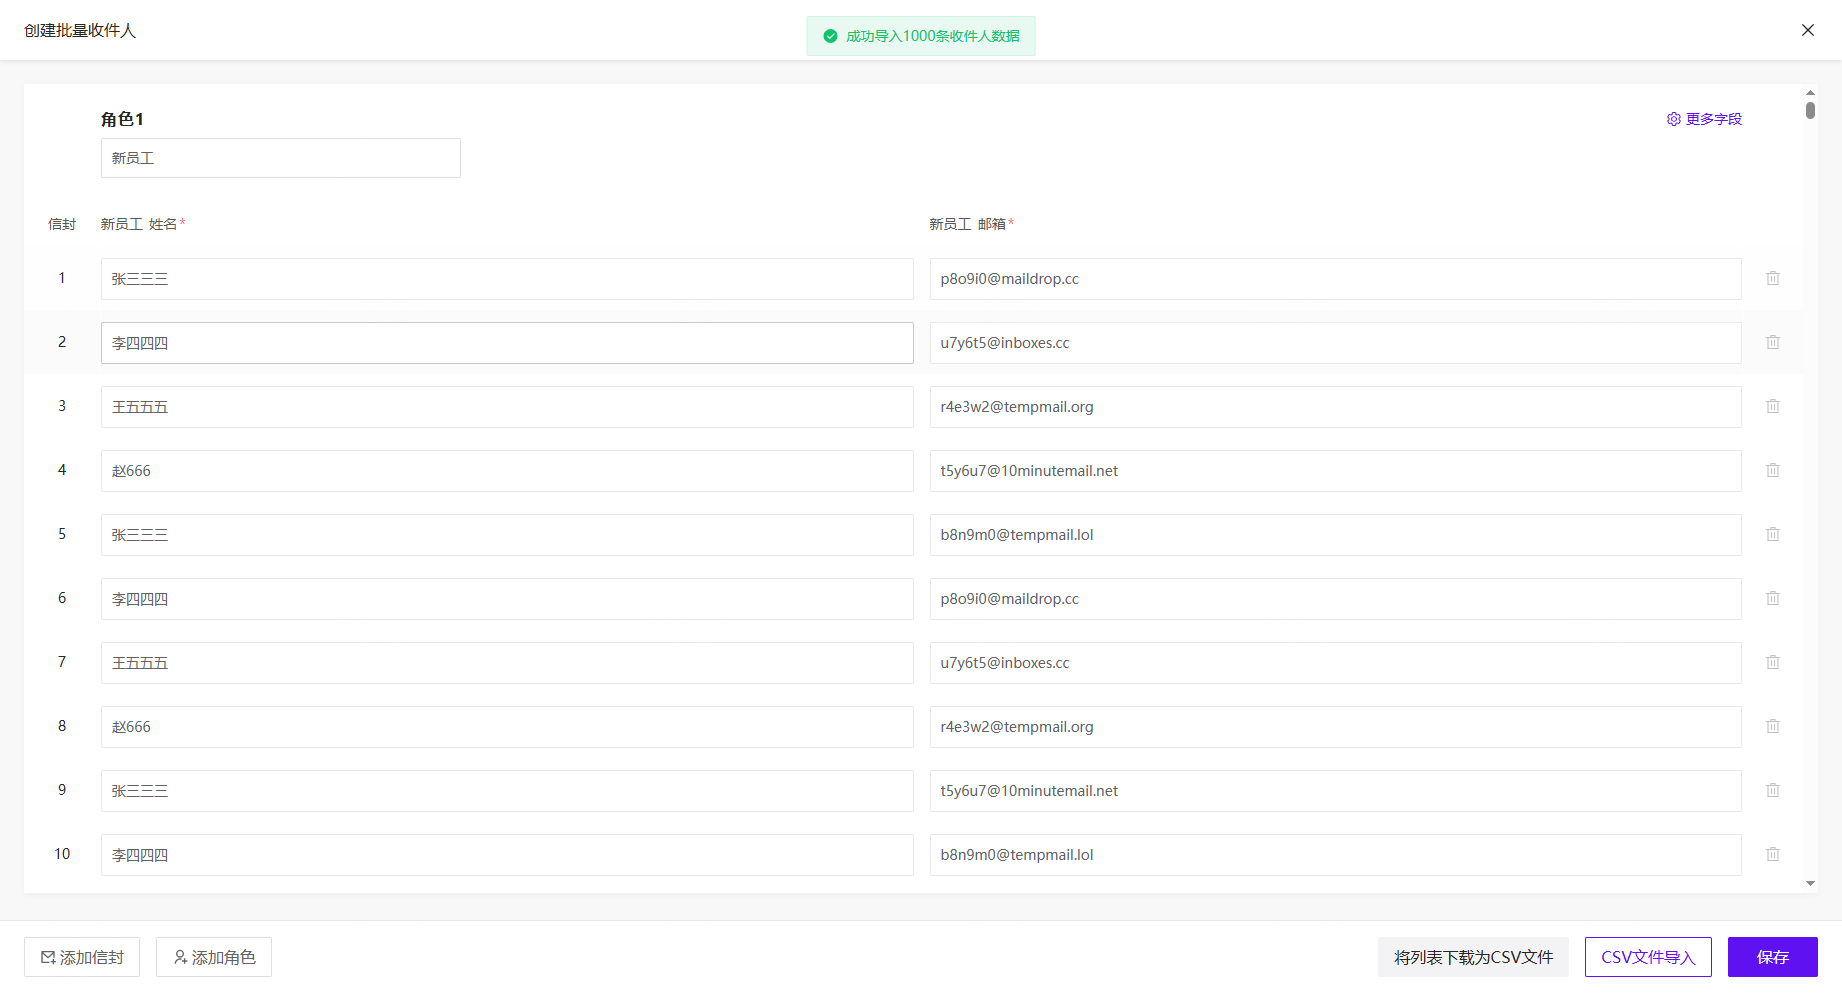
However, adding 1,000 envelopes and then manually adding recipient information for 1,000 employees is cumbersome. Therefore, we provide CSV or XLSX file upload. Users can download the template, export basic information of incoming employees from the HR system, quickly adjust it according to the template requirements, and import the file into Nota Sign to create all 1,000 envelope recipients at once.
6. Add CC Recipients
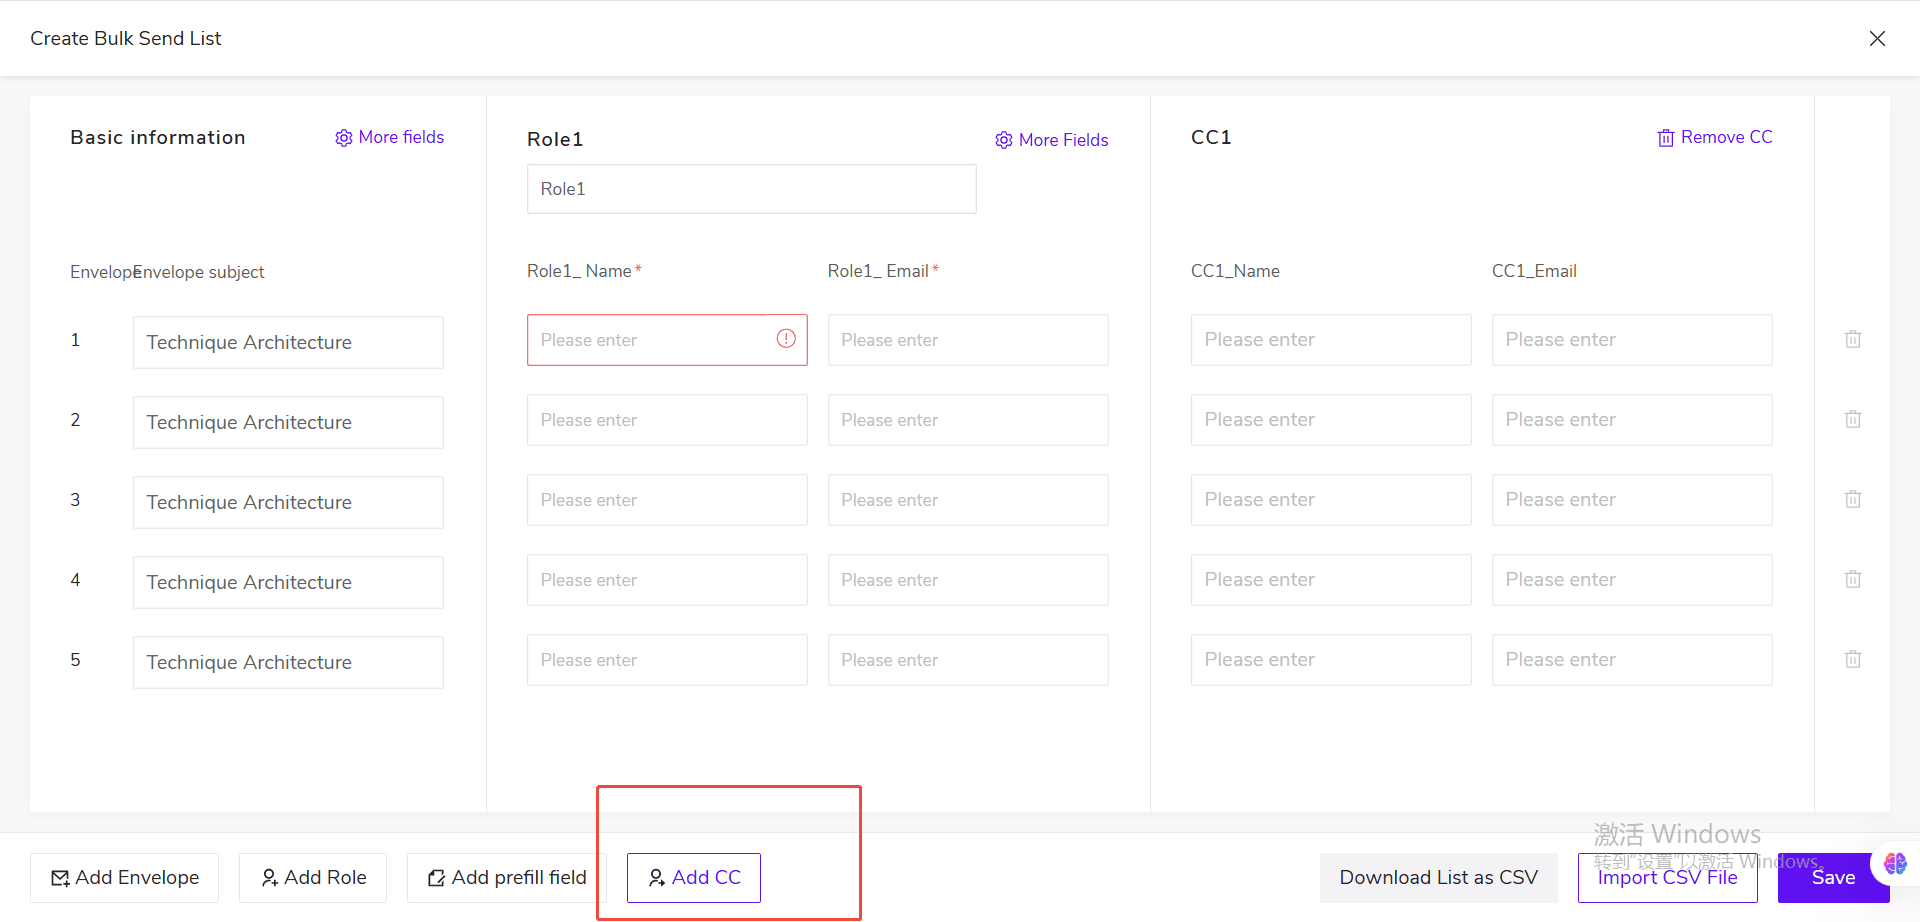
To set different CC recipients for different envelopes, click [Add CC Recipient] at the bottom of the manifest.
The newly added CC recipient column group includes:
- Name;
- Email.
You can add multiple CC recipient column groups as needed and fill in different CC recipient information in different manifest rows.
To delete a CC recipient, click the delete icon on the right side of the column group header. After deletion, the name and email data in that column group will also be deleted.
7. Add Pre-filled Fields
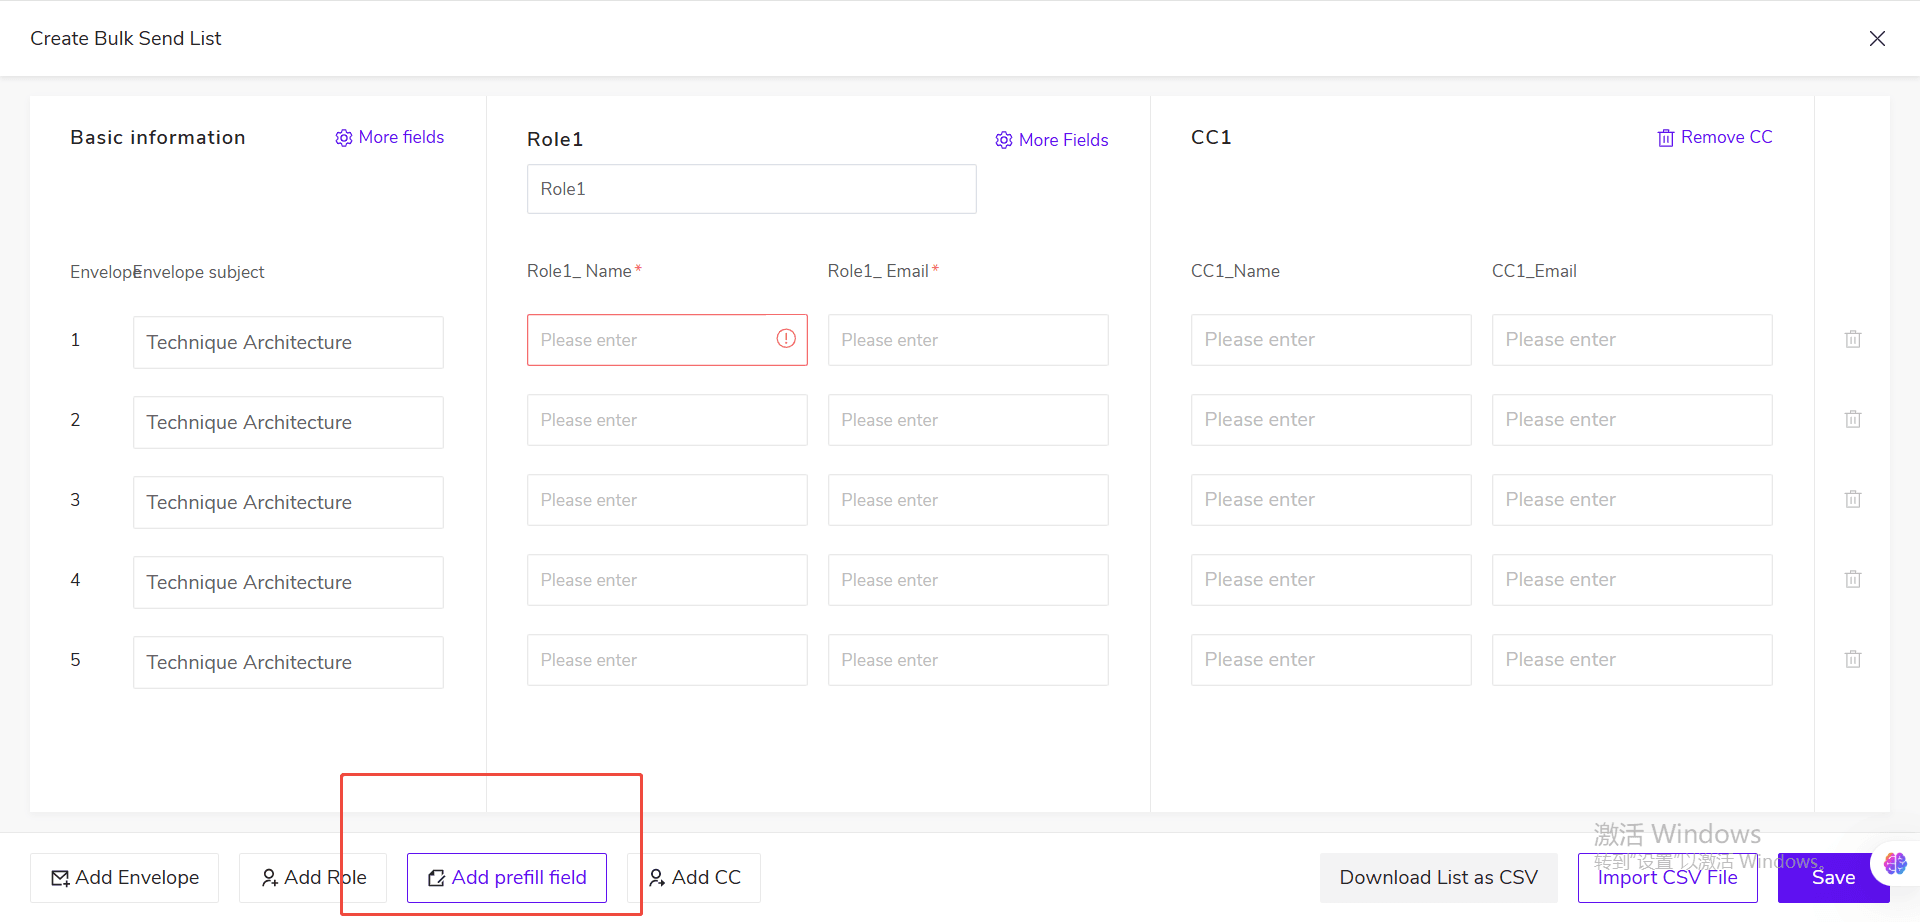
If you need to pre-fill information such as contract numbers, employee IDs, or employee names for each envelope, click [Add Pre-filled Field] at the bottom of the manifest.
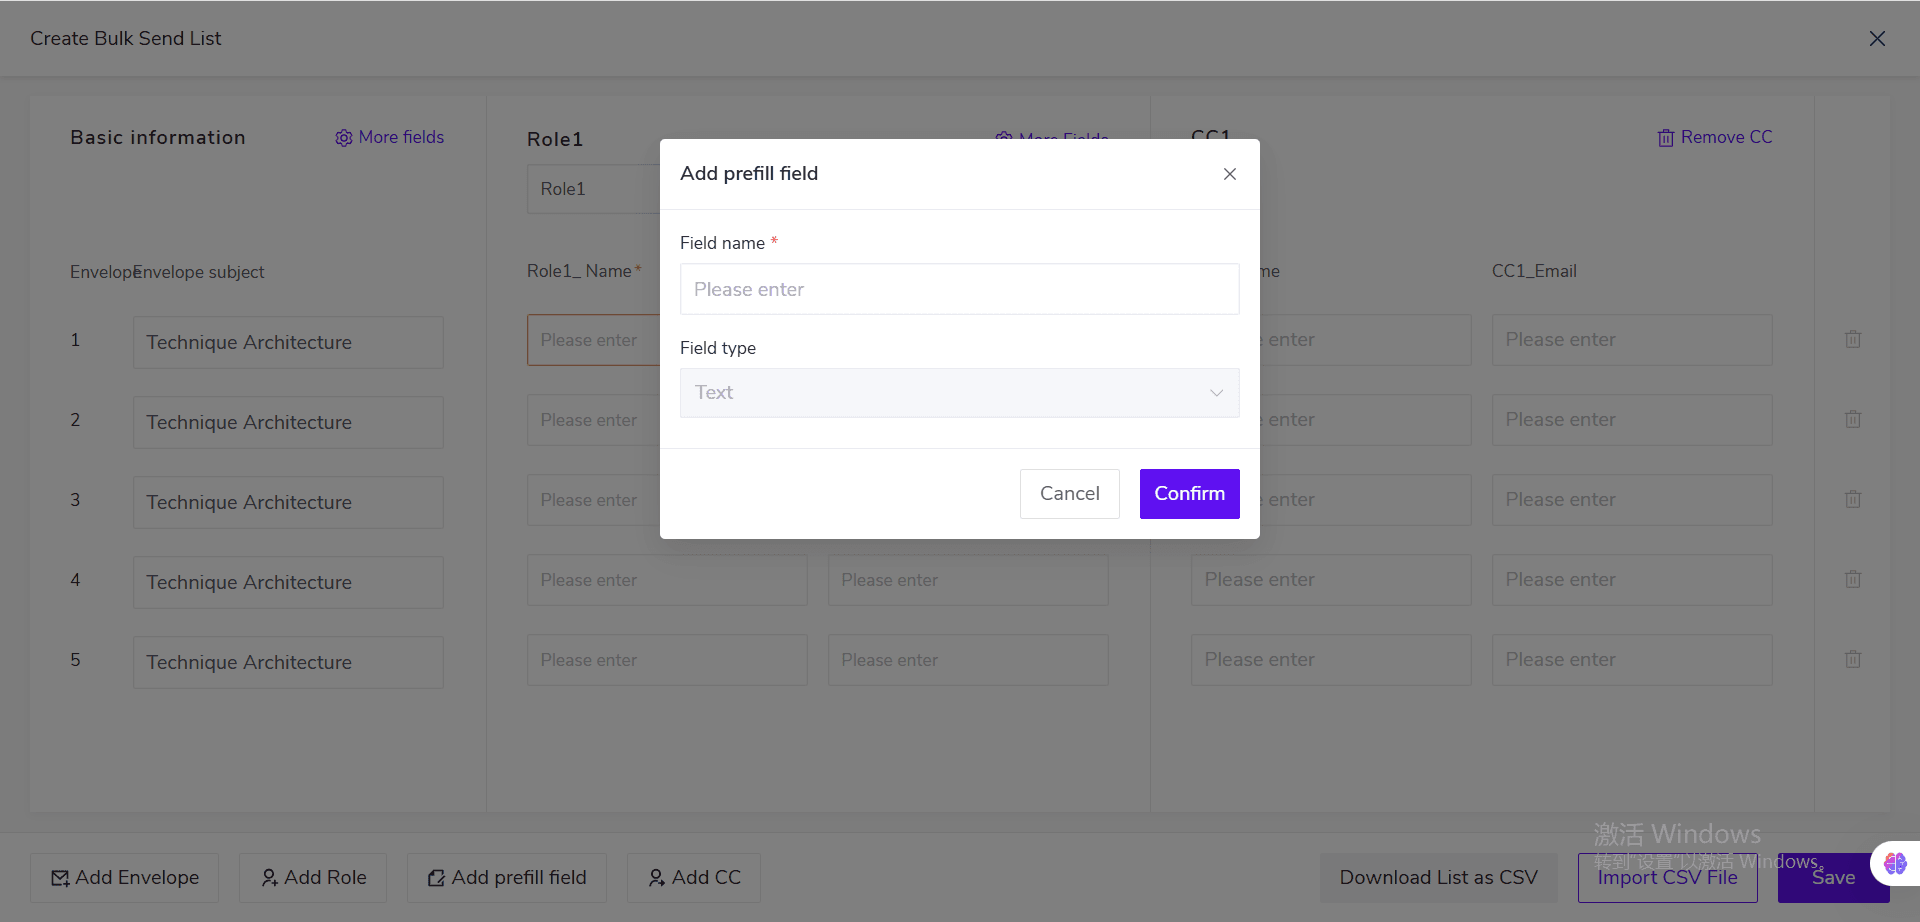
Enter the field name and click [Confirm]. The system will add the corresponding pre-filled field column to the manifest. You can fill in different values for each row.
Currently, only text-type pre-filled fields are supported.
💡 Notes:
- Pre-filled field names cannot be empty.
- Pre-filled field names cannot duplicate existing pre-filled field names.
- Custom pre-filled field names are preserved as entered and are not translated.
- Deleting a pre-filled field also deletes the column data and disassociates the field from text controls.
- After deleting the last pre-filled field, the pre-filled field column group in the manifest is automatically hidden.
8. Batch Maintain the Manifest Using CSV or Excel Files
When creating a large number of envelopes, you can first download the manifest template, then fill in and import data in bulk via CSV or Excel files.
Step-by-step instructions:
(1) Configure basic information, batch roles, CC recipients, and pre-filled fields as needed.
-
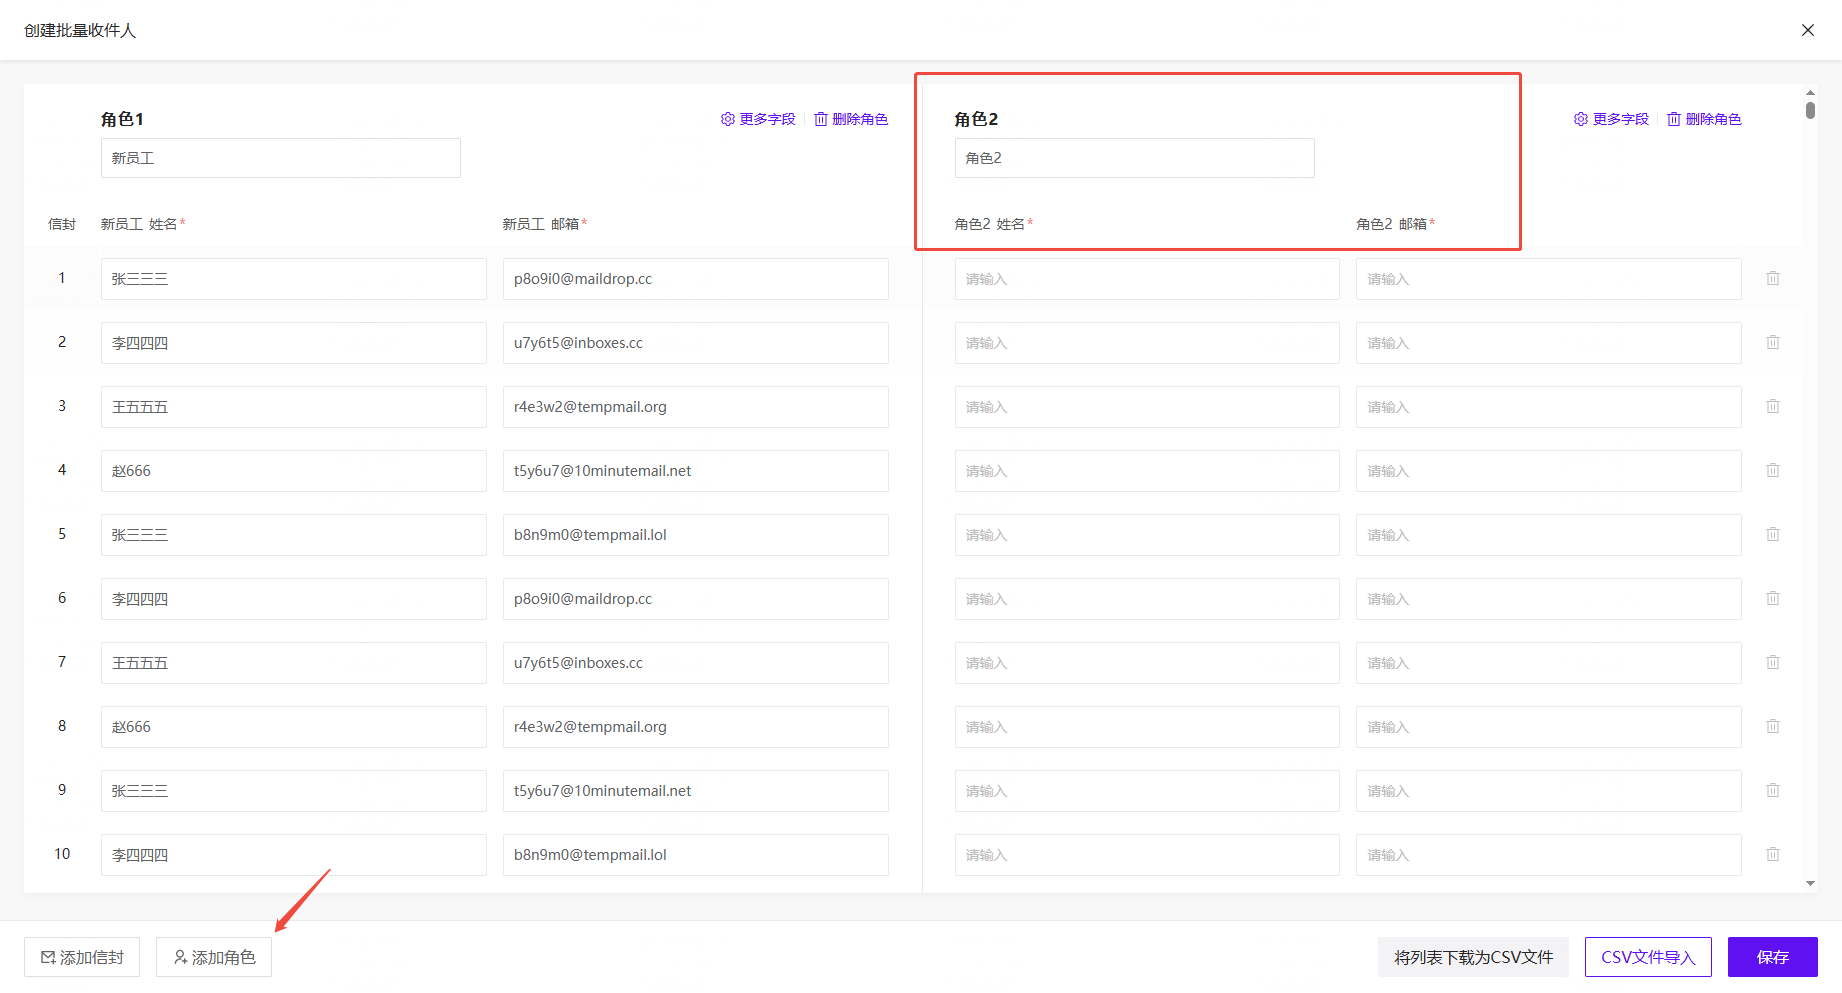
If a batch send task requires multiple recipient roles, click the button in the lower-left corner to add roles in bulk. A maximum of ten recipient roles can be added per batch task.
-
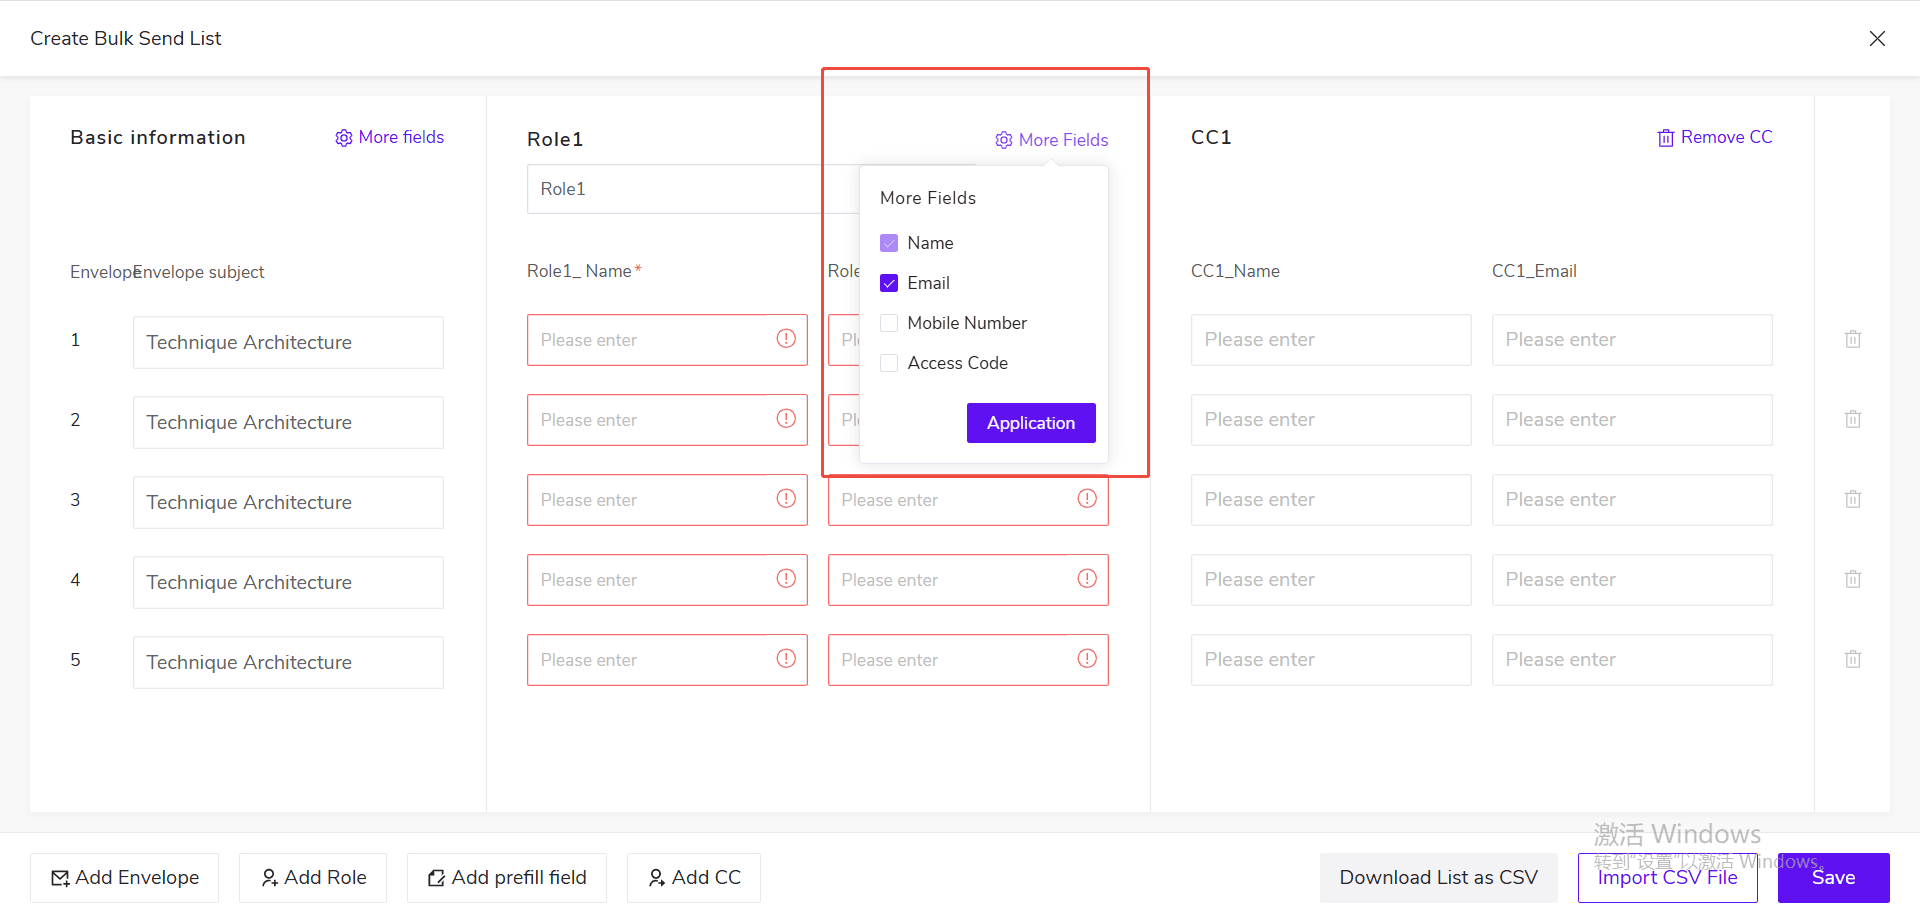
If batch send envelopes require phone numbers for recipients, click [More Fields] in the upper-right corner of each role. After checking, the recipient role will have the corresponding attribute fields added for the sender to fill in.
(2) Click [Download List as CSV File].
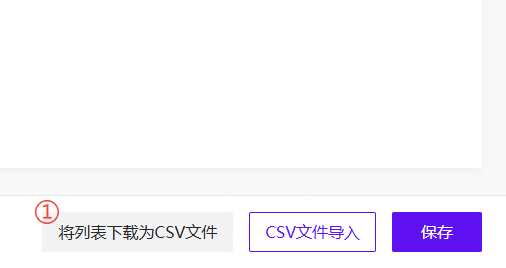
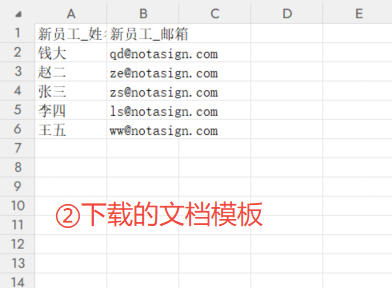
The system generates the template based on currently configured and displayed fields. Hidden fields or fields that have not been added will not be included. (3) Fill in the data in the downloaded template.
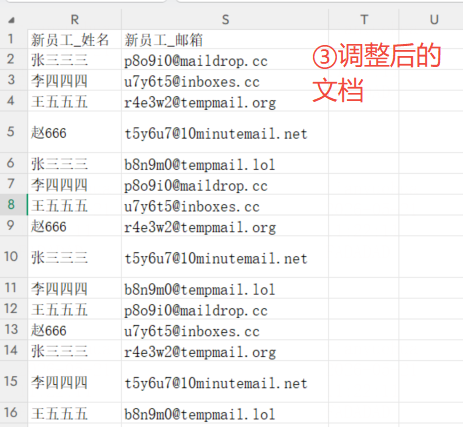 (4) Return to the batch send manifest and click [CSV File Import].
 (5) Select the completed CSV or Excel file.
9. After setting up the batch recipients, click Save to return to the batch task creation home page.
After saving, the task home page will display the batch roles that have been added to the manifest. If multiple batch roles are added, the page will display them separately.
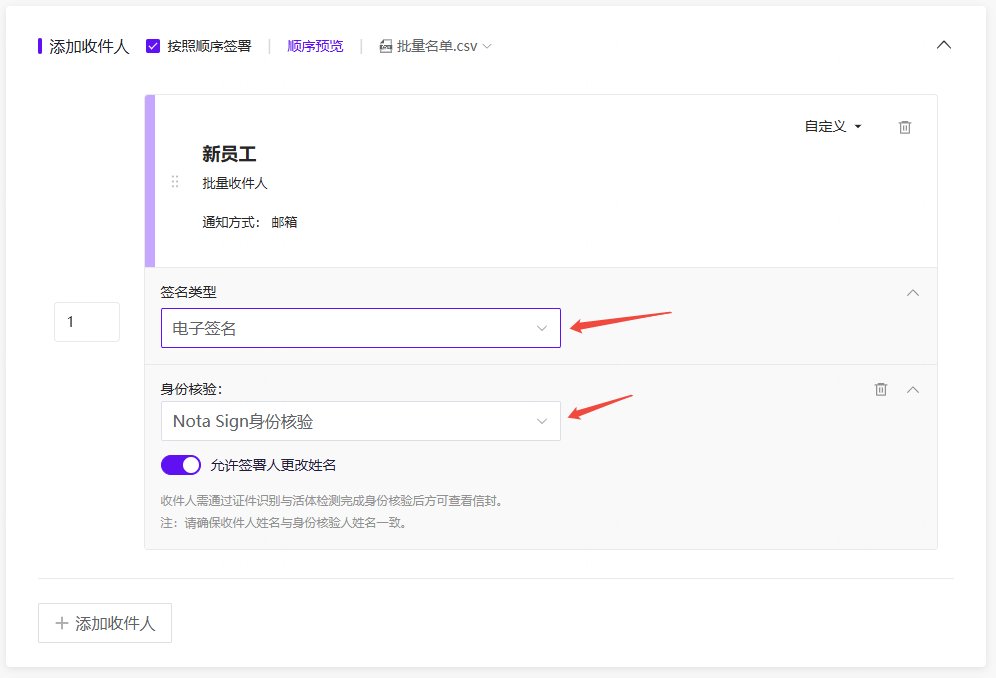
10. Senders can set signature methods for “New Employees,” such as electronic signatures or digital signatures, and can also add eKYC identity verification. After configuration, all recipients under this batch role will apply the same signing and identity verification requirements.
11. Add fixed recipients as needed. If all envelopes in the same batch need to be sent to the same person—for example, all new employee contracts need to be sealed by the same HR representative—click [Add Recipient] in the recipient list on the task home page.
Fixed recipients will be added to every envelope generated in this batch, eliminating the need to fill them out repeatedly in the batch send manifest.
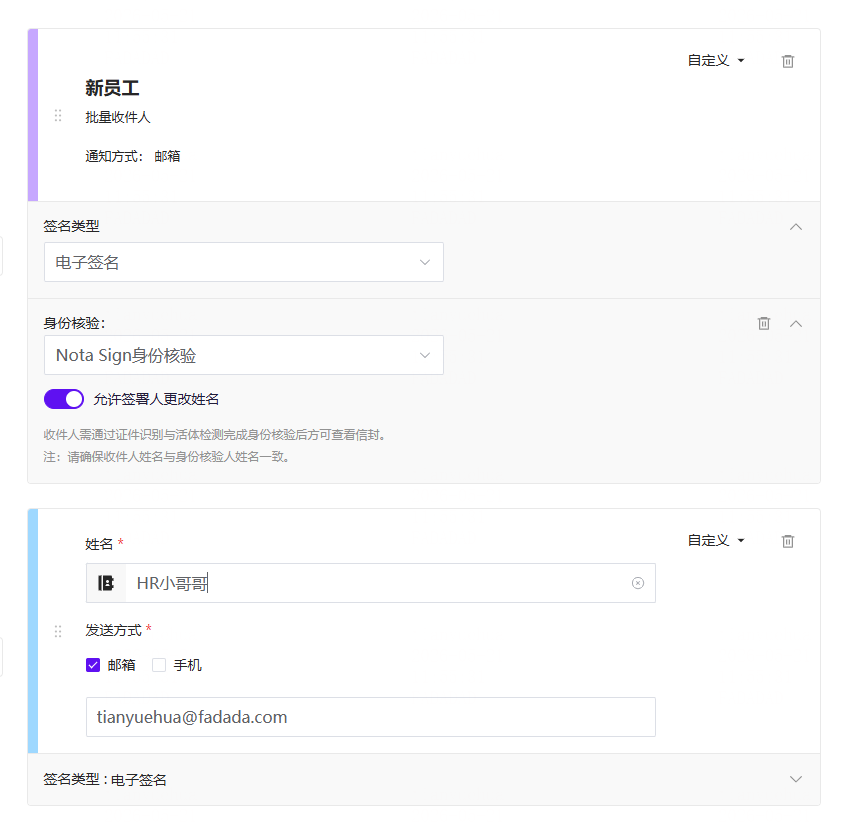
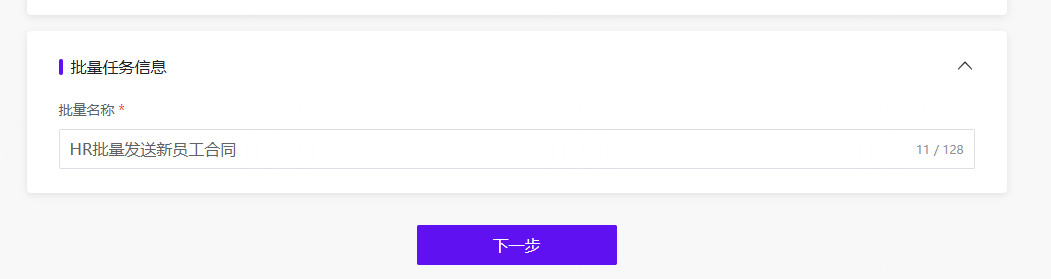
12. After completing recipient settings, enter the batch task name, then click “Next” to proceed to the control settings page.
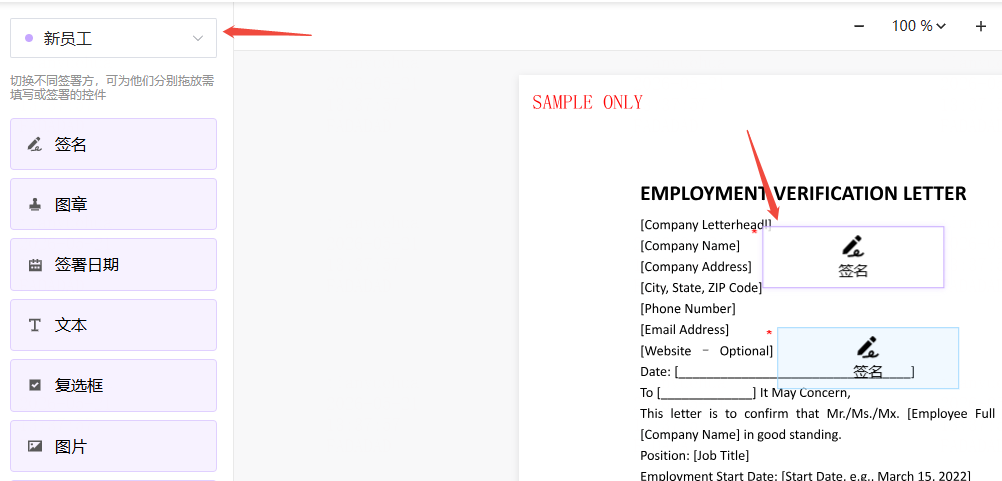
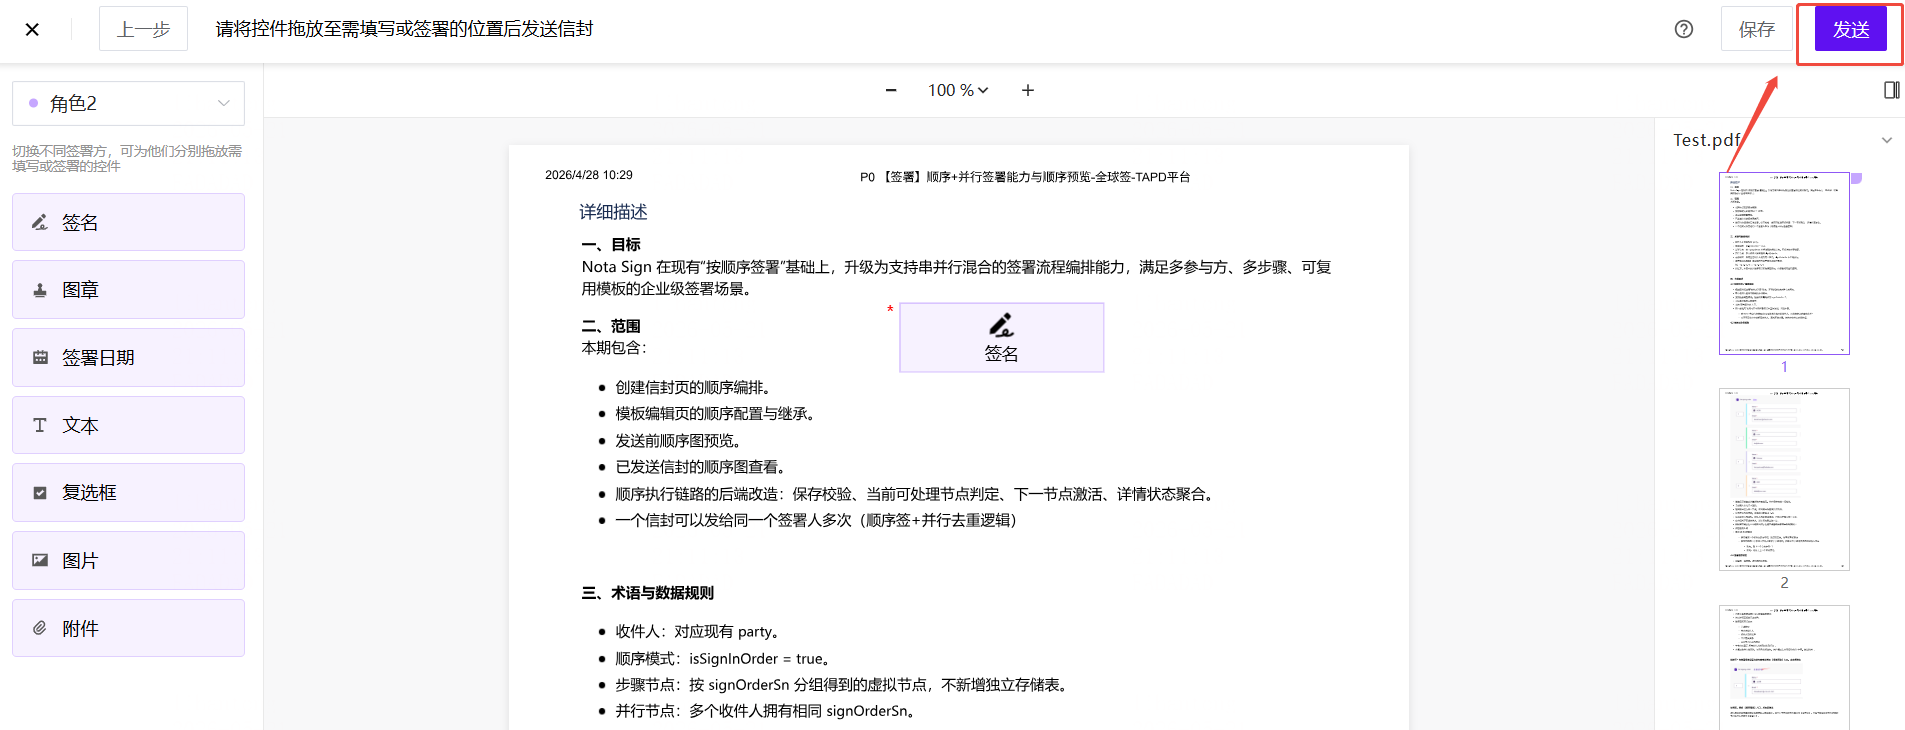
13. Click [Next] to enter the control settings page. You can set controls for each batch role or individual recipient.
If you need to pre-fill content entered by the sender via the batch recipient list, you can select [Sender Fill-in] in the upper-left corner and drag the [Text] control to the designated position in the document.
After selecting the [Text] control, click [List Field] in the [Batch Pre-fill] section of the right-side properties panel, and select the field to be associated. After association, the system will pre-fill the content of the corresponding field in the batch recipient list into this text control.
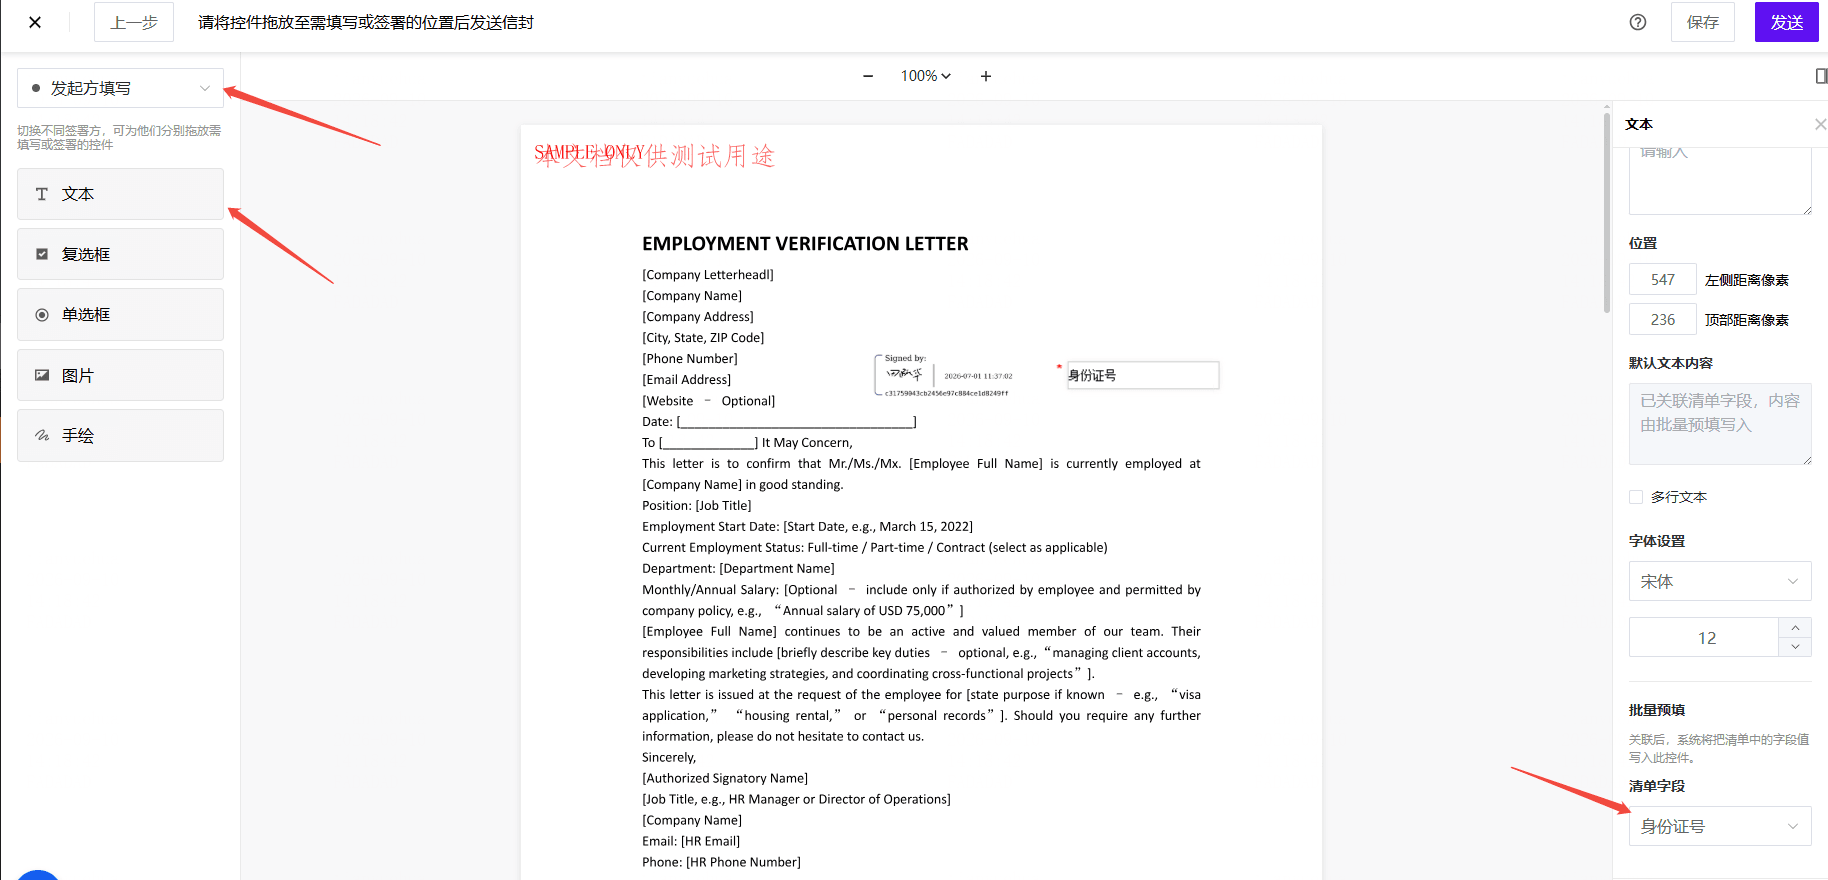
For example, after selecting the list field [ID Number], the system will pre-fill the corresponding ID number into the corresponding text control in different envelopes based on the data in the batch recipient list.
14. After clicking Send, the system will generate the batch send task.
II. Managing Batch Send Tasks
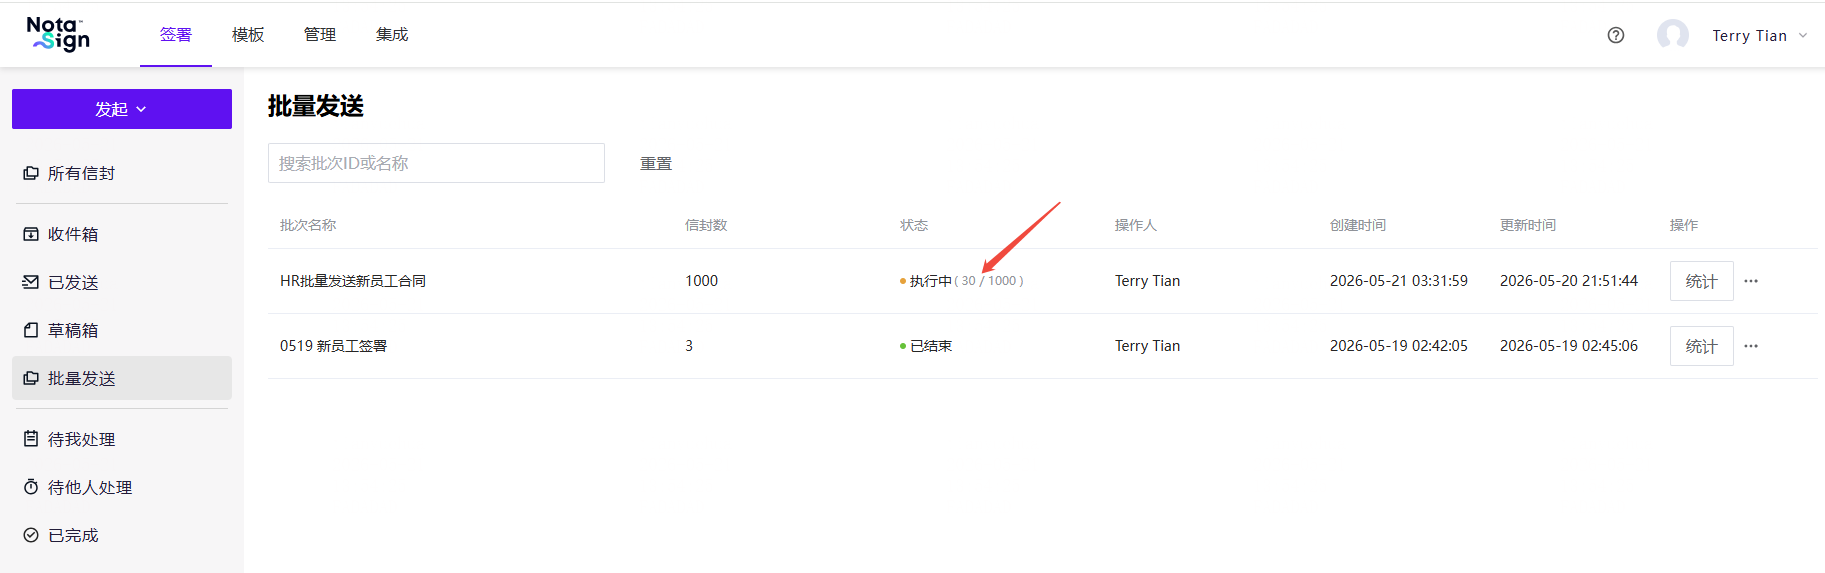
1. After sending, the system will generate a batch send task. Users can view the execution progress of the corresponding task under Workspace → Sign → Batch Send.
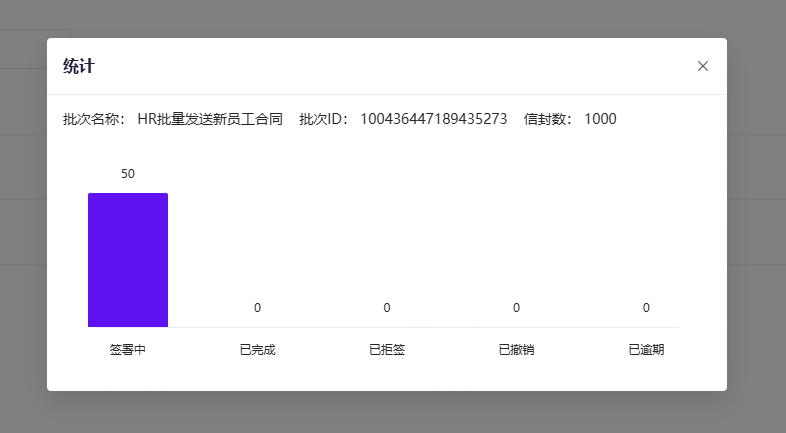
2. Click on Statistics to view the number of envelopes that have been successfully sent and the current signing progress.
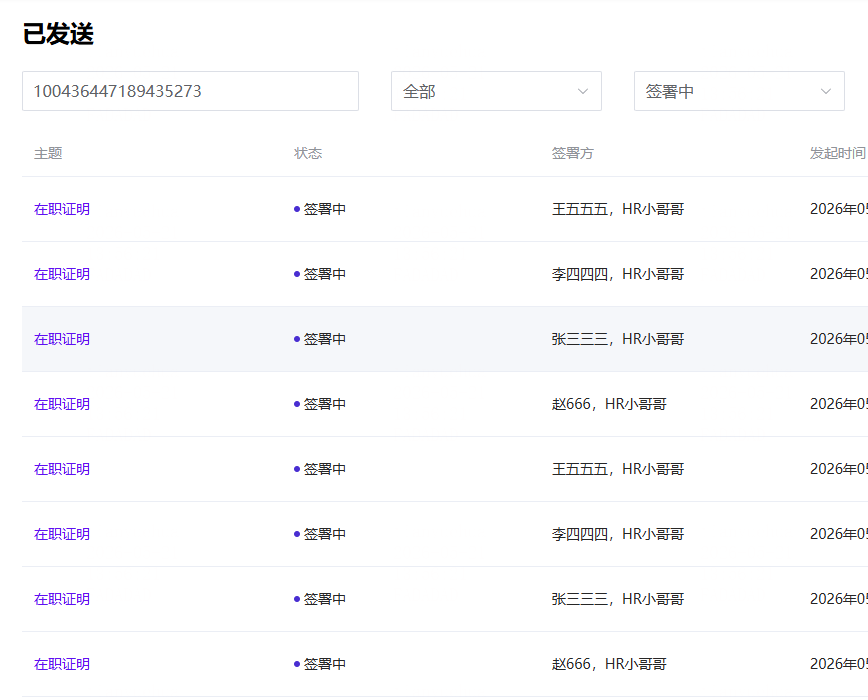
3. Click on the corresponding bar chart to view the list of sent envelopes.
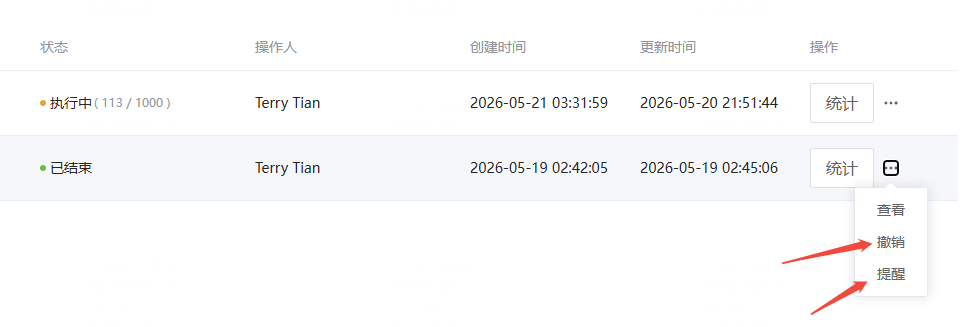
4. If the sender needs to revoke batch-sent envelopes for special reasons, click the “Batch Revoke” operation in the task action items.
5. If the sender needs to send signing reminders for envelopes under a batch task, click the “Batch Reminder” operation in the task action items.
III. Managing Batch Send Templates
If the contracts and roles in a given scenario are relatively fixed, users can choose to create a batch send template. In the template, you can upload documents, create batch roles, single recipient roles, set controls, and more.
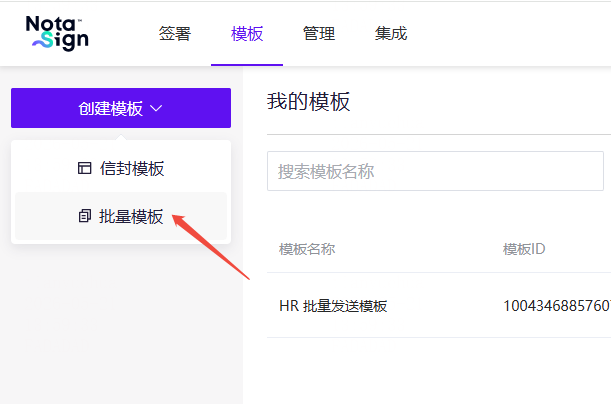
1. Users can create batch send templates in the Templates interface.
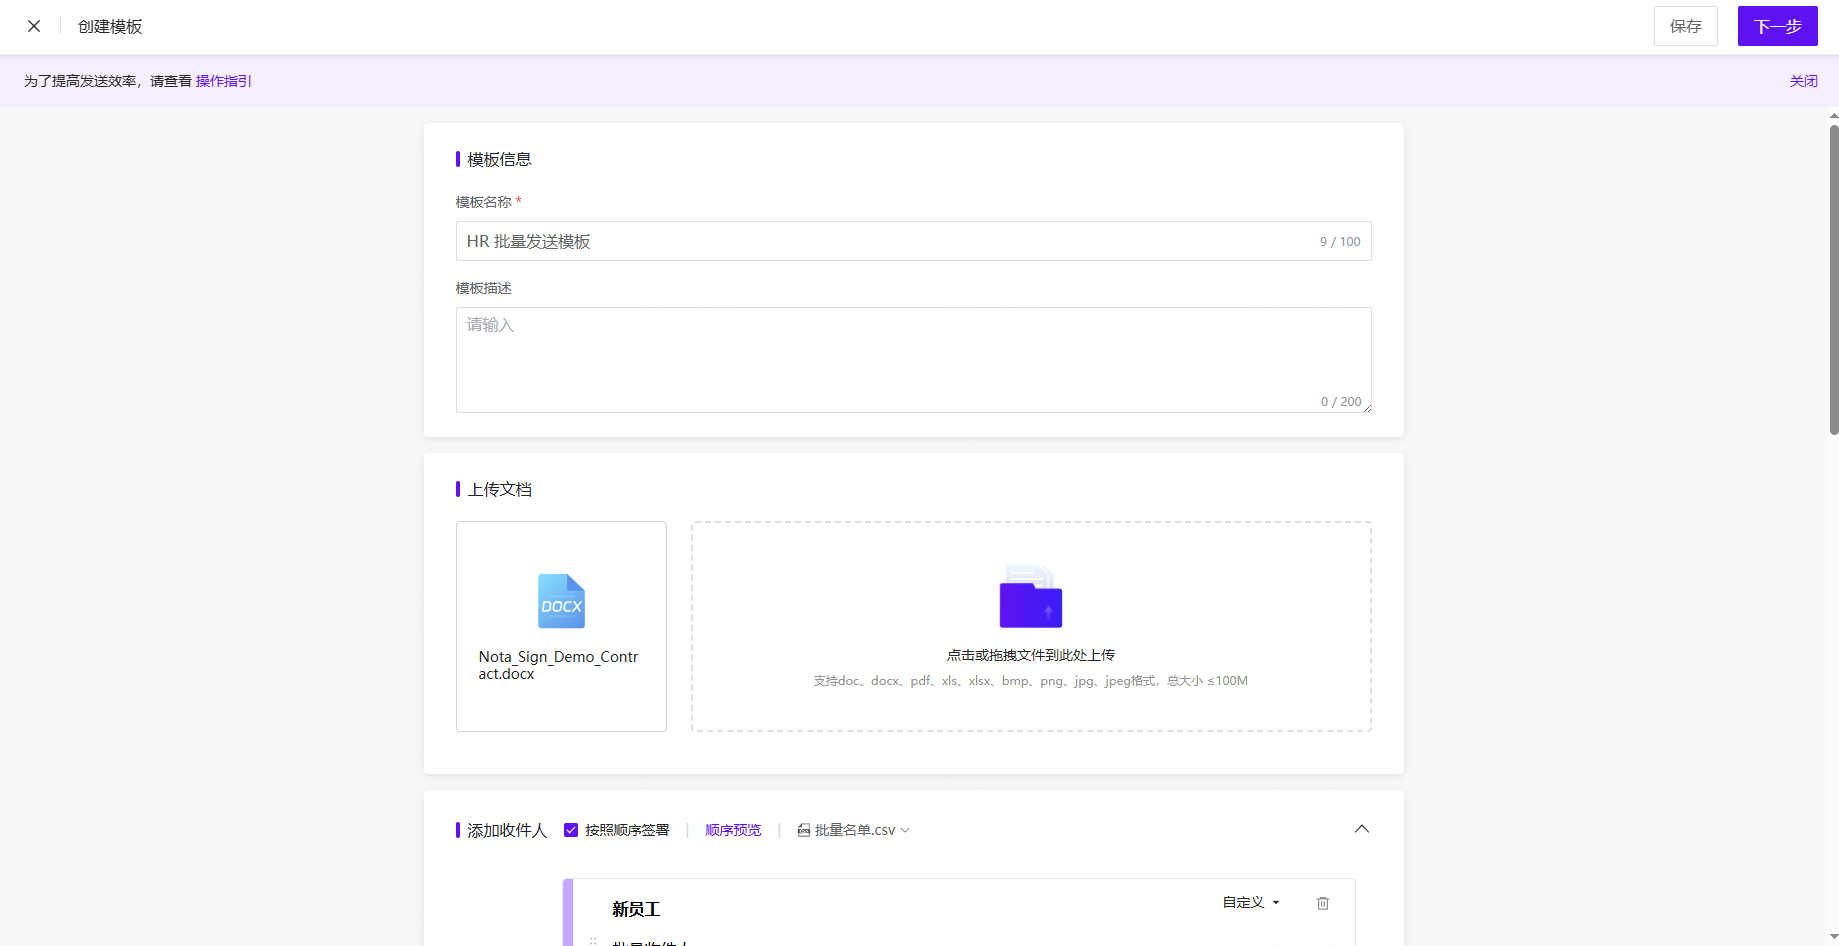
2. Users can create batch roles in the template settings.
3. Users can create single recipient roles in the template settings.
4. Users can set template controls in the template envelope settings.