
Video Tutorial:
1. Sending an Envelope
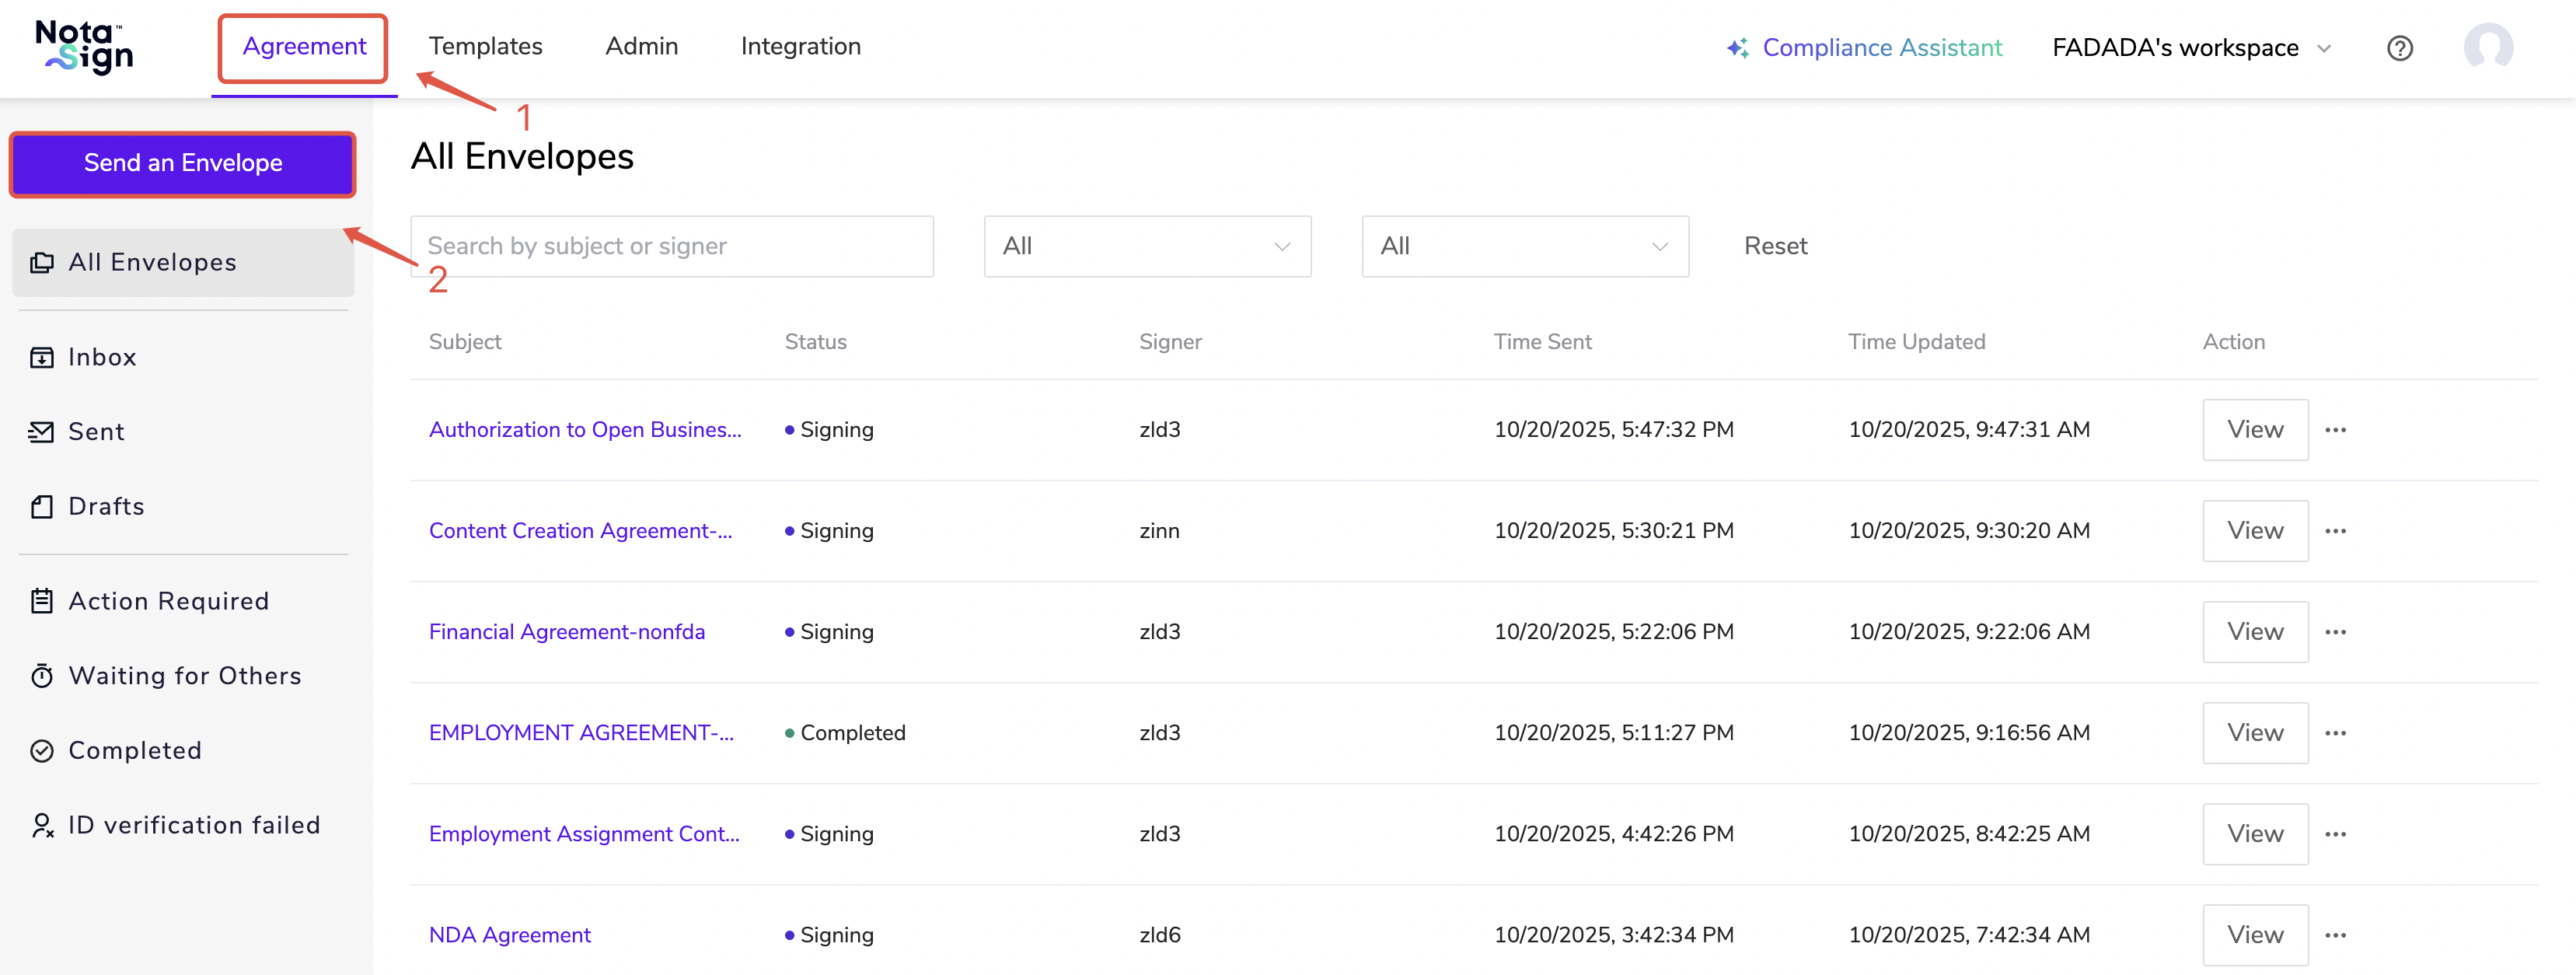
Log in to the Nota Sign dashboard, navigate to Agreements > Send an Envelope.
1.1. Upload Documents
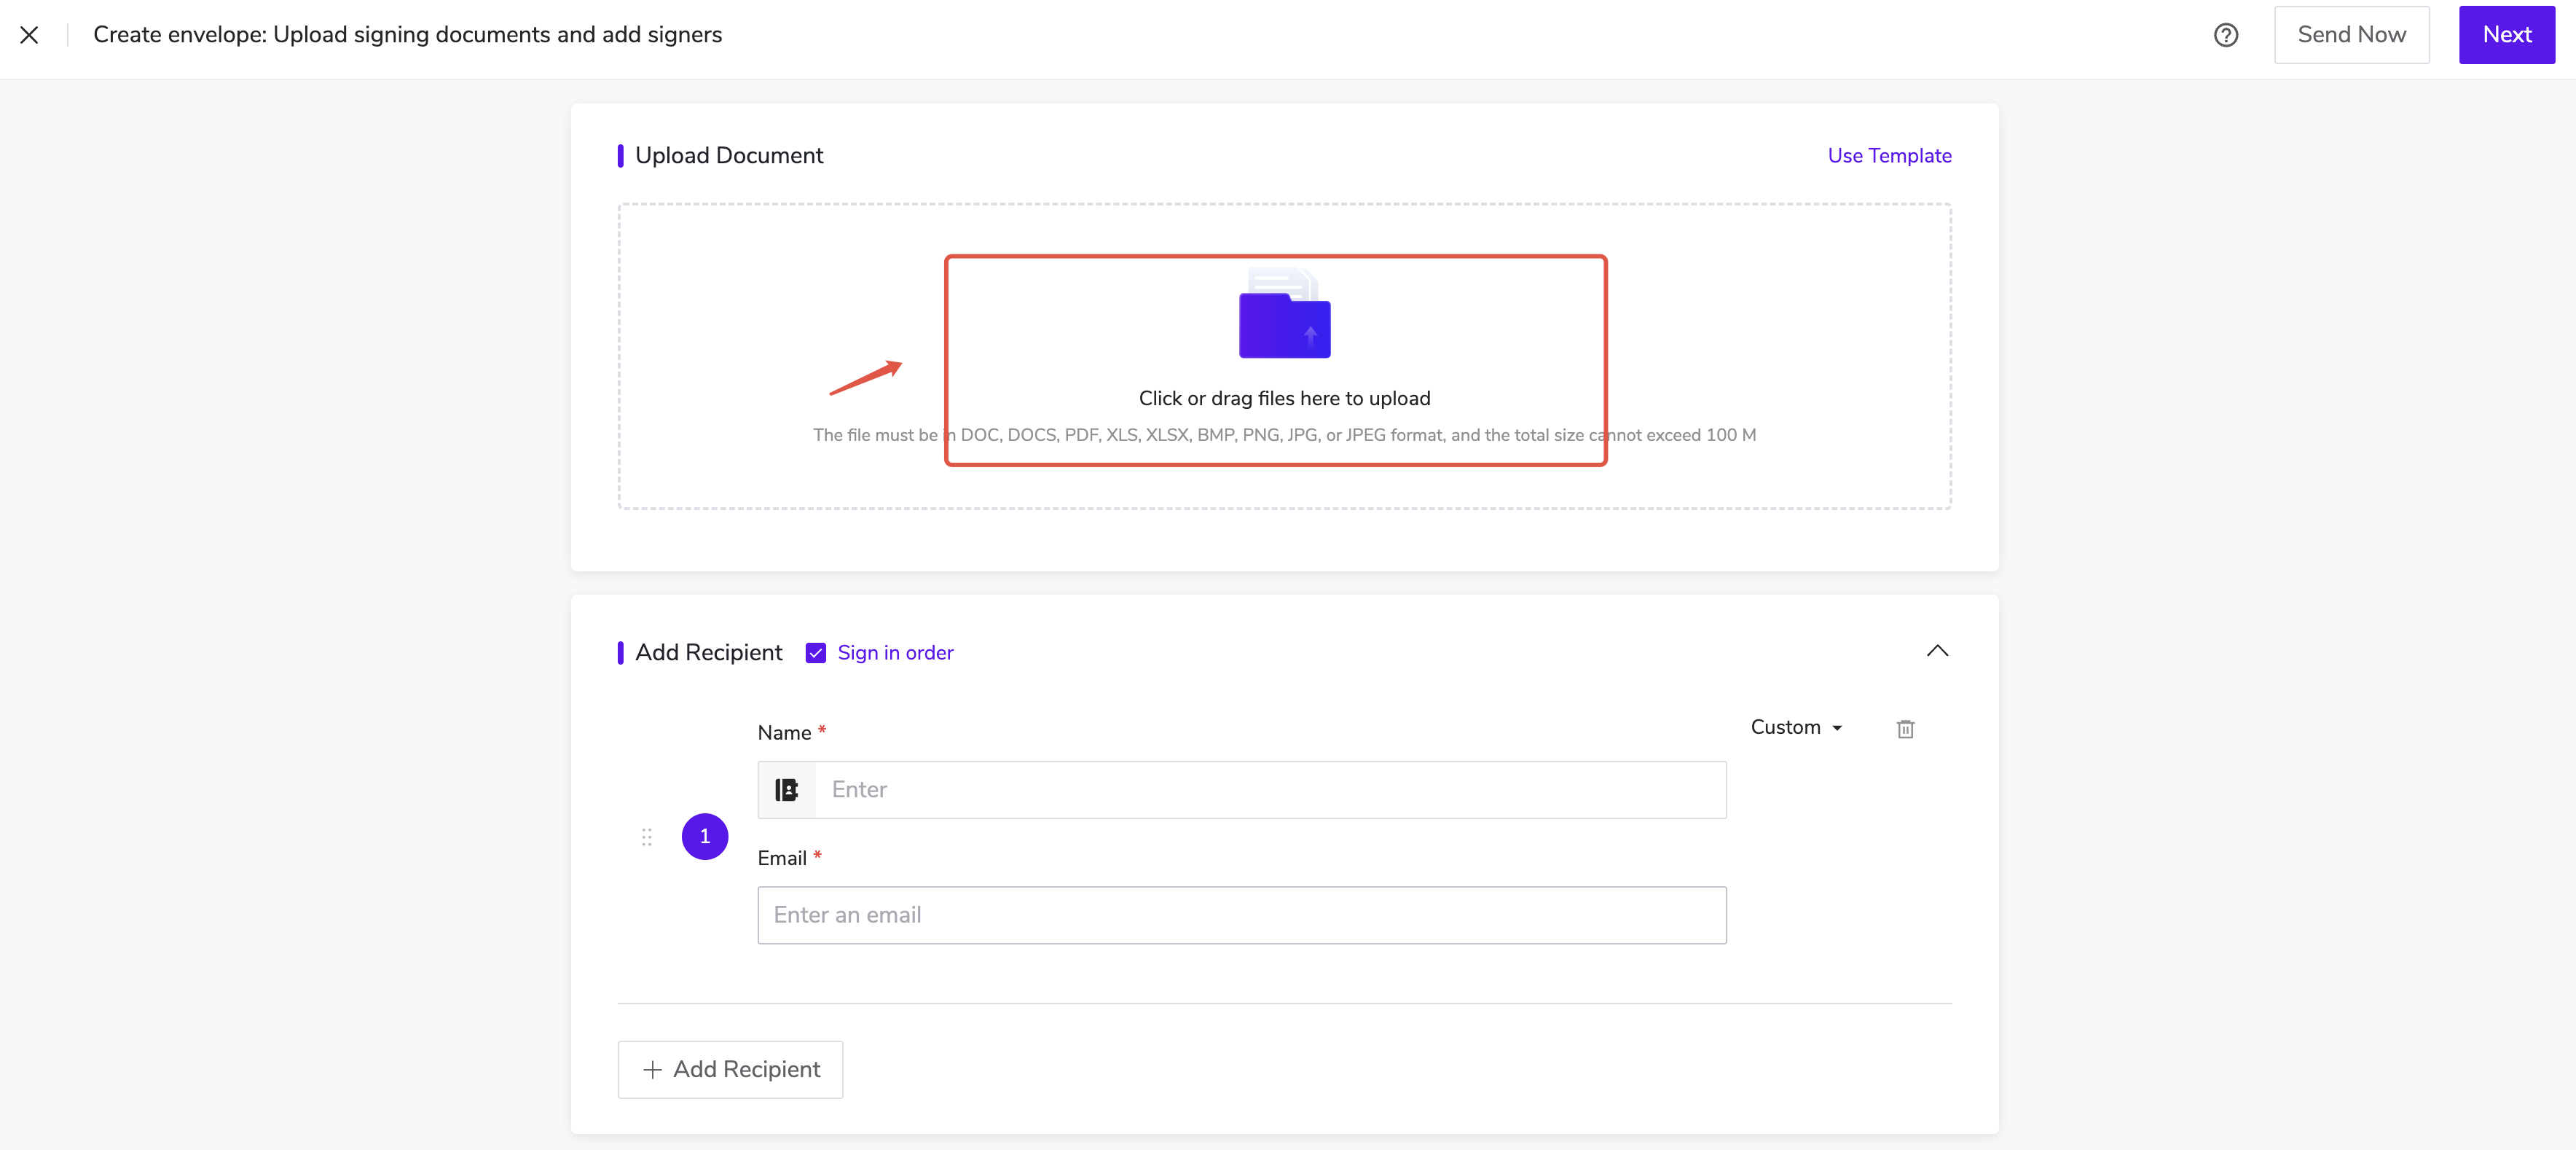
Upload files to your envelope:
-
Click or drag and drop files into the Add Documents area.
-
You can upload multiple files, up to a total size of 100 MB, in common formats such as PDF, Word, Excel, PNG, JPG, and more.
1.2. Add and Configure Recipients
Add Recipients
-
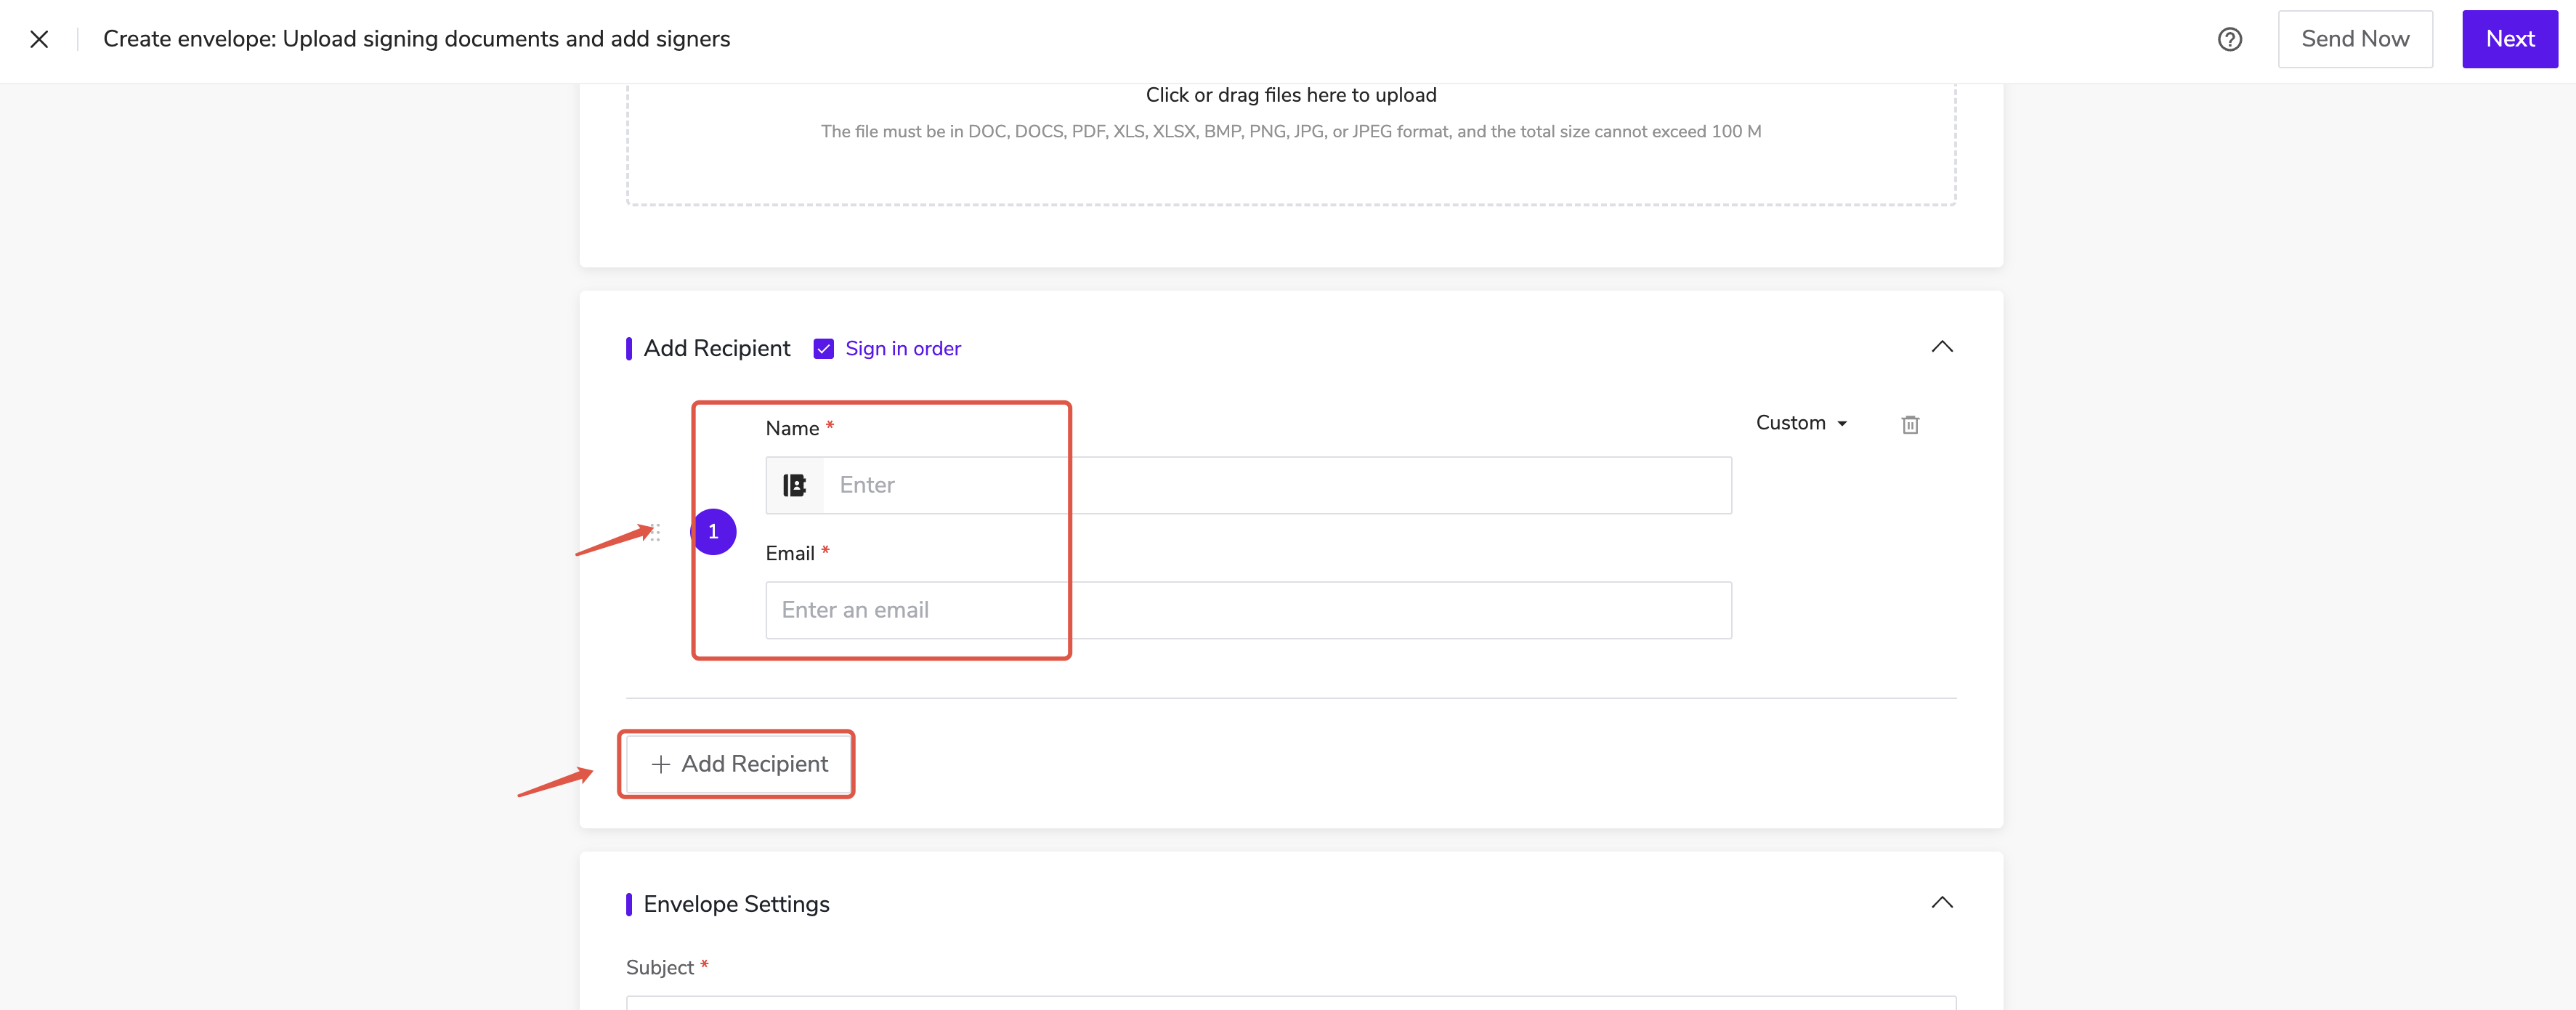
Enter the Name and Email Address of each recipient.
-
Click Add Signer to include additional participants.
- Below the recipient information, locate the Select Signature Type option.
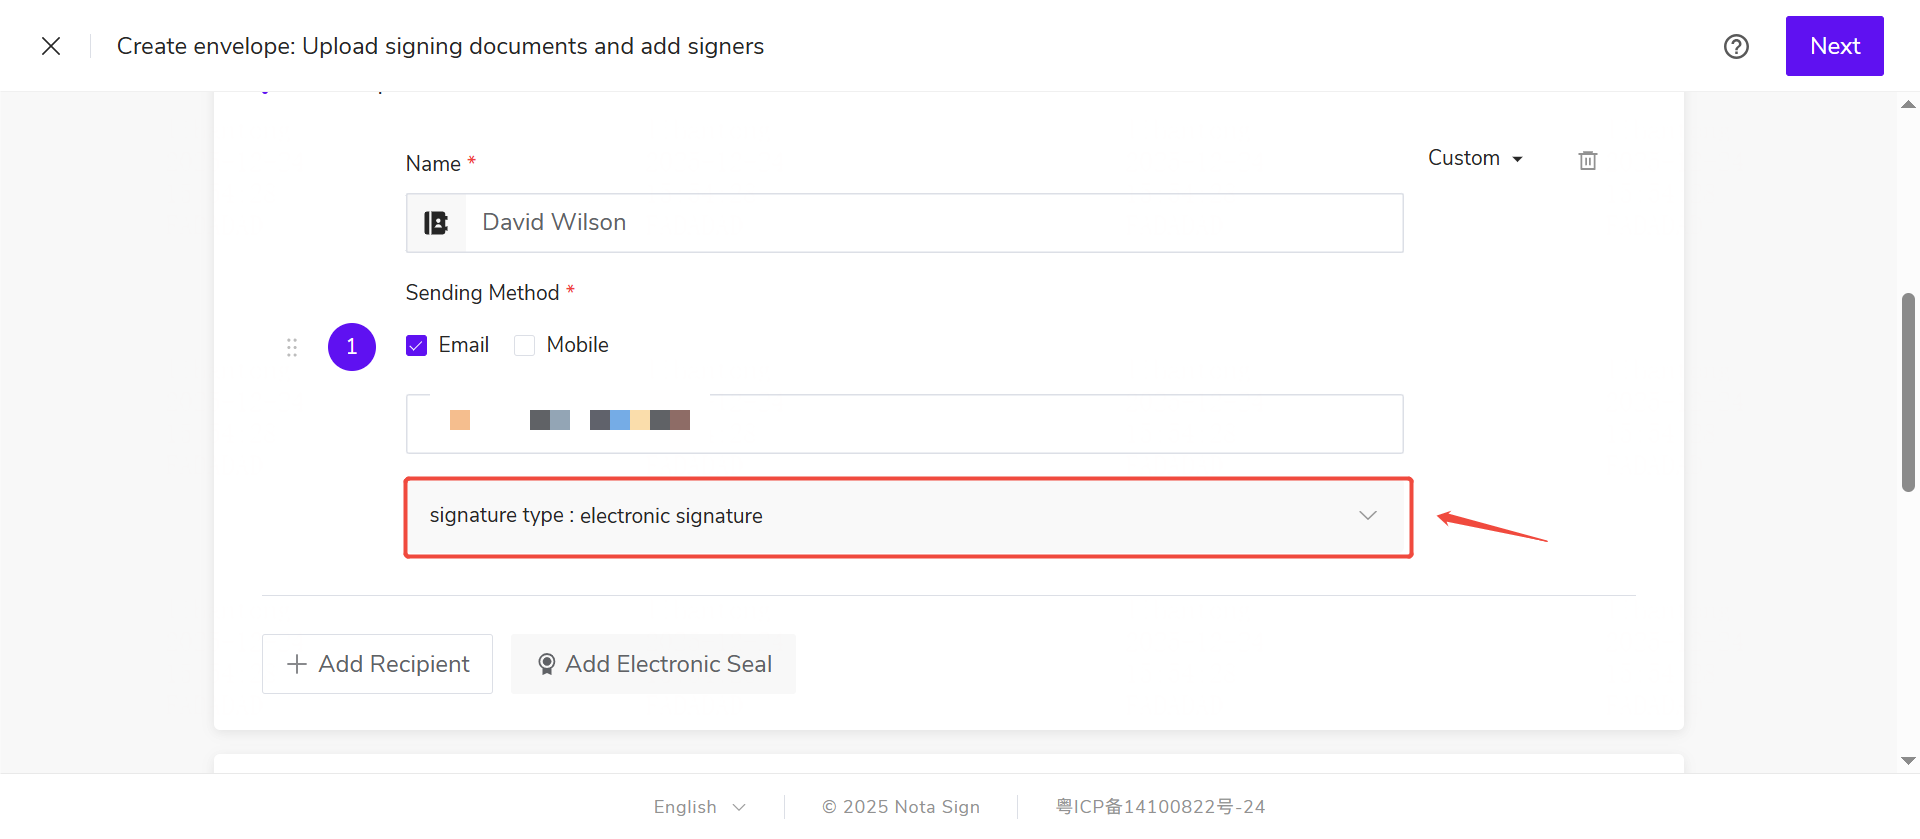
- In the list, specify the recipient’s signature type as Electronic Signature or Digital Signature.
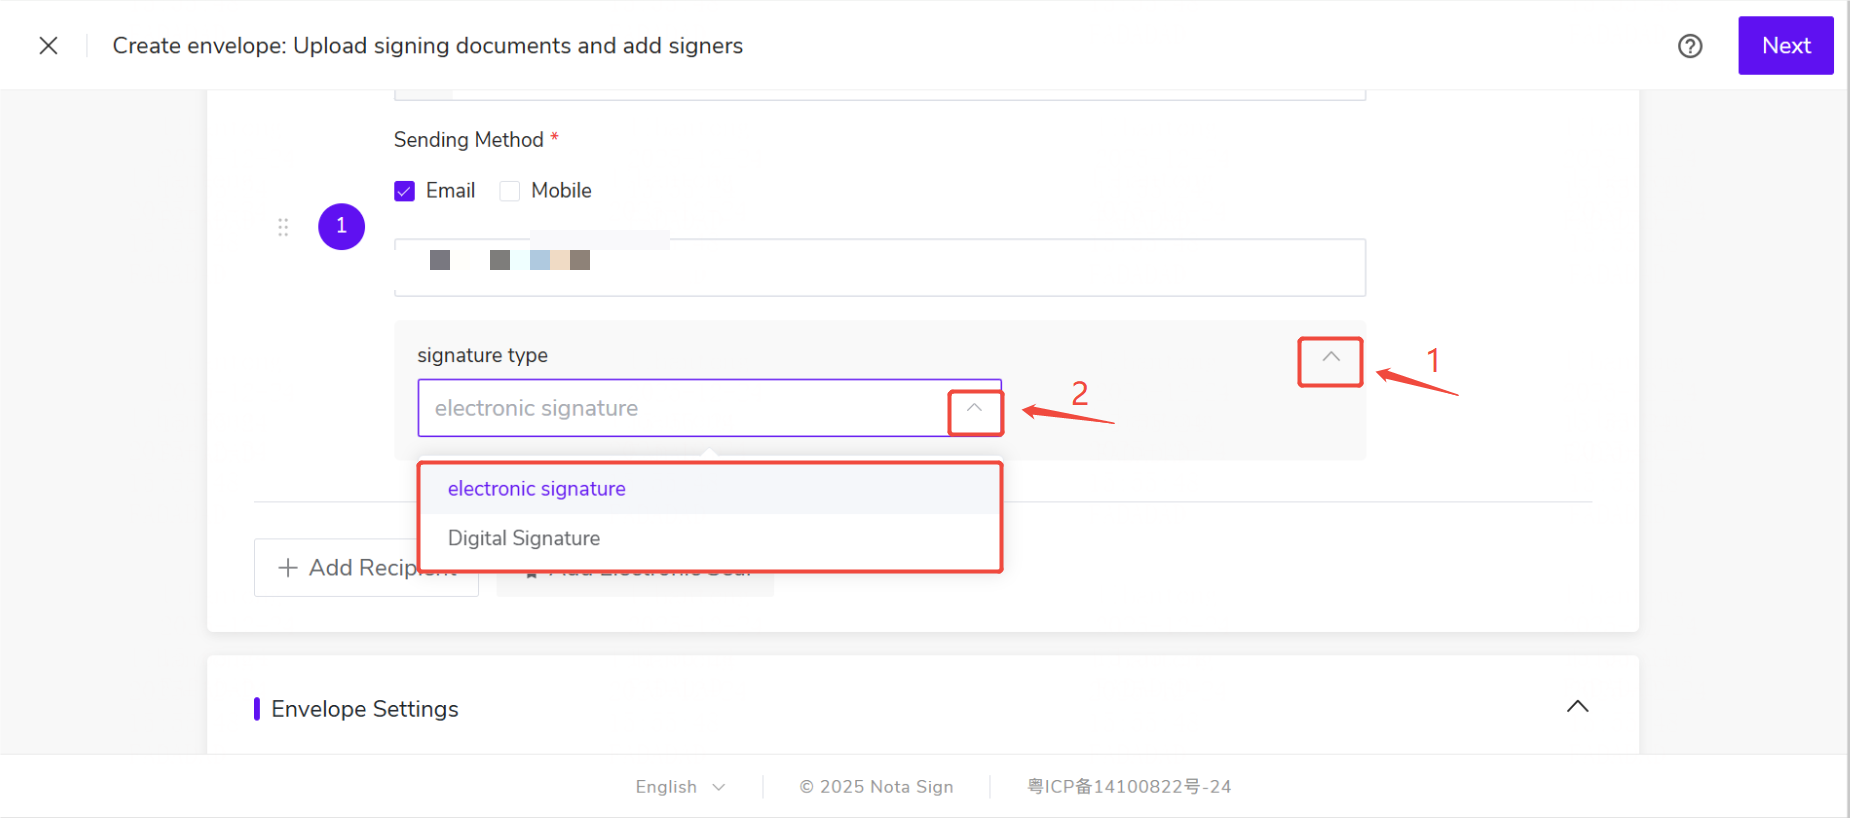
Note: If your workspace has not purchased any digital signature volume, the system will only display the Electronic Signature option.
Configure Additional Settings (Optional)
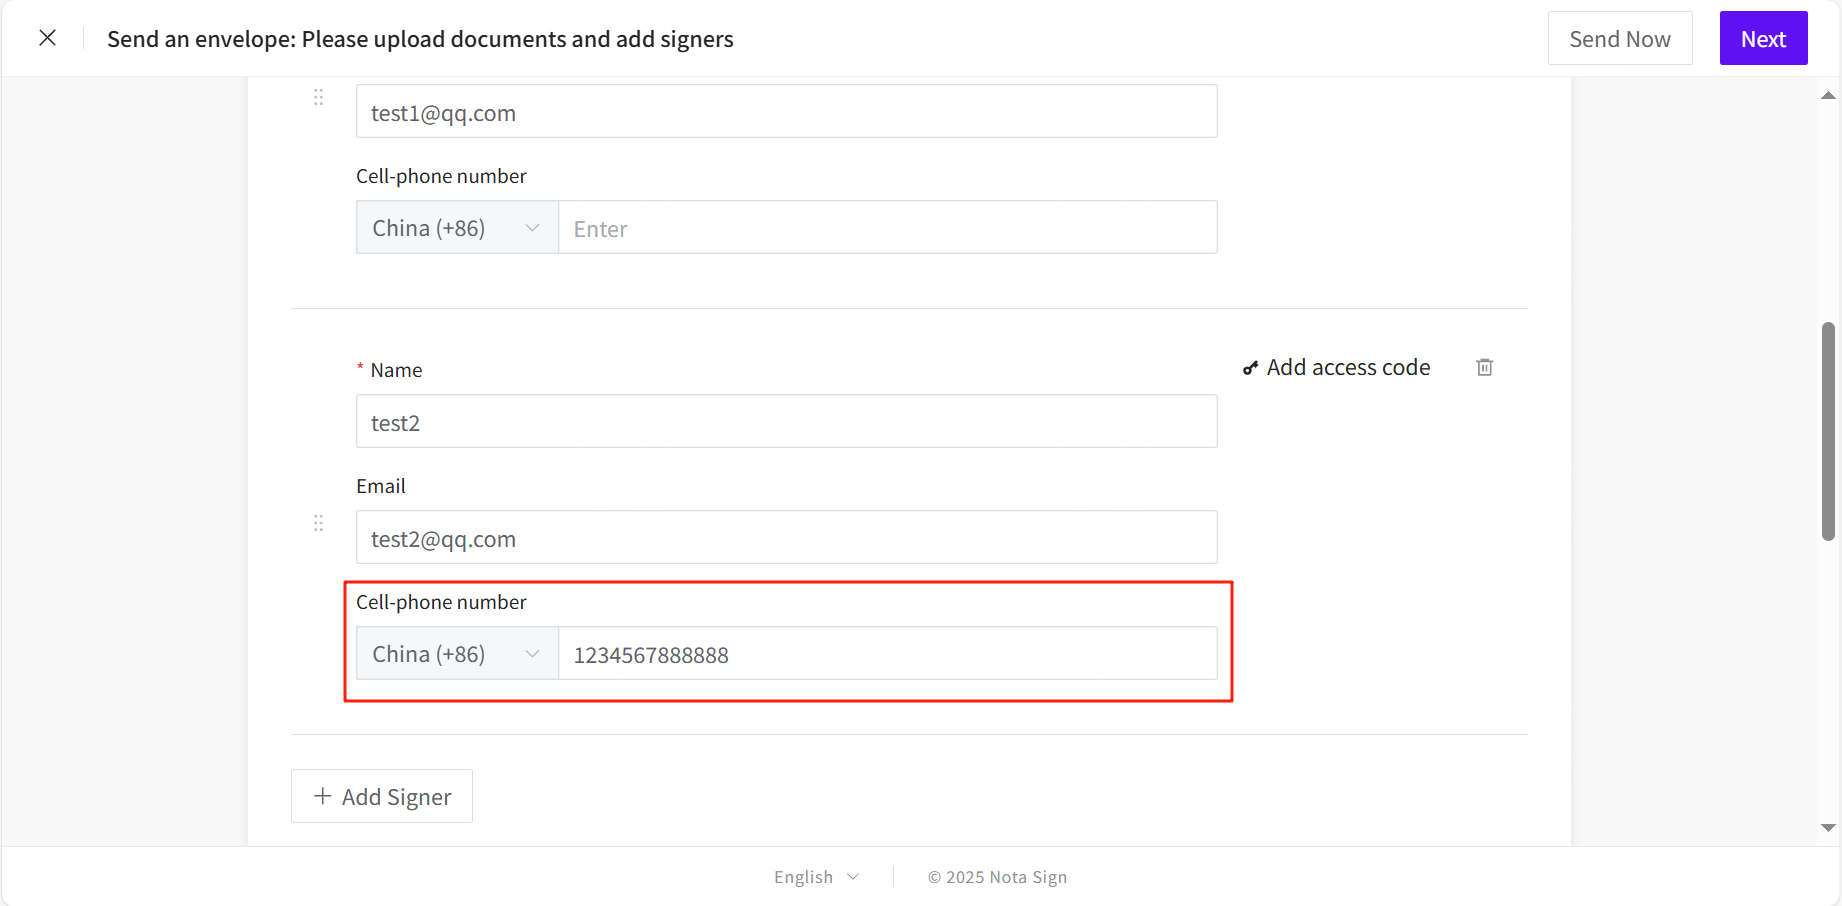
SMS Notification: Enable to send signing notifications via SMS (requires international SMS credits).
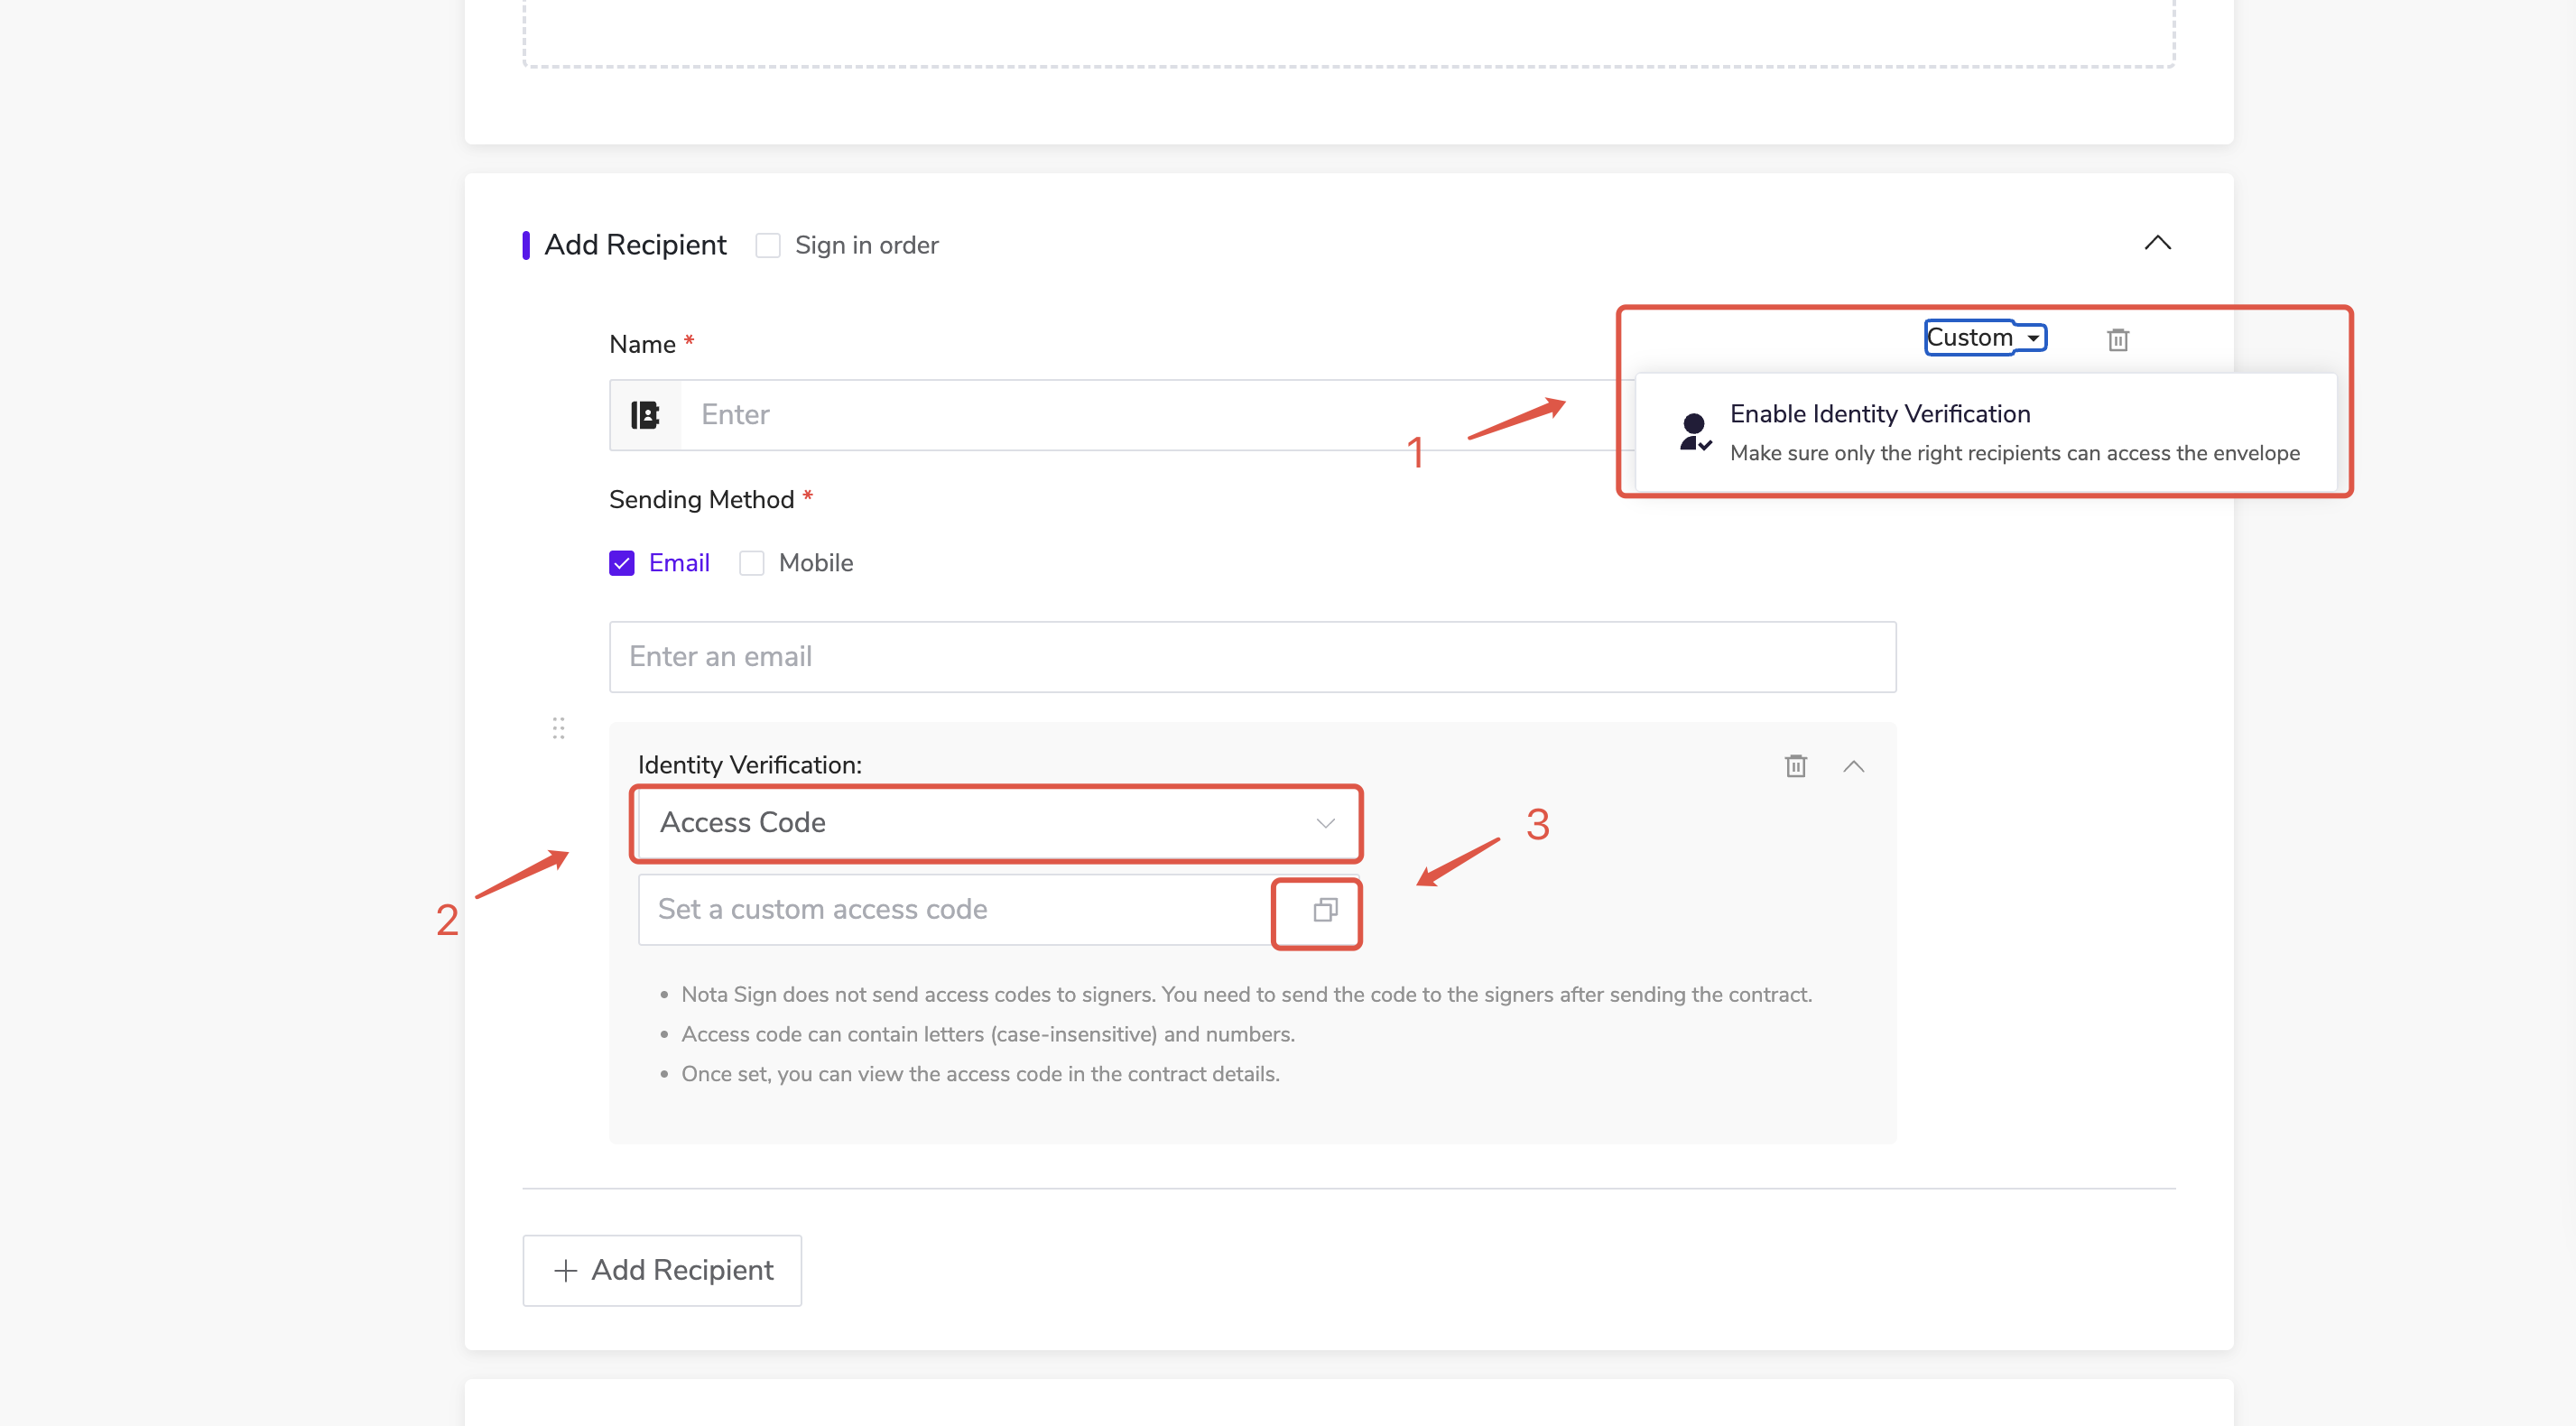
Access Code: Restrict access by requiring recipients to enter an access code.
-
Click Custom > Enable Identity Verification > Access Code.
-
Input a custom access code.
-
Click the Copy icon to share the code with recipients securely.
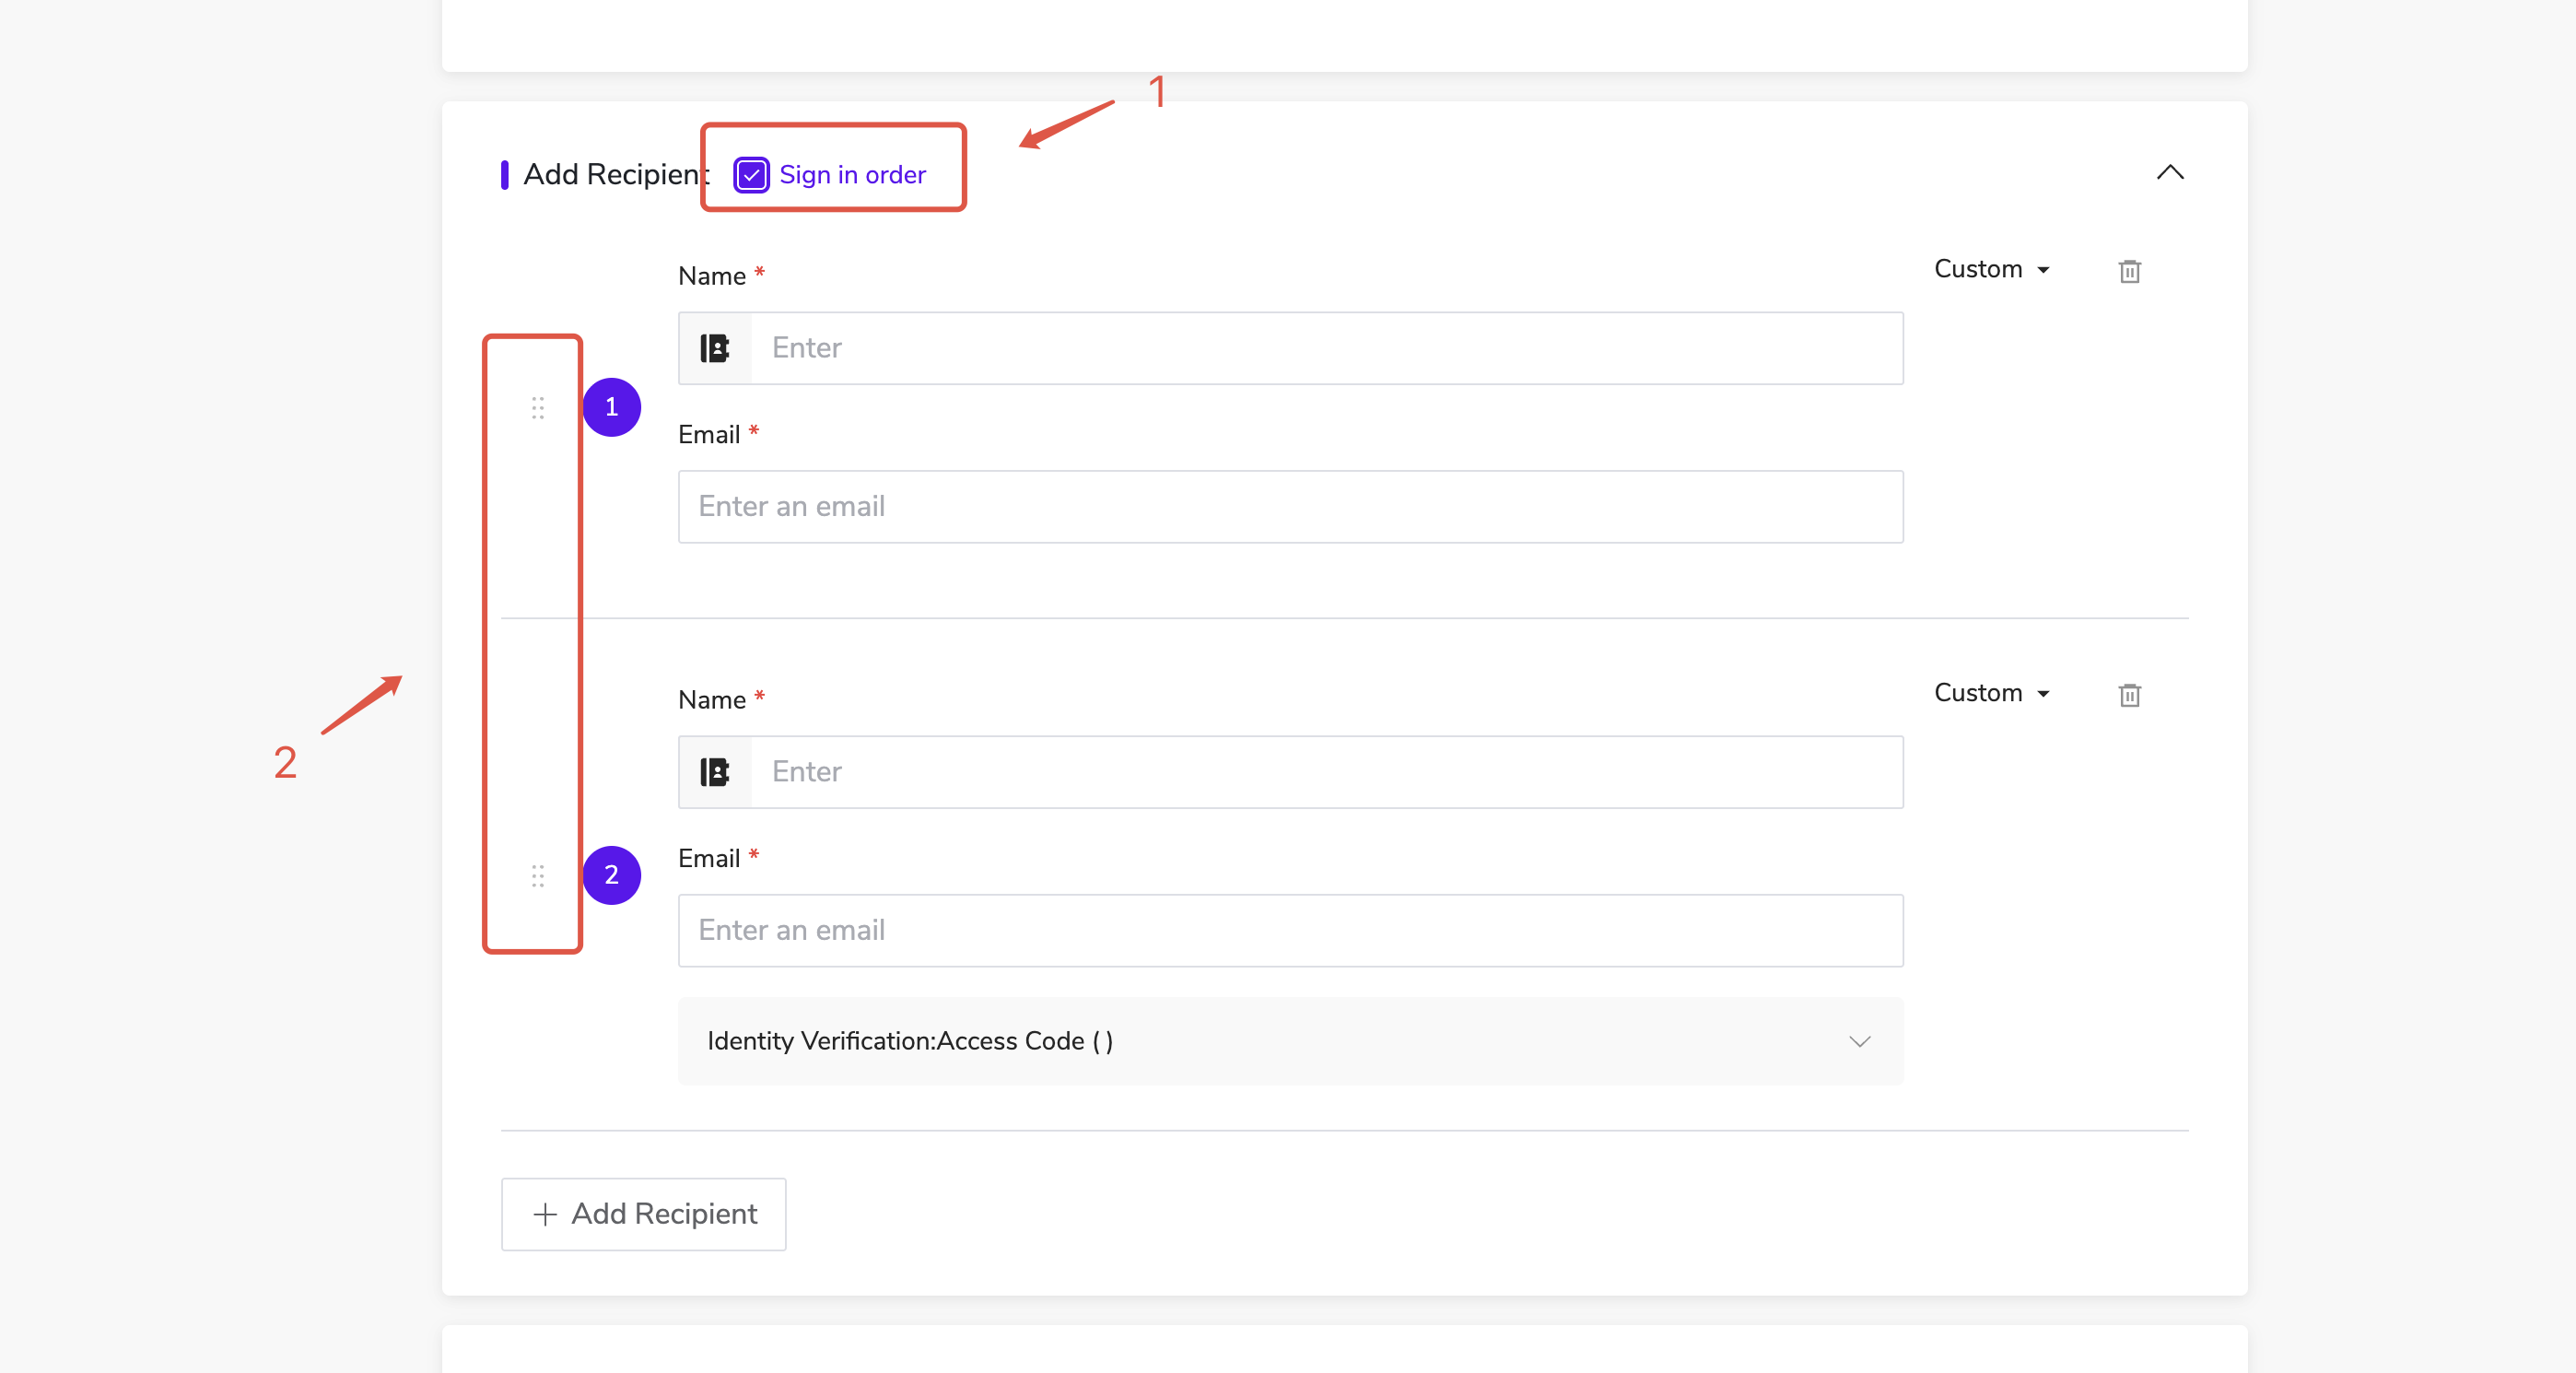
Signing Order: Enable if signers must sign in a specific sequence.
-
Select Sign in Order.
-
Drag and drop signers to arrange the desired order.
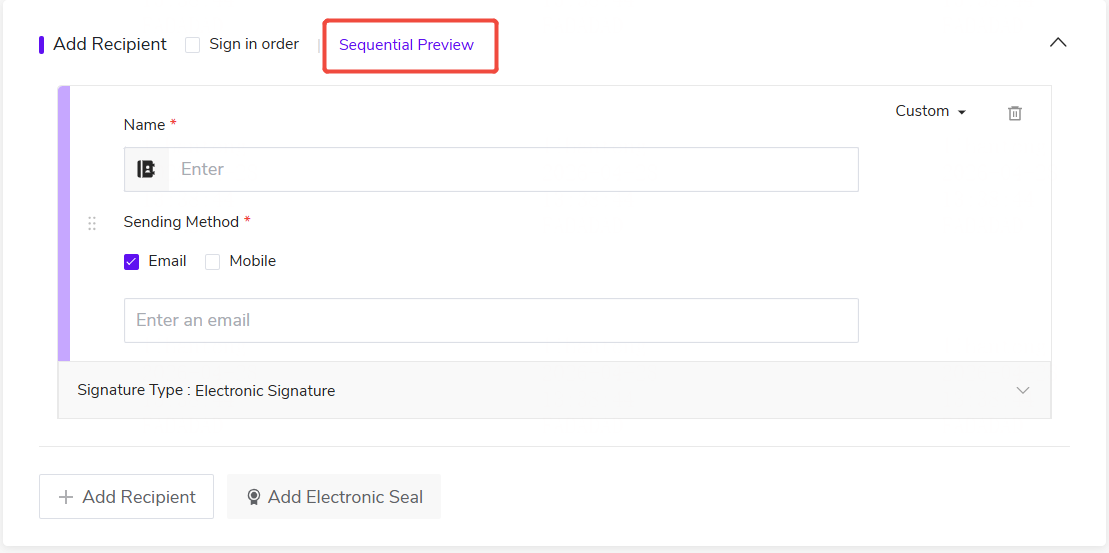
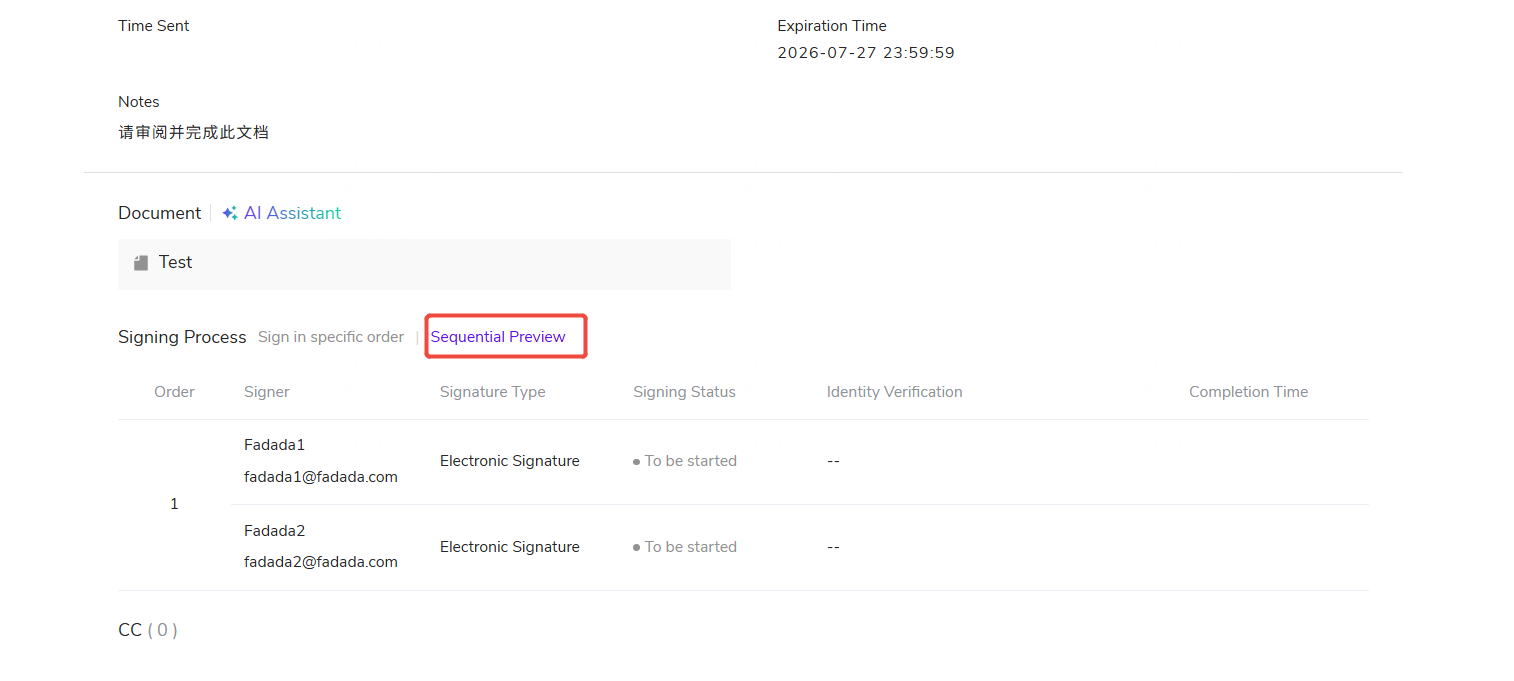
Hybrid Serial-Parallel Signing: Enable hybrid serial-parallel workflow orchestration, designed to support enterprise-level signing scenarios involving multiple participants, multi-step processes, and reusable templates.
1.Clicking [Sequence Preview] button next to the selected items in the signing order settings;
2.Clicking [Sequence Preview] on Details Page;
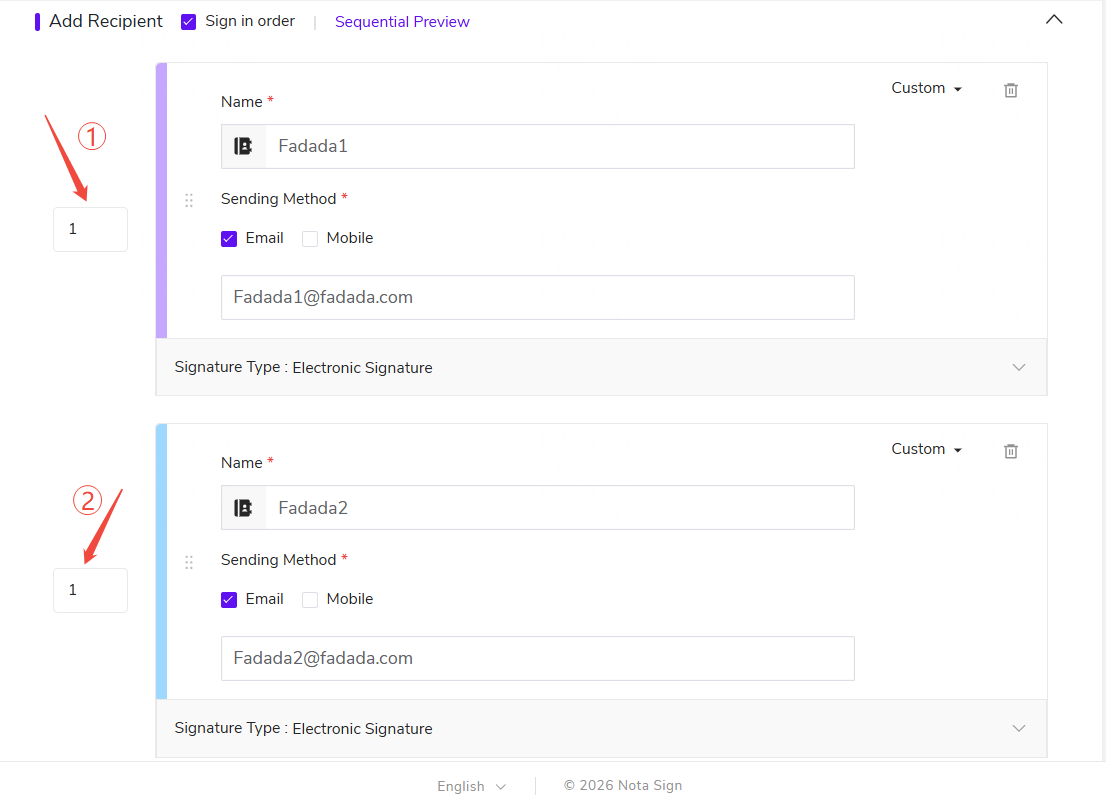
3.Parallel Signing Setup: Configure the signing order to enable parallel signing workflows;

4.Node Details in Preview: Click any node in the preview modal to view the corresponding email address or phone number;
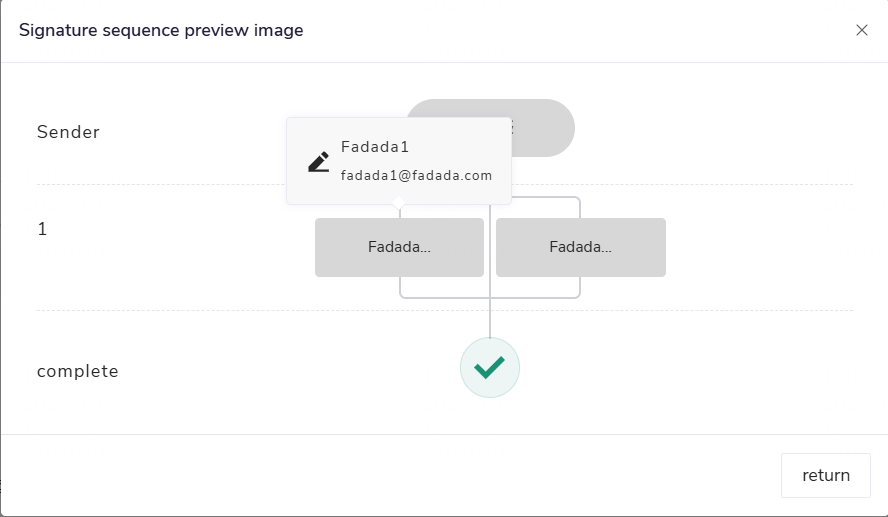
5.Adaptive Preview Layout: For parallel steps with more than 3 participants, the sequence is displayed below. If the number of nodes exceeds 10 rows, the sequence preview will be displayed in a full-screen modal.

1.3. Set Envelope Details
-
Envelope Subject: Automatically populated from the document name; you may edit it.
-
Expiration Date: Specify a signing deadline (defaults to 90 days from envelope creation).
-
Customize Reminder Frequency: After an envelope is sent, signing reminders are automatically sent at the specified interval (in days) to recipients who have not yet completed their signatures.
- In standard (parallel) signing: All unsigned recipients receive reminders according to the set frequency.
- In sequential signing:
- Only the recipient currently due to sign receives reminders;
- Recipients who have already signed will no longer receive any reminders;
- Recipients in subsequent signing steps will begin receiving reminders only after the previous signers have completed their actions—and only when it becomes their turn to sign.
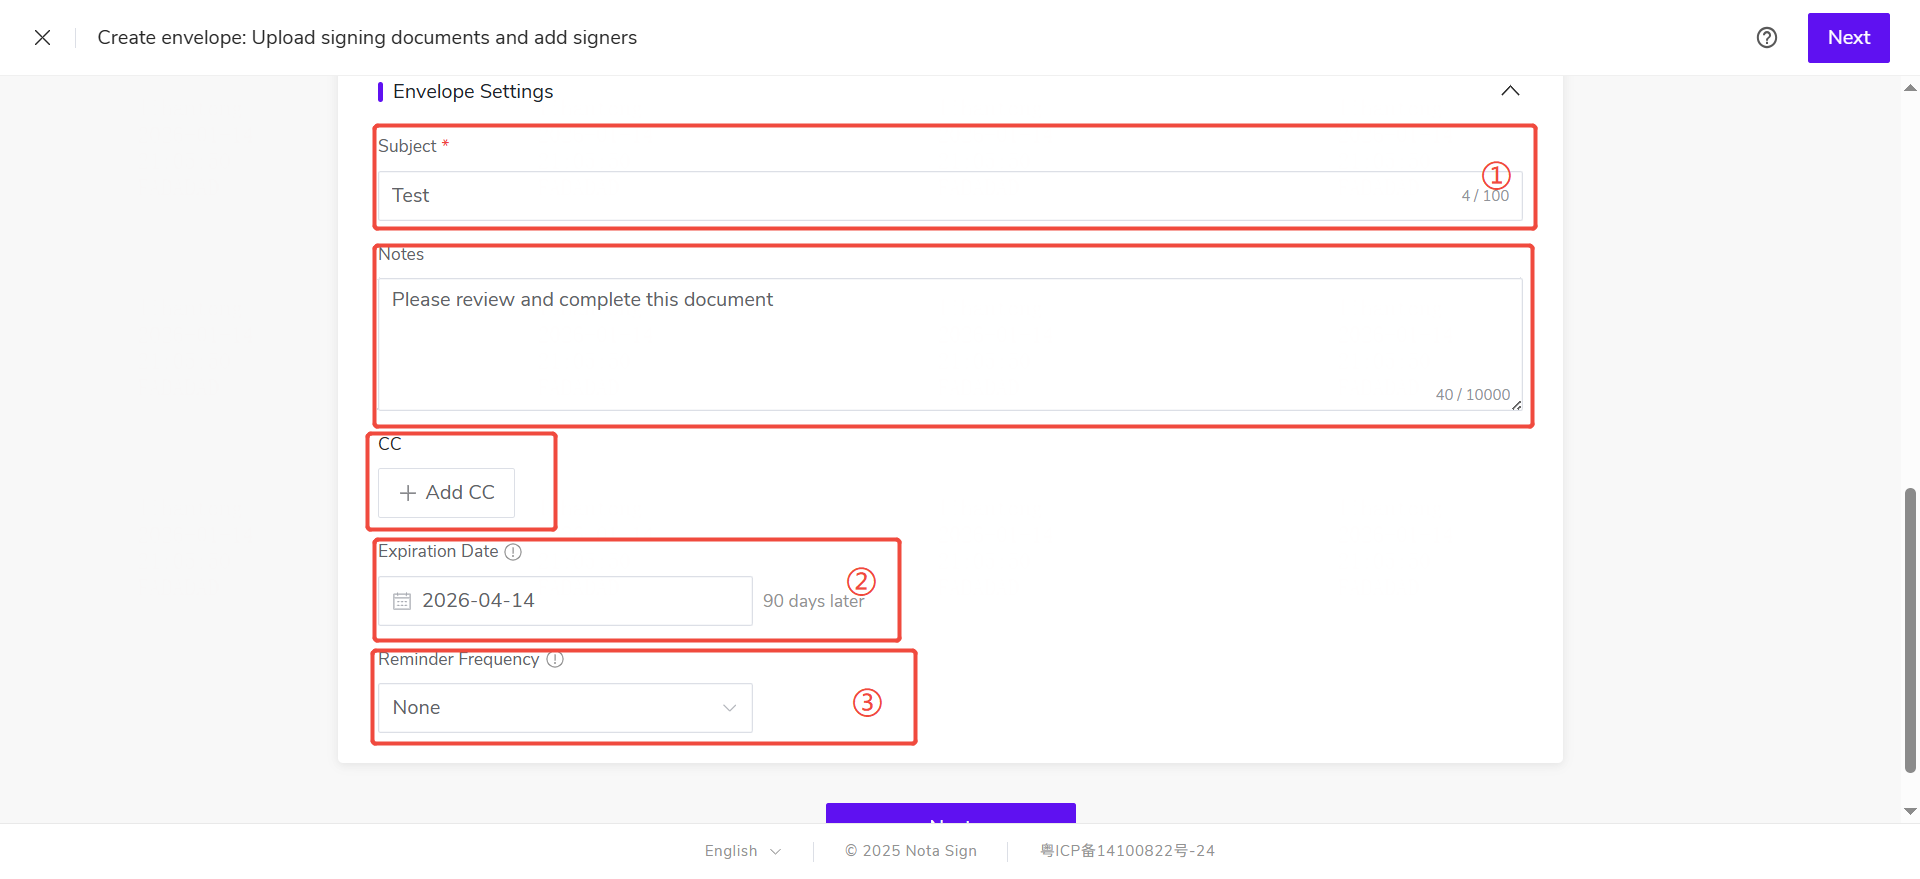
Optional Fields:
Add Message: Internal message shown in the envelope summary.
Add CC : Include observers who will be notified upon envelope completion.
- Click Next to proceed.
1.4. Enter the Field Configuration Page
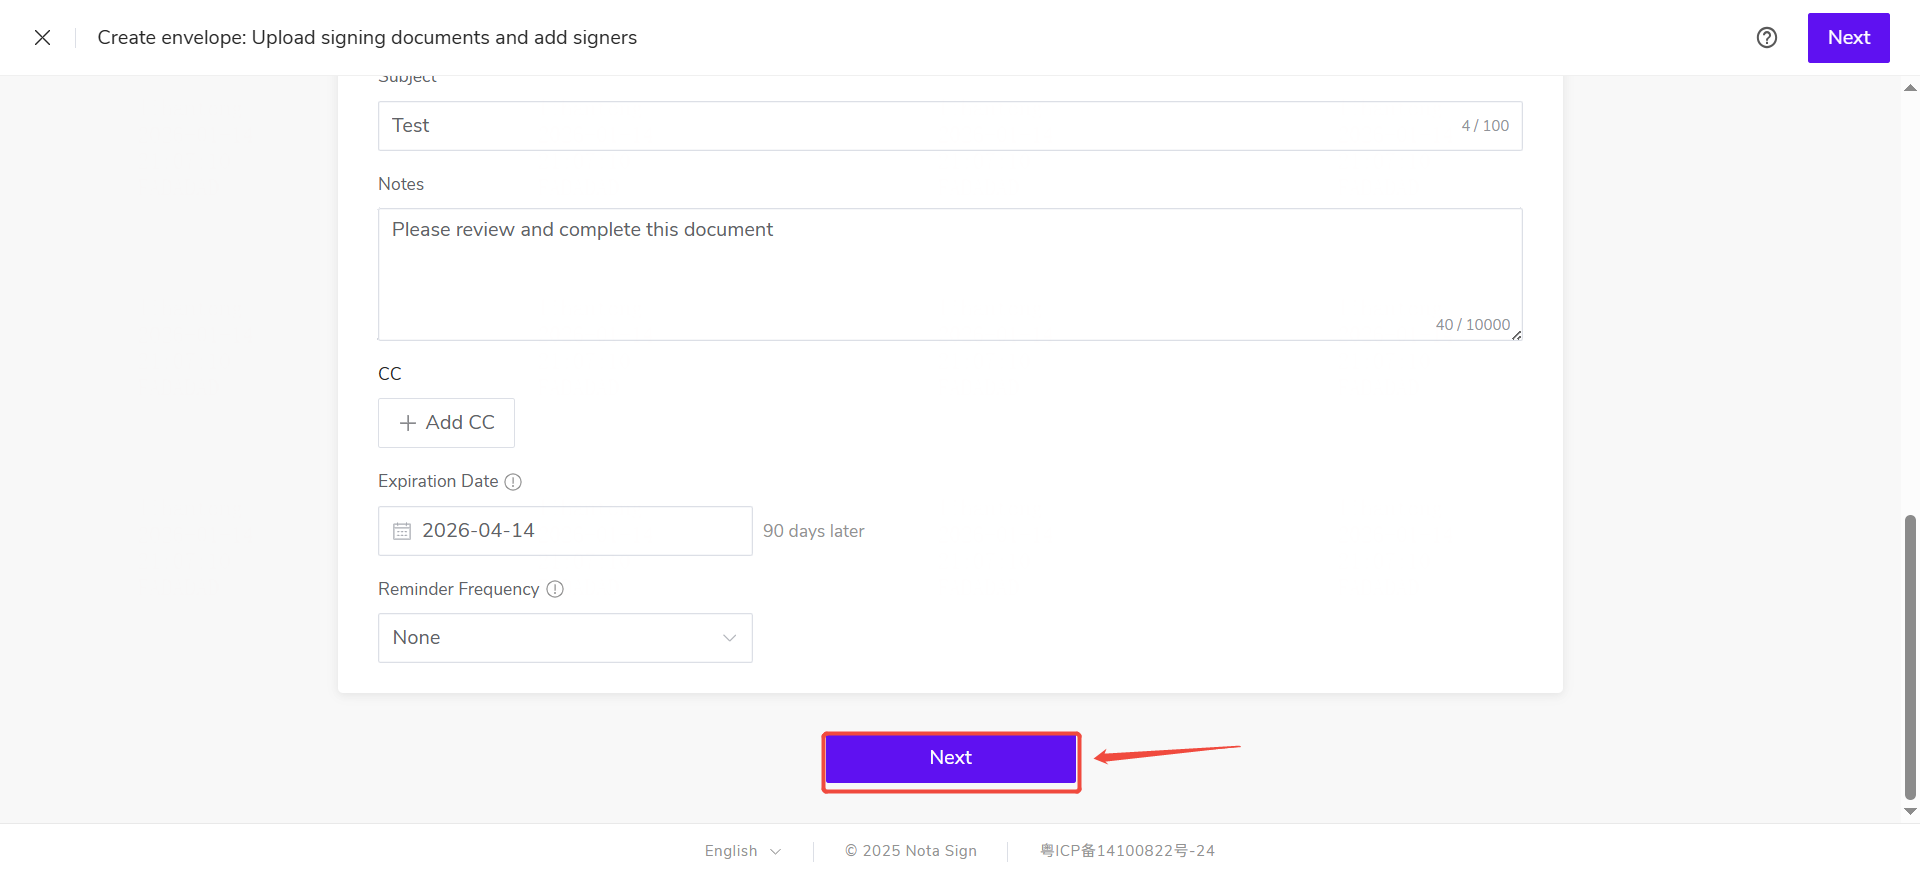
Click Next at the bottom of the page to enter the control configuration interface.
1.5. Configure Signing Controls
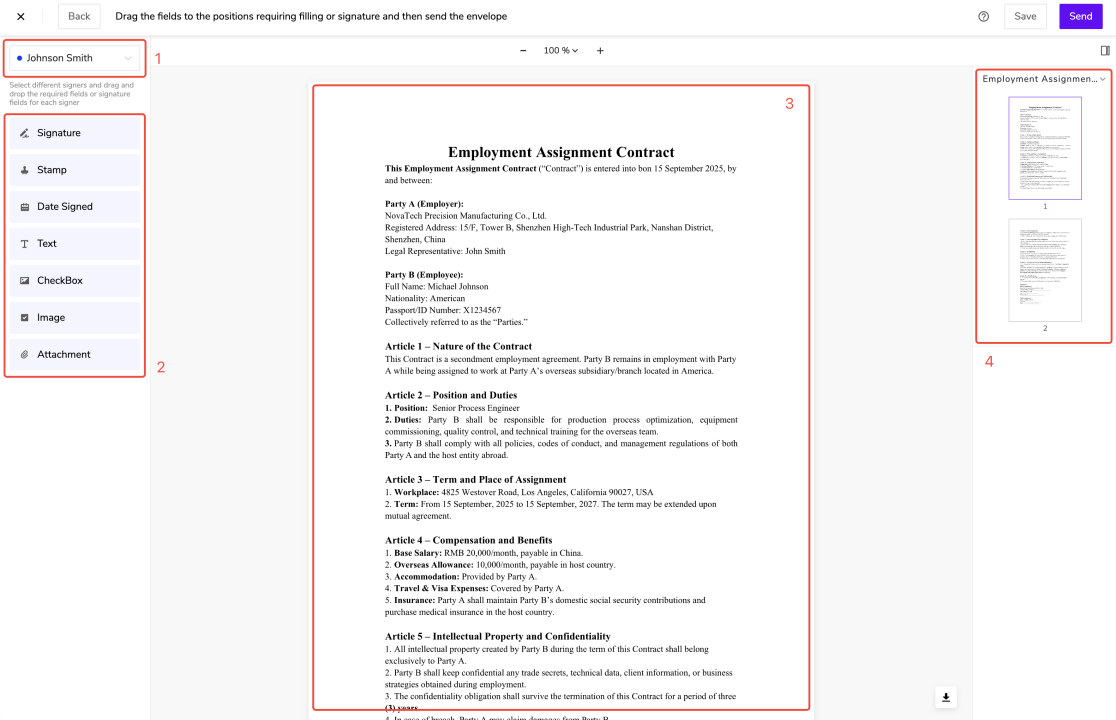
The field configuration page has two main sections:
-
Recipient settings: Different recipients can be selected to perform control settings respectively;
-
Control setting panel: Necessary filling controls and seal locations can be set for the recipient;
There are two types of controls provided by Nota Sign:
-
Signing controls: Signature, Seal, Signing Date;
-
Filling controls: Text, Checkbox, Image, Attachment;
-For recipients with dual tasks of filling and signing, all content for that node can be completed with a single submission. Please check all required fields before submission to ensure the signing process proceeds smoothly.-
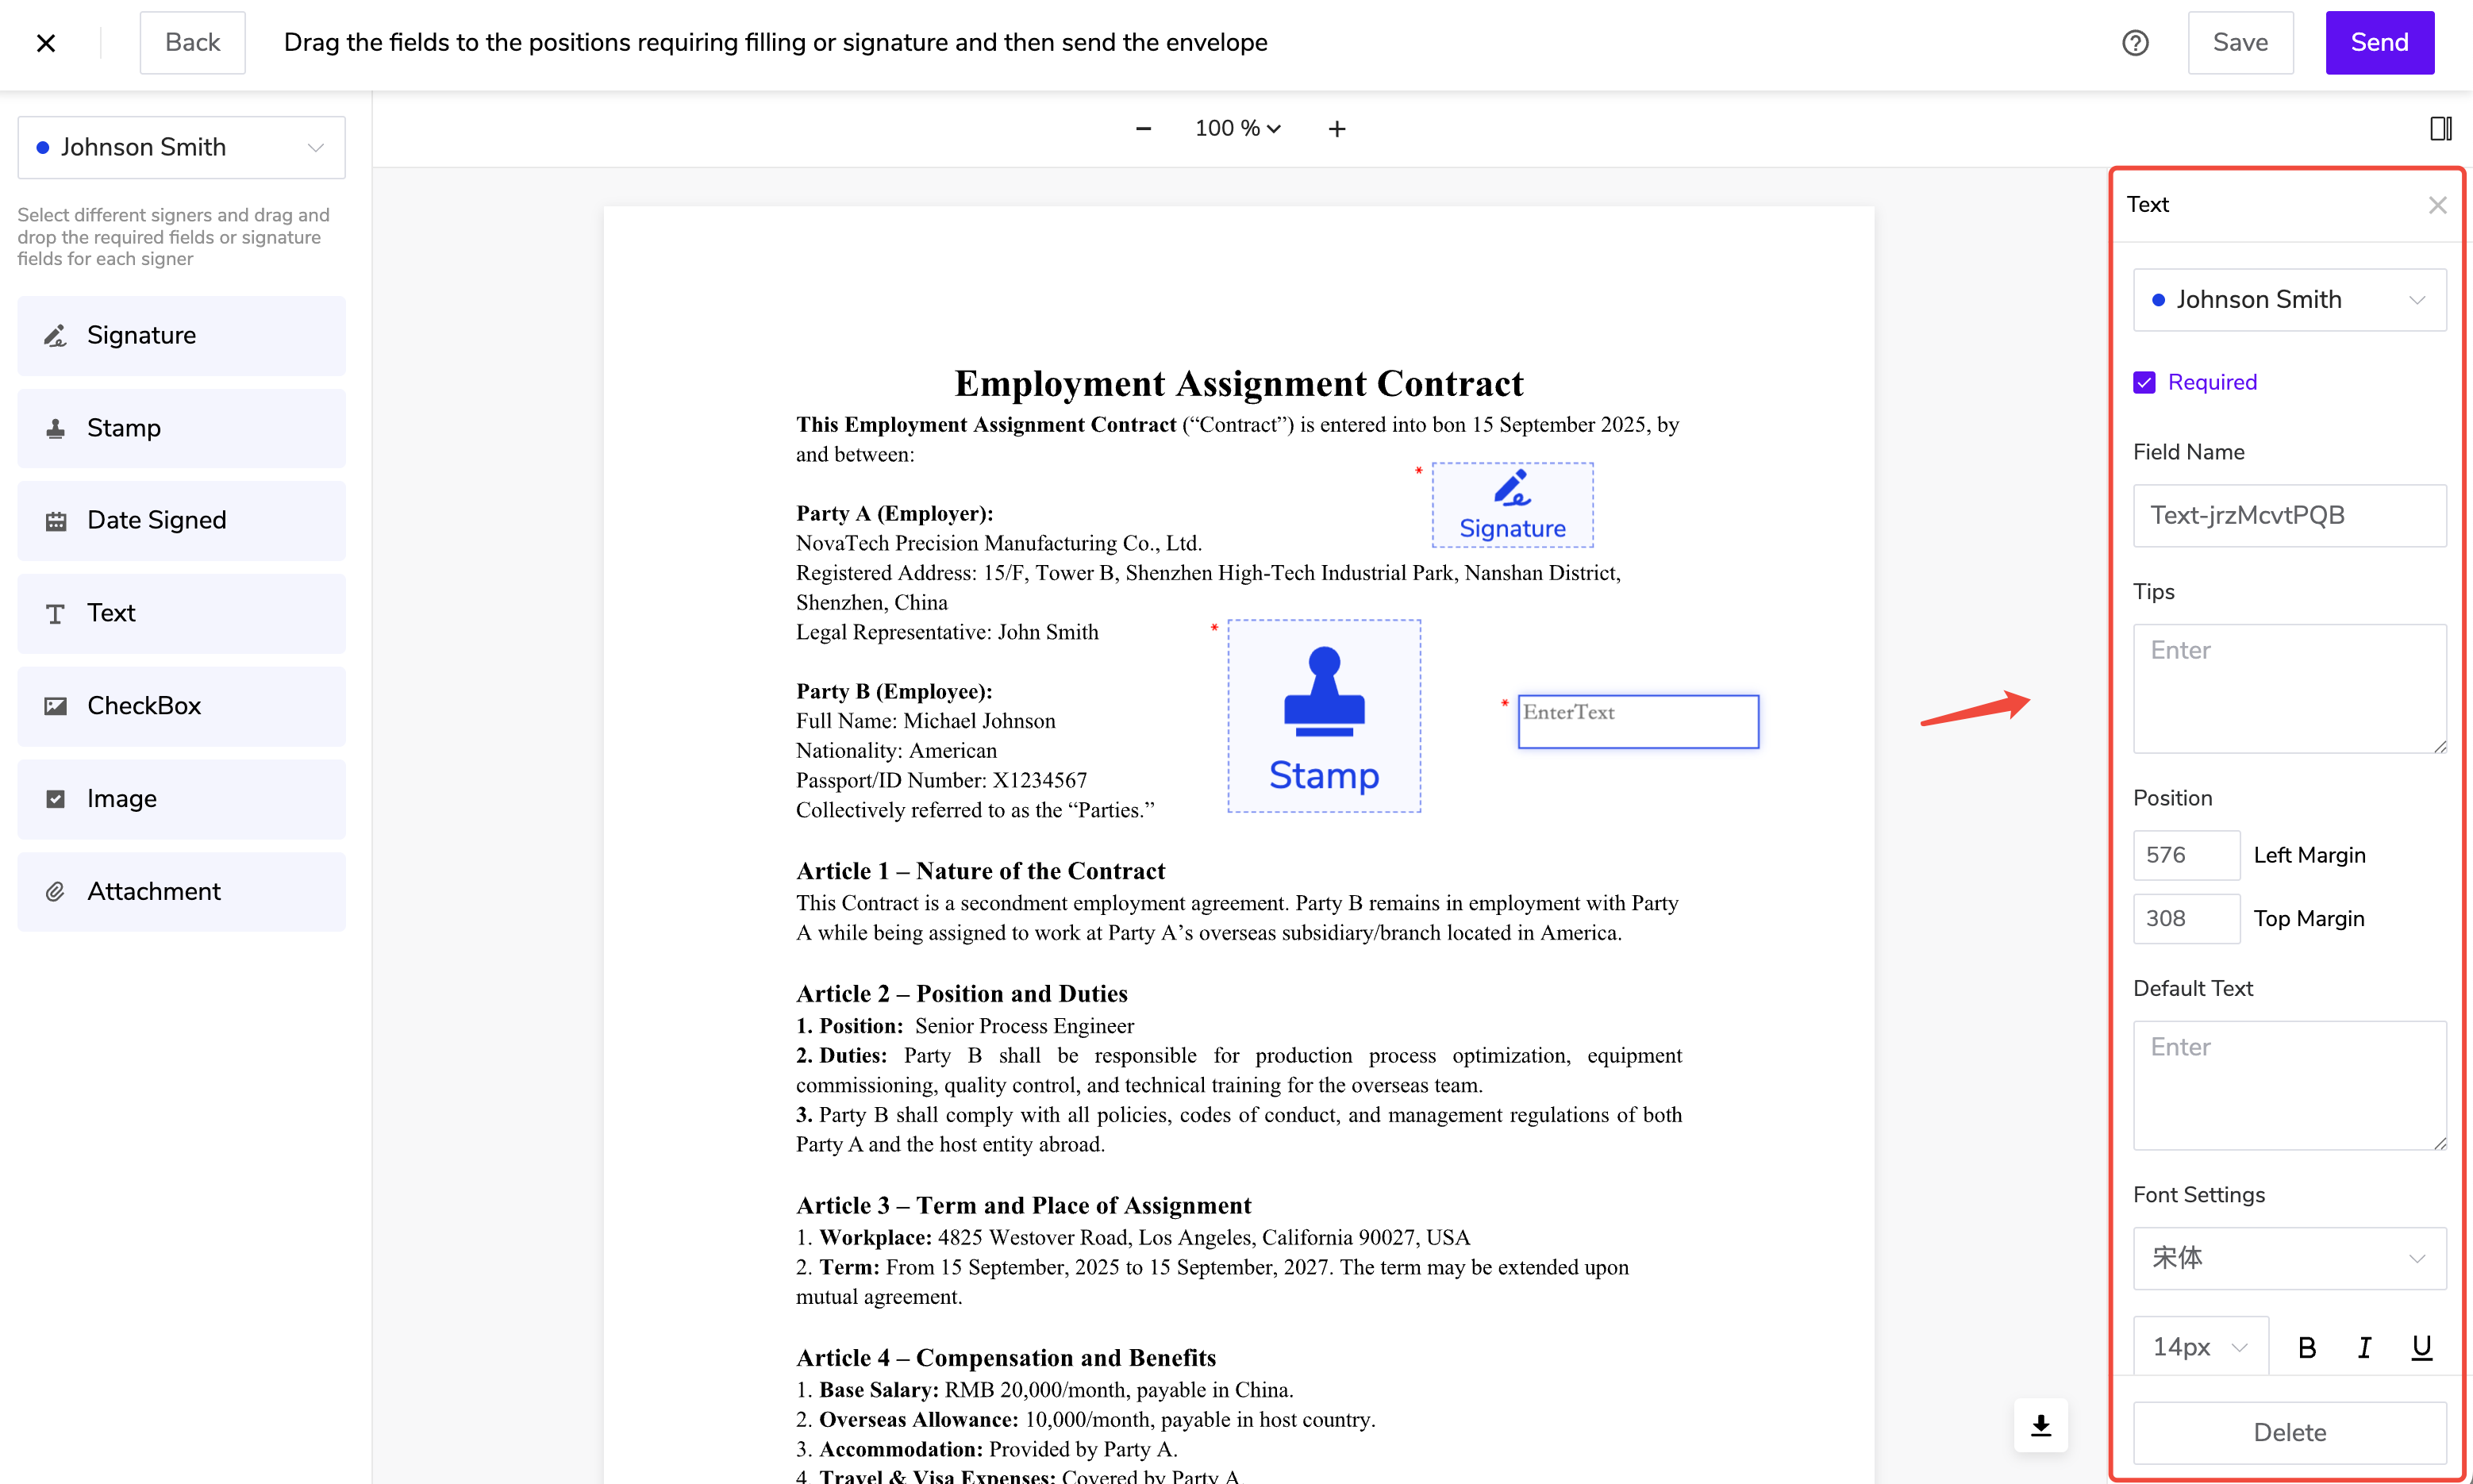
After clicking a control, properties can be configured on the right:
-
Recipient: Specify who needs to fill this control;
-
Is Required: Set whether filling is mandatory;
-
Control Name: For easy identification of control content;
-
Usage Tips: Set guiding instruction text;
-
Default Content: Set pre-filled text content;
-
Font Style: Supports Bold, Italic, and Underline;
-
Font Type and Size: Supports multiple fonts and sizes (12px–28px).
-
Document body preview area: Provides a preview of the uploaded document and allows setting corresponding controls for it;
-
Document list navigation area: Allows browsing and quick navigation to the corresponding documents.
Operational steps:
- Select Recipient
Switch between different recipients in the upper left corner of the page
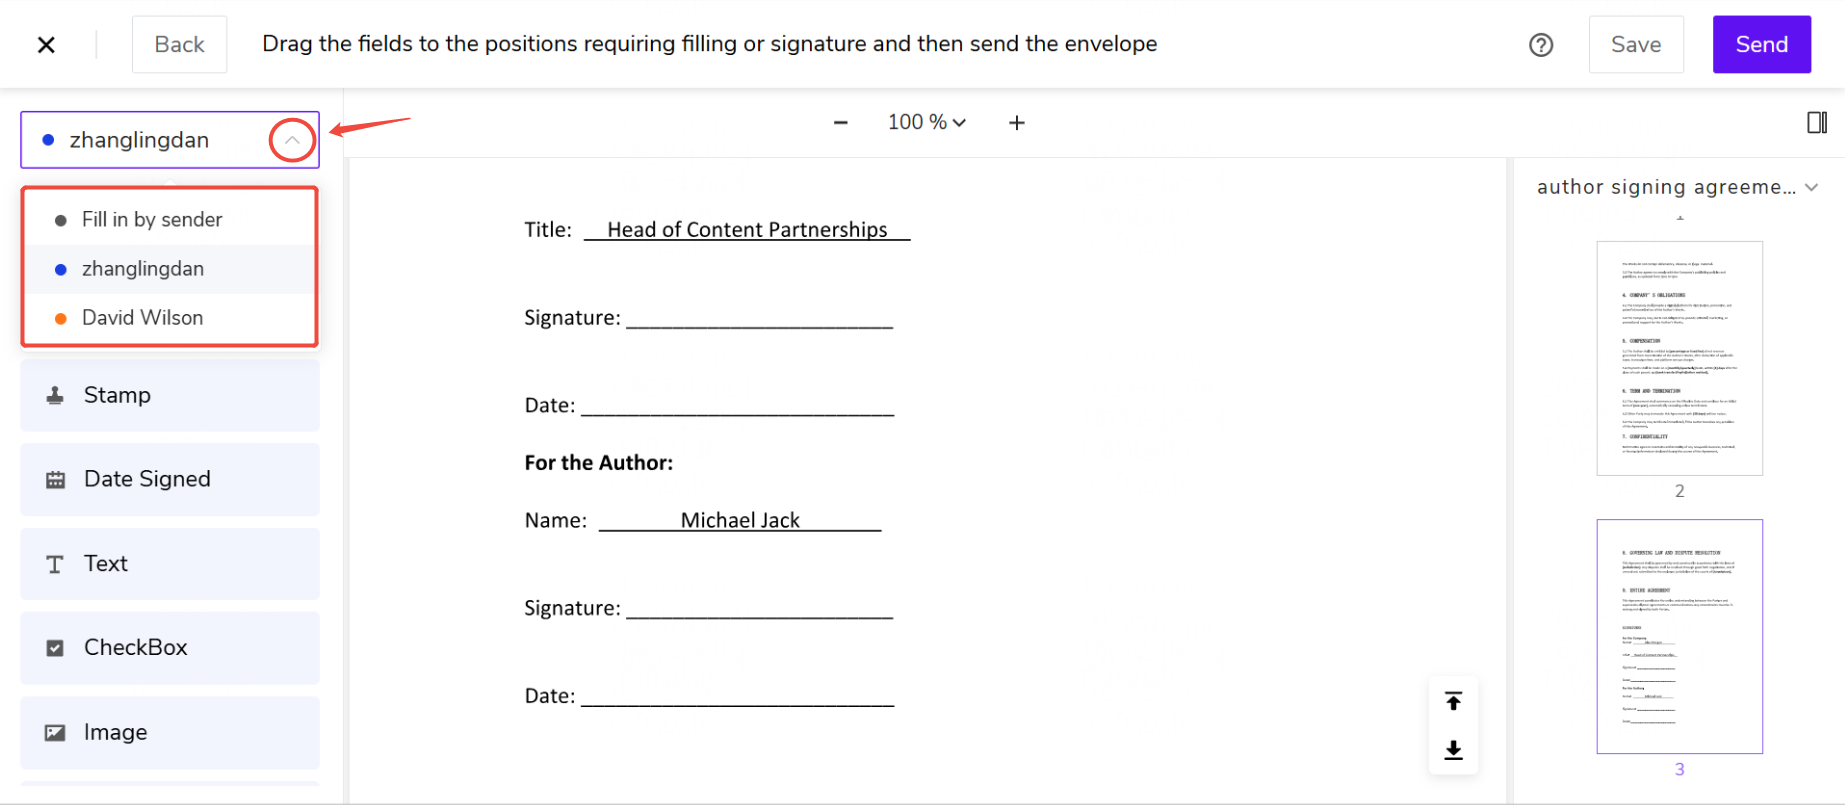
The system will automatically display available controls based on the “Signature Type” you selected in the previous step.
- Set Recipient Controls
-
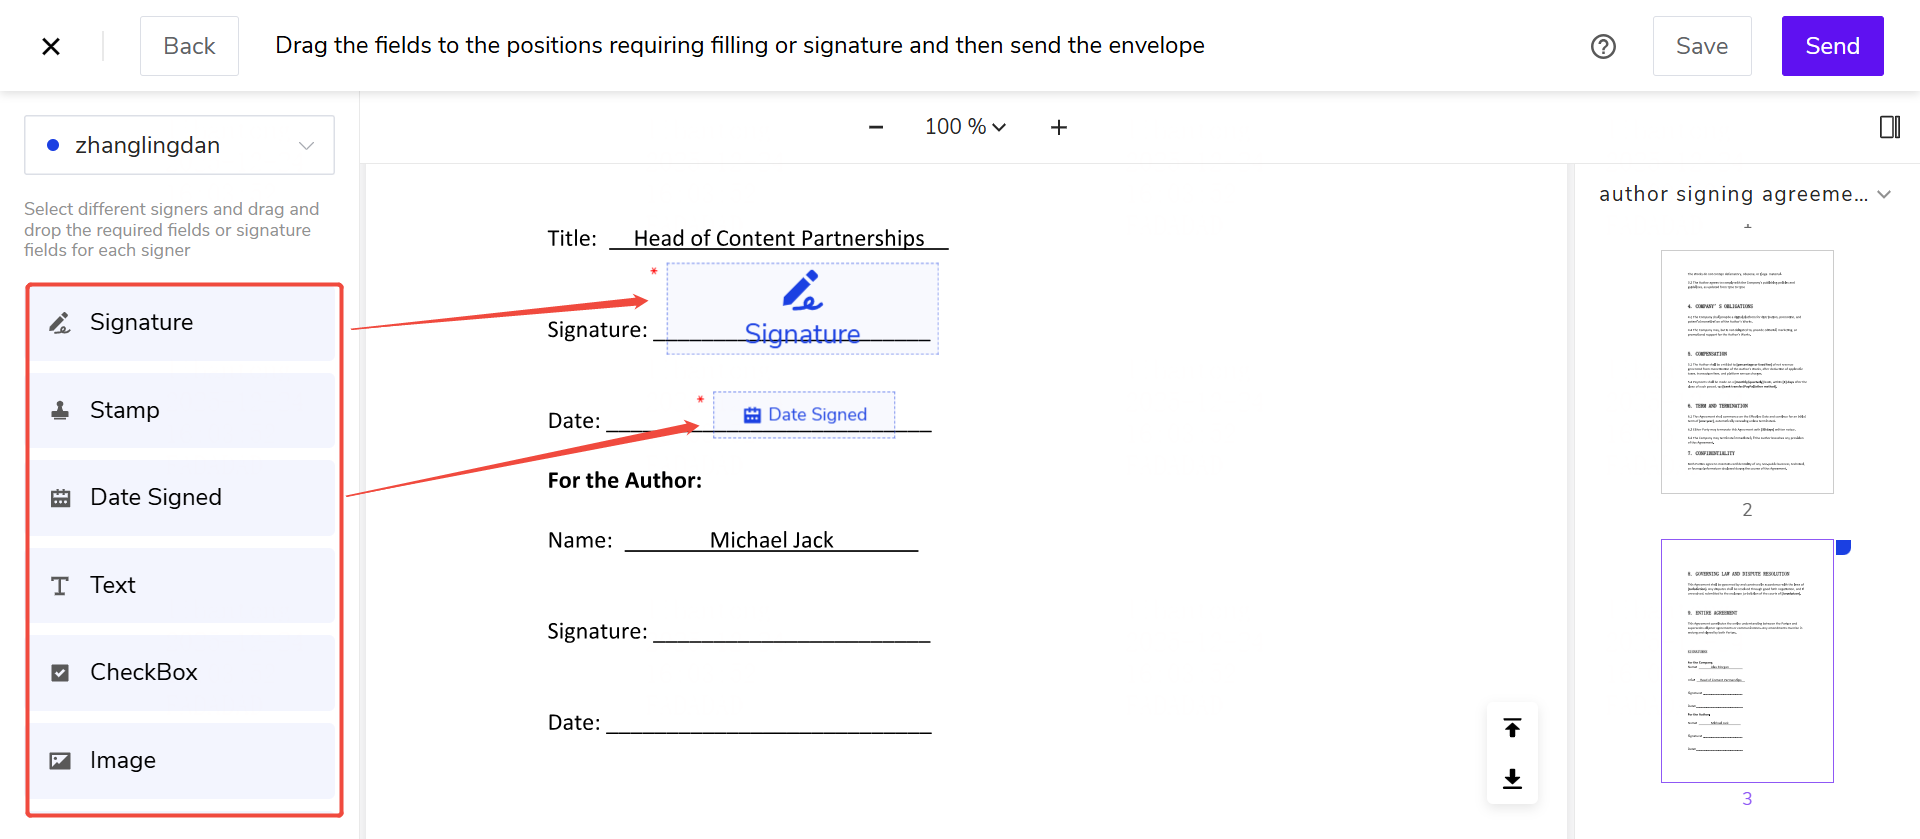
Select a control from the control panel on the left;
-
Drag it to the corresponding position in the document body area.
1)If the signer is designated for Electronic Signature, only electronic signature type controls can be placed.
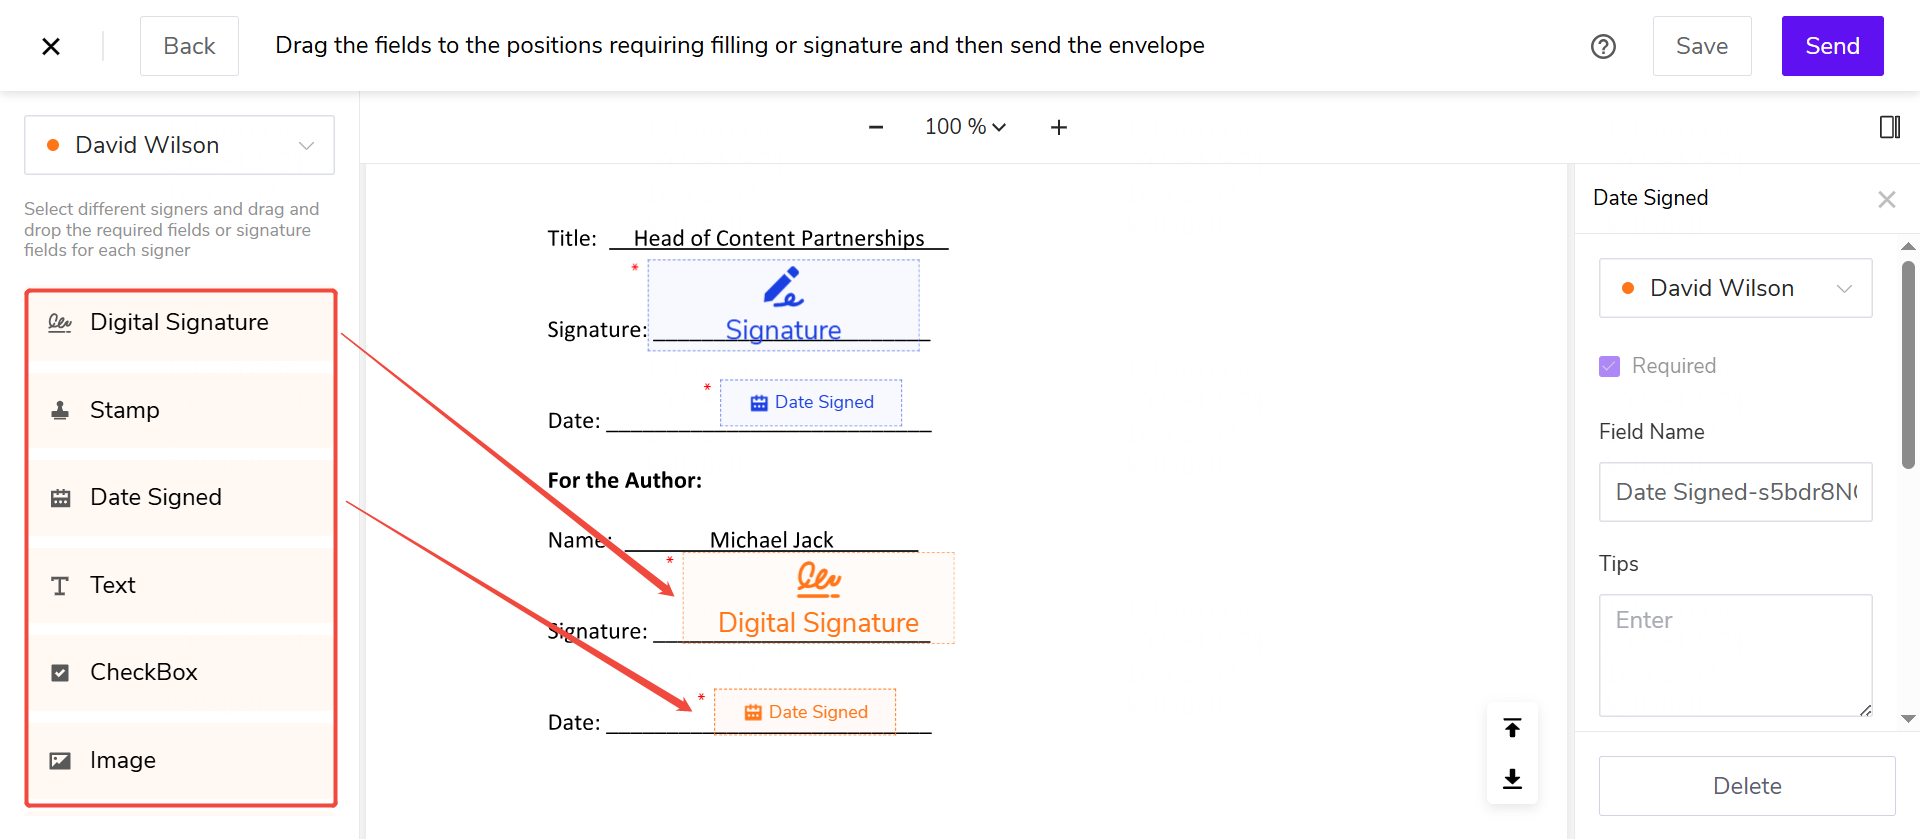
2)If the signer is designated for Digital Signature, only digital signature type controls can be placed.
3)If the freehand drawing field is selected when initiating the signing process, the signer can use a handwritten signature.
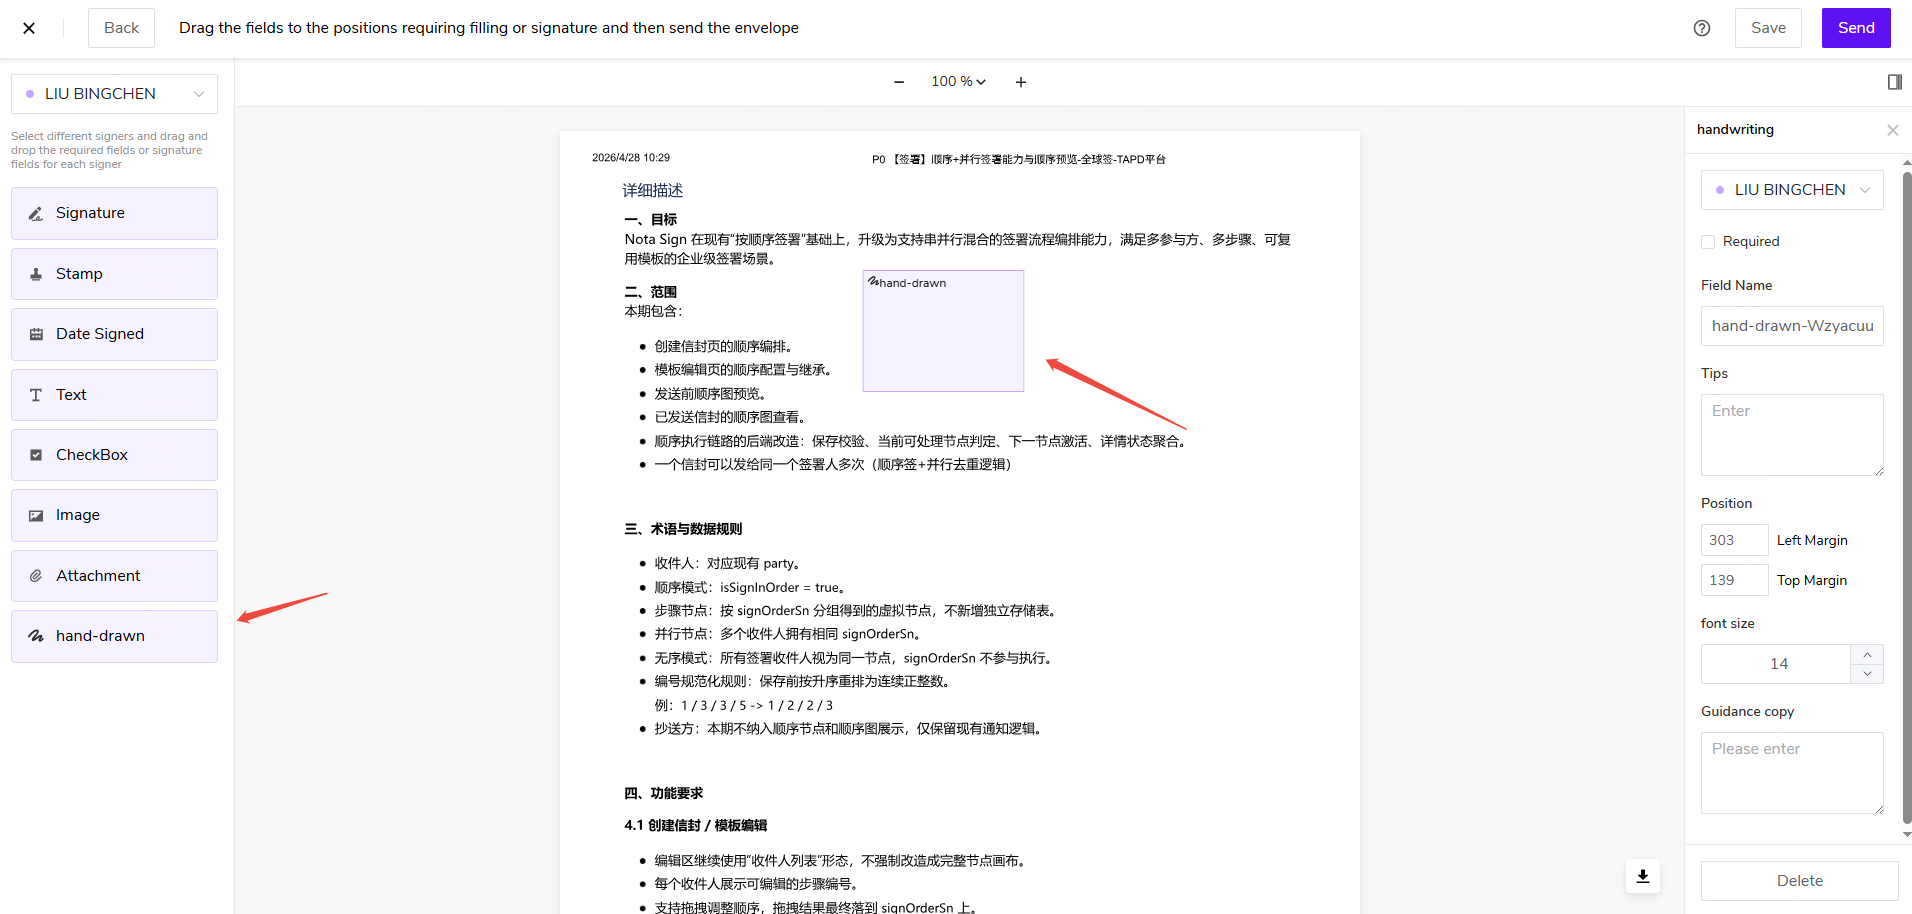
- 💡 Note: When initiating the signing process, the freehand drawing field must be used together with the signature field. -
1.6. Send the Signing Invitation
After completing control settings, click [Send] in the upper right corner of the page to send the envelope.
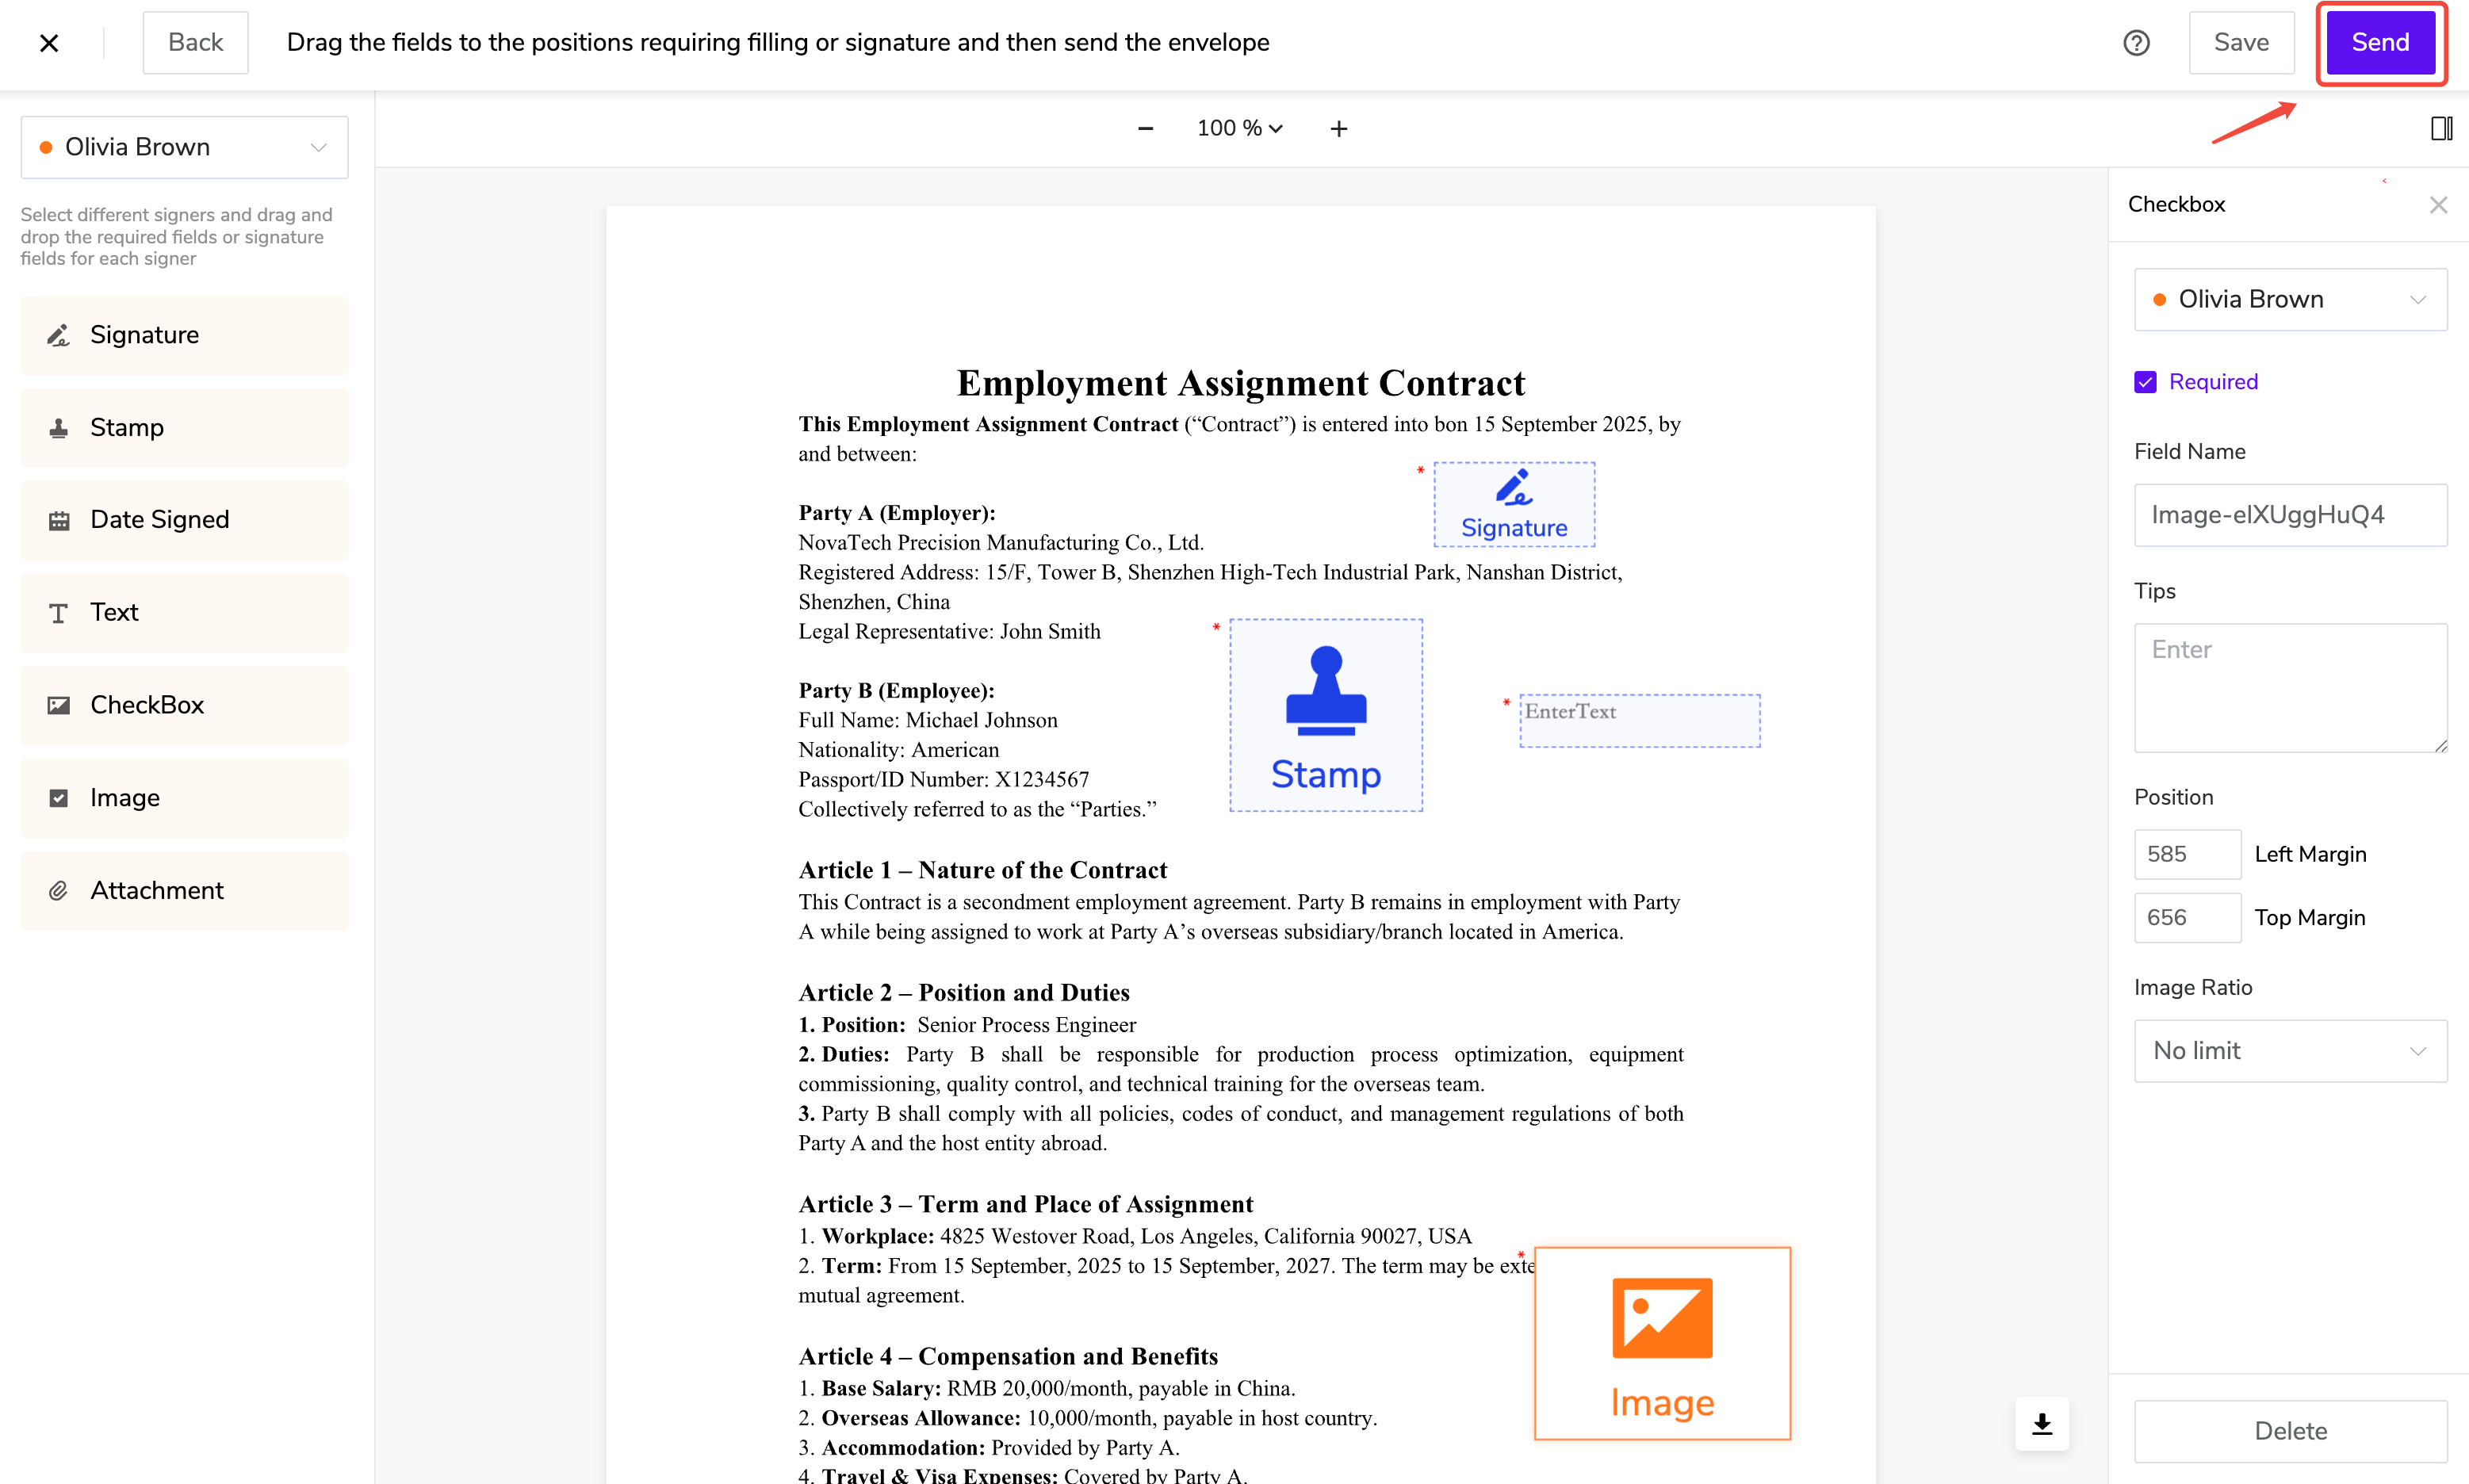
Recipients will receive a signing email or SMS sent by the system; they can click the link to enter the document for signing.
Once successfully sent, one envelope quota will be deducted.
Signing a Simple Electronic Signature (SES) Envelope
Video Tutorial:
2. Accessing the Envelope
You can access the envelope through two main methods:
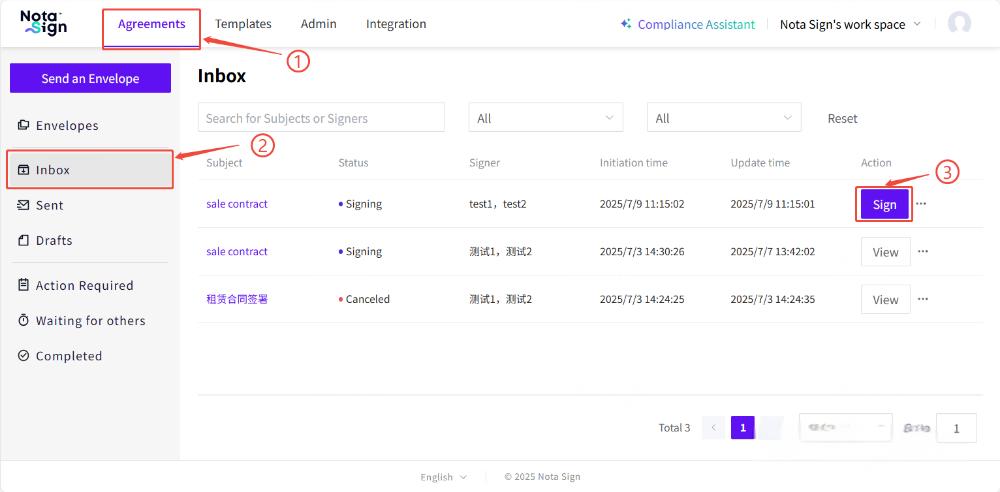
2.1. Option 1: From the Nota Sign Dashboard
-
Log in to your Nota Sign account.
-
Navigate to Agreements.
-
Click on the Inbox tab in the left sidebar.
-
Locate the envelope you need to sign and click Sign.
2.2. Option 2: From the Email Invitation
-
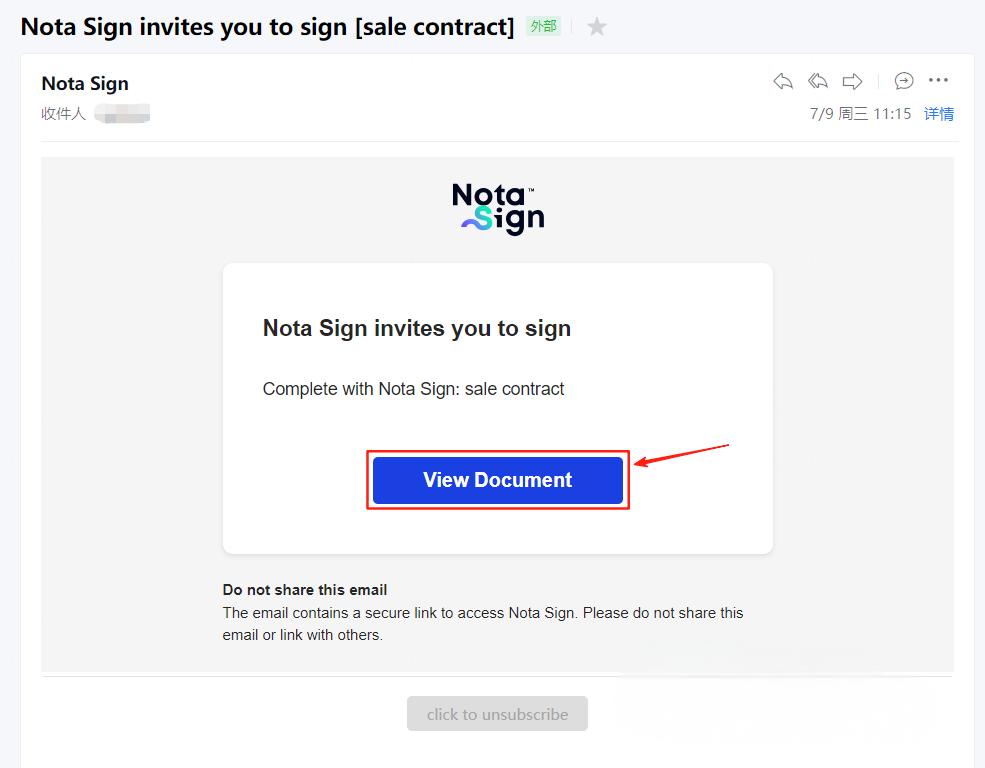
Open the signature request email sent by Nota Sign.
-
Click View Document to open the envelope directly in your browser.
3. Signing the Envelope
3.1. Begin Signing
-
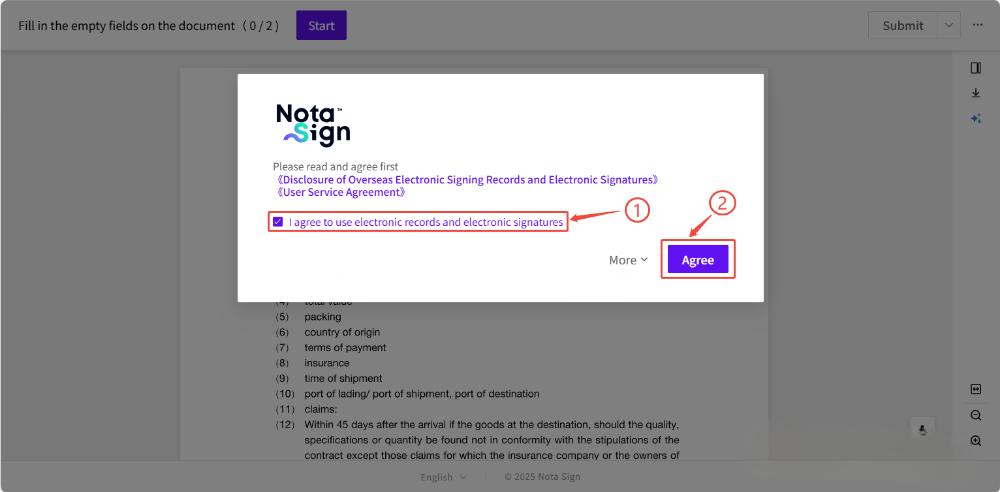
Carefully read through the agreement content.
-
To proceed, click Agree after reviewing the terms.
-
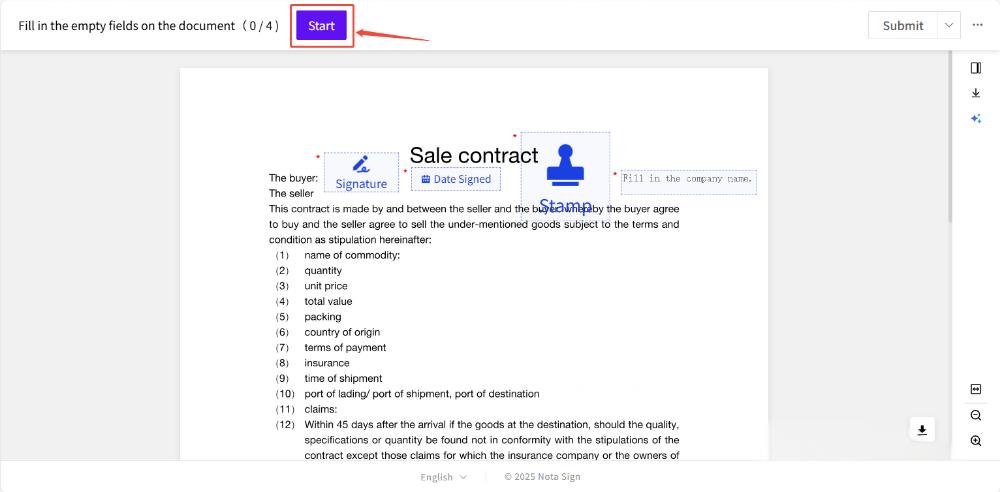
Click Start to begin the signing process.
3.2. Complete Required Fields
Click on each highlighted field and complete it as required. Supported field types include:
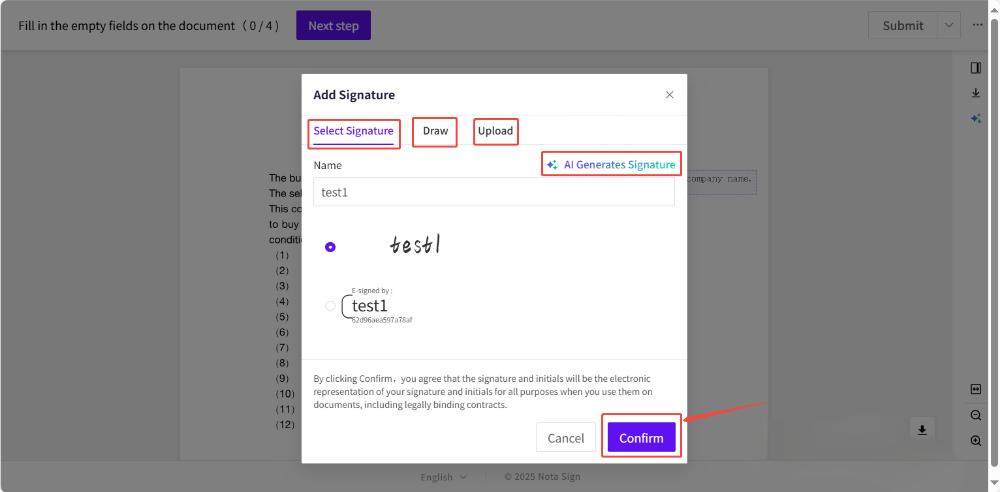
- Signature: Click the Signature field to insert your signature. You can choose from the following options:
Default Style, Drawn, Upload and AI-generated.
-
Date: Click the Date field to automatically insert the current date.
-
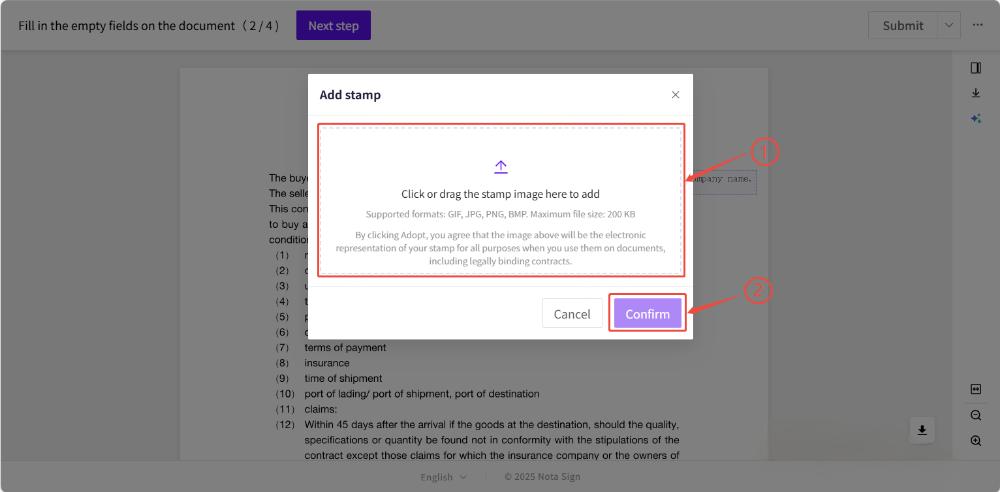
Stamp: Click the Stamp field to upload a compliant company or personal stamp.
-
Text Fields: Click into any Text field and type the requested information.
-
Checkbox: Click a Checkbox field to mark it as selected.
-
Image Upload: Use this field to upload required supporting images.
-
Attachment: Click the Attachment to upload supplementary documents related to the envelope.
When using a Text Field, the assigned recipient must complete the required field before the signing process can proceed. Please ensure that all required text fields are properly filled by each designated recipient to avoid delays in workflow progression.
3.3. Submit the Signed Document
Once all required fields are completed, click Submit in the upper-right corner to finalize the signing process.
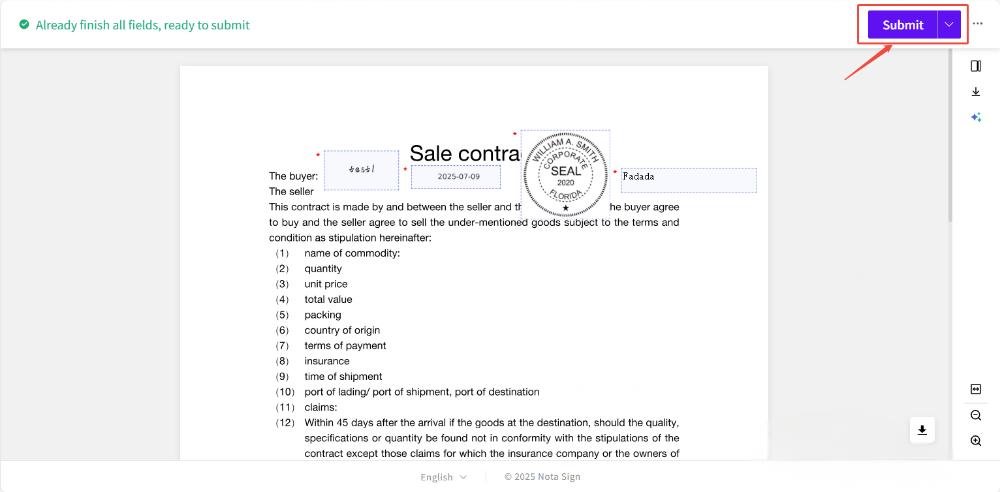
You will receive a confirmation email once the document has been successfully signed.