Self-Sign is a quick feature specifically designed for the sender to fill out and sign documents themselves. No additional recipients are needed, and there are no intermediate transmission states. Filling and signing are completed in one step: submit to finish. Currently, this feature is only available for SaaS (Non-GxP) workspaces.
-
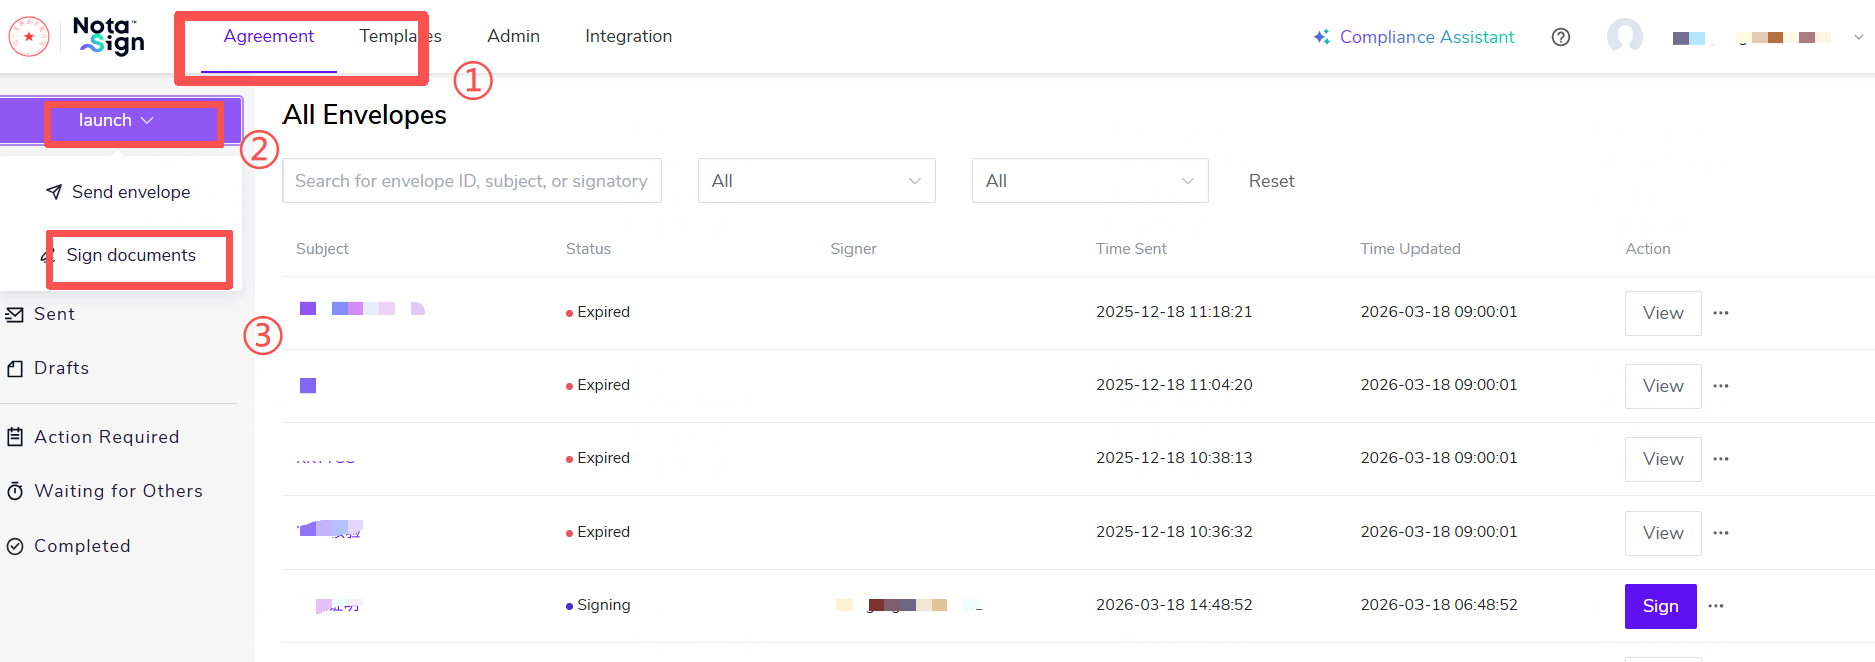
Log in to the Nota Sign workspace. With member sending permissions configured, select [Sign Document].
-
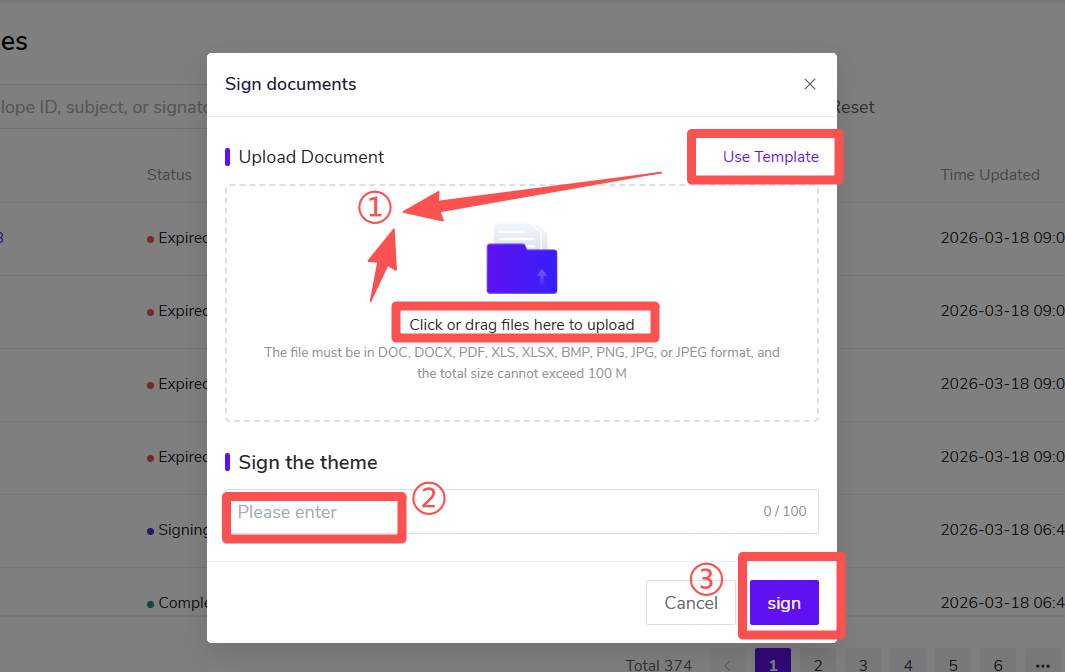
Select [Local Upload] or [Use Template]. Confirm the envelope subject (the system defaults to extracting the name of the first uploaded document). Click the [Sign] button below to enter the document filling page.
-
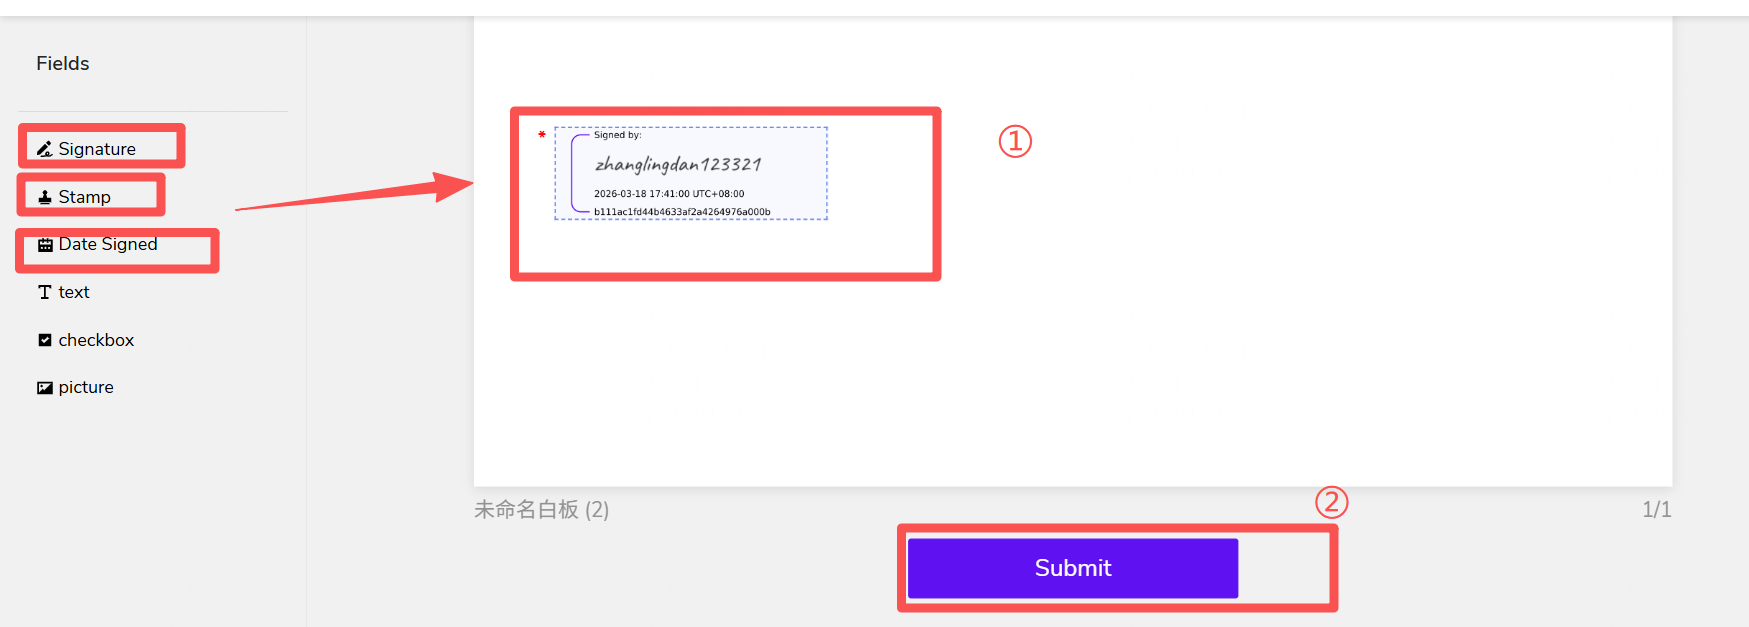
Drag and drop controls and complete the filling. On the document page, you can drag and drop various controls from the left menu onto the document for filling. For detailed explanations of specific control functions and operations, please refer to the following tutorial: Sign Envelope
-
After confirming that all controls have been filled out and signed, click [Submit]. Upon successful submission, the system will directly generate an envelope with a “Completed” status and save it in the list. You will receive an email notification of the completed signing, and the system will automatically generate the corresponding envelope signing log and audit report for you to download.