
Video Tutorial:
1. Part 1: Create a Template
1.1. Access the Template Creation Page
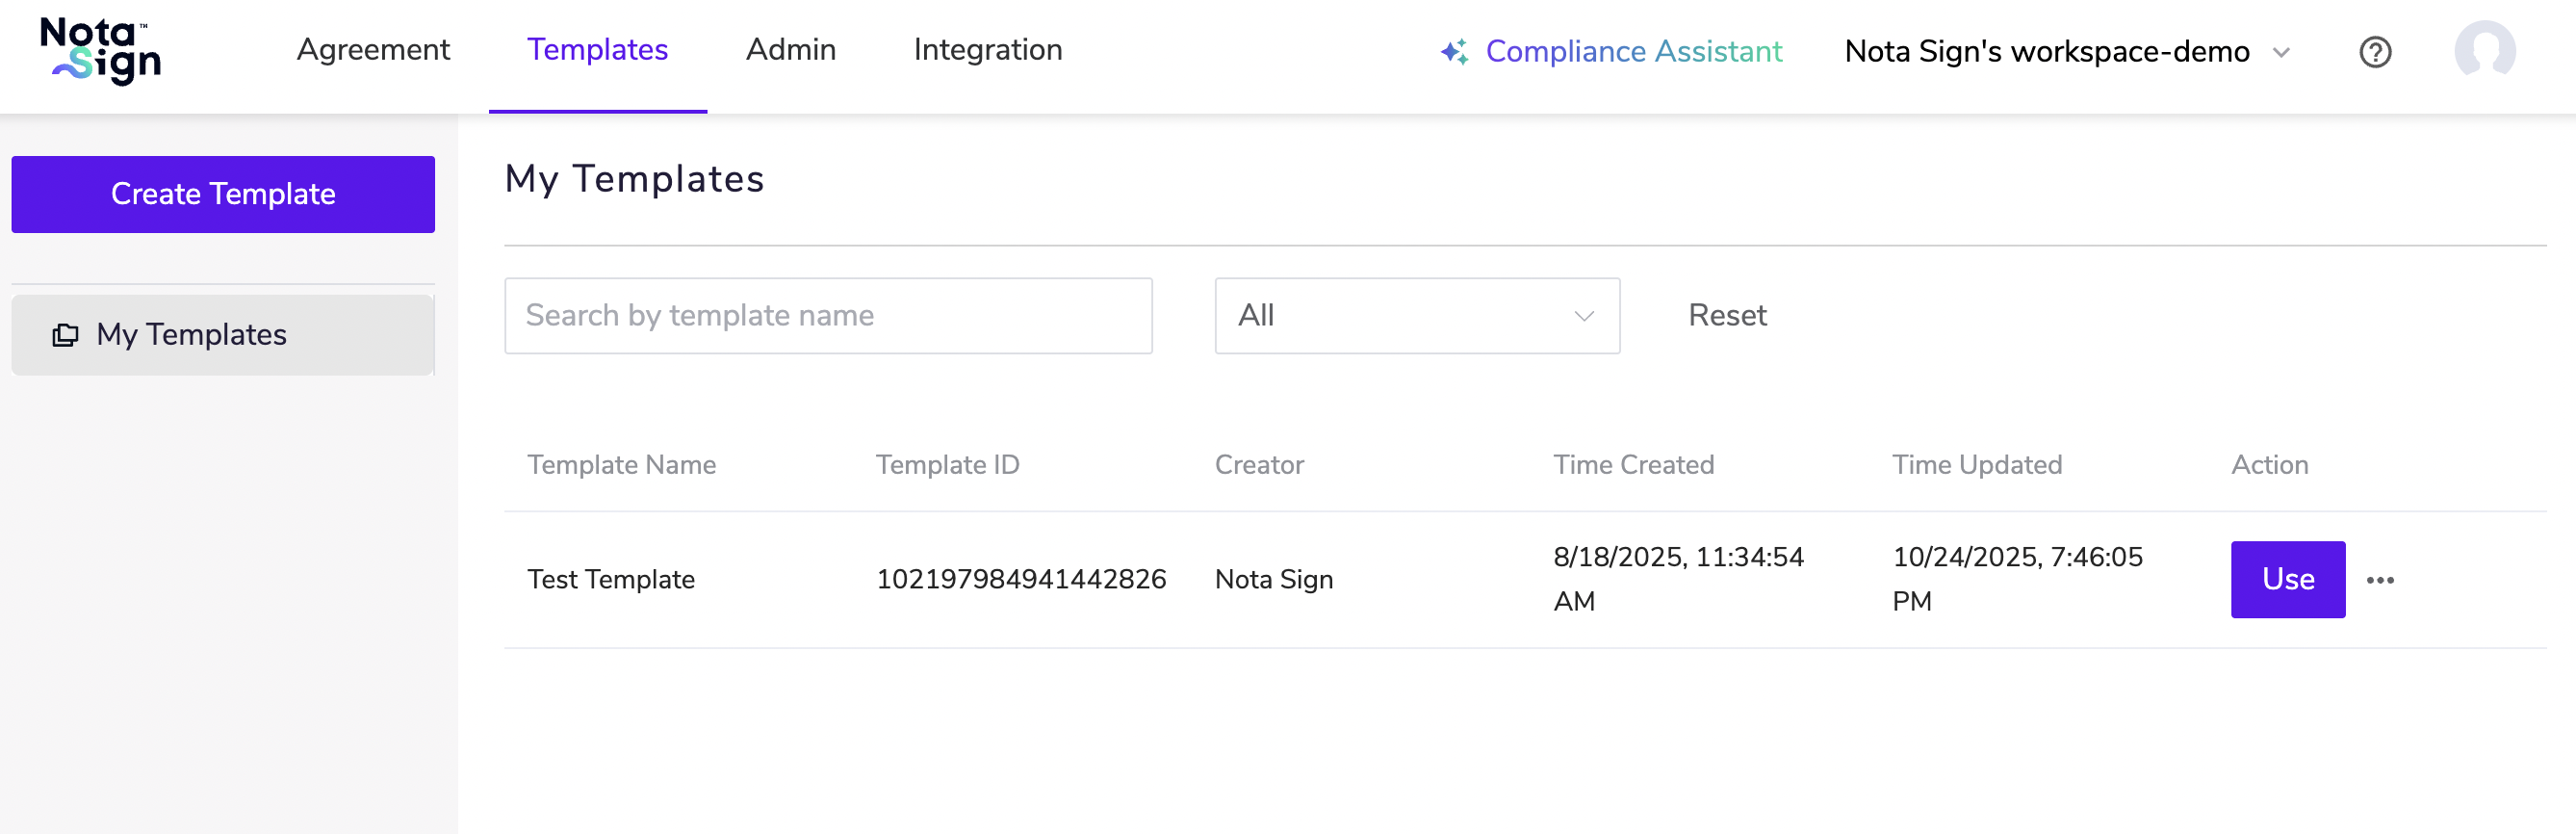
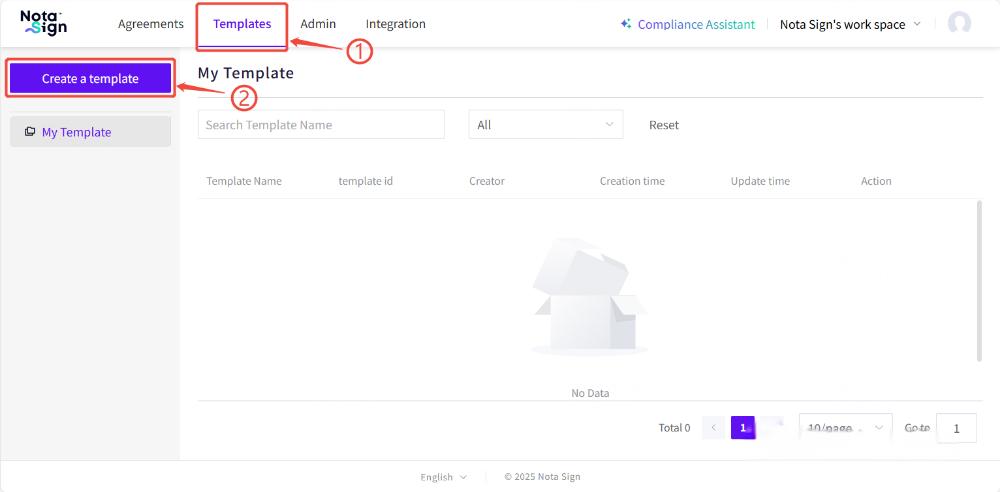
- Log in to the Nota Sign dashboard, navigate to Templates > Create a Template.
1.2. Set Template Details
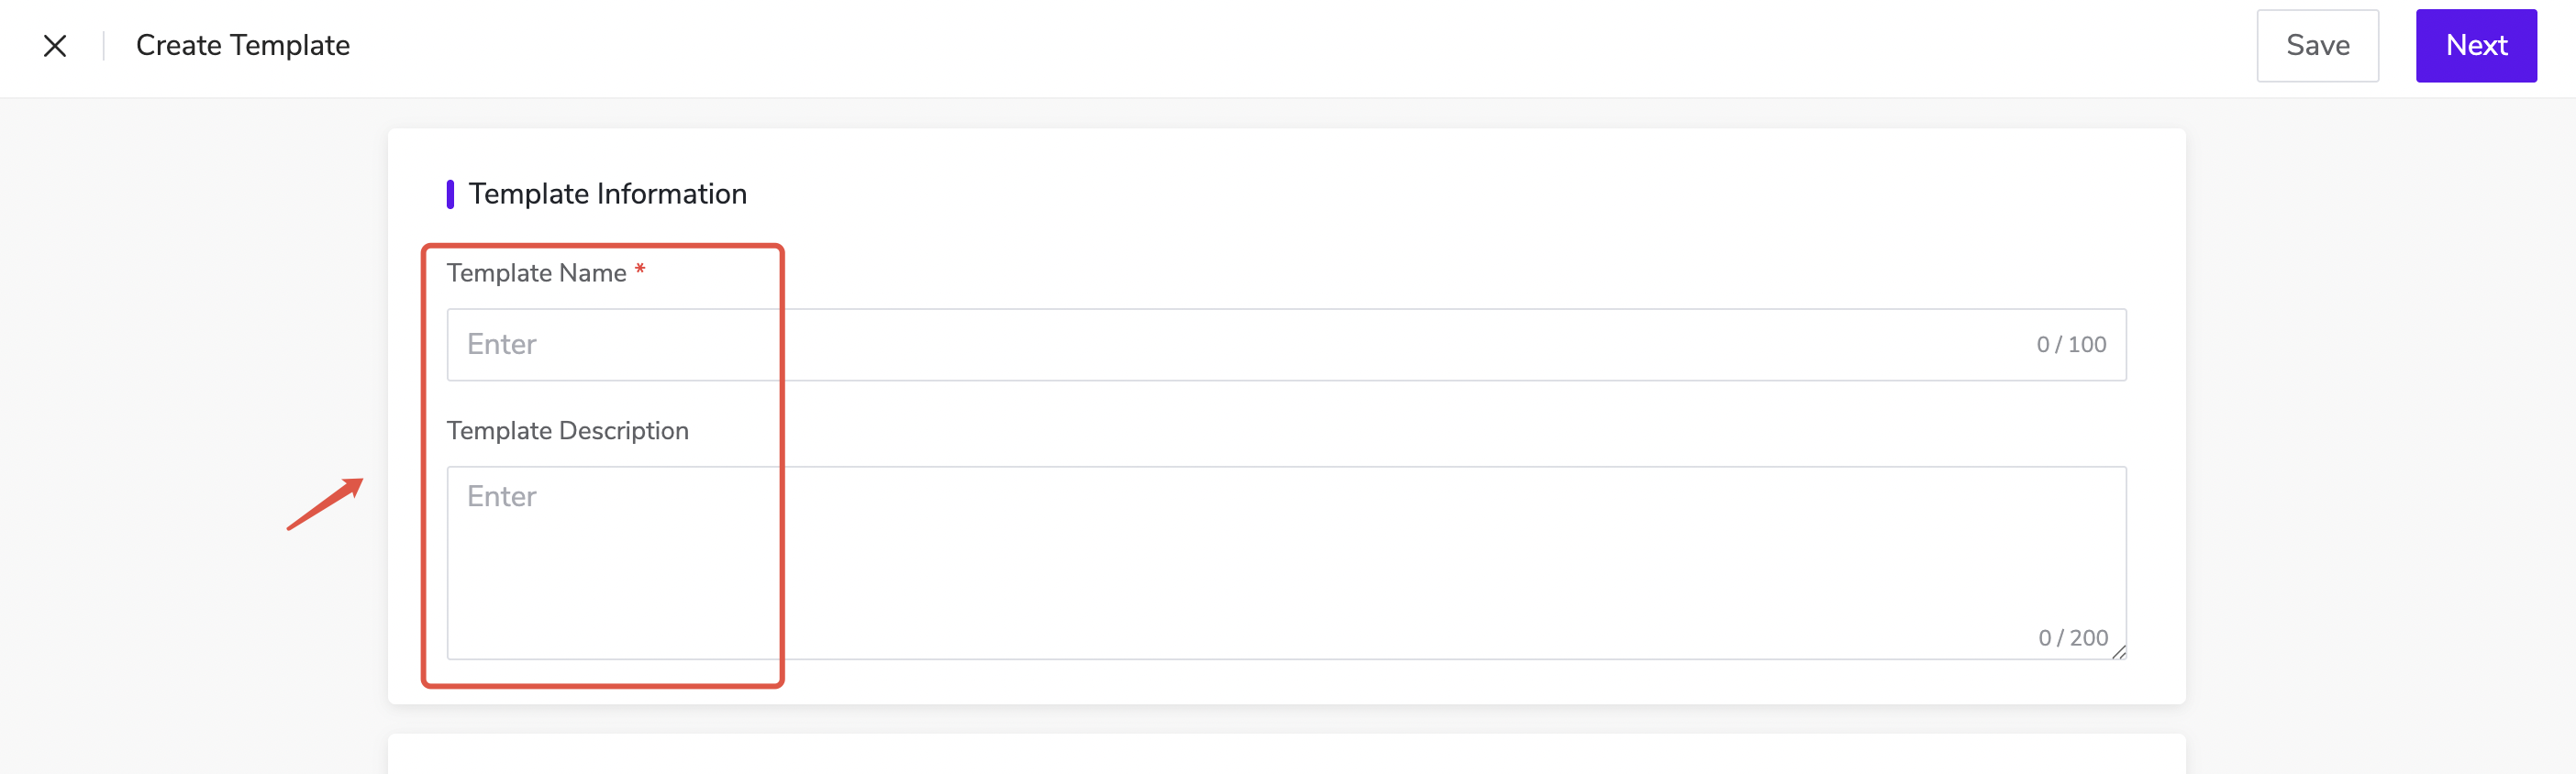
Provide basic information for the template:
-
Template Name: A unique, descriptive name.
-
Template Description: Optional summary to describe the template’s purpose.
-
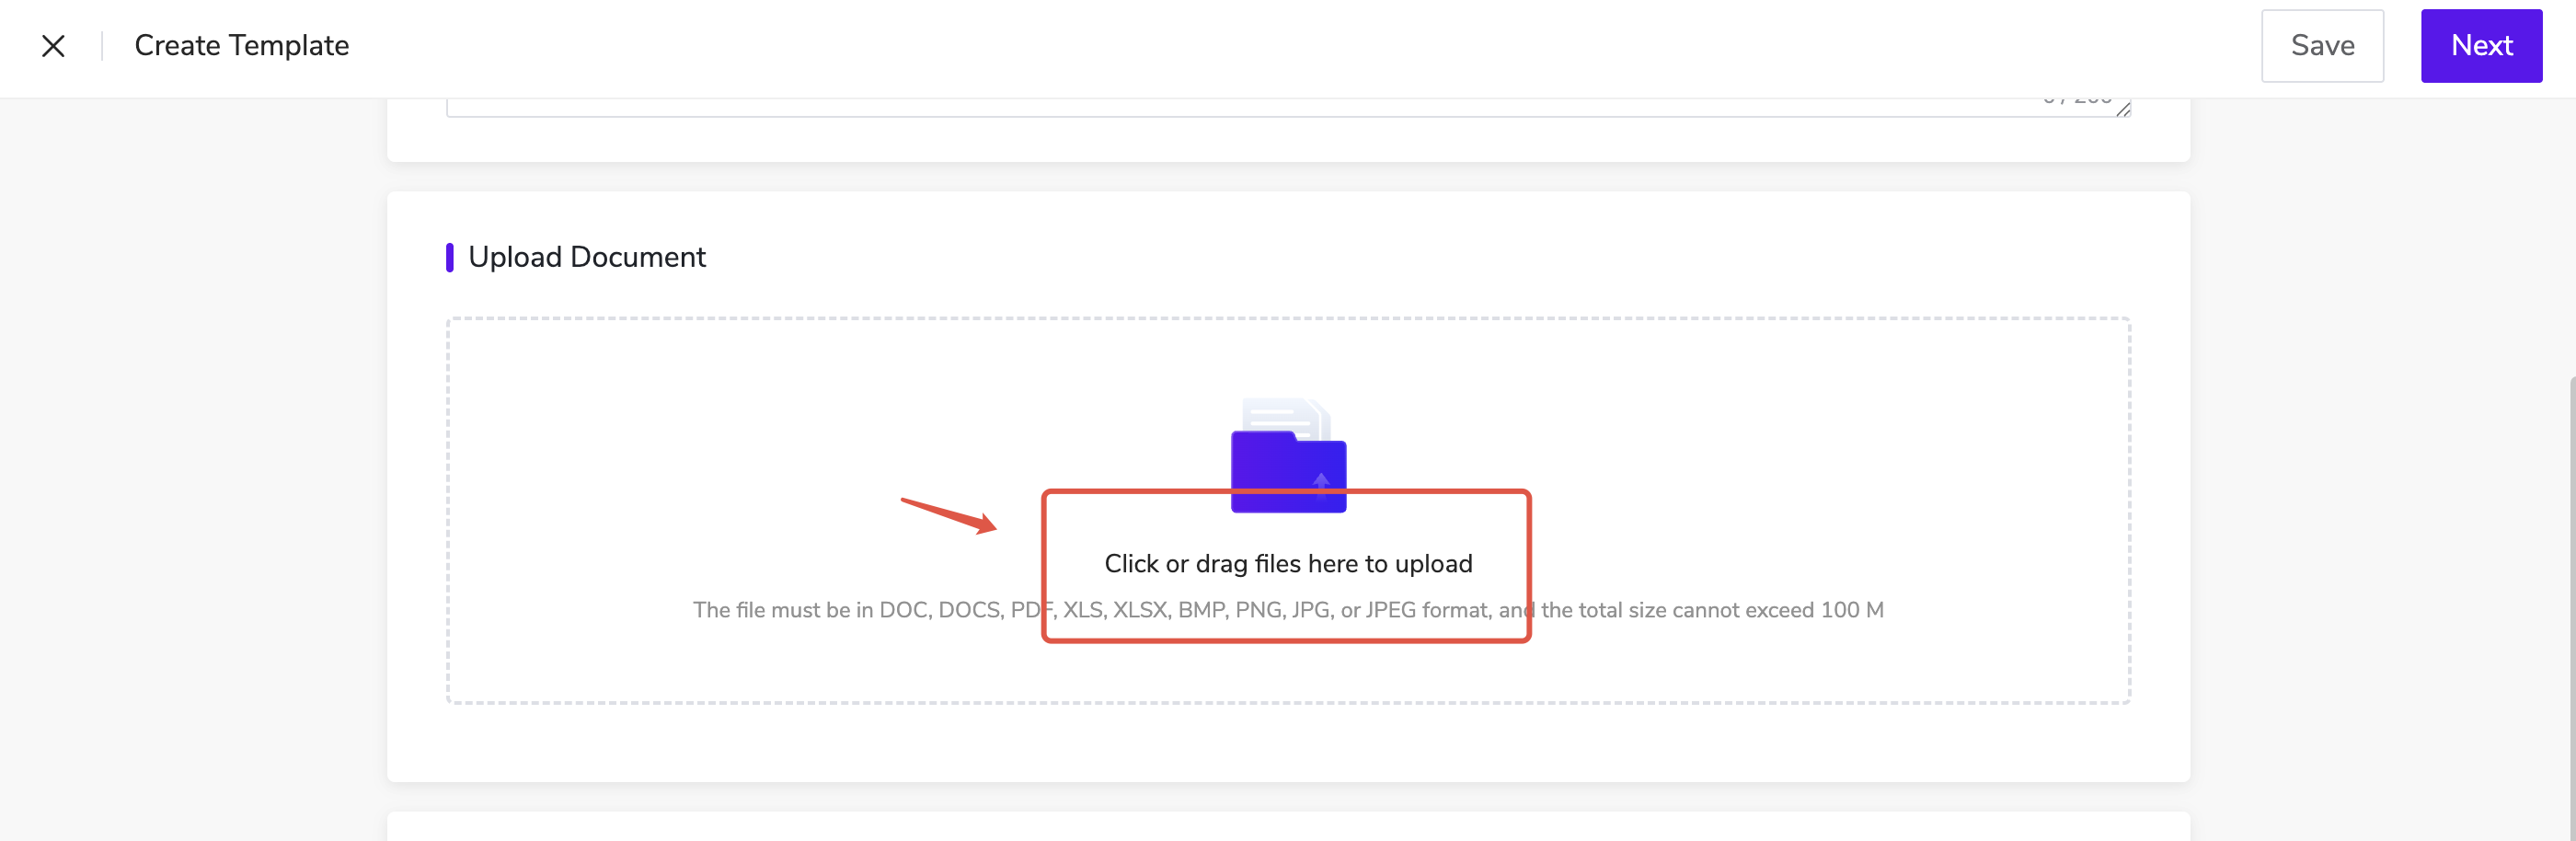
Upload Document: Add the document to be used as the template.
1.3. Define Recipient Roles
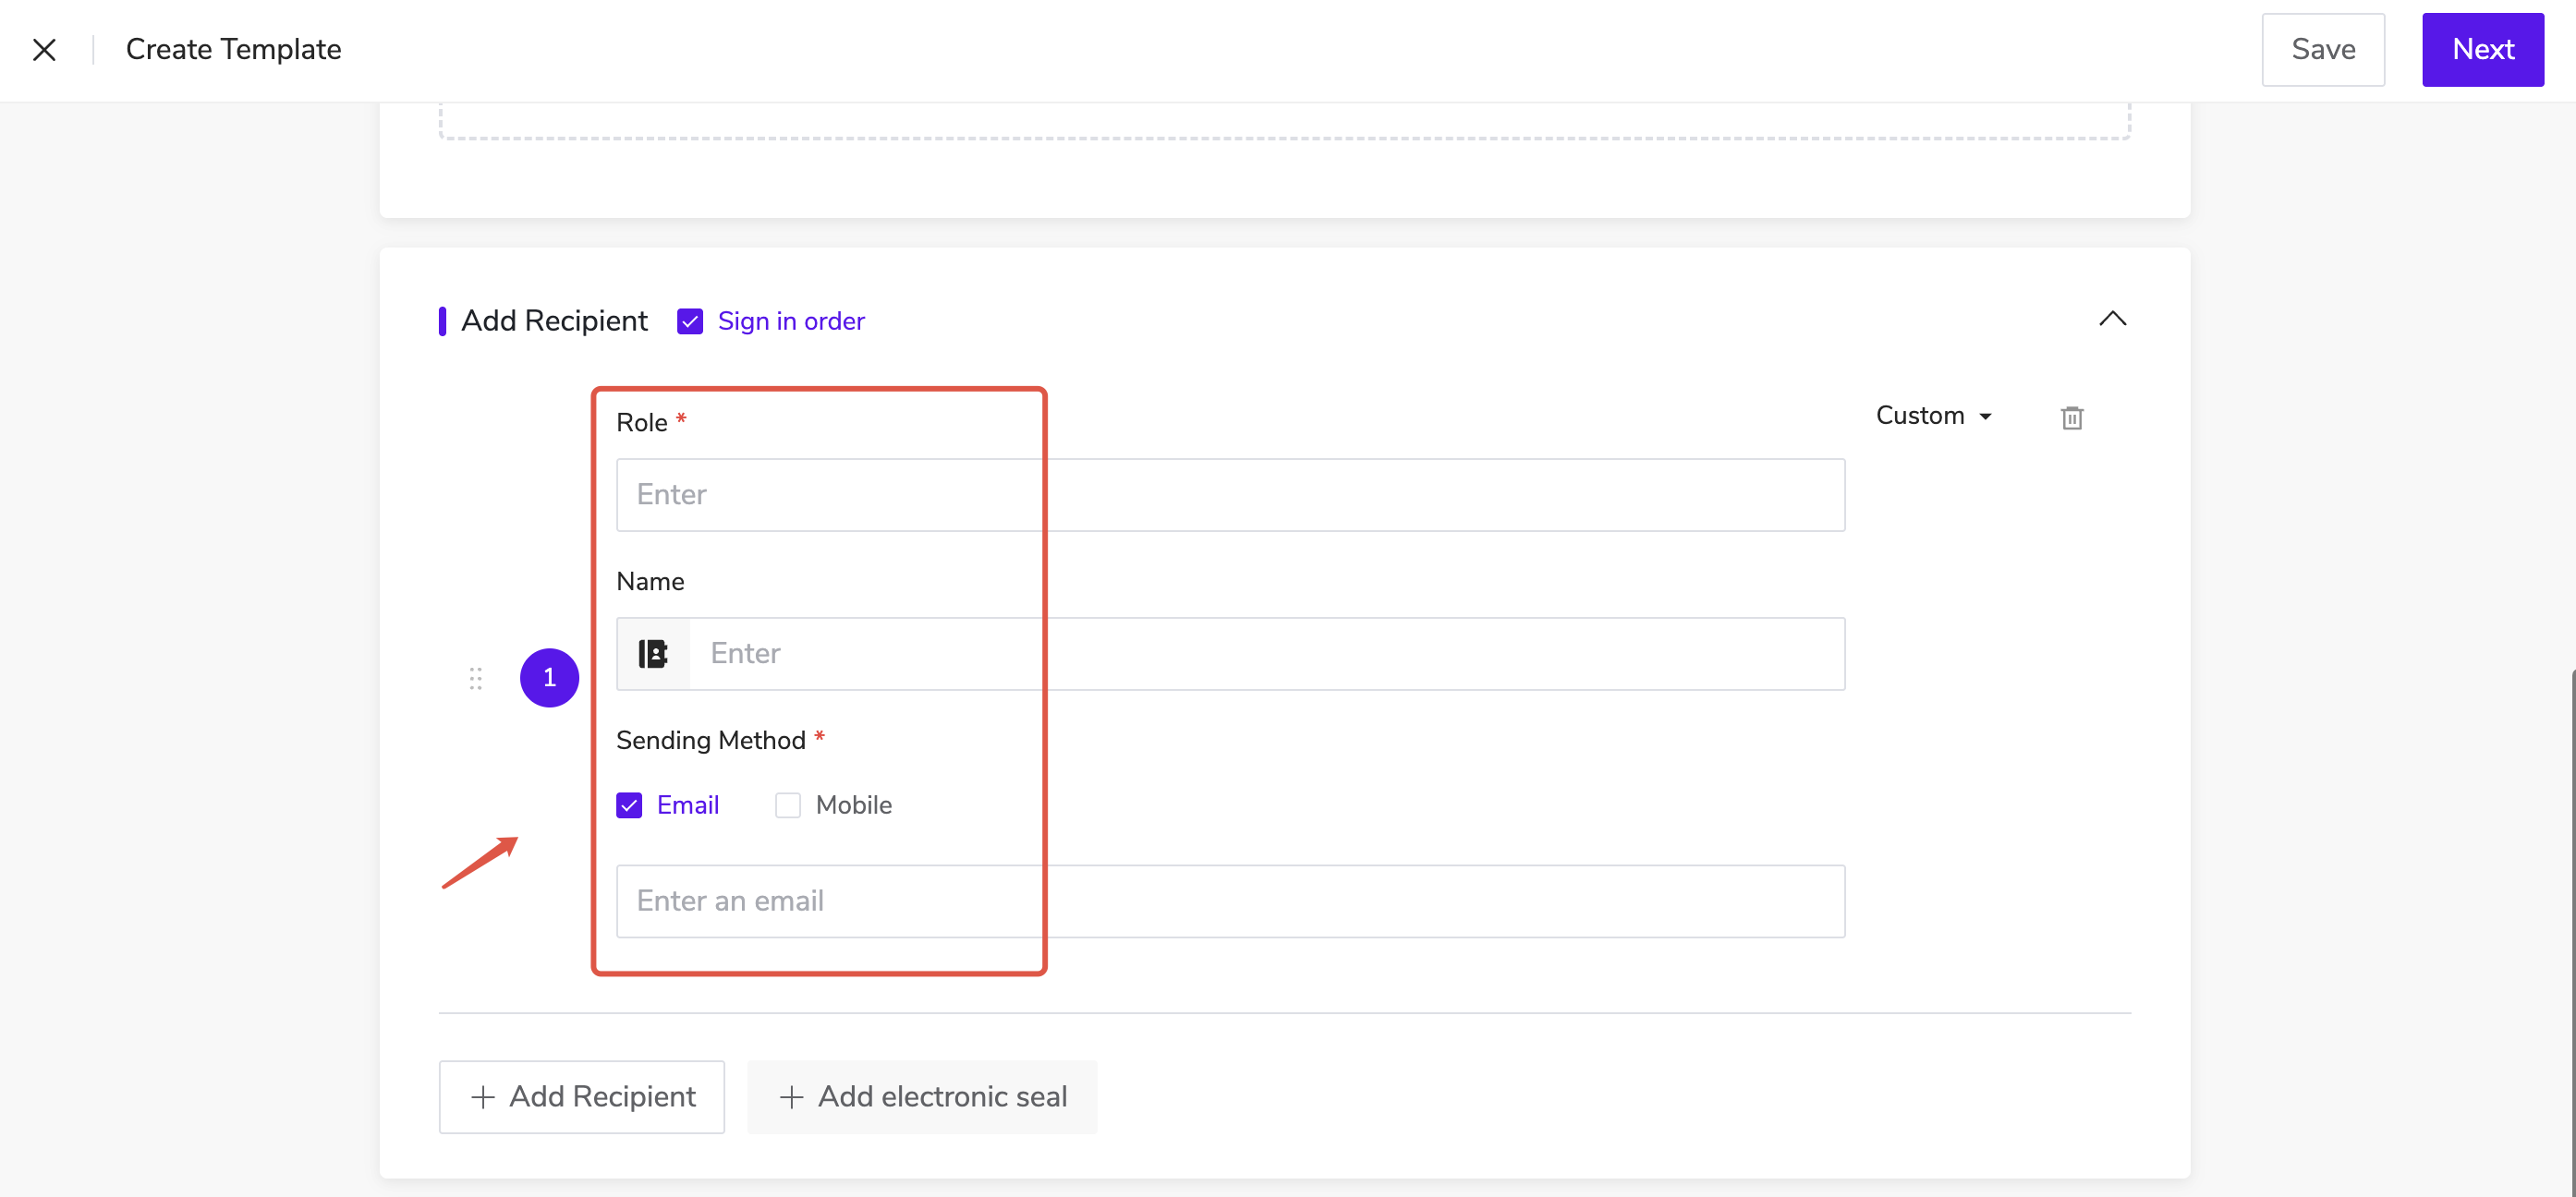
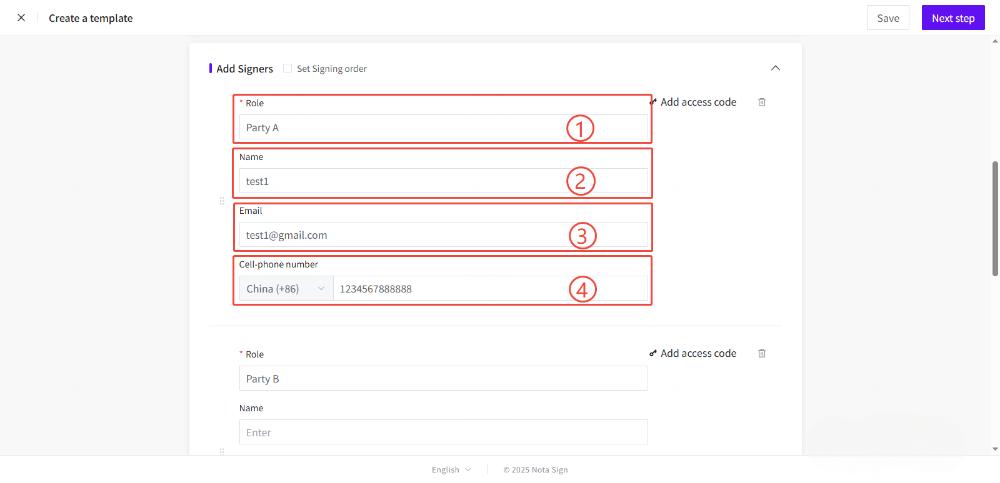
Specify signer roles and contact information.
-
Role: Assign each signer a role (e.g., Party A, Party B).
-
Name & Email: Enter the signer’s full name and email address.
-
SMS Notification (Optional): Add a phone number to send signing notifications via SMS (requires SMS credits).
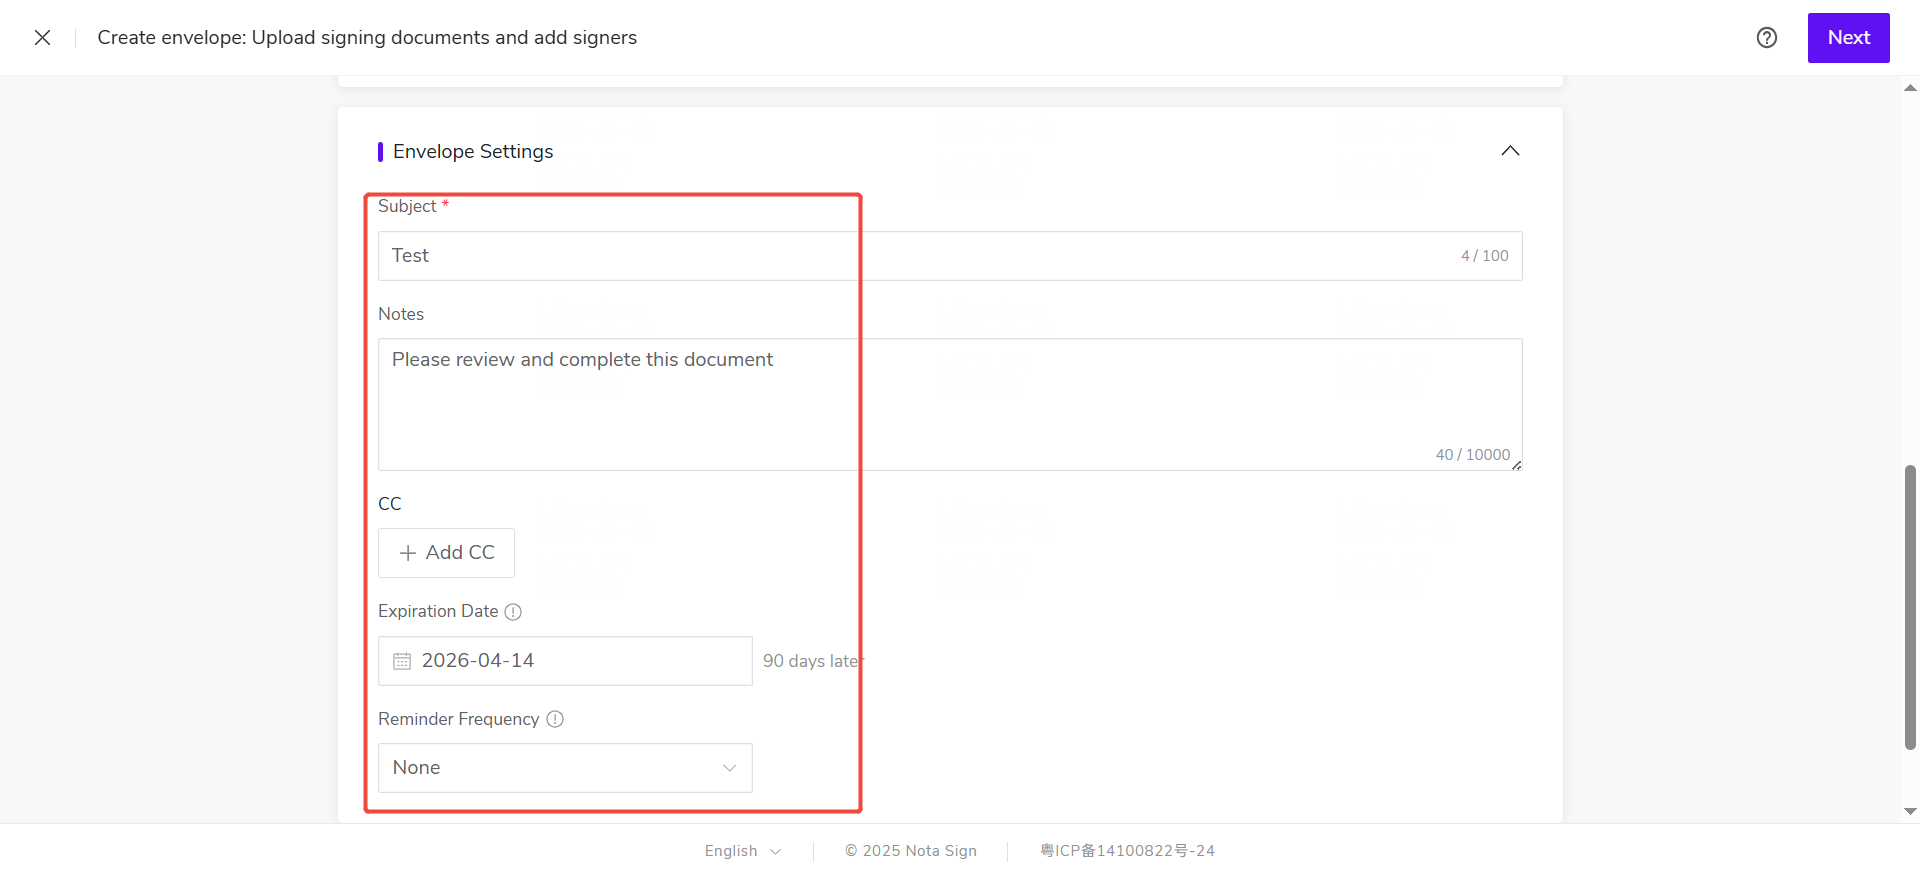
1.4. Configure Envelope Settings
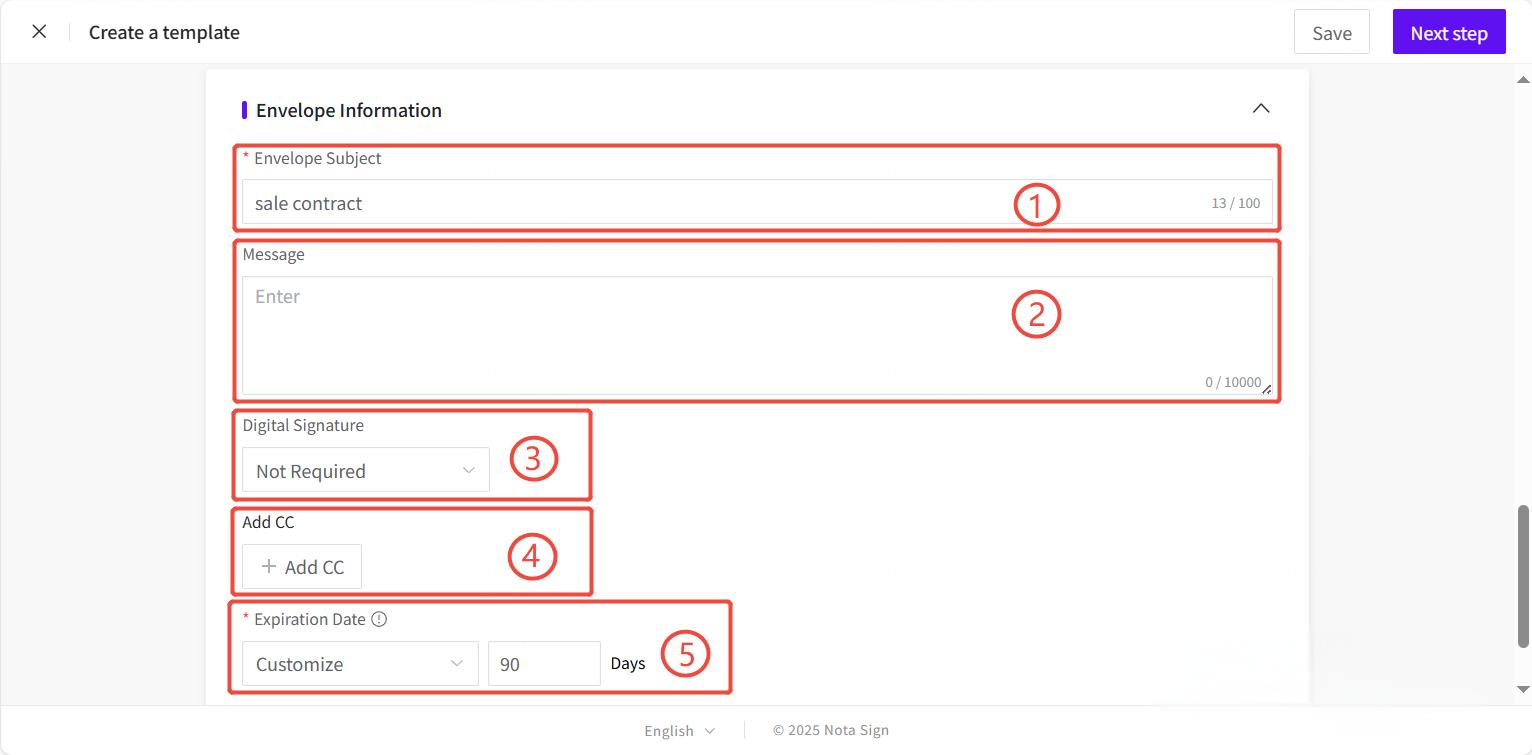
Customize how the envelope behaves when this template is used:
-
Envelope Subject: Automatically generated based on the document name (editable).
-
Digital Signature Type: Select digital signature type for signatures.
-
Expiration Date: Specify a signing deadline.
-
Auto-Reminder Frequency: Select signing reminders which are auto-sent unsigned recipients.
Refer to the [How to Send an Envelope] for advanced settings.
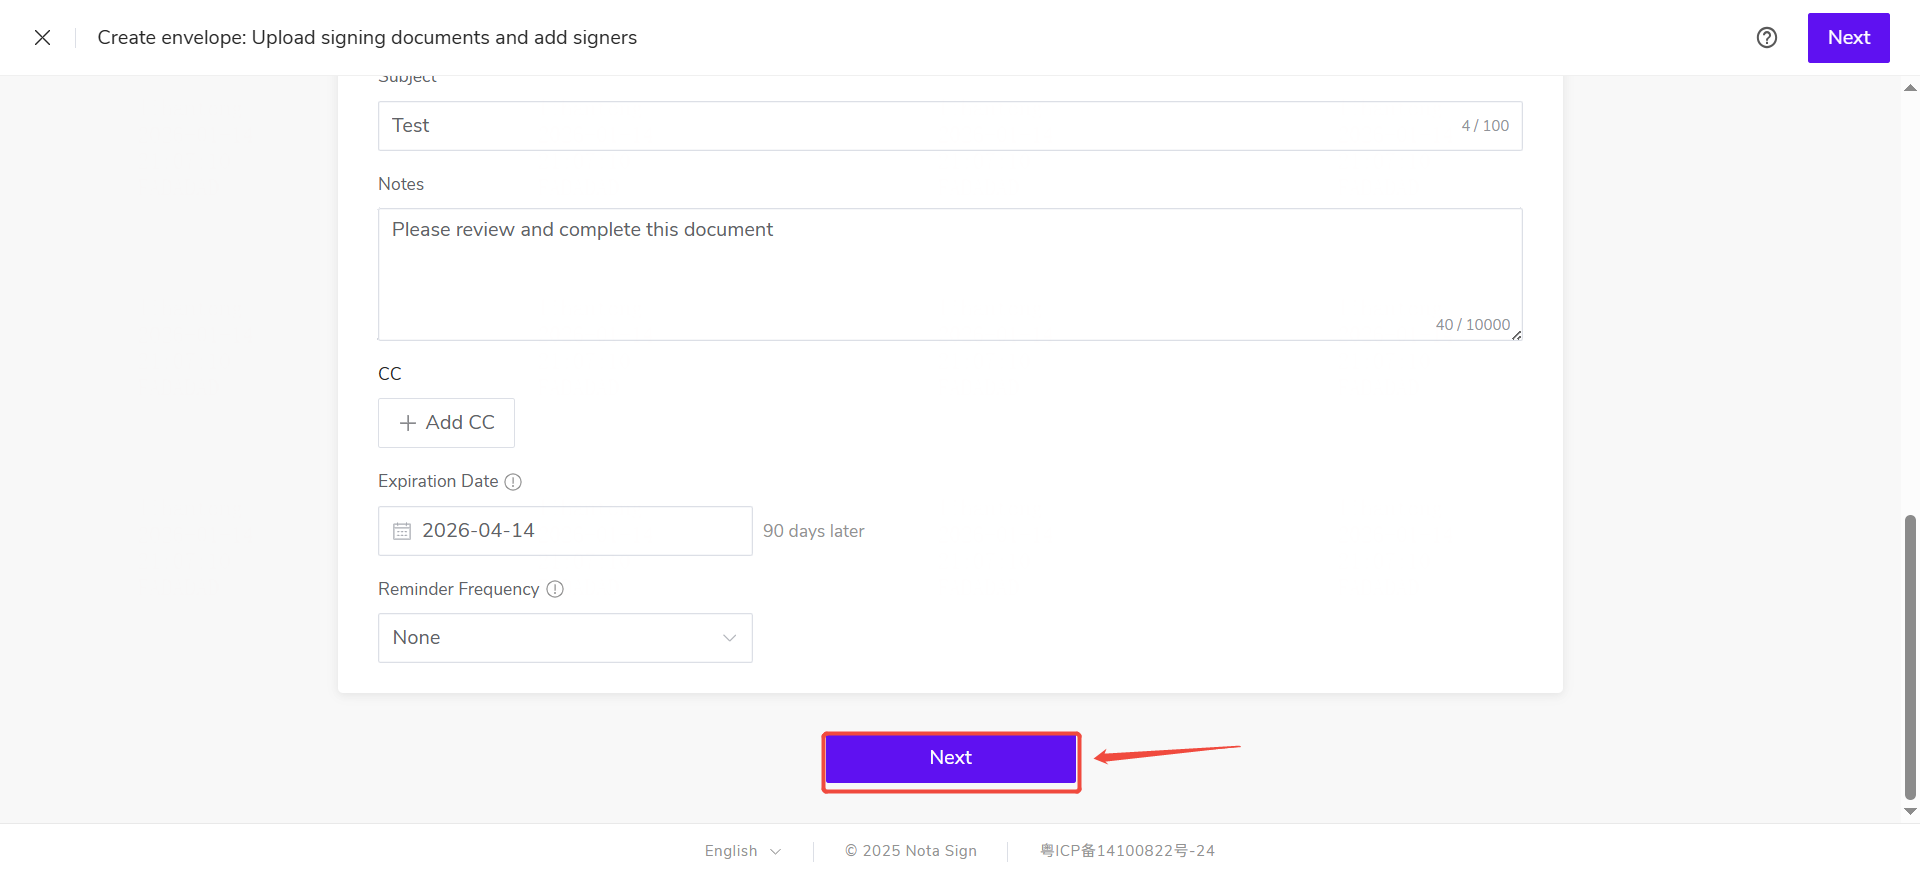
1.5. Enter the Field Configuration Page
Click Next at the bottom of the page to enter the signing field configuration.
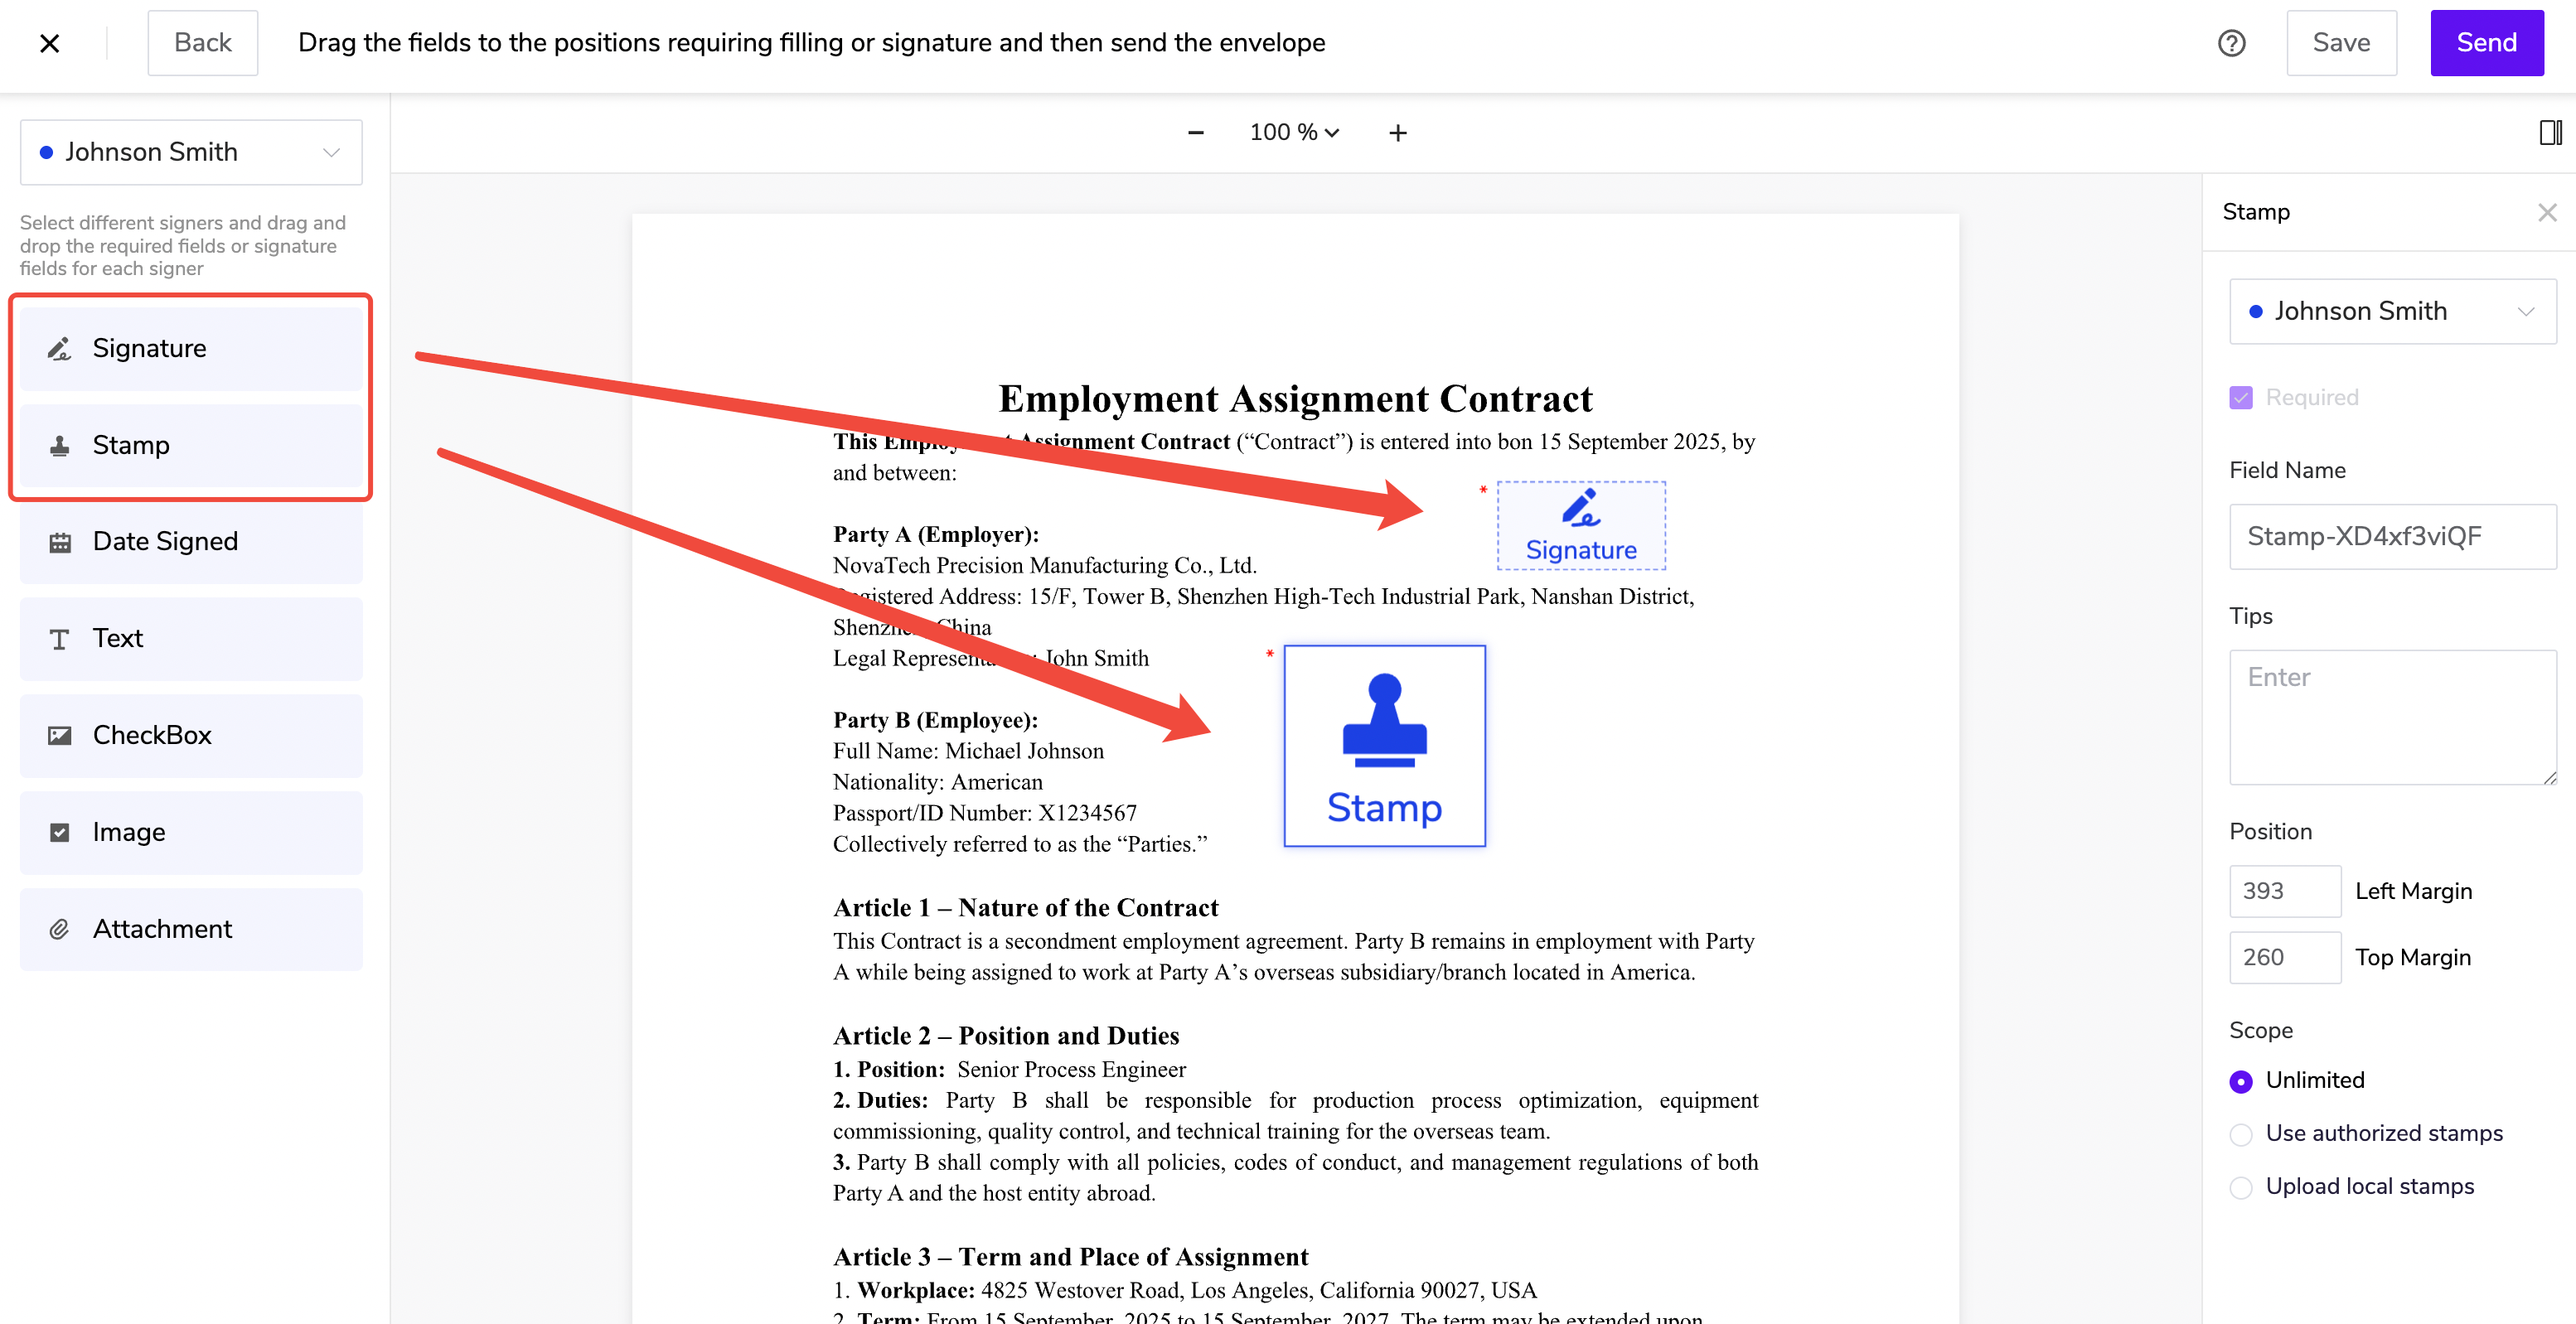
1.6. Add Signing Fields and Publish the Template
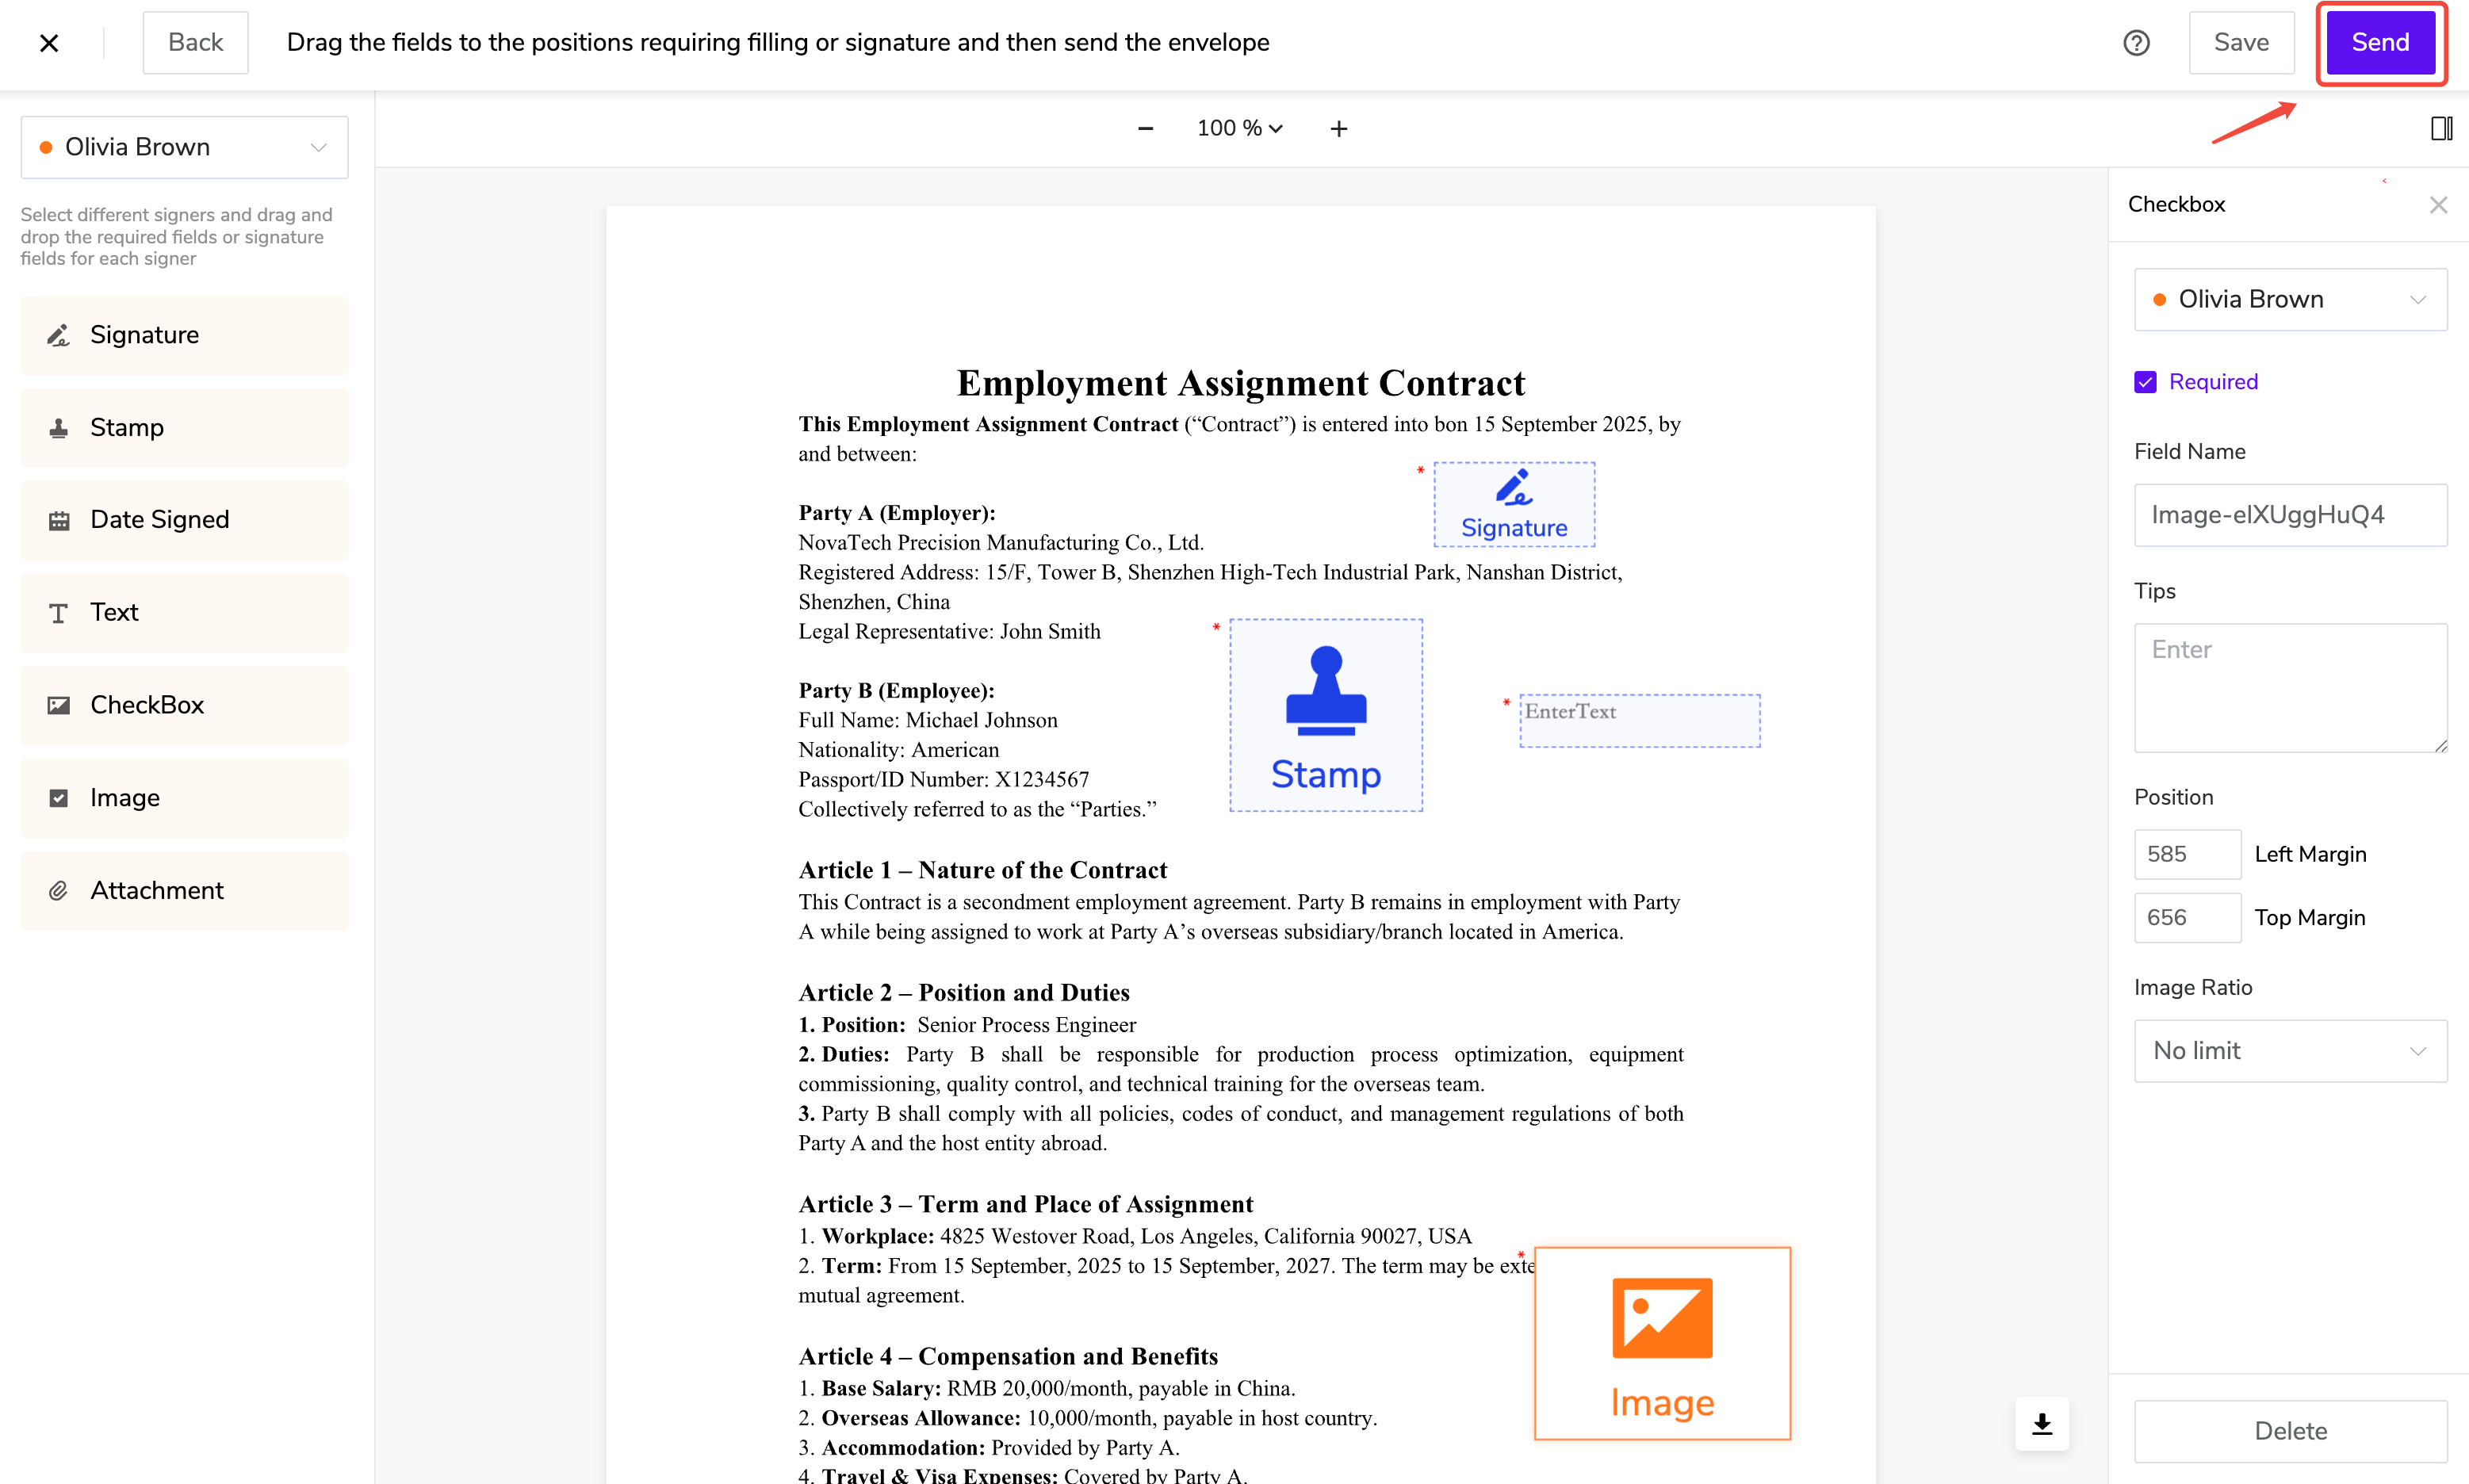
Drag and drop fields (signature, stamp, text input, checkbox, etc.) onto the document for each signer role.
-
Assign fields to the appropriate signer.
-
Mark required fields.
-
Customize field labels, tooltips, default values, and formatting.
Refer to the Send SES Envelopes for full options.
After confirming the field configuration, click Send in the upper-right corner to save the template.
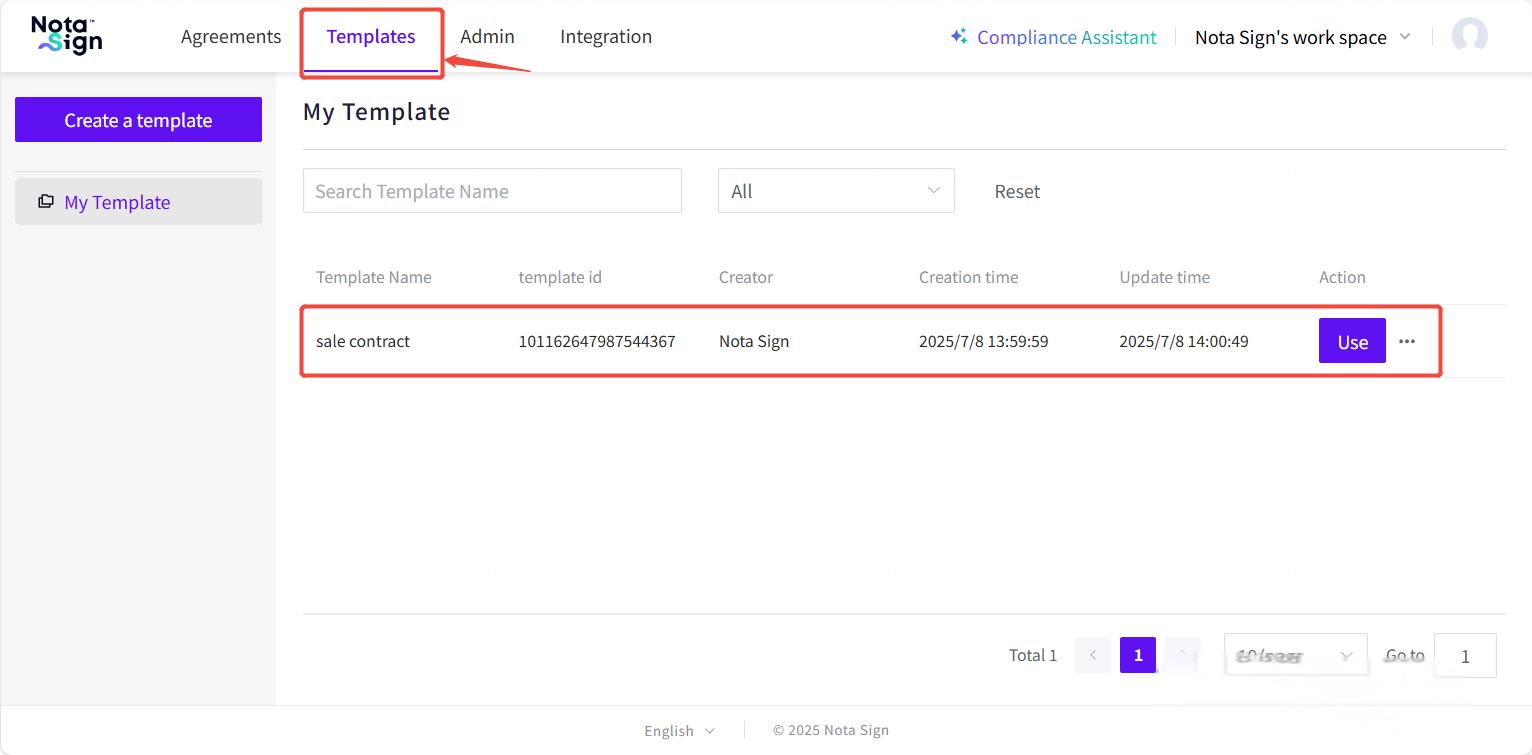
After the template is created successfully, you can view, edit, or delete it on the Templates page.
2. Part 2: Use a Template
2.1. Method 1: From the Templates Page
-
Go to Templates.
-
Locate the desired template.
-
Click Use.
2.2. Method 2: From the Envelope Page
-
Navigate to Agreements.
-
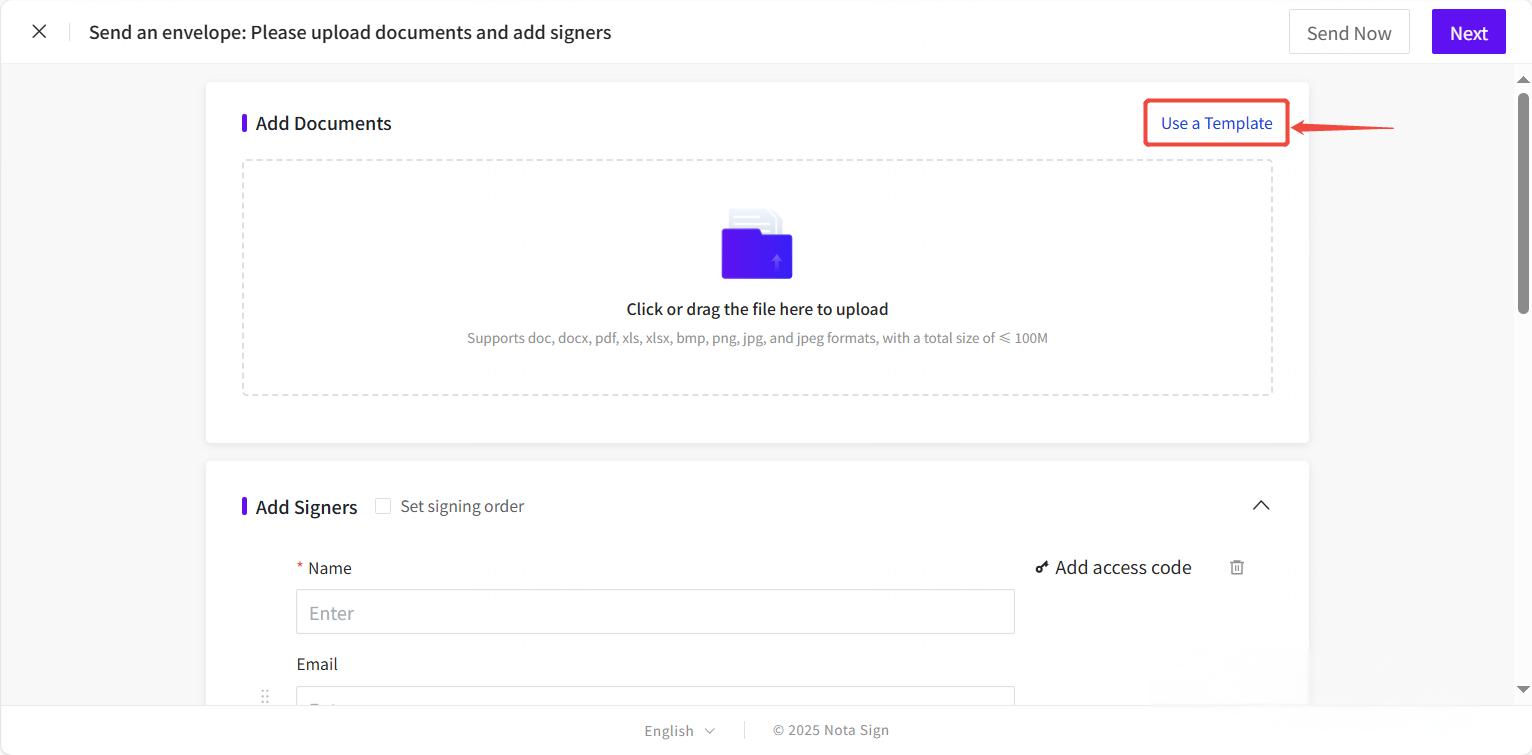
Click Send an Envelope.
-
Select Use a Template.
-
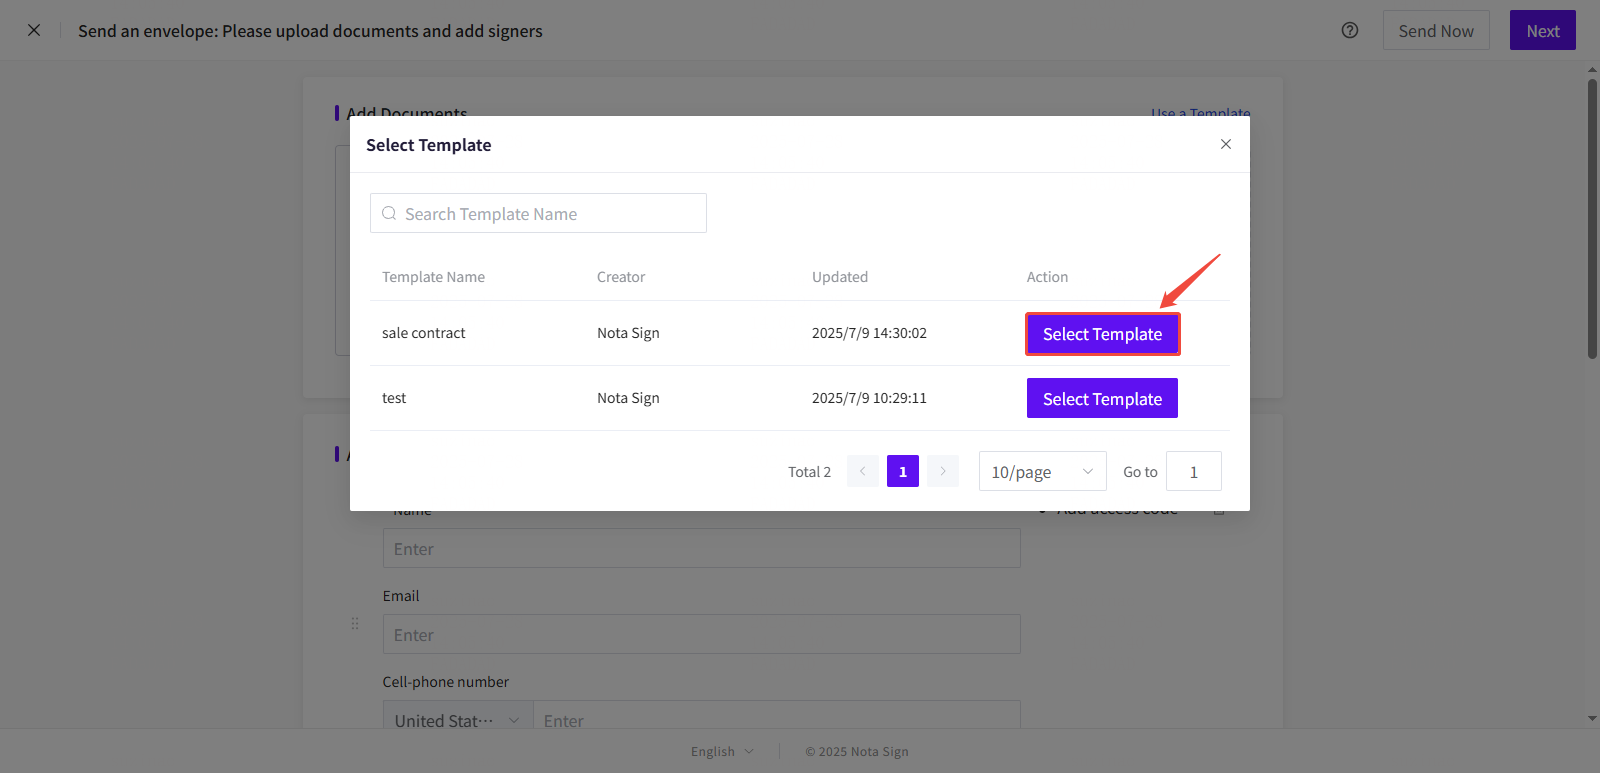
Select a Template in the list.
3. Part 3: Send a Document Using a Template
3.1. Launch the Template
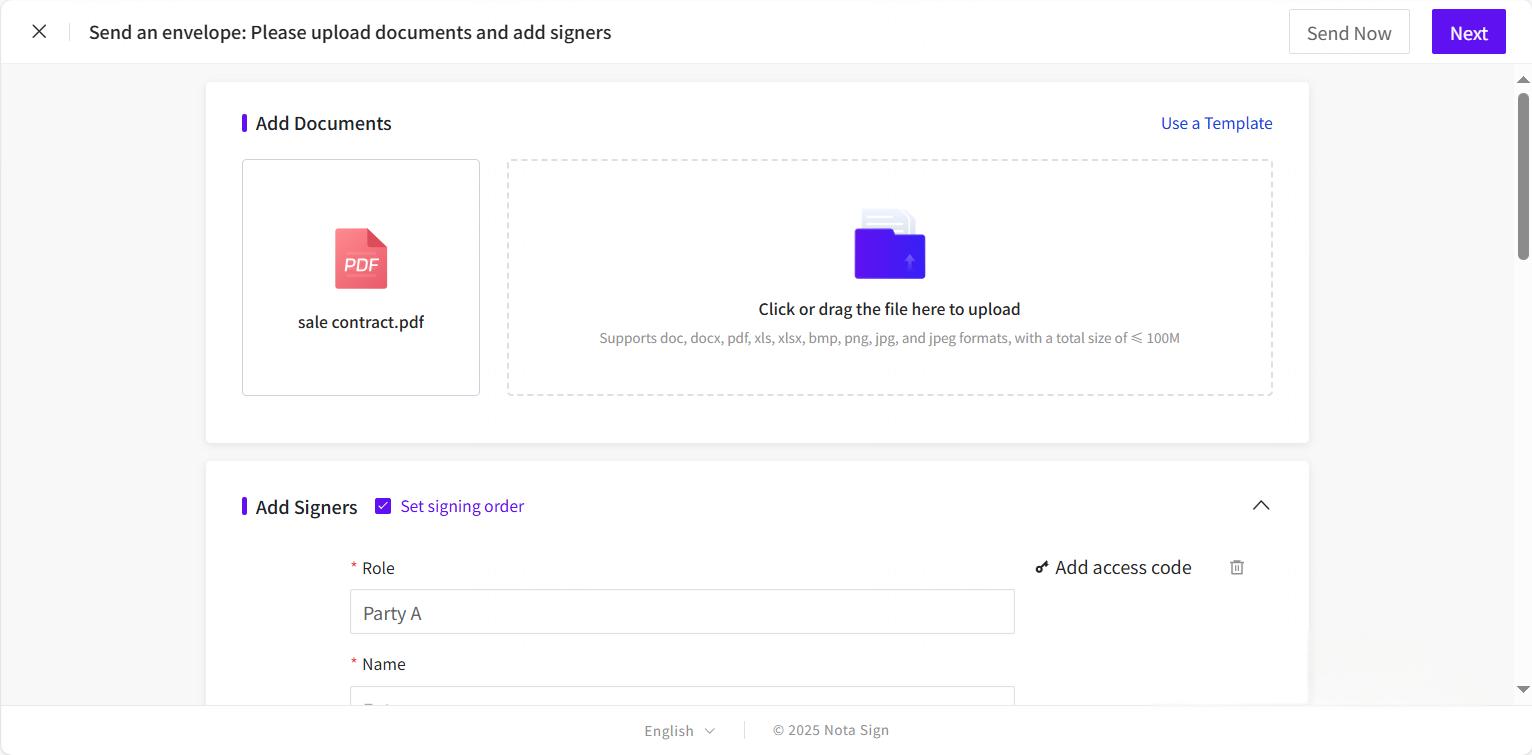
Select a template. The envelope creation interface will automatically load with pre-filled information.
Review and update the recipients list, access settings, and envelope information as needed.
Click Next to proceed.
3.2. Review and Configure Signing Fields (If Needed)
Adjust or add fields if needed using the drag-and-drop toolbar.
Once all fields and settings are confirmed, click Send to send the envelope.
Once successfully sent, one envelope credit will be deducted.