
1. Standard Identity Verification
Video Tutorial:
1. Step 1: Receive the Envelope
You can access the envelope to be signed in the following two ways:
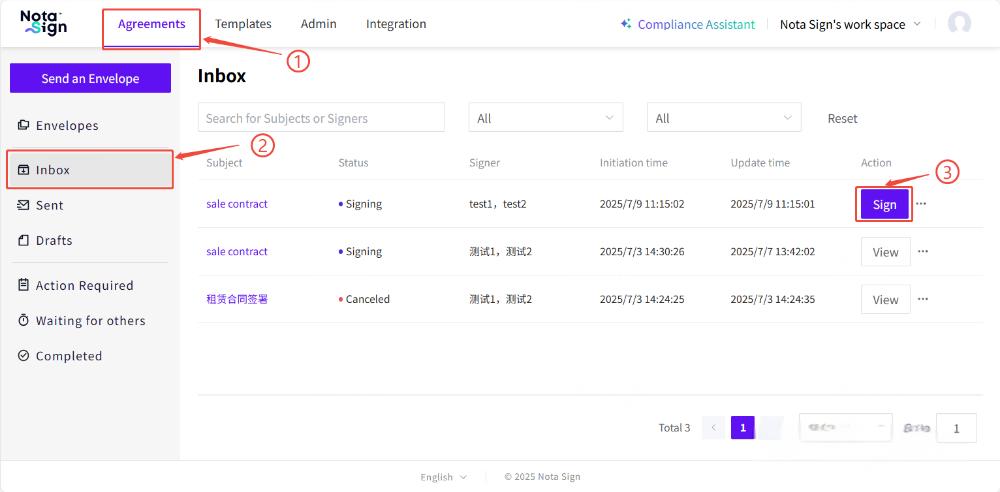
1) Method 1: Receive the Envelope via the Nota Sign Workspace
- Log in to the Nota Sign workspace and go to the Sign page;
- Click Inbox in the left navigation bar to view the list of envelopes awaiting signature;
- Locate the envelope and click the View button on the right to start signing.
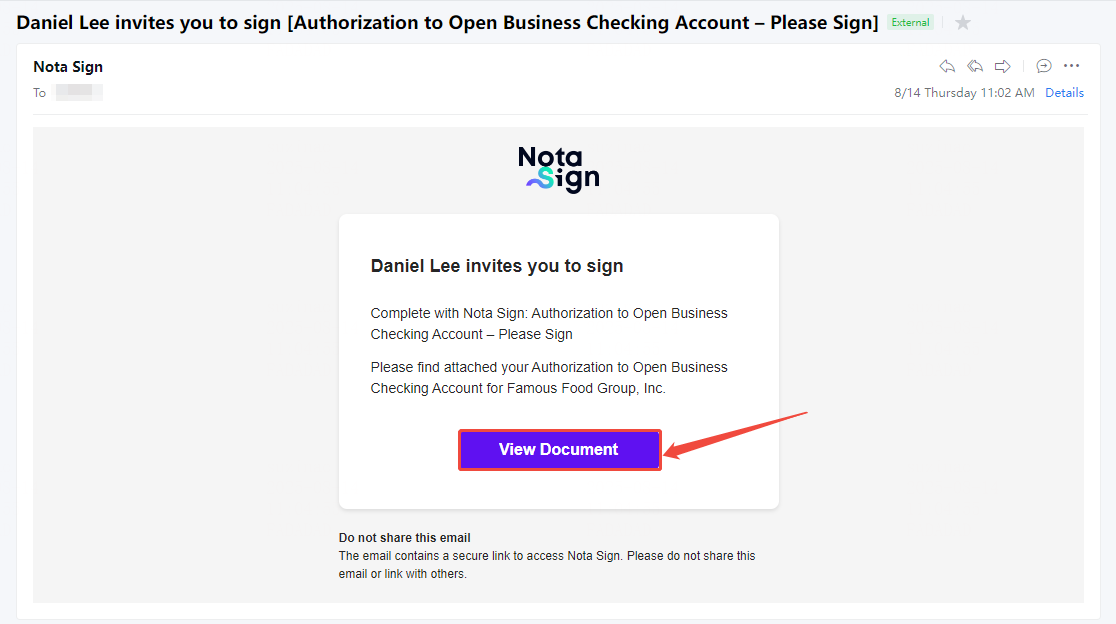
2) Method 2: Receive the Envelope via Email
Check your email inbox for the signing invitation from Nota Sign, and click the View Document button to directly enter the signing page.
2. Step 2: Open the Envelope and Complete Identity Verification
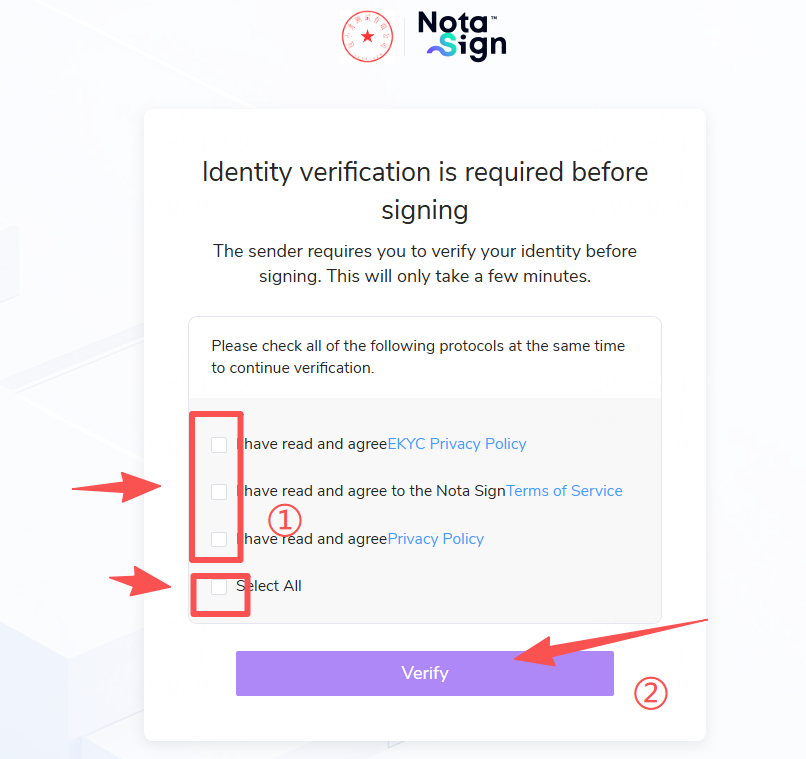
- Carefully read and agree to the three relevant agreements, or click Select All directly. Then click Start Verification;
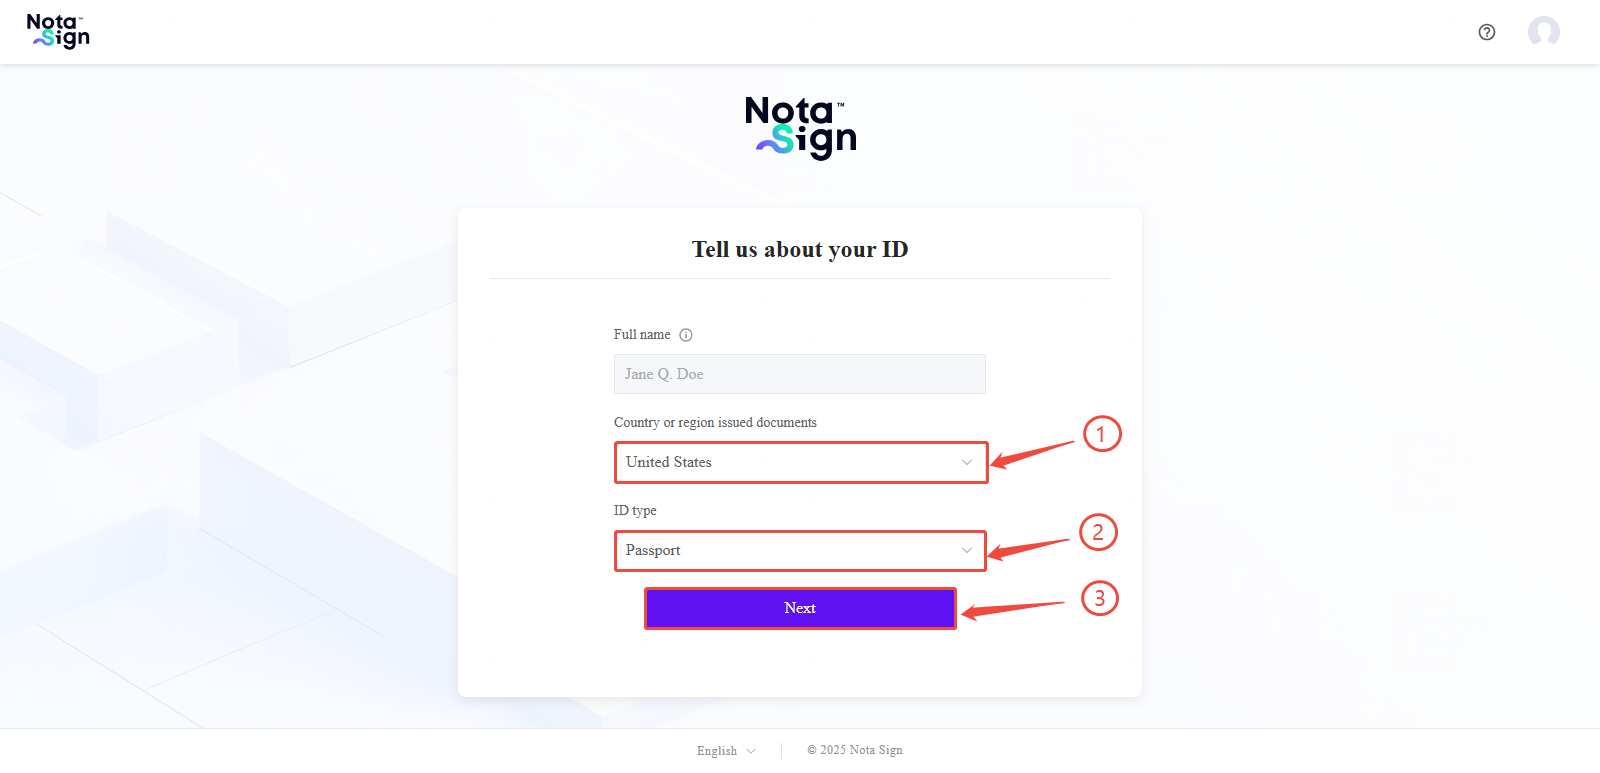
- Select the country or region and ID type, then click Next to proceed with the verification process;
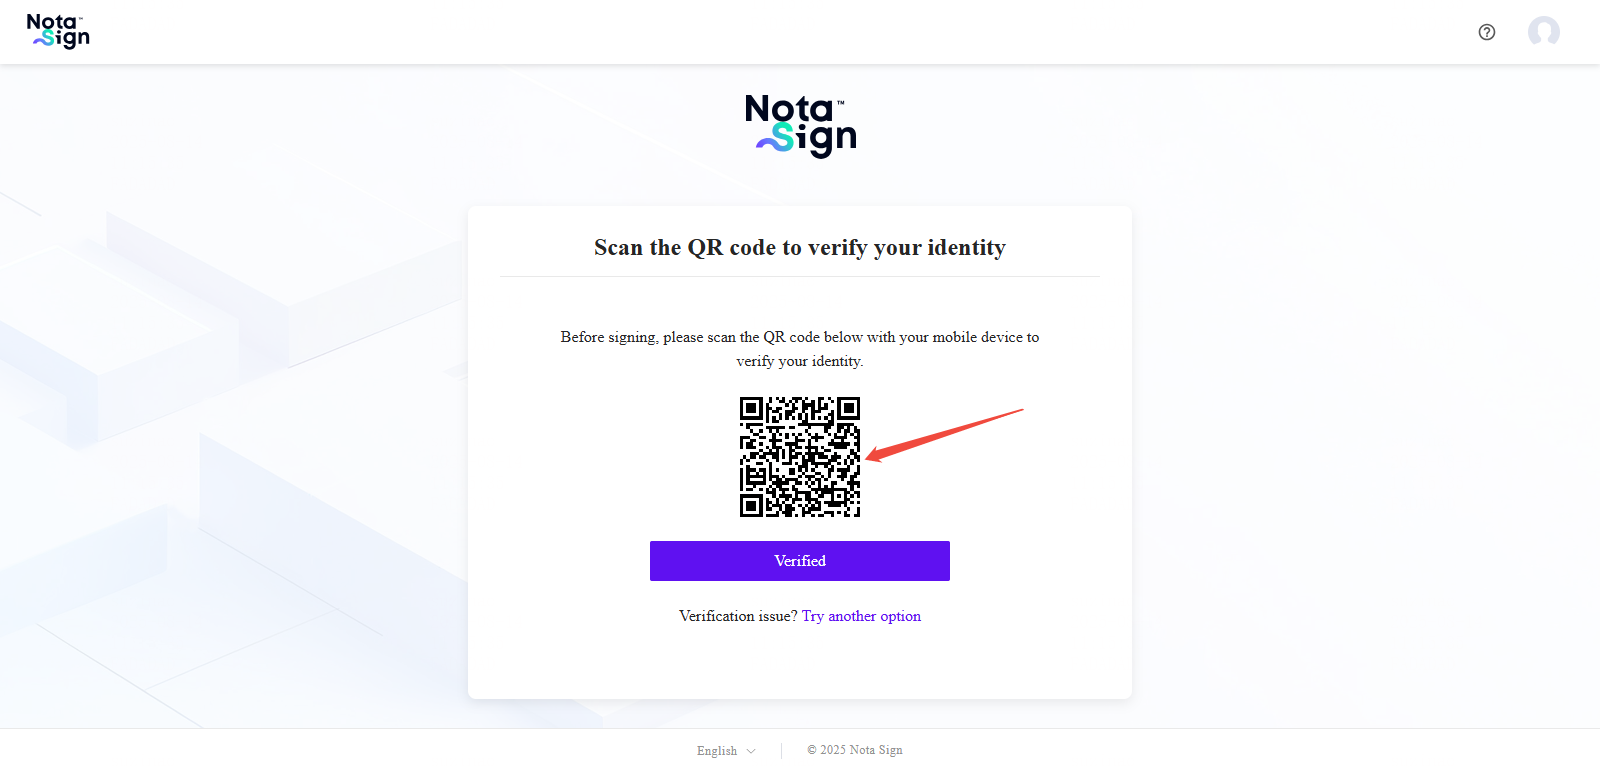
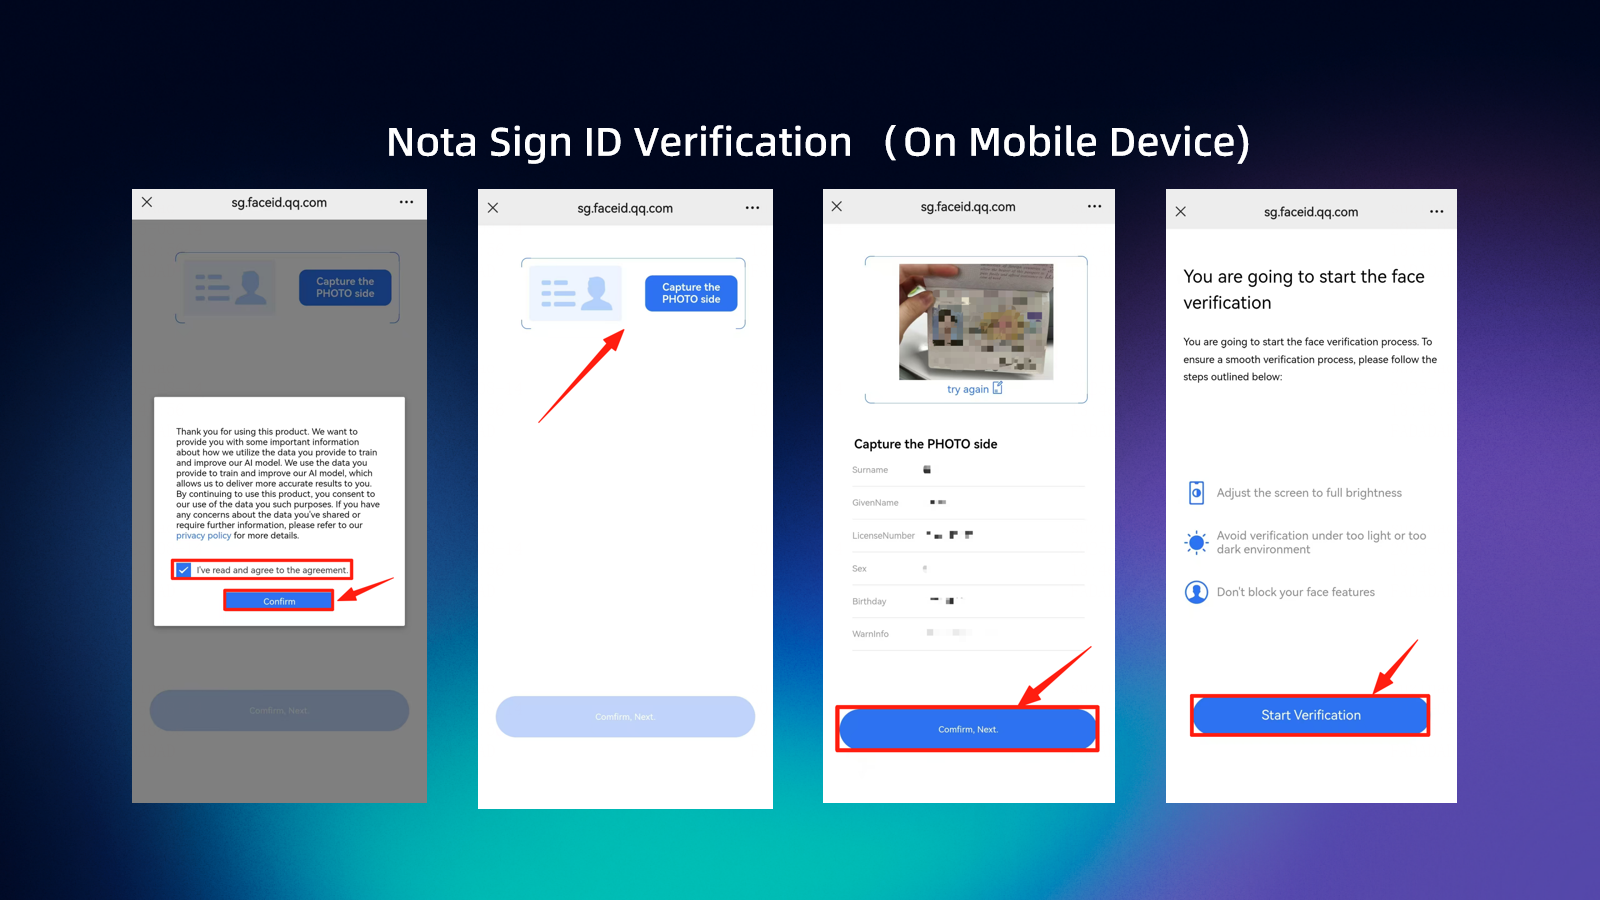
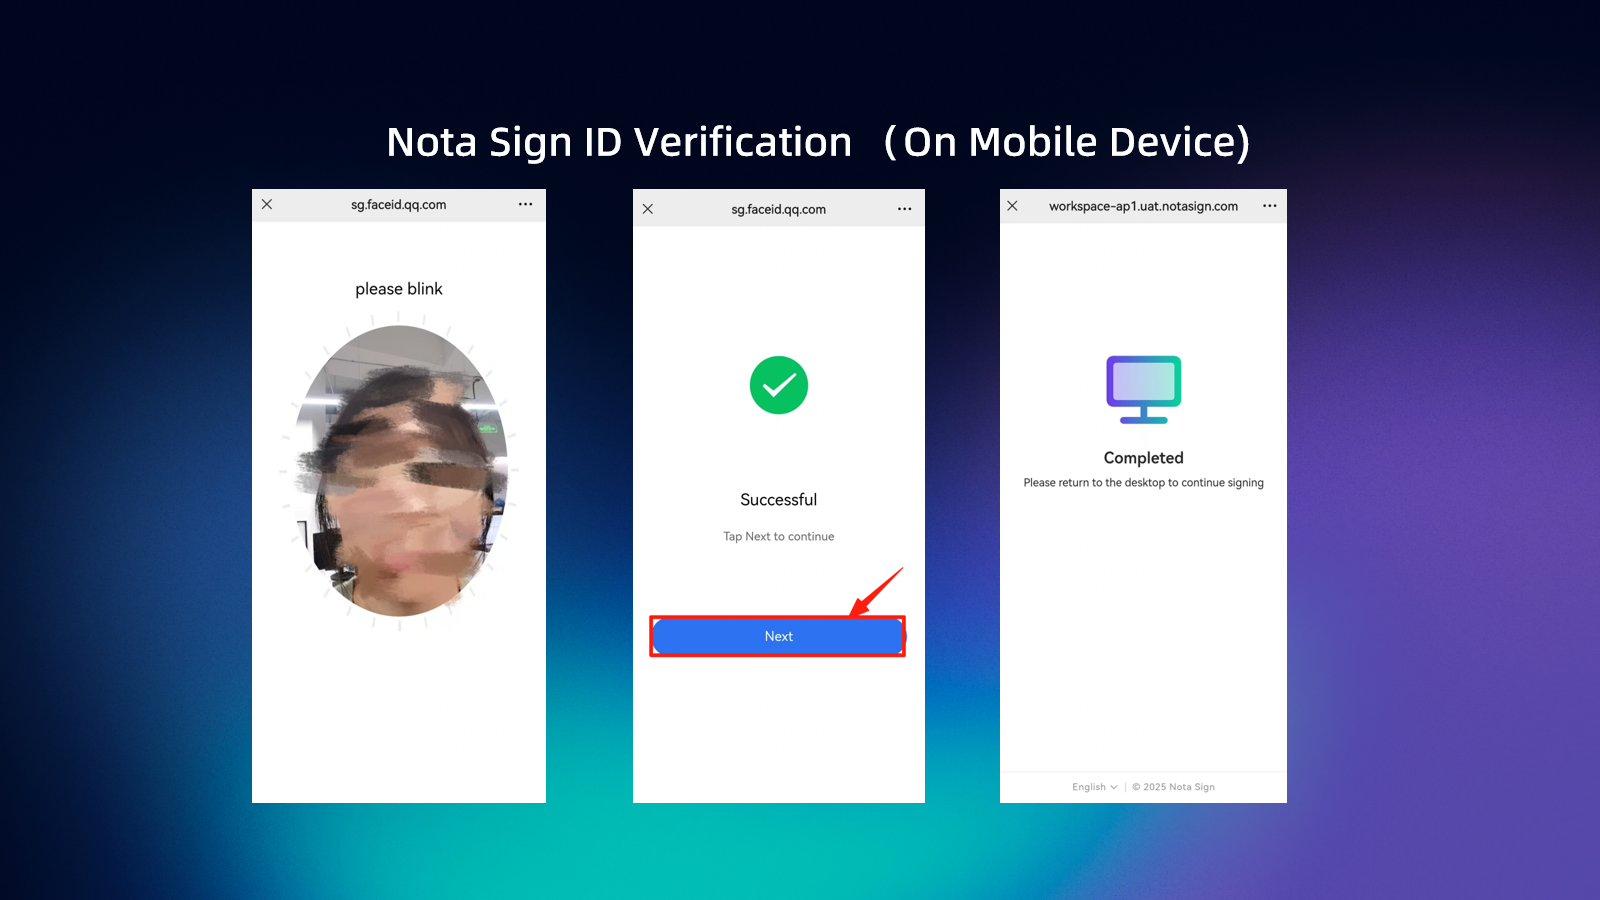
- Use your mobile phone to scan the QR code on the page and complete the identity verification on your phone following the on-screen instructions;
- After verification is complete, return to your computer; the QR code page will automatically redirect to the signing page.
- eKYC Verification Failure Scenarios: The sender can set a certain number of retry attempts for the recipient in the backend:
- If the recipient successfully verifies within the allowed retry attempts, the PC page will automatically redirect to the signing interface.
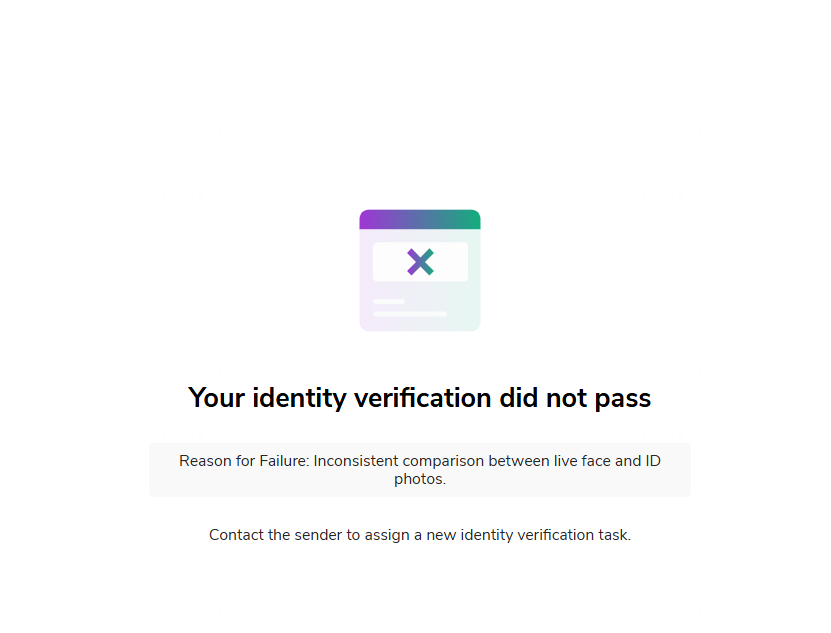
- If the recipient fails to pass verification after reaching the maximum retry limit, the PC page will display the following result page:
- Scenario Where Recipient Name Does Not Match the ID Document Name: If the recipient name provided when the envelope was sent does not match the name on the ID document, the system will also send an email notification to the sender. In this case, there are two scenarios:
- If the sender has checked [Allow Verifier to Rename by Default] in the backend: After confirming that the name on their ID document is correct, the recipient can click [Use ID Document Name]. The system will automatically complete the name change and update the recipient’s name, and the page will automatically redirect to the signing page.
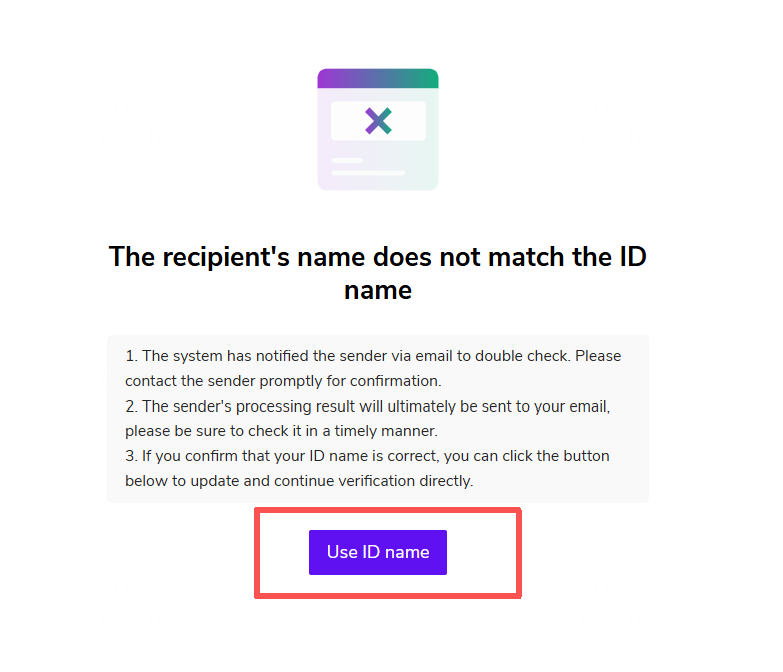
- If the sender has not checked [Allow Verifier to Rename by Default]: The page will not display the rename button. The recipient must wait for the sender to process the change in the backend (or via email).
- Sender’s Steps When eKYC Verification Fails: In the sender’s workspace, select Sign → click the envelope subject → select the recipient and click View Details → click Modify Recipient Name.
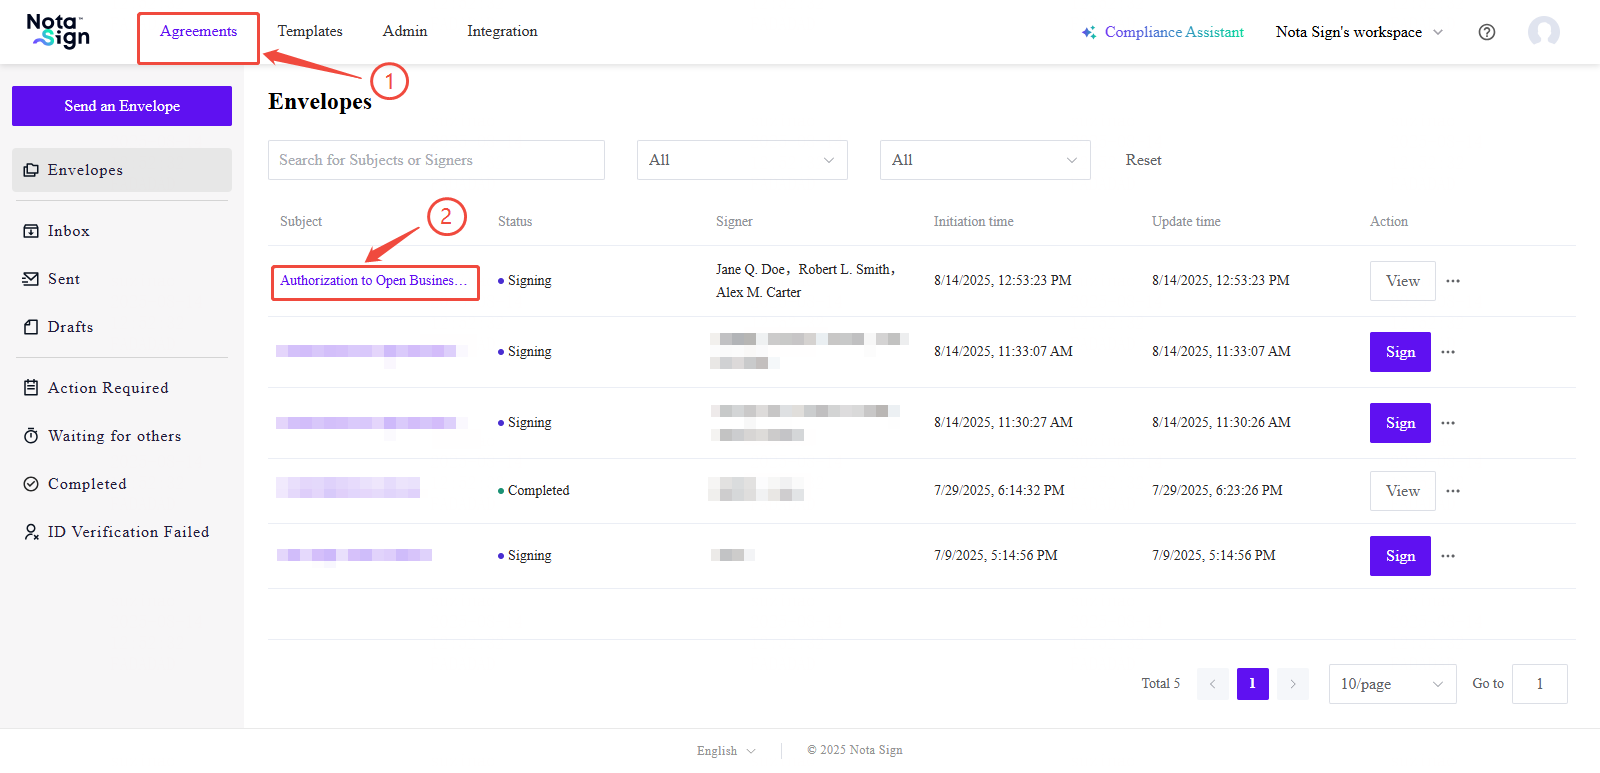
Note: Scenario Where the User Actively Clicks Exit During eKYC Verification: Users can choose to restart verification on their own. This action will not incur any charges.
3. Step 3: Fill In and Sign
- After successful identity verification, the system will display the relevant terms of use;
- Please read the terms carefully and check [Confirm];
- Click the Start button to enter the signing process.
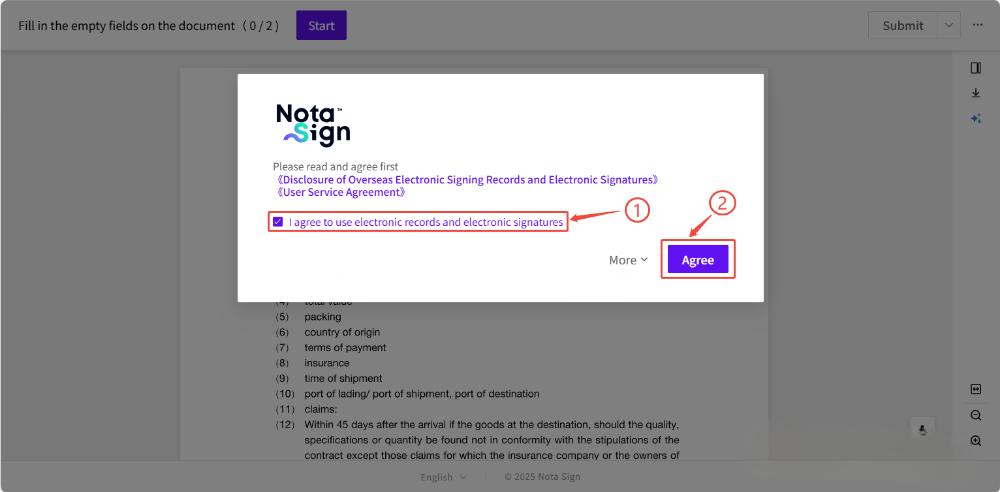
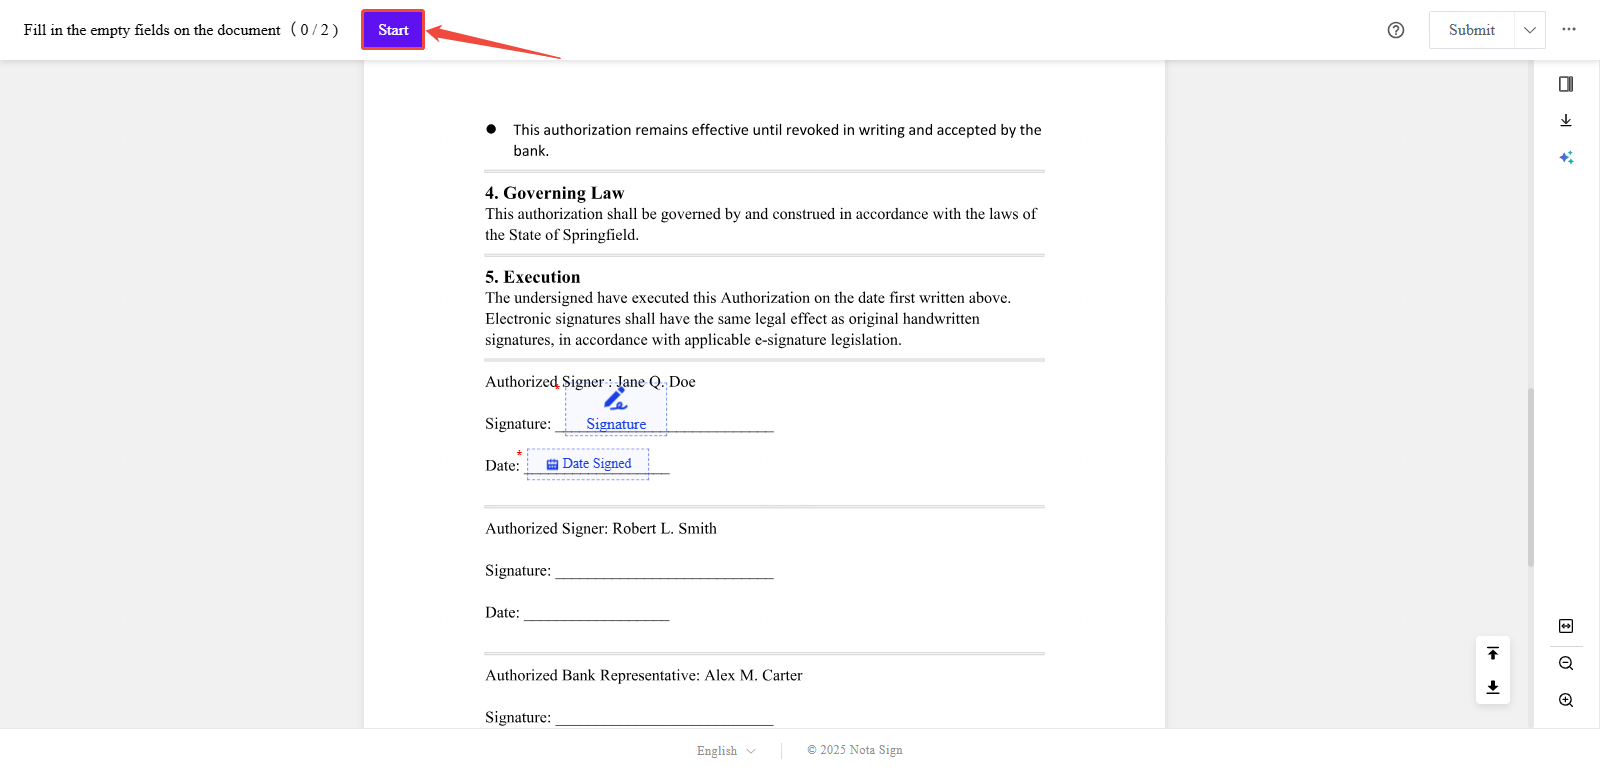
Signing Control Descriptions
The system will guide you through the following controls one by one:
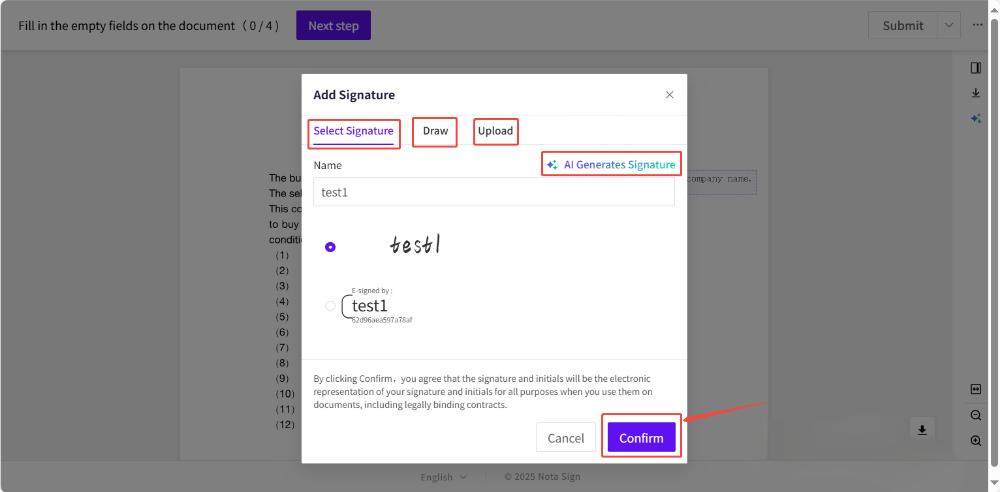
- Signature Control: Click the signature control, and the system will provide multiple signature options: default signature style, handwritten signature, upload signature image, AI-generated signature. Select a signature method and click [Confirm].
- Date Control: When the sender has preset the “Date Control” for the recipient, the system will automatically fill in the current date when the recipient enters the signing page.
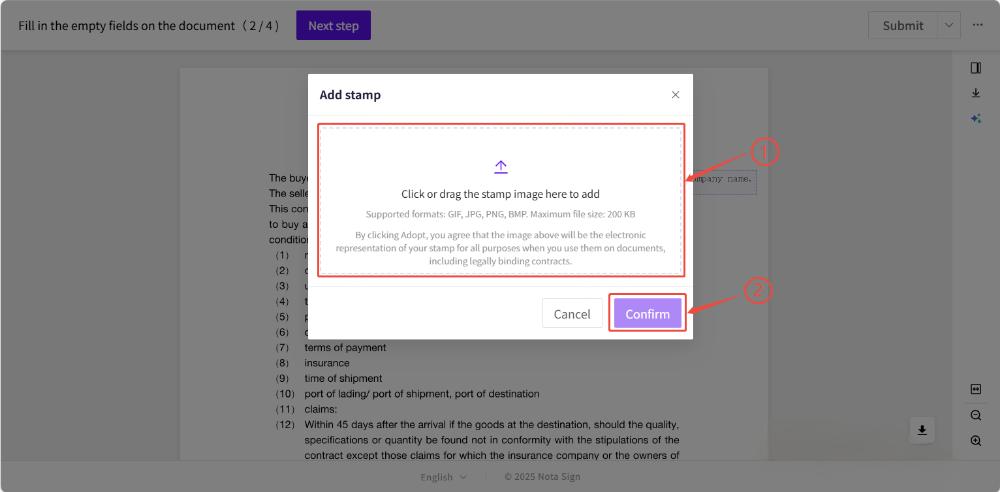
- Stamp Control: Used to affix company or personal stamps. Select an authorized stamp or upload a stamp image that meets the requirements.
For more control operation guides, please refer to Control Management
4. Step 4: Complete and Submit the Signing
After completing all controls, click Submit in the upper right corner of the page. The system will automatically submit and complete the signing process.
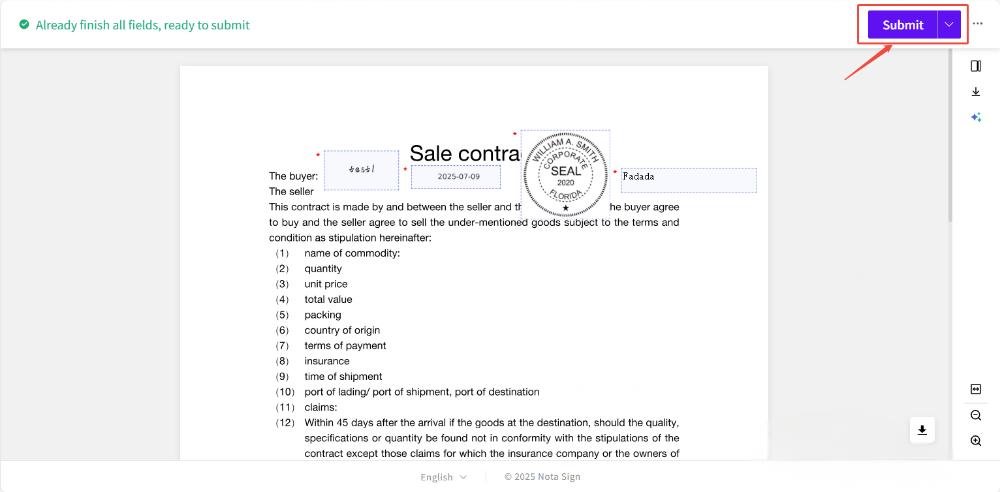
Once all recipients have completed their signatures, they will receive a signing completion notification and can view the signing records at any time on the Sign page.
2. Digital Signature Identity Verification
In certain digital signature scenarios, the sender may require you to complete Nota Sign identity verification before submitting your digital signature. This verification is used to further confirm the signer’s identity. After passing the verification, you can proceed with the digital signature.
This feature is currently applicable to Digi-Sign ID-One digital signature scenarios. Whether this identity verification is required depends on the sender’s settings when sending the envelope.
1. When Will I Be Directed to Digital Signature Identity Verification?
The system may guide you to complete identity verification when submitting a digital signature if the following conditions are met:
- You are required to complete signing using a digital signature;
- You have selected or are assigned to use Digi-Sign ID-One;
- The sender has enabled Digital Signature Identity Verification for you;
- You already hold a Digi-Sign ID-One certificate.
If you do not yet hold a Digi-Sign ID-One certificate, the system will follow the existing certificate application process and will not trigger this additional identity verification.
2. How to Complete Digital Signature Identity Verification?
- Open the signing task and complete the document fills and signature controls as prompted;
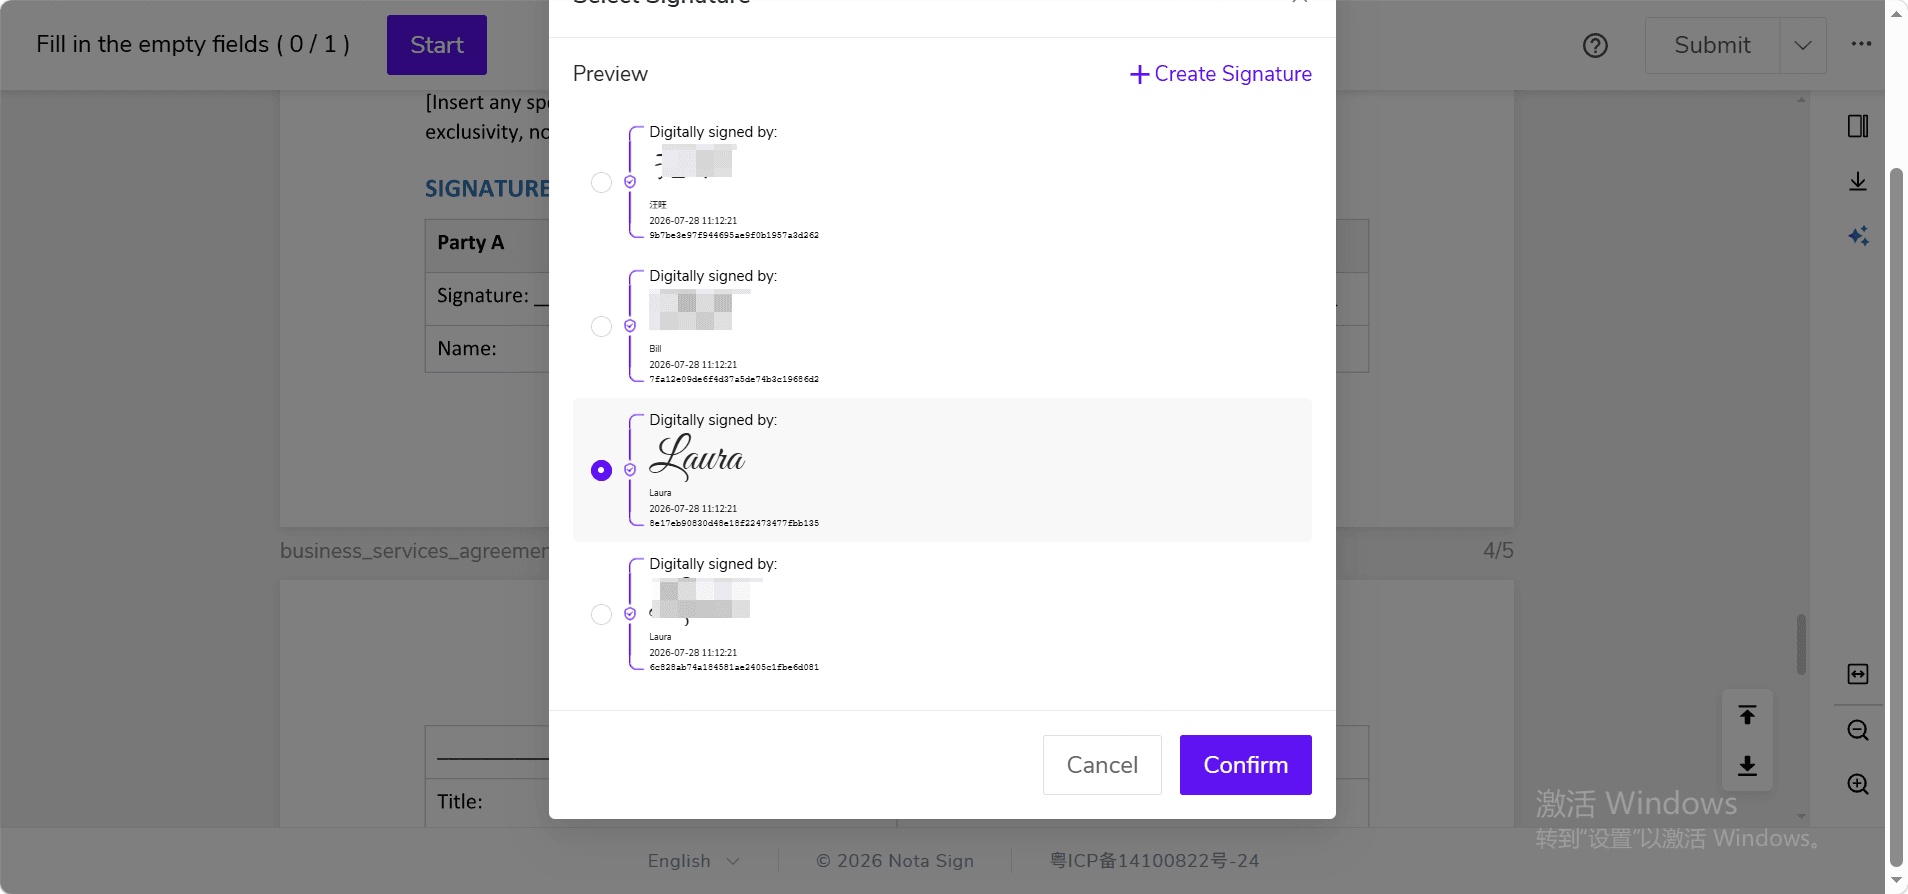
- Click Submit;
- Select or confirm Digi-Sign ID-One on the CA selection page;
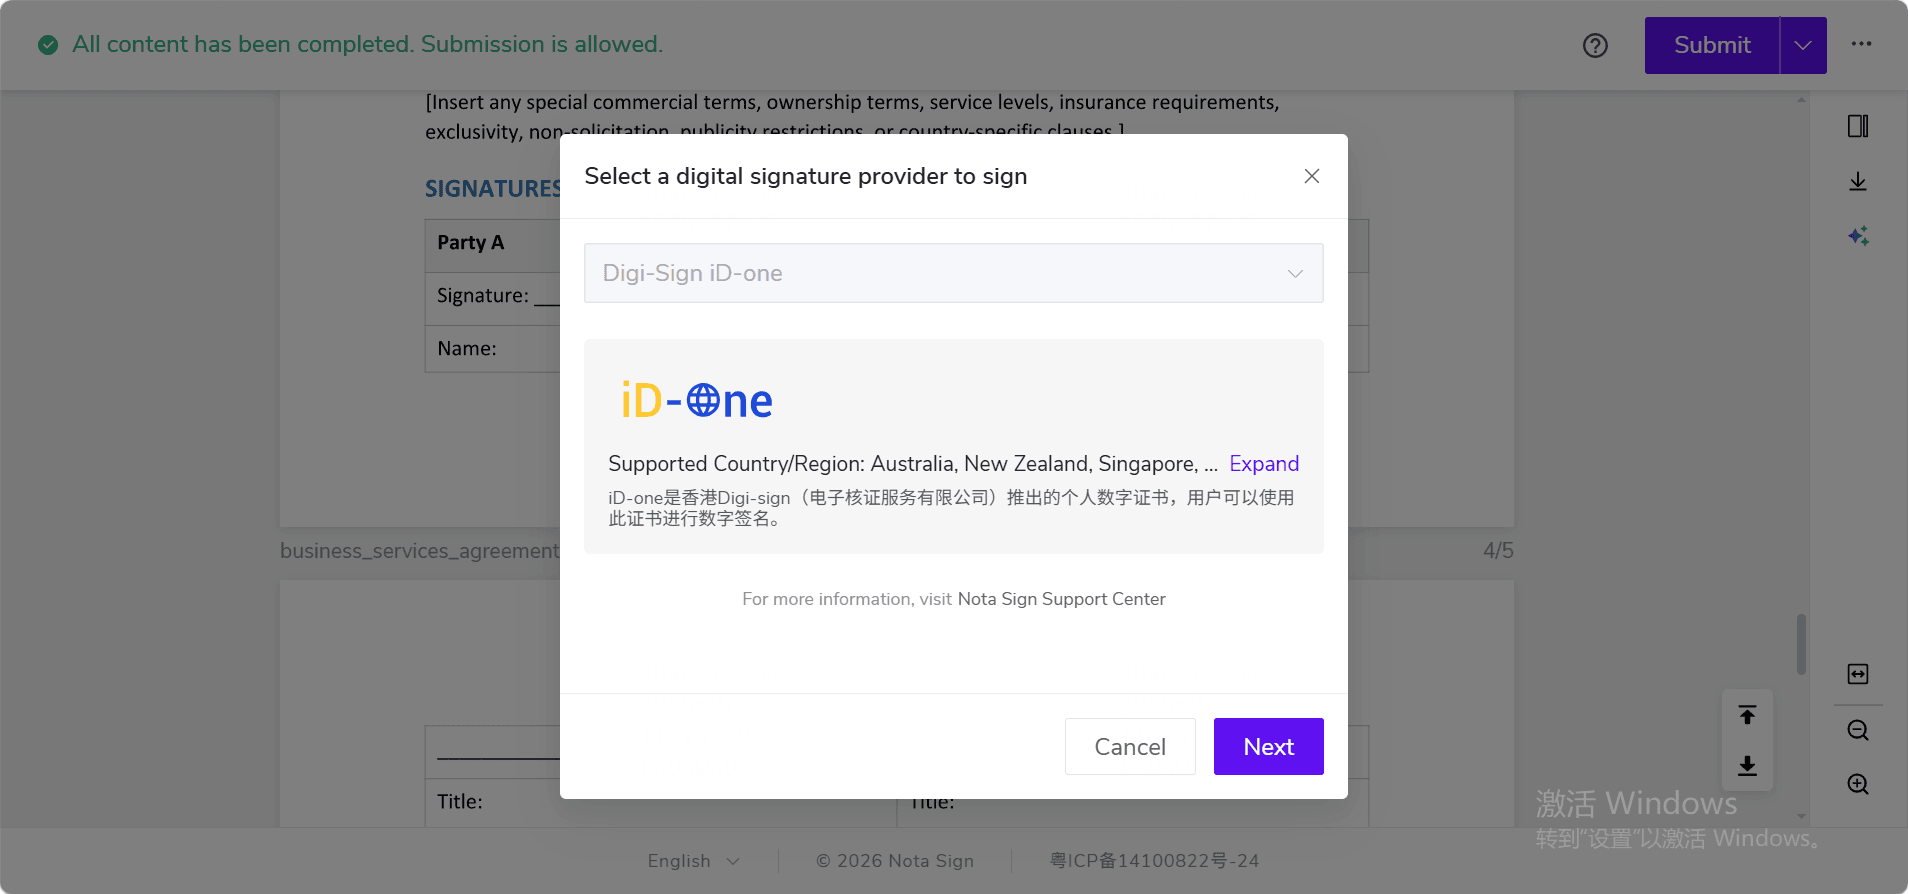
- The system will enter the Nota Sign identity verification page;
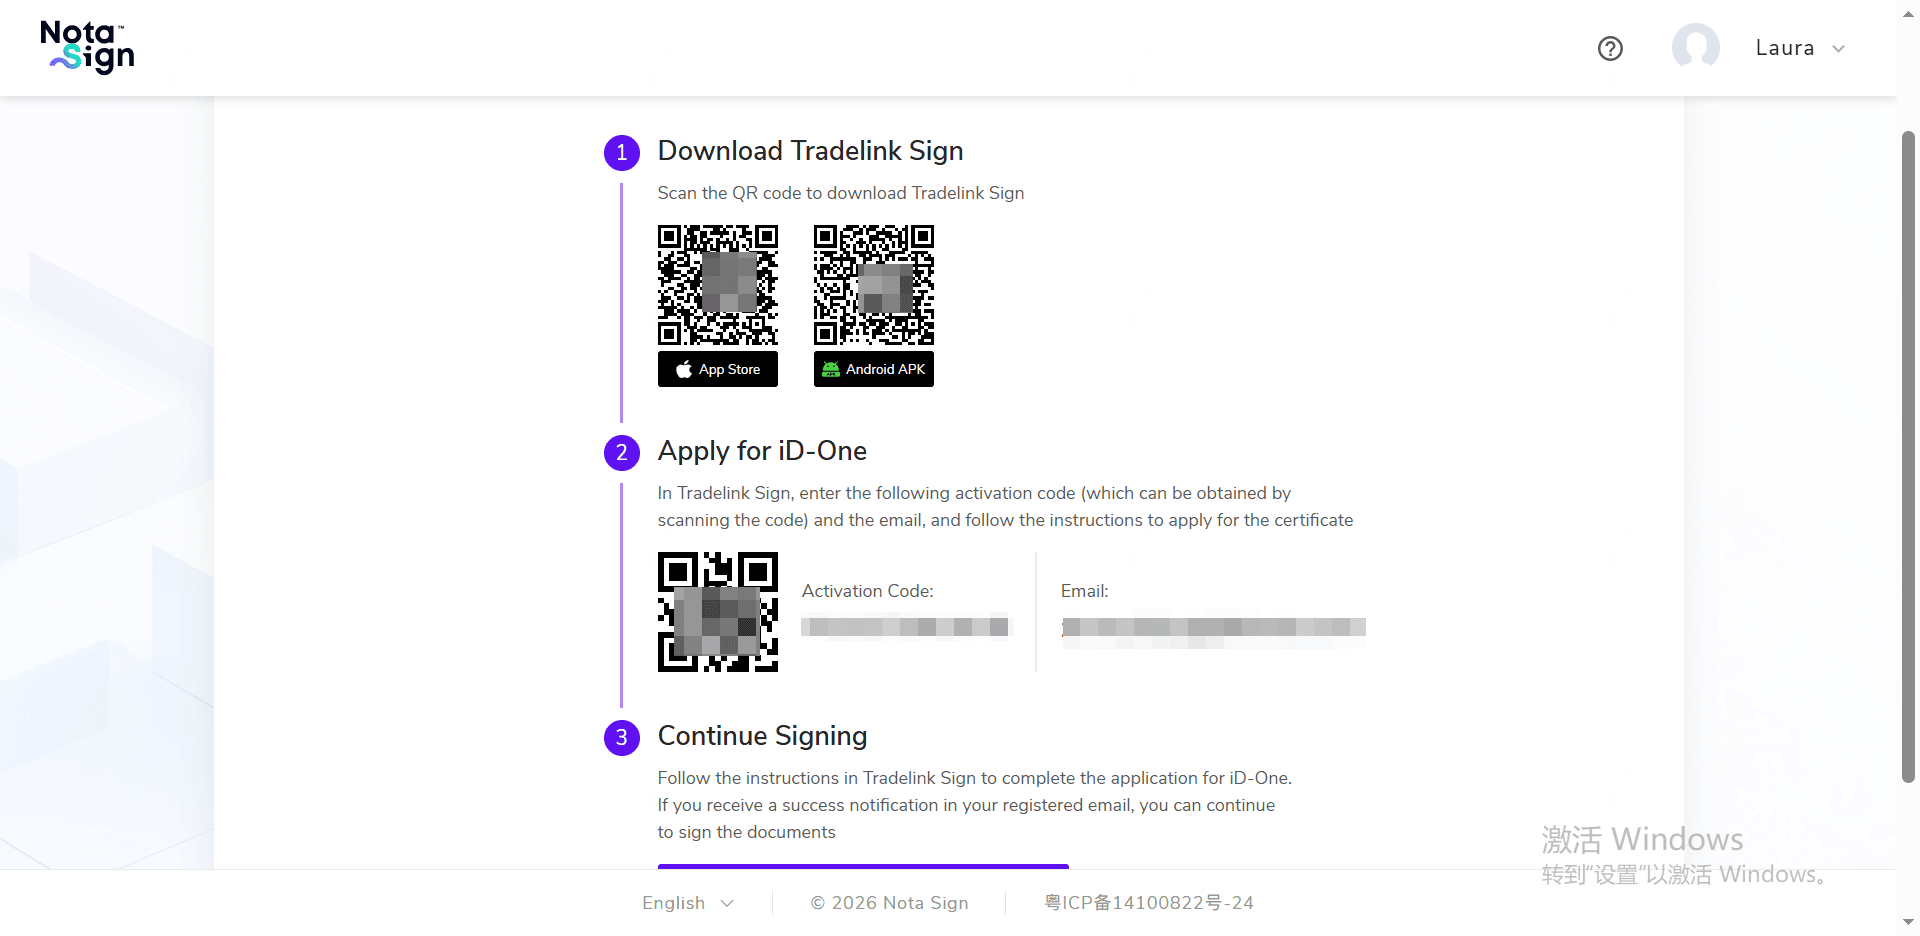
- Use your mobile phone to scan the QR code or follow the on-screen prompts to complete identity verification;
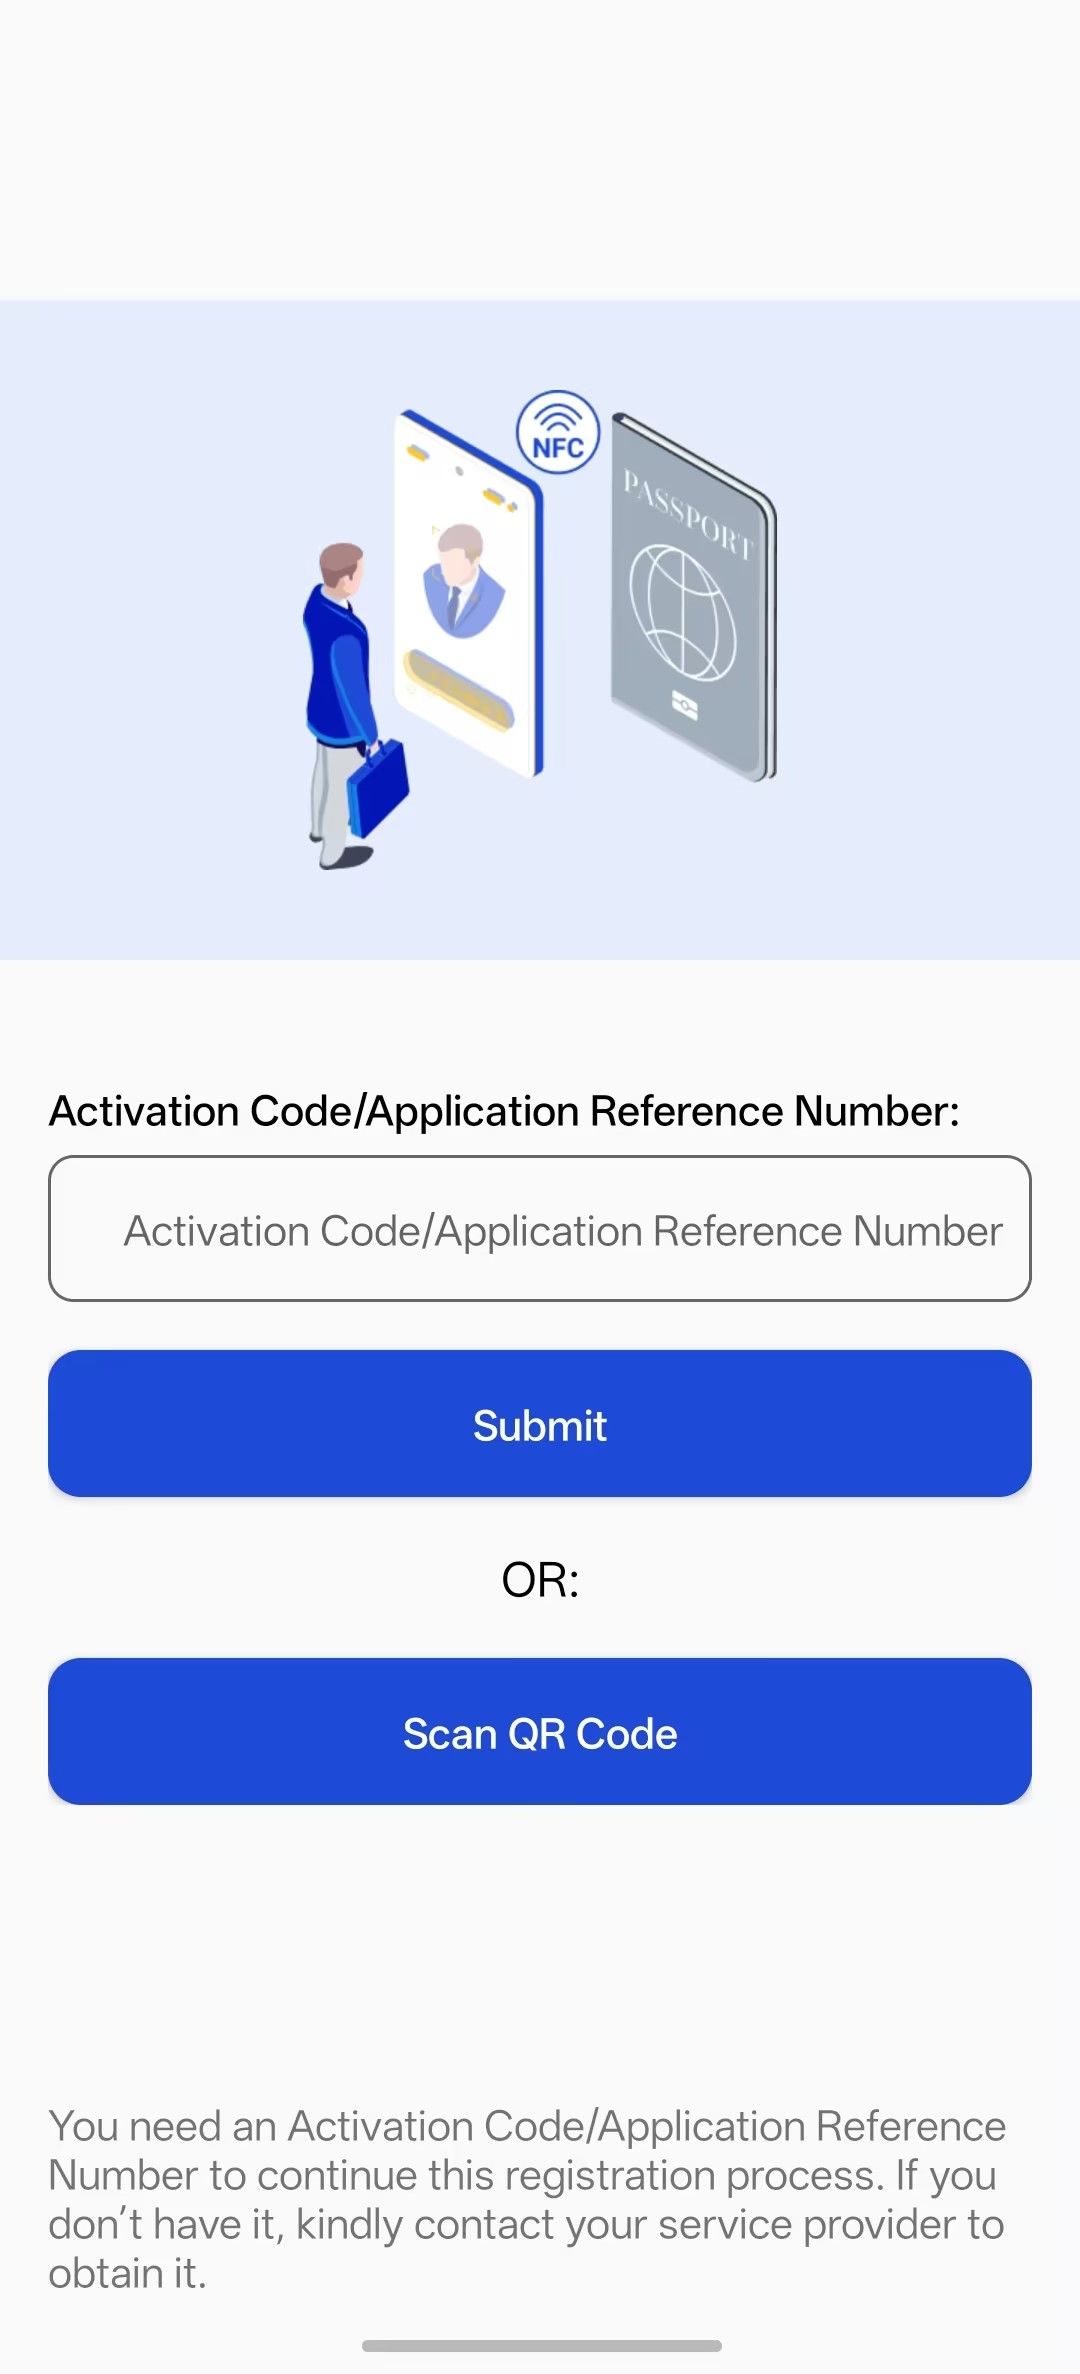
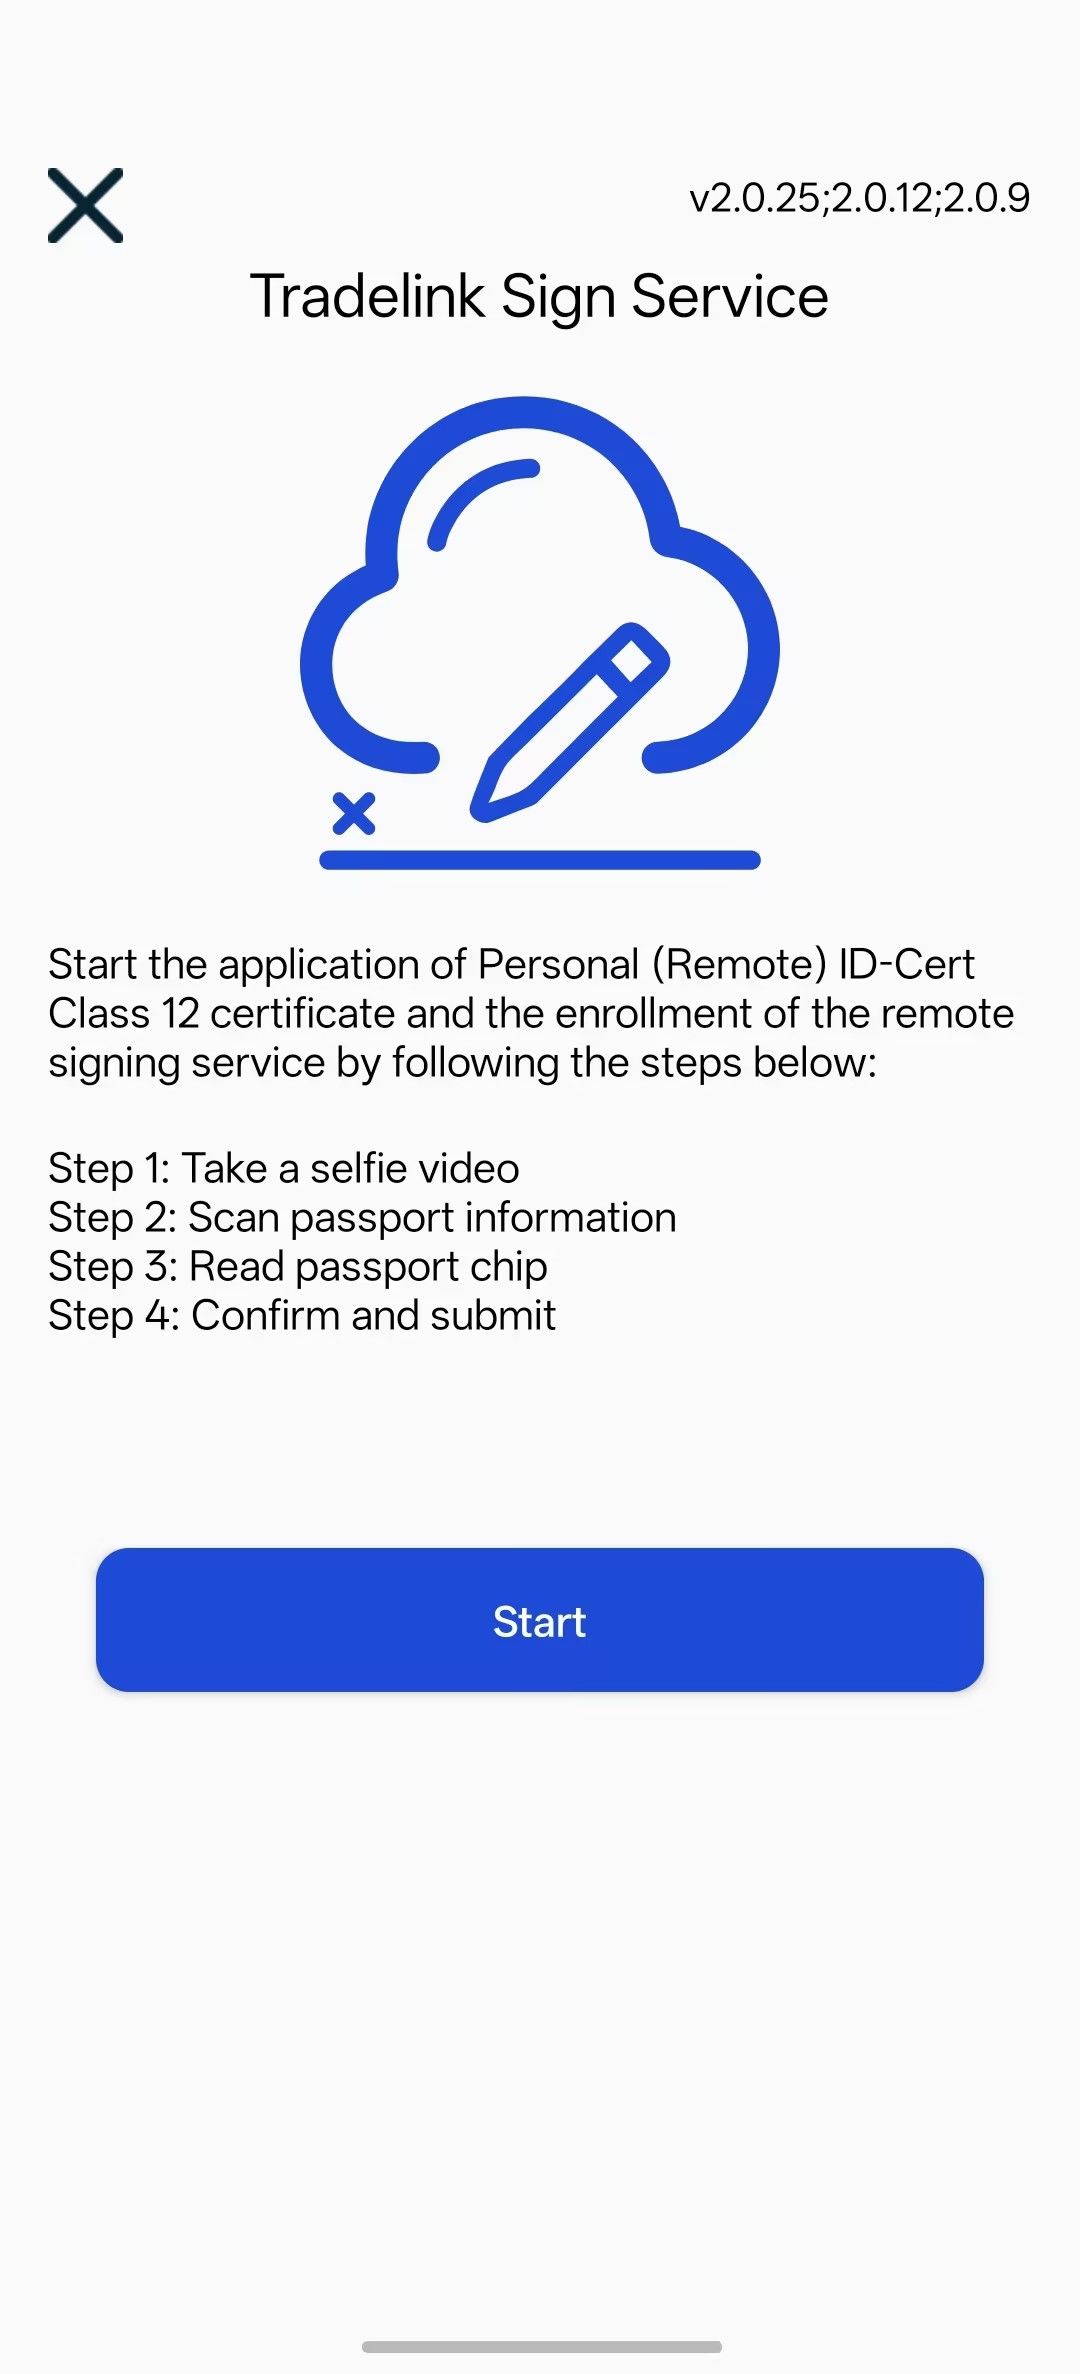
- After passing identity verification, the system will return to the digital signature flow;
- Complete the CA OTP verification as prompted; How to Complete SMS OTP Verification
- After passing OTP verification, the digital signature is completed.
3. What If Identity Verification Fails?
If identity verification fails, you can retry following the on-screen prompts.
- If the page provides a Retry button, you can initiate verification again;
- If you cannot retry, you will need to contact the sender for assistance;
- If your name does not match the ID document, please follow the on-screen instructions or contact the sender to confirm whether the recipient name needs to be adjusted.
Once identity verification is passed, the system will continue with the digital signature process. Please do not close the page to avoid affecting the subsequent CA OTP verification and signing submission.