Skip to content

Enable digital signature

On this page

1, How to enable digital signature

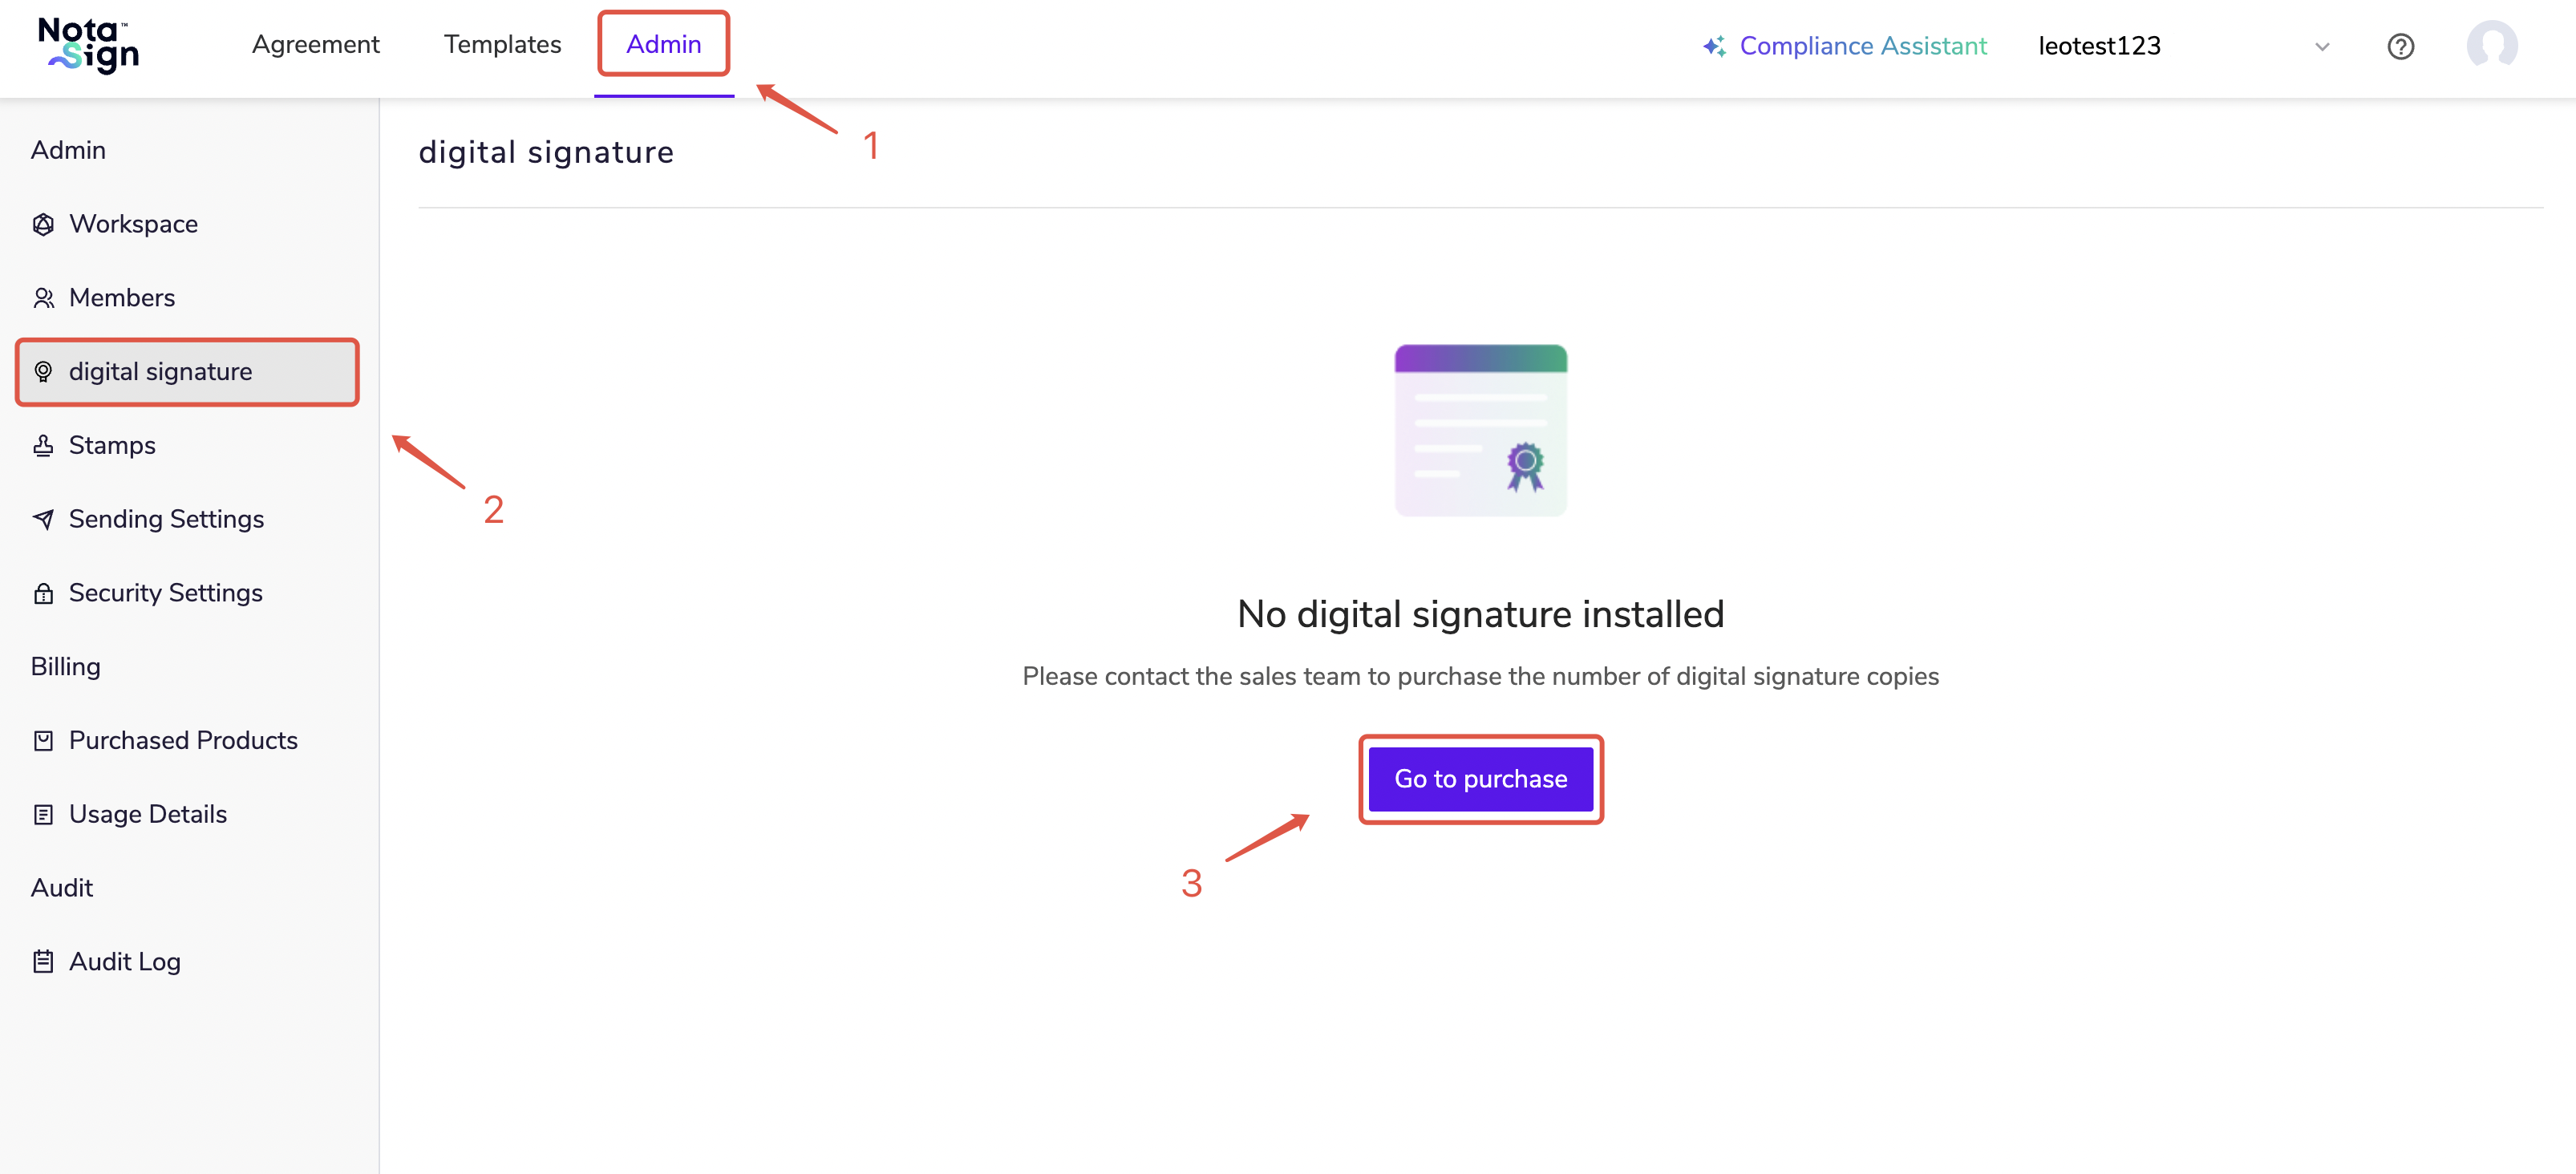
  1. Log in to the Nota Sign workbench, click on [Management] - [Digital Signature], and enter the digital signature management page;

If you have not purchased any digital signatures, click on ‘Go to Purchase’ and contact the sales team to purchase the corresponding number of digital signatures. After purchase, the corresponding digital signatures will be automatically installed;

image01

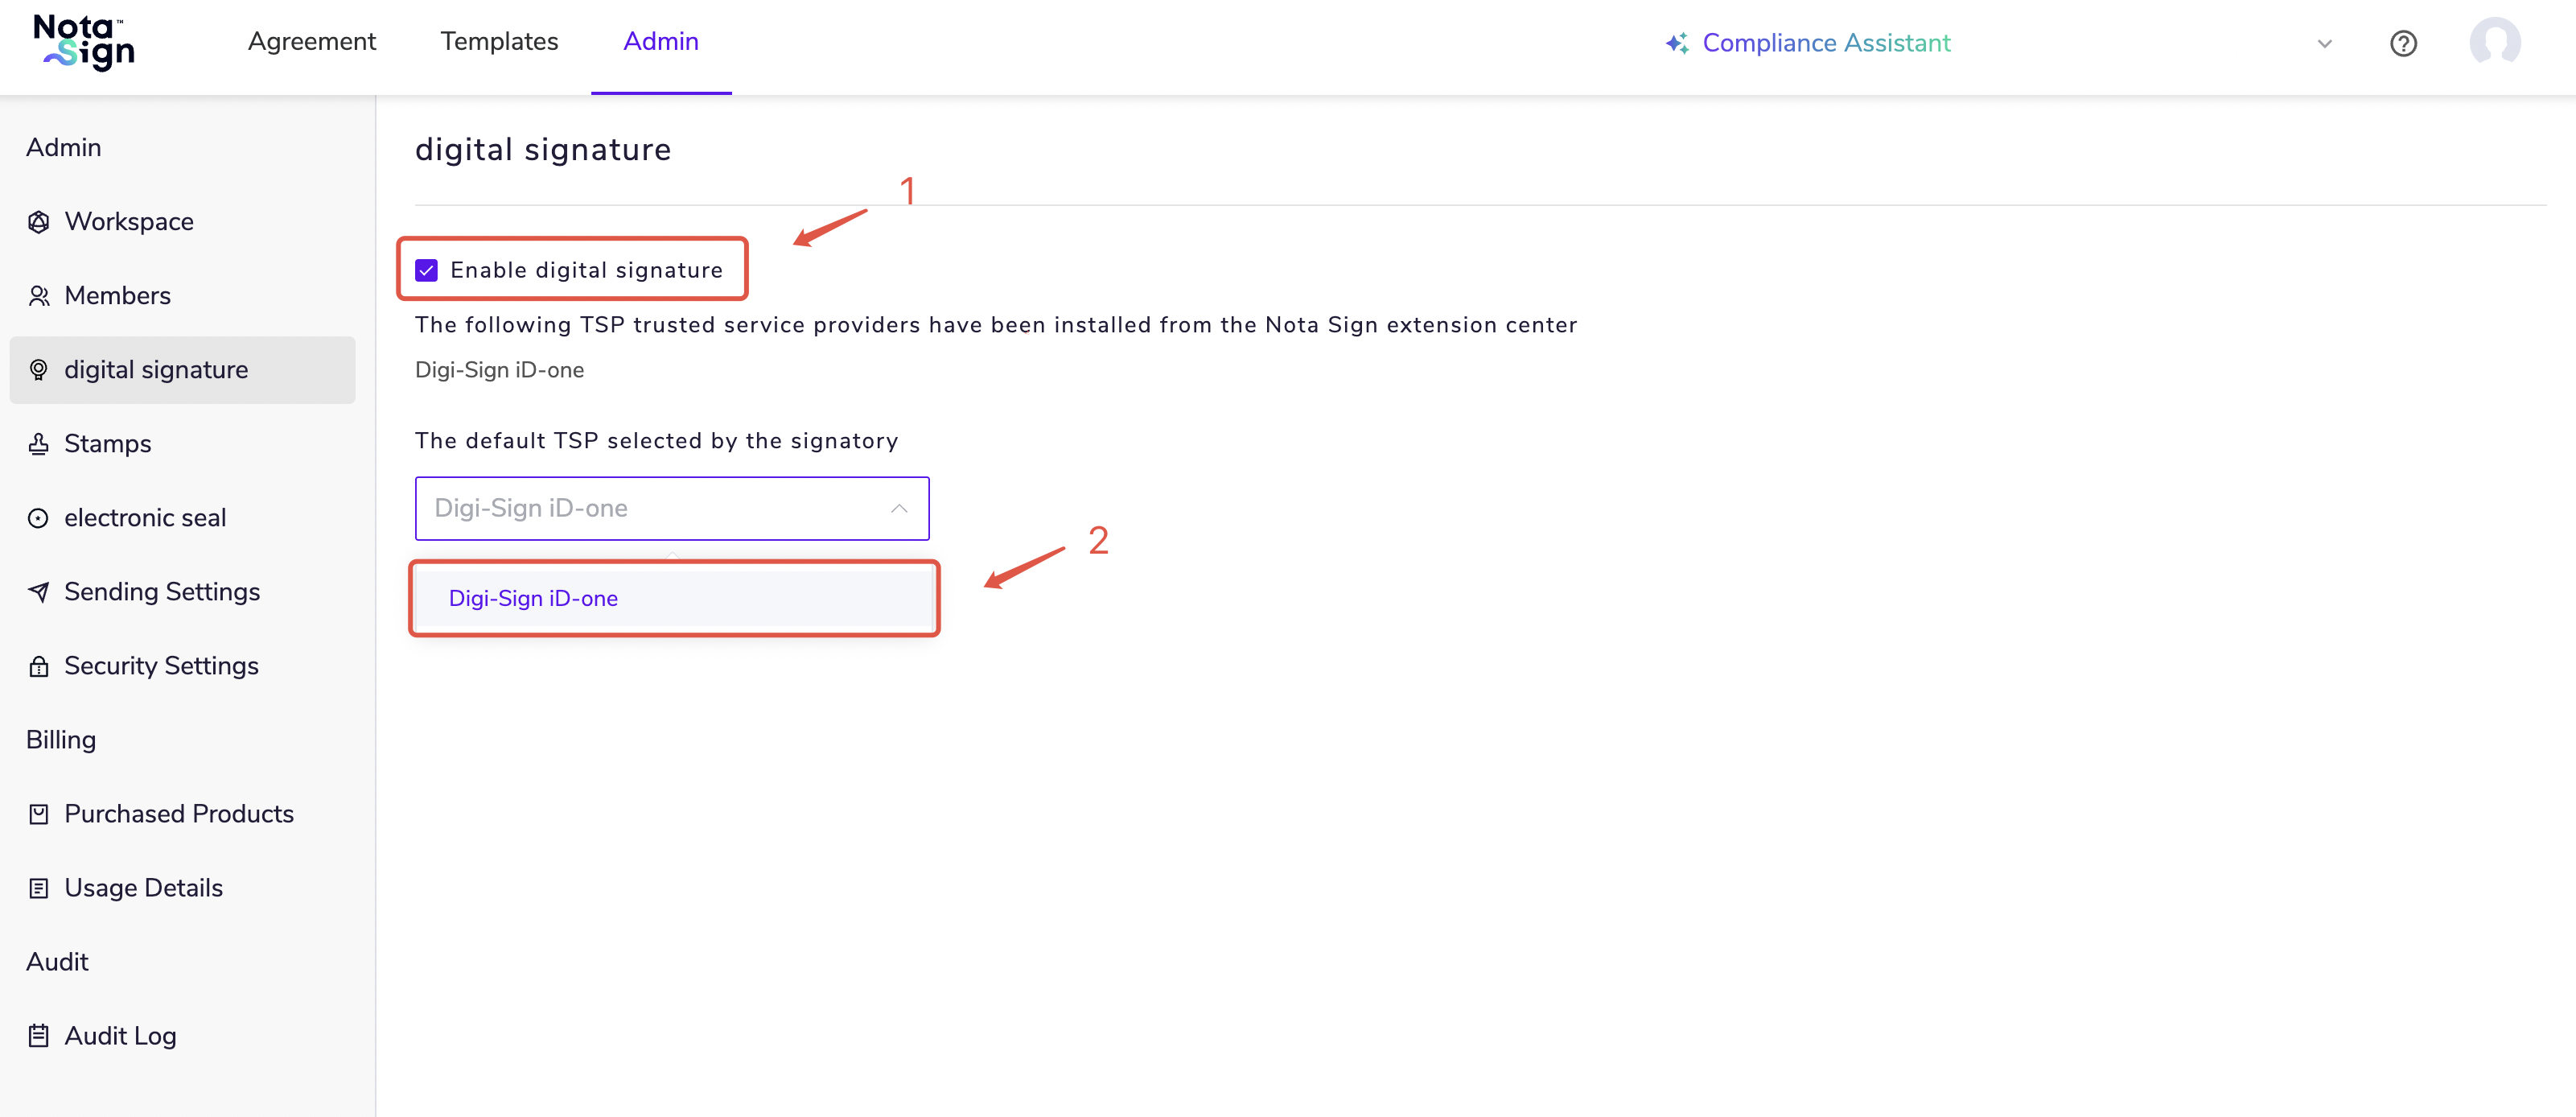
If you have purchased and installed a digital signature, the digital signature page will display all types of digital signatures you have purchased;

  1. Check ‘Enable Digital Signature’ and select the type of digital signature you want to use.

image02

2, Initiate envelope

  1. Log in to the Nota Sign workbench, go to [Sign] - [Initiate], select [Initiate Envelope];

  2. Upload the documents that need to be signed;

  3. Add recipient information and select ‘Digital Signature’ in the signature type;

image-20250703175029001

image-20250703175029001

After completing the signature control settings, click [Send] to send out the envelope.

image-20250704100742712

Need help?

Contact Nota Sign Support