
1, View workspace information
You can quickly view the basic information of the current workspace, including name, ID, and data storage location, through the management console.
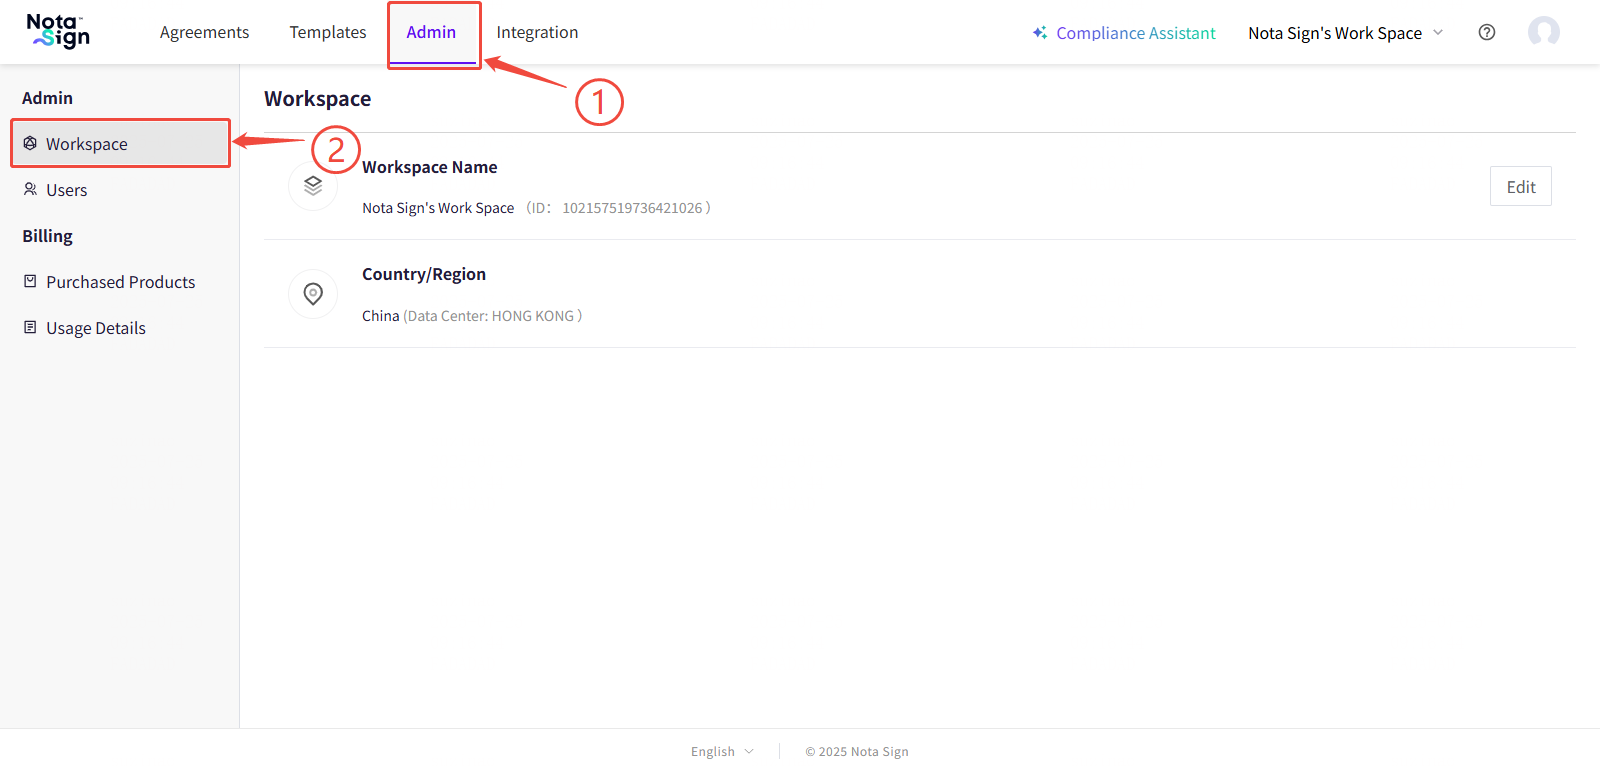
1. Access the workspace management page
-
Log in to the Nota Sign workbench;
-
Click on ‘Manage’ in the top navigation bar to enter the management console;
-
Click on “Workspace” in the left menu to enter the workspace information management page.
2. View workspace information
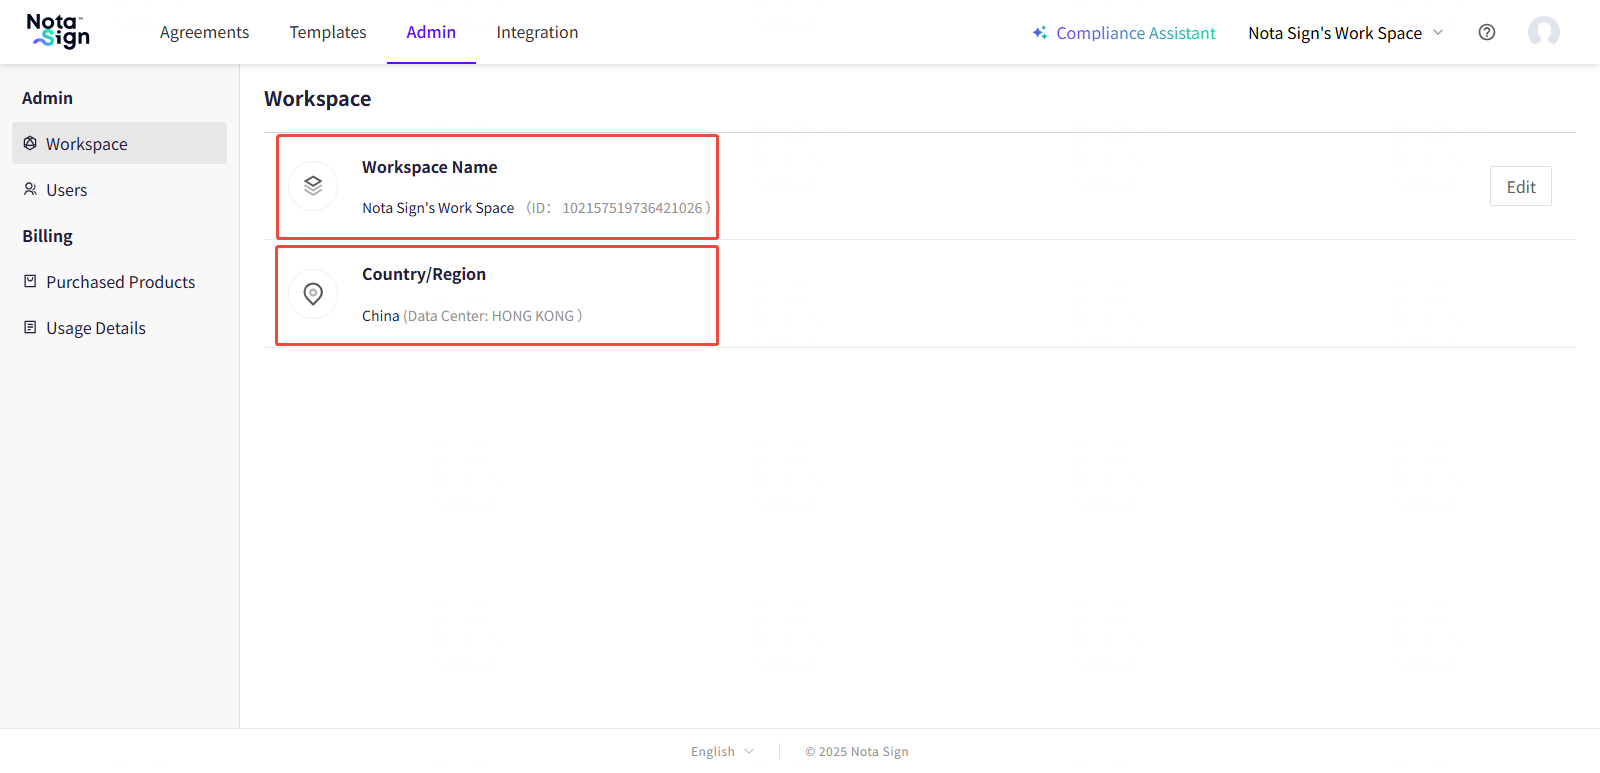
On the “Workspace” page, you can view the following information about the current workspace:
-* * Workplace Name * *: Custom name for the workspace, supports subsequent modifications
-* * Workplace ID * *: A unique identifier automatically generated by the system, used for system identification and API calling
-* * Data Storage Center * *: Display the data storage area or server location to which the workspace belongs
3. Edit workspace name
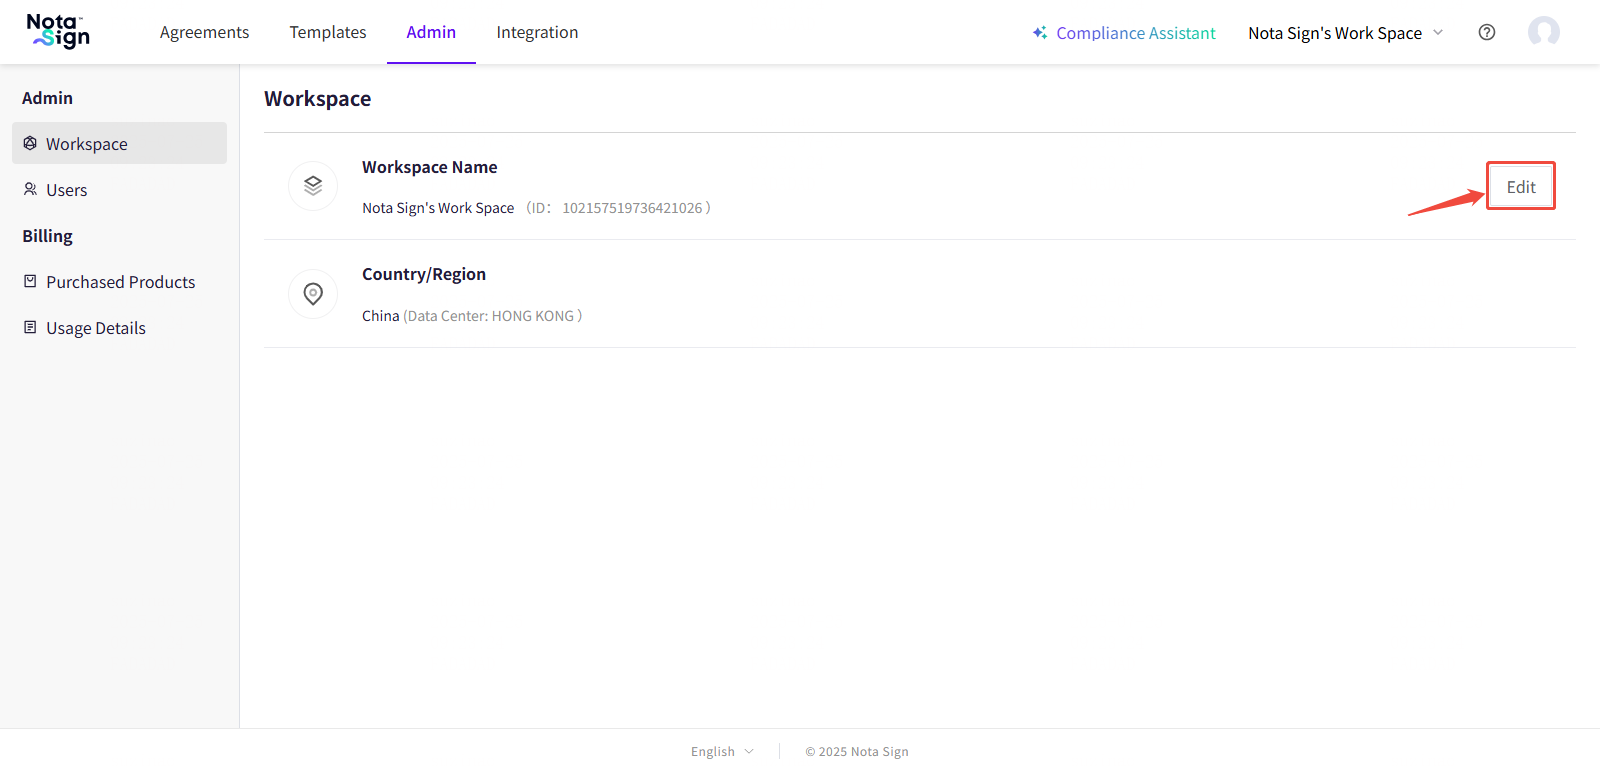
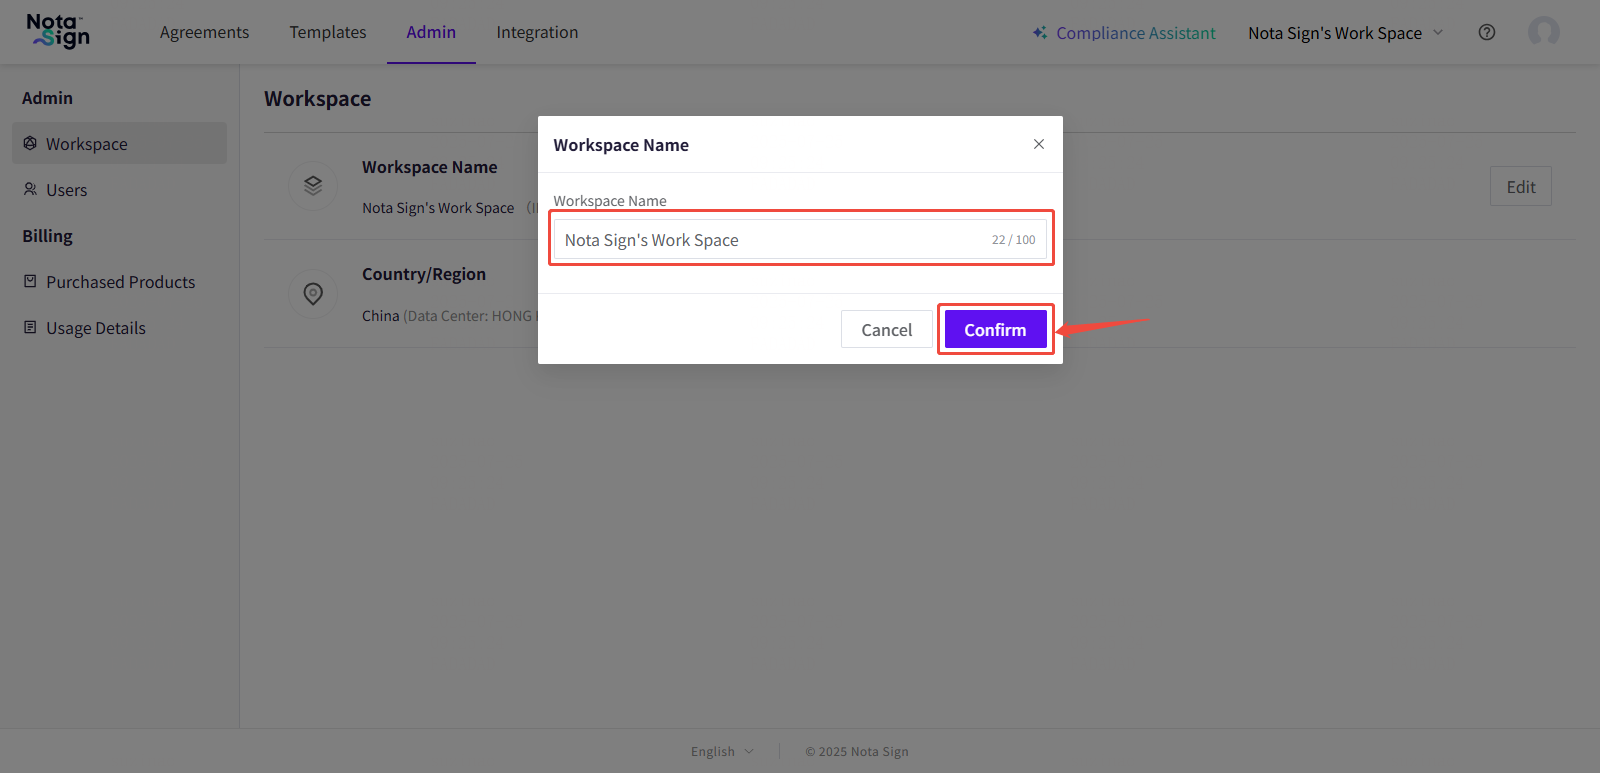
To update the workspace name, you can follow these steps:
-
Click the ‘Edit’ button on the right side of the page;
-
Enter the new workspace name in the pop-up input box;
-
Click [Confirm] to save the modifications.
💡 Tip: The workspace name modification will take effect in real-time, and all members will see the updated name in their interface.
2, Set default workspace
1. Feature Overview
Nota Sign supports setting a ‘default workspace’. After setting up:
When logging in, you will directly enter the pre-set default space.
When someone sends you an envelope, the system will default to using your default space for receiving.
2. How to set the default workspace?
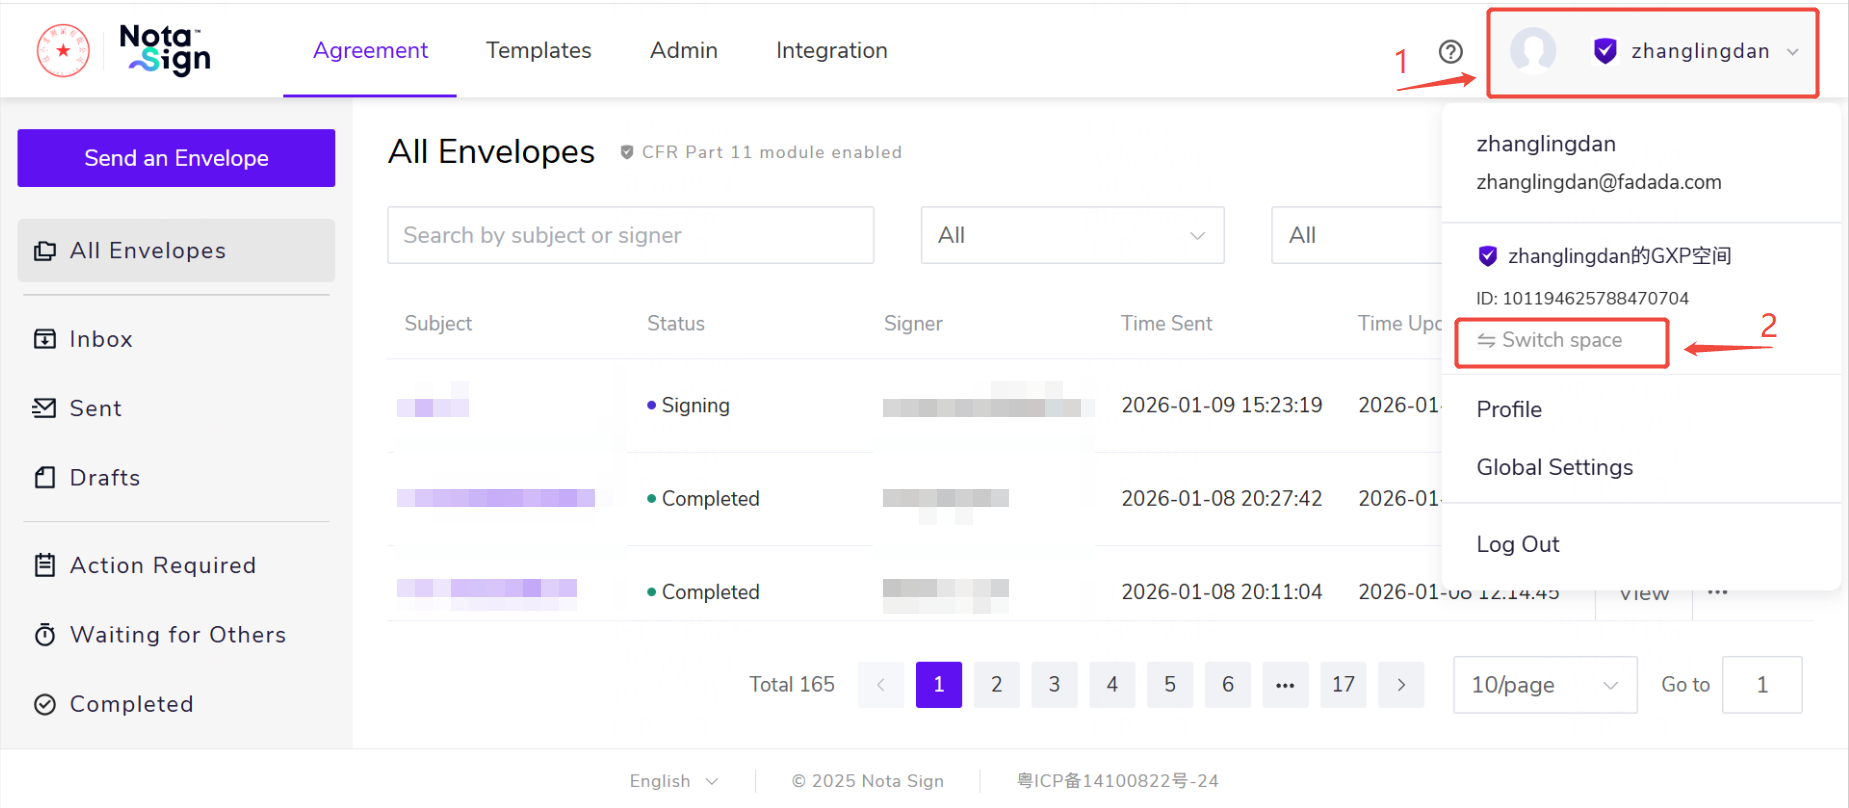
- Click on the personal avatar in the upper right corner of the page, and then click on “Switch Space” in the drop-down menu.
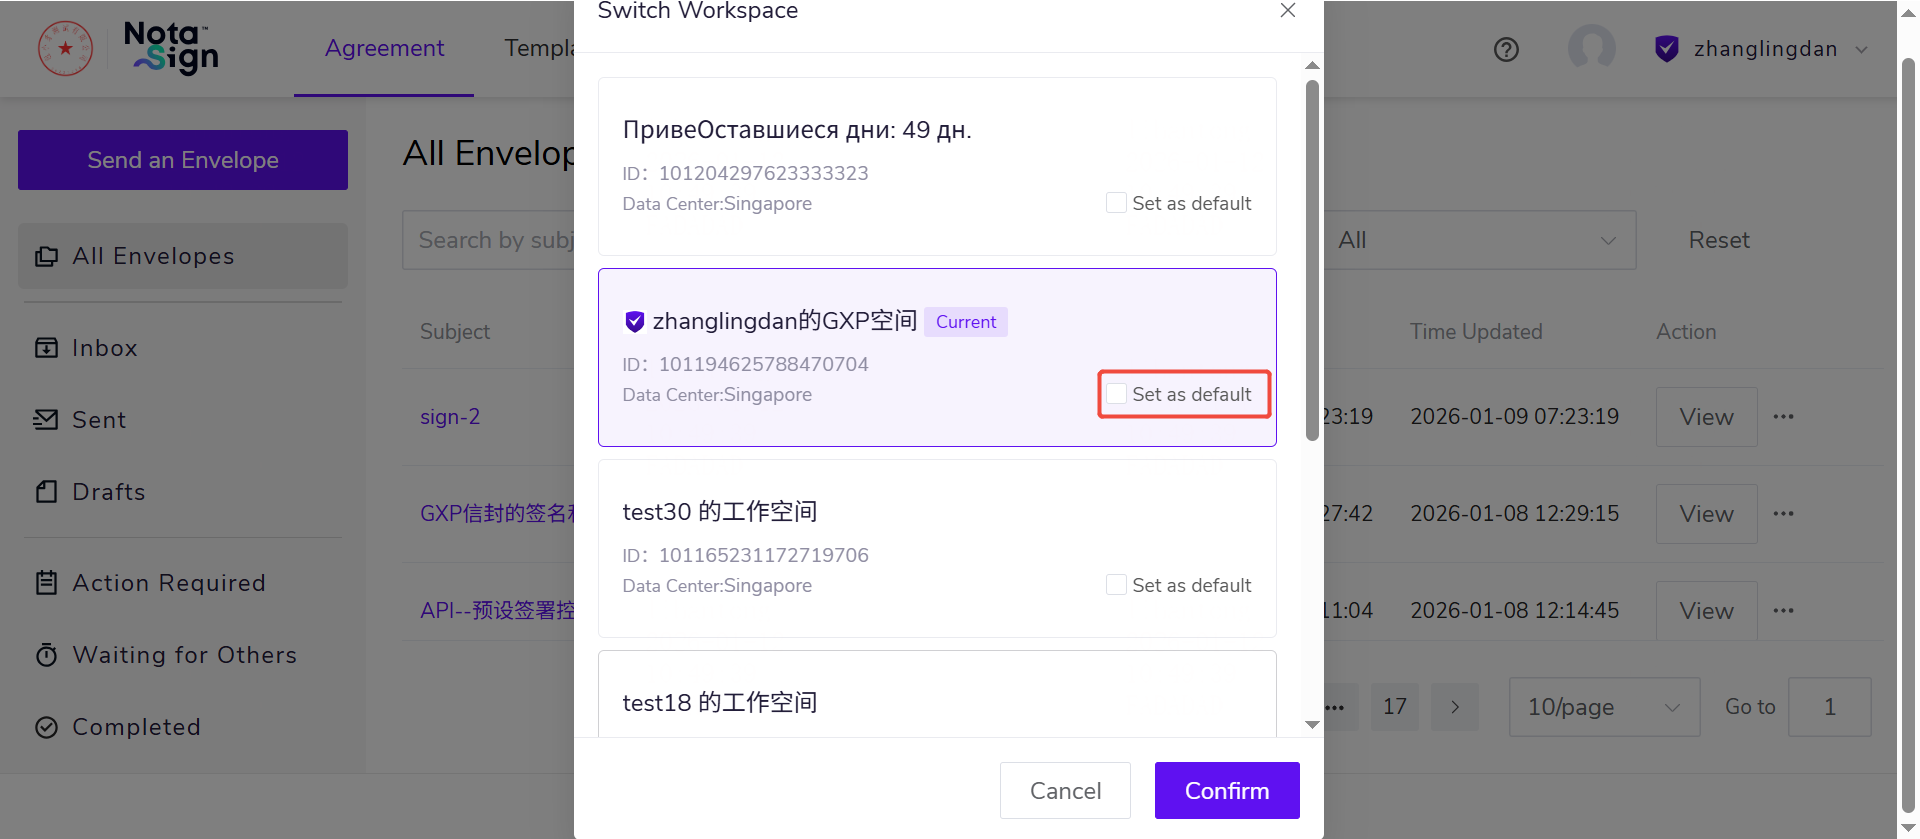
- Select the default space from the space list and click Set as default.
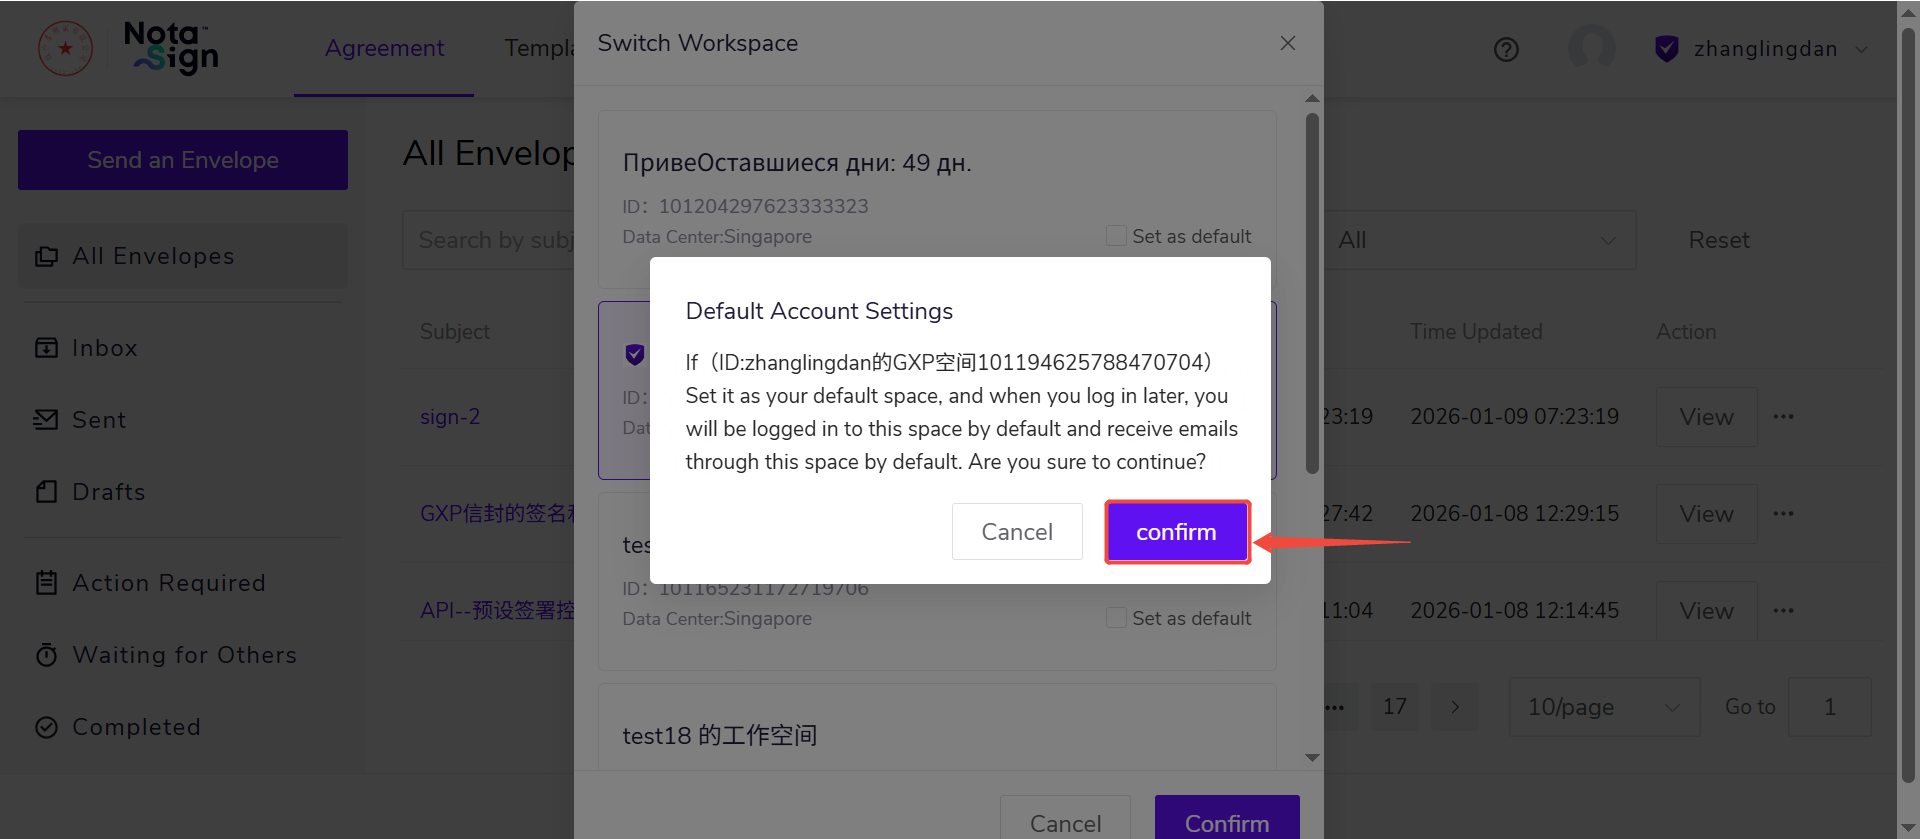
- The page displays the name and ID of the current space, click confirm, and subsequent logins will default to the space and receive emails through the space by default.
- Click [OK] to complete the setup.
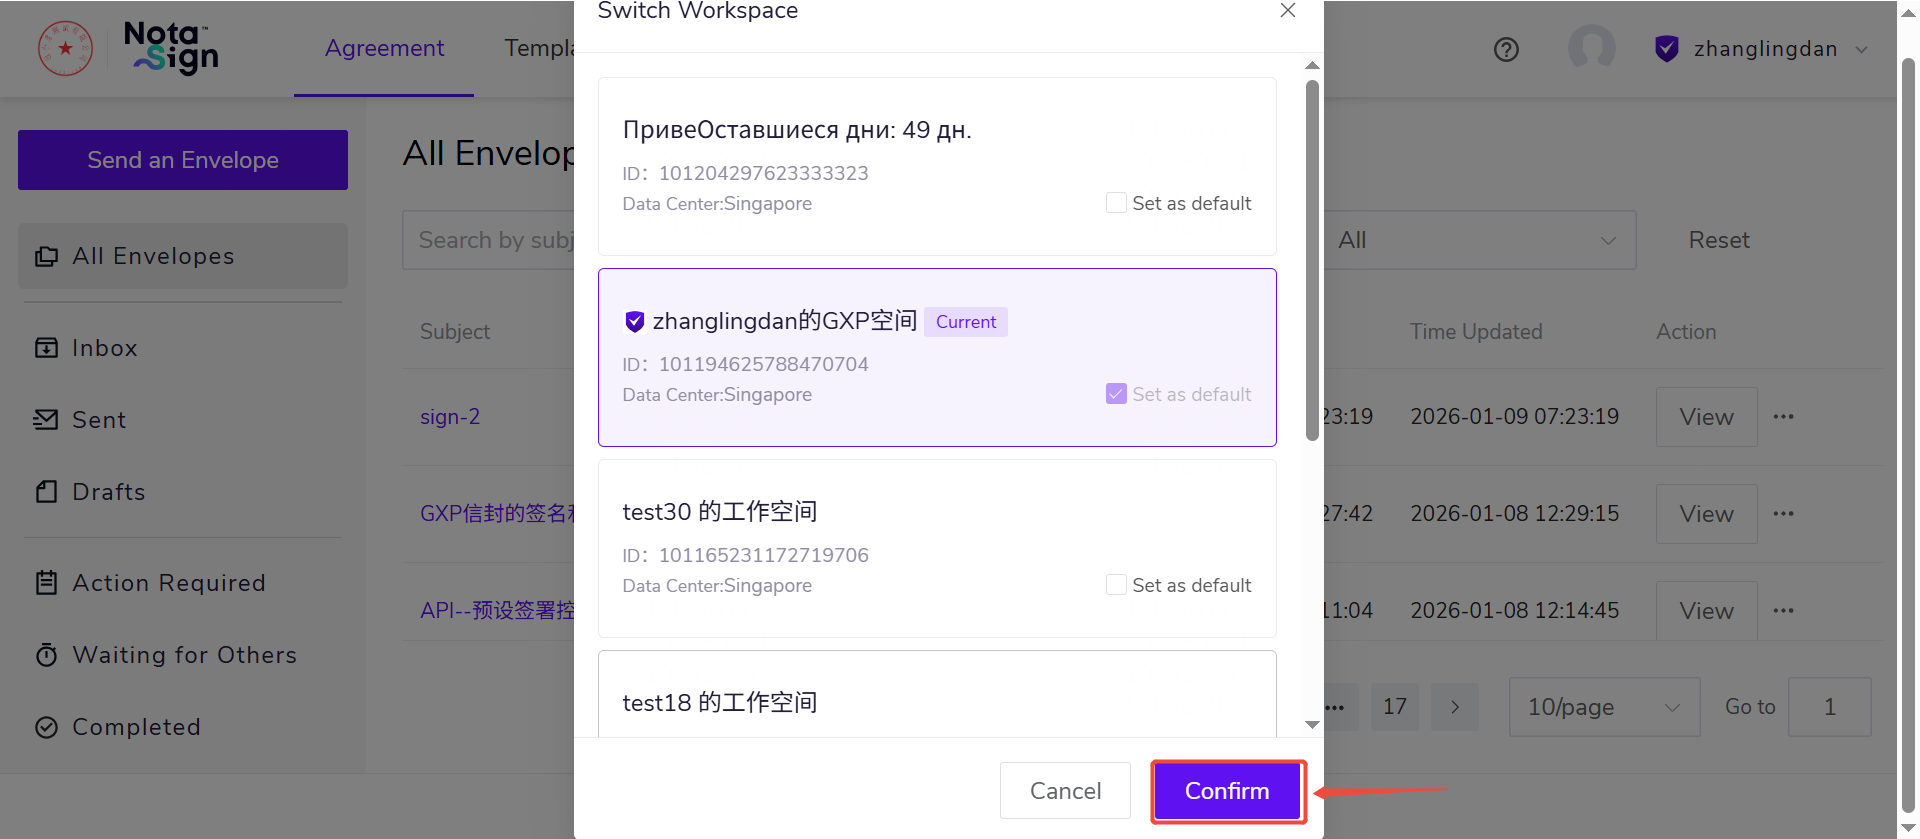
After successful setting, the “default” icon will be displayed next to the default space name in the personal avatar drop-down menu.
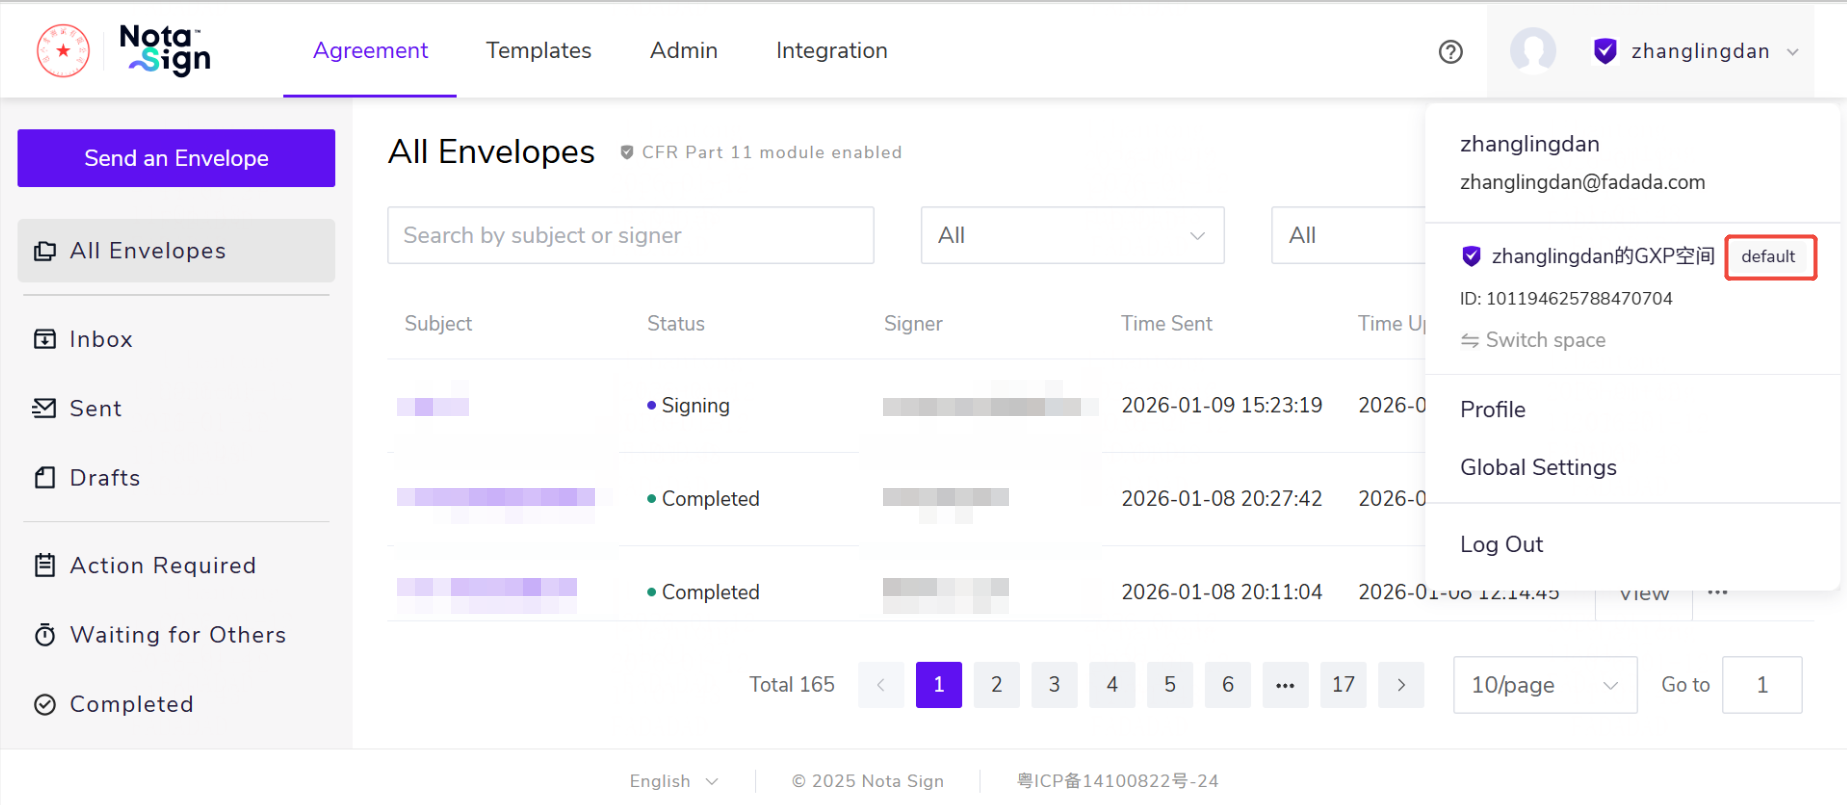
-*After successful login, if the default space status is normal, it will automatically enter the space. *-
3, Switching workspaces
1. Feature Overview
Nota Sign supports multi workspace management, making it easy for you to efficiently switch between different teams, projects, or client environments. Whether you are collaborating across departments or handling multiple independent businesses simultaneously, you can quickly isolate and access the corresponding content through the workspace, ensuring precise operations and clear data.
2. How to switch workspaces?
- Click on the personal avatar in the upper right corner of the page, and then click on “Switch Space” in the drop-down menu.
- Click on the target workspace you want to switch to complete the switch.
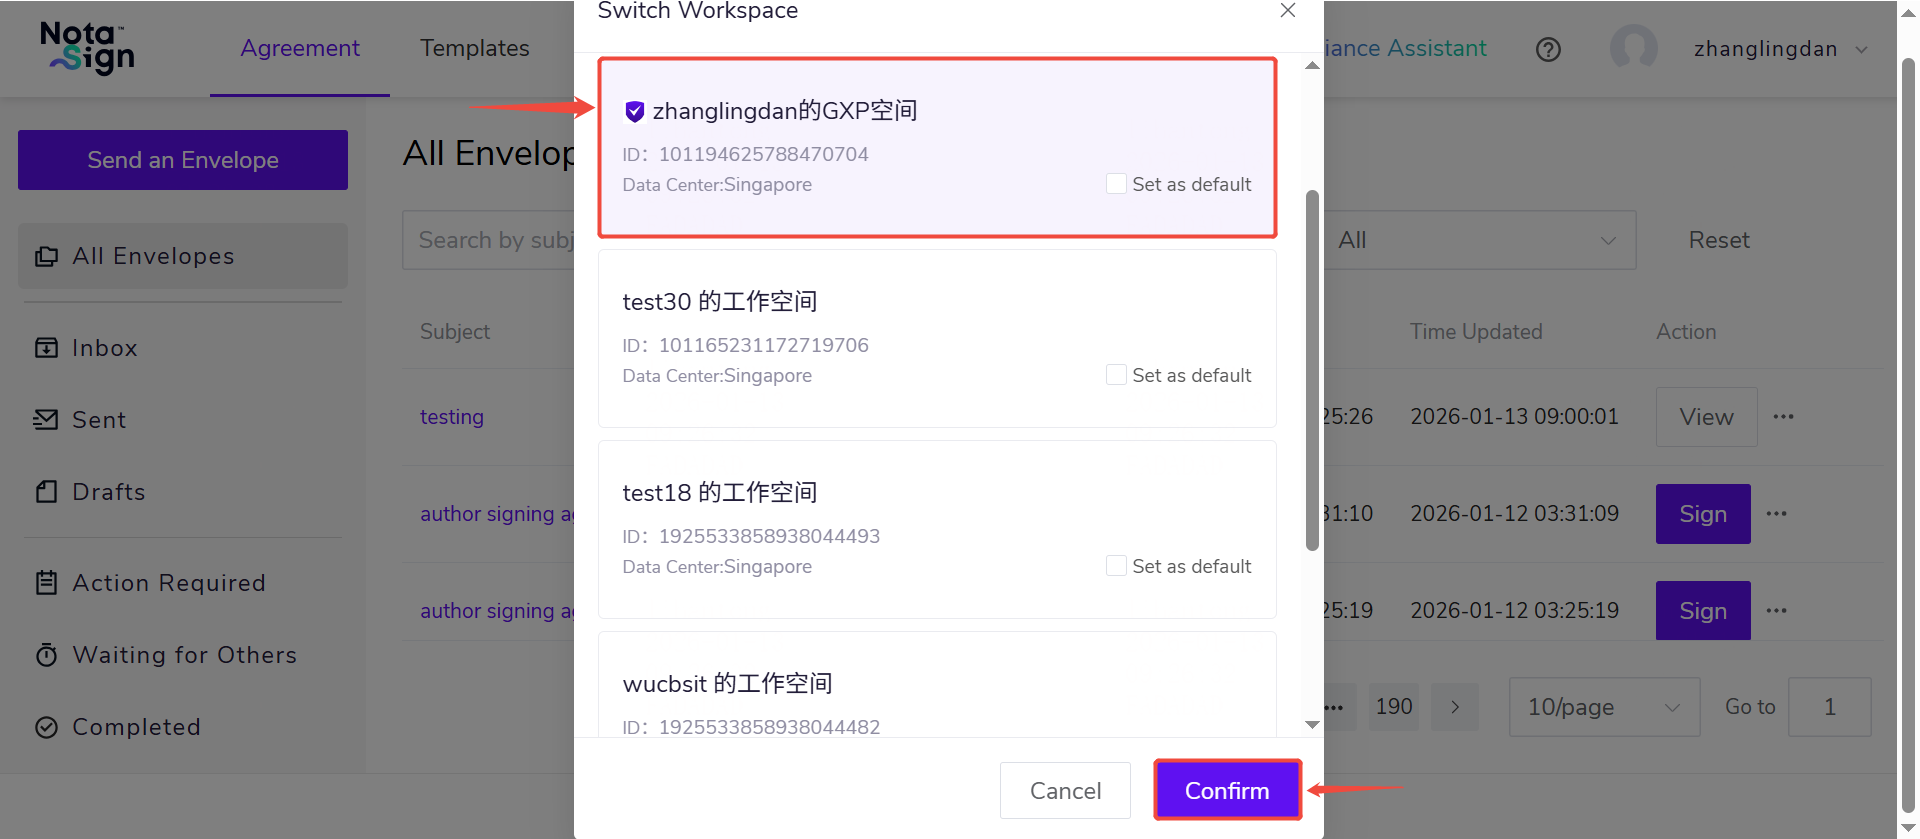
-Note: Only workspaces where you have a designated role (as a member or administrator) will be visible in the switcher; Switching workspaces will not affect your permissions or the work previously saved in each environment