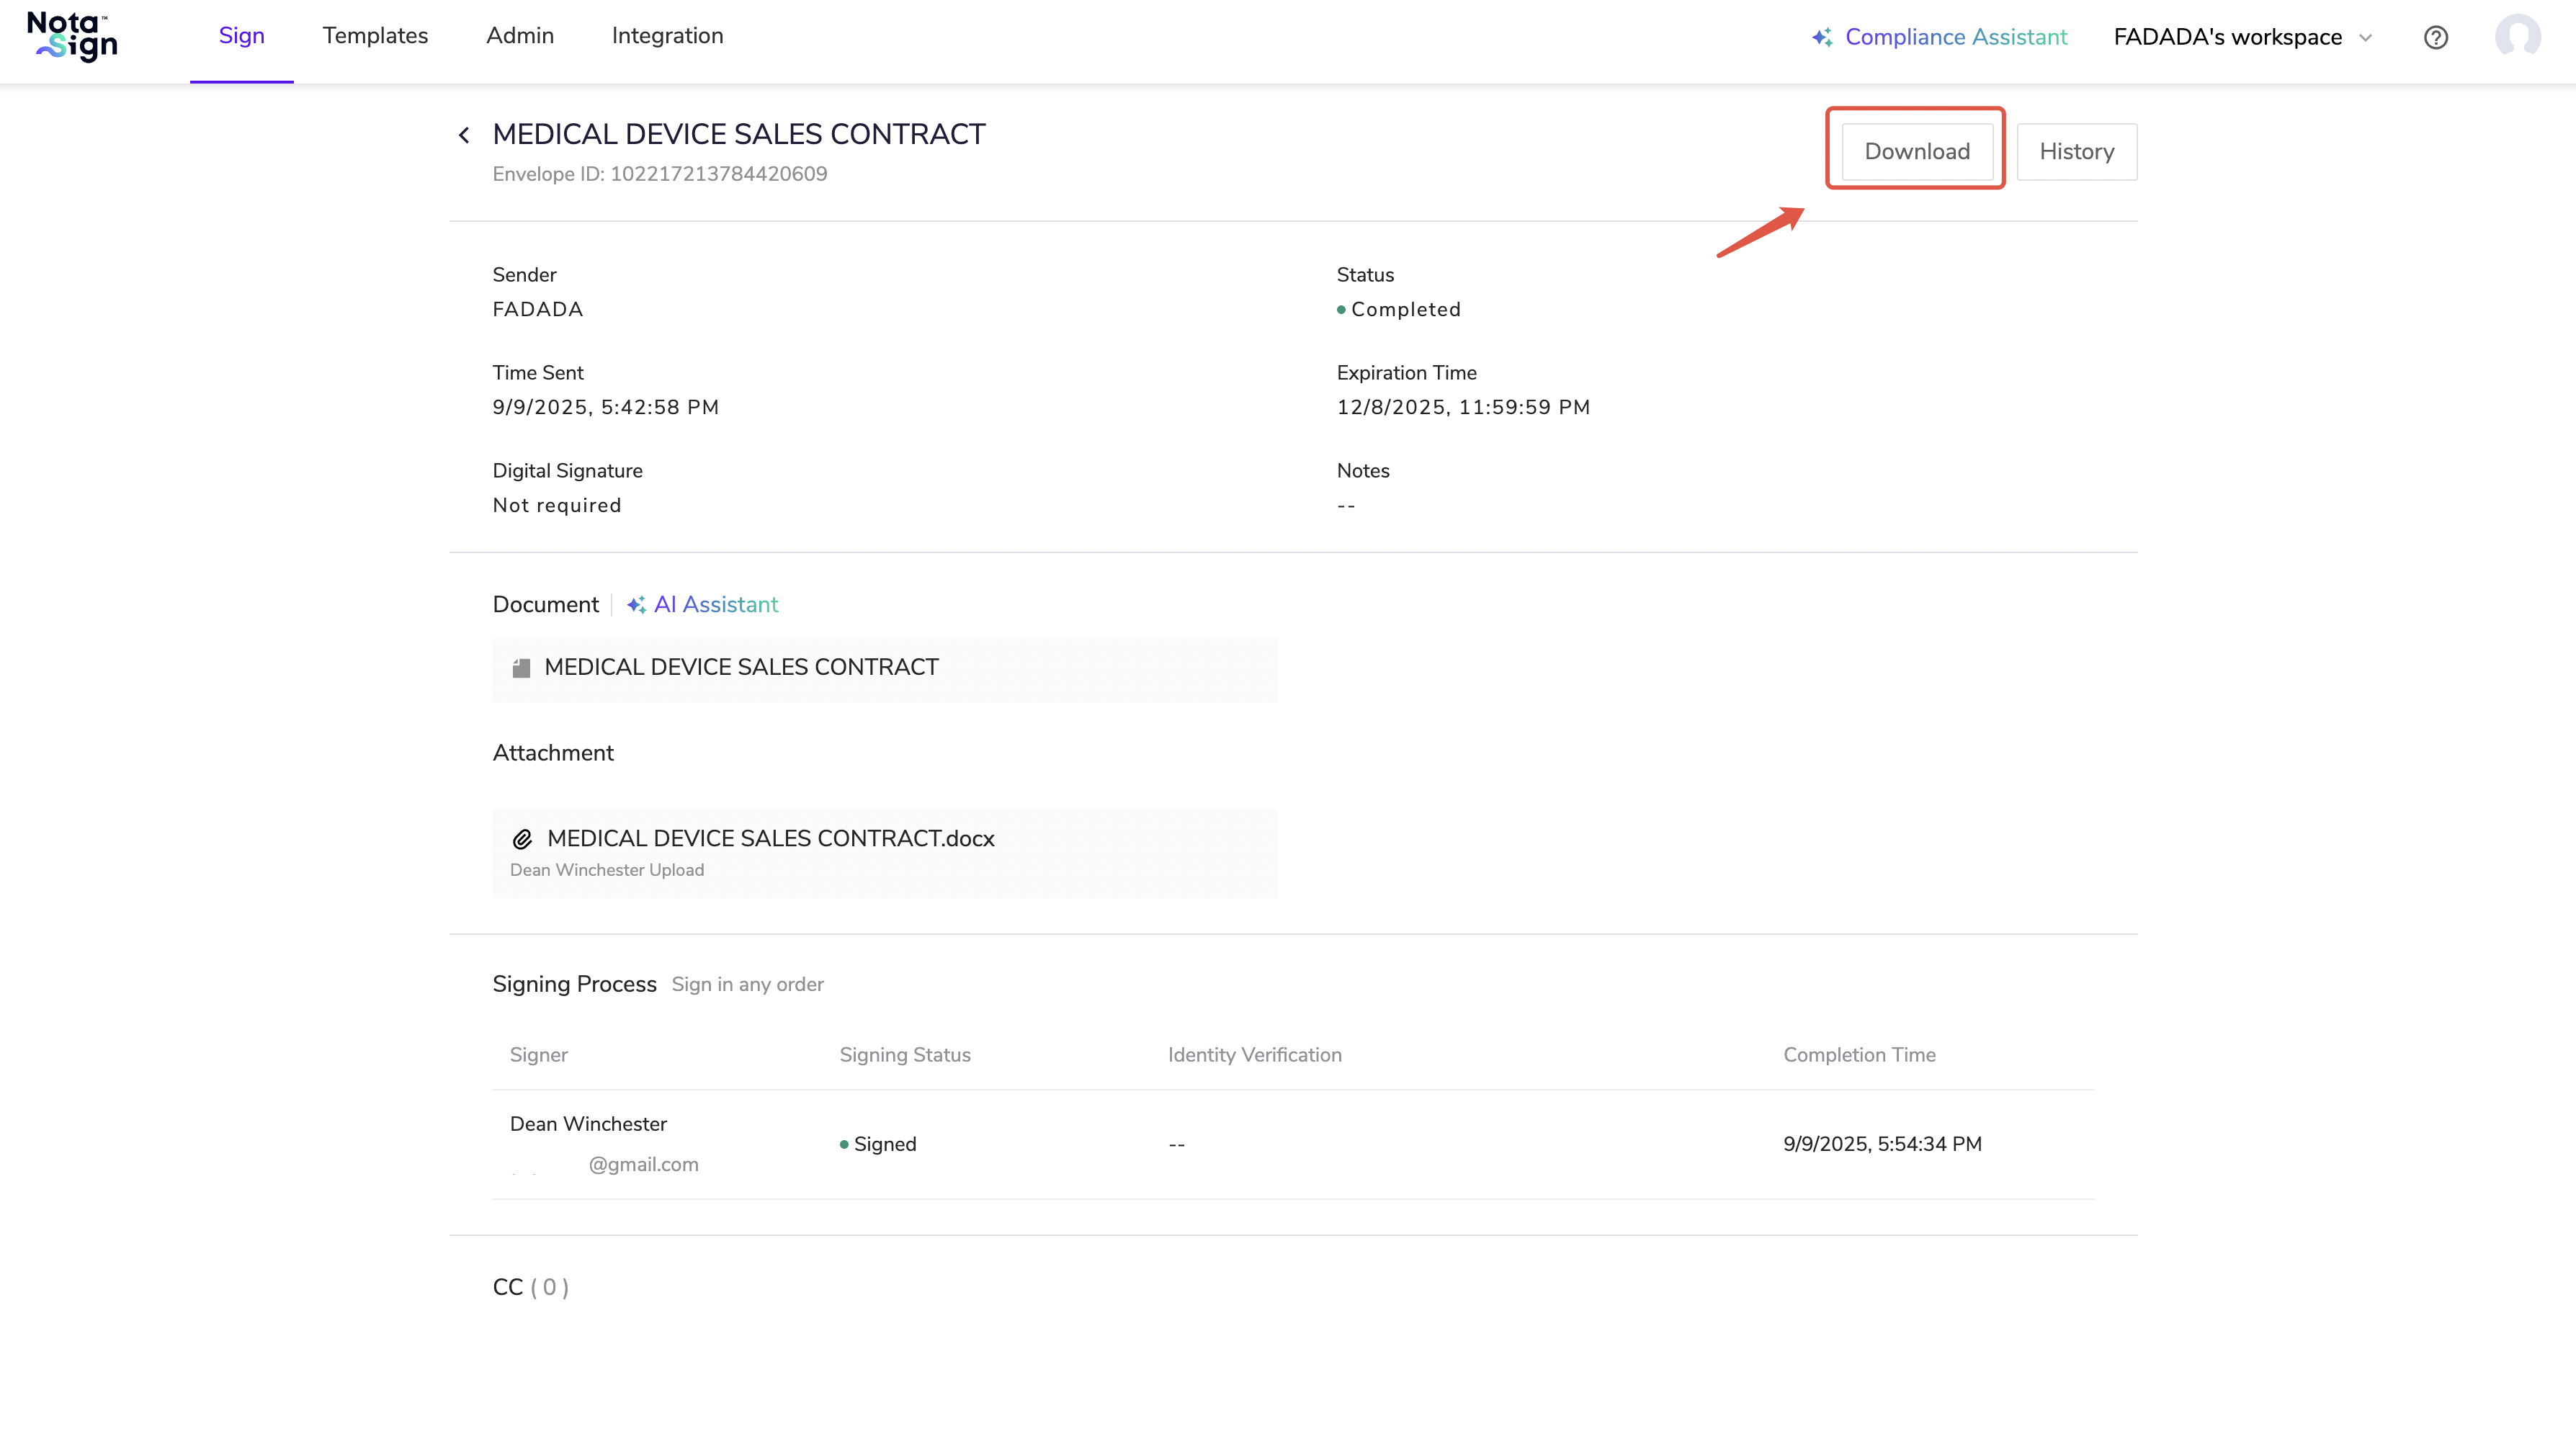
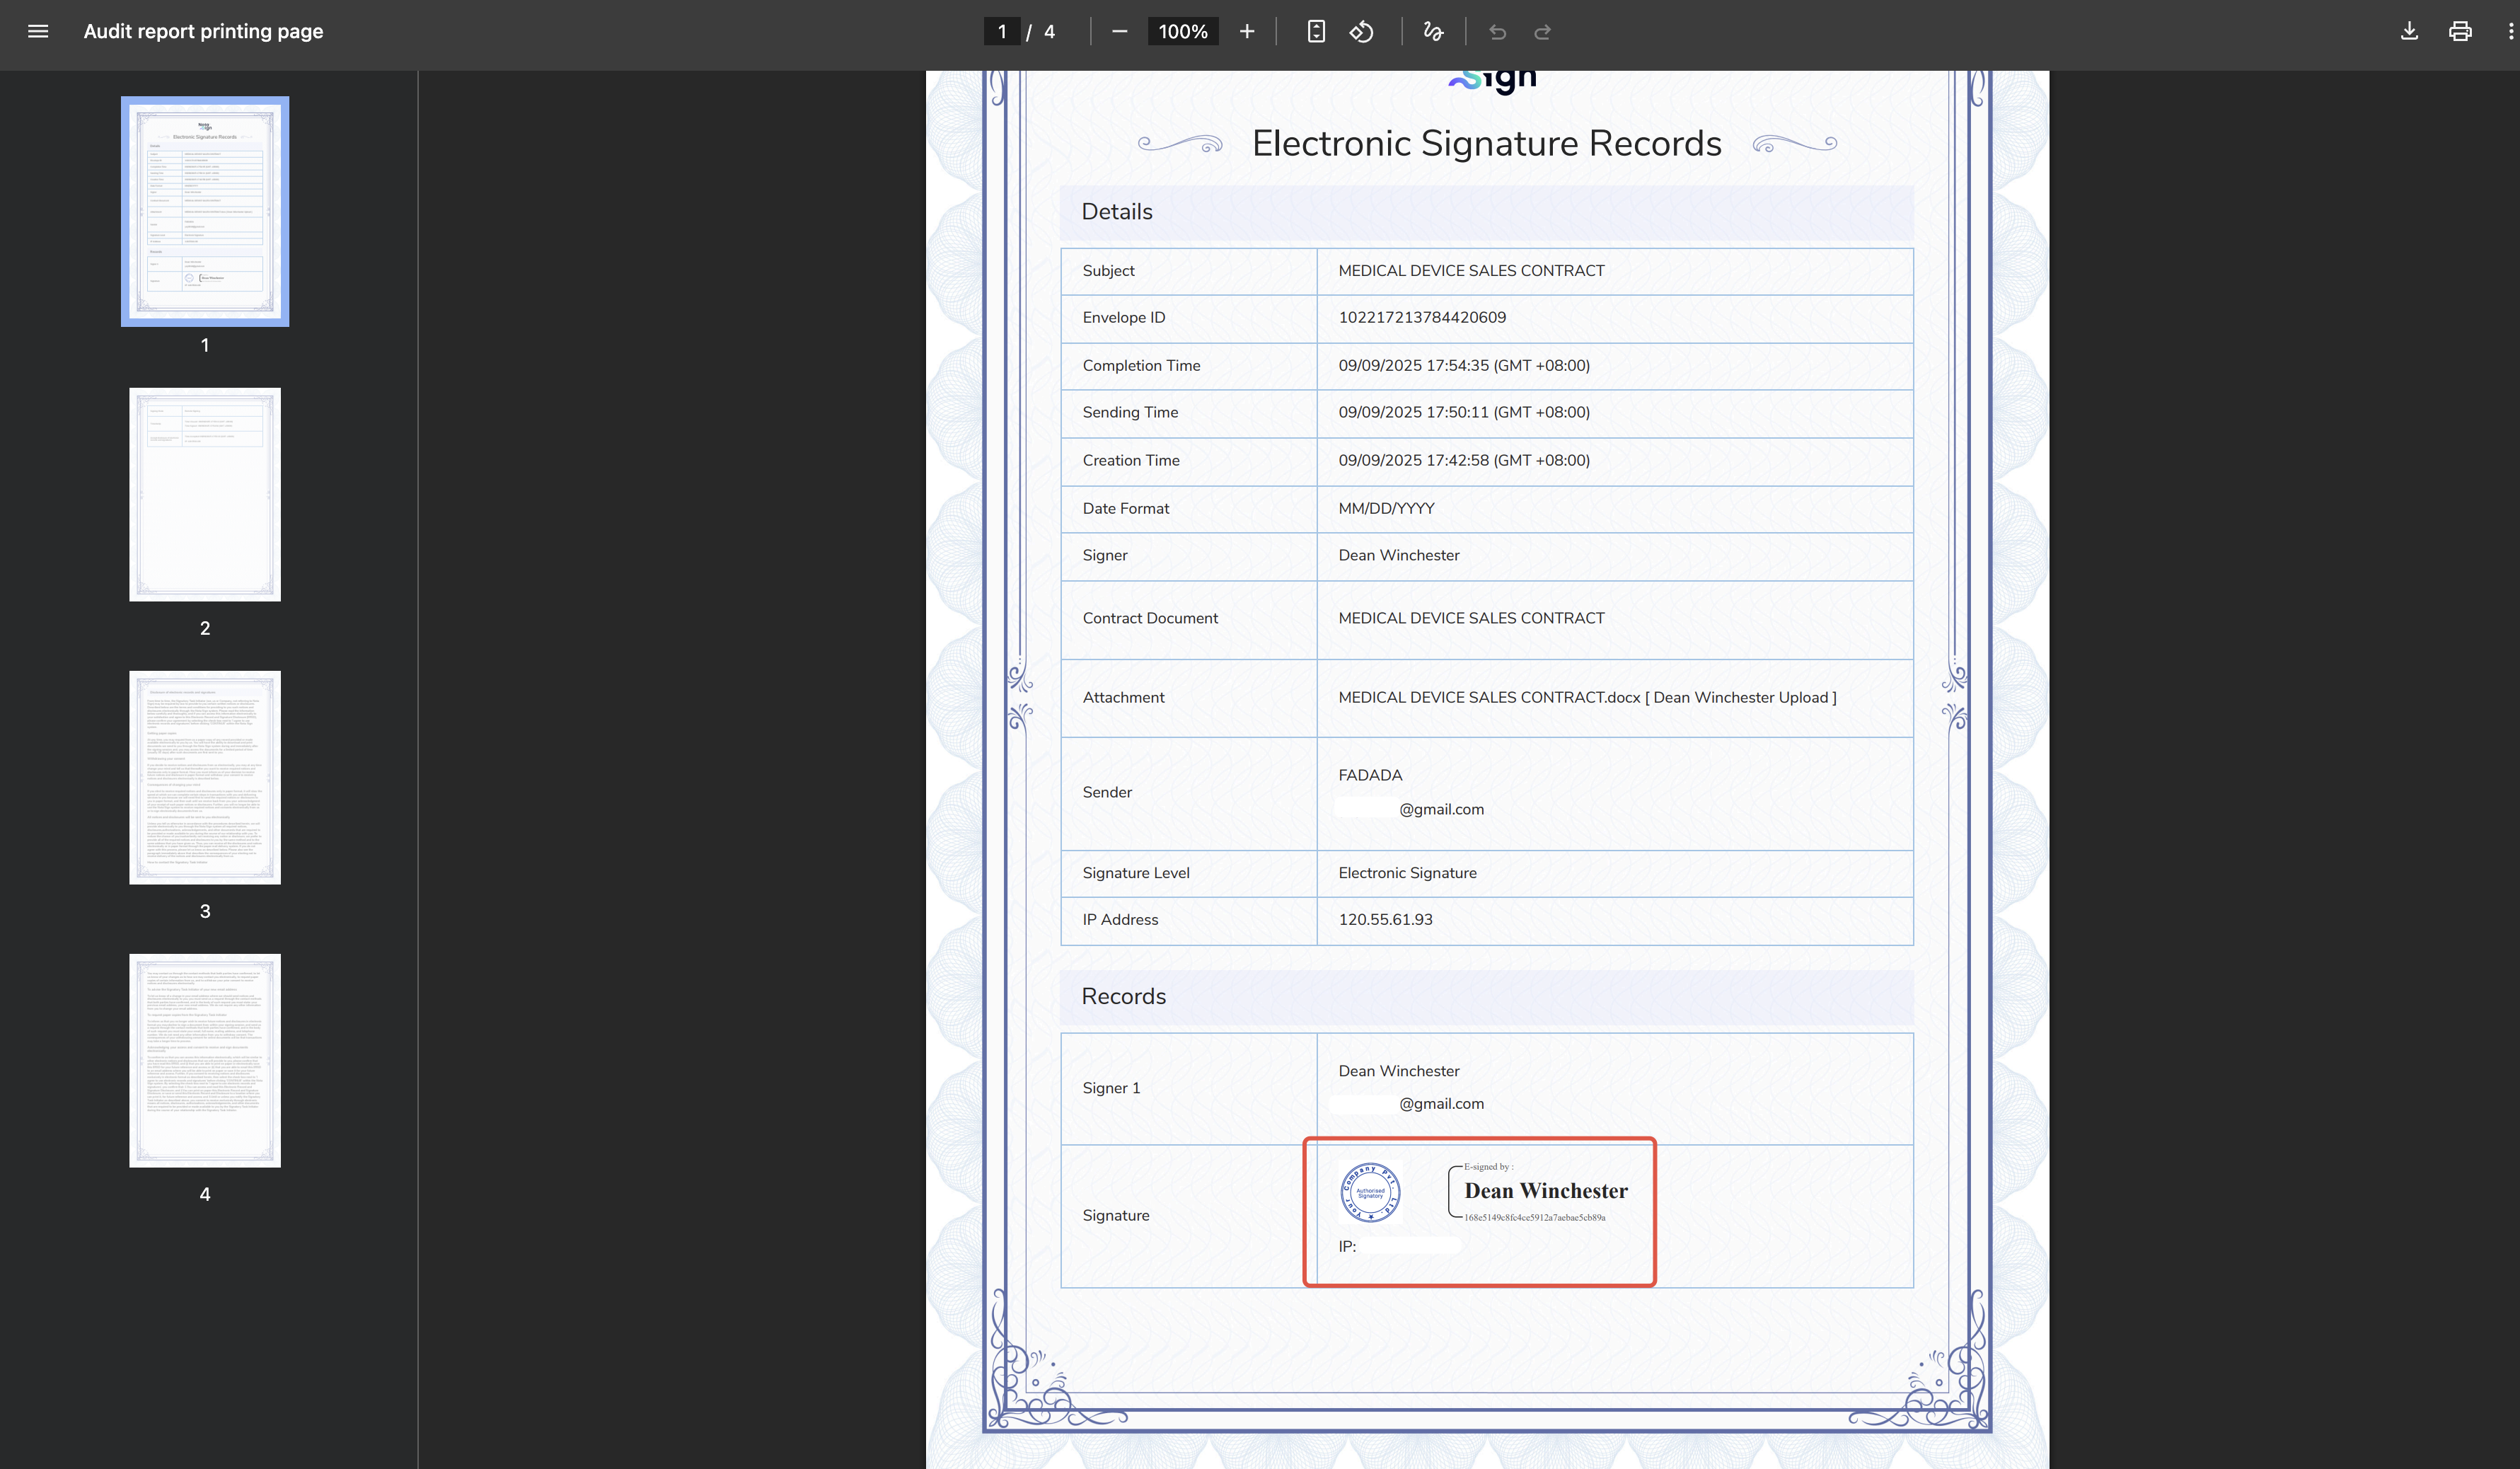
This document covers the management of stamps, including stamp user configuration and stamp usage record inquiry.
1. Add a Stamp
You can authorize a corporate stamp to multiple workspace members through stamp management. See the detailed instructions below.
Video Tutorial:
1.1. Access the Stamp Page
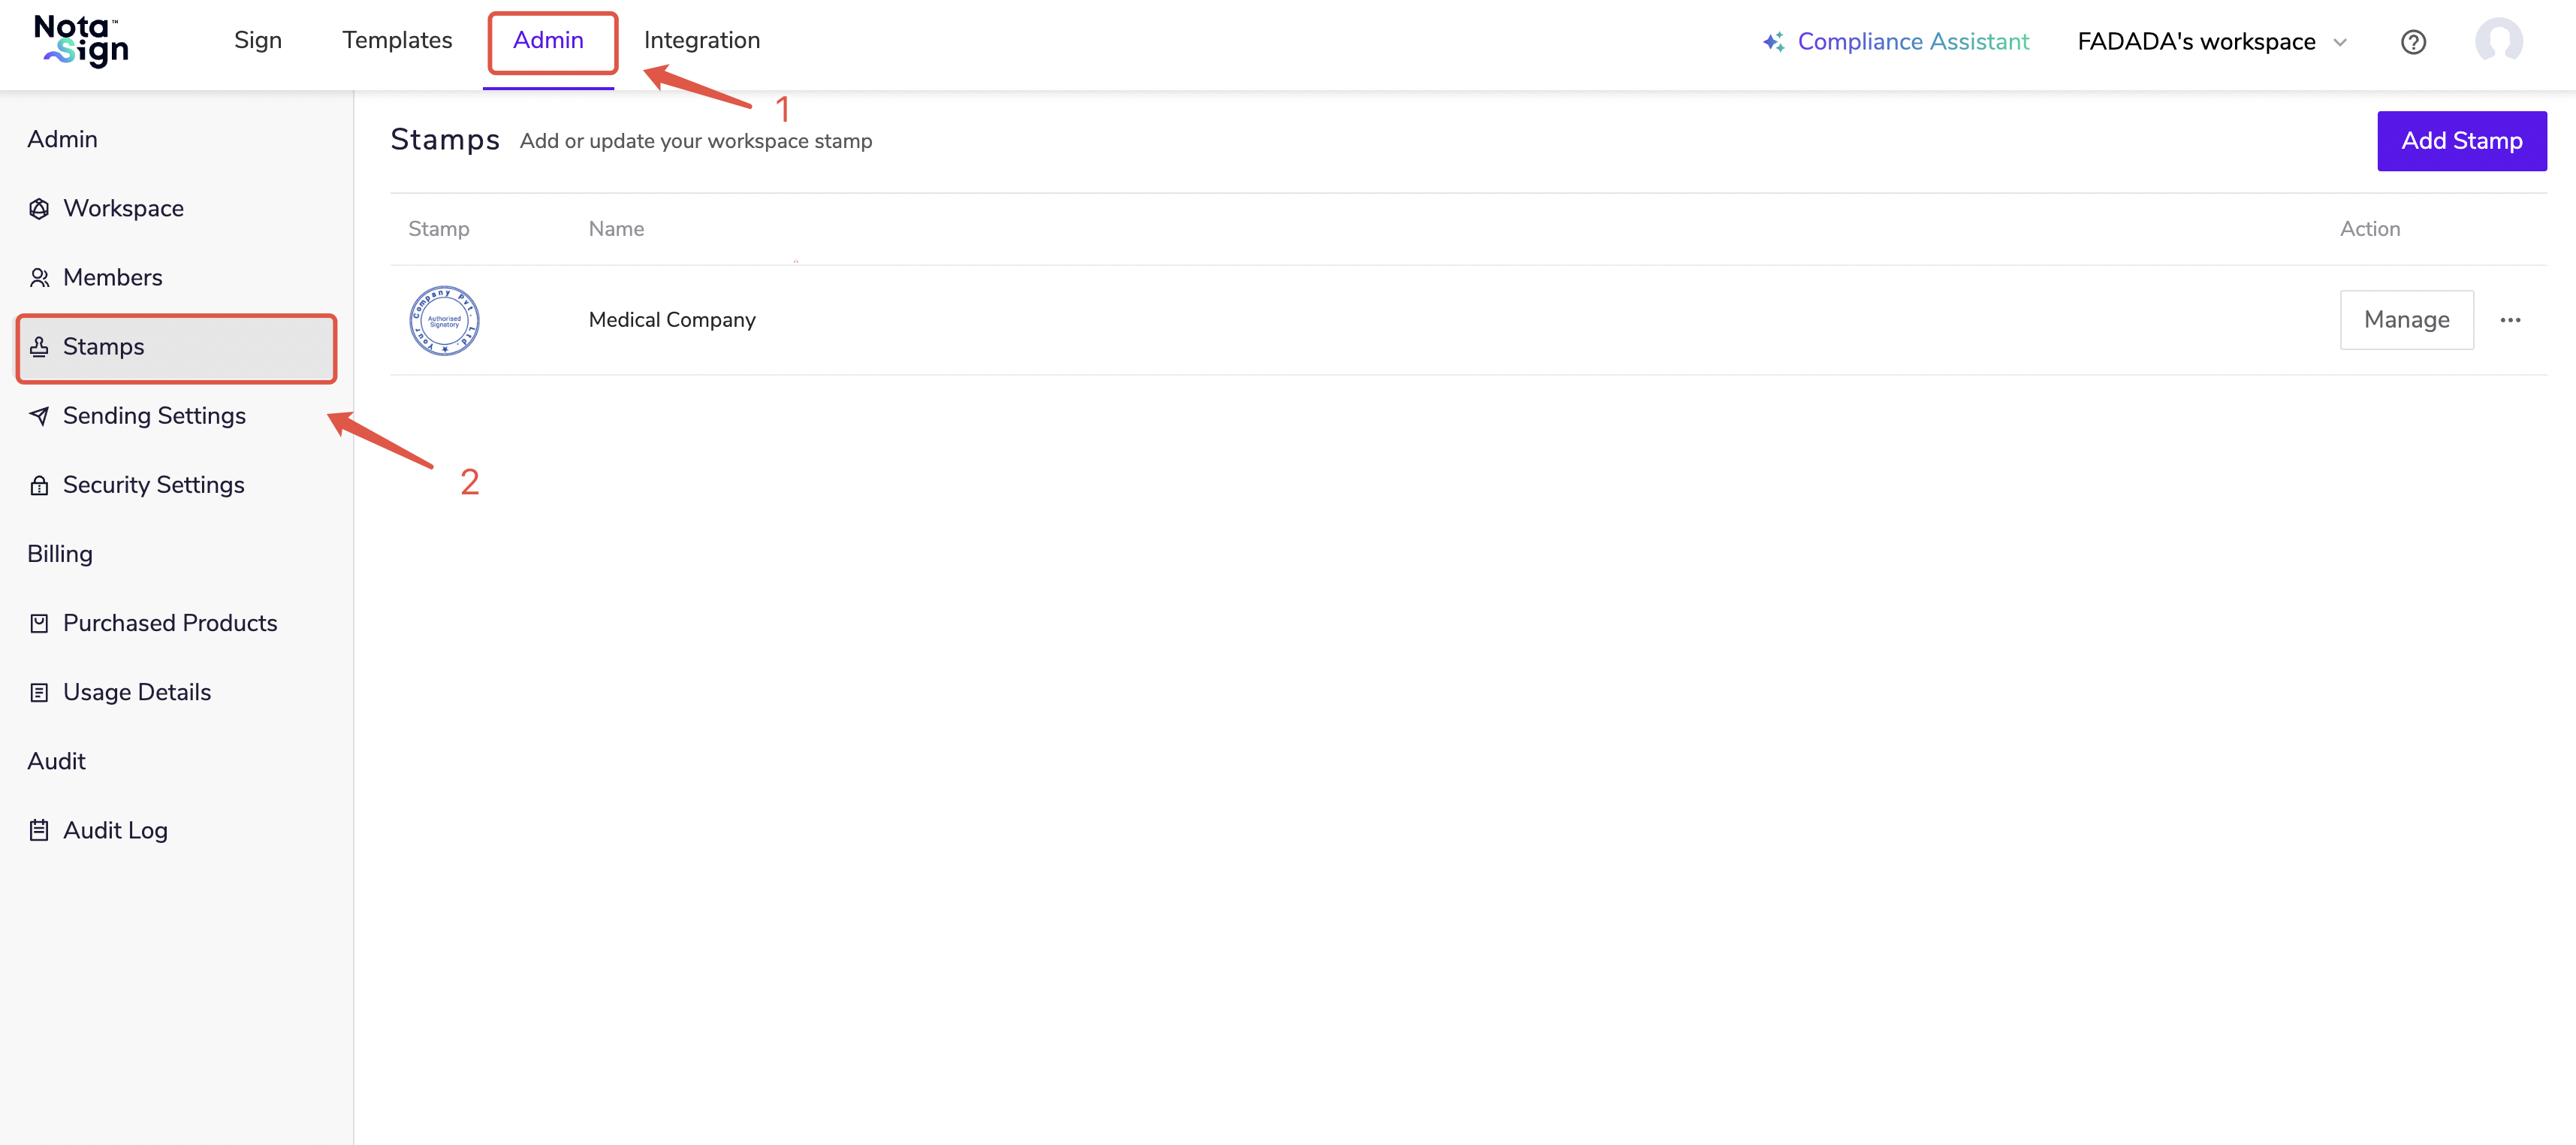
- Log in to your Nota Sign workspace.
- Click Admin in the top navigation bar to enter the Admin Console.
- Click Stamps in the left menu to open the Stamp Management page.
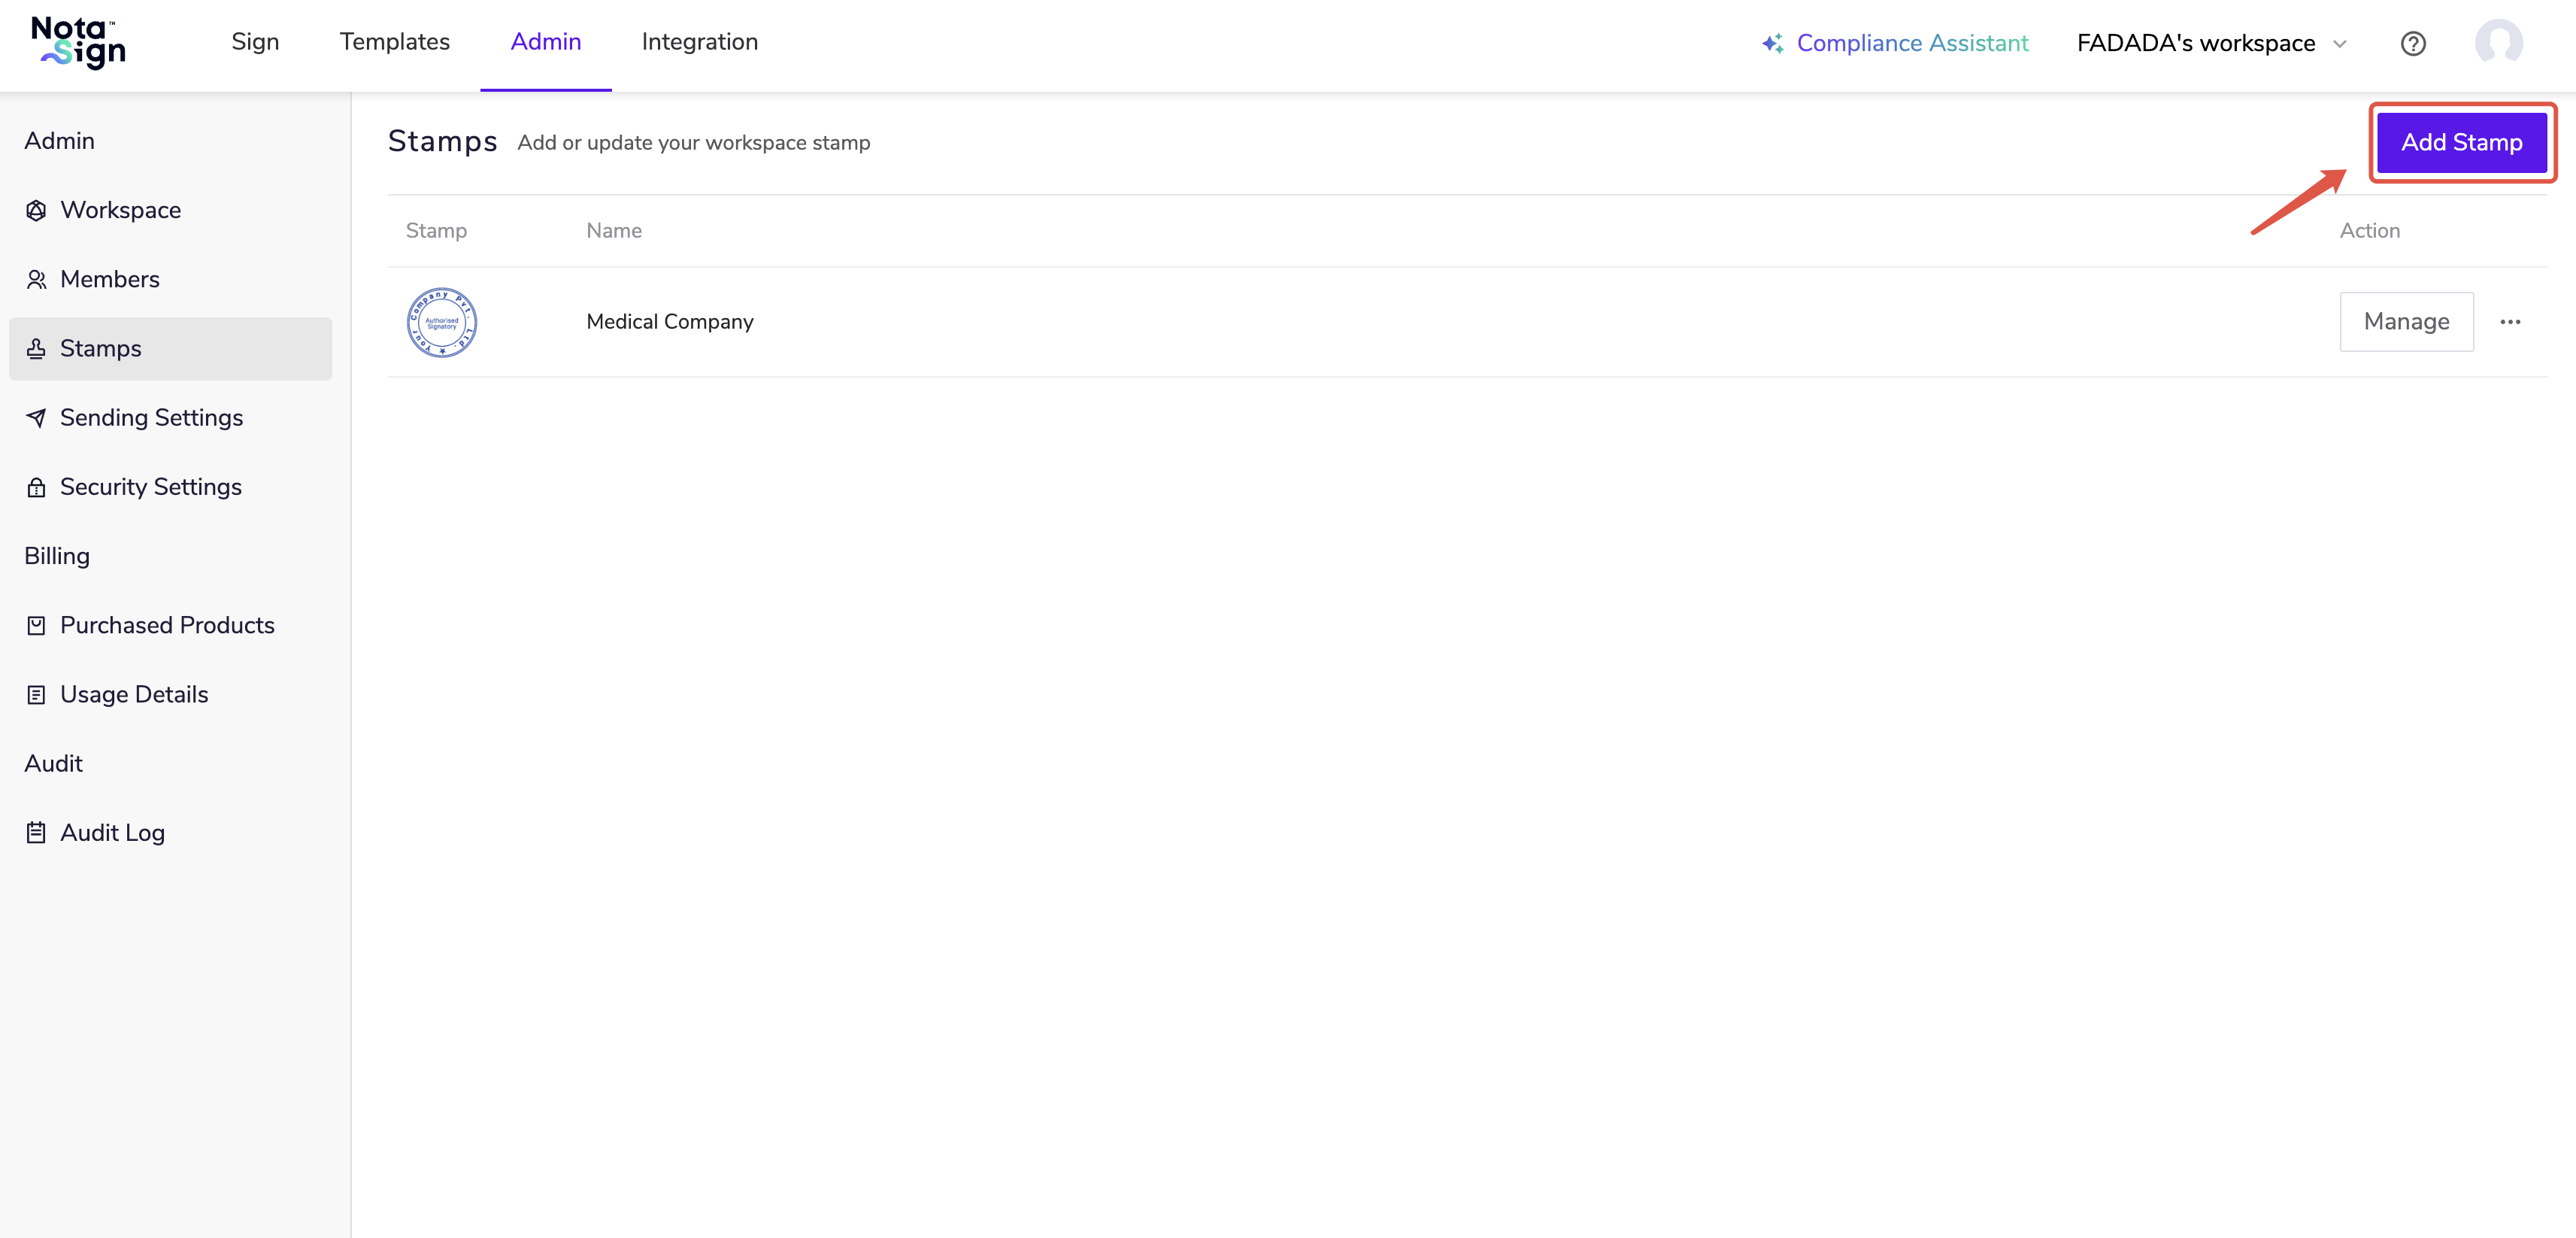
1.2. Add a New Stamp
- Click Add Stamp on the right side of the page to upload a stamp.
- The system supports common image formats (e.g., jpg, jpeg, gif, png, bmp), with a maximum file size of 500 KB.
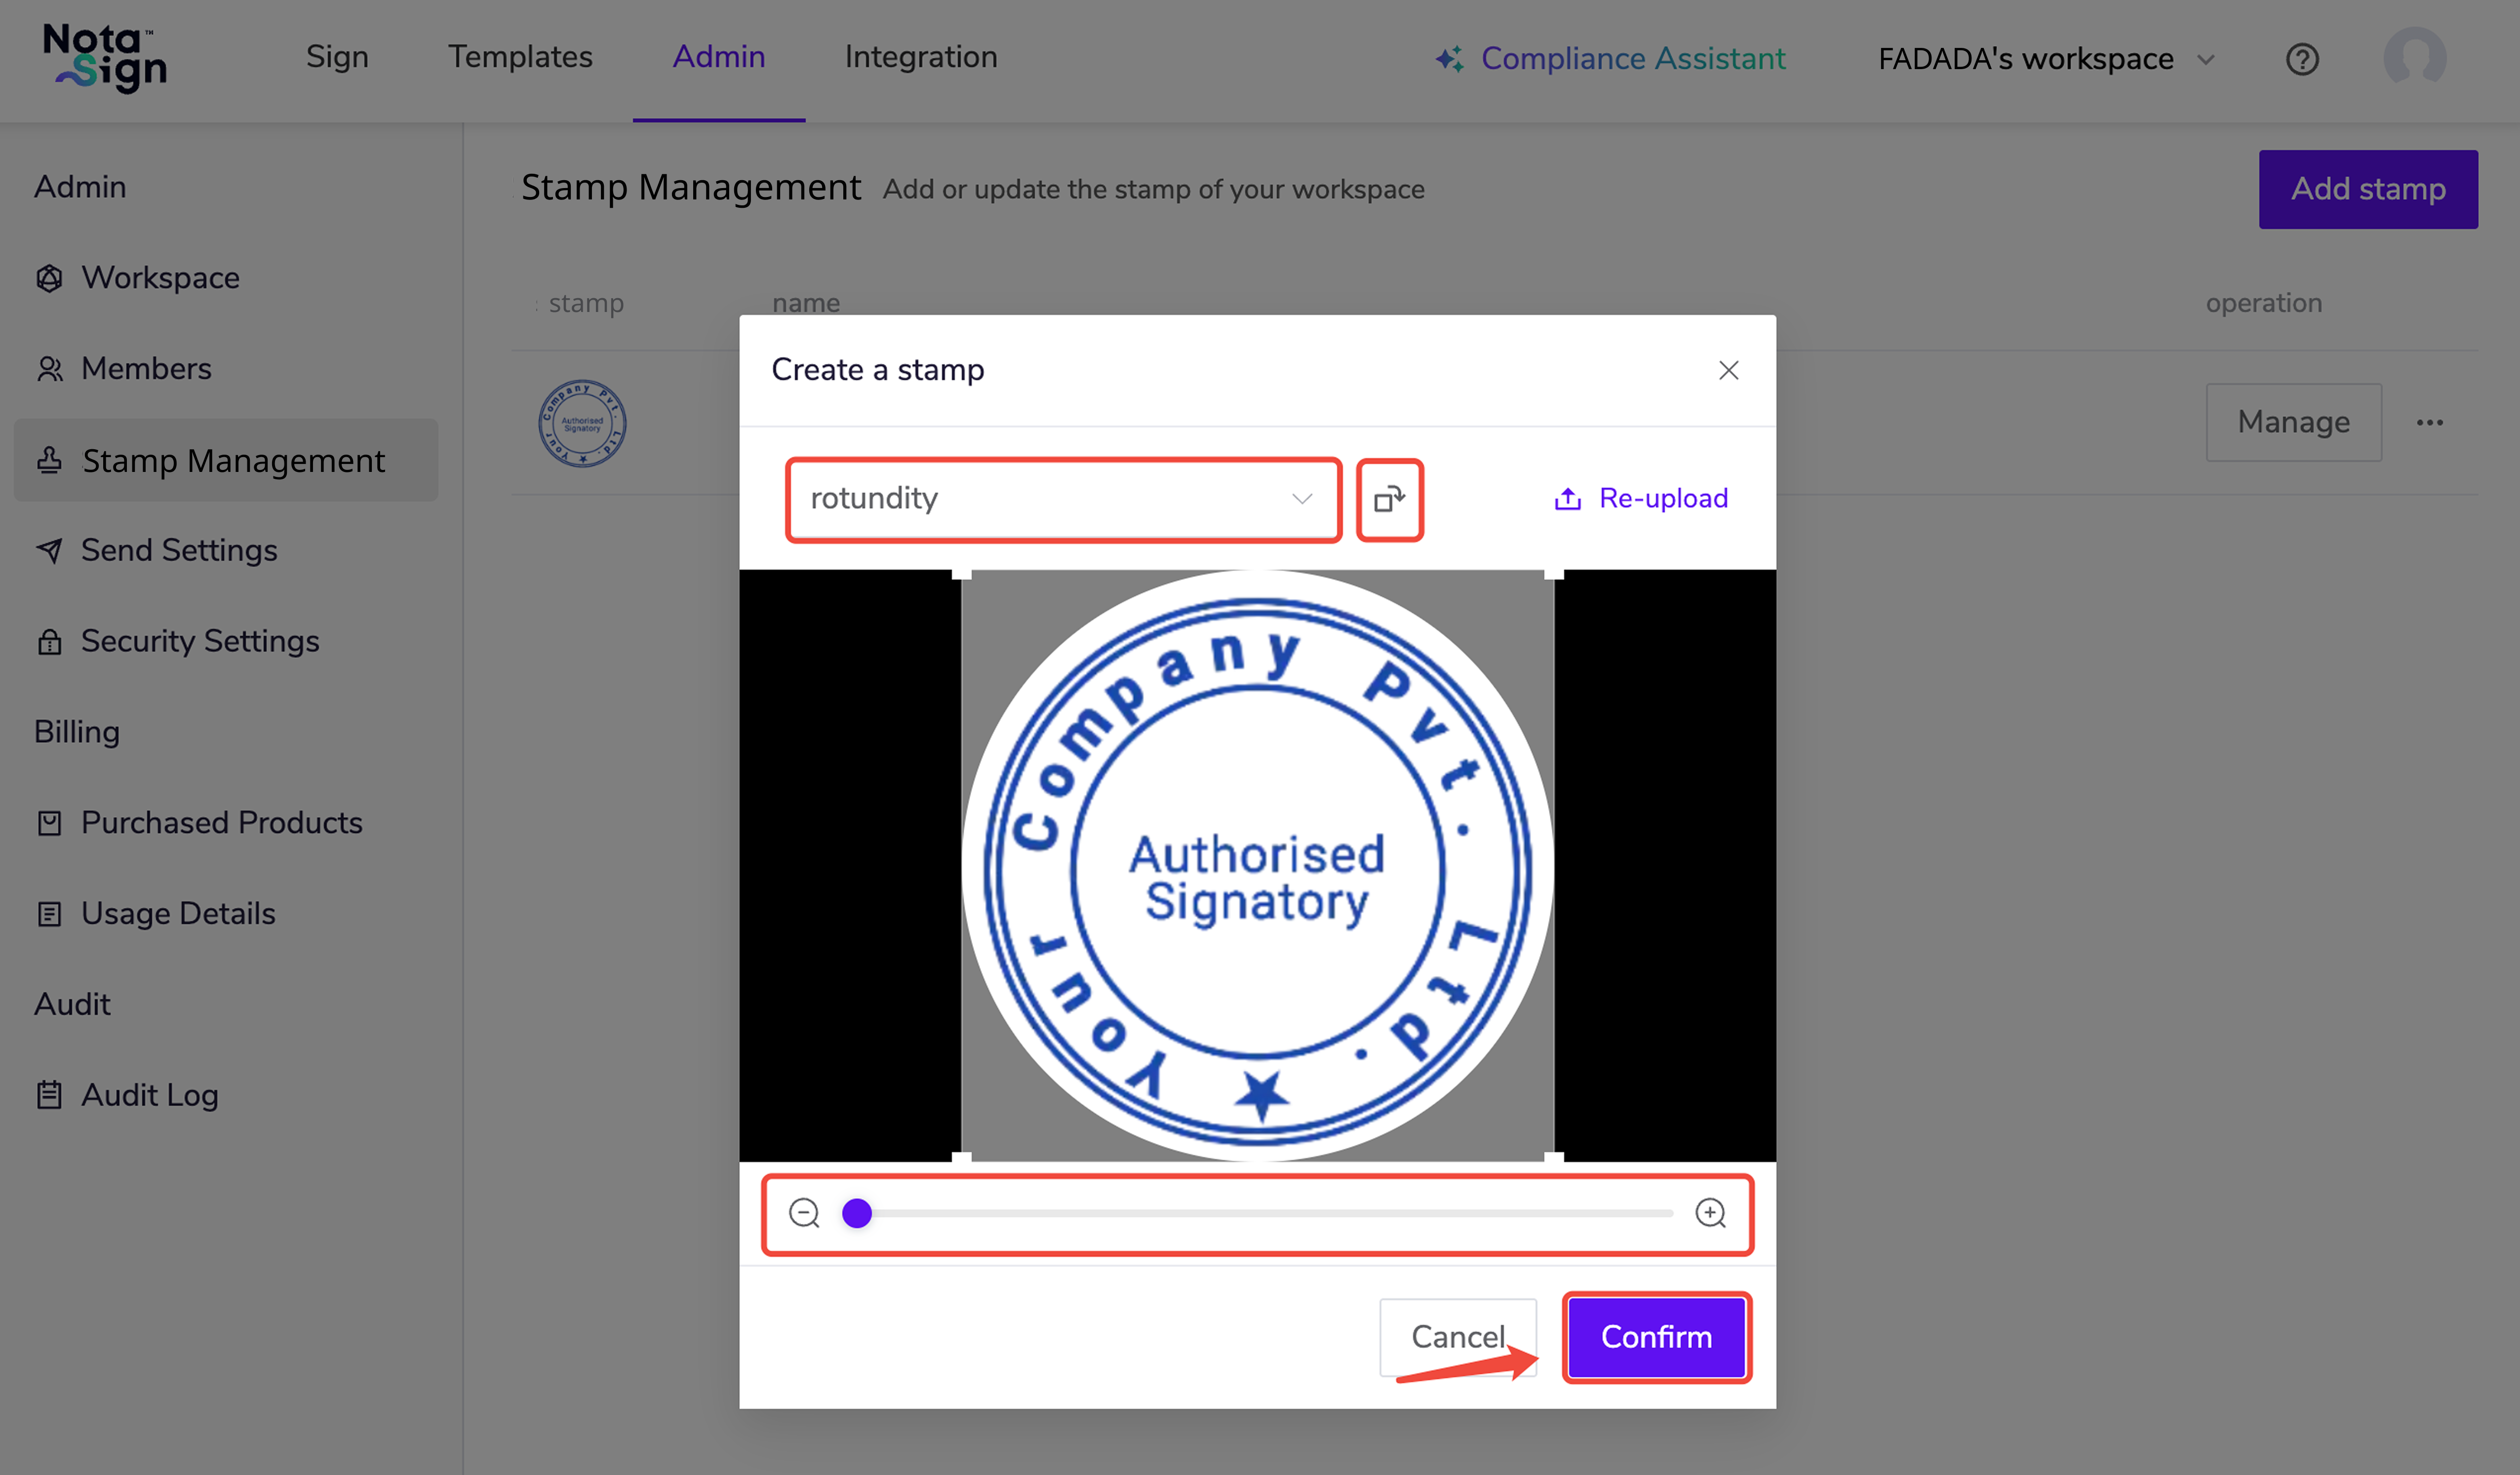
- Adjust the stamp to fit the reference frame by selecting the stamp shape, sliding the size adjustment bar, or moving the stamp, then click Confirm.
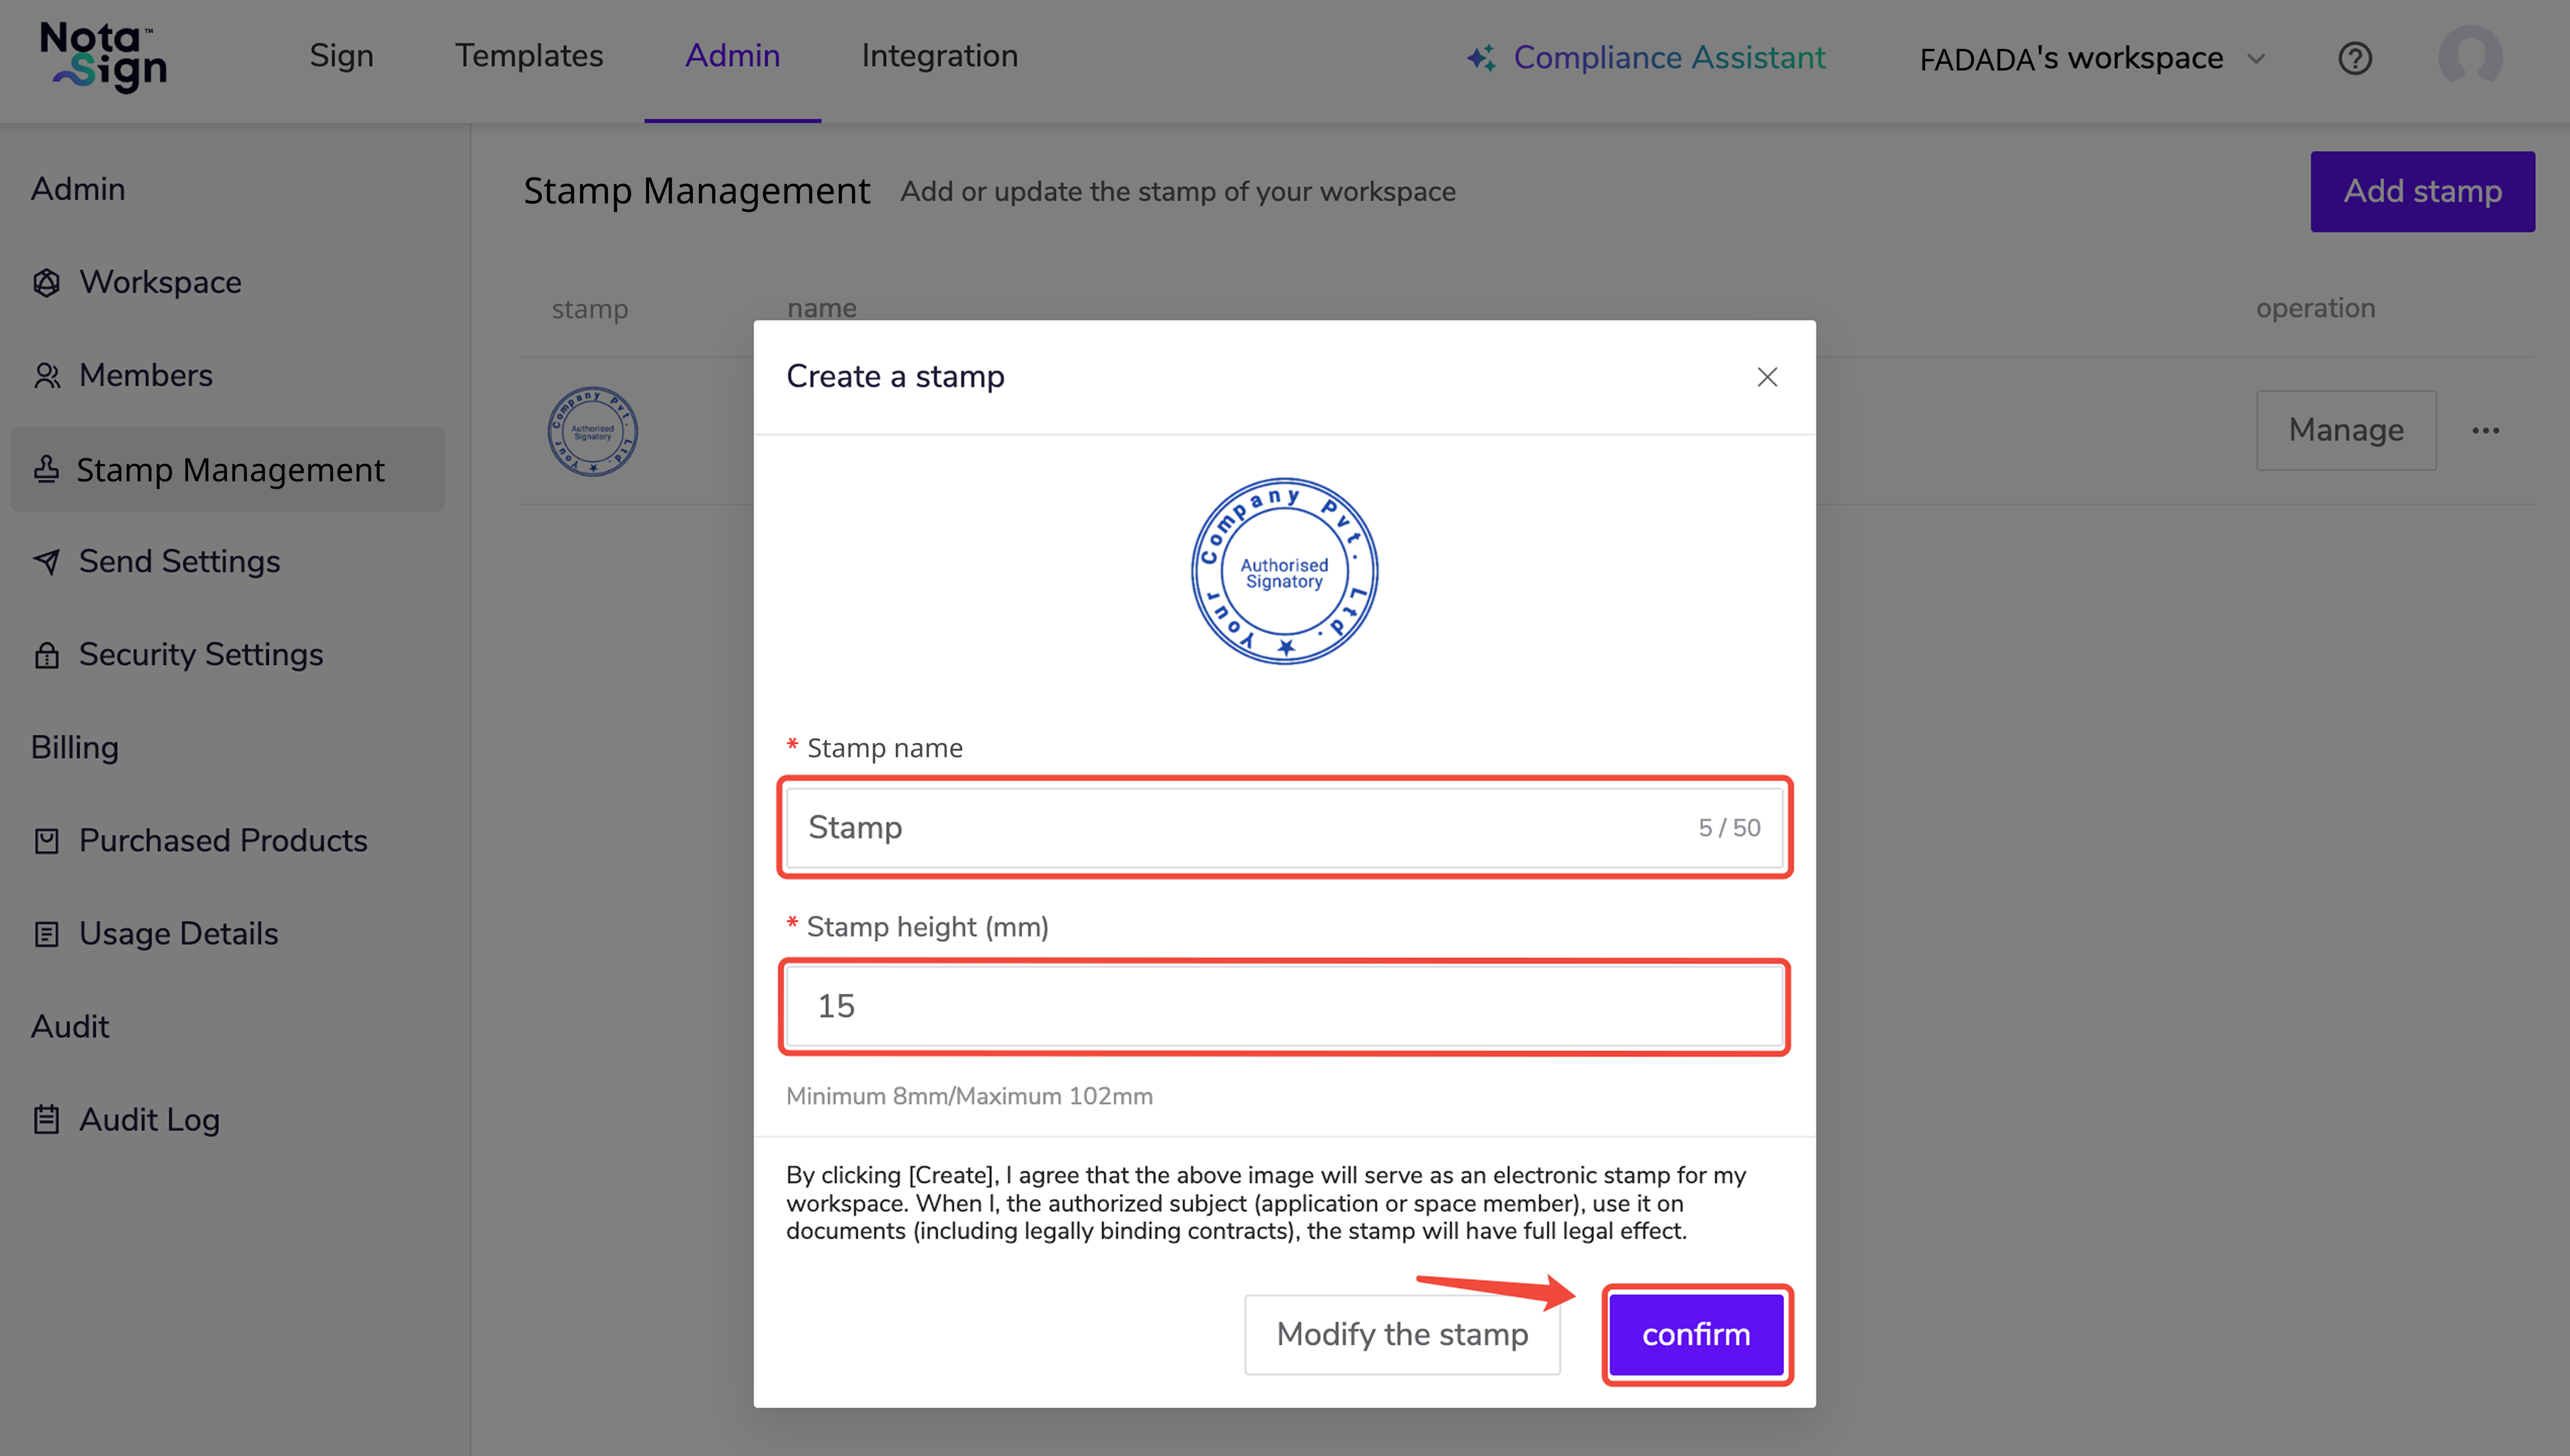
- Define the stamp name and stamp height, then click Confirm.
1.3. Edit or Delete a Stamp
On the Stamp page, click More on the right side of an existing stamp to edit or delete it.
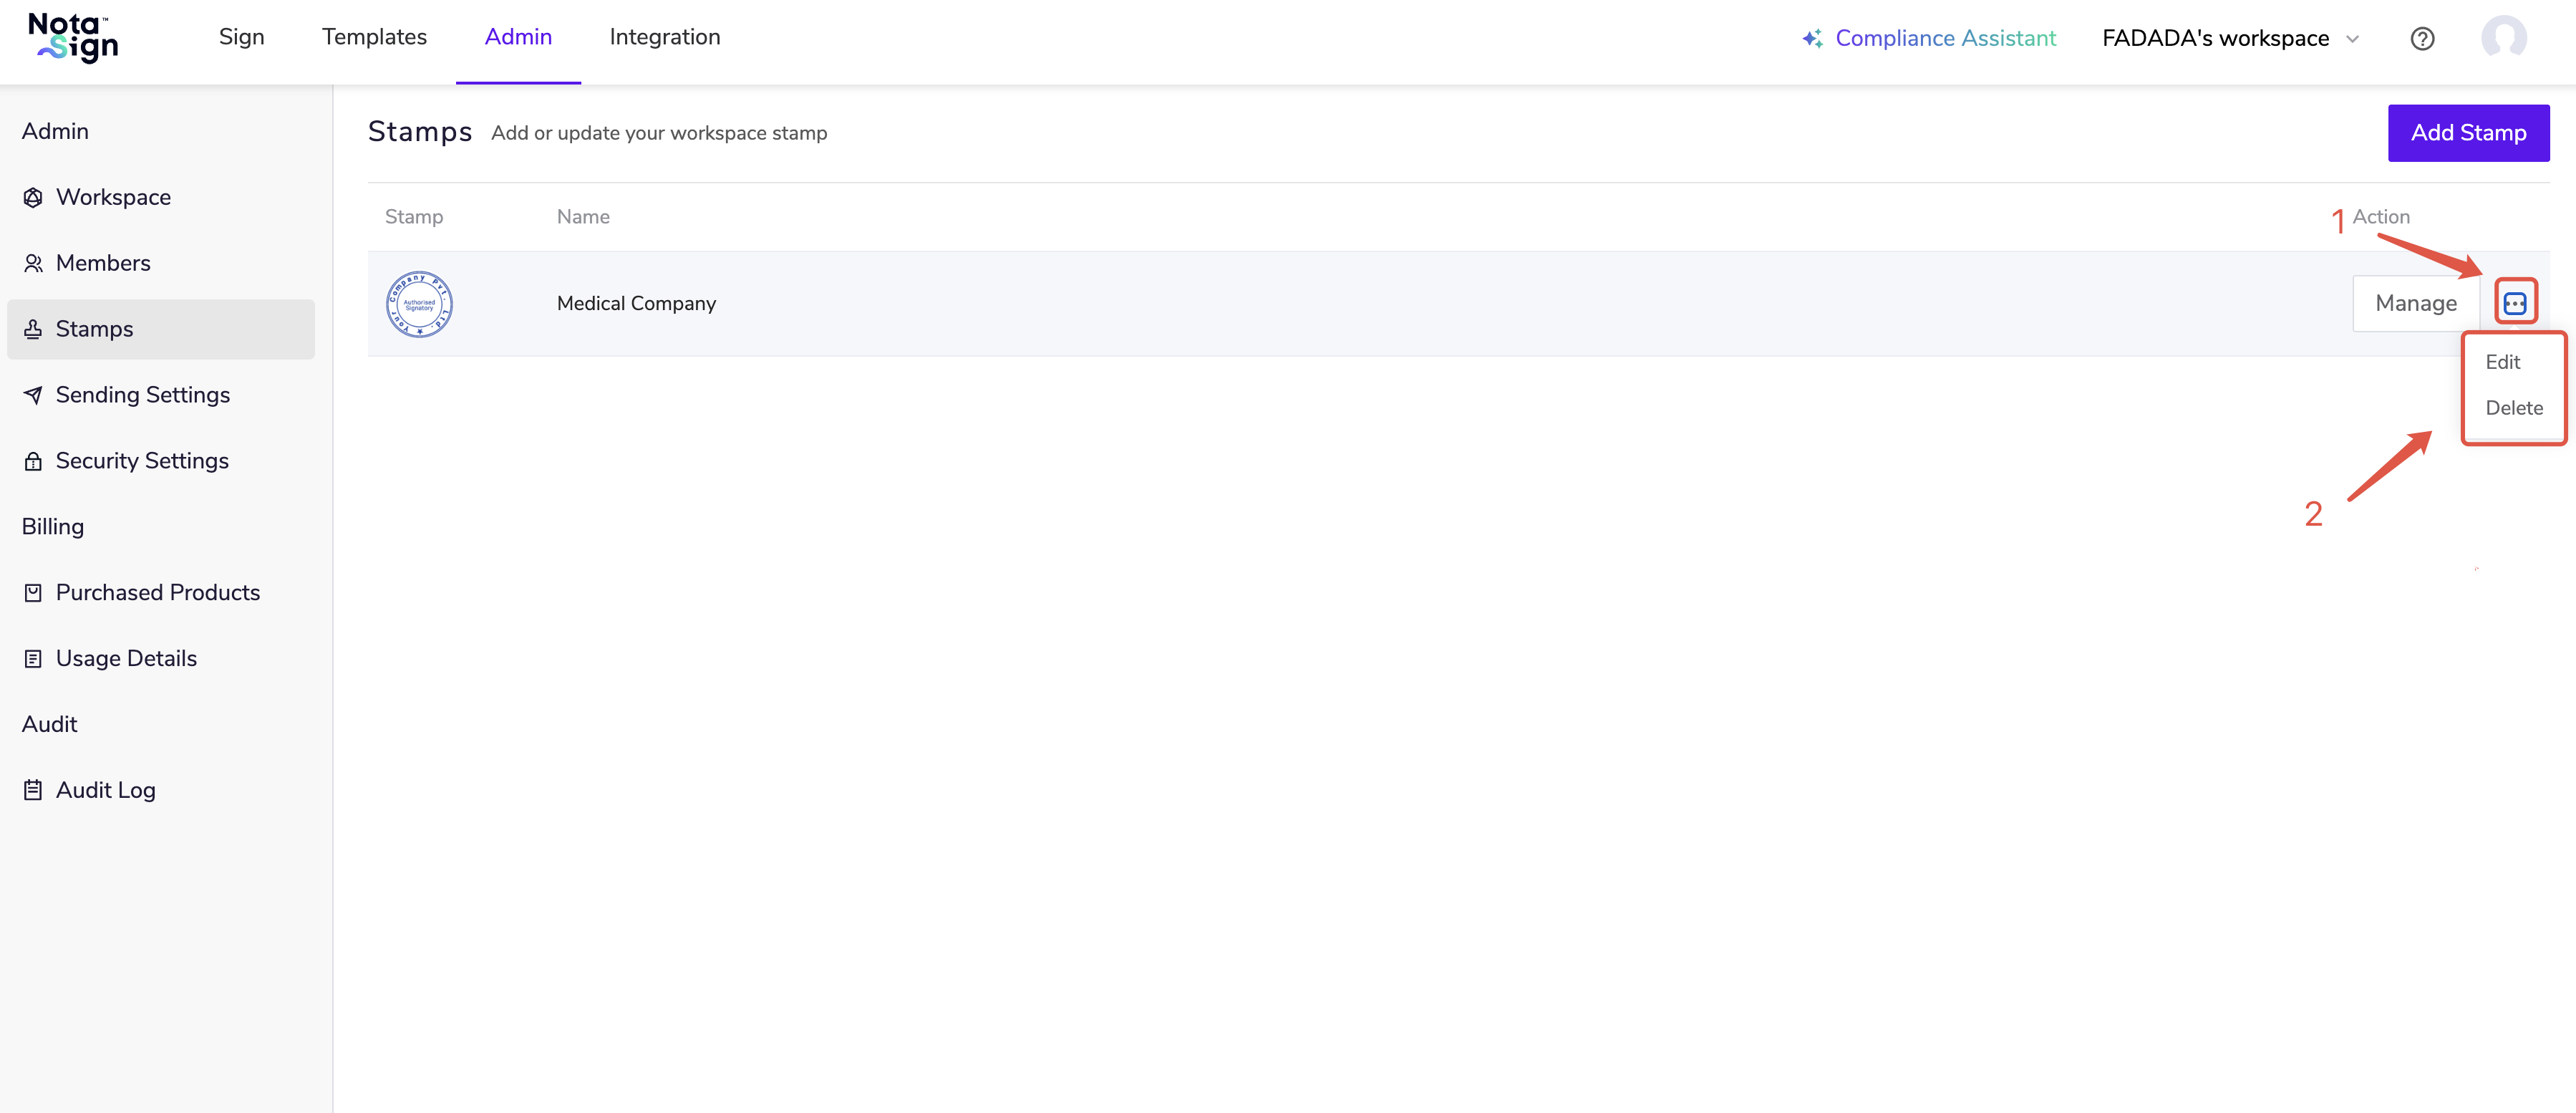
⚠️ Note: Only the stamp name and height can be edited.
II. Setting Up Seal Users
Video Tutorial:
1. Accessing the Seal User Management Page
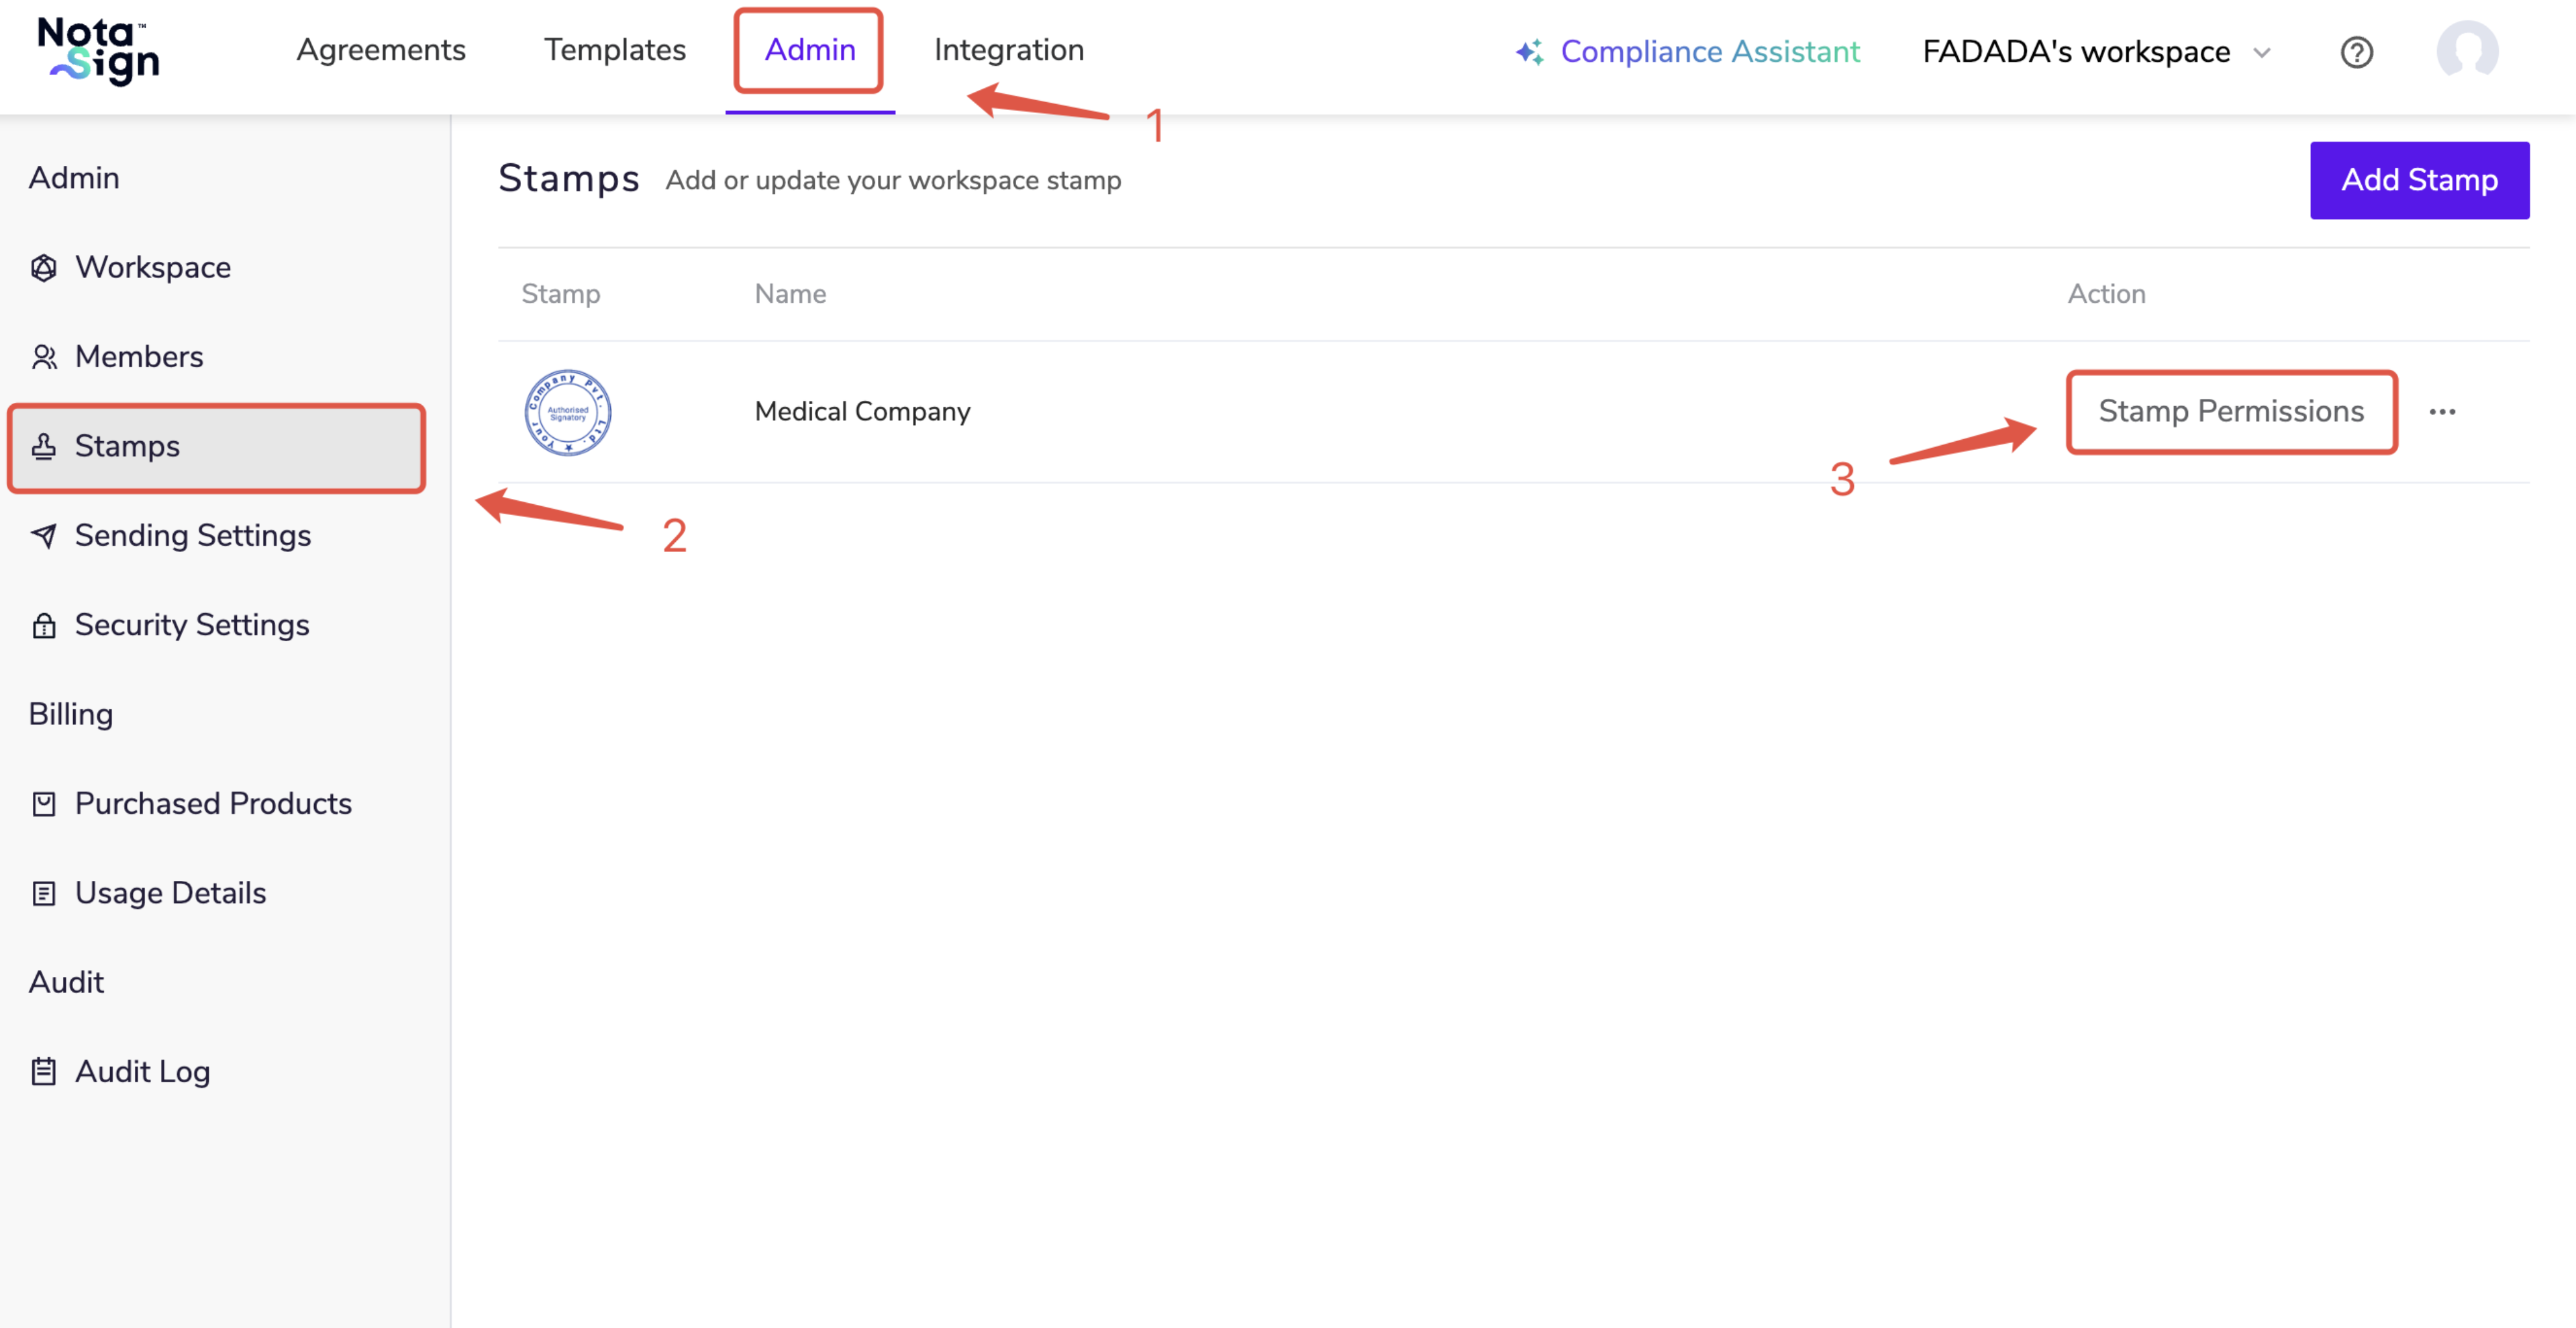
(1) Log in to the Nota Sign workspace; (2) Click [Manage] in the top navigation bar to enter the management console; (3) Click [Seal Management] in the left menu to enter the seal management page; (4) Click [Seal User Management] on the right side of the added seal to enter the seal user management page.
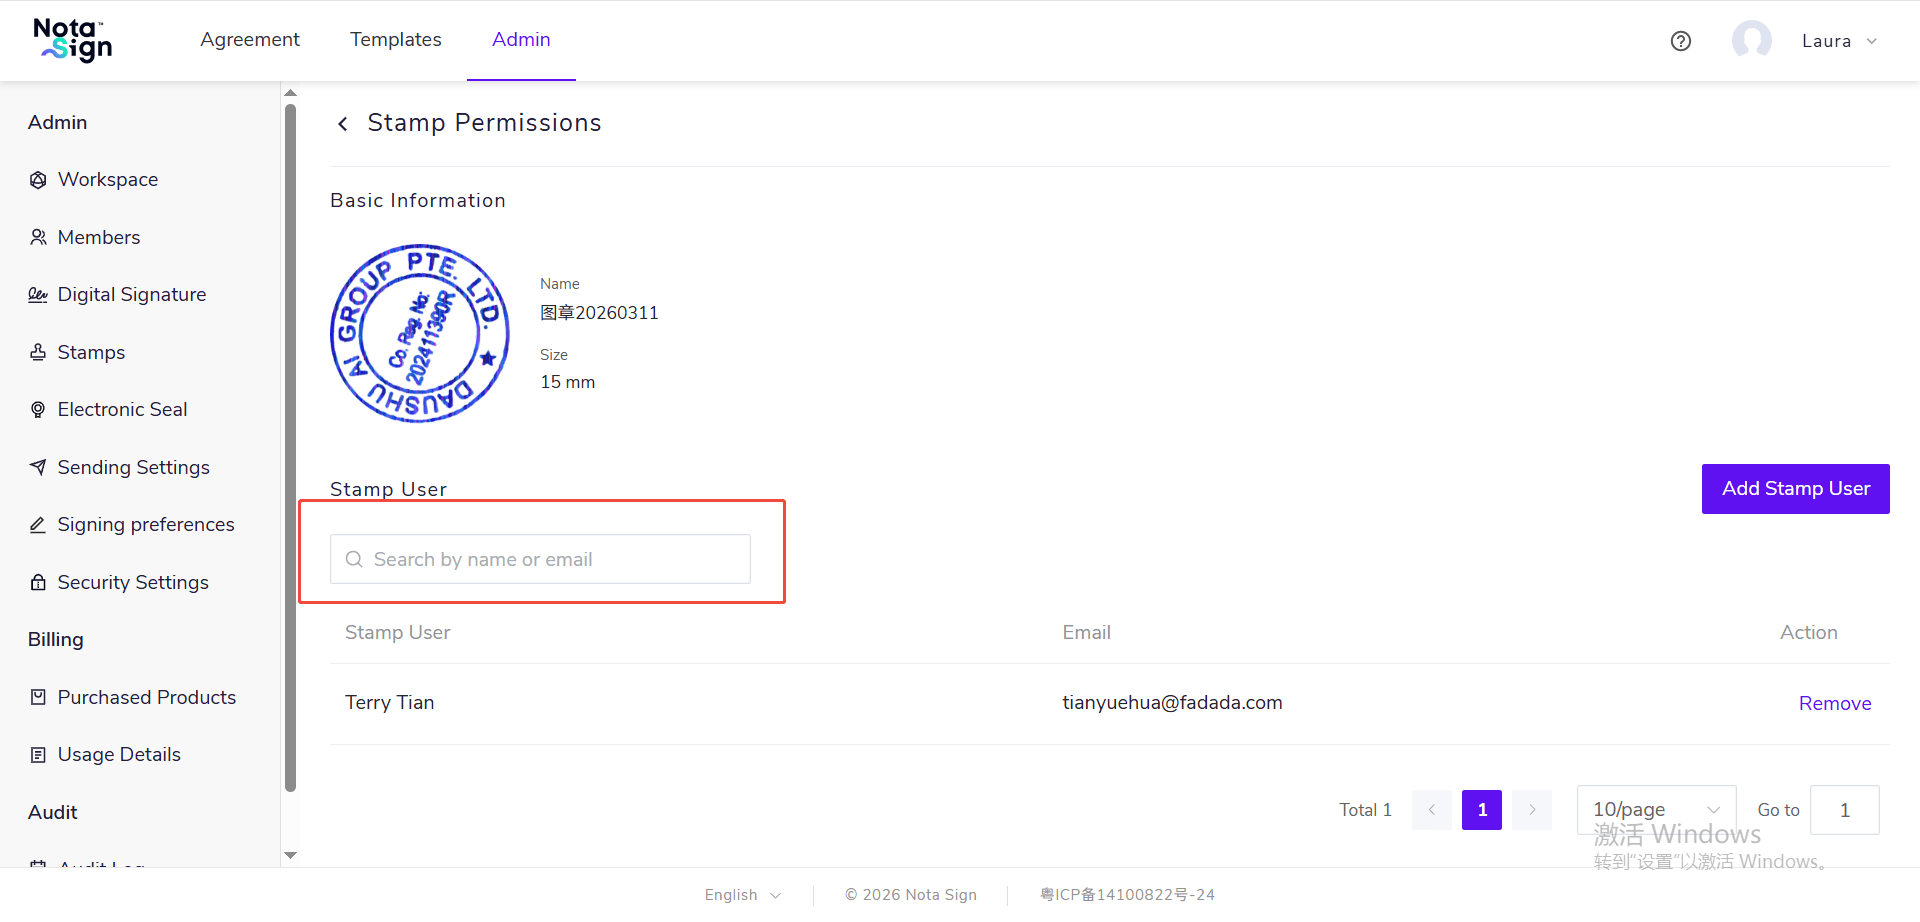
2. Searching for Seal Users
When there are many seal users, you can quickly find added seal users under the current seal by name or contact email.
(1) Enter the [Seal User Management] page for the corresponding seal; (2) In the search box above the seal user list, enter the seal user’s name or contact email; (3) The system will display seal users that match the entered content.
Supports fuzzy search by entering full or partial names or contact emails.
3. Adding Seal Users
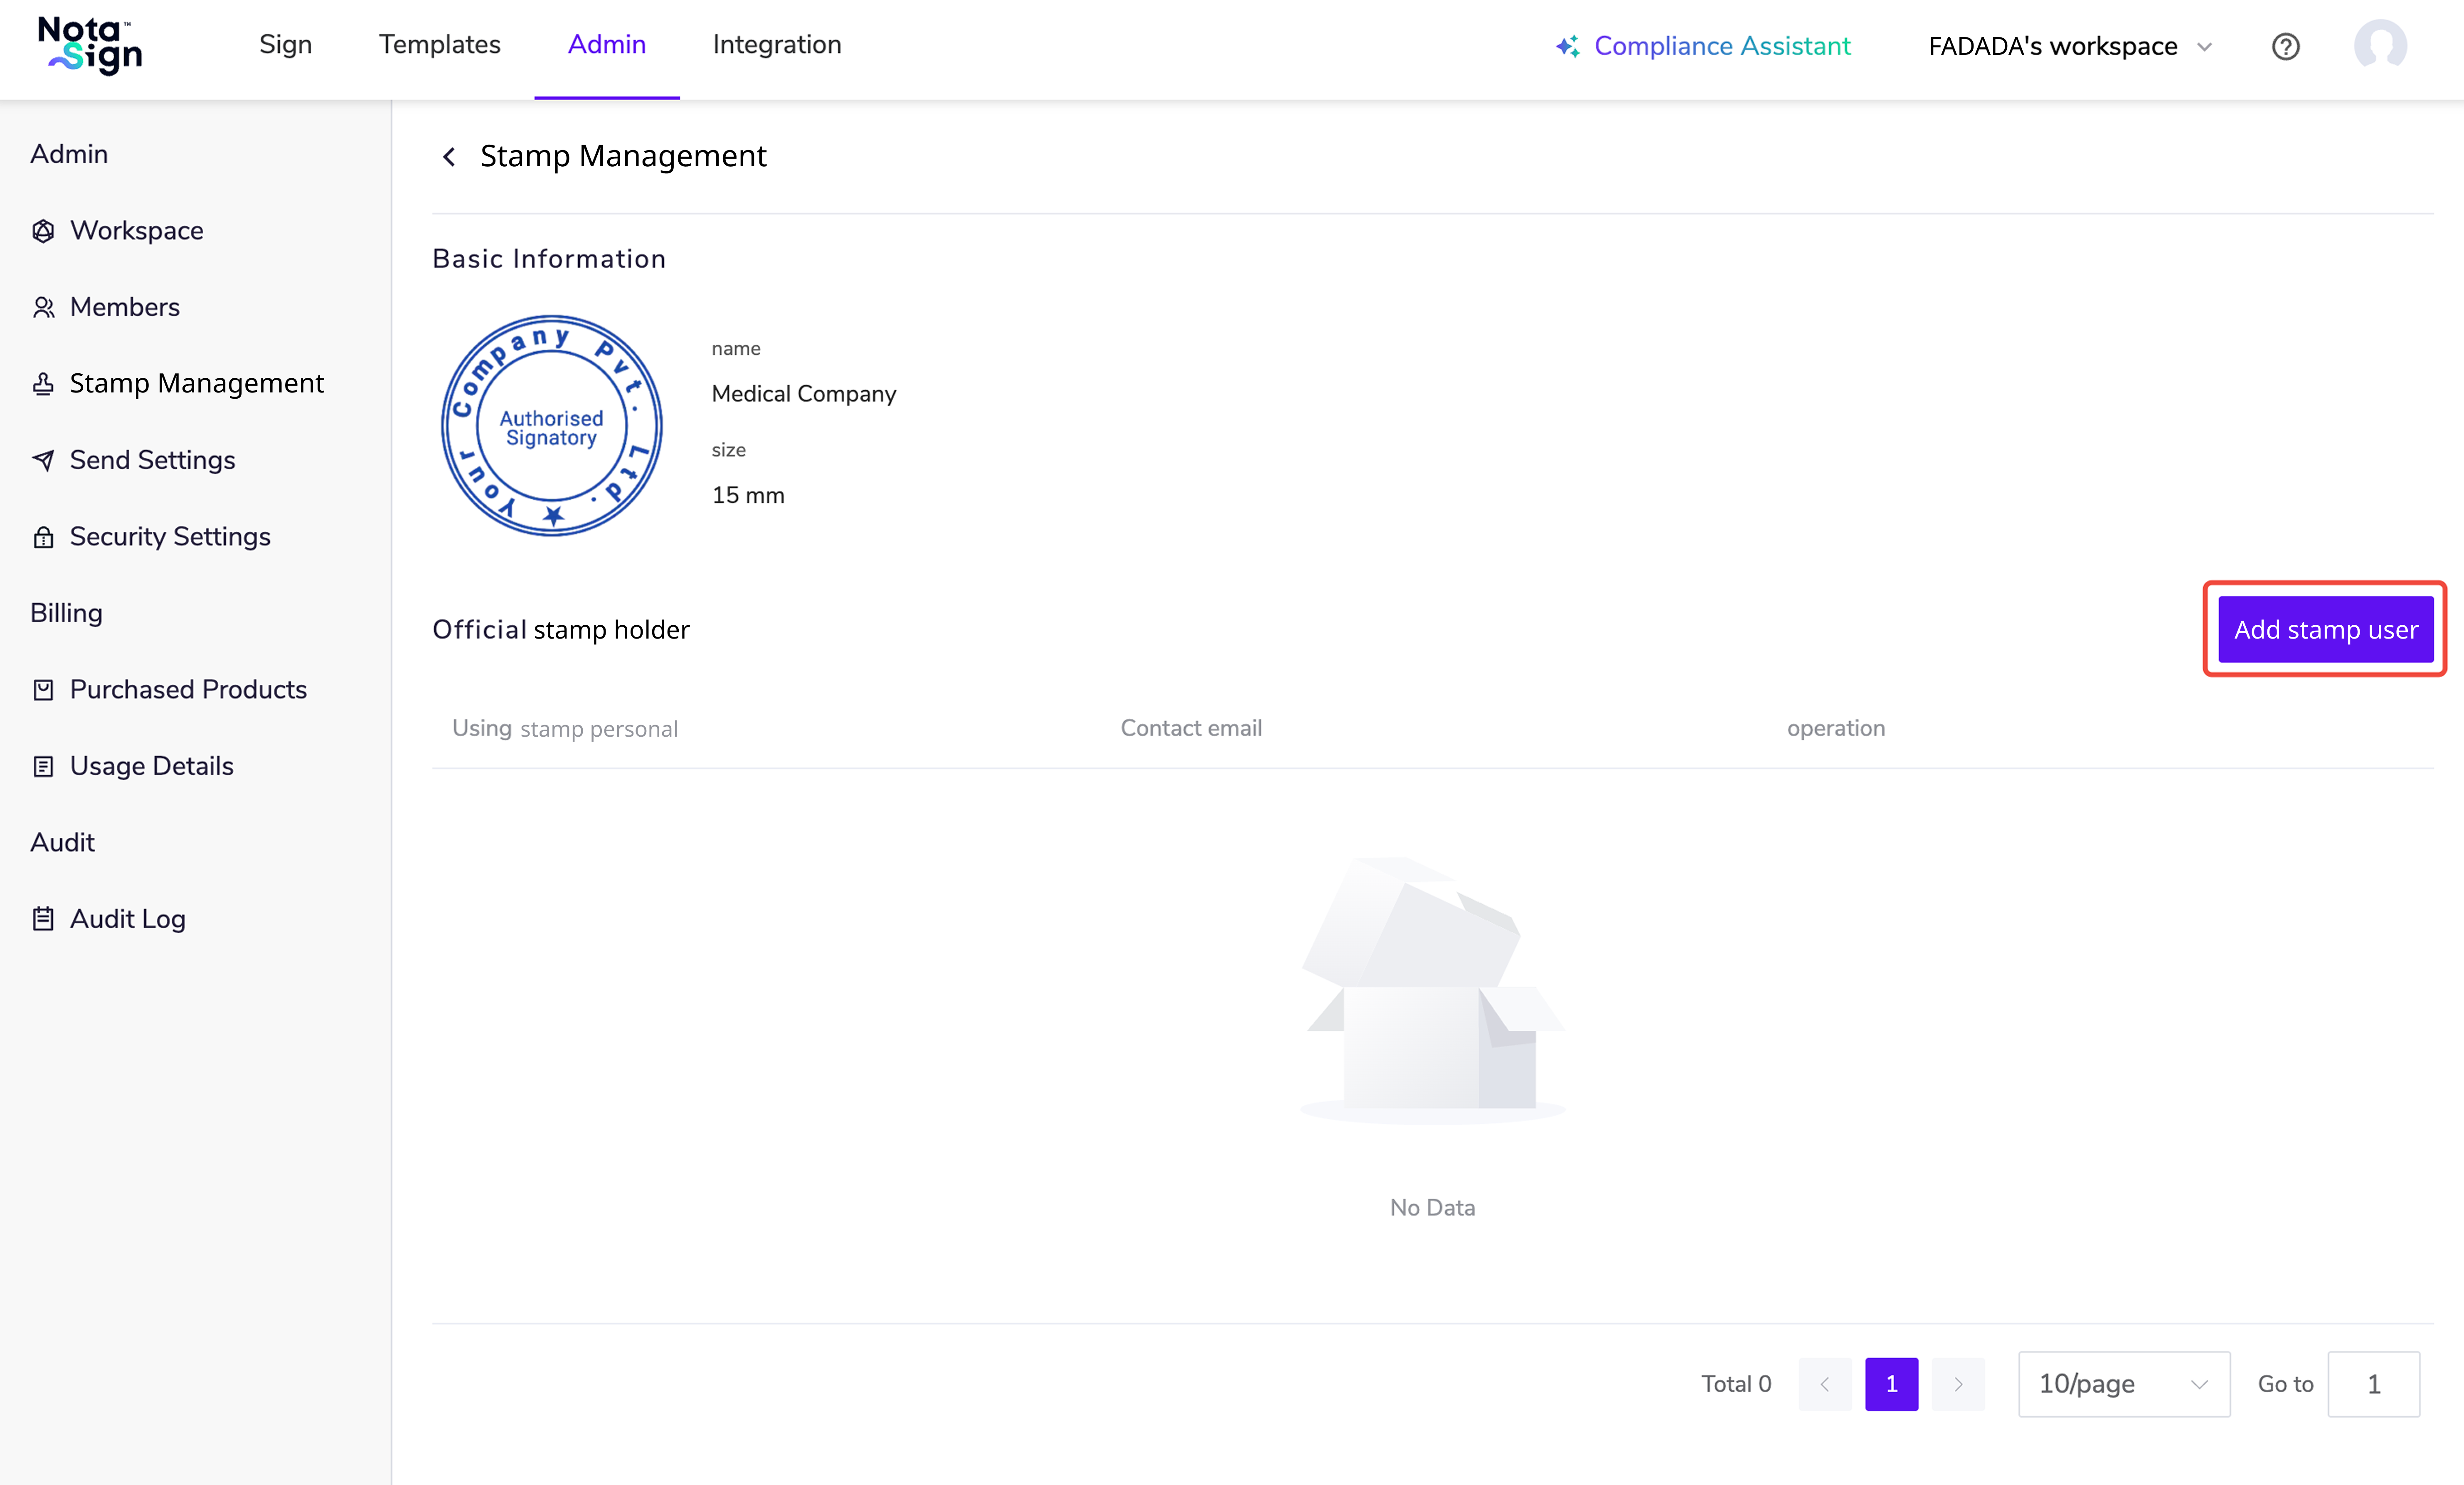
Seal users can use authorized seals to reduce signing time.
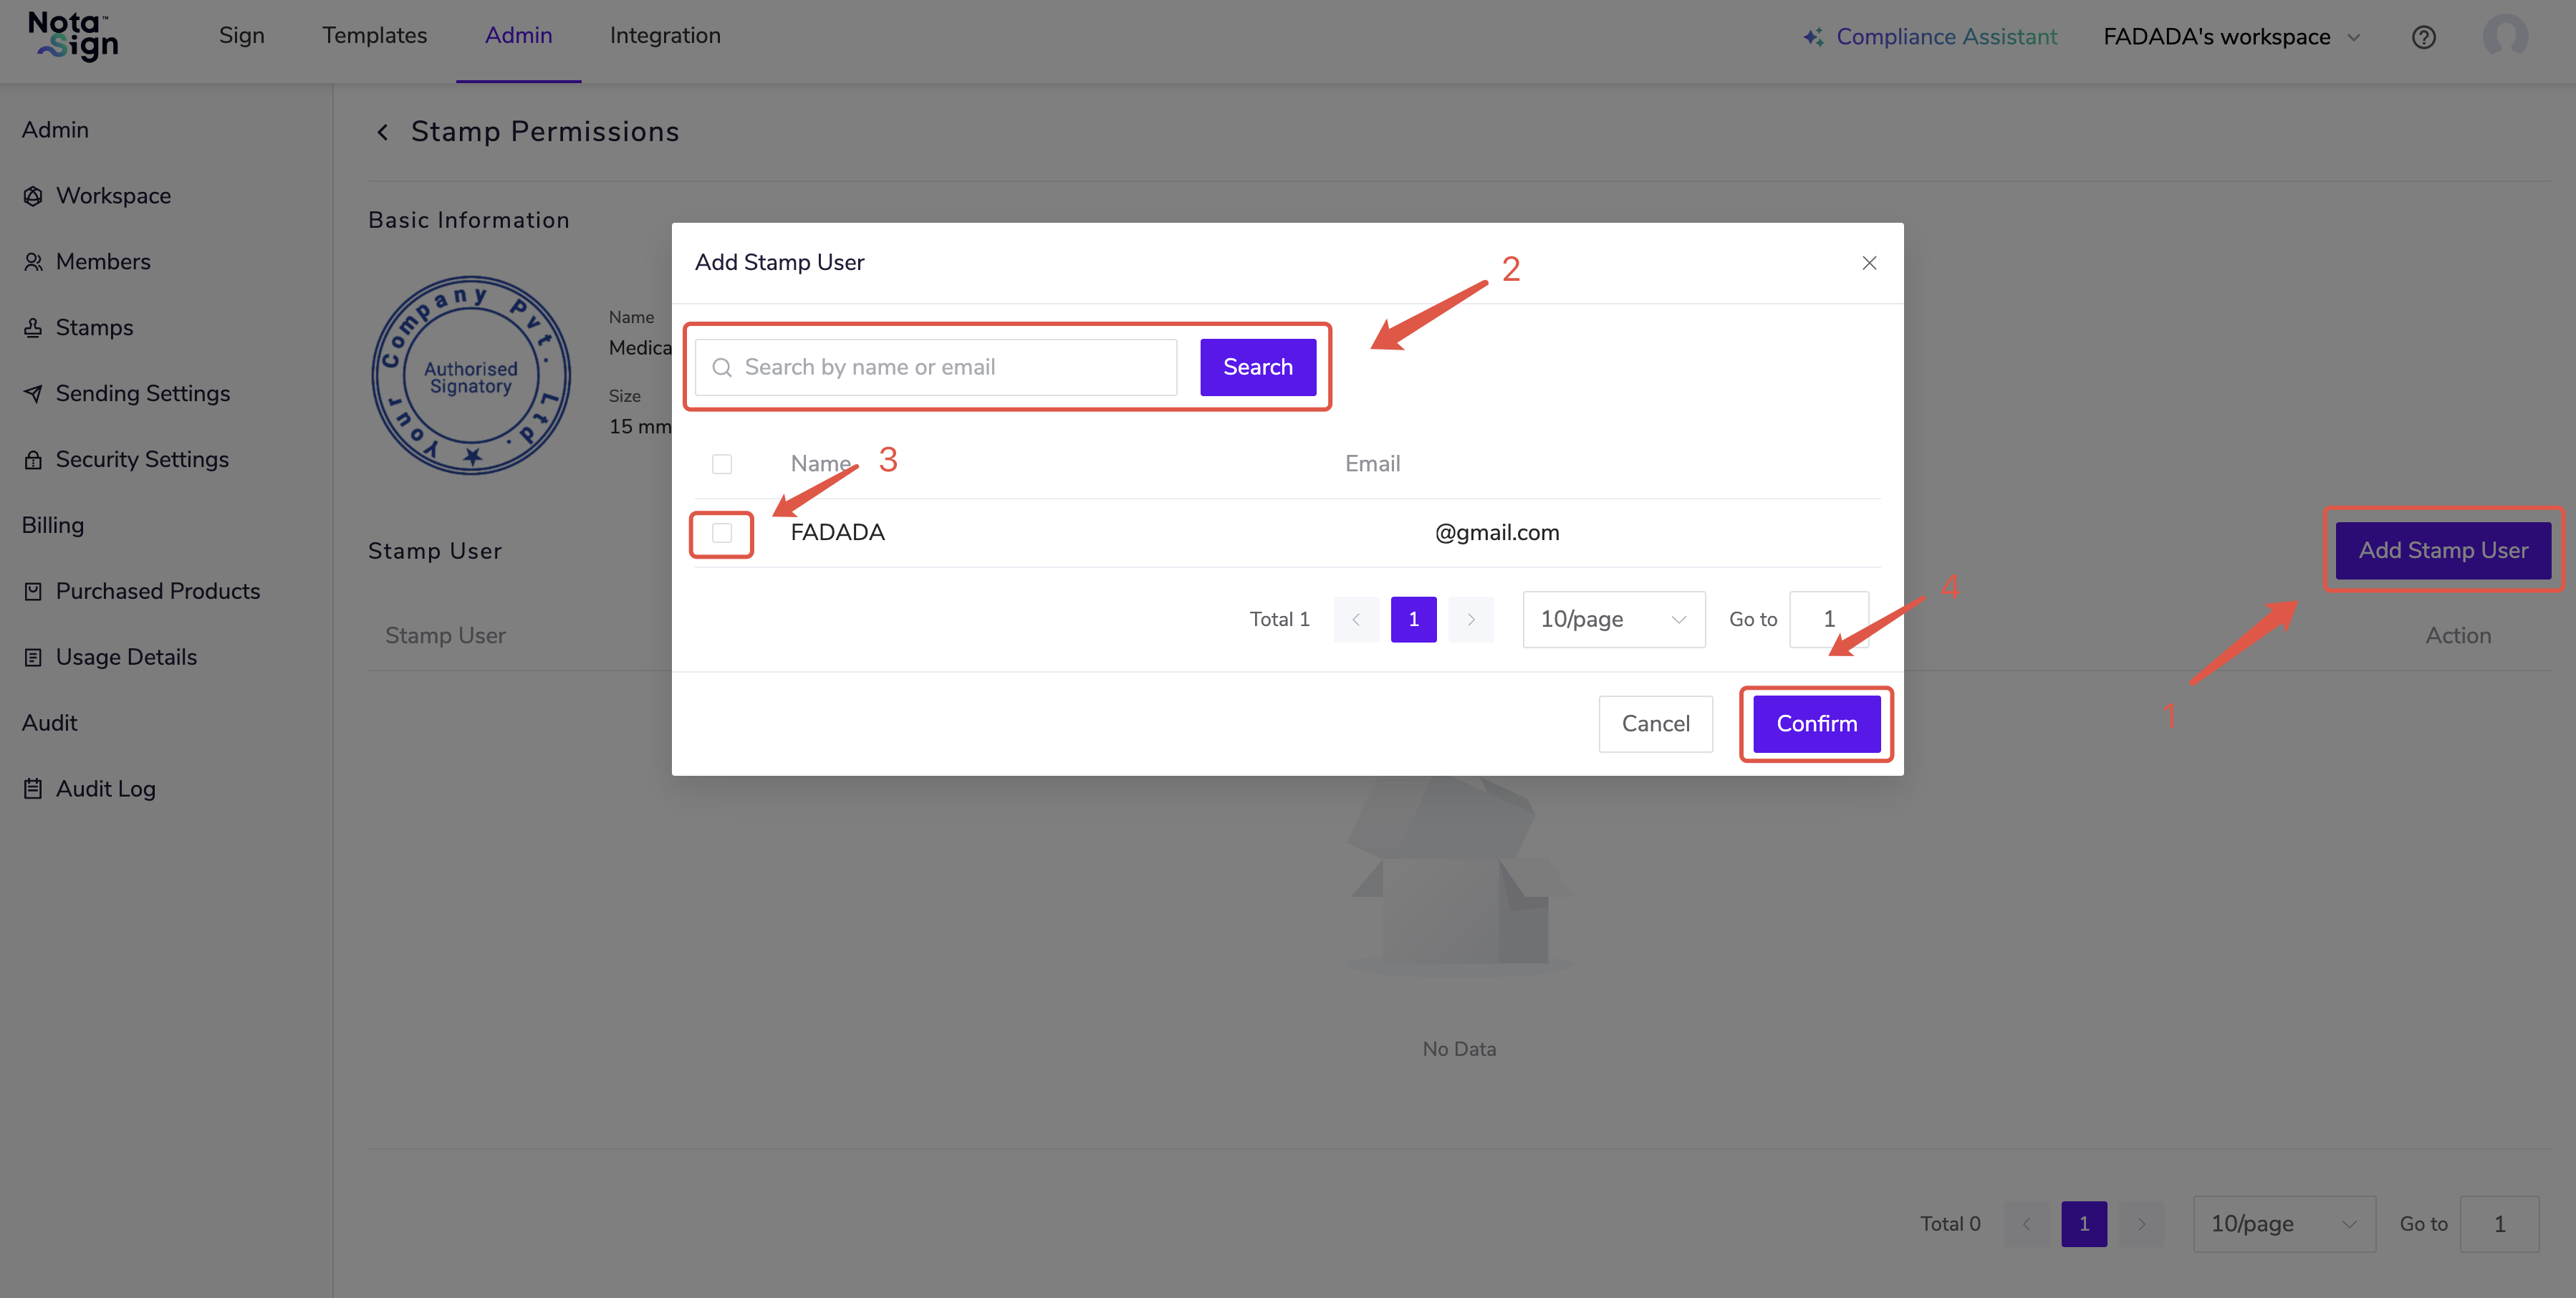
(1) Click [Add Seal User] on the right side to add a seal user;
(2) Enter the seal user’s name or email and click [Search]; (3) Check the box to the left of the name and click [Confirm].
4. Removing Seal Users
(1) Click [Remove] on the right side of the seal user on the [Seal User Management] page;
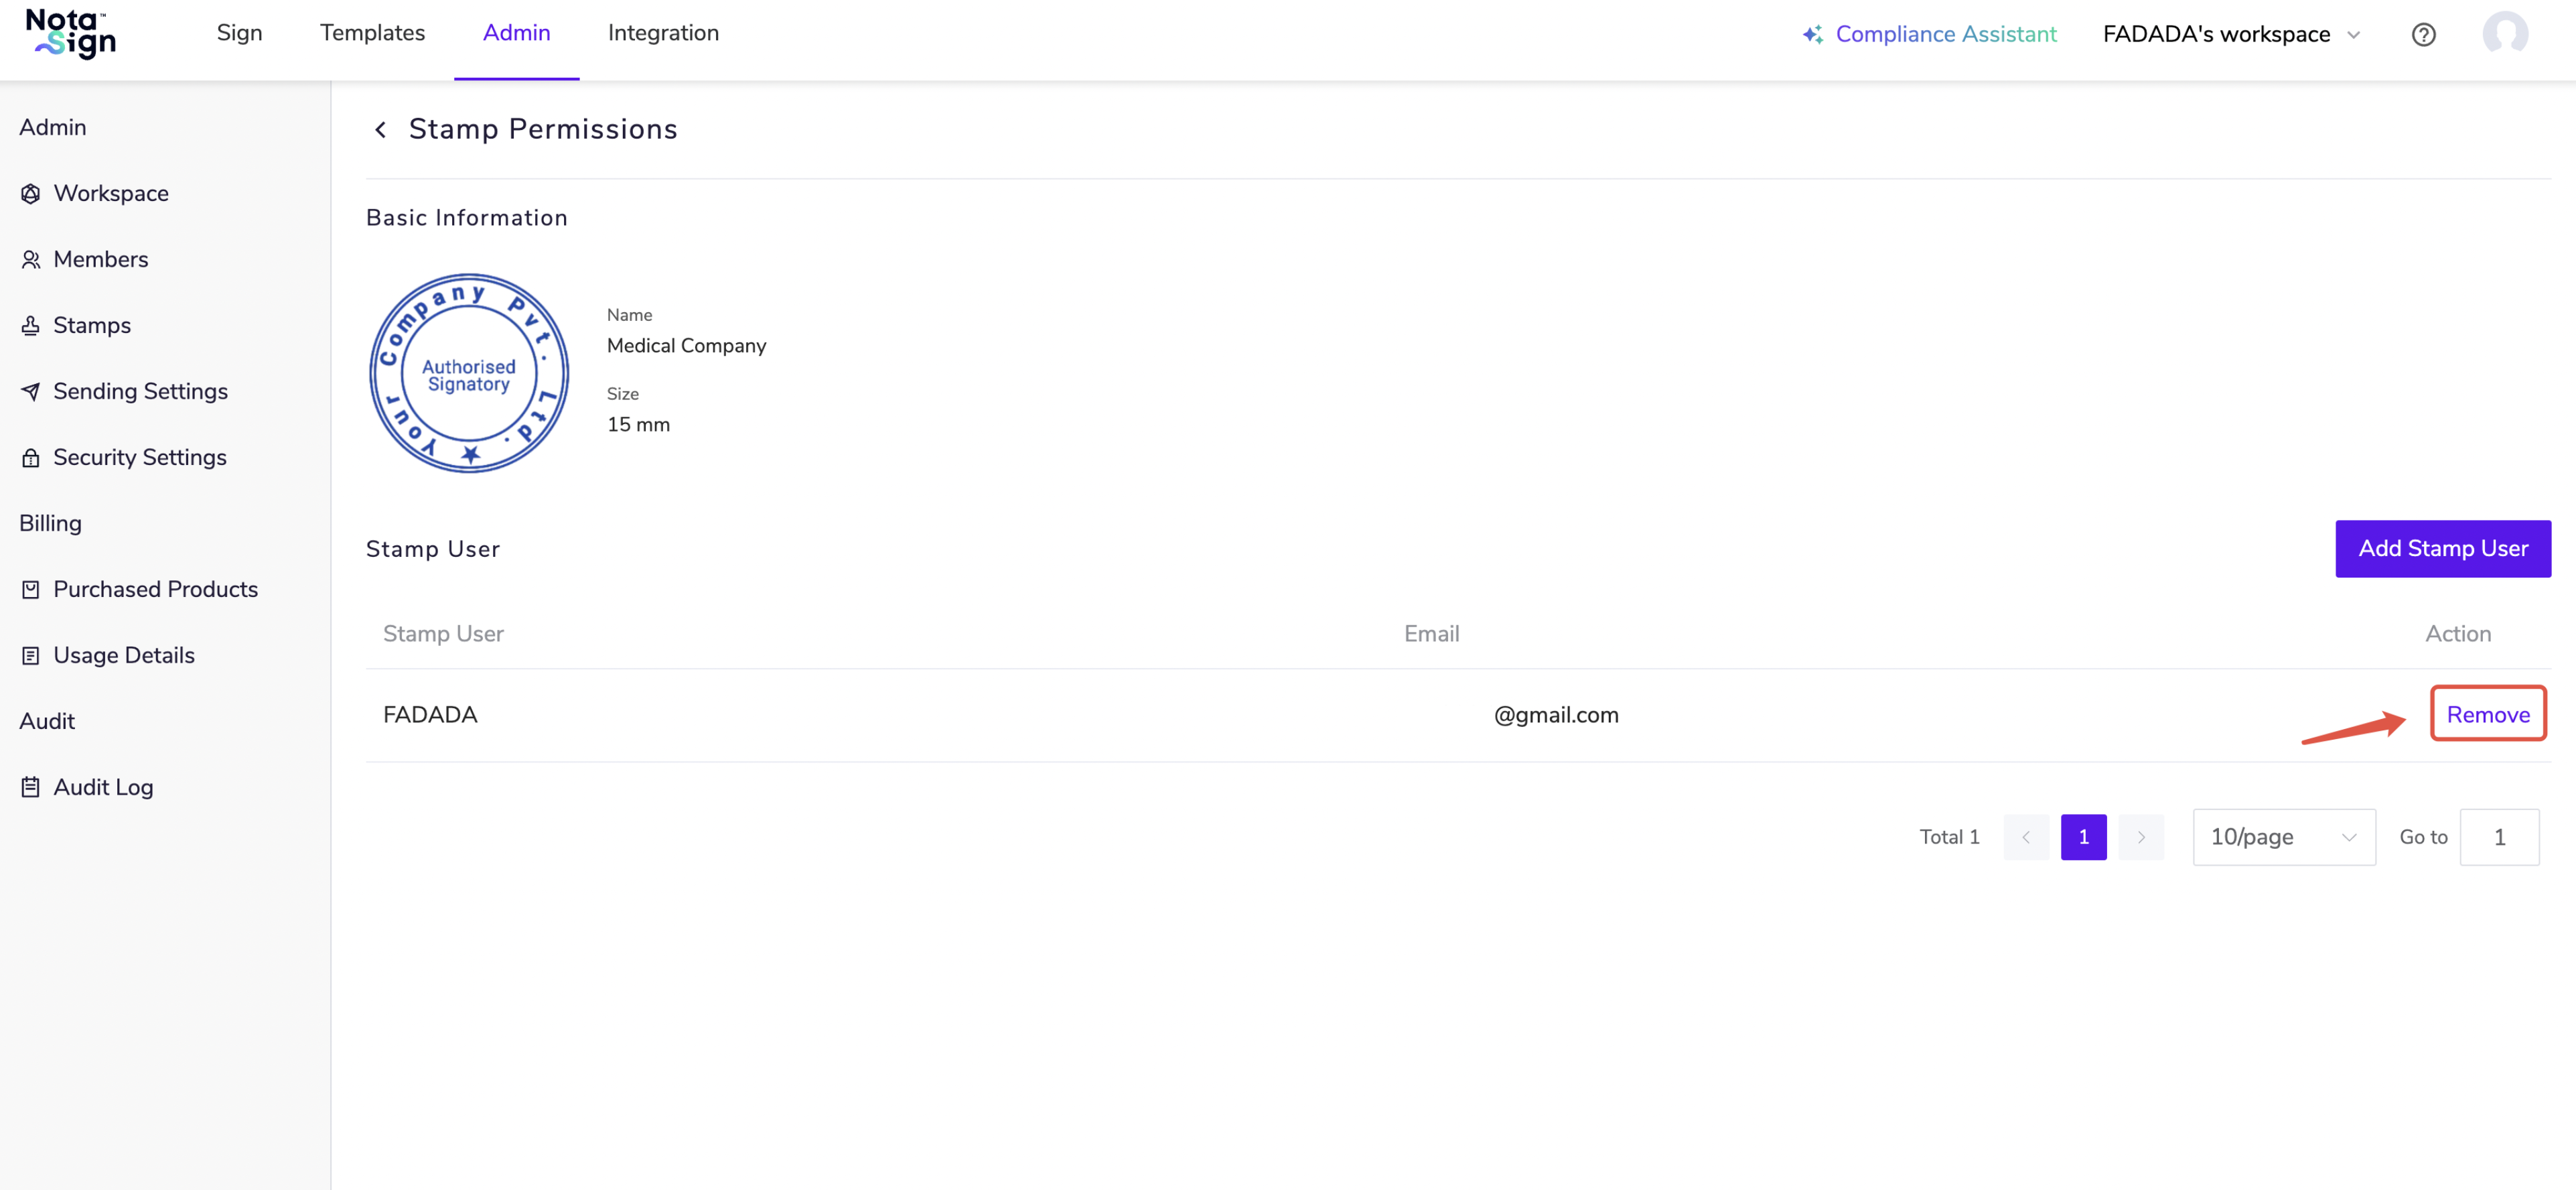
(2) Click [Remove] again to confirm the deletion.
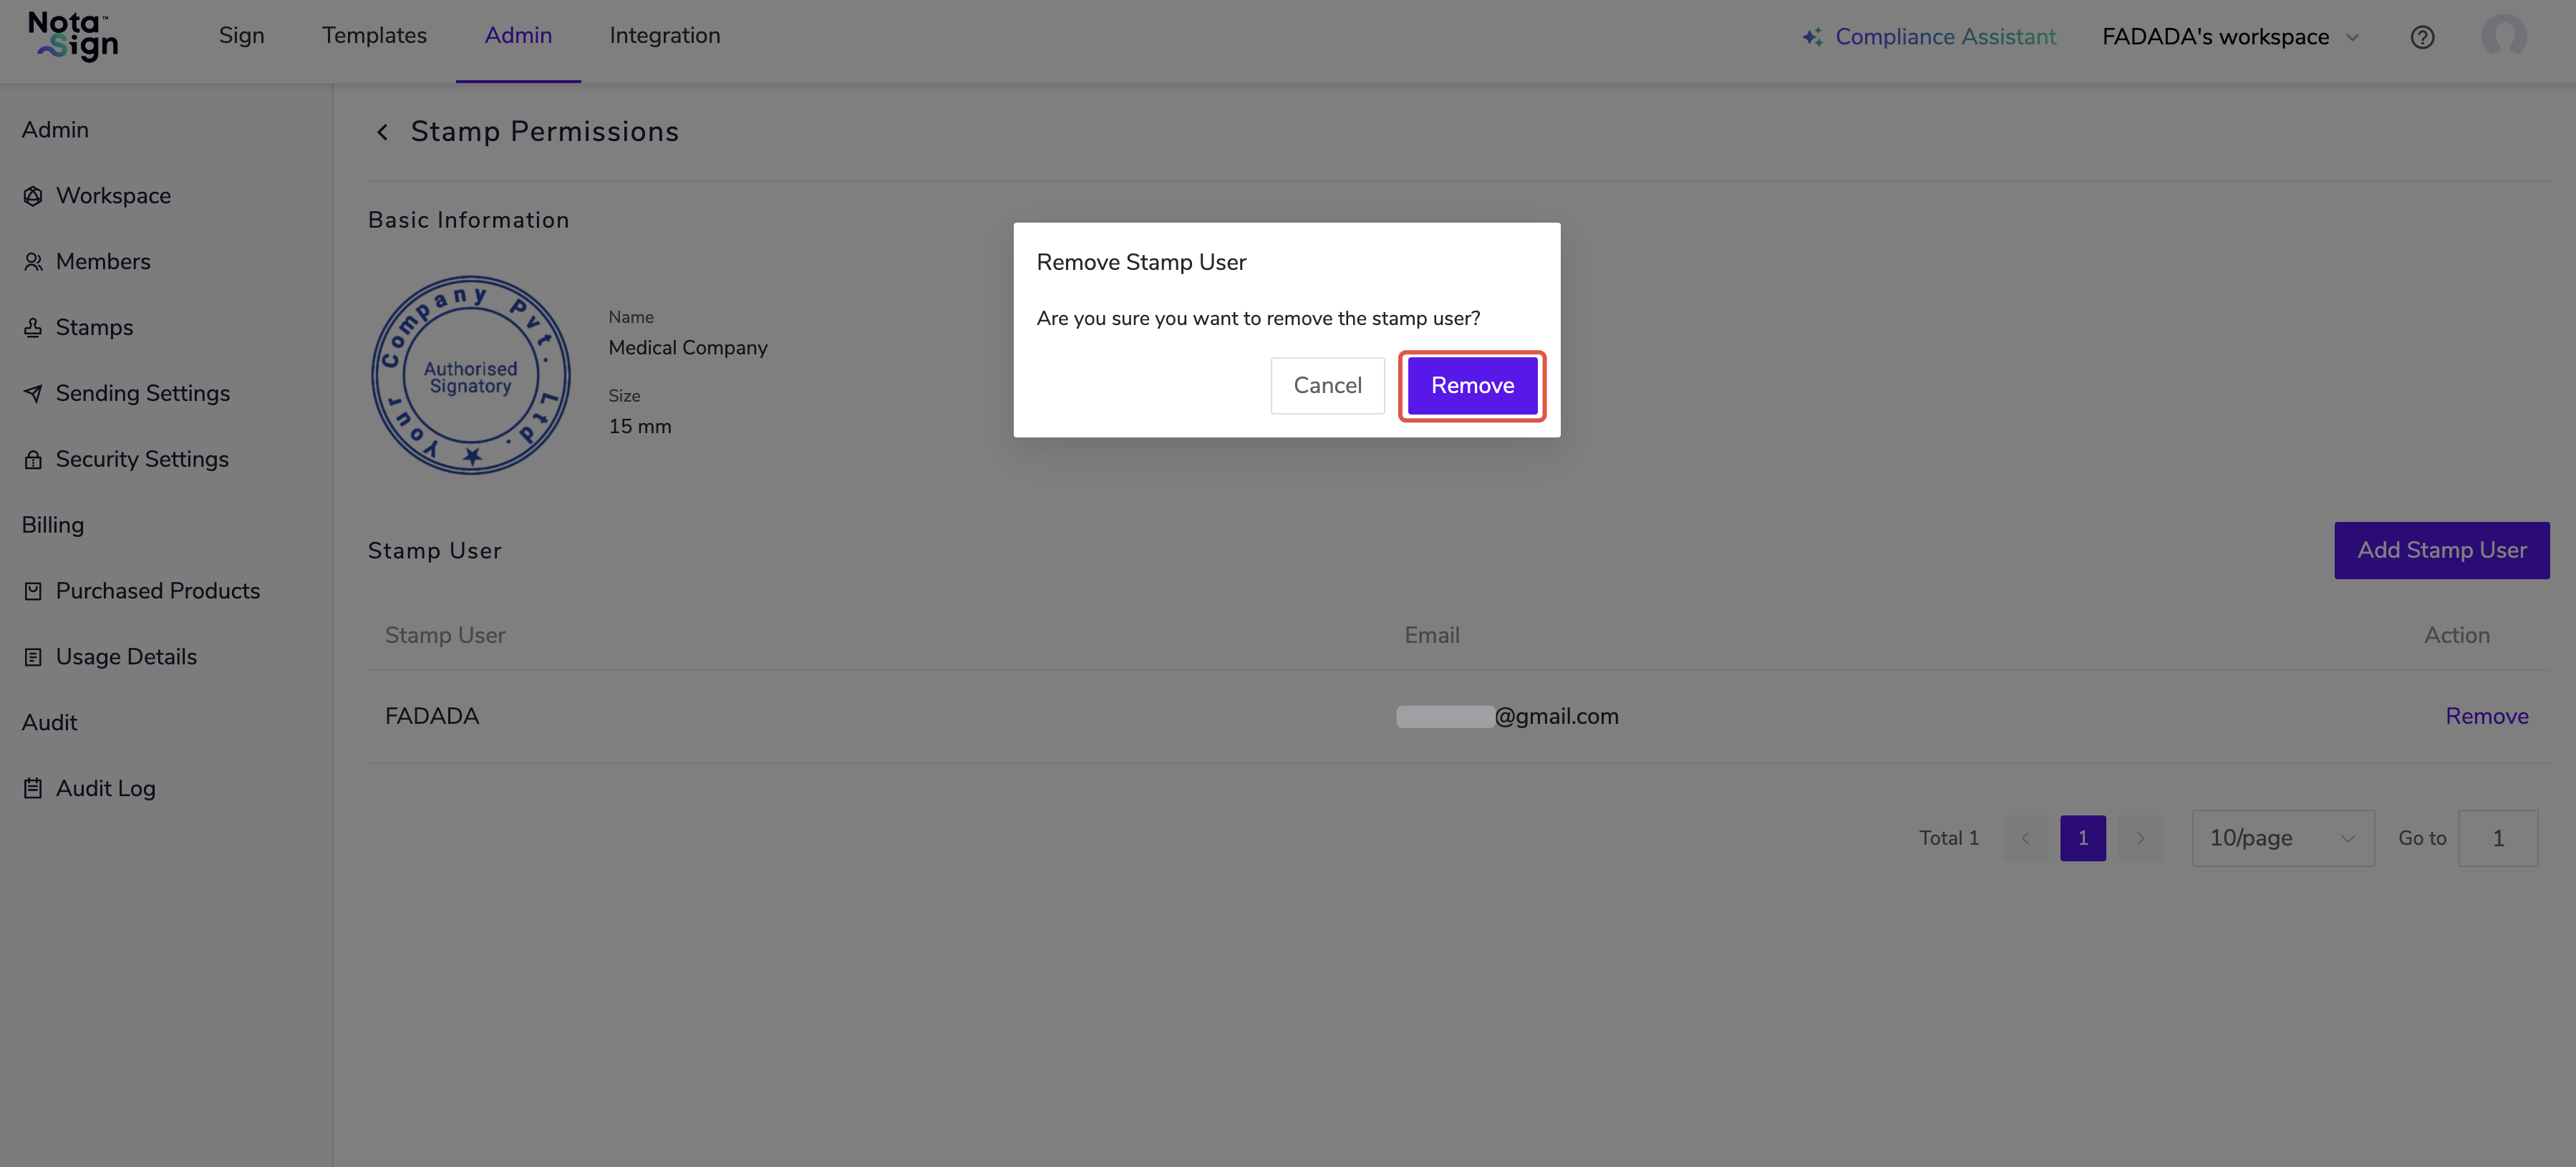
⚠️ Note: Once a seal user is removed, their permission to use the associated seal will be revoked simultaneously.
3. Check Stamp Usage Records
After the envelope is sent, you can review stamp usage in the envelope’s audit report.
- Click View.
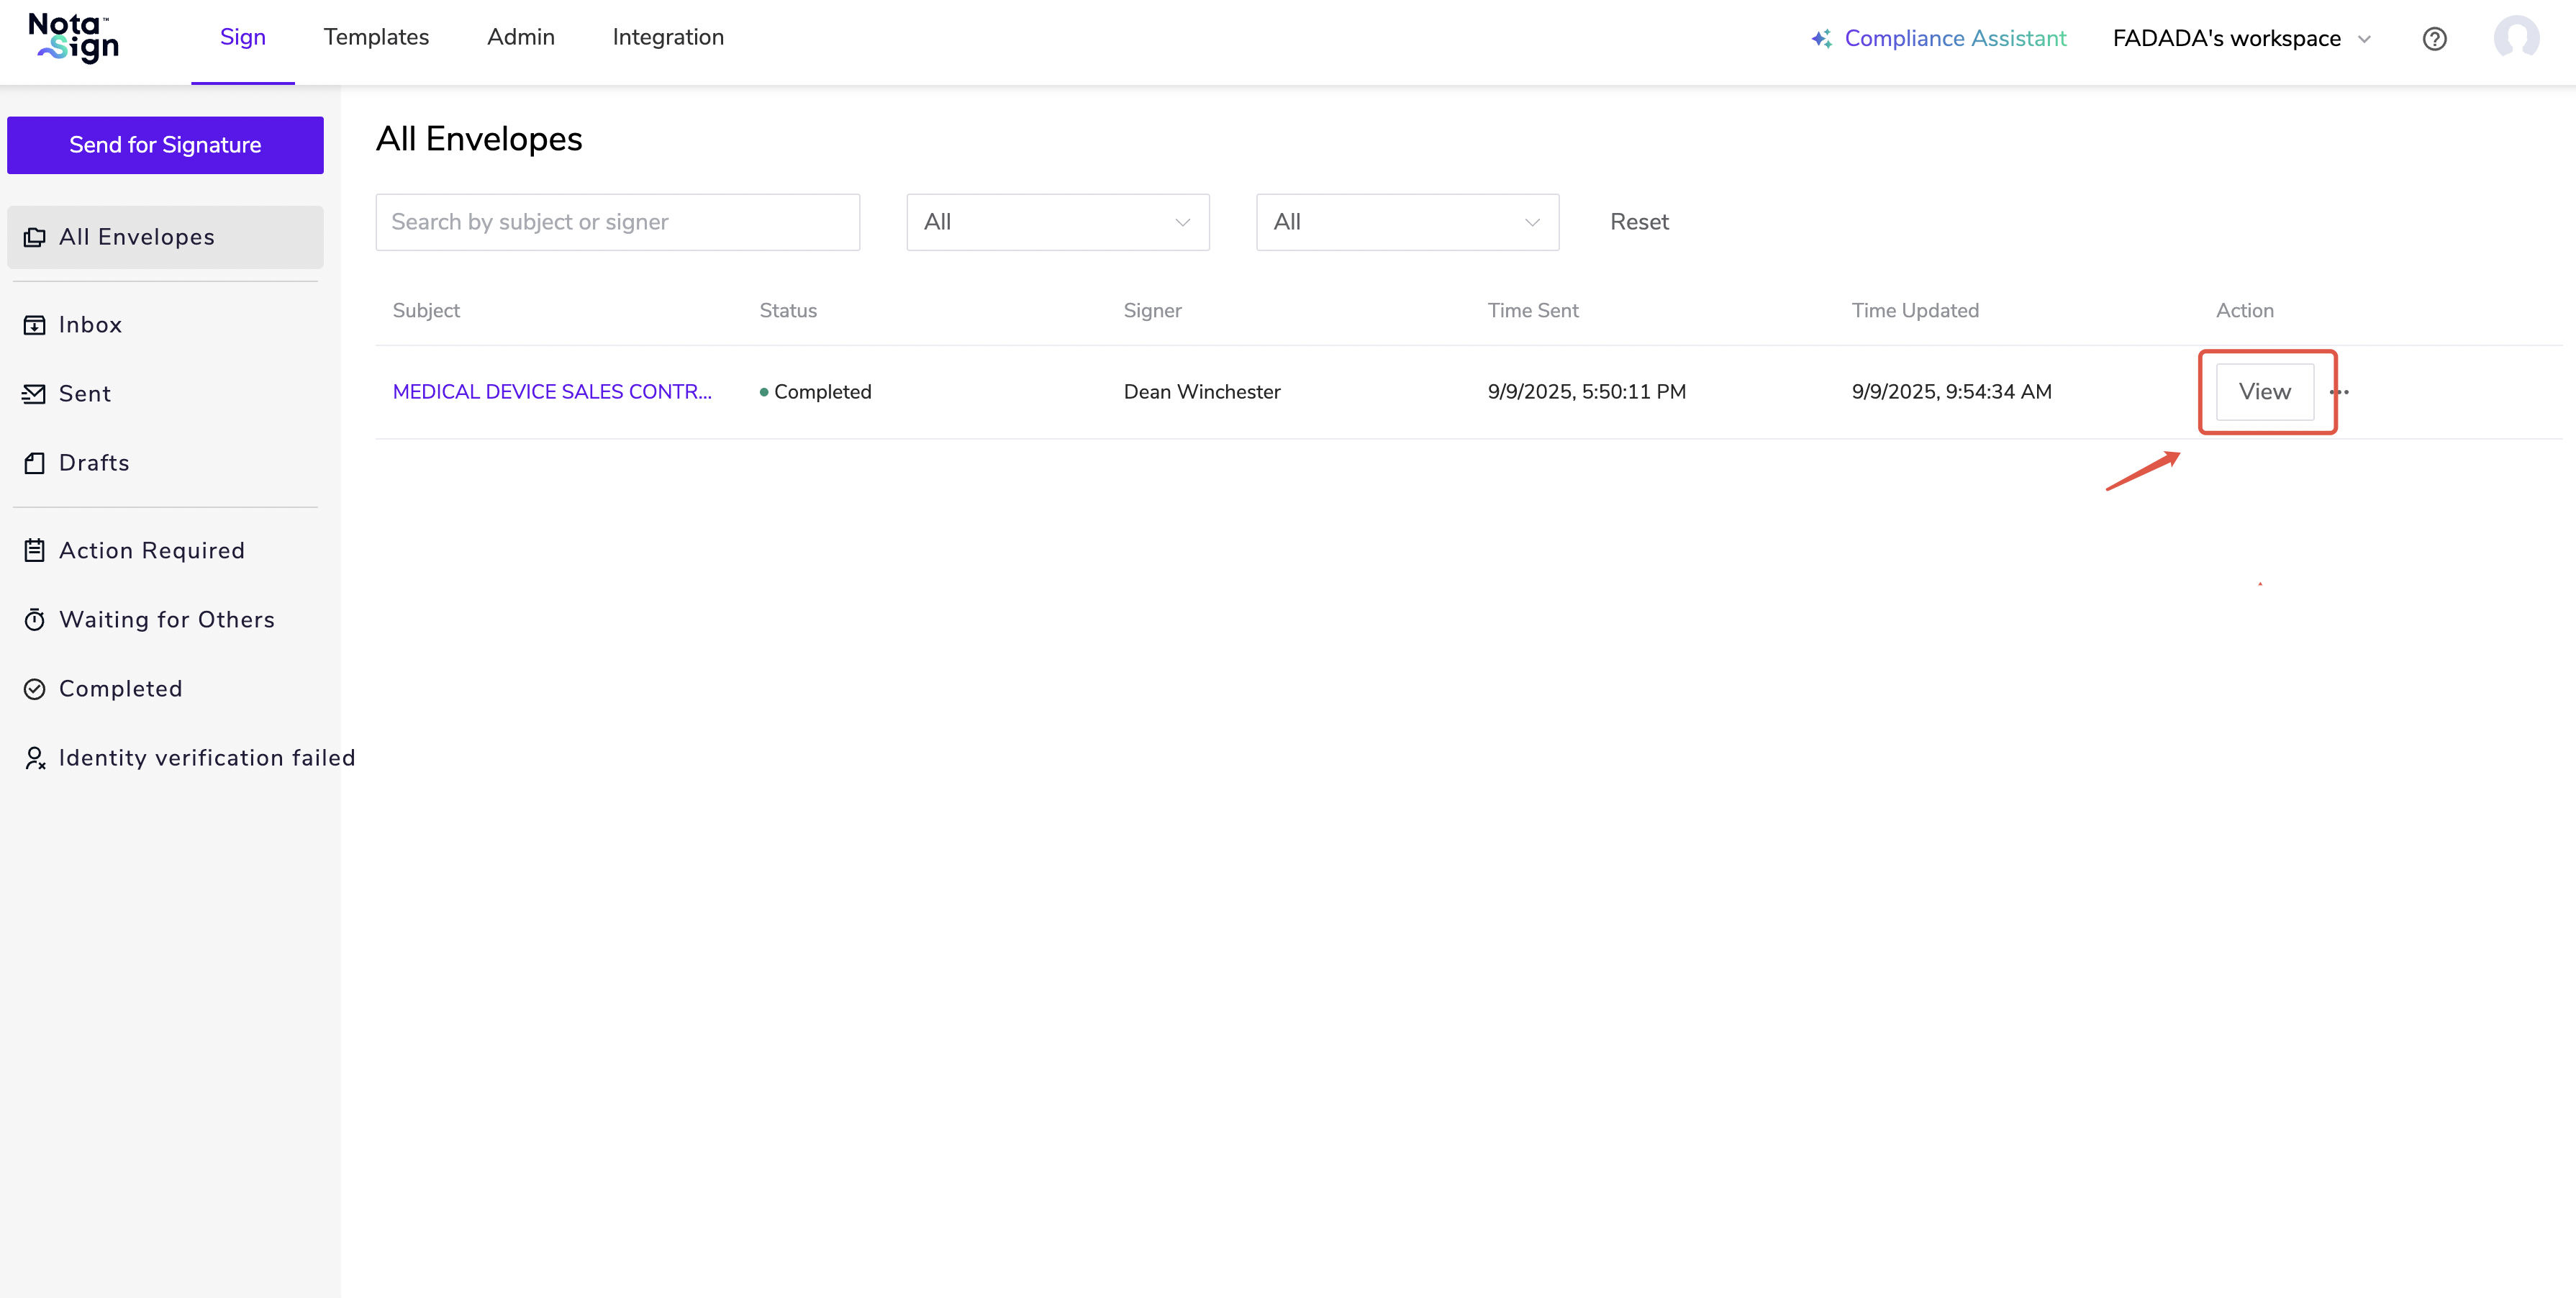
- Click Download to download the audit report and review signing details.