
This document covers the full lifecycle management of electronic seals in Nota Sign, including seal overview, application, binding existing certificates, daily management, and using seals in envelope sending and signing scenarios.
1. Electronic Seal Overview
Electronic seal is a digital certificate-based electronic identifier used to represent a legal entity (such as a company, institution, or organization) to authenticate the authenticity, integrity, and source of a document’s content. It is functionally equivalent to a traditional corporate seal or legal representative’s stamp, but exists in the form of an encrypted digital signature, enabling identity verification, tamper resistance, and legal traceability.
In Nota Sign, electronic seals are backed by legally binding digital signatures and combined with visual seal graphics, so that electronic documents can clearly reflect the signer’s identity and document security in both appearance and technology.
Electronic seals ensure that:
- The source of the file is authentic and the signer’s identity is verifiable;
- The content of the file cannot be modified after signing, and the signing record can be independently verified by a third party to prevent forgery.
1.1. Typical Use Cases
Electronic seals are suitable for a variety of formal electronic document scenarios that require organizational or legal entity authentication, including:
- Legal documents such as enterprise contracts, agreements, authorization letters, and quotation sheets;
- Internal management documents such as approvals, procurement, bidding, and financial statements;
- Government and public institution official documents, government approval, and archive circulation;
- Overseas business signing, cross-border electronic contracts, and international cooperation agreements.
2. Apply for an Electronic Seal
Video Tutorial:
2.1. Fill in Basic Information
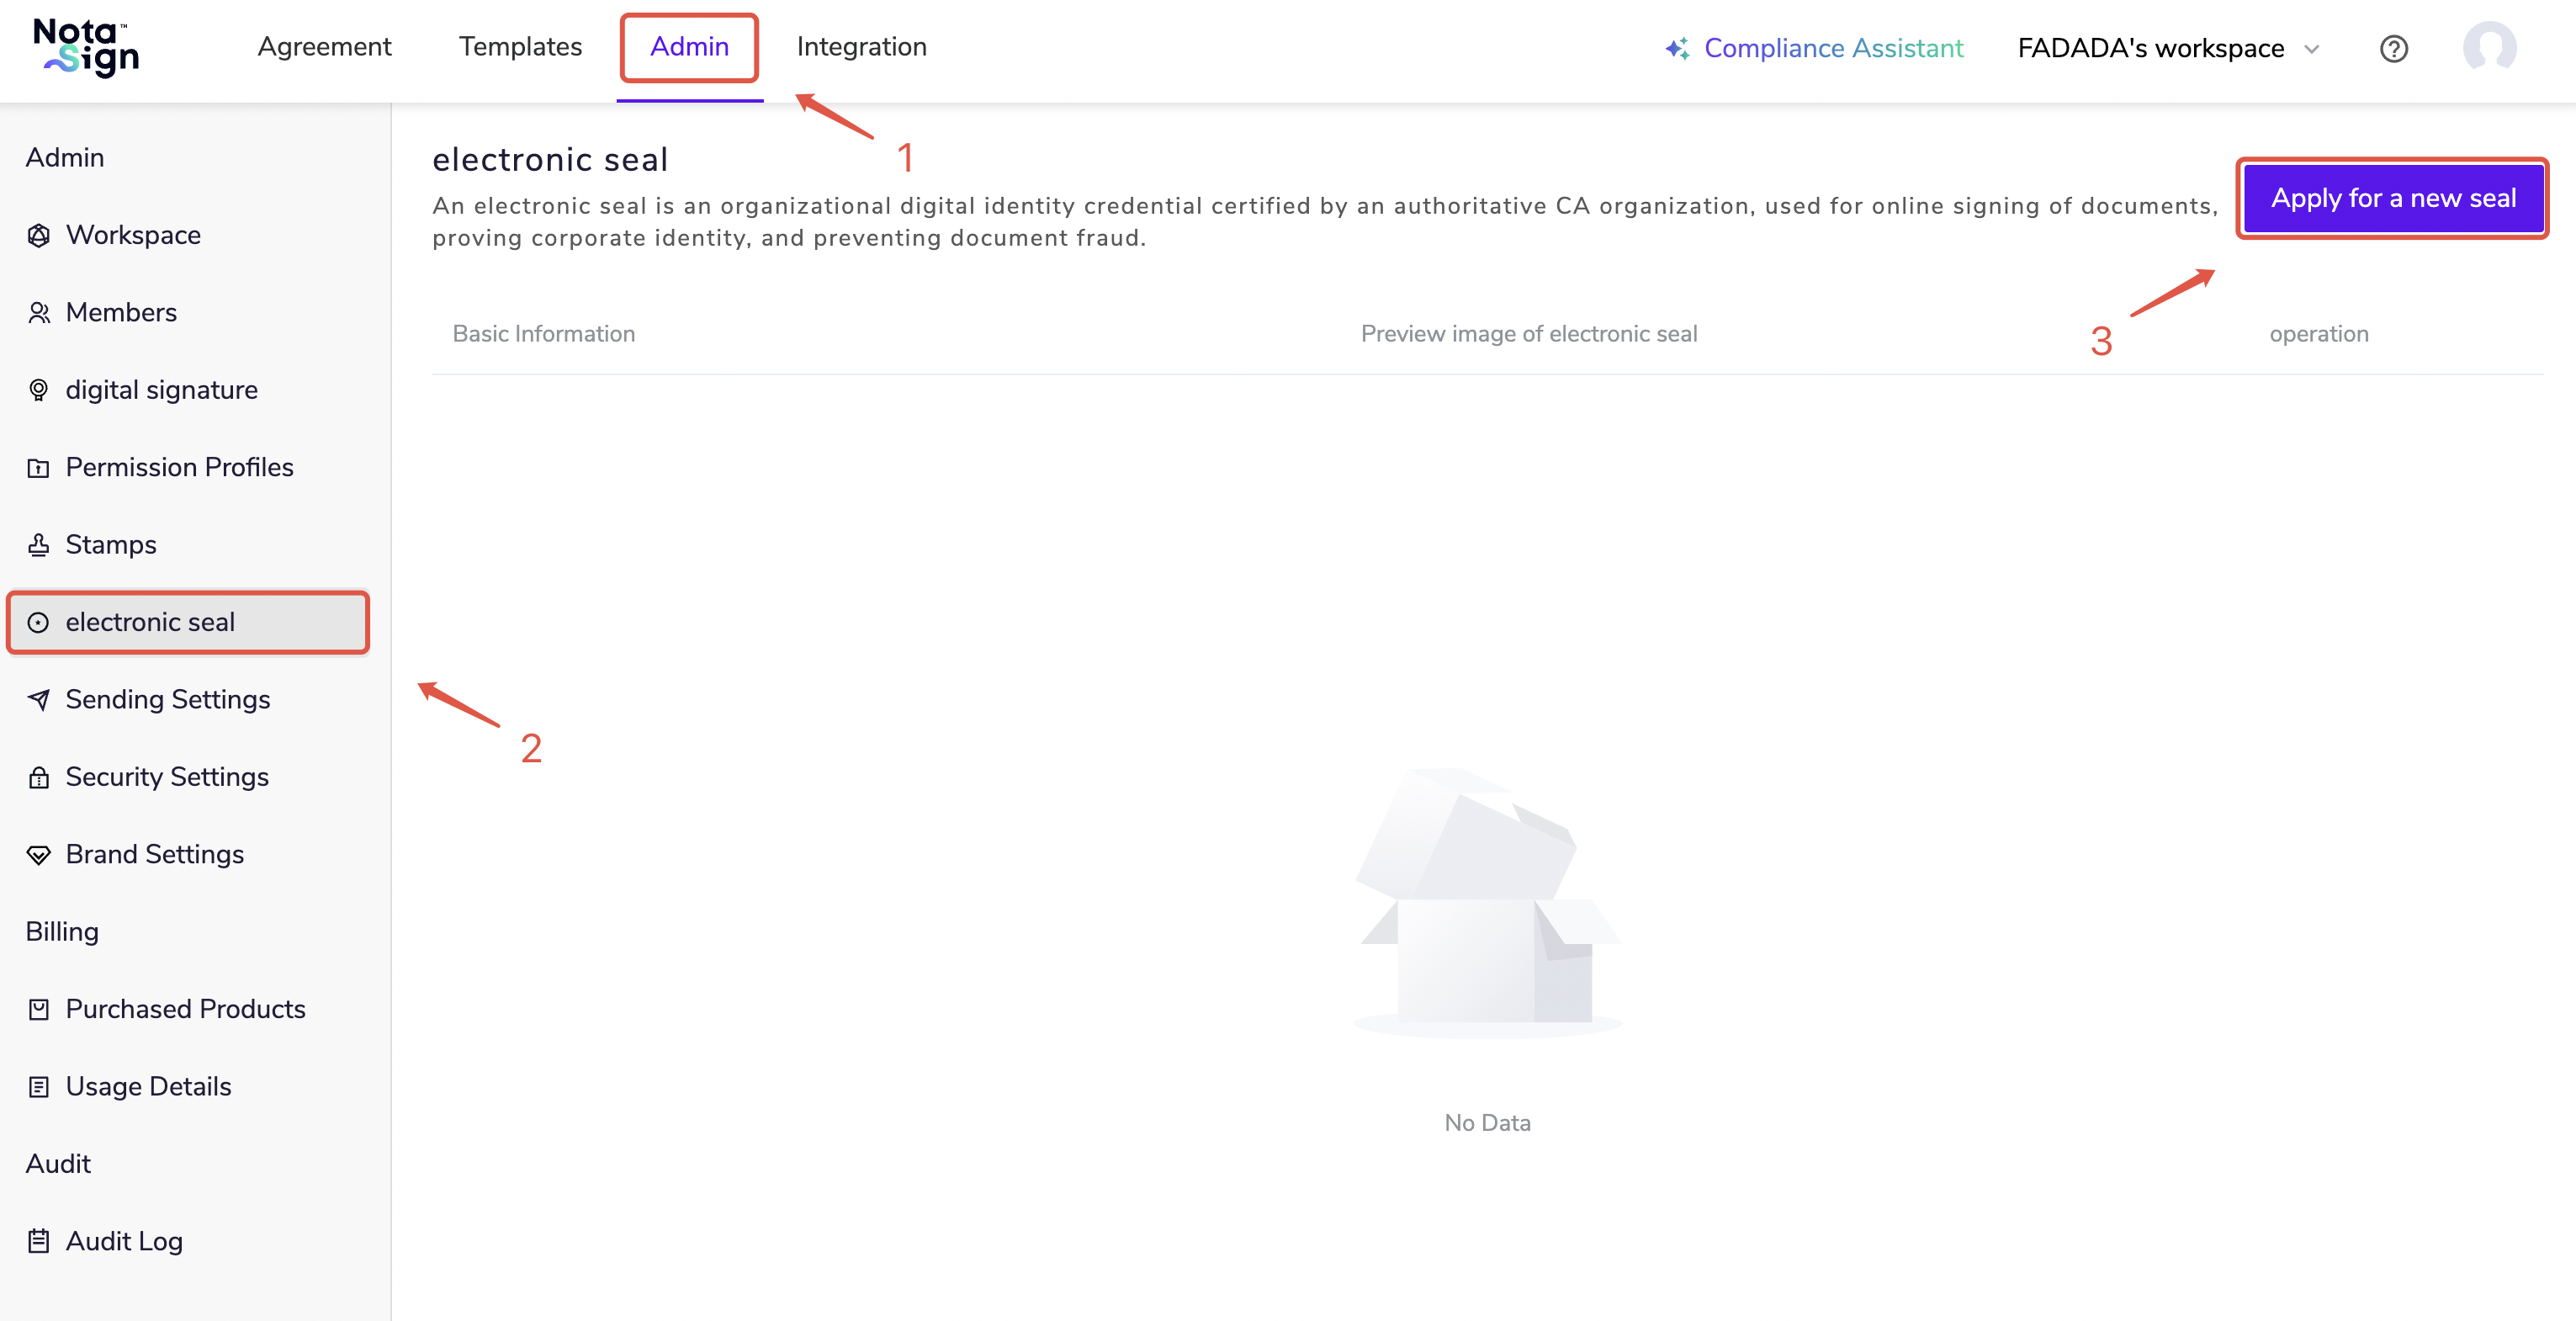
- Log in to the Nota Sign Workbench, click [Management] - [Electronic Seal];
Click [Apply for New Seal].
- Create a name for the new electronic seal, select an already enabled trust service provider, and click [Apply for Certificate].
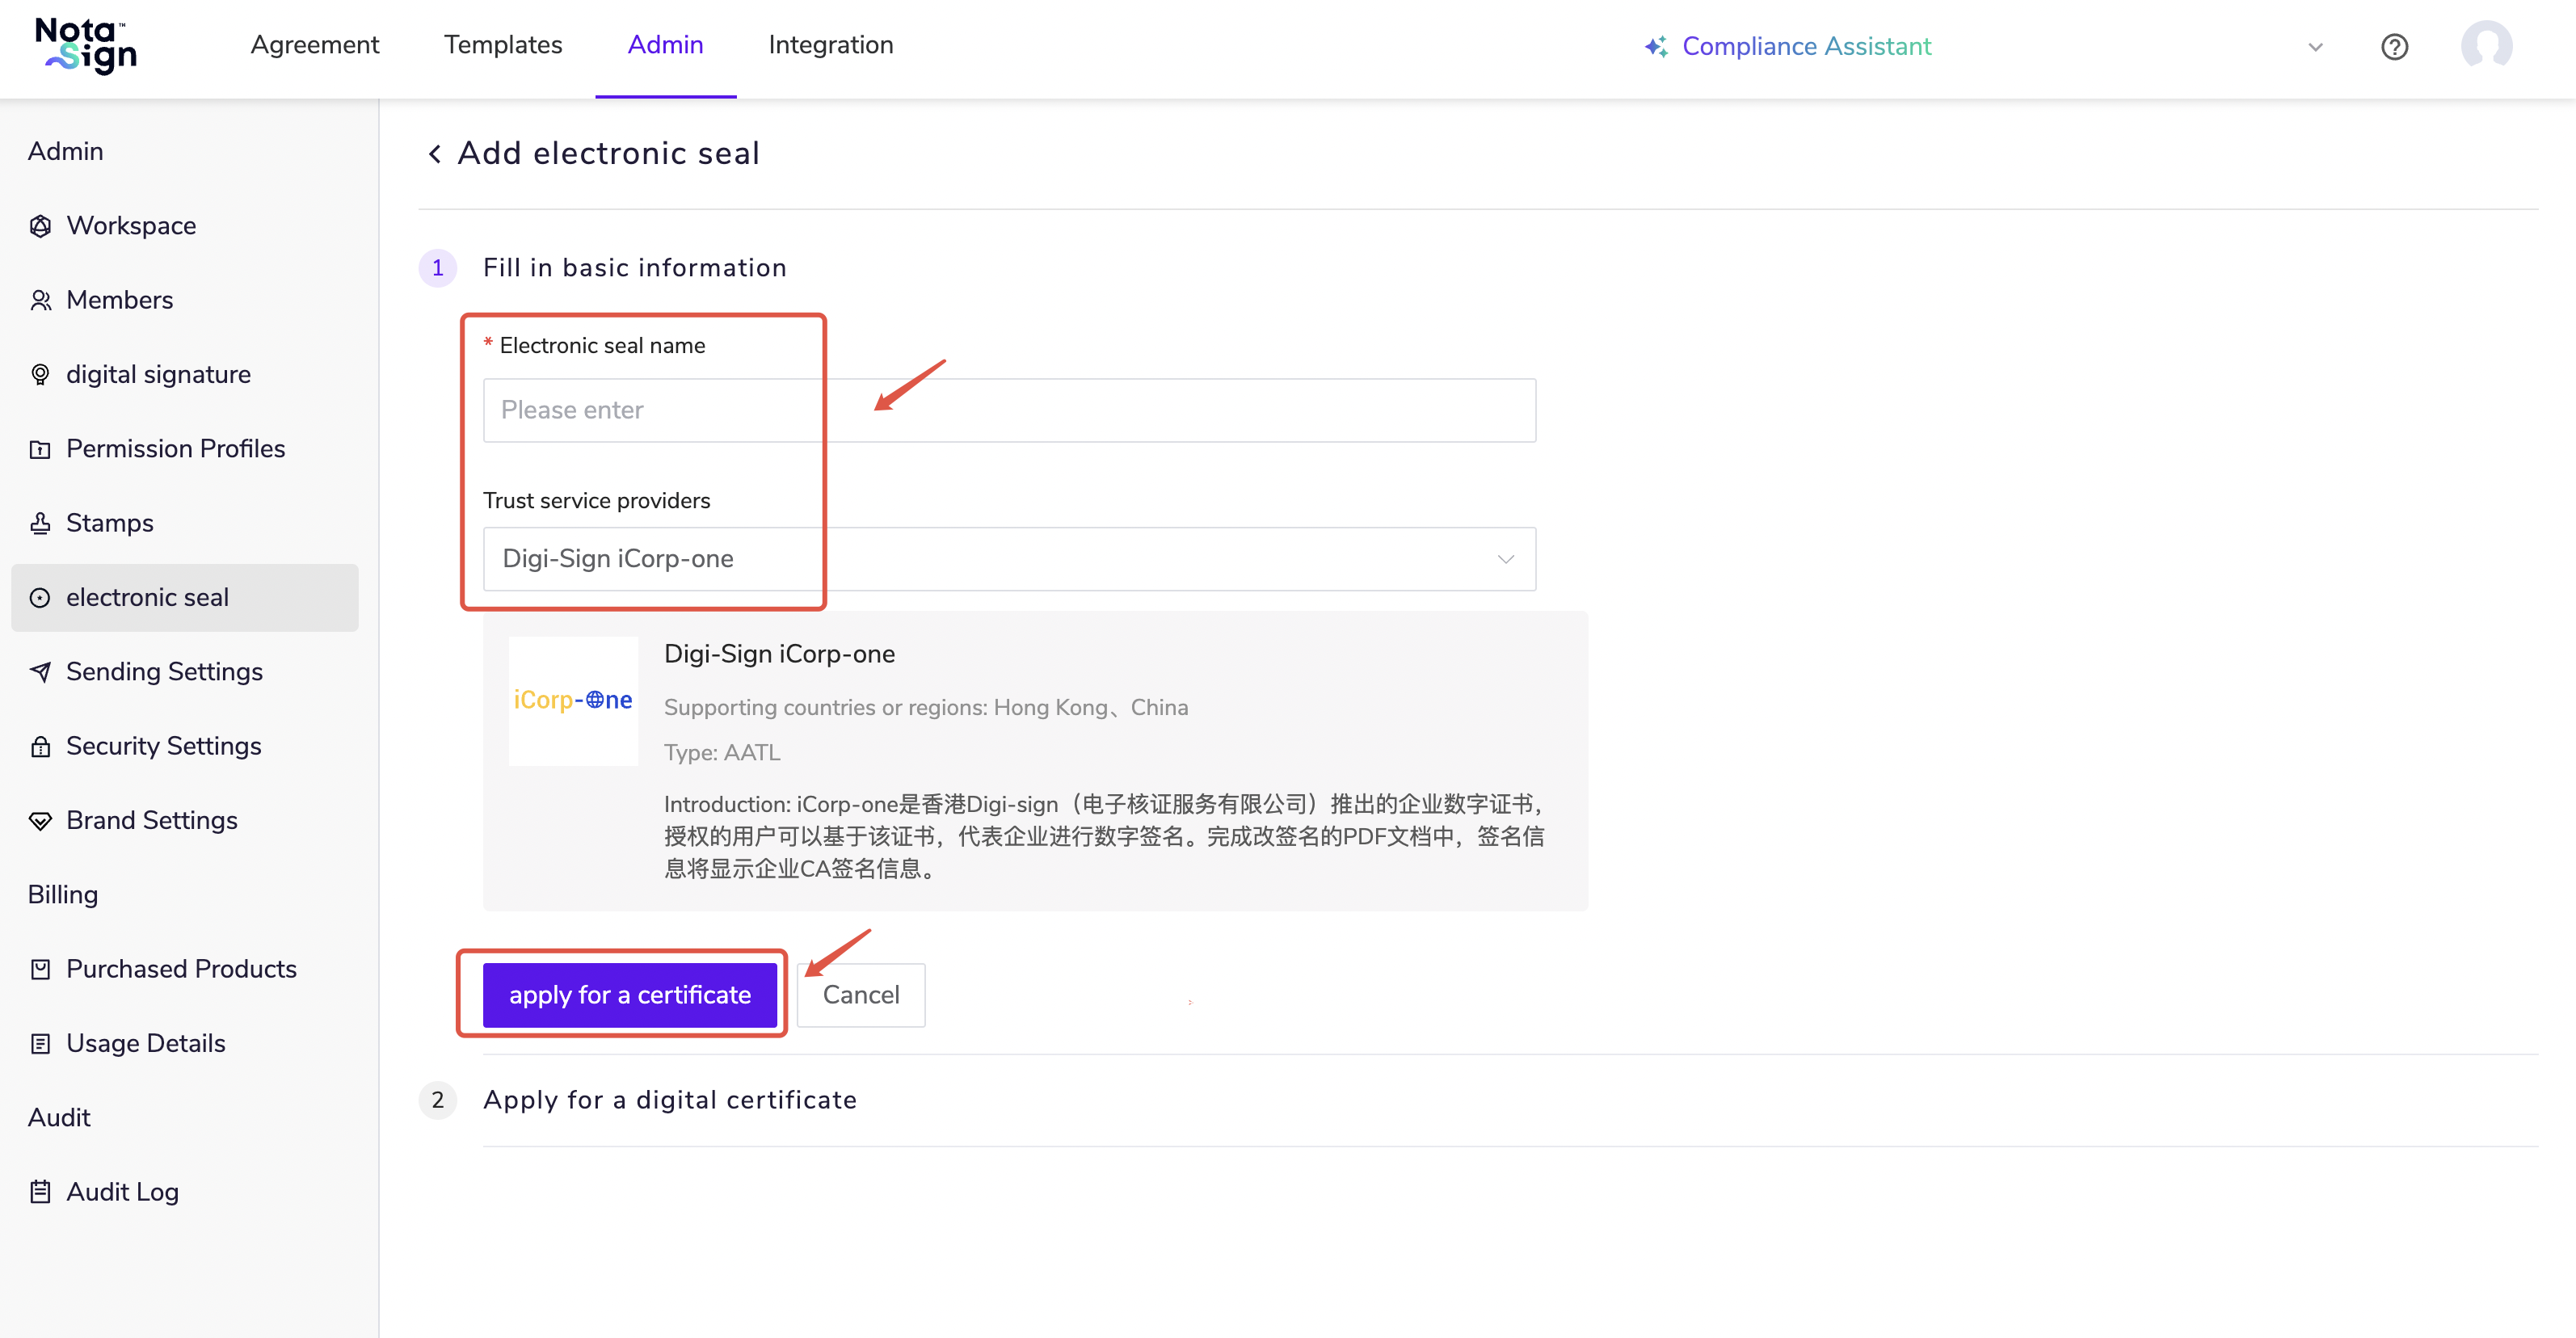
Currently, Nota Sign Global Sign supports the application of the following digital certificates. For specific application tutorials, please click the links below:
Apply for iCorp-One Digital Certificate
China ZXCA Corporate Digital Certificate
Bind Intesi Enterprise Digital Certificate
Apply for a Vinotek enterprise certificate
3. Manage Electronic Seals
3.1. Enable an Electronic Seal
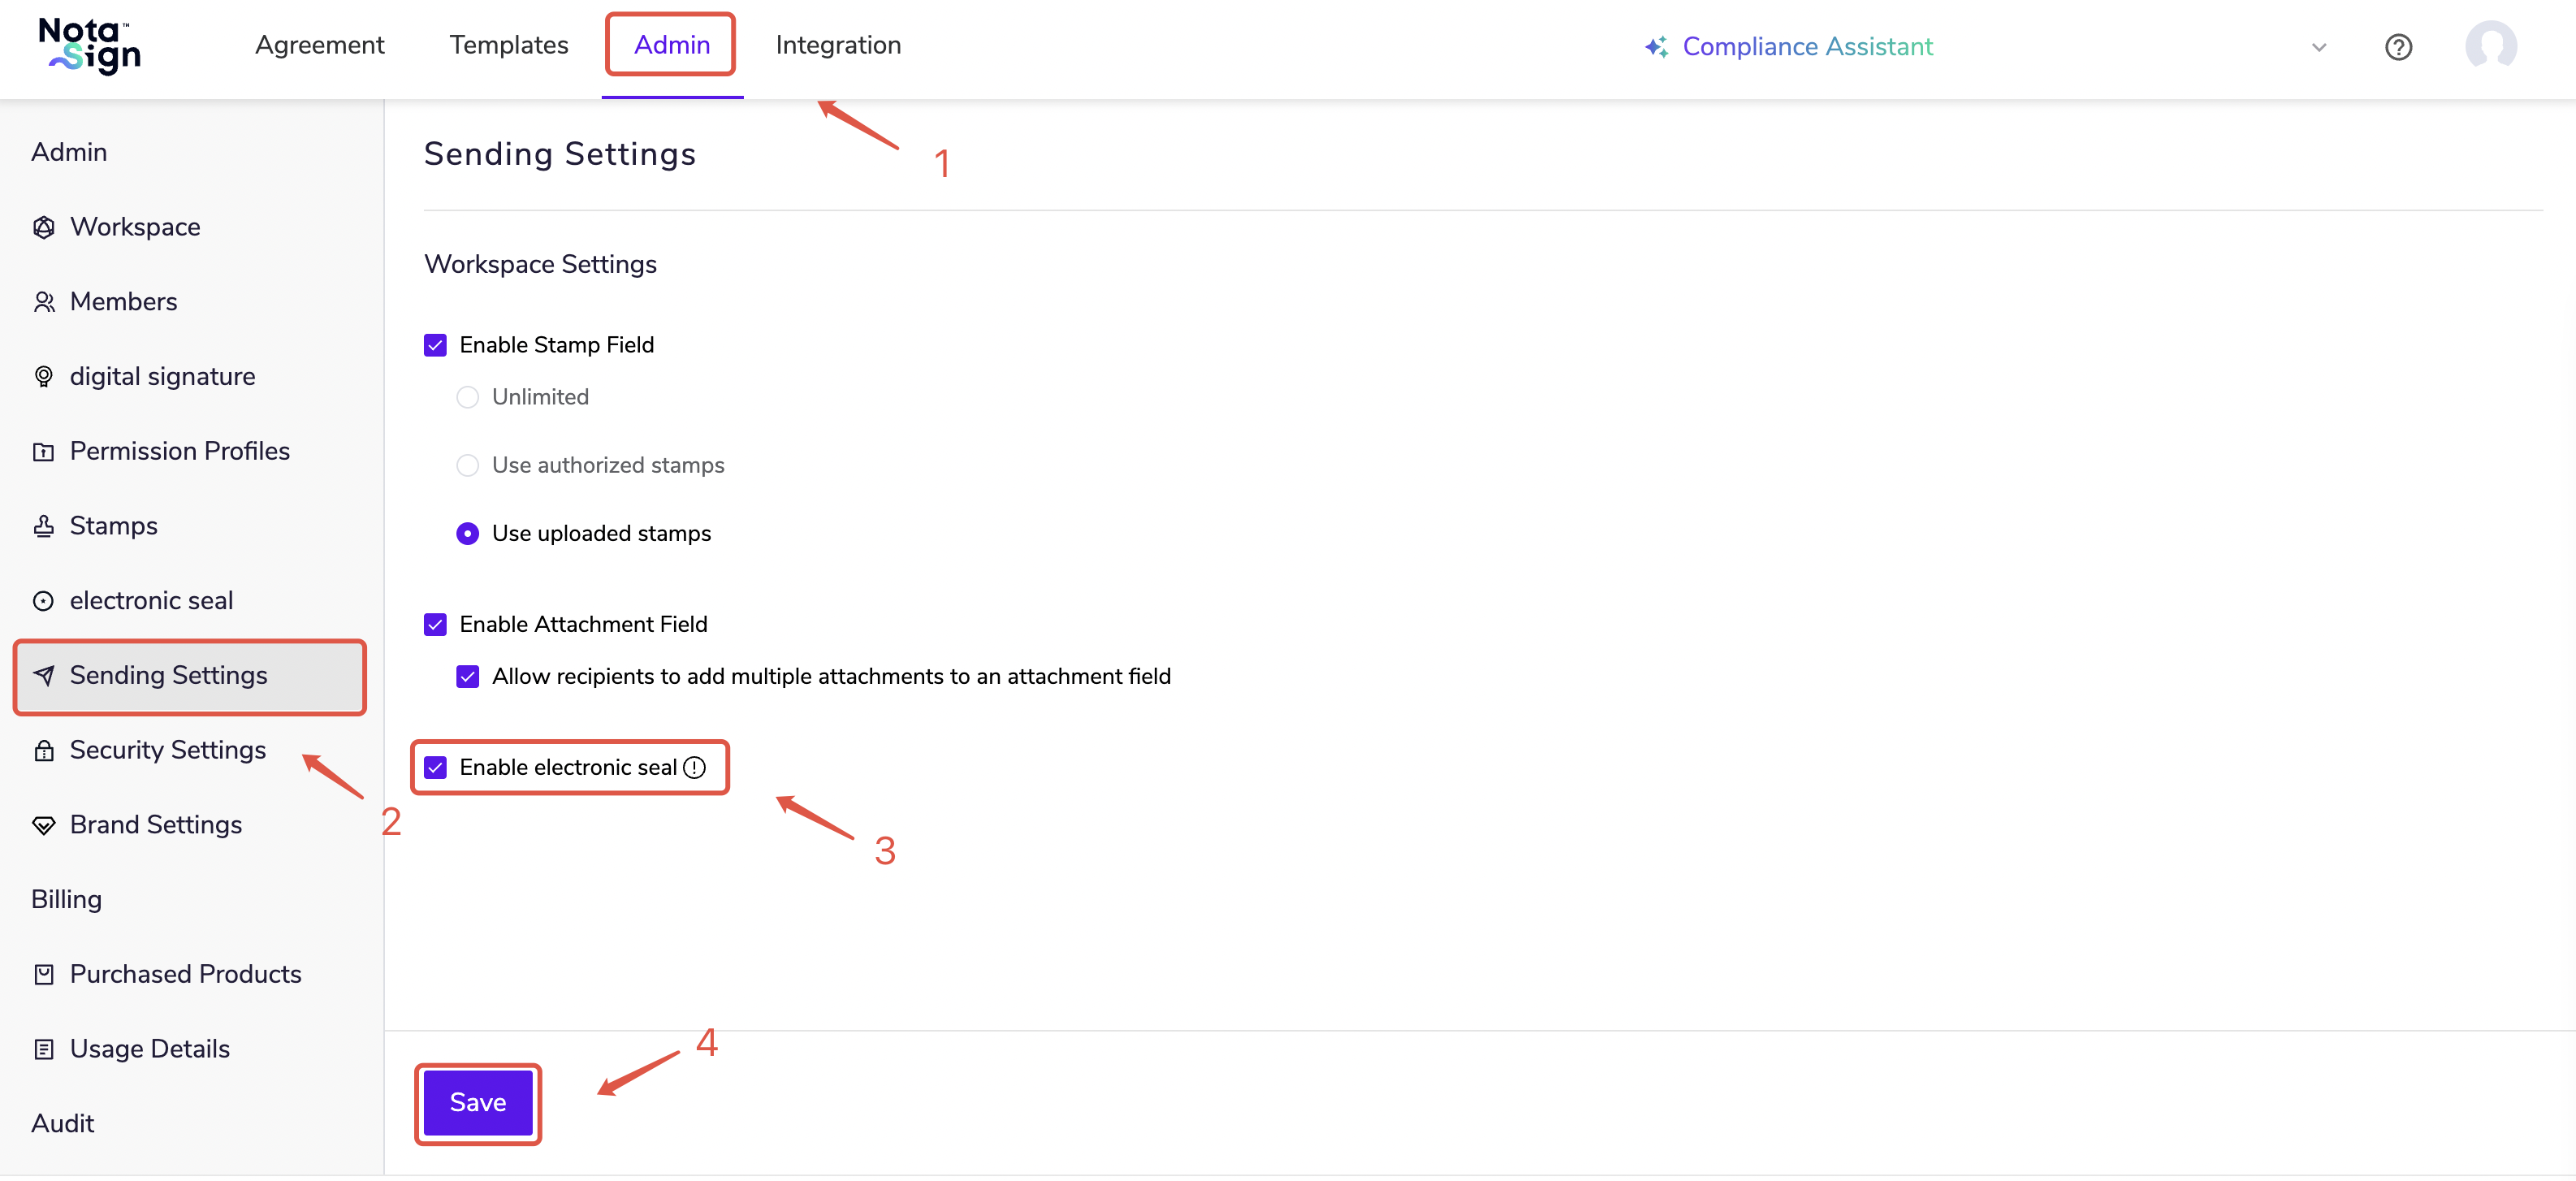
(1) Log in to the Nota Sign workspace and click Admin > Sending Settings. (2) Check Enable Electronic Seal then click Save.
3.2. View Electronic Seal Details
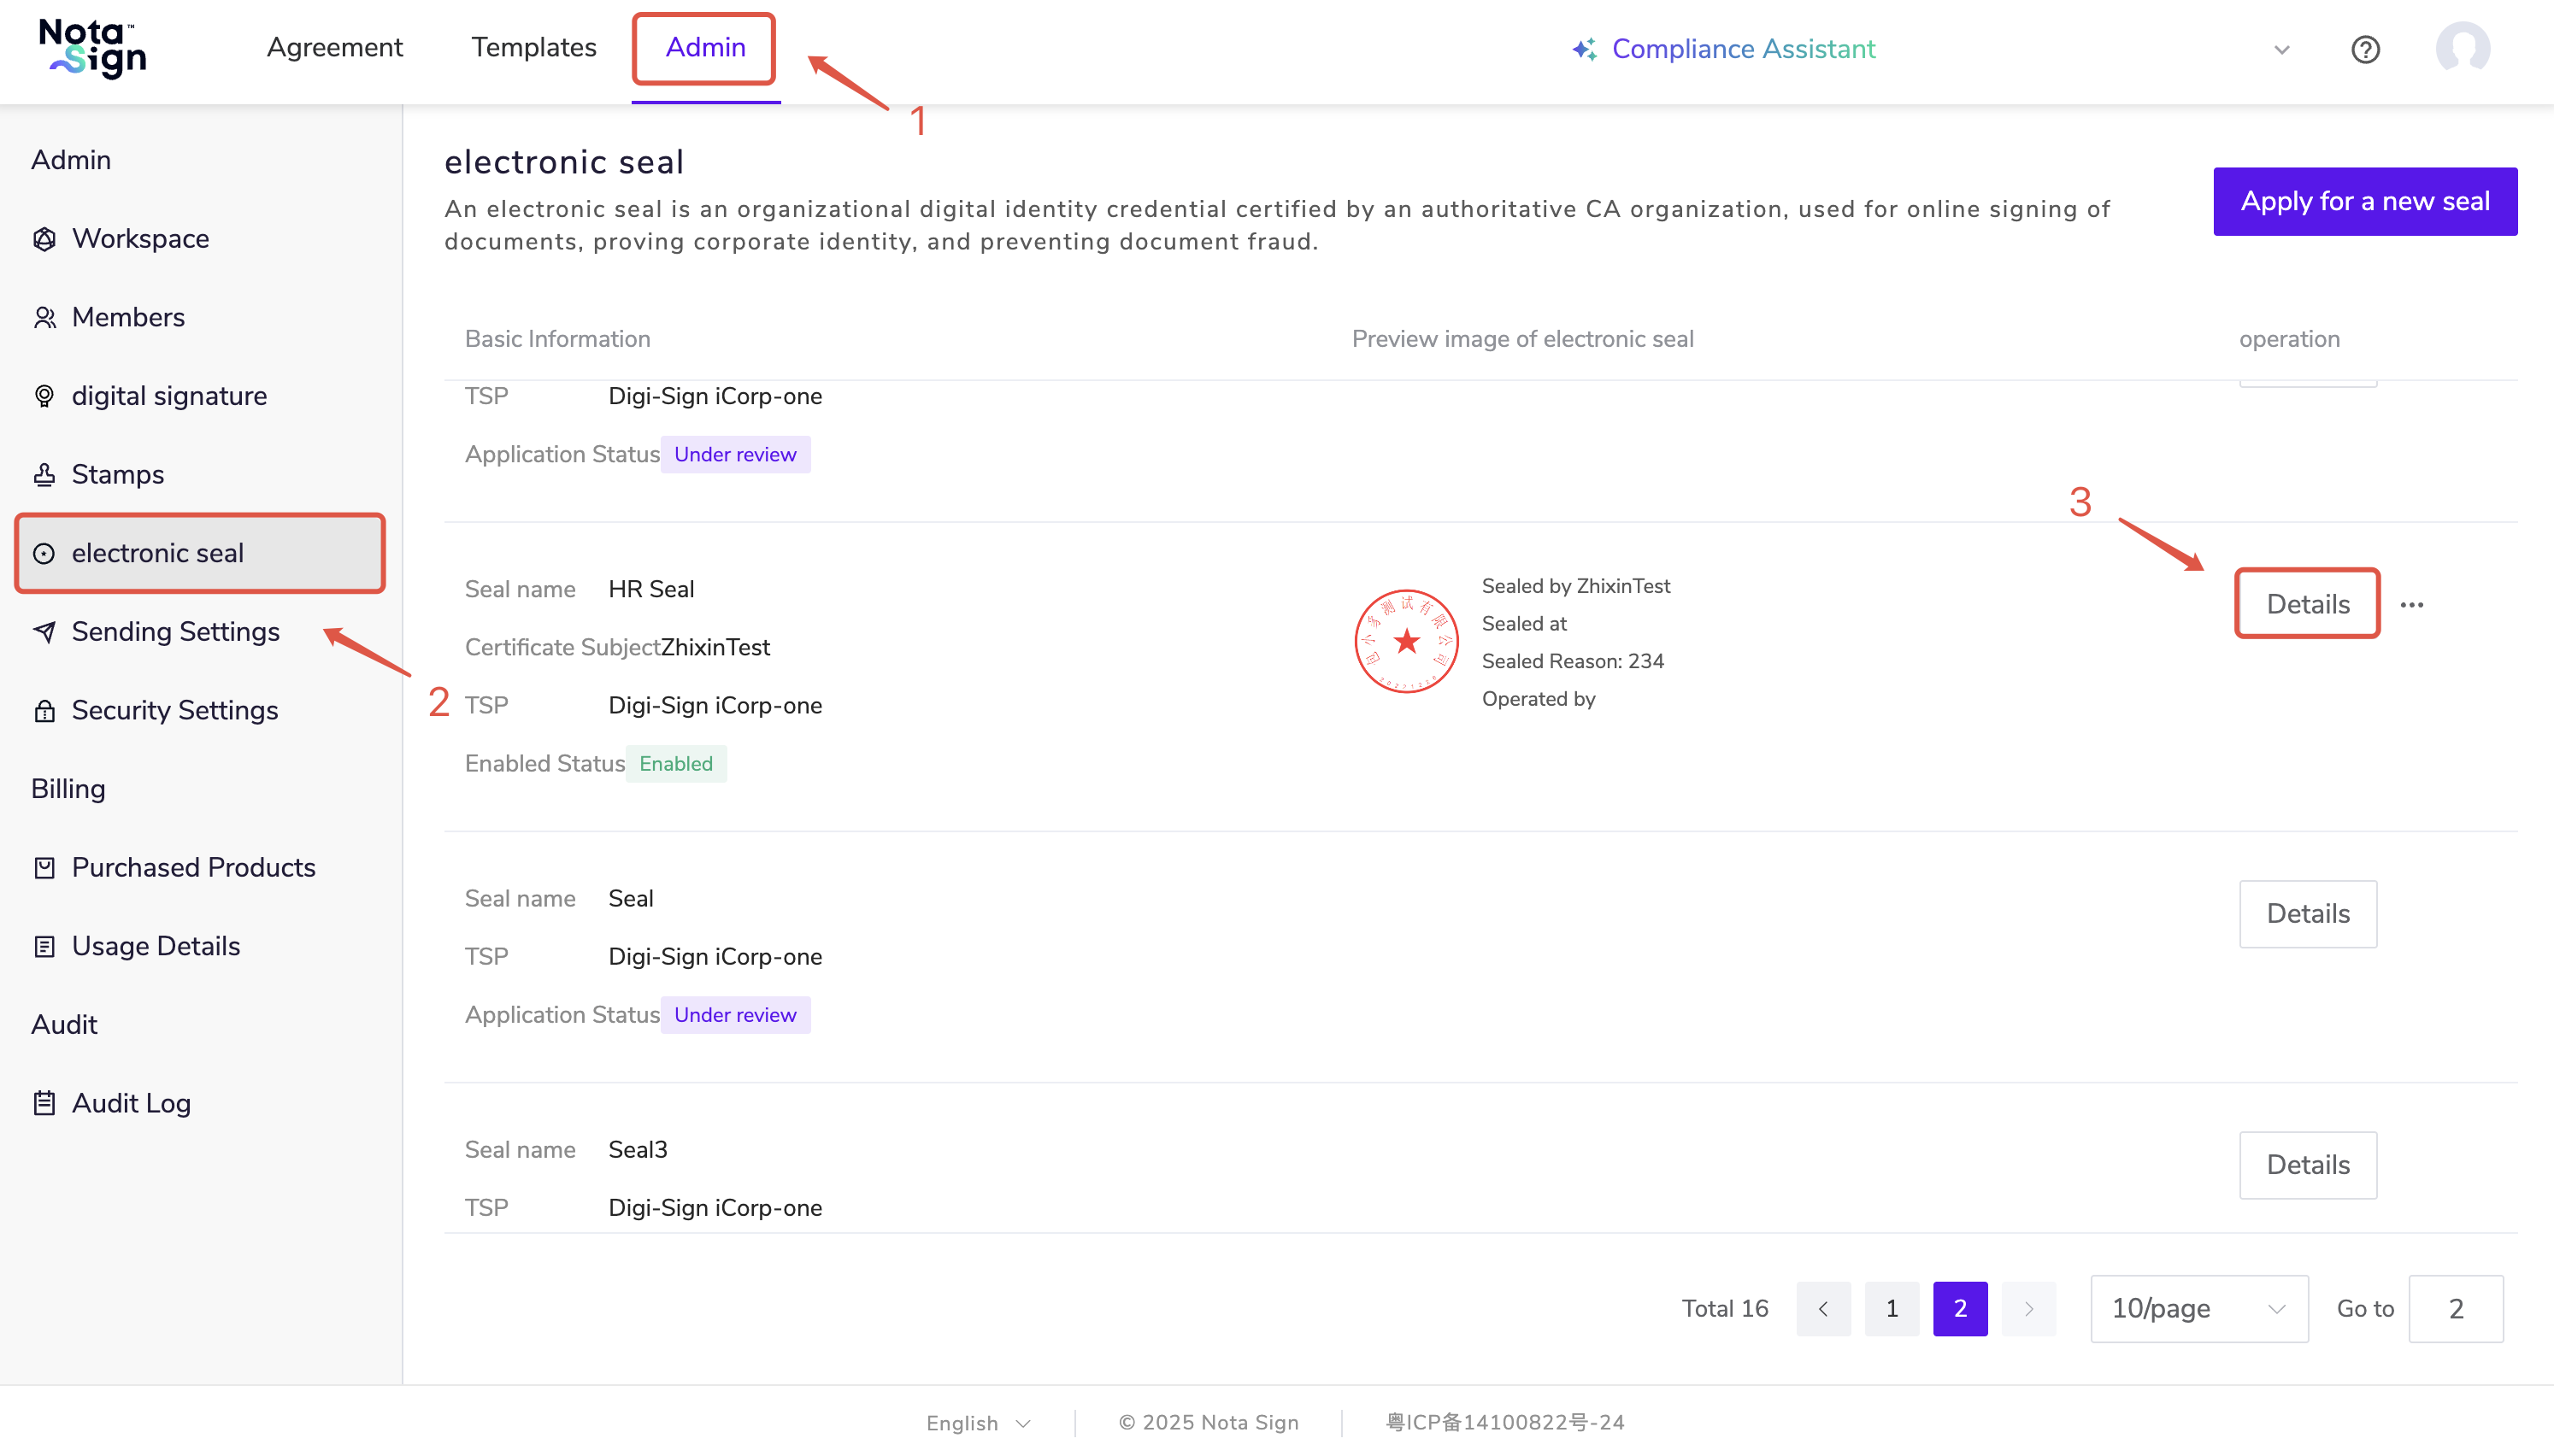
(1) Click Admin > Electronic Seal. (2) On the Electronic Seal page, you can view all issued seals, including the seal name, seal type, and certificate validity period. (3) Click Details to view detailed information. The seal name can be modified, and you may upload a custom seal image and add remarks.
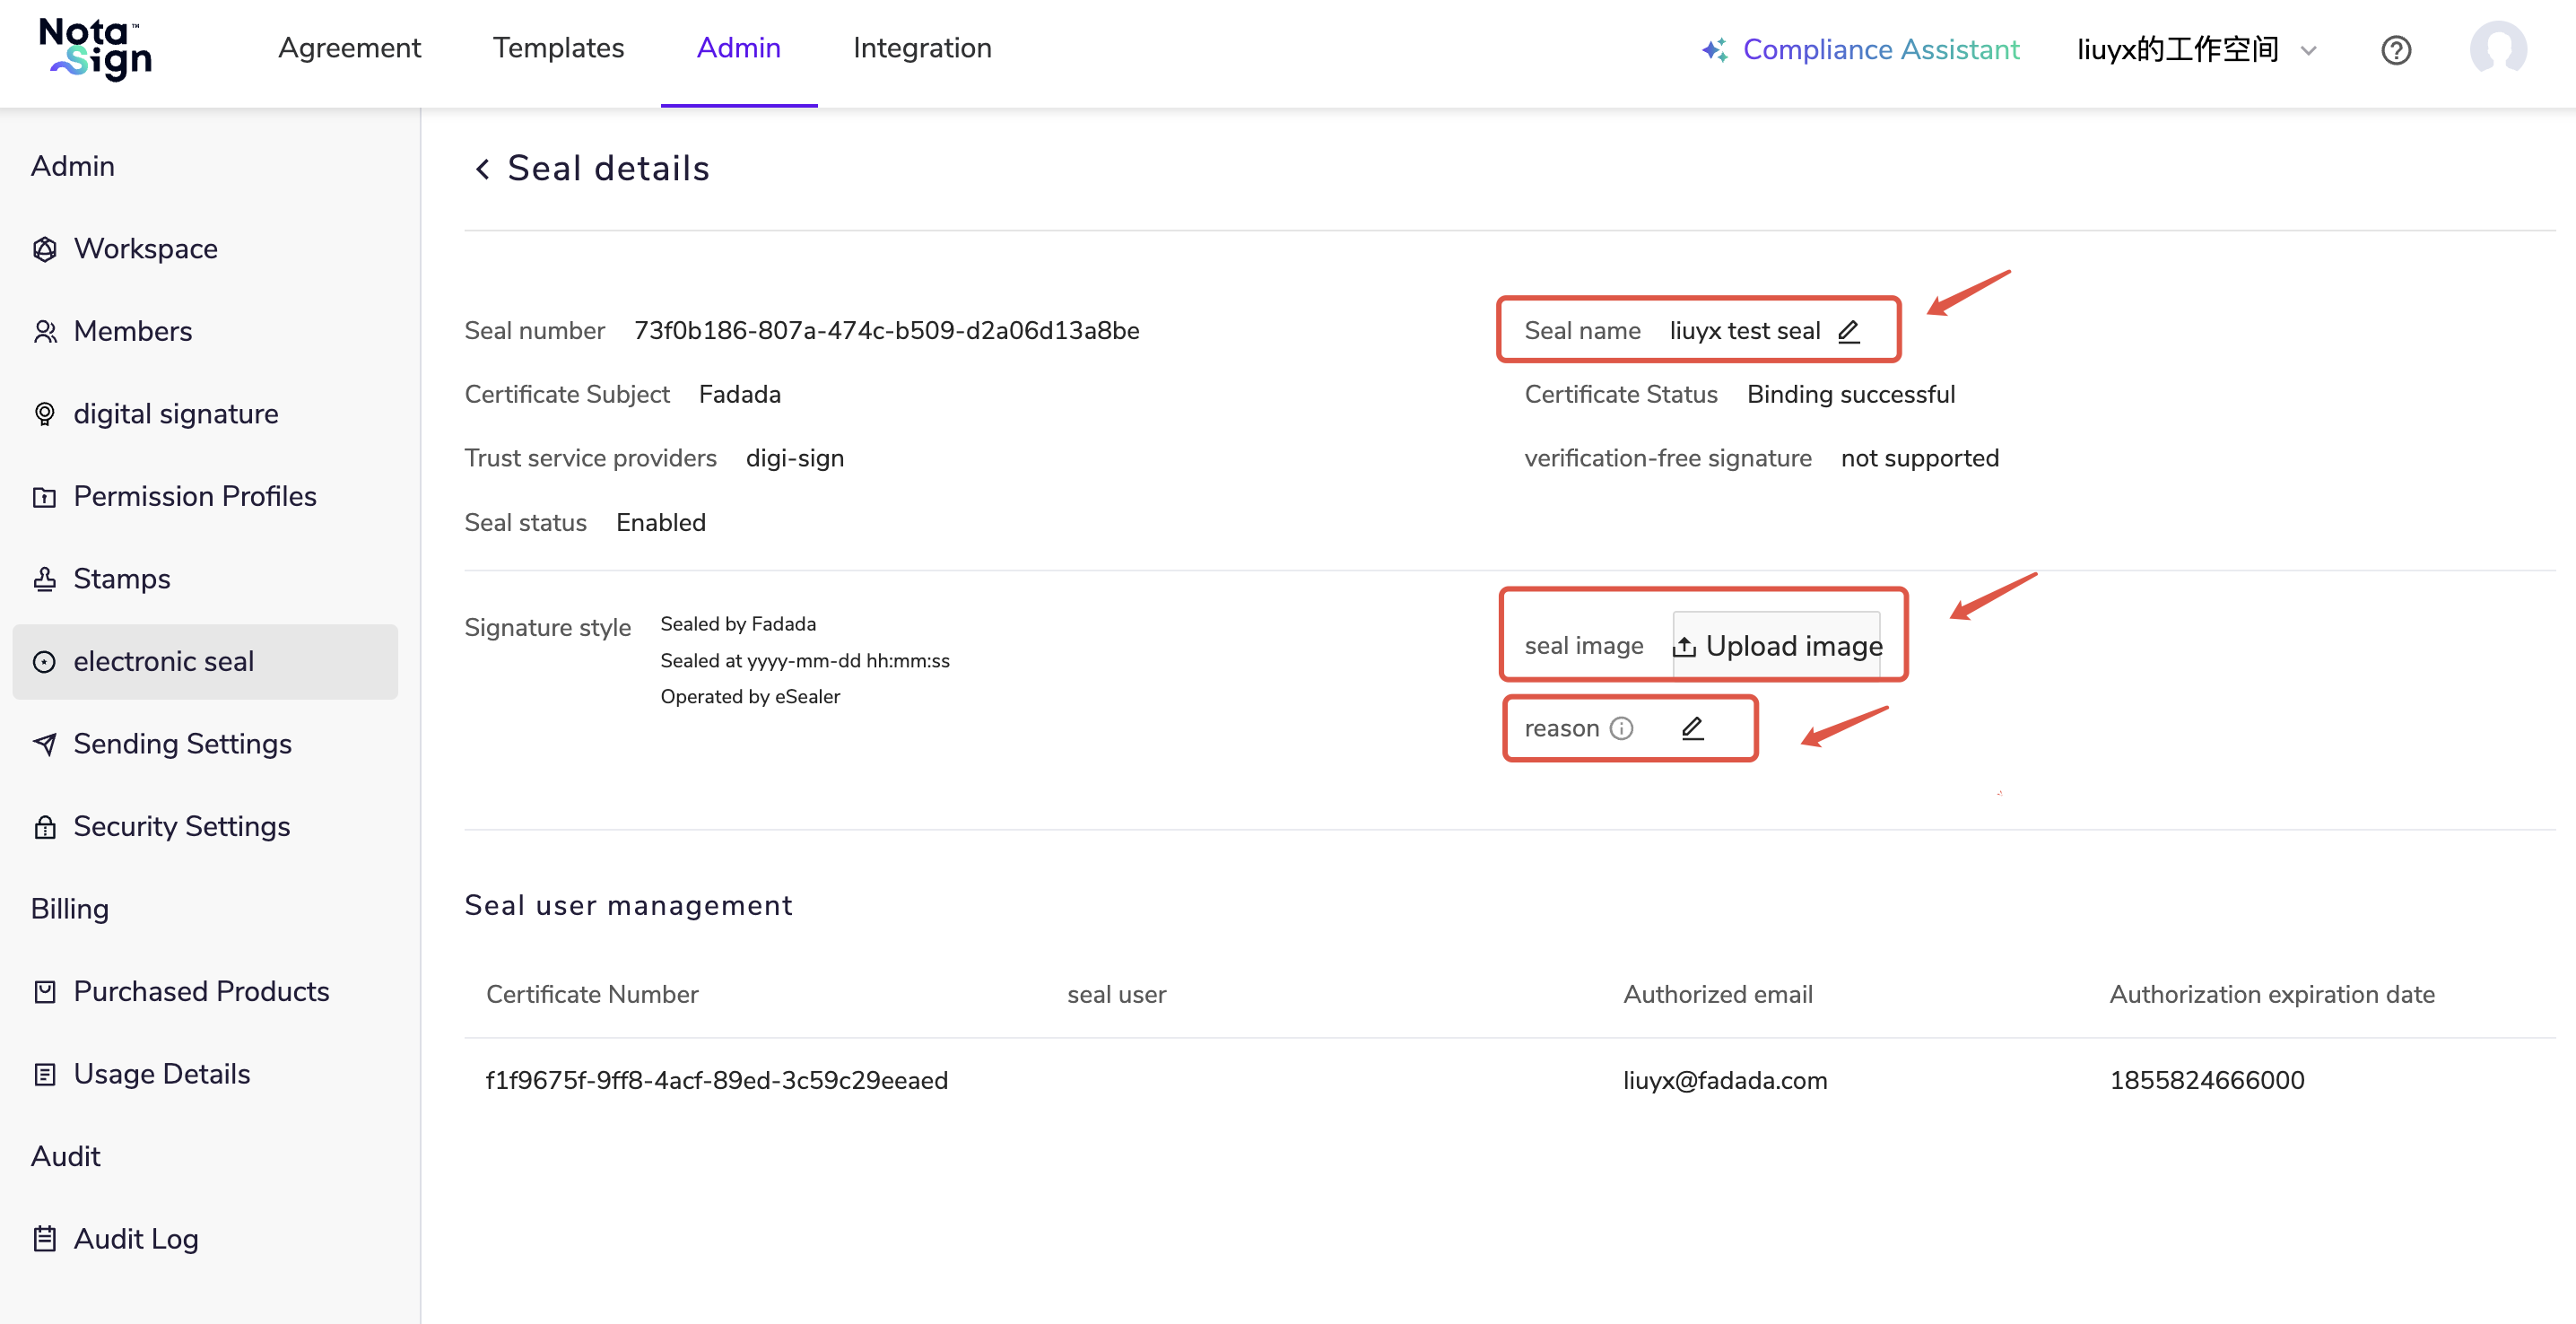
3.3. Set Signature Auxiliary Information
Administrators can set whether to display seal auxiliary information in the signed PDF document after signing is completed. Seal auxiliary information includes Certificate Subject, Signing Time, Signing Reason, and Operation Account.
(1) Click [Manage] → [Electronic Seals] to enter the electronic seal management page; (2) Find the electronic seal that needs to be configured and enter the electronic seal details page; (3) Find [Display Seal Auxiliary Information] and enable or disable this feature based on actual needs; (4) After completing the settings, save the electronic seal configuration.
When [Display Seal Auxiliary Information] is enabled, both the seal image and the seal auxiliary information will be displayed in the signed PDF document. When disabled, only the seal image will be displayed.
Notes:
- If the electronic seal does not have a seal image uploaded, [Display Seal Auxiliary Information] is enabled by default and cannot be disabled;
- After disabling [Display Seal Auxiliary Information], the current seal image cannot be deleted. To delete it, please re-enable this feature first;
- Hiding seal auxiliary information only changes the seal appearance in the PDF page and does not affect the certificate signature, signature verification, timestamps, or audit evidence of the electronic seal;
- Modifying the seal appearance does not affect the electronic seal appearance in already signed documents.
3.4. Disable an Electronic Seal
After a seal application is approved, it is enabled by default. Click Disabled to immediately revoke the usage rights of the seal.
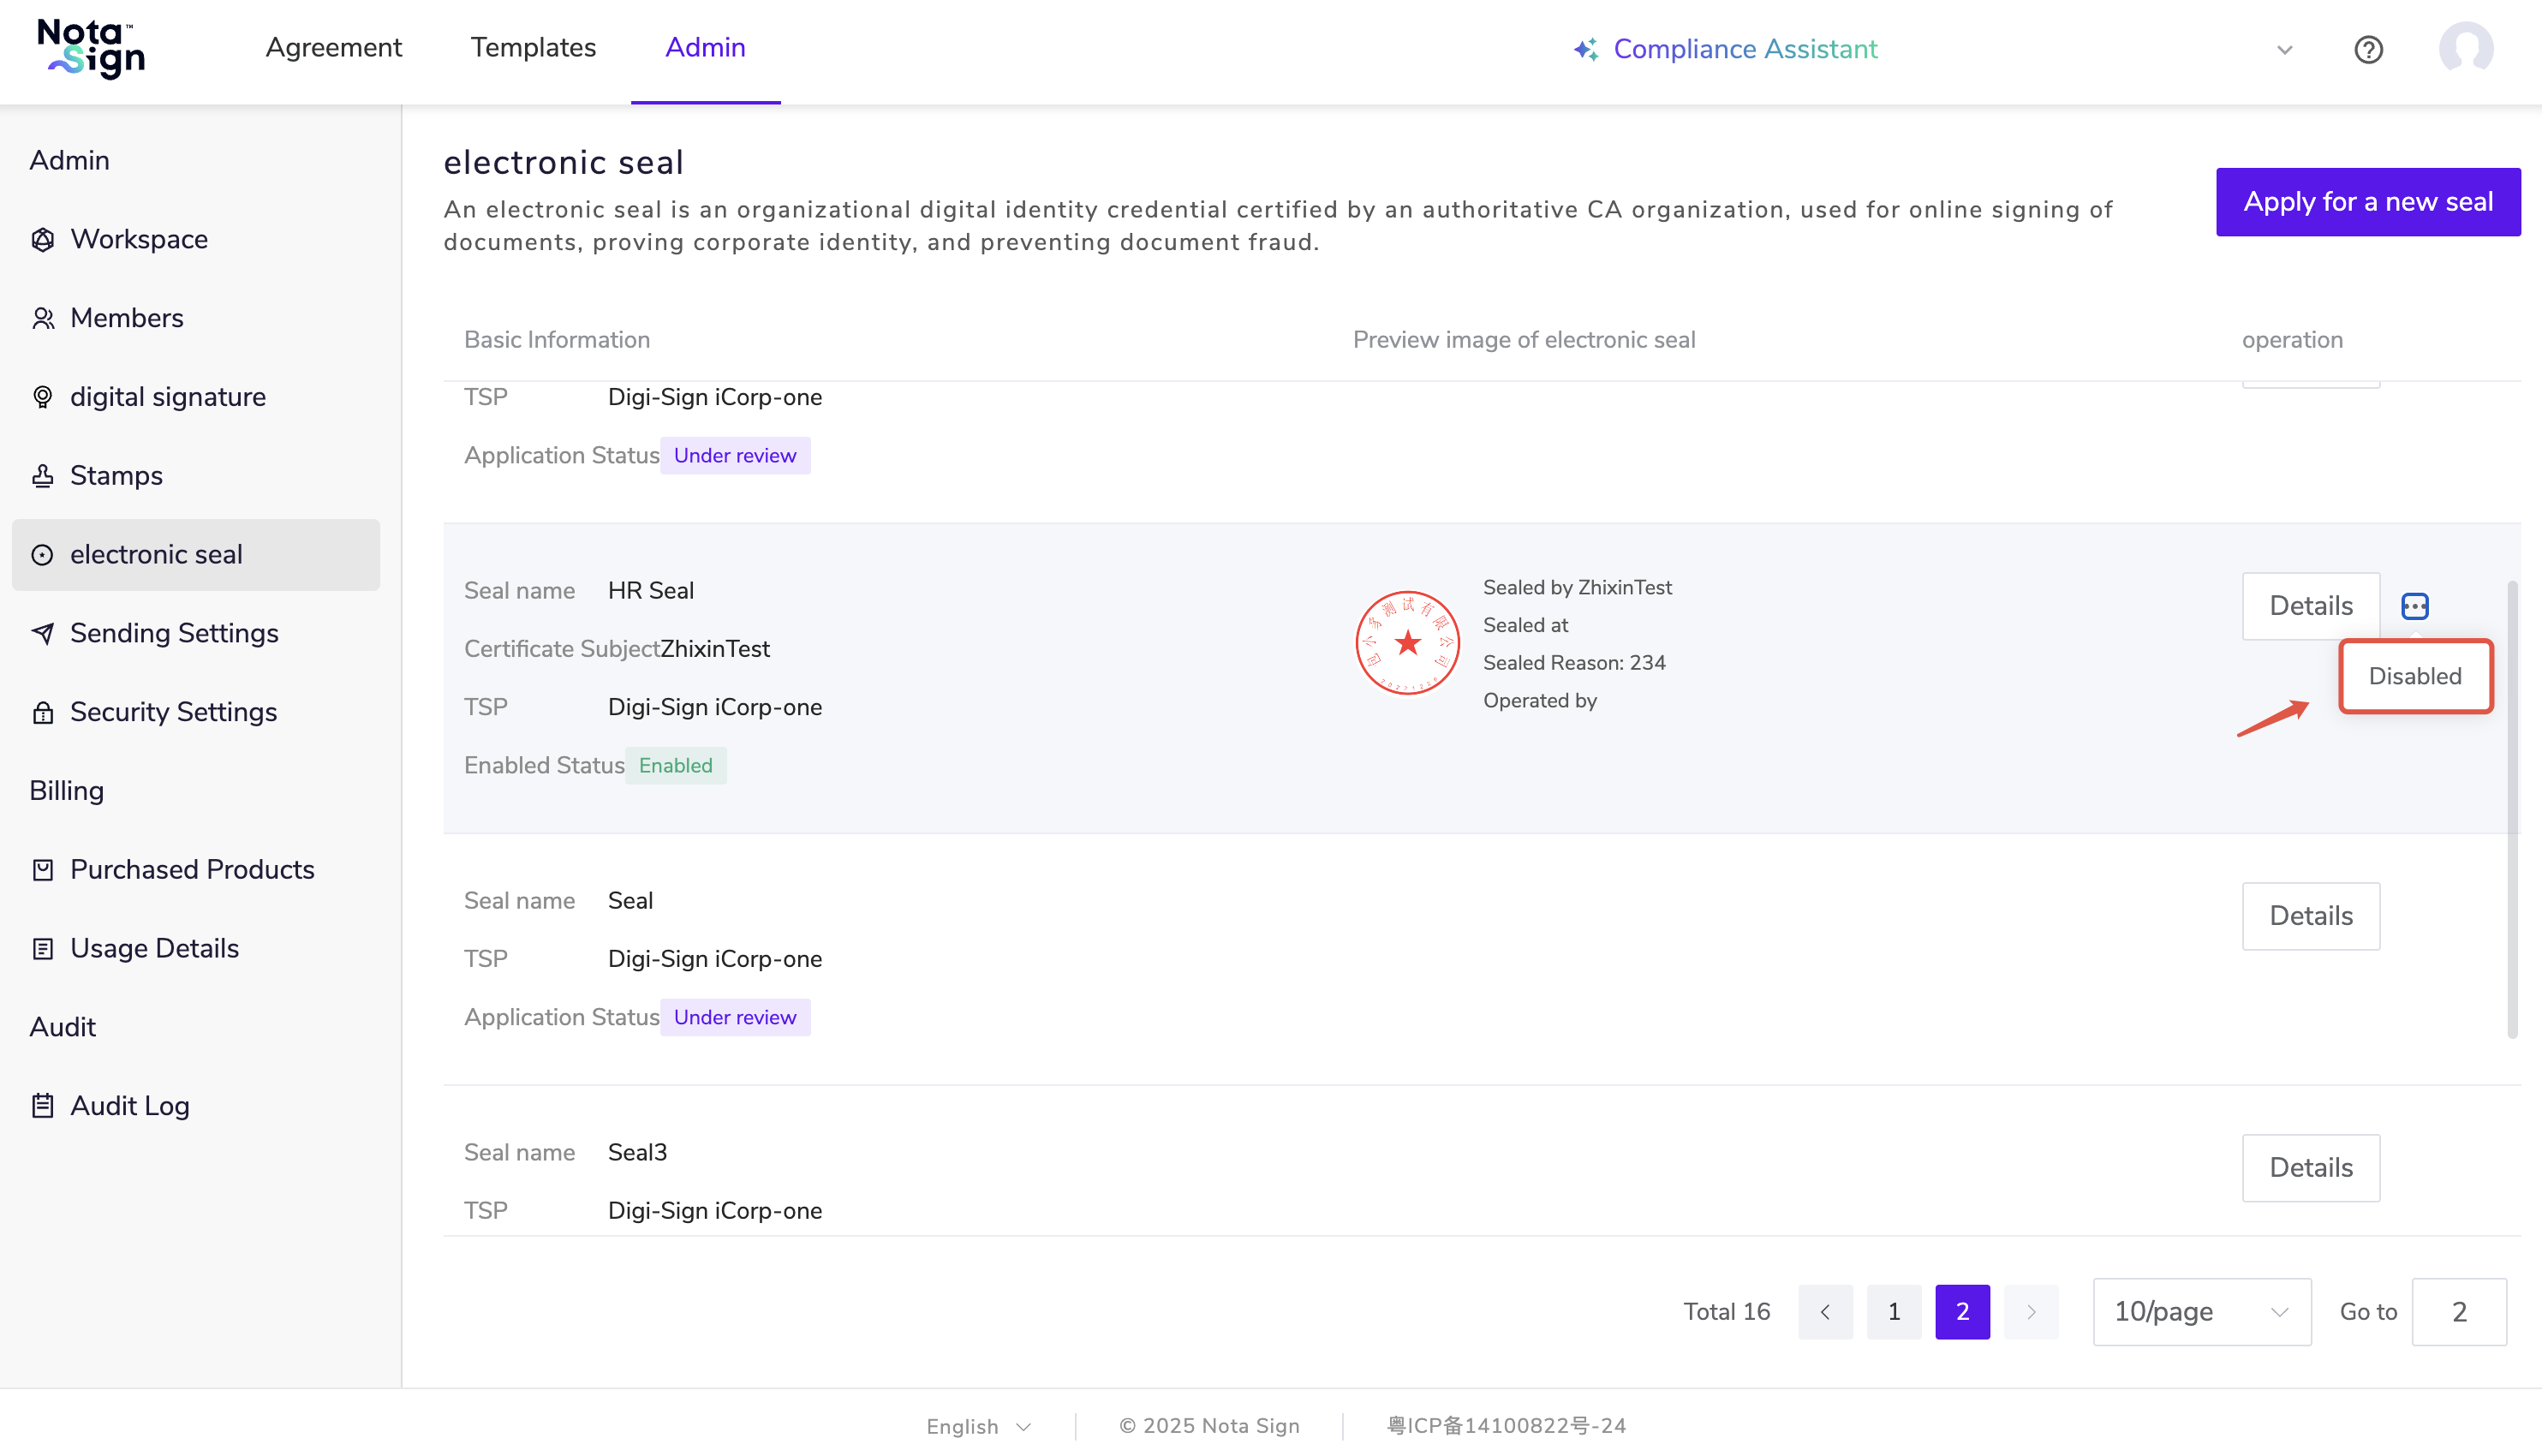
Disabling Notes:
- Once disabled, any ongoing signing processes using this seal will be immediately terminated and cannot be completed.
- The seal will no longer appear in the selectable list when creating envelopes or initiating signing.
- If a recipient attempts to use this seal during signing, it will no longer be selectable or usable.
Disabling only affects the seal’s signing functionality and does not delete historical signing records. Administrators may re-enable the seal at any time to restore its availability.
4. Add Electronic Seals When Sending an Envelope
Video Tutorial:
4.1. Enable Electronic Seal
(1) Log in to the Nota Sign Workbench and click [Admin] - [Sending Settings]; (2) Check [Electronic Seal] and click [Save].
4.2. Set Up Envelope
(1) Log in to the Nota Sign Workbench and click [Agreement] - [Send an Envelope]; (2) After setting up the recipient(s), click to add [Electronic Seal].
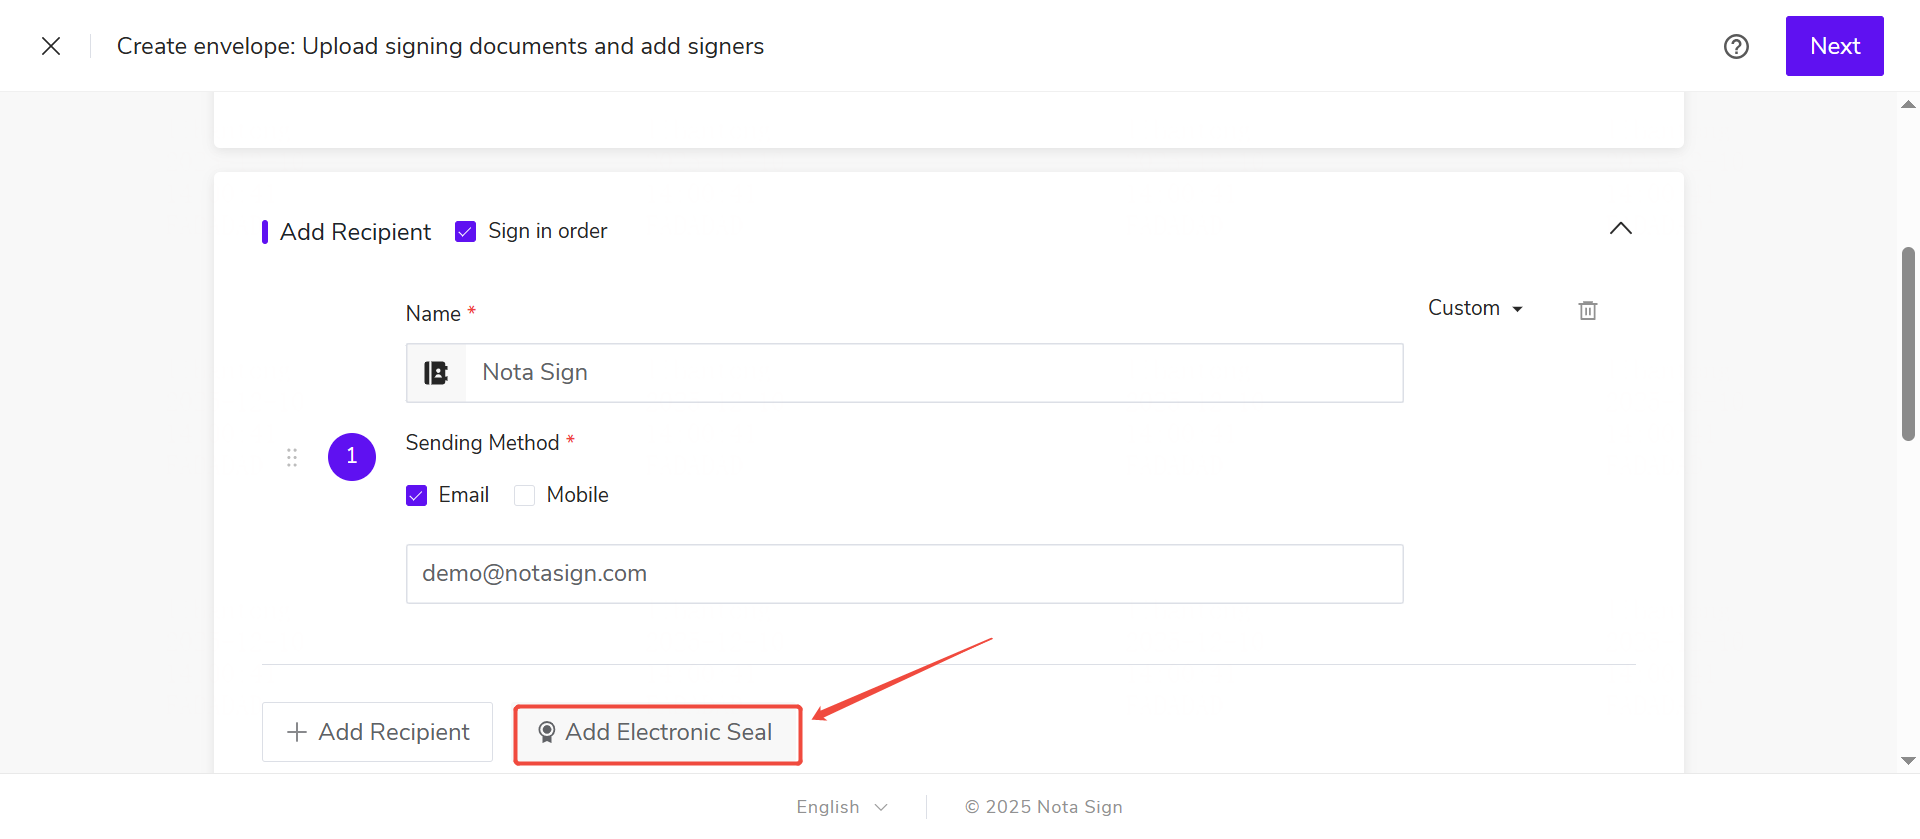
When sending an envelope, there are two ways to use an electronic seal. One is for the sender to apply the seal themselves, and the other is to designate another recipient to apply the seal.
4.3. Method 1: Sender Uses the Seal Themselves
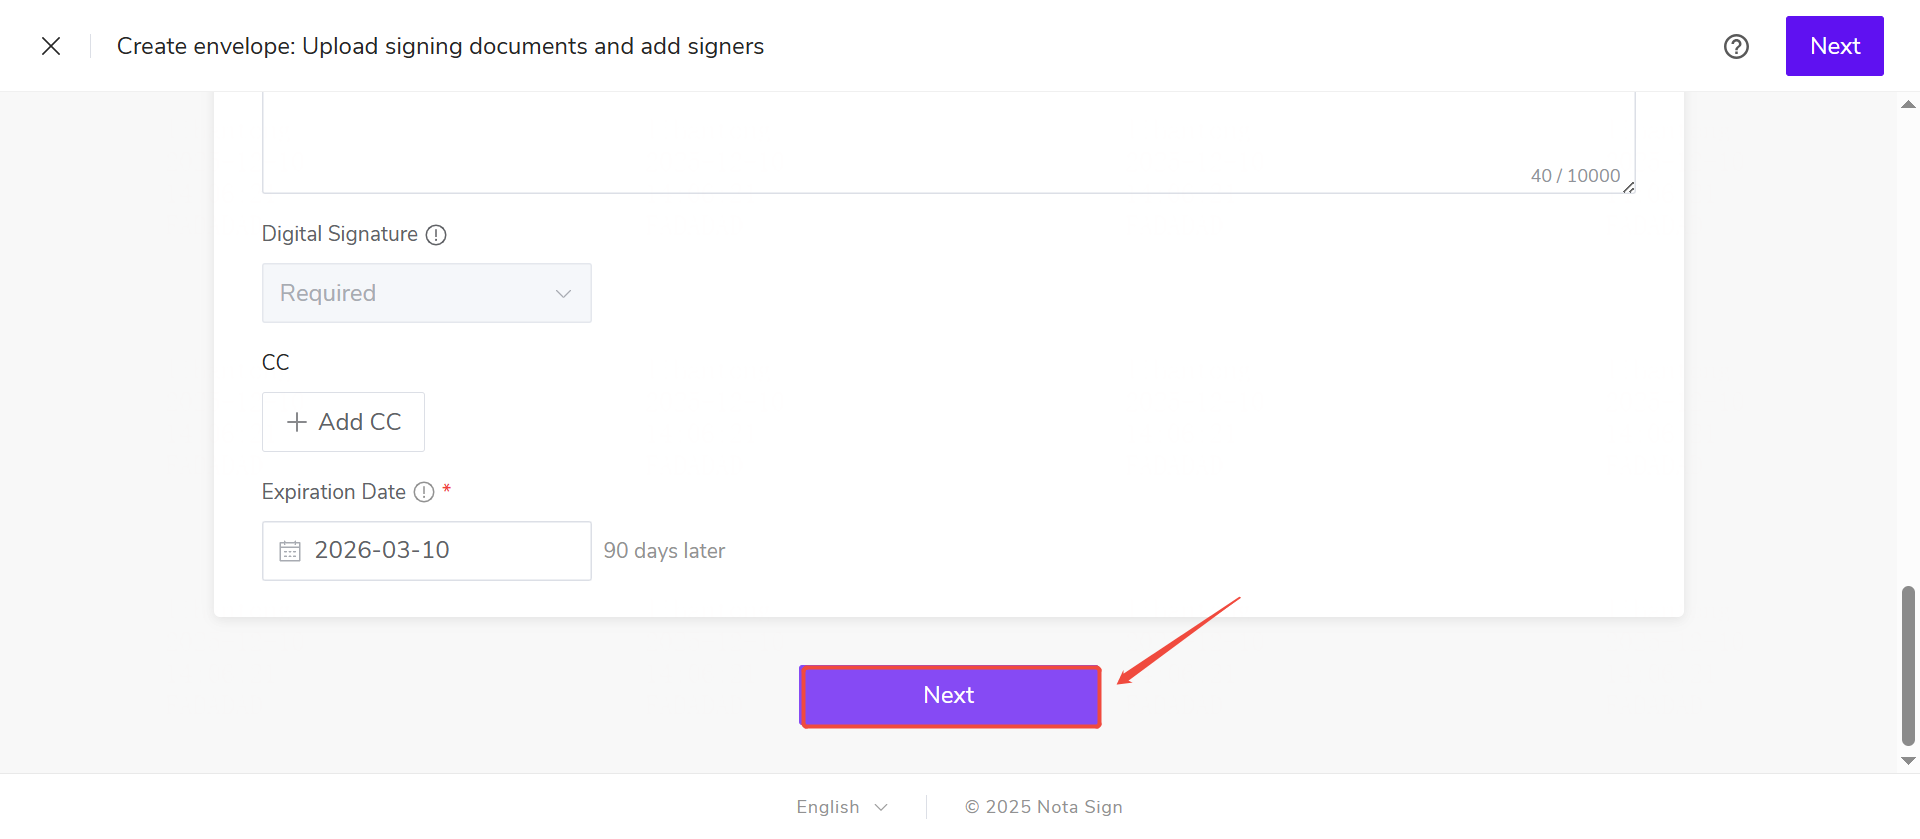
(1) Select the electronic seal to use from the list of authorized seals for the sender.
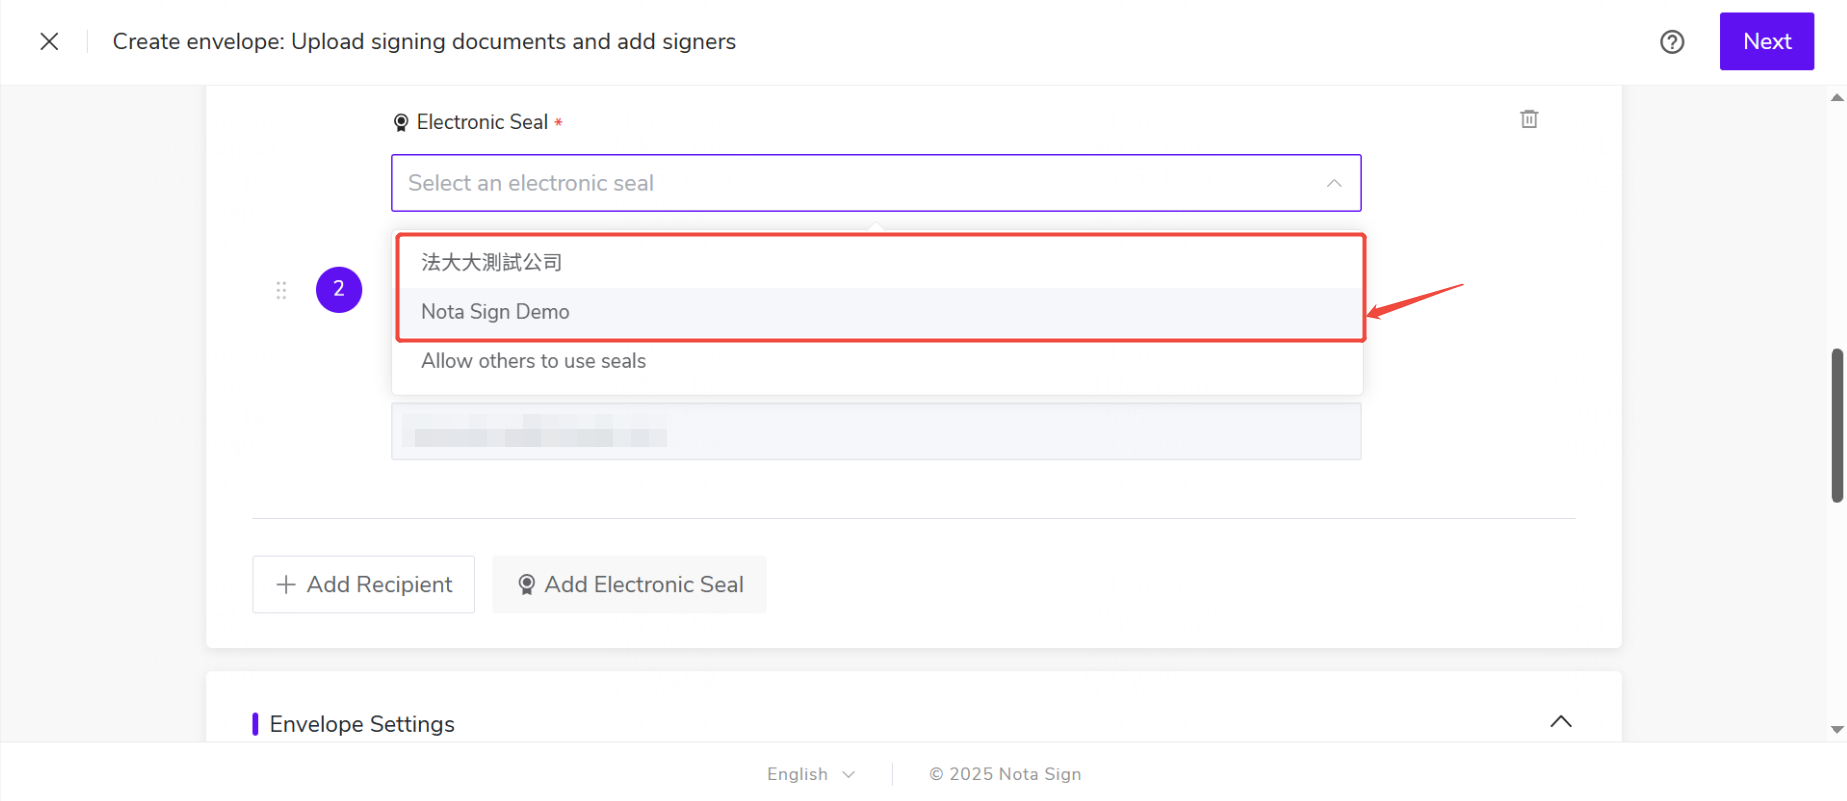
(2) Click [Next] at the bottom of the page to enter the Widget Settings Interface.
4.4. Method 2: Designate Others to Use the Seal
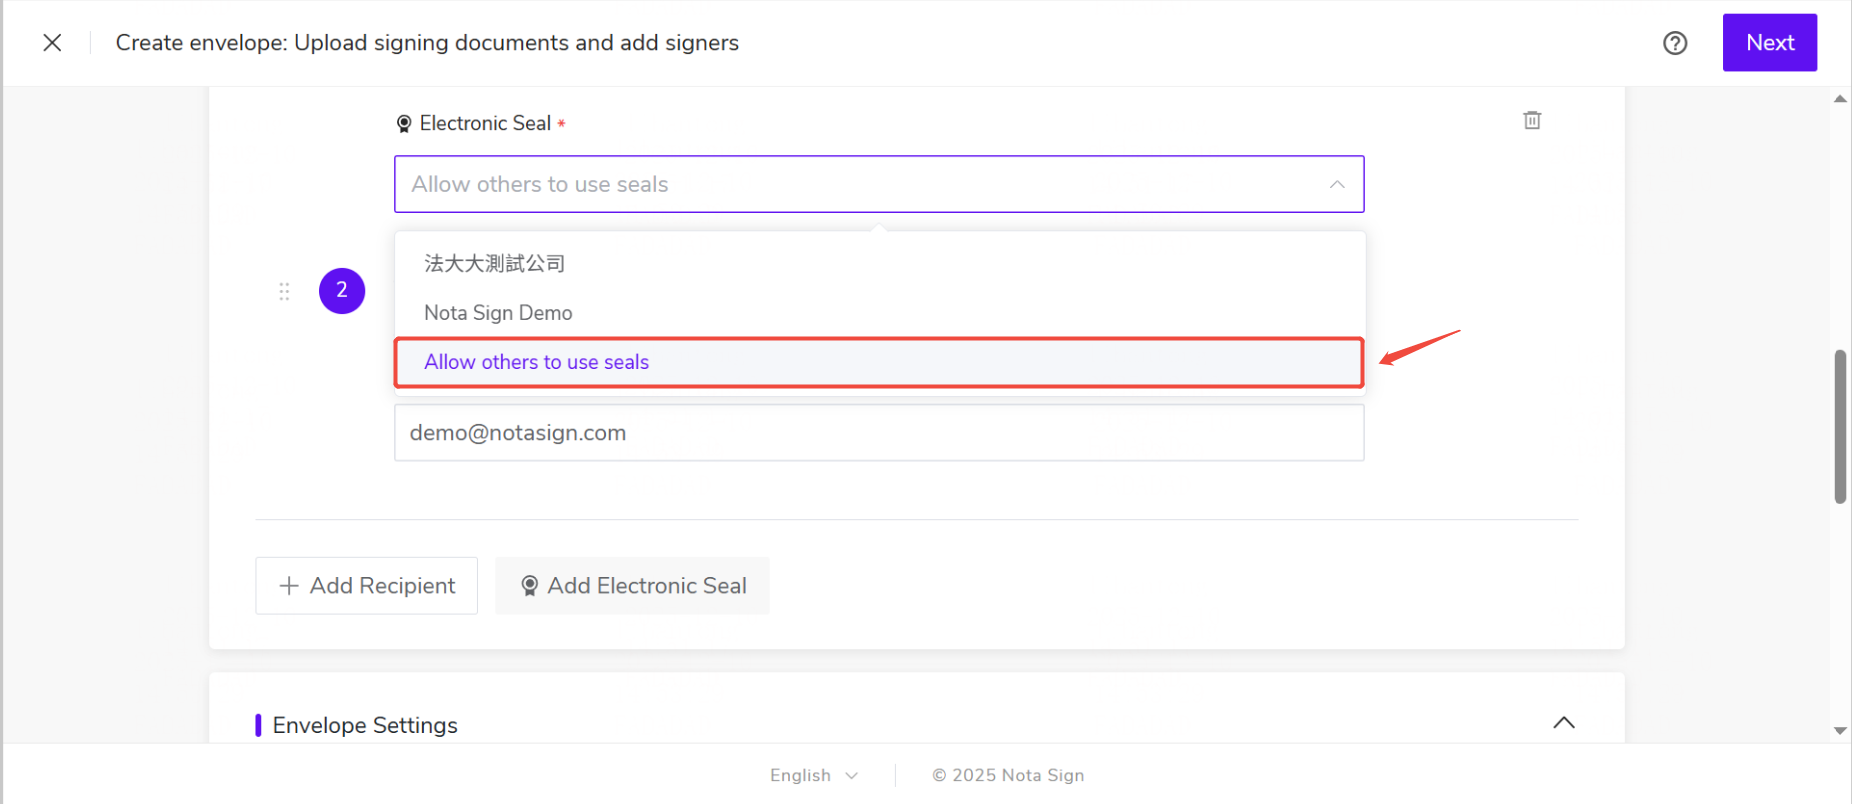
(1) Select “Designate Others to Use the Seal” from the list.
(2) Enter the authorized email address of the person who will use the seal.
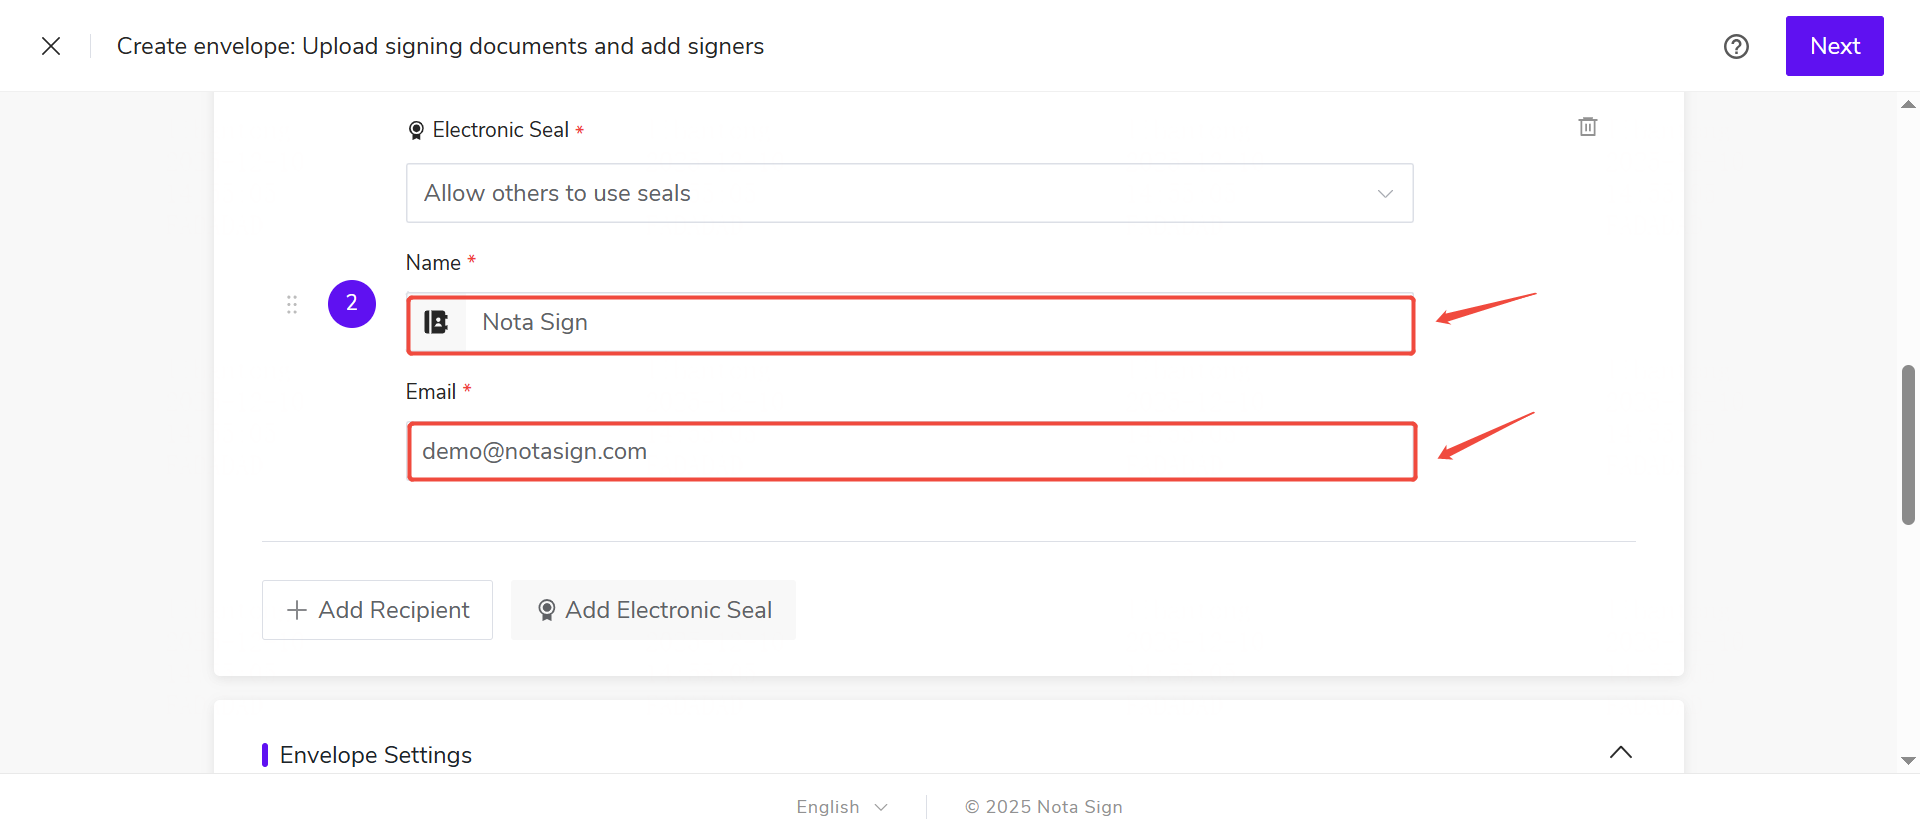
(3) Click [Next] at the bottom of the page to enter the Widget Settings Interface.
4.5. Set Up Electronic Seal Widgets
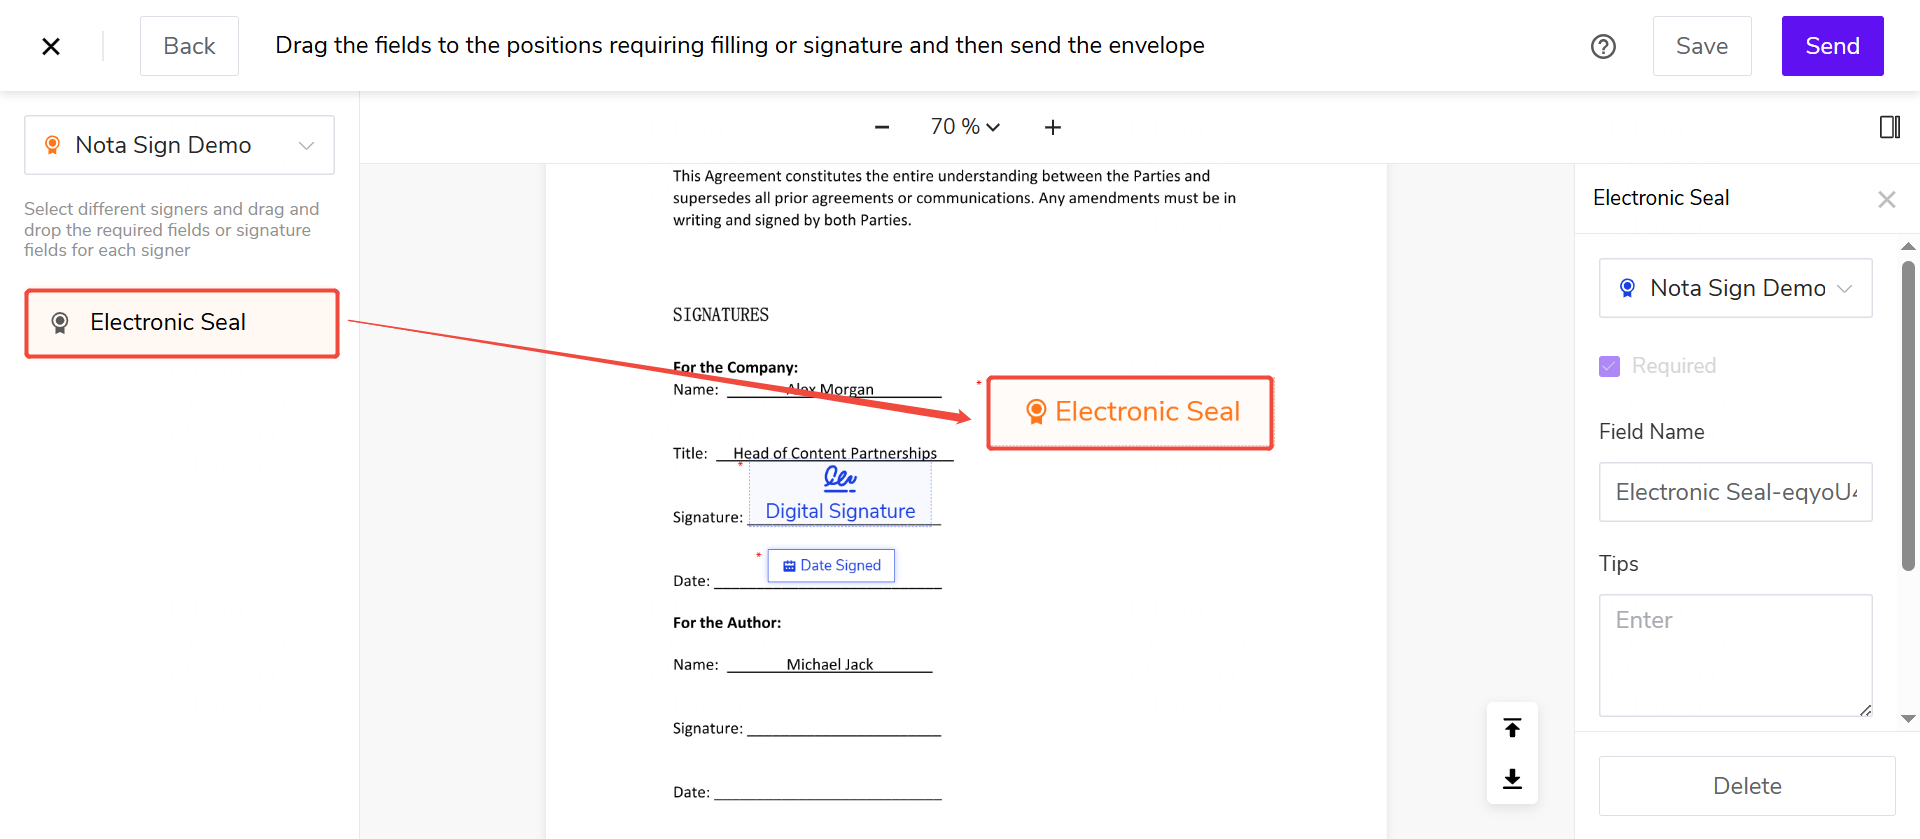
Select the widget from the left-side widget panel; drag it to the corresponding position in the main area of the document.
4.6. Send Signing Invitation
After completing the widget settings, click [Send] in the top right corner of the page to send the envelope.
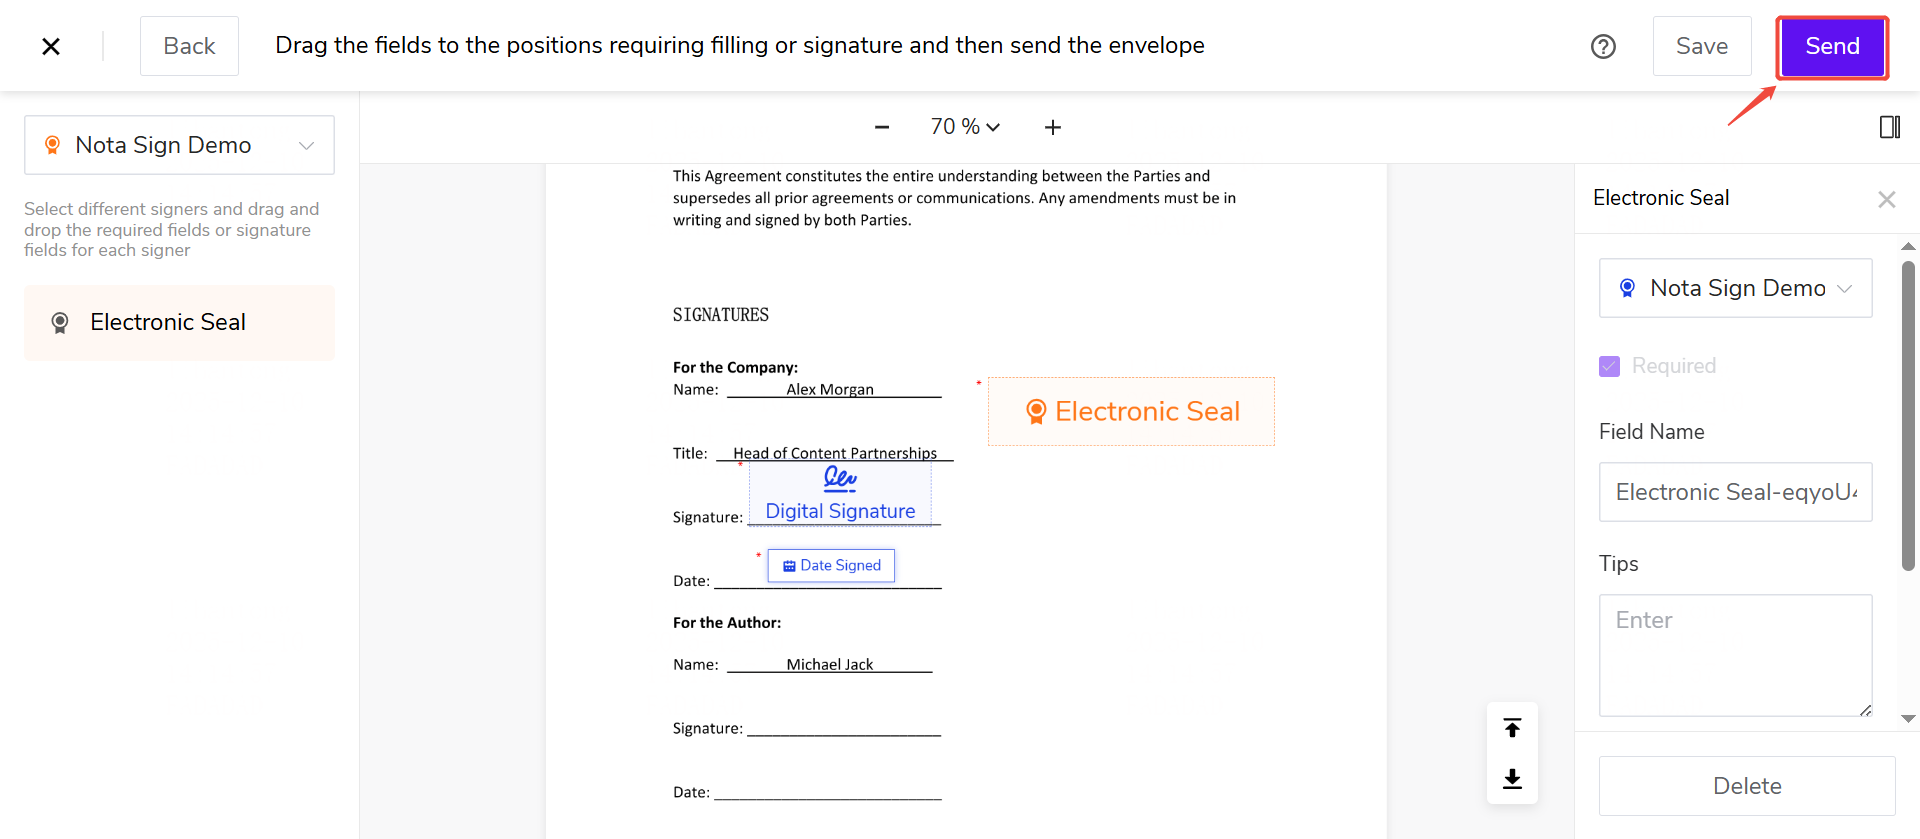
The recipient(s) will receive a signing email or SMS sent by the system, and can click the link to access the document and sign it.
5. Sign an Envelope Using an Electronic Seal
Video Tutorial:
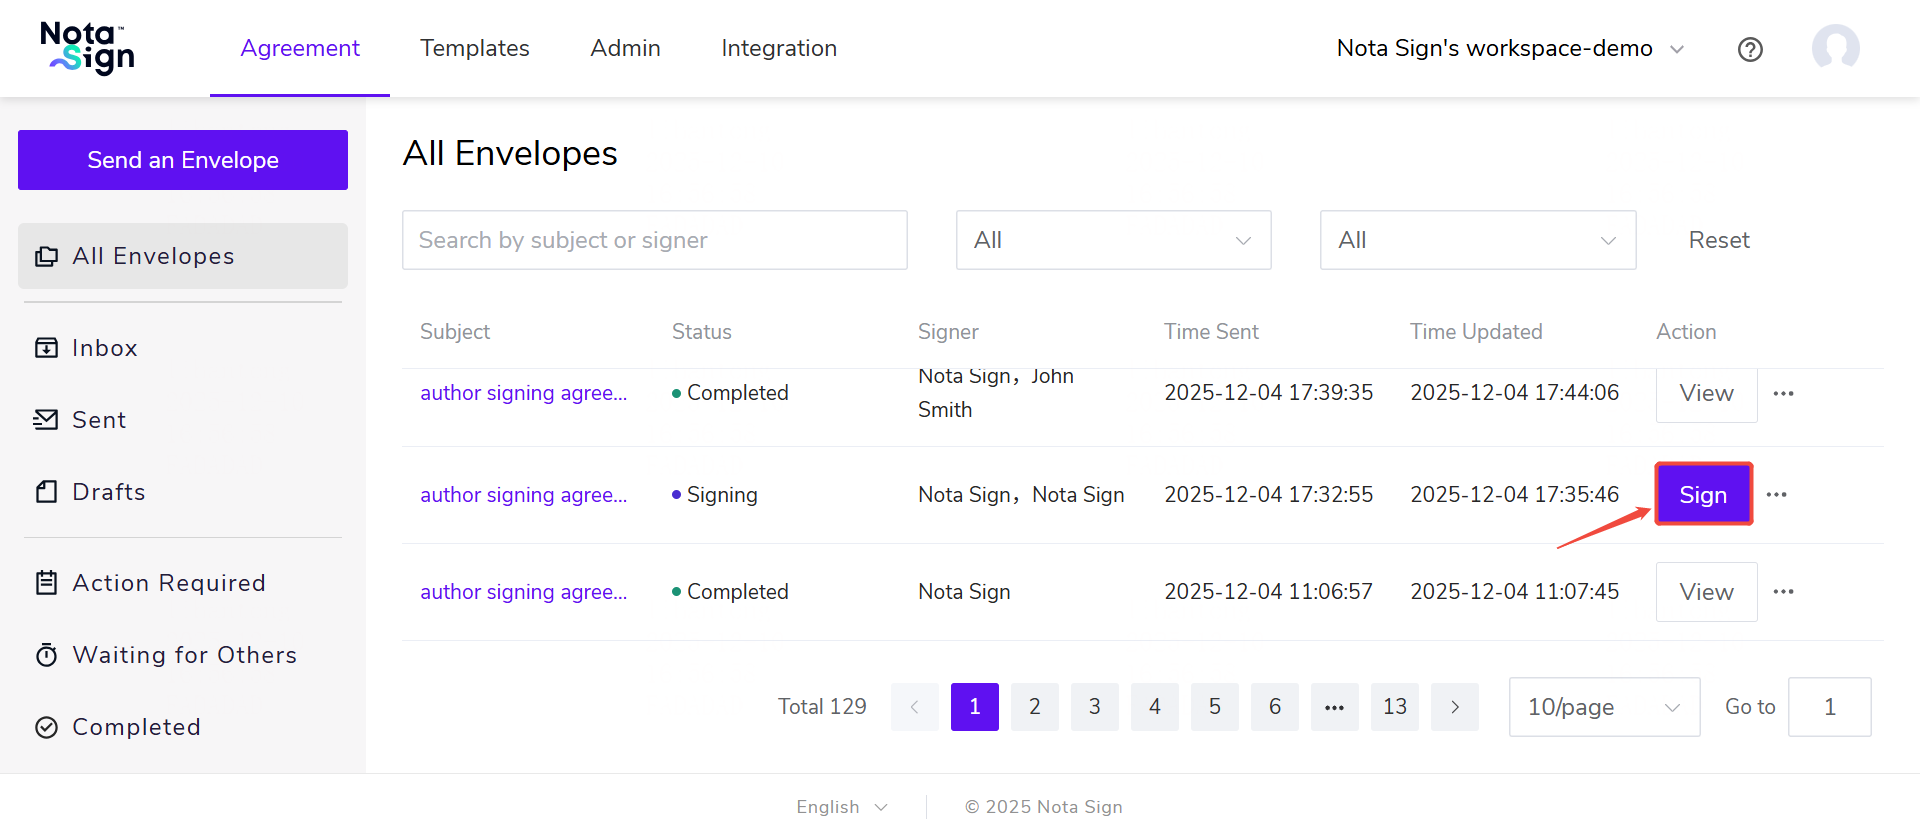
(1) Click [Agreement] - [All Envelopes] (2) Locate the document pending signature and click [Sign]
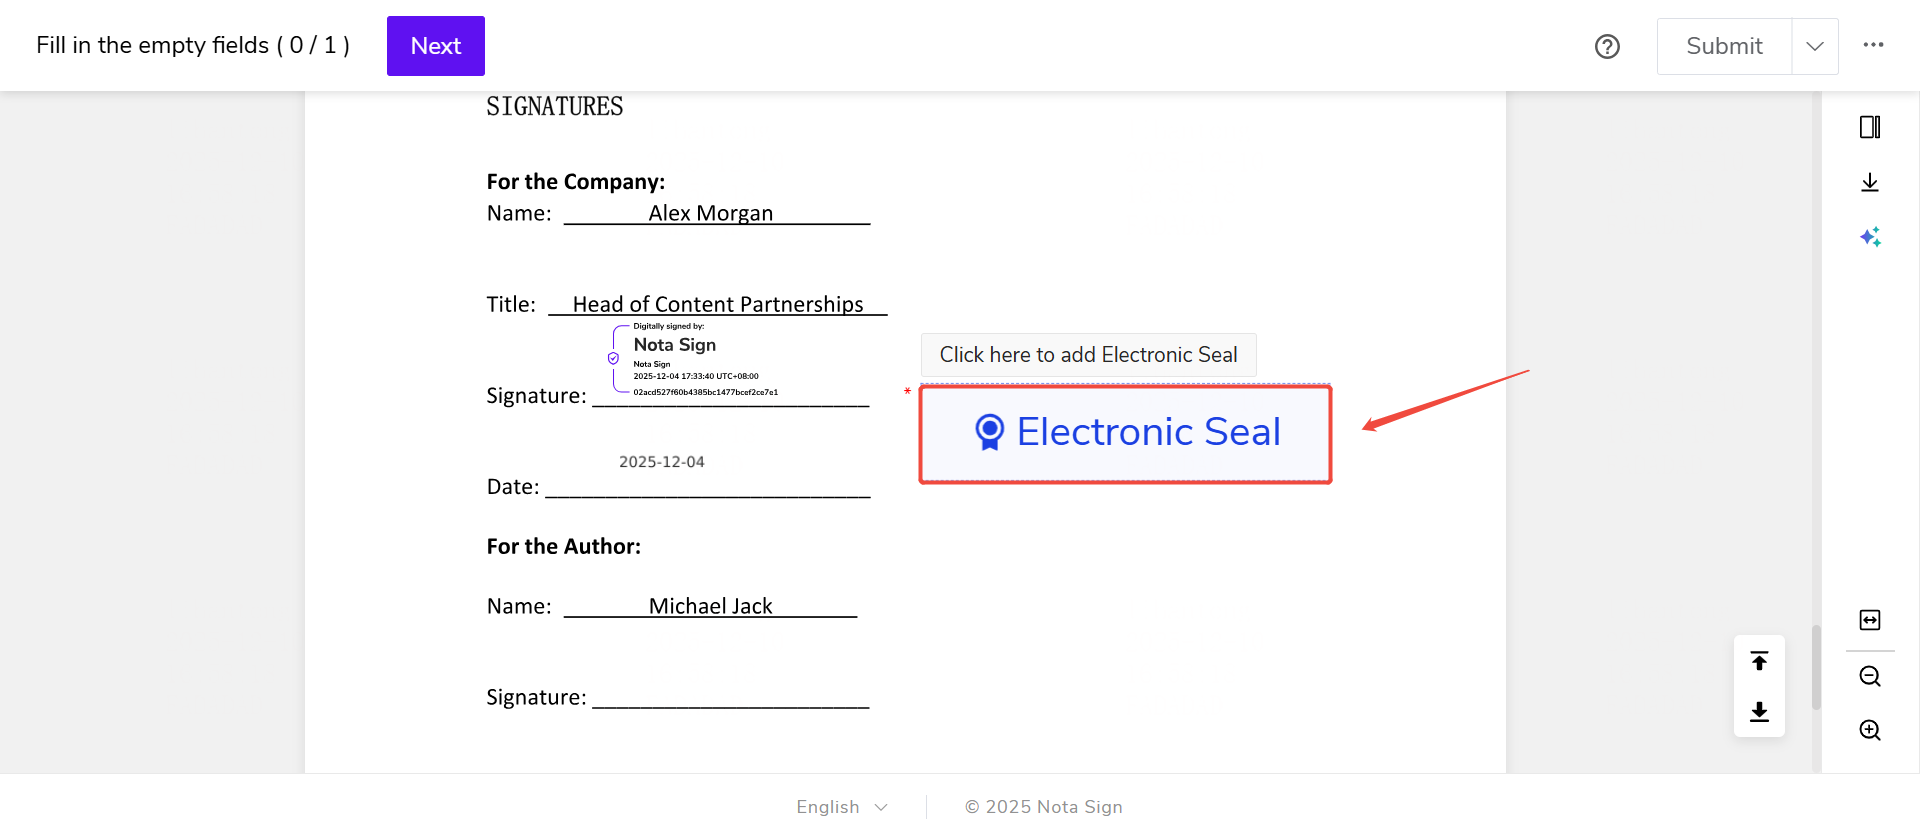
(3) Click the Electronic Seal Widget
(4) Select an authorized electronic seal
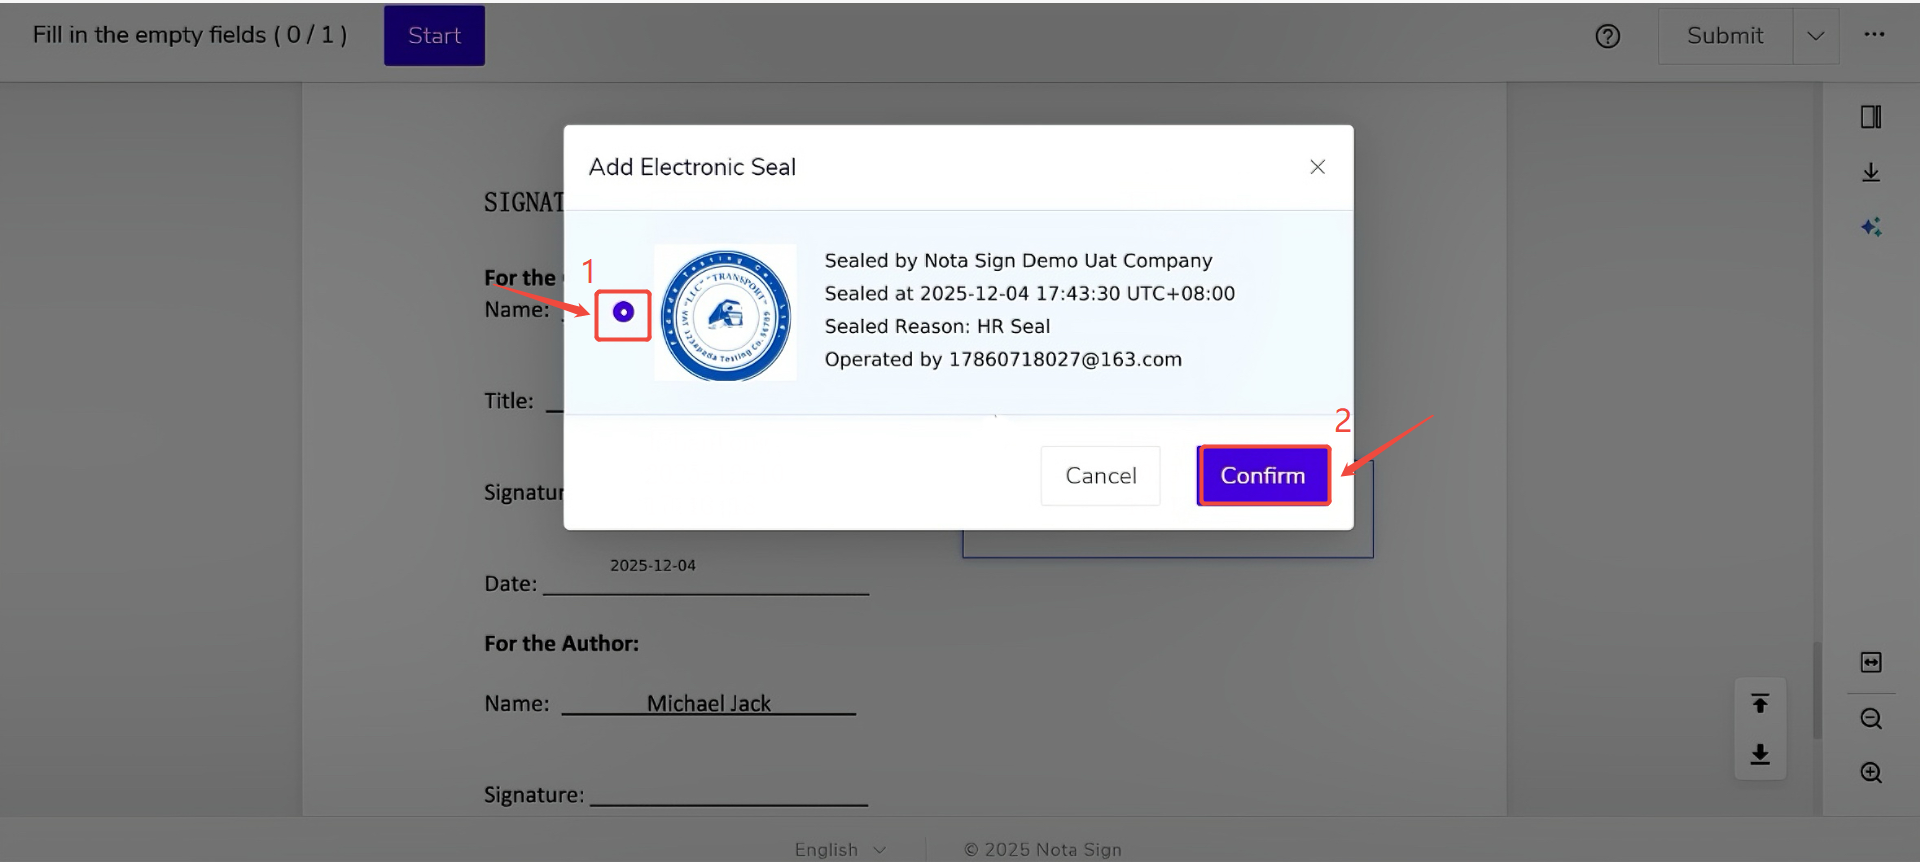
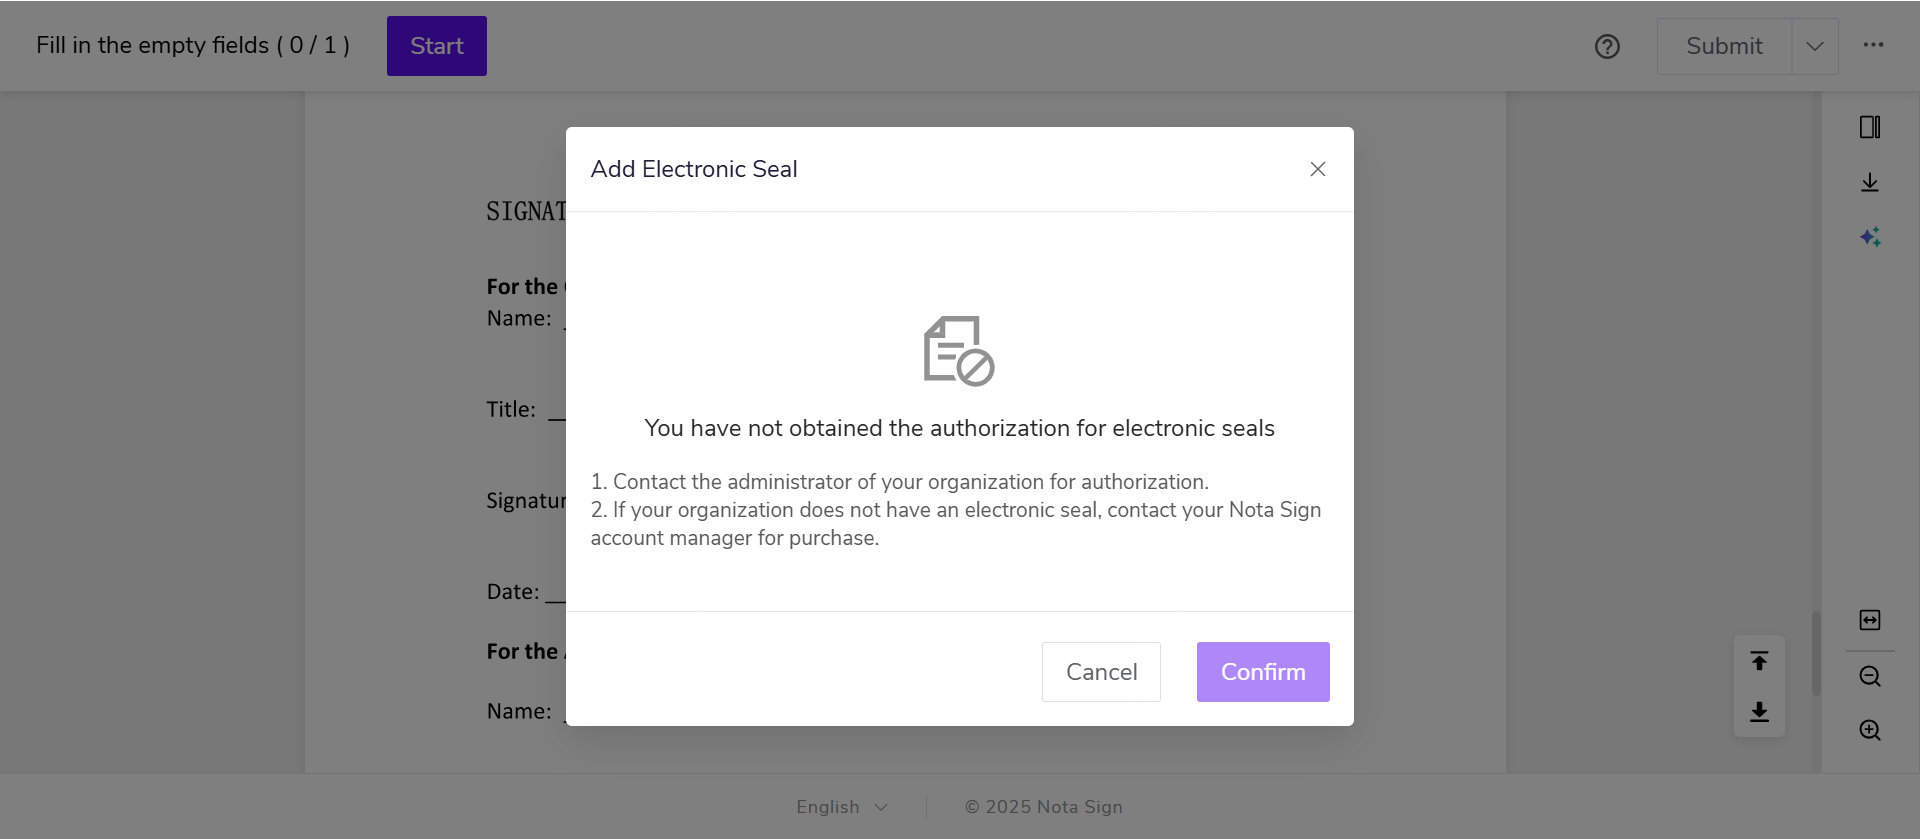
If the signer does not have an authorized electronic seal, an application must be submitted first
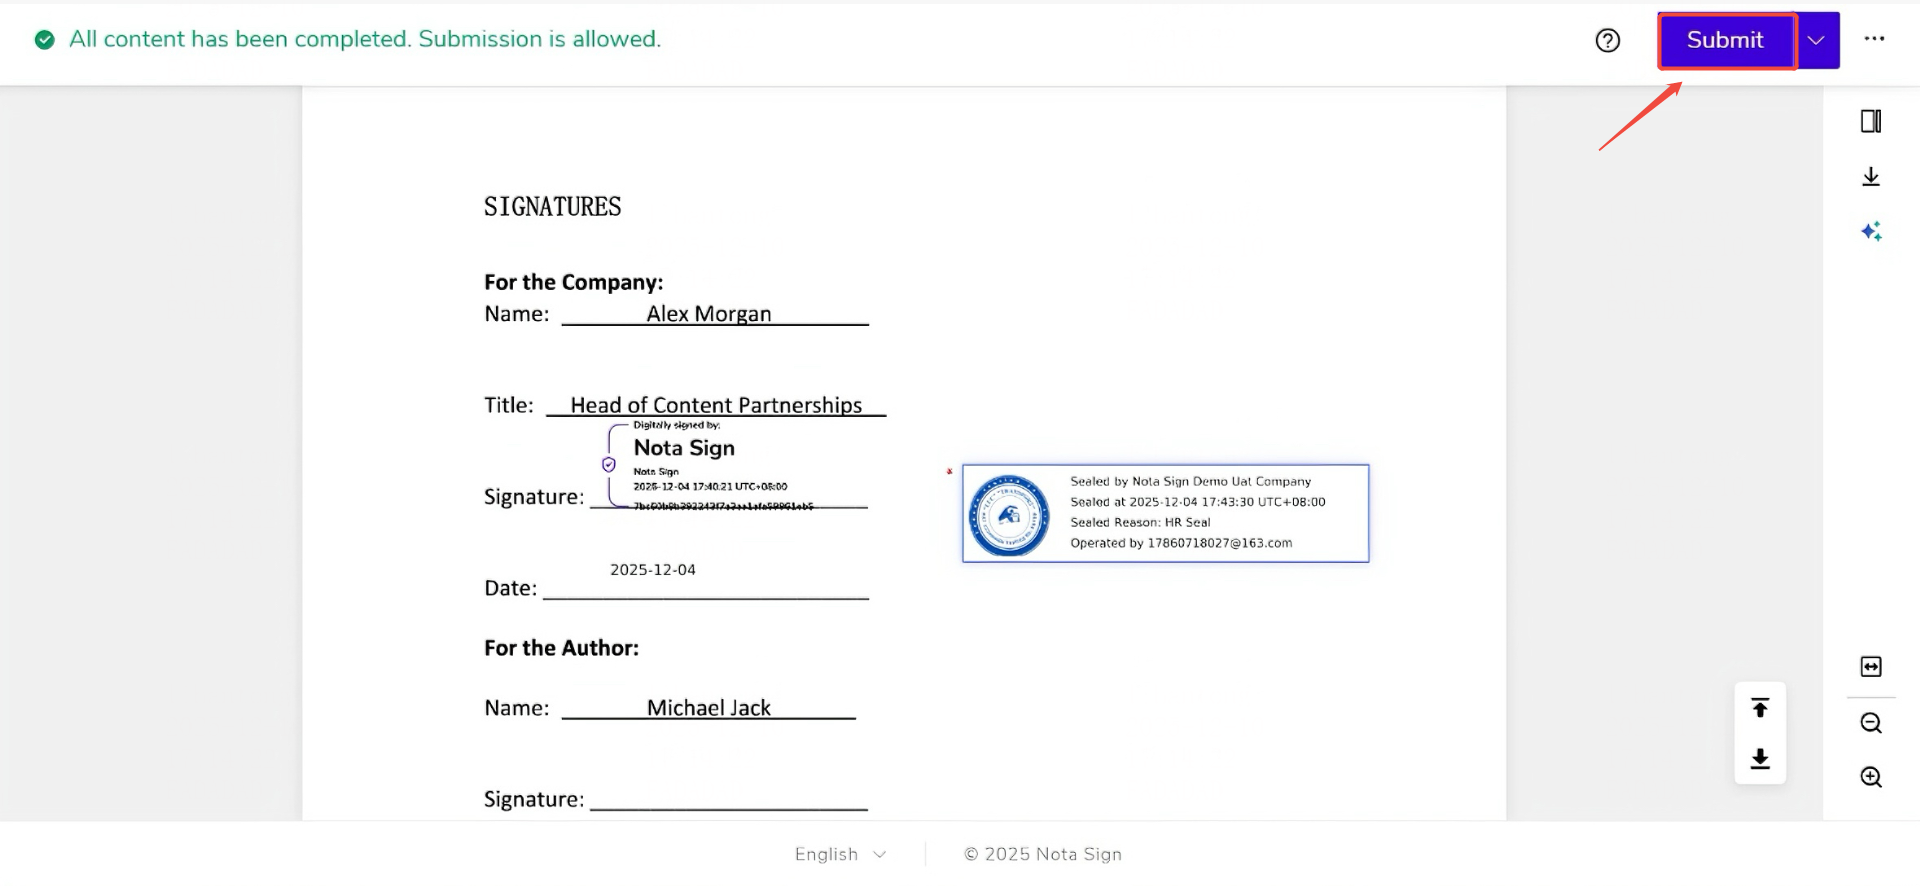
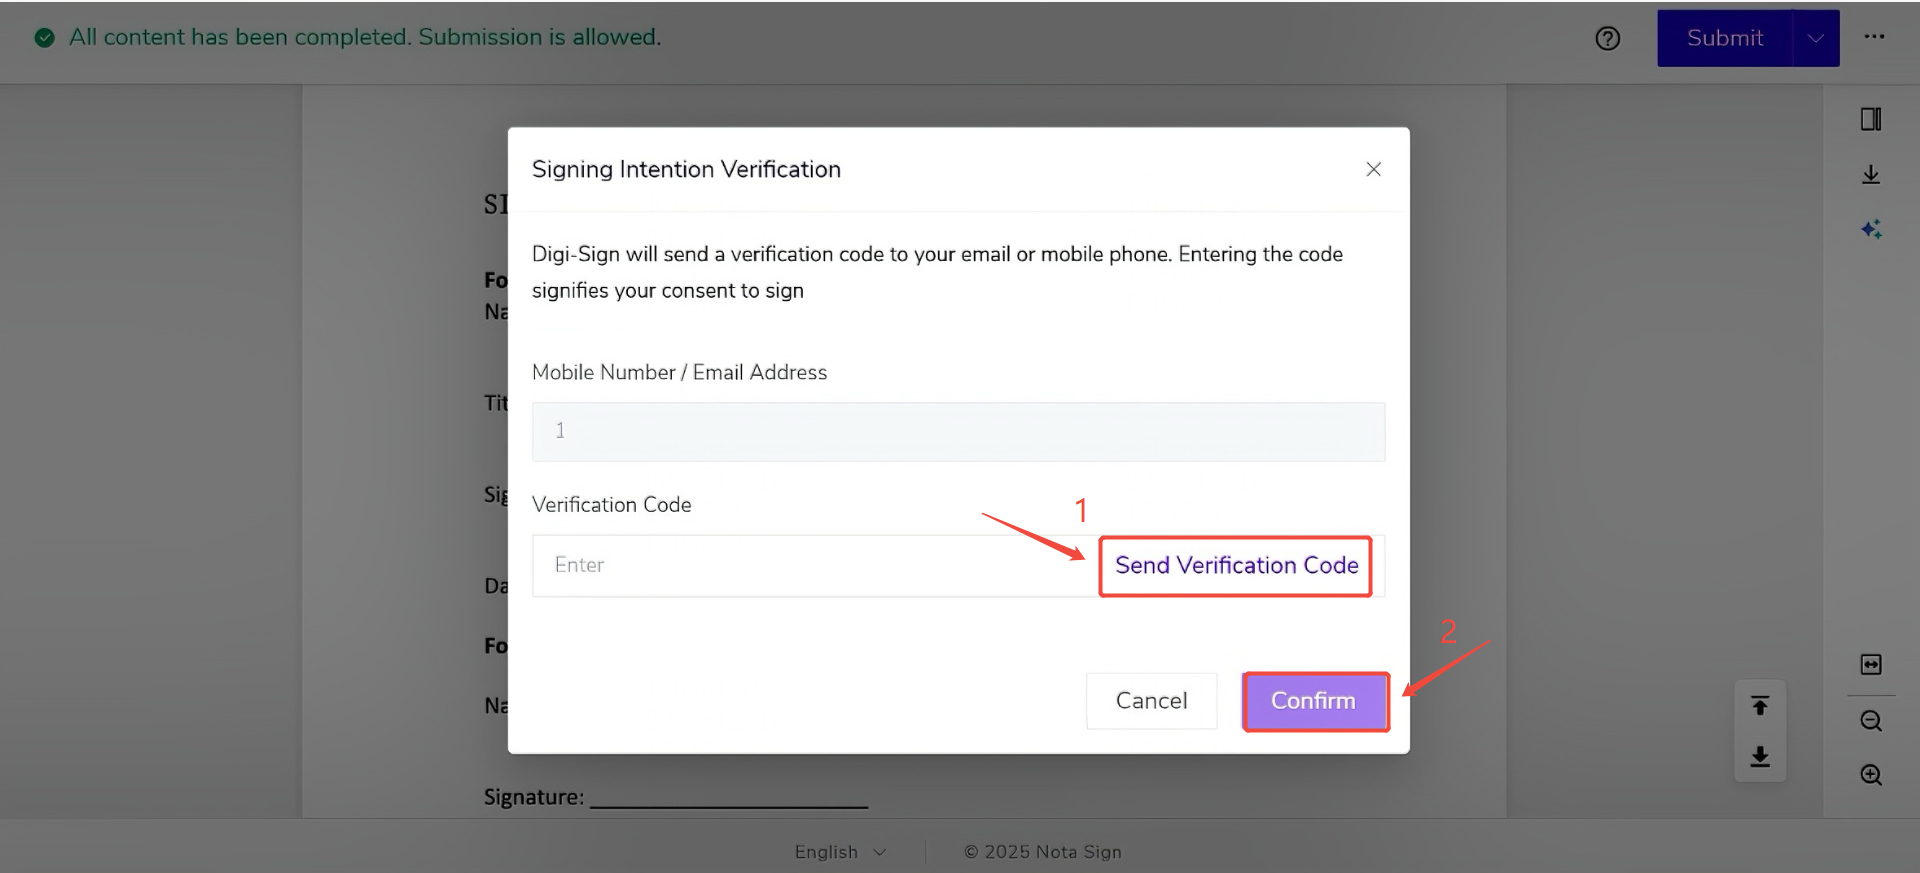
(5) Click Submit and complete email verification
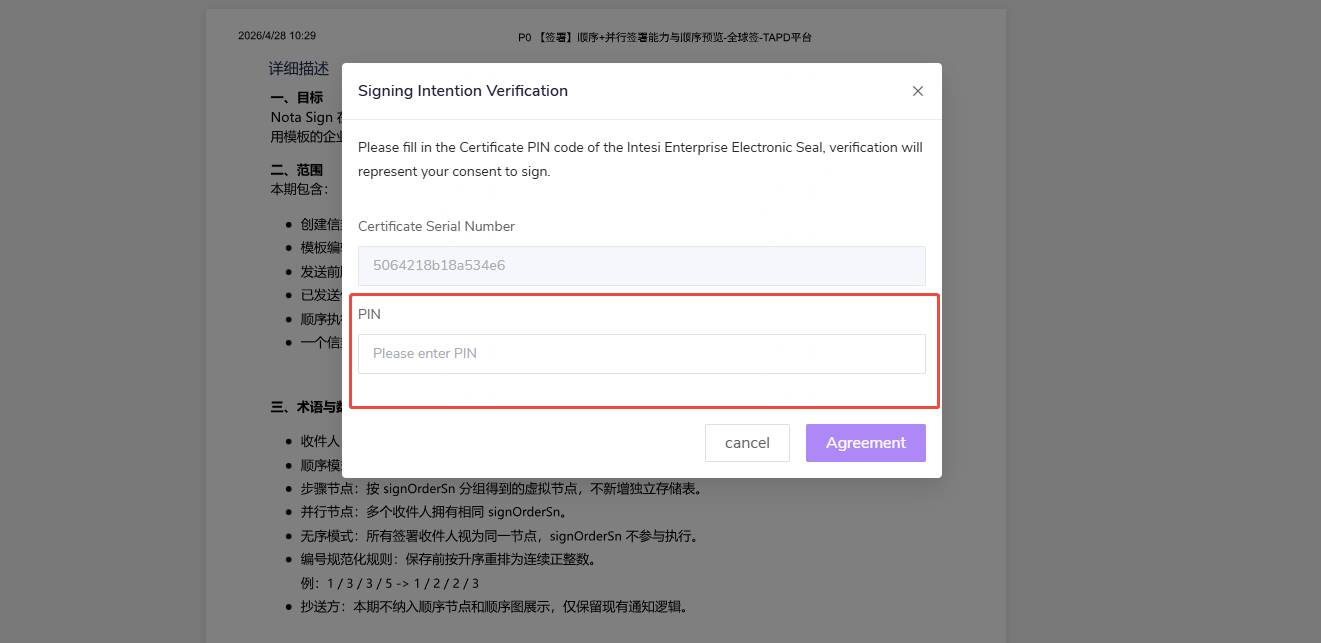
💡 Note: When using the Intesi Electronic Seal, the PIN required for signing is the password of the user’s Intesi account.
(6) Click Confirm to complete the signing