
I. Feature Overview
When creating an envelope, you can set recipients as Signers, Approvers, or Viewers according to your business process. Approvers can approve or reject documents, and Viewers can read and confirm that they have viewed the documents.
Before using, please confirm that the administrator has enabled the corresponding roles in [Manage] > [Send Settings] > [Recipient Settings].
II. Understanding Recipient Roles
The operations that different roles can perform are as follows:
| Recipient Role | Use Case | Operations They Can Perform |
|---|---|---|
| Signer | Requires the recipient to sign, seal, fill in information, or upload attachments in the document | View the document and complete the signing or filling tasks assigned to them |
| Approver | Documents need to go through internal review or business approval before proceeding to the next stage | View the document and choose to approve or reject |
| Viewer | Requires the recipient to read the document and confirm they have viewed it, but does not require signing | View the document and complete the viewing |
Only Signers can have controls such as signatures, fill-in fields, and attachments. Approvers and Viewers cannot have controls, nor can they be configured with signing terms confirmation.
III. Adding and Configuring Approvers and Viewers
1. Create or edit a regular envelope and proceed to the Add Recipients step.
2. Click [Add Recipient] and fill in the recipient’s name, email, and other receiving information. Newly added recipients default to Signers.
3. Open the recipient’s role options and select [Approver] or [Viewer] as needed.
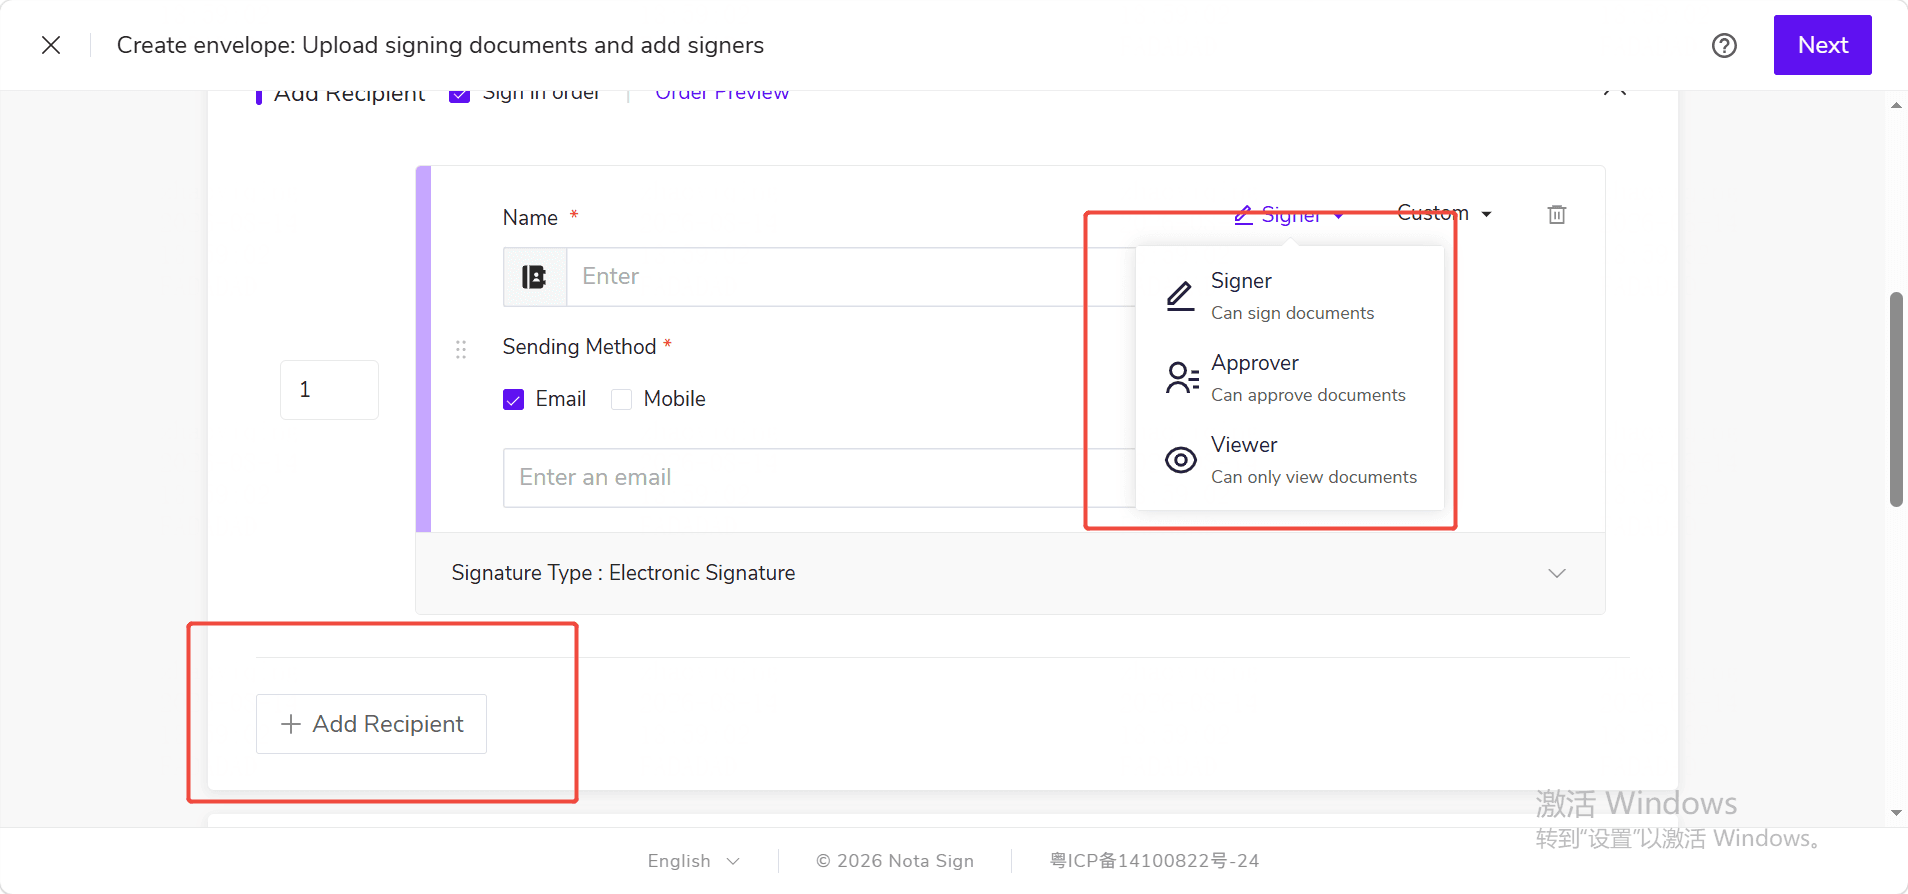
💡 Note: If you do not see the corresponding roles, please contact the administrator to confirm whether the role switches and the current version support them. Electronic seals and electronic stamp duty use the original independent recipient types and cannot be switched to Approver or Viewer.
4. Set the recipients’ processing order:
- After adding an Approver, the envelope must be processed in order, and each Approver needs to occupy a separate sequential node;
- Viewers can be set as a separate sequential node or can receive invitations simultaneously with Signers in a non-sequential process.
💡 Note: When an envelope contains Approvers, sequential processing cannot be turned off, nor can Approvers be placed in the same sequential node with other recipients.
5. Review the recipient’s control and terms confirmation configurations, then click [Save] or [Next].
If you change a Signer who has already been assigned controls or terms confirmation to an Approver or Viewer, the system will prompt that incompatible configurations exist when saving or proceeding to the next step. You can:
- Cancel this operation and go back to modify the role;
- Go to control settings and reassign controls to Signers;
- Delete the incompatible configurations for this recipient and continue.
6. Complete the remaining envelope settings and send. The system will send corresponding invitations to recipients at the current node according to the processing order you set.
III. Using in Templates and Envelope Corrections
1. Setting Roles in Templates
When creating or editing a regular template, you can set template roles as Signers, Approvers, or Viewers following the steps above. The template will save the roles, processing order, and control assignment relationships. When creating an envelope using the template, the system will automatically bring out these settings.
When saving a template or initiating an envelope using a template, the system will re-validate the current plan, role switches, processing order, and control assignments. If a role in the template is no longer available, you need to adjust the role or delete the corresponding recipient first.
2. Correcting Sent Envelopes
In the Envelope Correction page, you can:
- Add new Approvers or Viewers;
- Change the name, email, or phone number of recipients who have not yet completed processing;
- Delete Approvers or Viewers who have not yet approved, rejected, or completed viewing.
You cannot modify the roles of existing recipients, nor can you change or delete recipients who have already approved, rejected, or completed viewing. Merely opening the link, completing identity verification, or reading the document will not be considered as having completed processing.
After saving the correction, the original processing links of the replaced or deleted recipients will immediately become invalid, and the system will resend invitations according to the corrected recipients and order.
IV. Viewing Processing Progress and Results
After sending the envelope, you can go to the Envelope Details to view each recipient’s role, current status, and completion time. If an Approver rejects the approval, you can also view the rejection reason they provided.
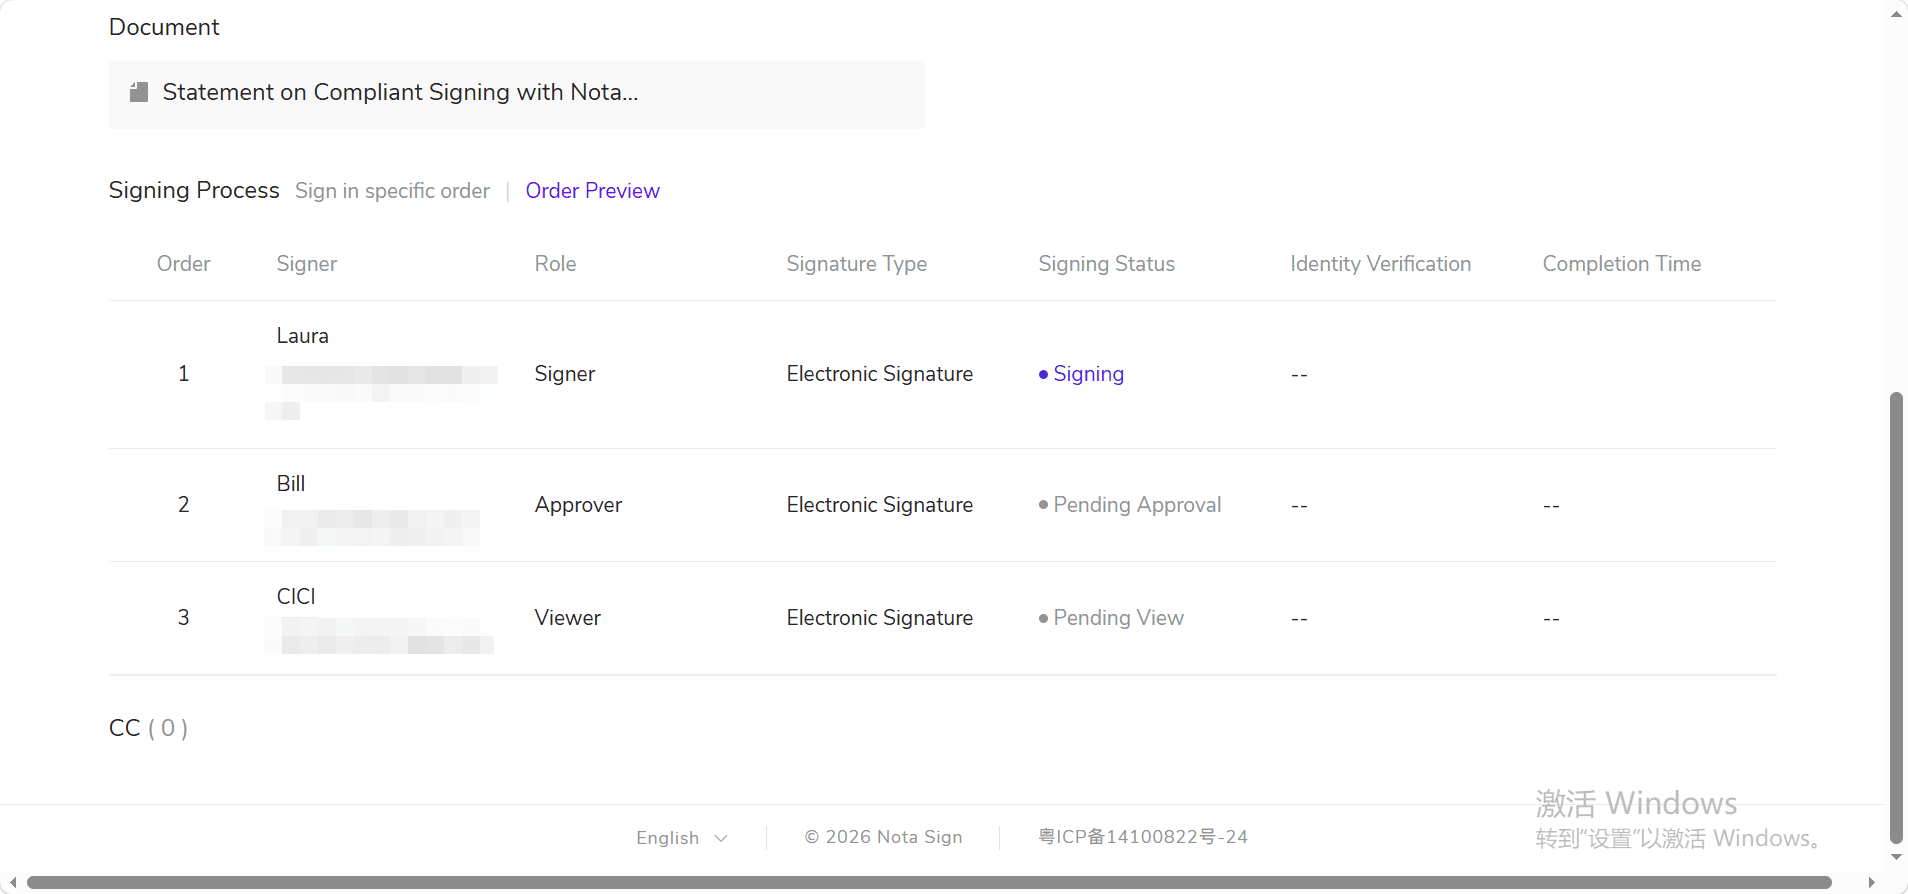
When the envelope is still in progress or has been terminated due to approval rejection, senders with document viewing permissions can download the [Current Document]. This file only reflects the document status at the time of download, is not the final completed document, and will not generate a completion certificate. After the envelope is normally completed, please download the file from the Final Completed Document entry.
Batch sending and batch sending templates currently do not support adding Approvers or Viewers.