
1. Feature Overview
Cross-page seals are used to generate continuous stamping effects along the right margin of multi-page documents. They are suitable for contracts, certification documents, and corporate sealing documents that require demonstrating the continuity and integrity of multi-page documents. After the administrator enables cross-page seals (see Sending Settings for details), senders can add cross-page seals when sending envelopes or creating templates, and designate the signer and the pages to be stamped.
Cross-page seals support the following two types of controls:
- Seal;
- Electronic Seal.
After the signer completes the stamping, the system will split the complete seal or electronic seal by page and display it on the right side of the selected pages.
💡 Notes:
- Cross-page seals only apply to documents with at least two pages.
- Cross-page seals are set per document and cannot be used across multiple files.
- Currently, cross-page seals can only be set on the right side of documents.
- Signature, signing date, text, attachment, image, checkbox, and other controls cannot be used as cross-page seals.
- GxP envelopes, batch sending, and batch sending templates currently do not support cross-page seals.
- Singpass-type signers currently do not support cross-page seals.
- Electronic seals must contain a seal image. Electronic seals with only text information cannot be used for cross-page seals.
2. Step-by-Step Instructions
1. Enter the Control Settings Page
(1) Go to [Sign] → [Initiate] and select [Initiate Envelope]. (2) Upload the documents to be signed. (3) Add recipients and complete the envelope information settings. (4) Click [Next] to enter the control settings page.
If the administrator has enabled cross-page seals, the [Cross-Page Seal] entry will appear on the right side of documents with at least two pages.
If you do not see the entry, please verify: ① Whether the administrator has enabled cross-page seals; ② Whether the current document has at least two pages; ③ Whether the current envelope and signer type support cross-page seals.
2. Expand the Cross-Page Area
(1) Find the document for which you want to set up a cross-page seal. (2) Click [Cross-Page Seal] on the right side of the document. The system will expand the cross-page area on the right side of the current document.
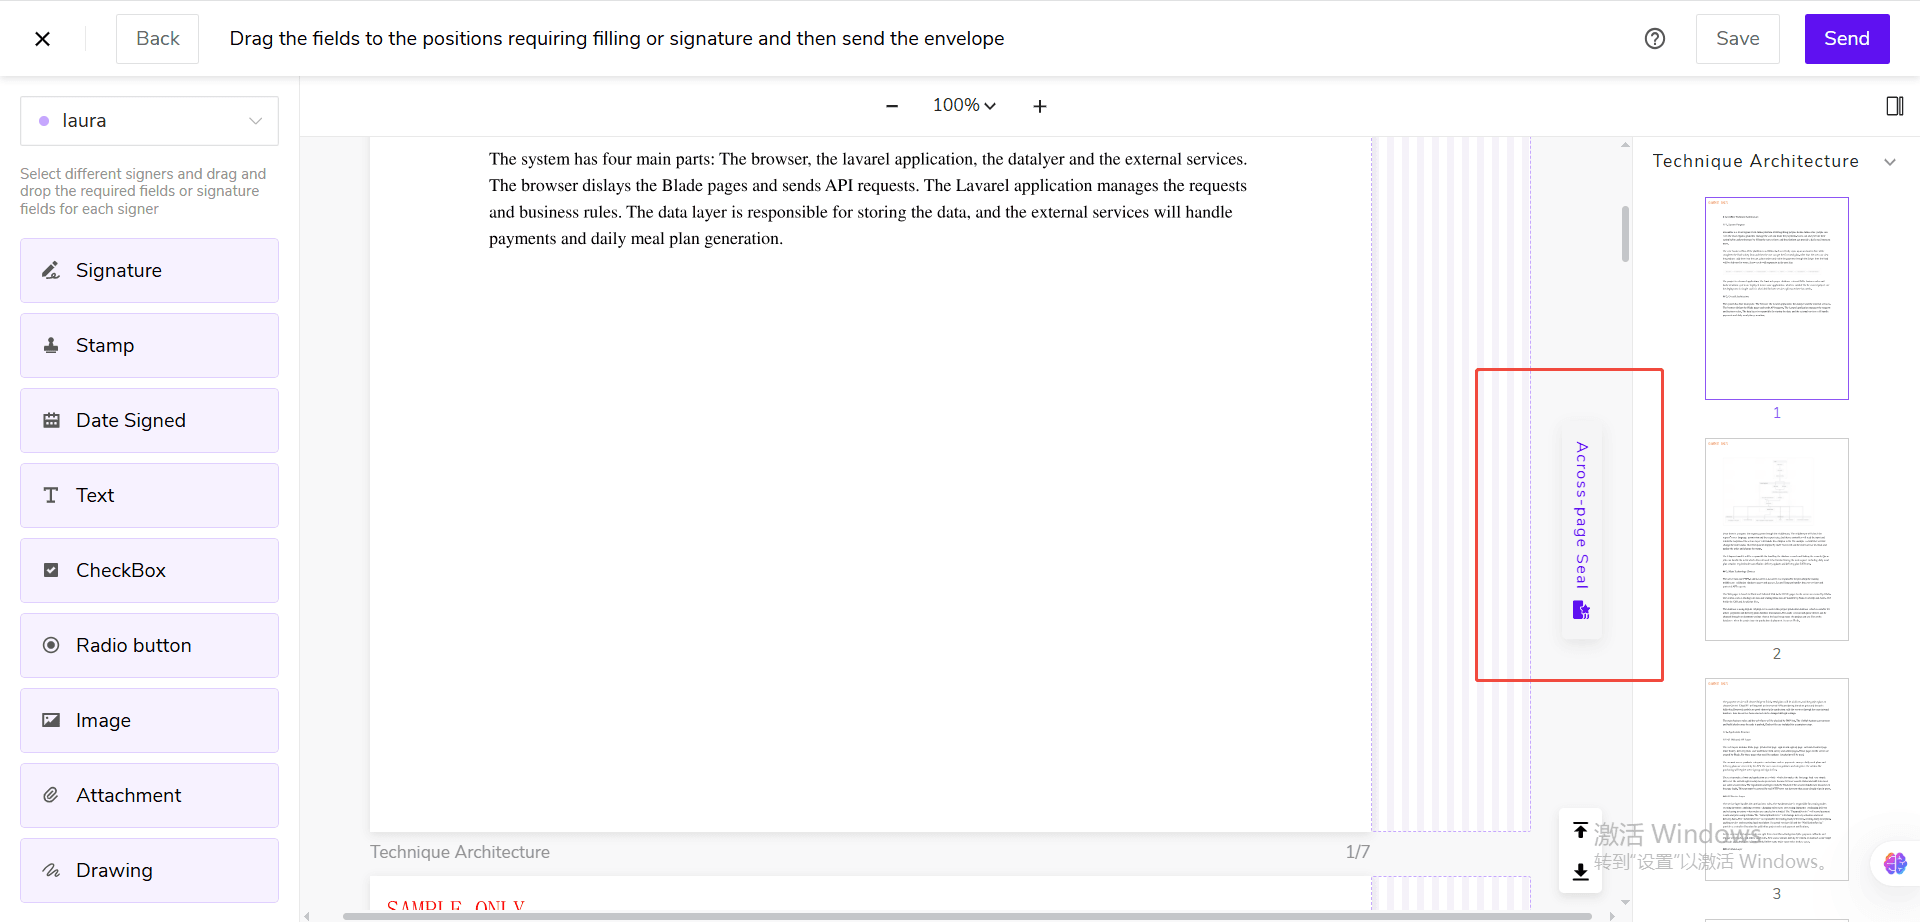
If an envelope contains multiple files, you need to set up cross-page seals for each multi-page document separately. One cross-page seal cannot be applied to multiple files.
3. Add a Cross-Page Seal
Drag any of the following controls into the cross-page area:
- [Seal] control;
- [Electronic Seal] control.
When a control is dragged over the cross-page area, the area will change color to indicate it can be placed. After being placed, the control will automatically be converted into a cross-page seal for the current document. Other types of controls will not cause the area to change color when dragged over it, and the system will not create the control if released in the cross-page area.
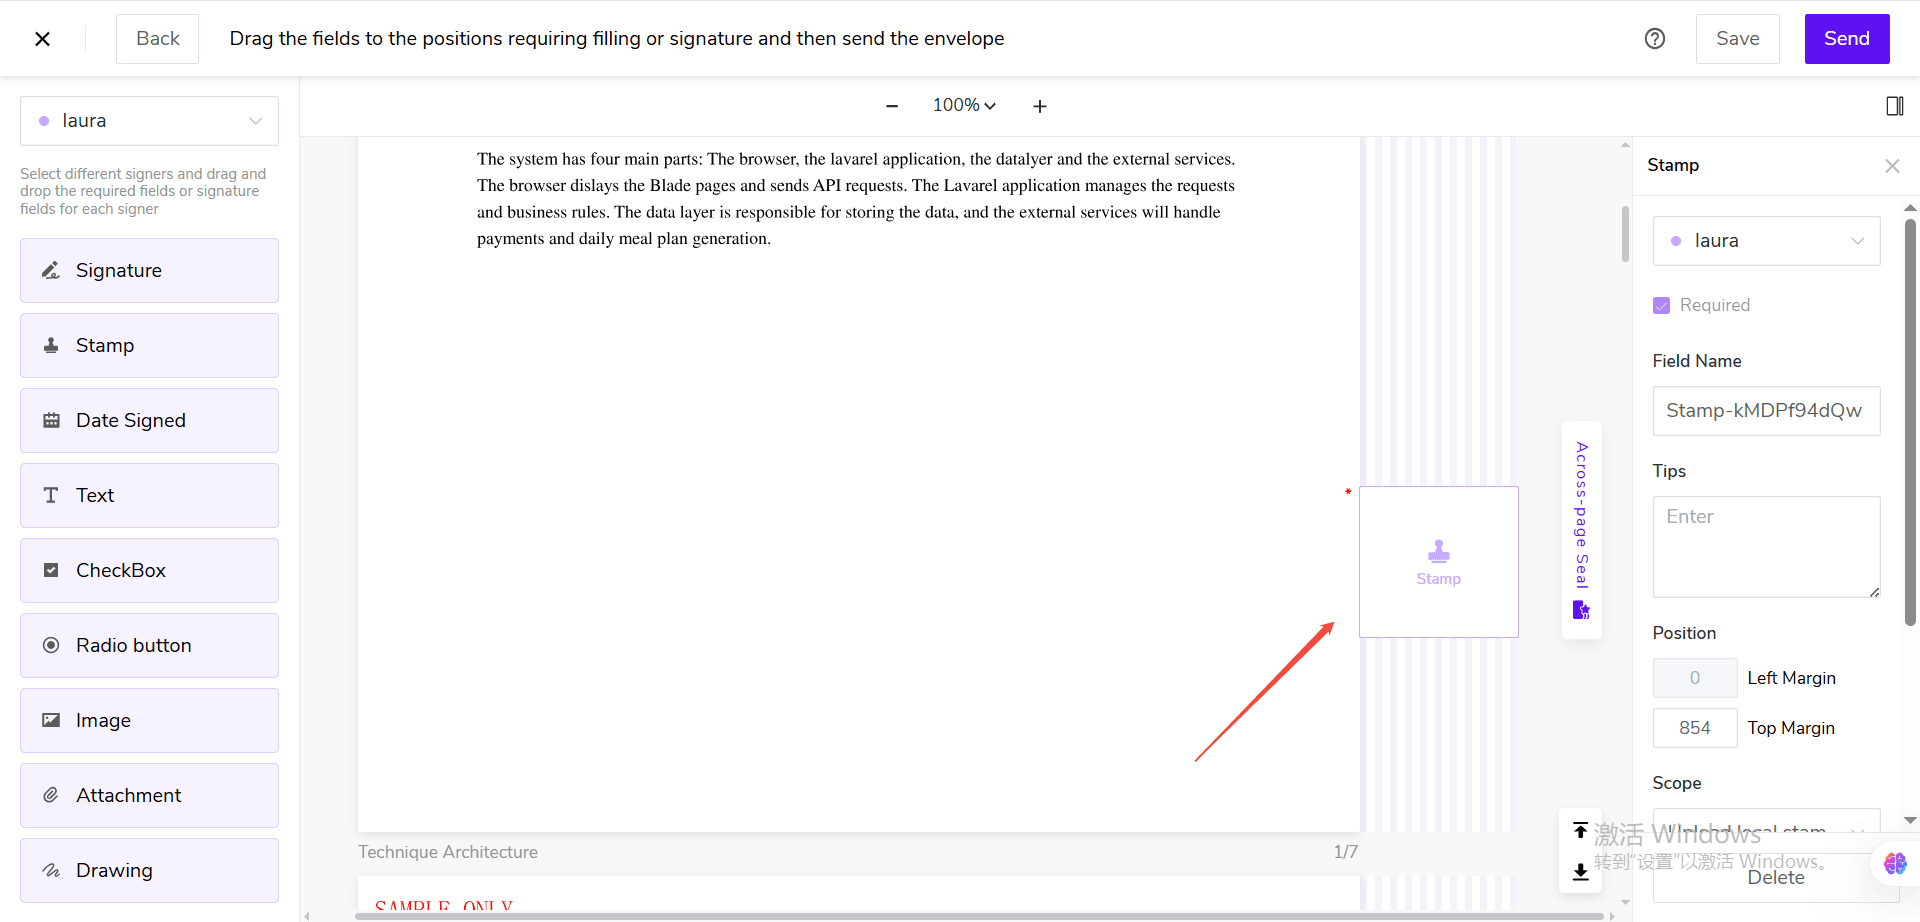
Each document can have up to 10 cross-page seals. After reaching the limit, the system will prompt: “A single document supports a maximum of 10 cross-page seals.”
4. Select the Signer
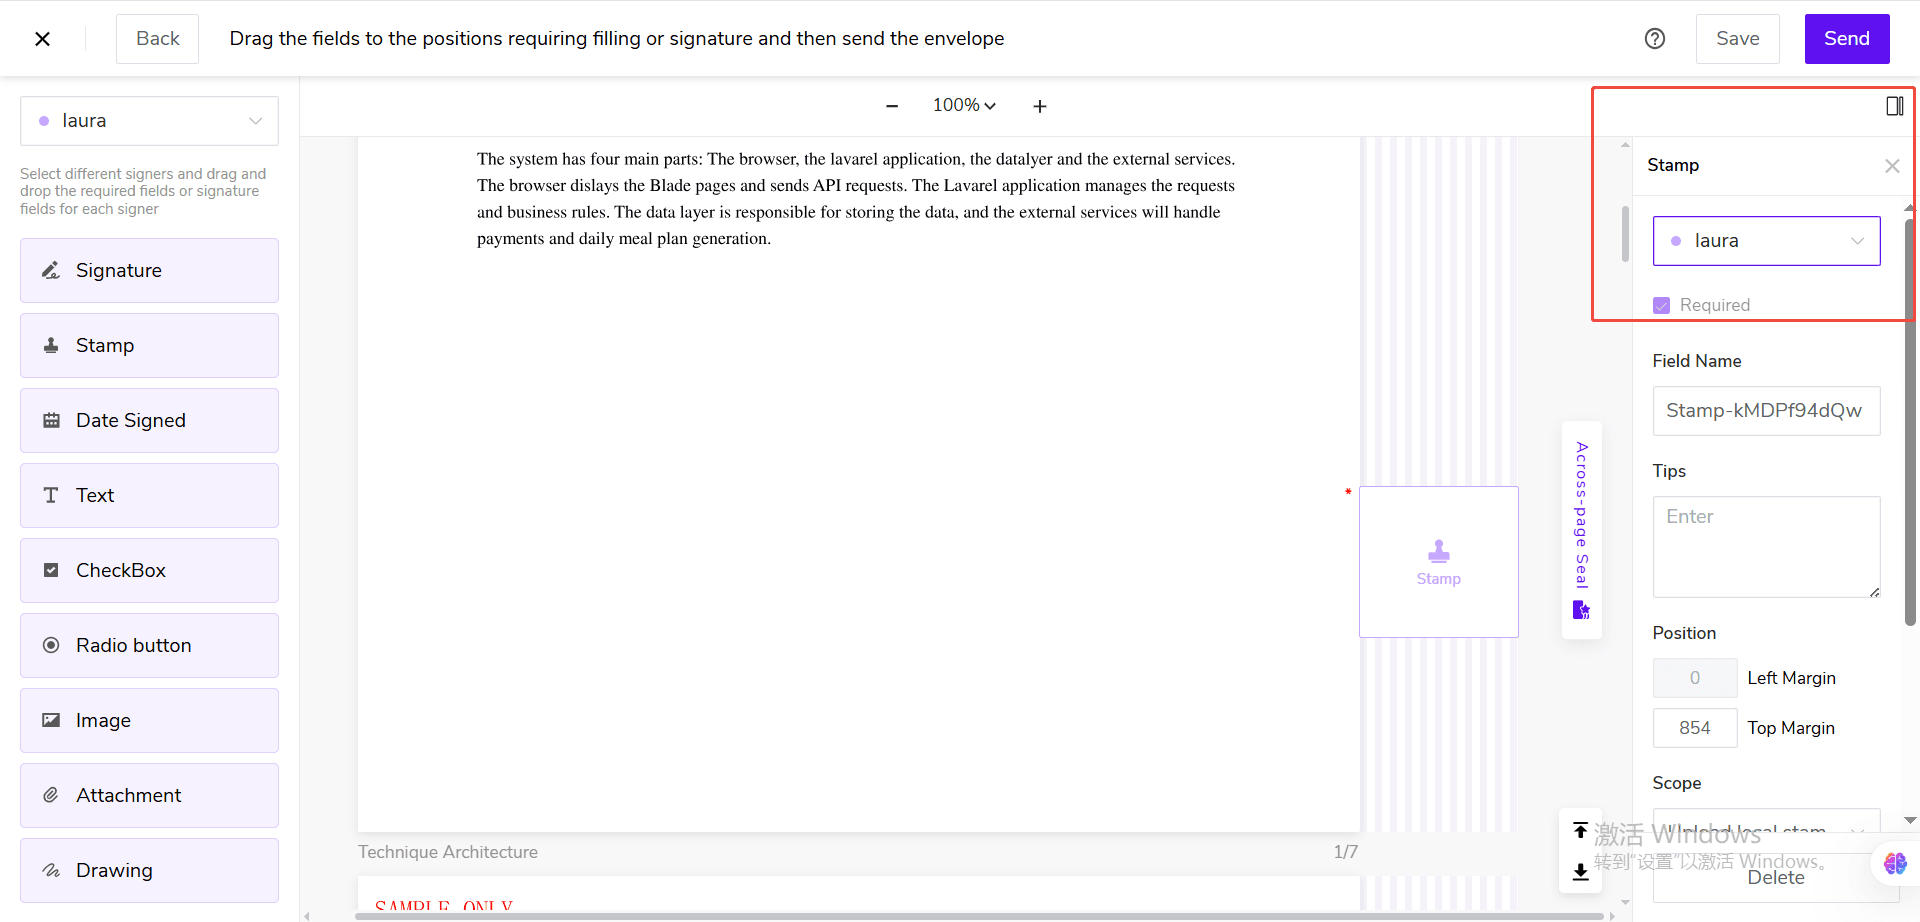
After selecting the cross-page seal, choose the signer responsible for completing it in the property panel on the right. Cross-page seals are required controls. After the envelope is sent, the designated signer must complete the cross-page seal operation before submitting the signing.
5. Set the Stamping Pages
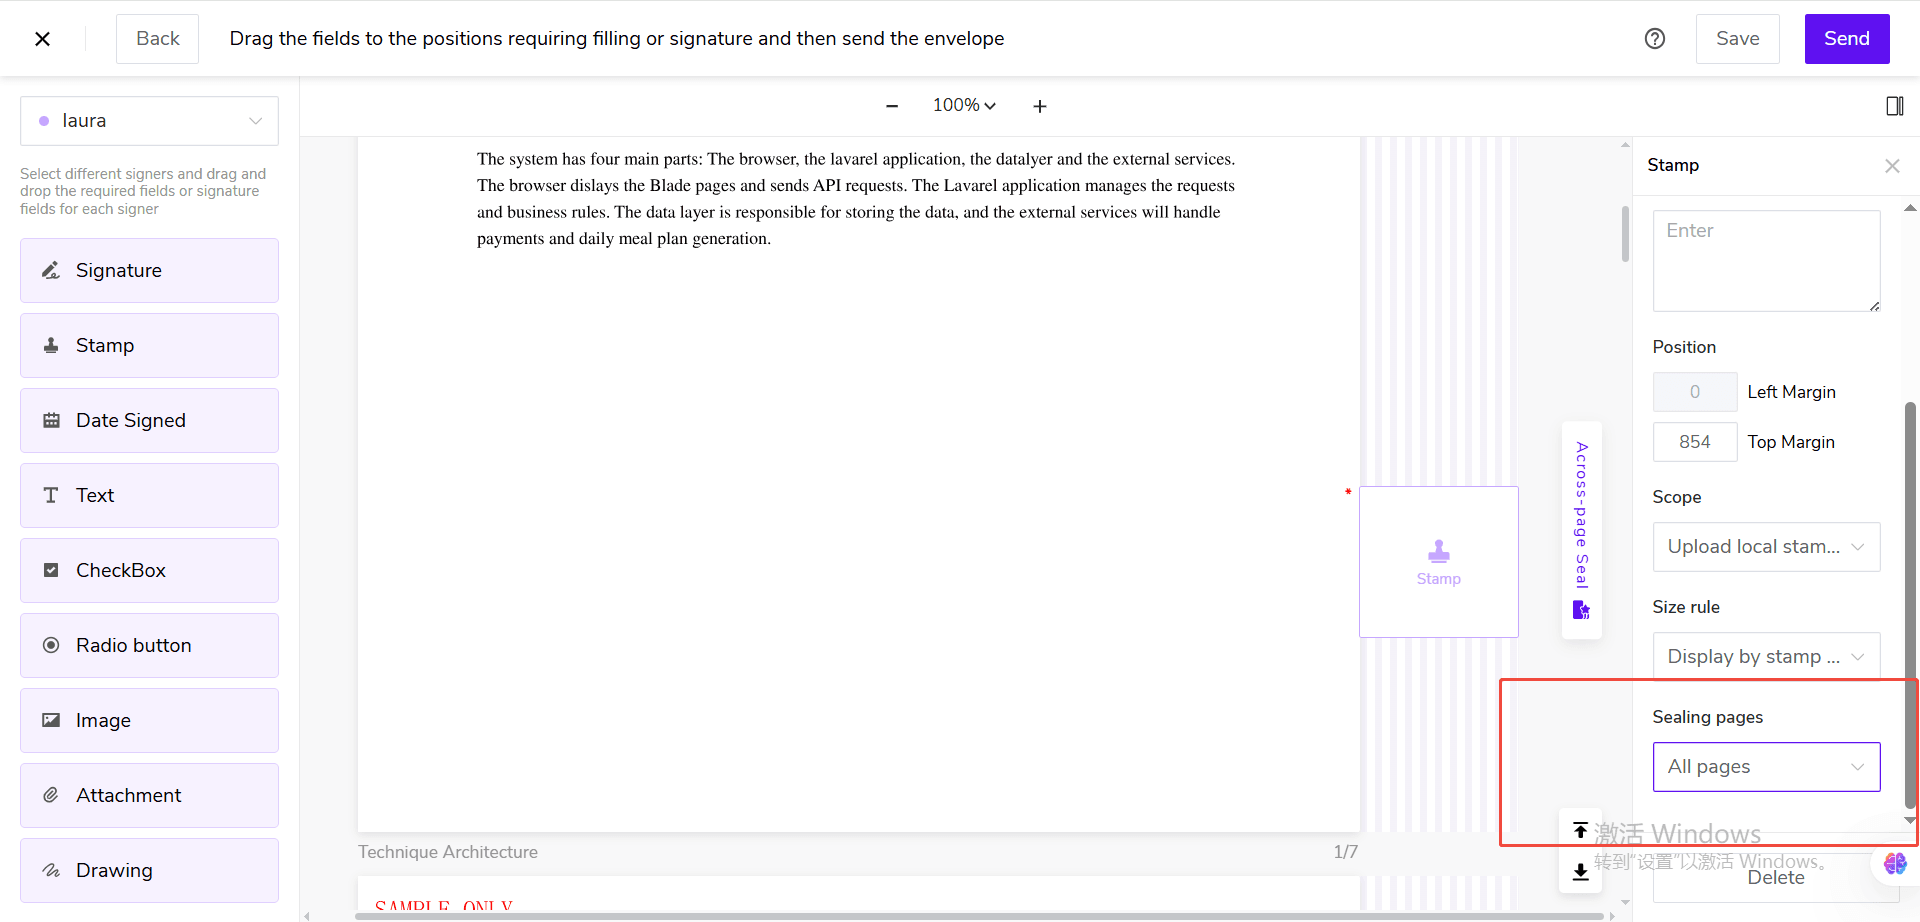
In the [Stamping Pages] section of the property panel on the right, select the scope of application for the cross-page seal.
The following options are supported:
- [All Pages]: Applied to all pages of the current document (default option)
- [Specified Pages]: Only applied to specified pages;
- [Odd Pages]: Only applied to odd-numbered pages of the current document;
- [Even Pages]: Only applied to even-numbered pages of the current document.
① After selecting [Specified Pages], you can enter page numbers in the following format: 1,3,5-7 (the above example represents pages 1, 3, 5, 6, and 7)
② If the page number format is incorrect, the system will prompt: Please enter valid page numbers, e.g., 1,3,5-7. ③ If the number of valid pages is less than two, the system will prompt: Cross-page seals must be applied to at least 2 pages. ④ Some options are subject to document page count limitations: When the document has fewer than 3 pages, [Odd Pages] cannot be selected; when the document has fewer than 4 pages, [Even Pages] cannot be selected. ⑤ When entering specified page numbers, please note:
- At least two valid pages must be included;
- Page numbers cannot exceed the total page count of the current document;
- Page ranges must be entered in ascending order, e.g.,
5-7;- Multiple page numbers or page ranges should be separated by English commas;
- A single cross-page seal supports a maximum of 100 pages.
6. Set Seal Size
When using the Seal control, you can choose the display method of the seal in the [Size Rule] section:
- [Display at control size]: The seal is displayed and split according to the size of the cross-page seal control;
- [Display at actual seal size]: The seal is displayed and split according to the actual size of the selected or uploaded image.
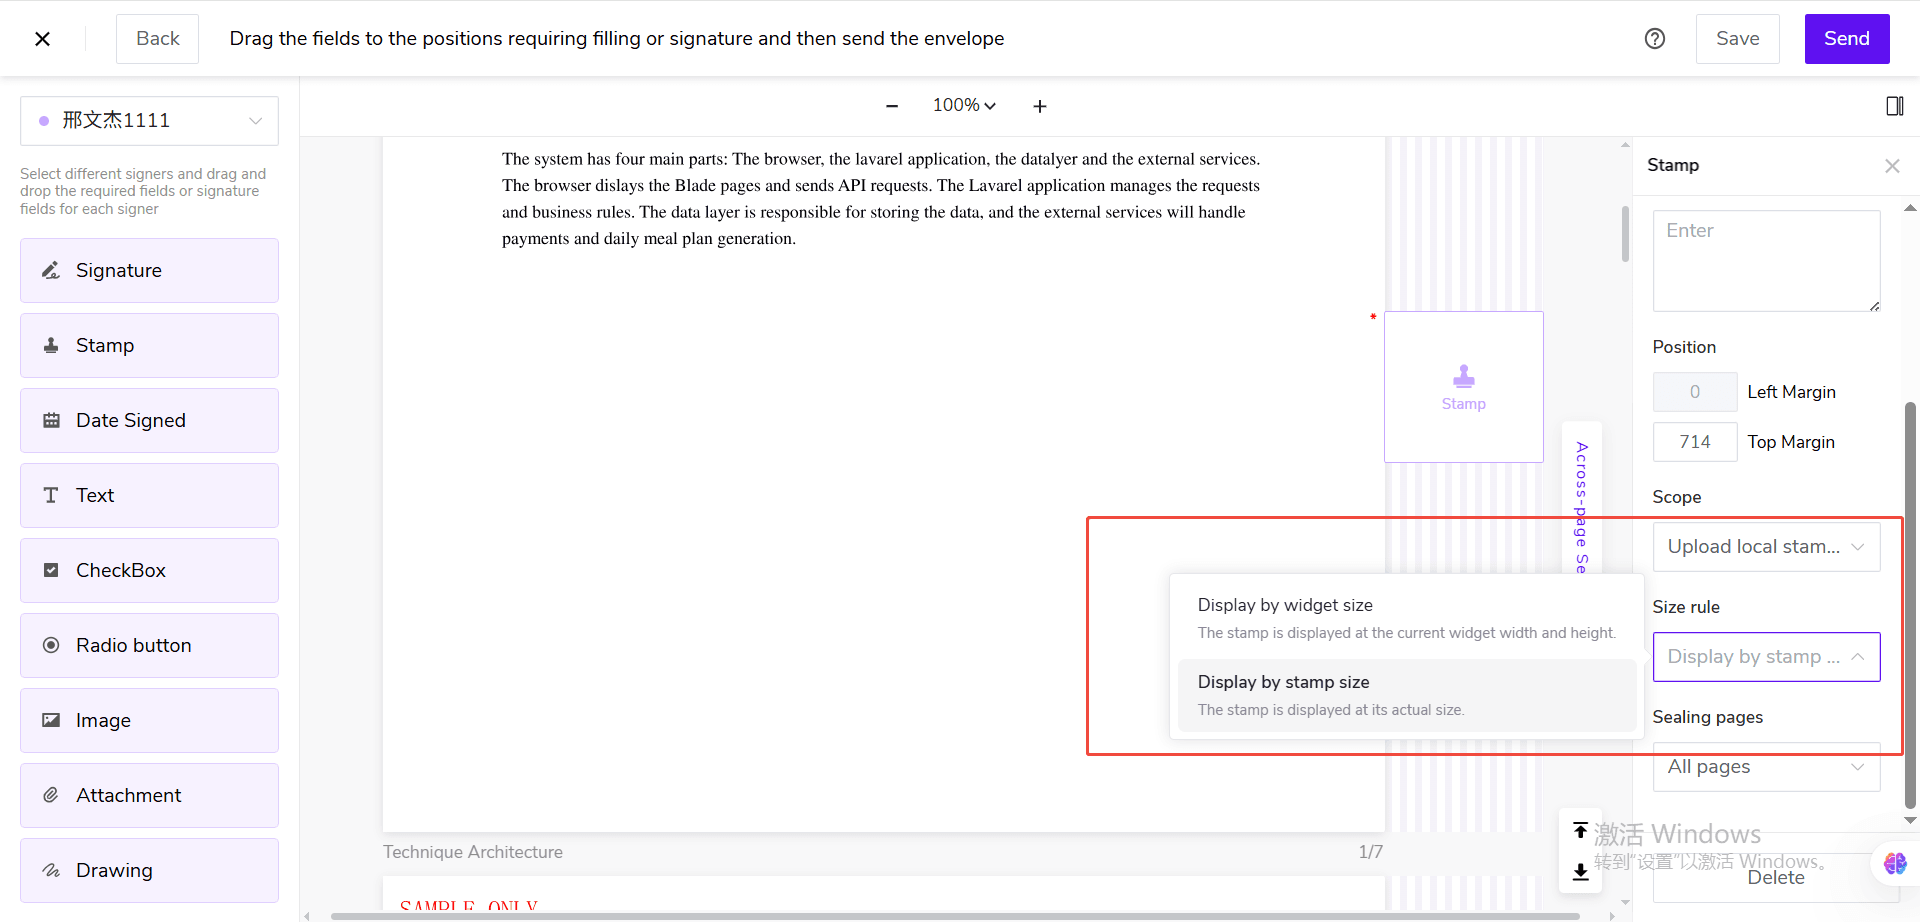
In some digital signature or electronic seal scenarios, the size rule will be fixed to [Display at control size] and cannot be modified.
7. Adjust the Position of the Cross-Page Seal
After adding a cross-page seal, you can drag the control up or down to adjust its position on the right side of the document. Cross-page seals cannot be resized by dragging borders or corners. If you need to delete a cross-page seal, select the control and perform the delete operation.
8. Preview the Cross-Page Seal Effect
After completing the settings, click [Collapse Cross-Page Seal]. The system will generate cross-page seal slices based on the configured stamping pages and display them on the right side of the corresponding pages. Pages not included in the stamping scope will not display slices.
If you need to continue modifying, you can:
- Click on the cross-page seal slice on the right side of the page;
- Or click the [Cross-Page Seal] entry again.
The system will re-expand the cross-page area and select the corresponding cross-page seal.
9. Send the Envelope
After completing the cross-page seal and other control settings, click [Send].
After the signer enters the signing page, they can select or upload a seal, or select an available electronic seal. After completion, the system will generate the cross-page seal effect on the corresponding pages. When using an electronic seal, the selected electronic seal must contain a seal image. If the electronic seal does not contain a seal image, the system will prompt: Cross-page seals require electronic seals with a seal imprint. Please select again. Signers can only complete the cross-page seals pre-set by the sender and cannot add, move, resize, or modify the stamping pages on their own.
3. Other Use Scenarios
3.1 Setting Cross-Page Seals in Templates
After the administrator enables cross-page seals, you can also set them up when creating or editing templates.
Step-by-step instructions:
- Create or edit a template.
- Upload or select a document with at least two pages.
- Enter the control settings page.
- Click [Cross-Page Seal] on the right side of the document.
- Drag a Seal or Electronic Seal control into the cross-page area.
- Select the template role responsible for completing the cross-page seal.
- Set the stamping pages, position, and size rules.
- Save the template.
When creating an envelope using this template, the cross-page seal configuration will be applied along with the template. Before sending, please confirm that the document, signer, and cross-page seal settings are correct.
3.2 Correcting Cross-Page Seals in Sent Envelopes
For SES envelopes that have not yet been fully signed, senders can adjust seal-type cross-page seals through the envelope correction feature.
The following operations are supported:
- Add seal-type cross-page seals for recipients who have not yet completed signing;
- Delete seal-type cross-page seals;
- Adjust the position of cross-page seals;
- Modify stamping pages and other settings.
After saving the correction, recipients who have not yet completed signing will complete the cross-page seal according to the latest configuration.
💡 Notes:
- Recipients who have already completed signing cannot have cross-page seals added, deleted, or modified.
- In-transit envelope corrections only support seal-type cross-page seals, not electronic seal cross-page seals.
- After adding, deleting, or modifying cross-page seals, the system will retain corresponding records in the envelope activity log.
3.3 Viewing Cross-Page Seal Records
After the signer completes the cross-page seal, a [Cross-Page Seal] record can be viewed in the document record section of the audit report.
The audit report will display the following information based on the cross-page seal type:
- Seal: Seal thumbnail and stamped page range;
- Electronic Seal: Electronic seal thumbnail, sealing subject, sealing time, sealing reason, operator, certificate serial number, and stamped page range.
If the same signer completes multiple cross-page seals in the same document, the audit report will display each cross-page seal record separately.