
During document signing, senders may need to verify a recipient’s identity using an email verification code. Nota Sign supports email OTP verification to help senders confirm the recipient’s identity and keep document signing secure.
1. Configure Email OTP Verification as a Sender
1. Enable Identity Verification
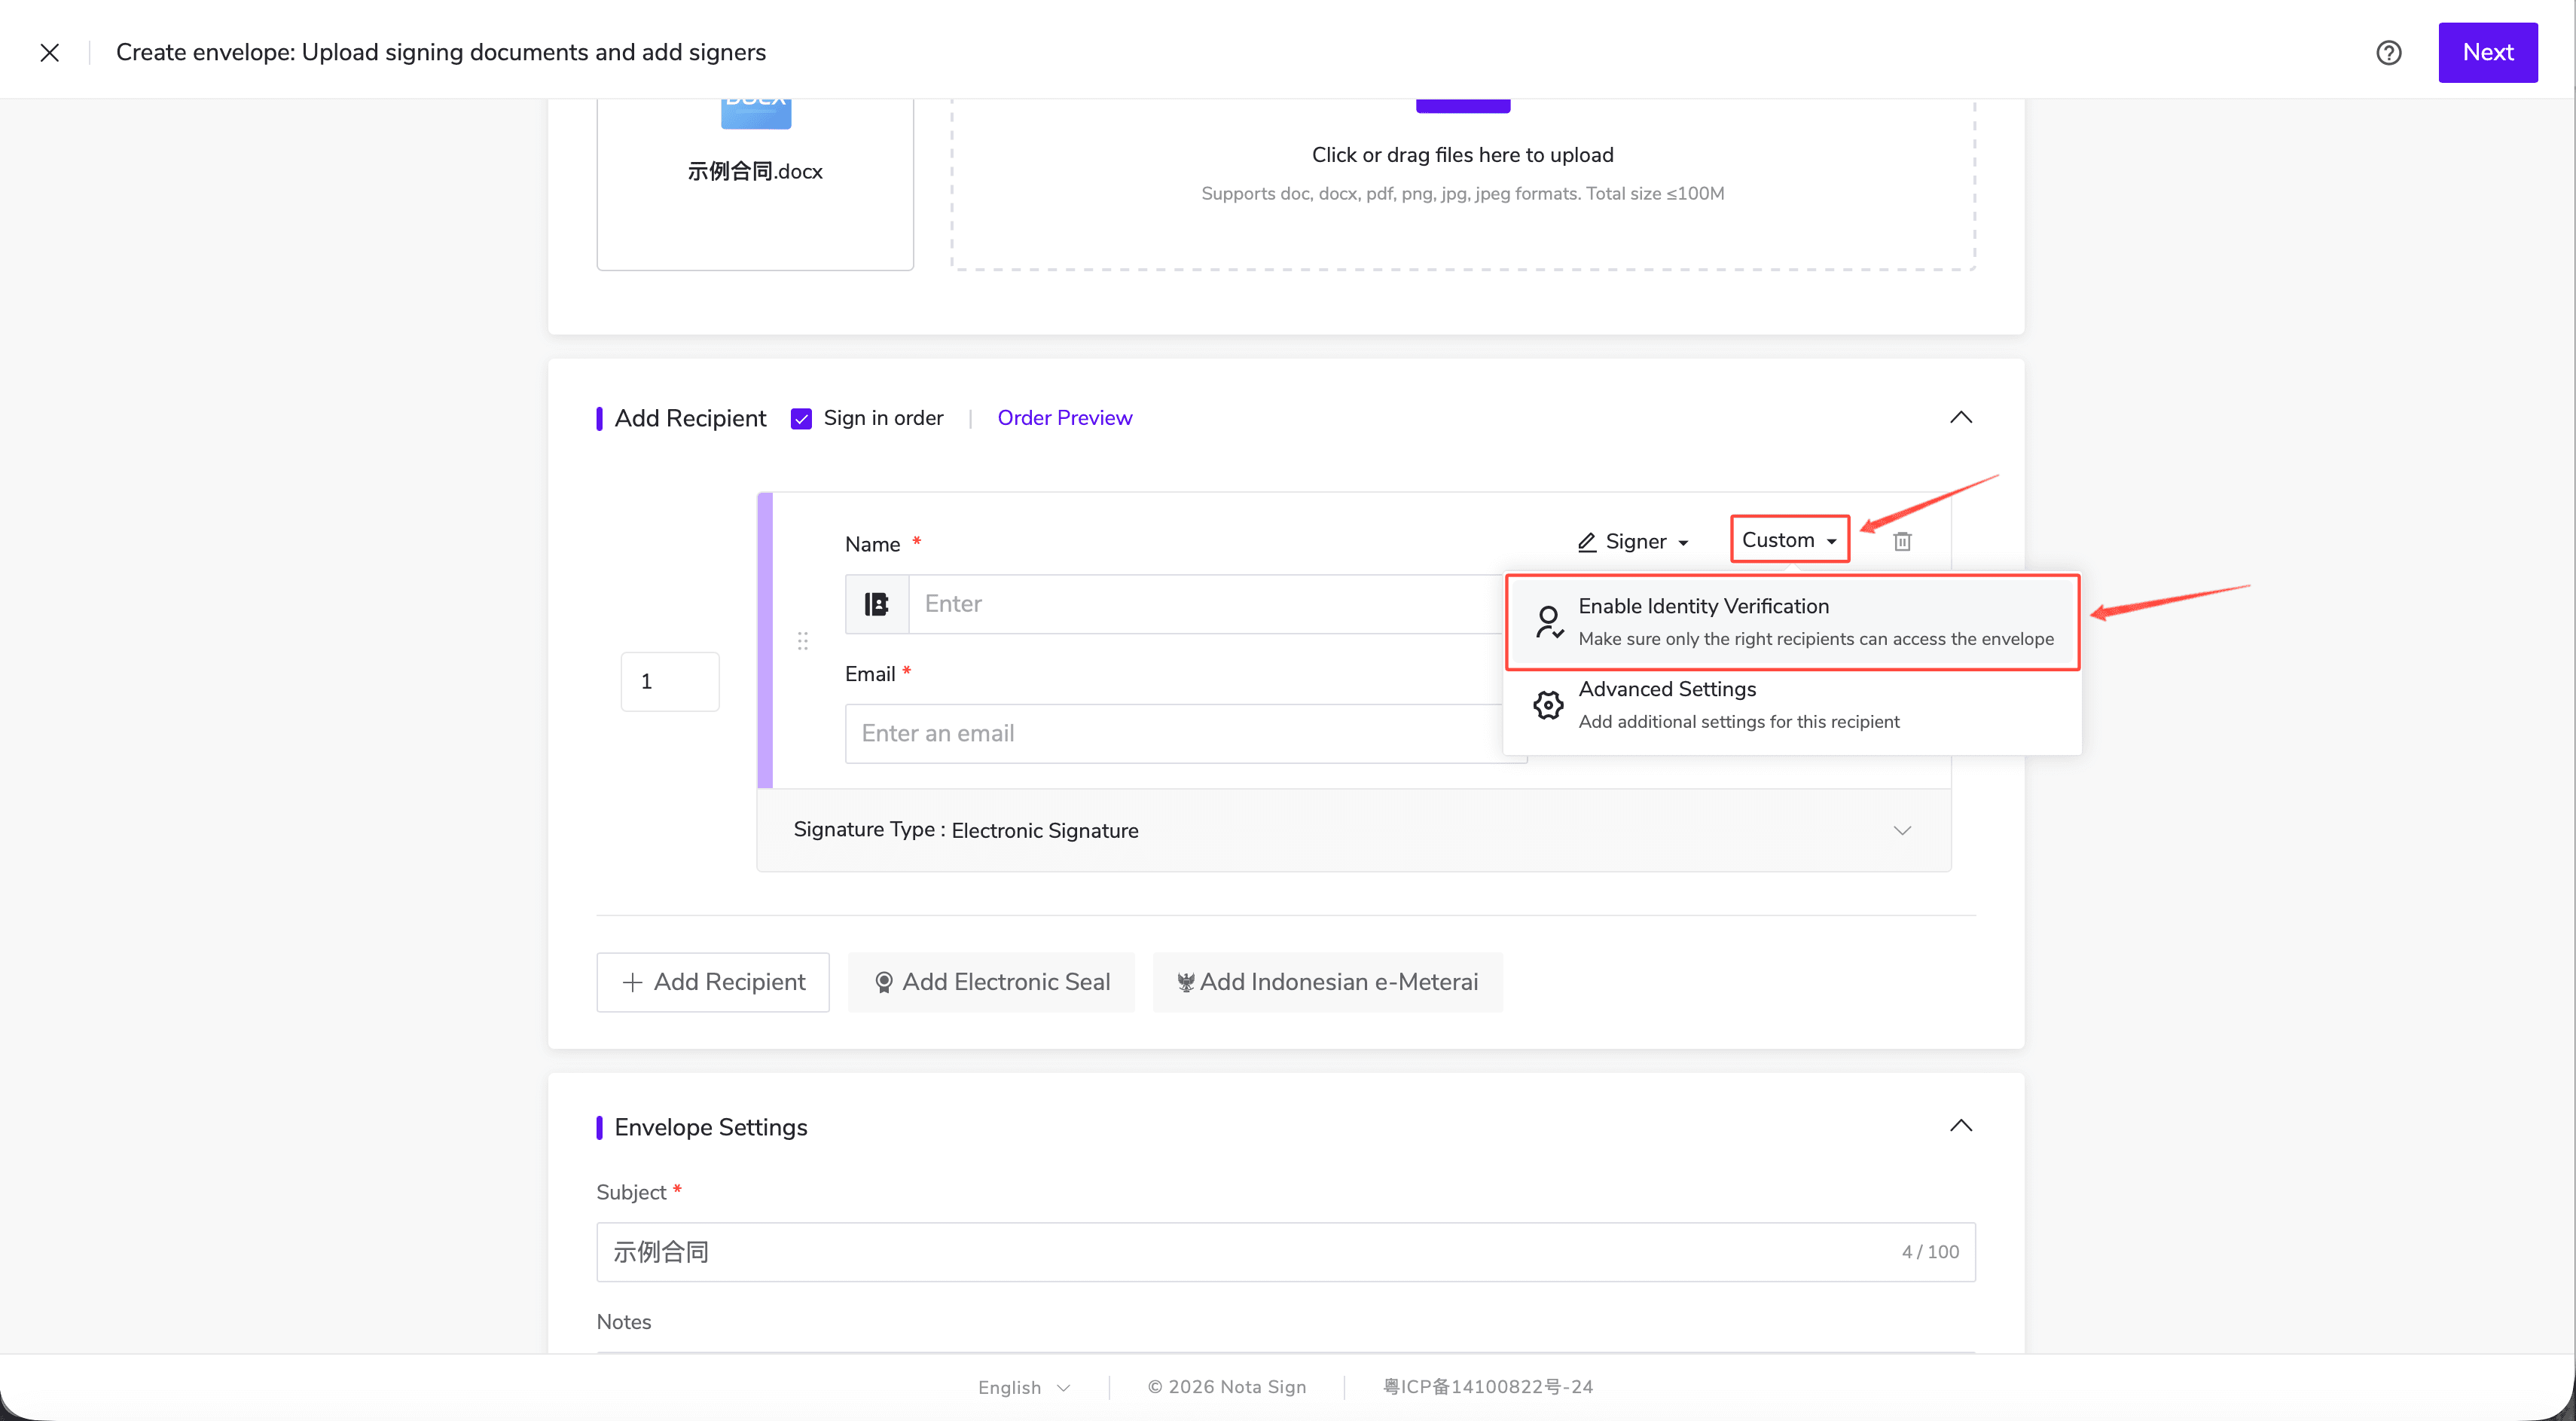
After creating an envelope and uploading the documents to be signed, go to the recipient section. Click “Customize” in the upper-right corner of the recipient card, then select “Enable Identity Verification”.
2. Select Email Verification
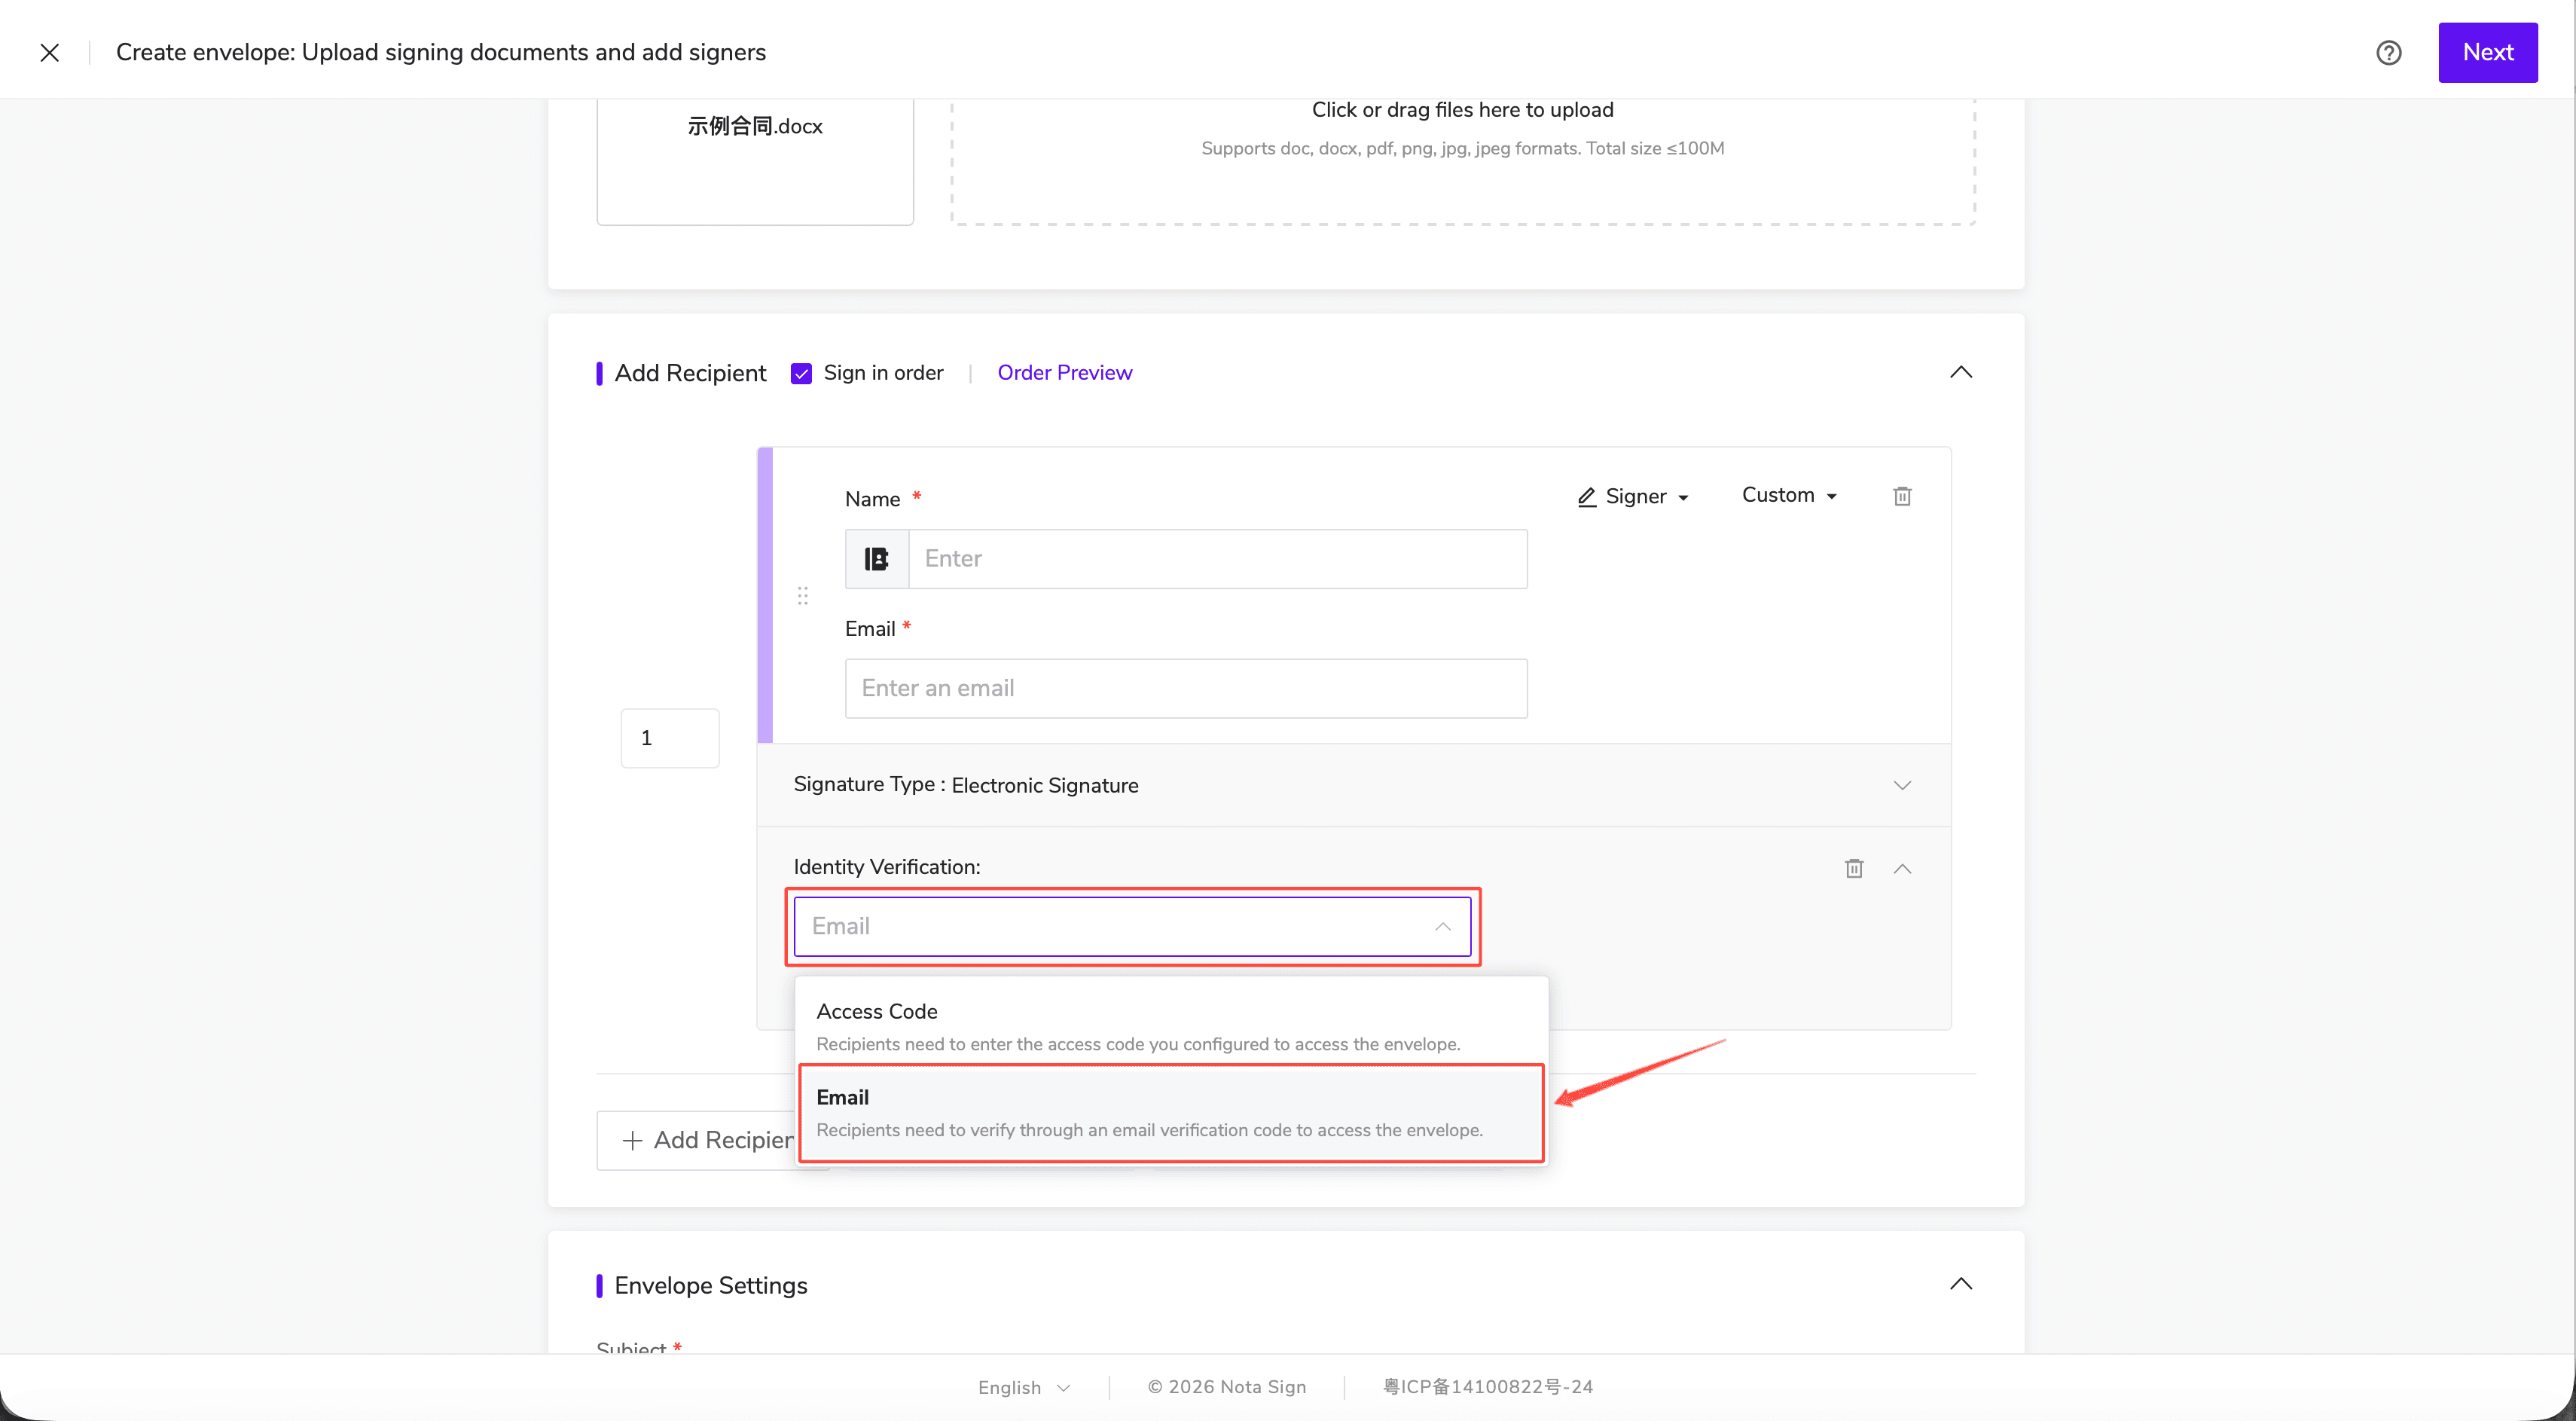
In the “Identity Verification” drop-down list, select “Email”.
3. Enter Recipient Information and Continue Configuration
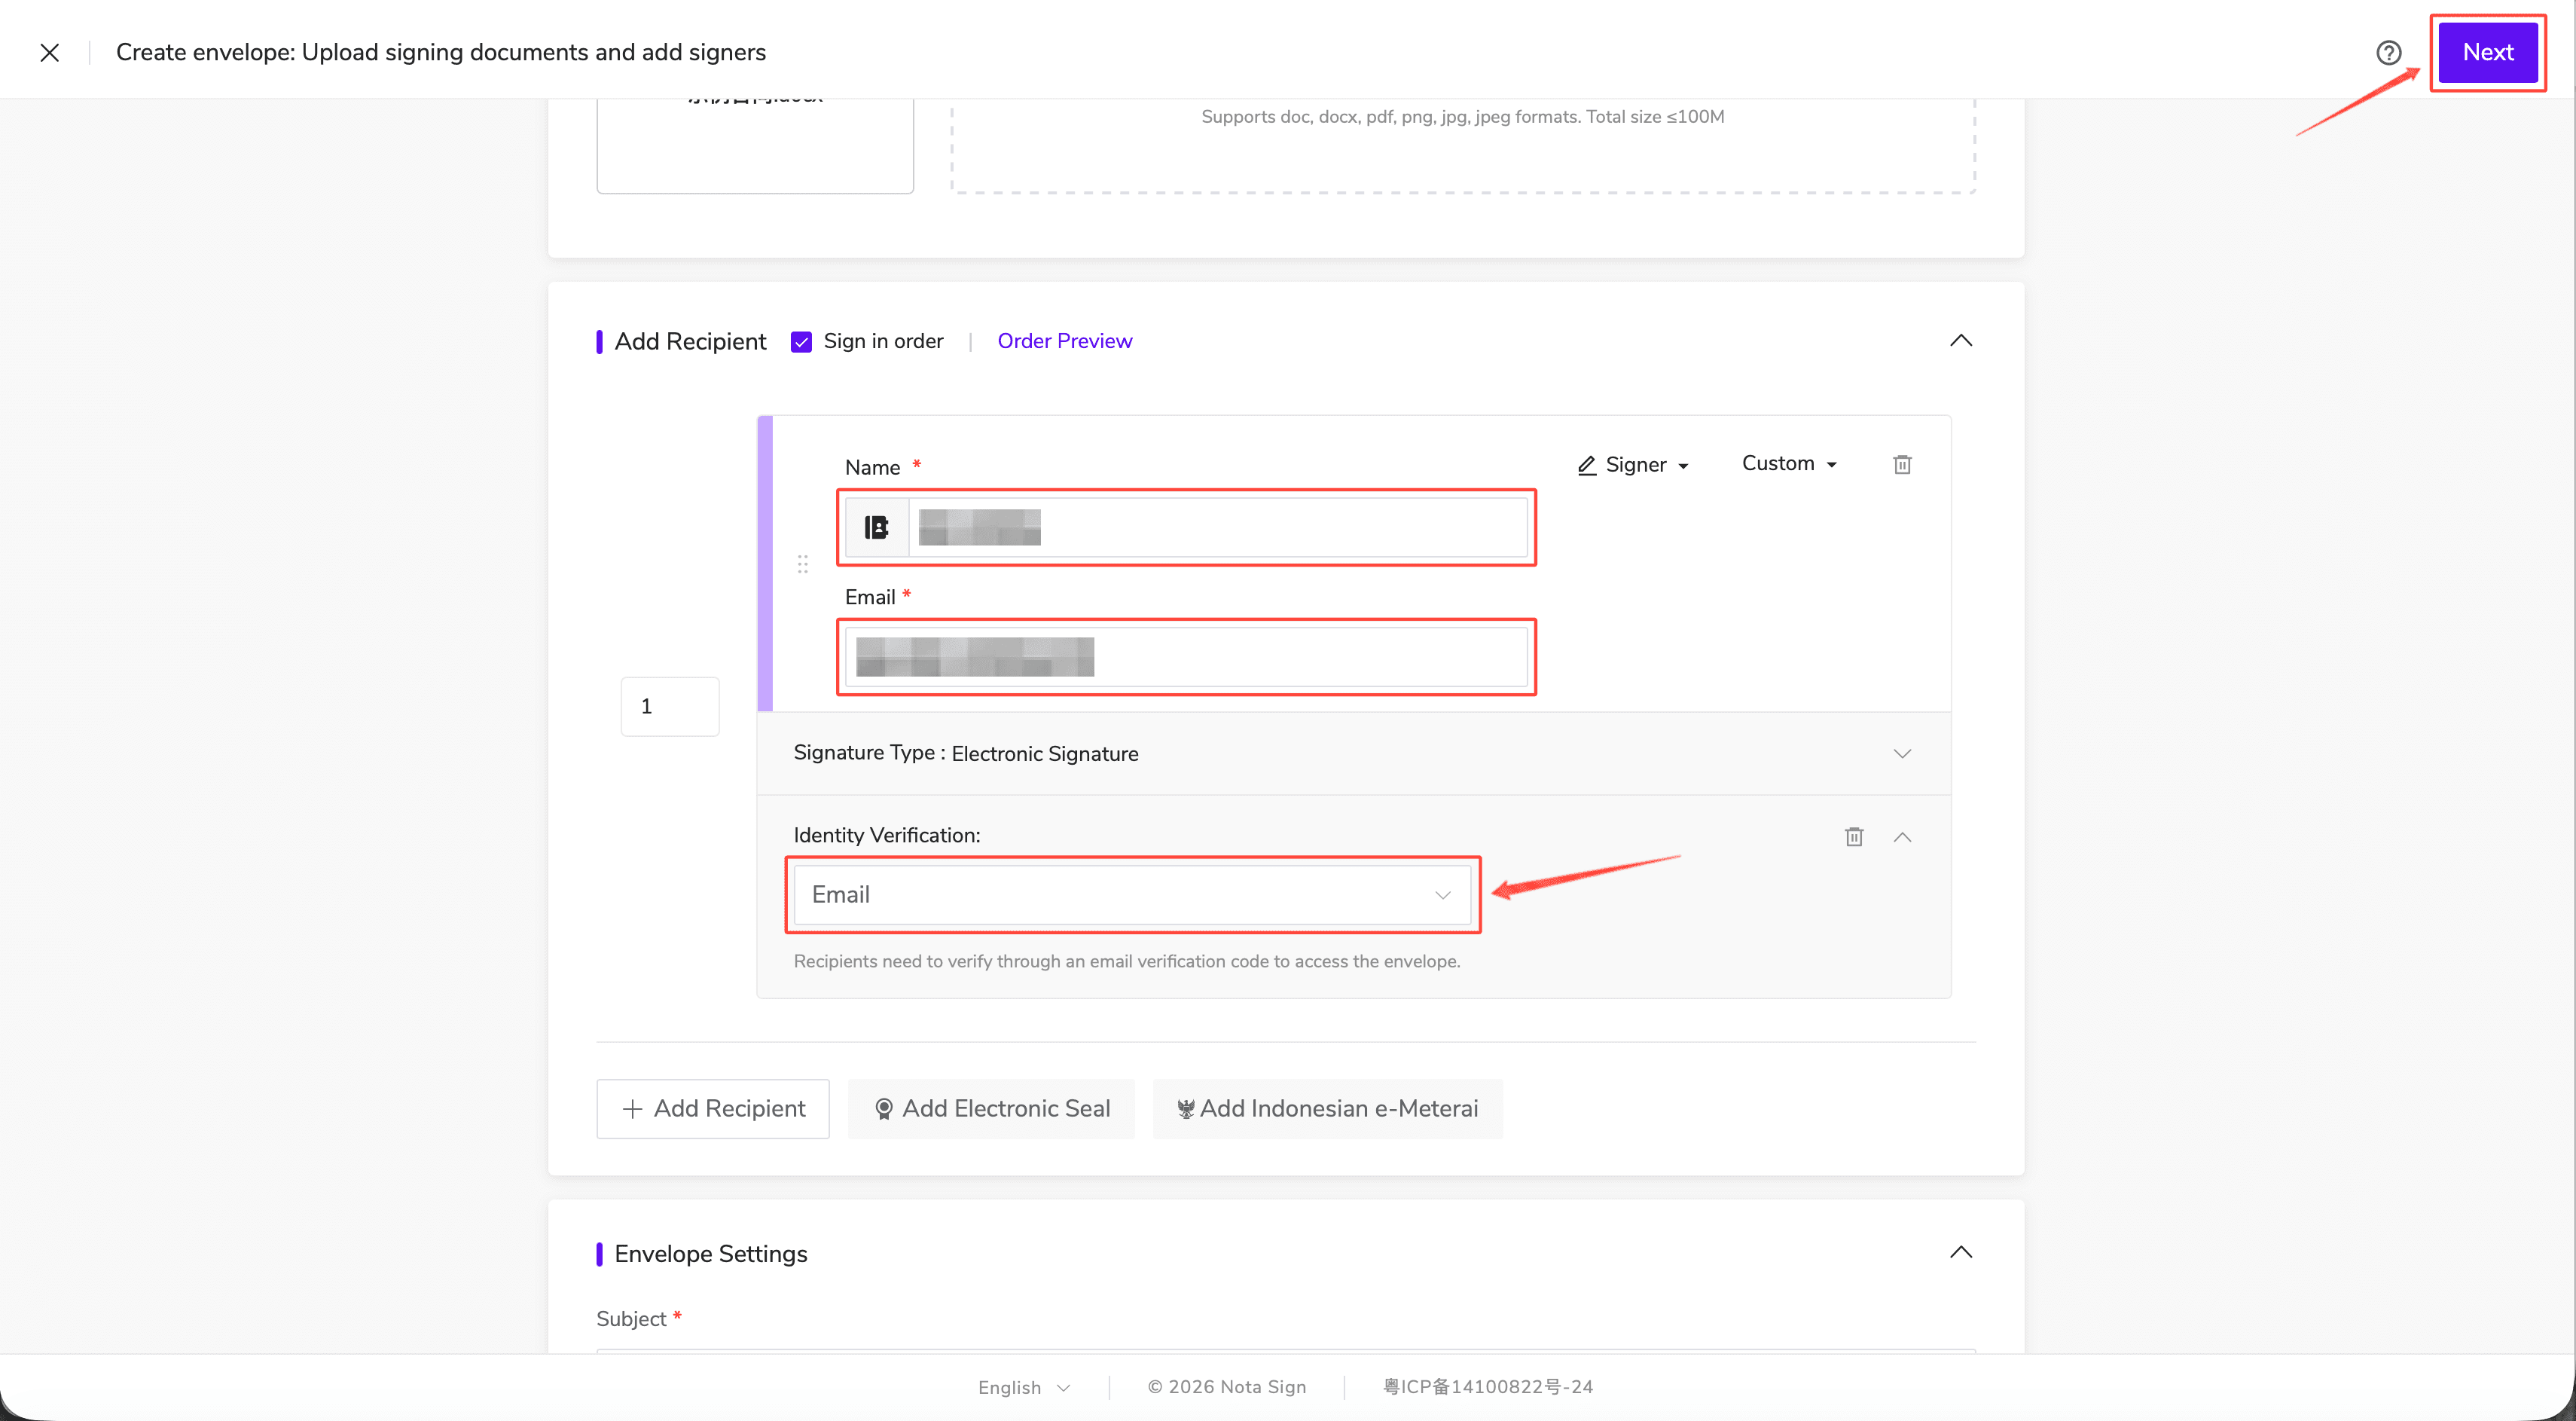
Enter the recipient’s name and email address. Confirm that “Email” is selected as the identity verification method, then click “Next” in the upper-right corner to complete the envelope configuration and send it.
2. Complete Email OTP Verification as a Signer
1. Open the Signing Invitation Email
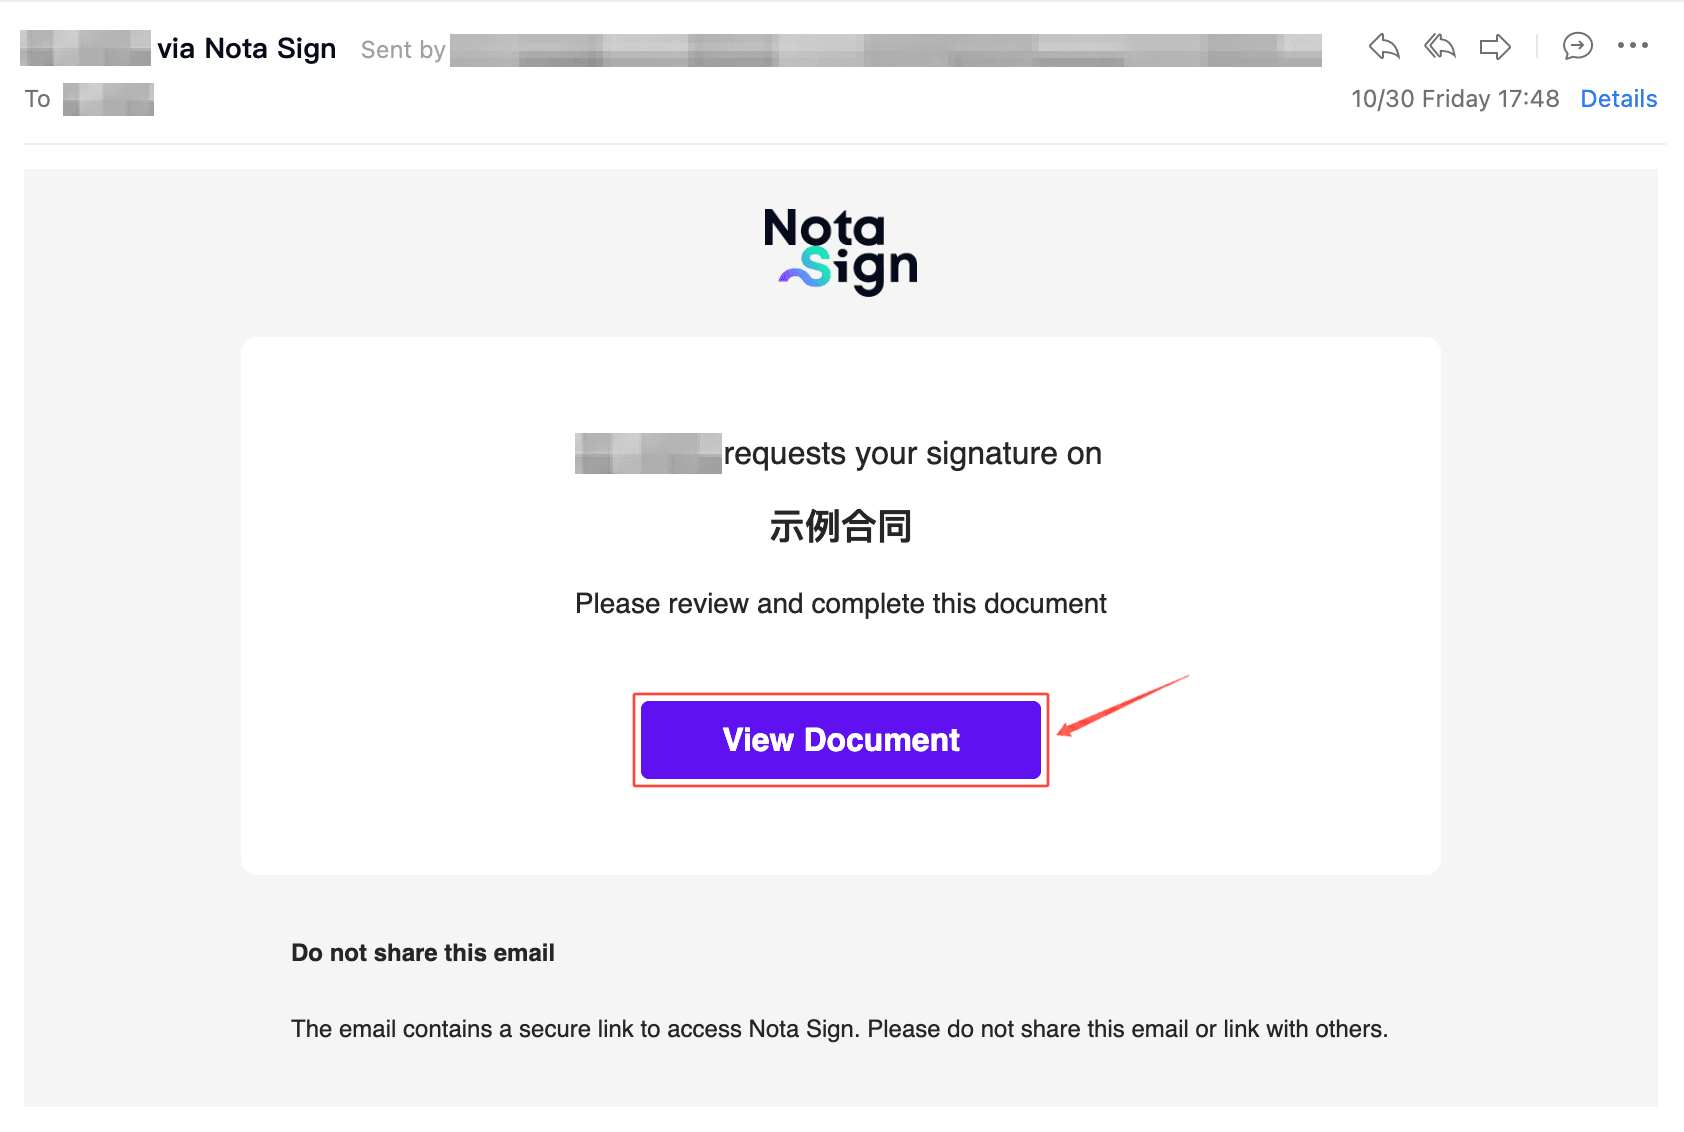
Check your inbox for the signing invitation email from Nota Sign. Click “View Document” in the email to open the envelope to be signed.
2. Request and Enter the Verification Code
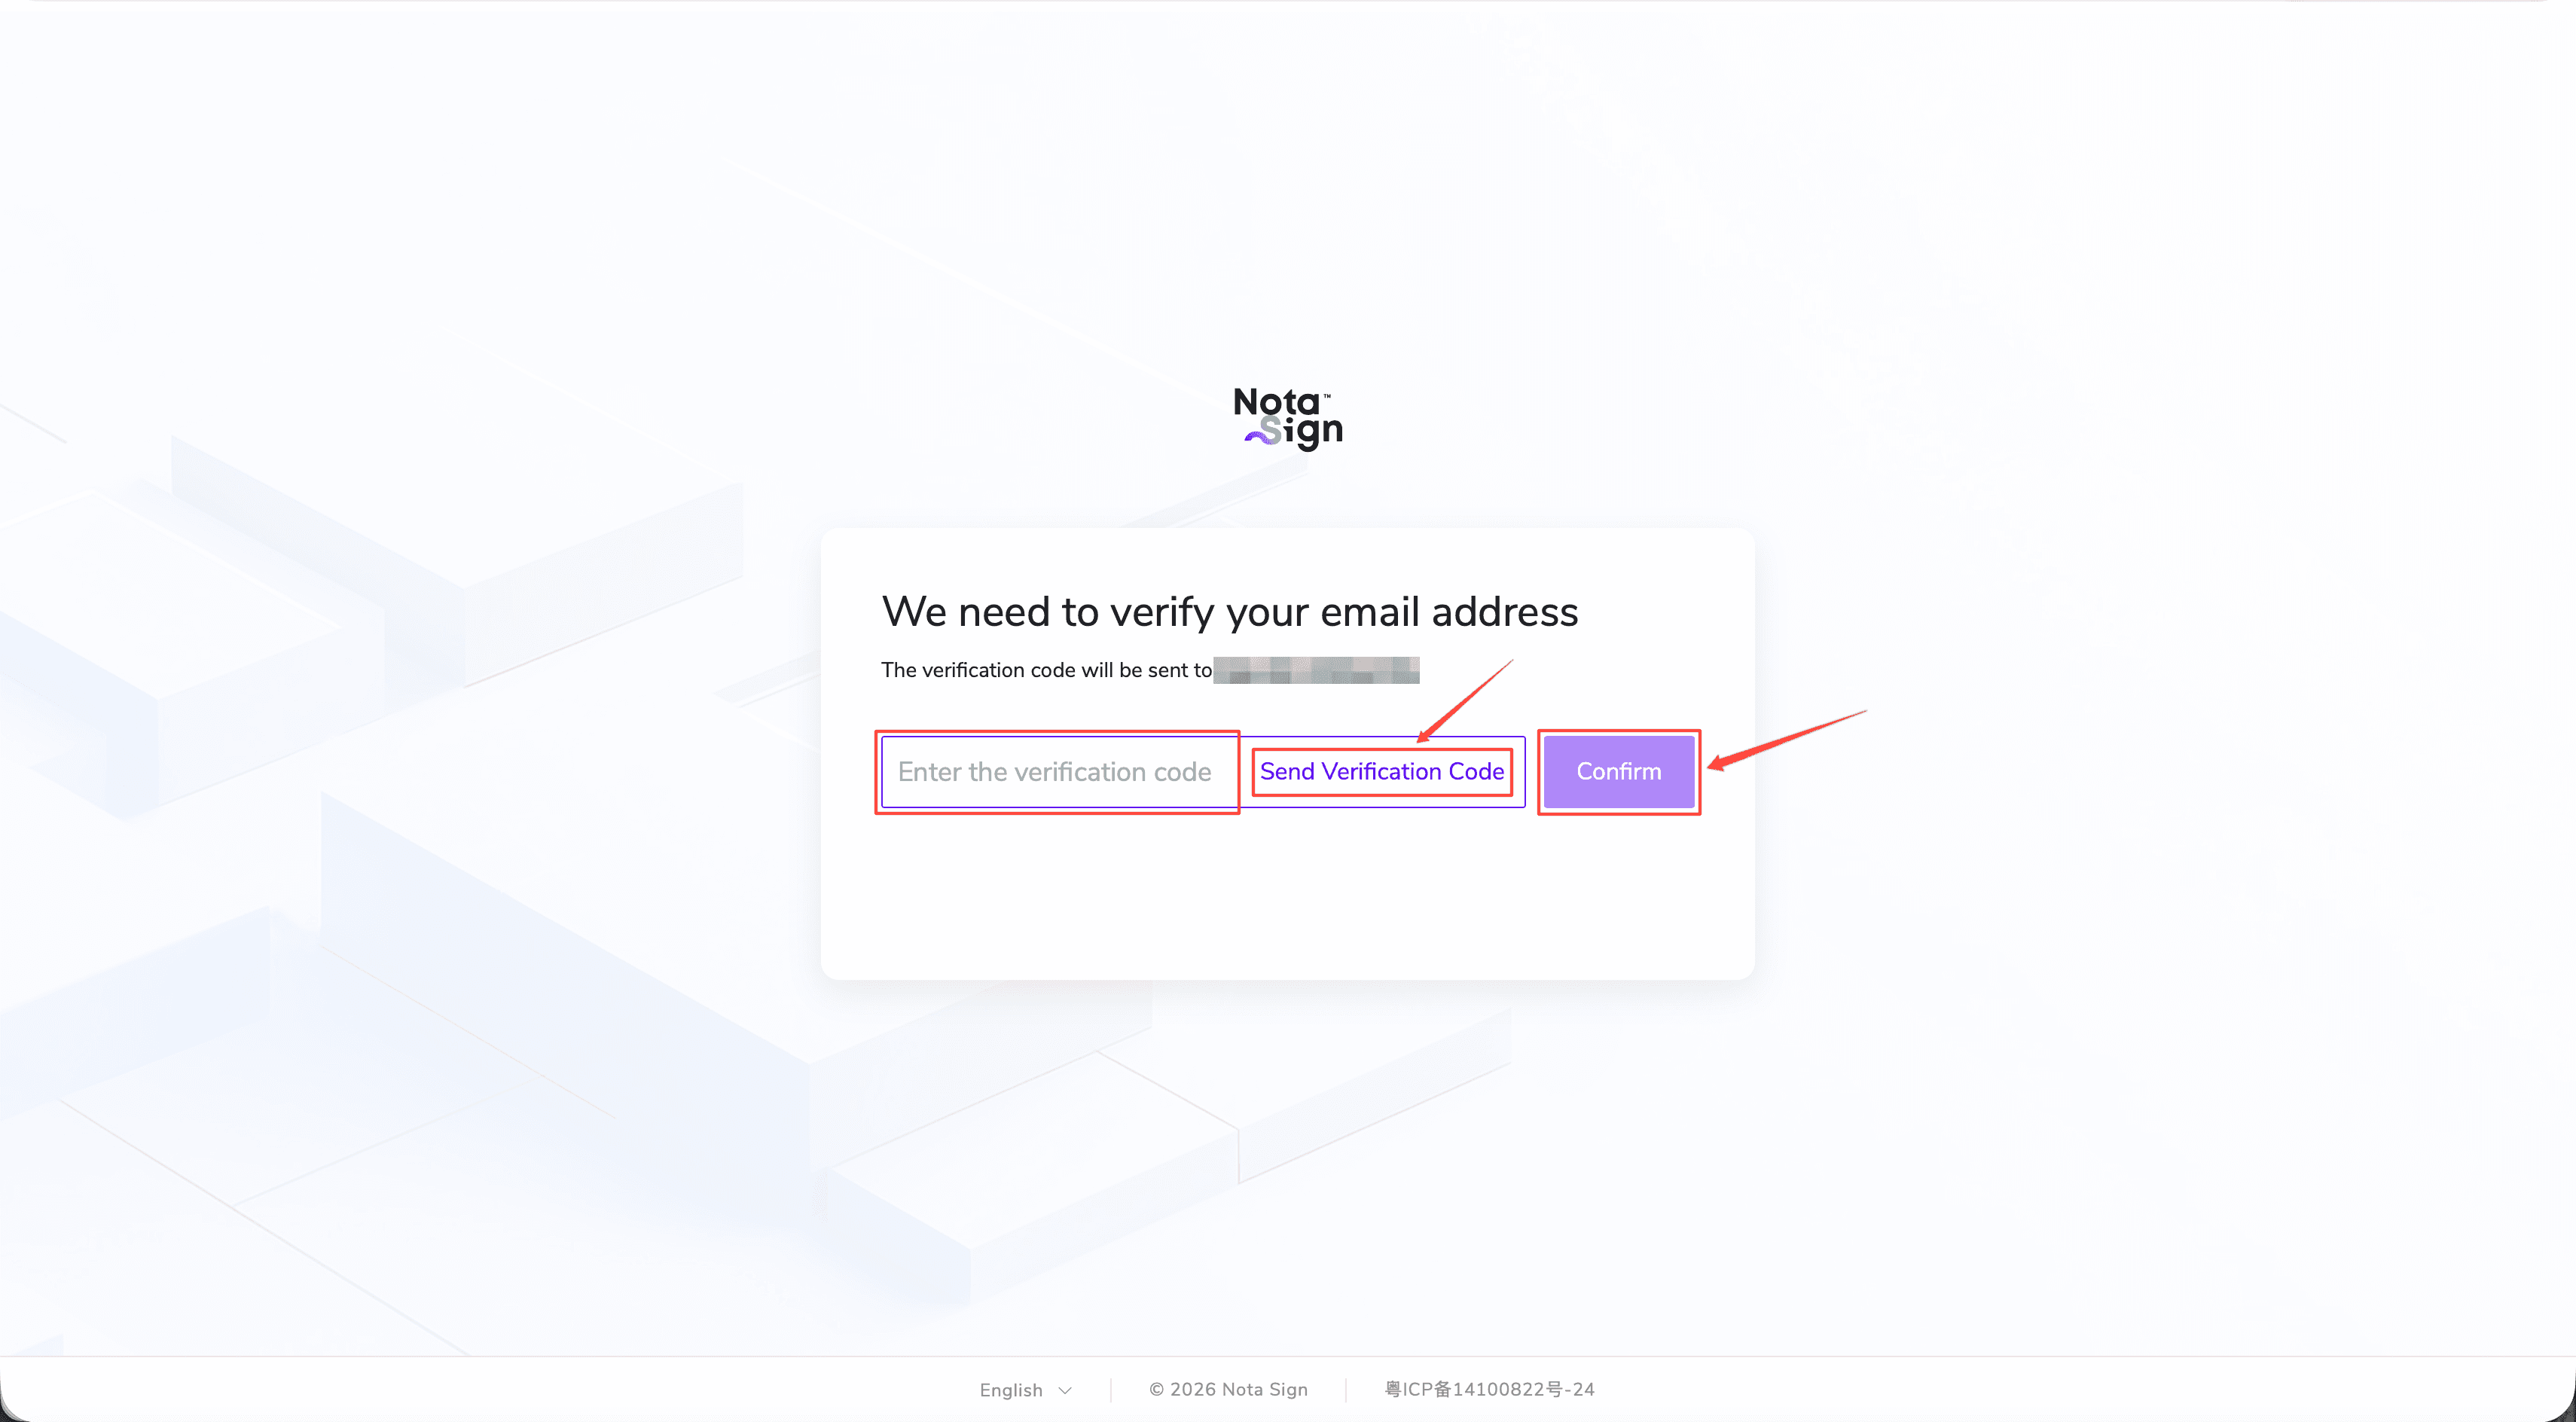
On the email verification page, click “Send Verification Code”. The system will send a one-time verification code to your email address. Check the verification email, enter the code on the page, then click “Confirm” to complete verification.
3. Continue Signing the Documents
After verification, you can open the documents and follow the on-screen instructions to complete signing.
Need Help?
If you encounter any issues, contact the Nota Sign Support team: support@notasign.com