
Custom Sender
I. Feature Overview
Custom Sender lets members send signing notifications from their account email addresses, making it easier for recipients to identify the sender.
For example, once your company verifies example.com and enables the feature for a workspace, a member who initiates signing with the account alice@example.com can use that email address to send the initial signing notification and signing reminders.
II. Before You Begin
- Your workspace must have an active Nota Sign Professional subscription.
- Prepare the company email domain you want to enable, such as
example.com. The email domain of the member initiating signing must match this domain. - Make sure you can access the domain’s administration console and add DNS records. If you do not have permission, contact your IT team or domain administrator for assistance.
Note: The domain is the part of an email address after
@. When adding a domain, enterexample.com, not a full email address.
III. Set Up Custom Sender
1. Add or Select a Domain
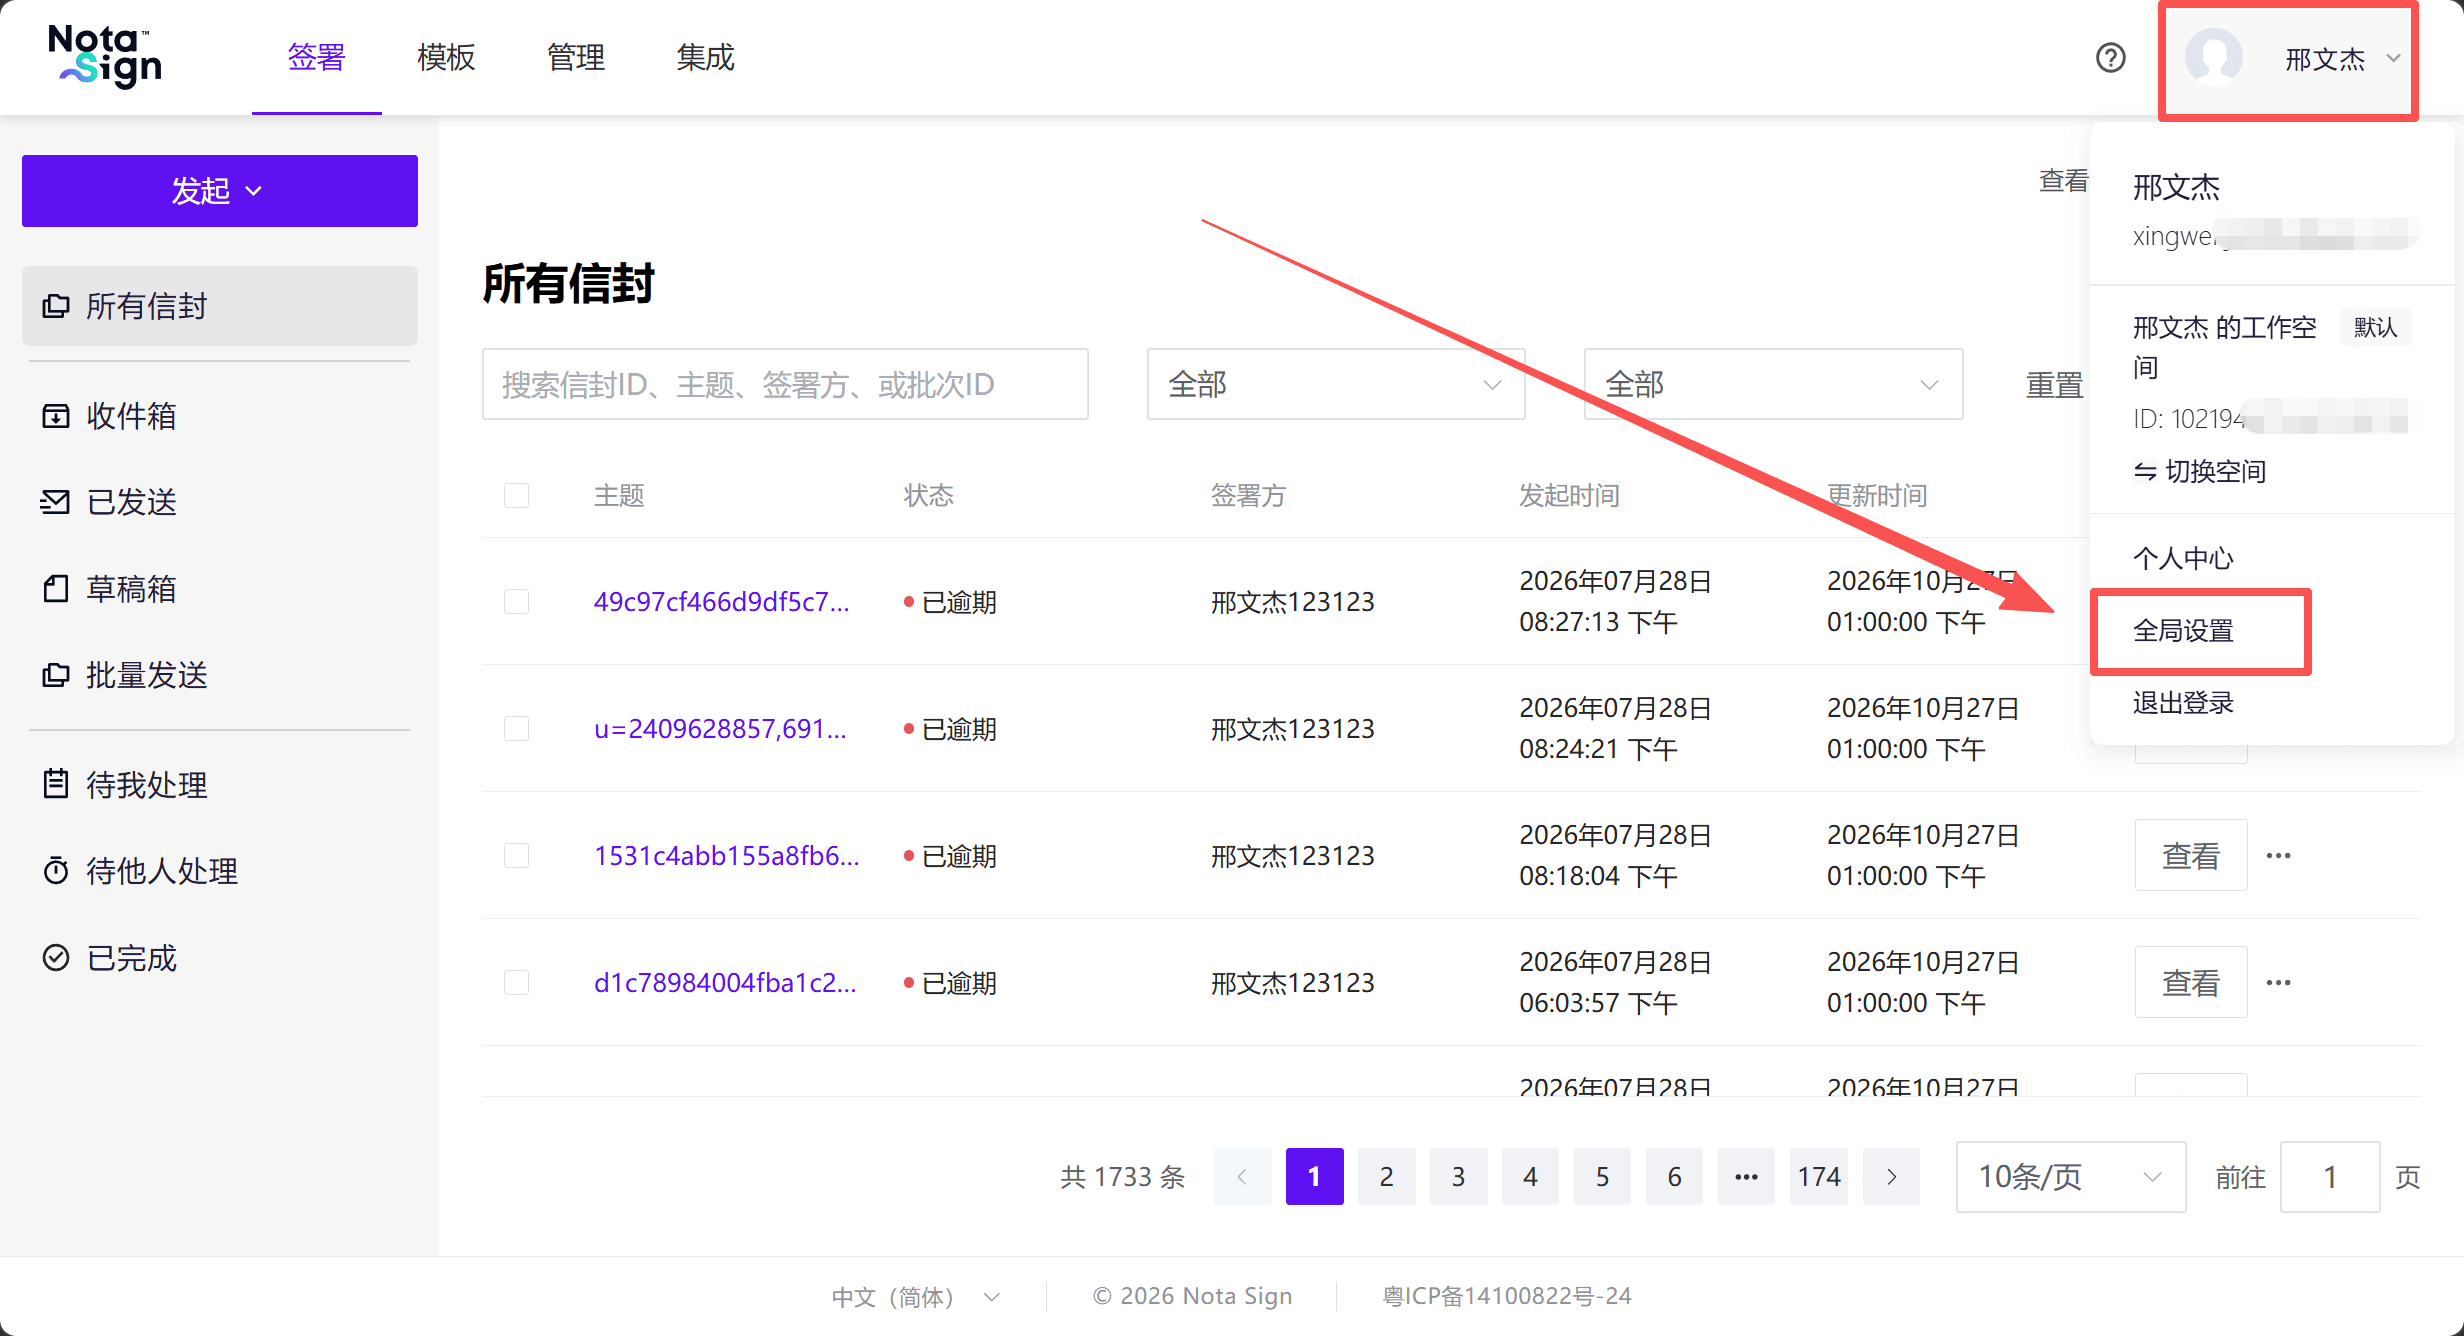
- Log in to the Nota Sign workspace. Click your profile picture in the upper-right corner and select [Global Settings] from the dropdown menu.
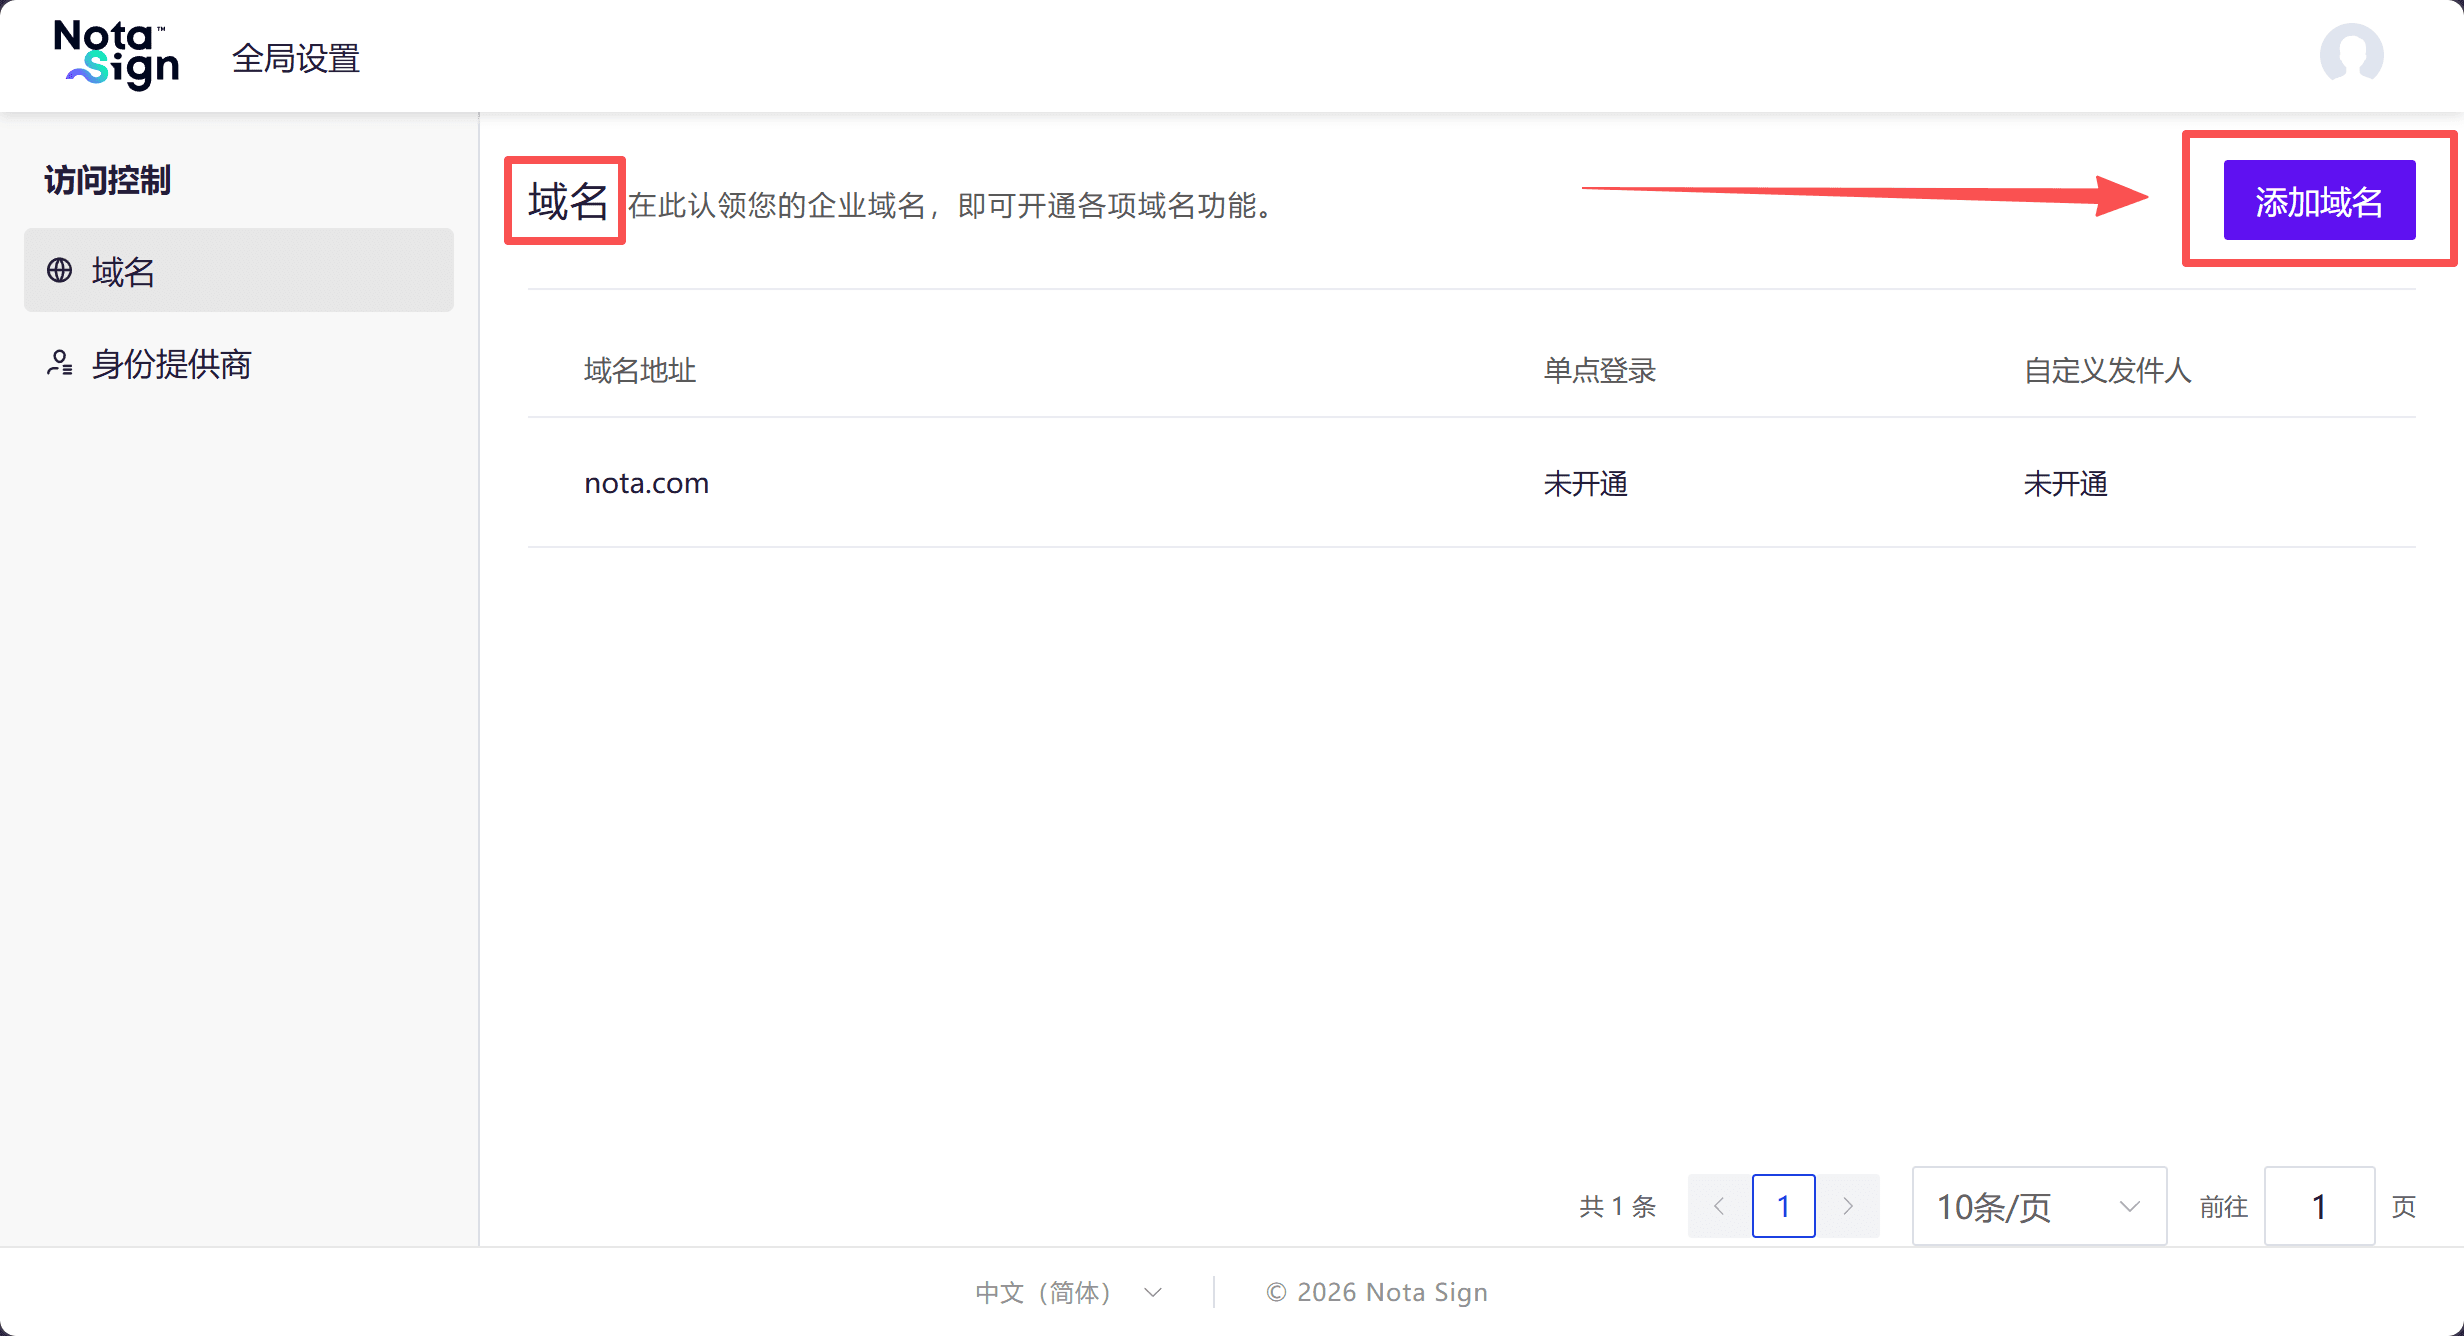
- Go to [Global Settings] → [Domains].
- To add a new domain, click [Add Domain] in the upper-right corner.
- Enter the [Domain Address] and click [Claim].
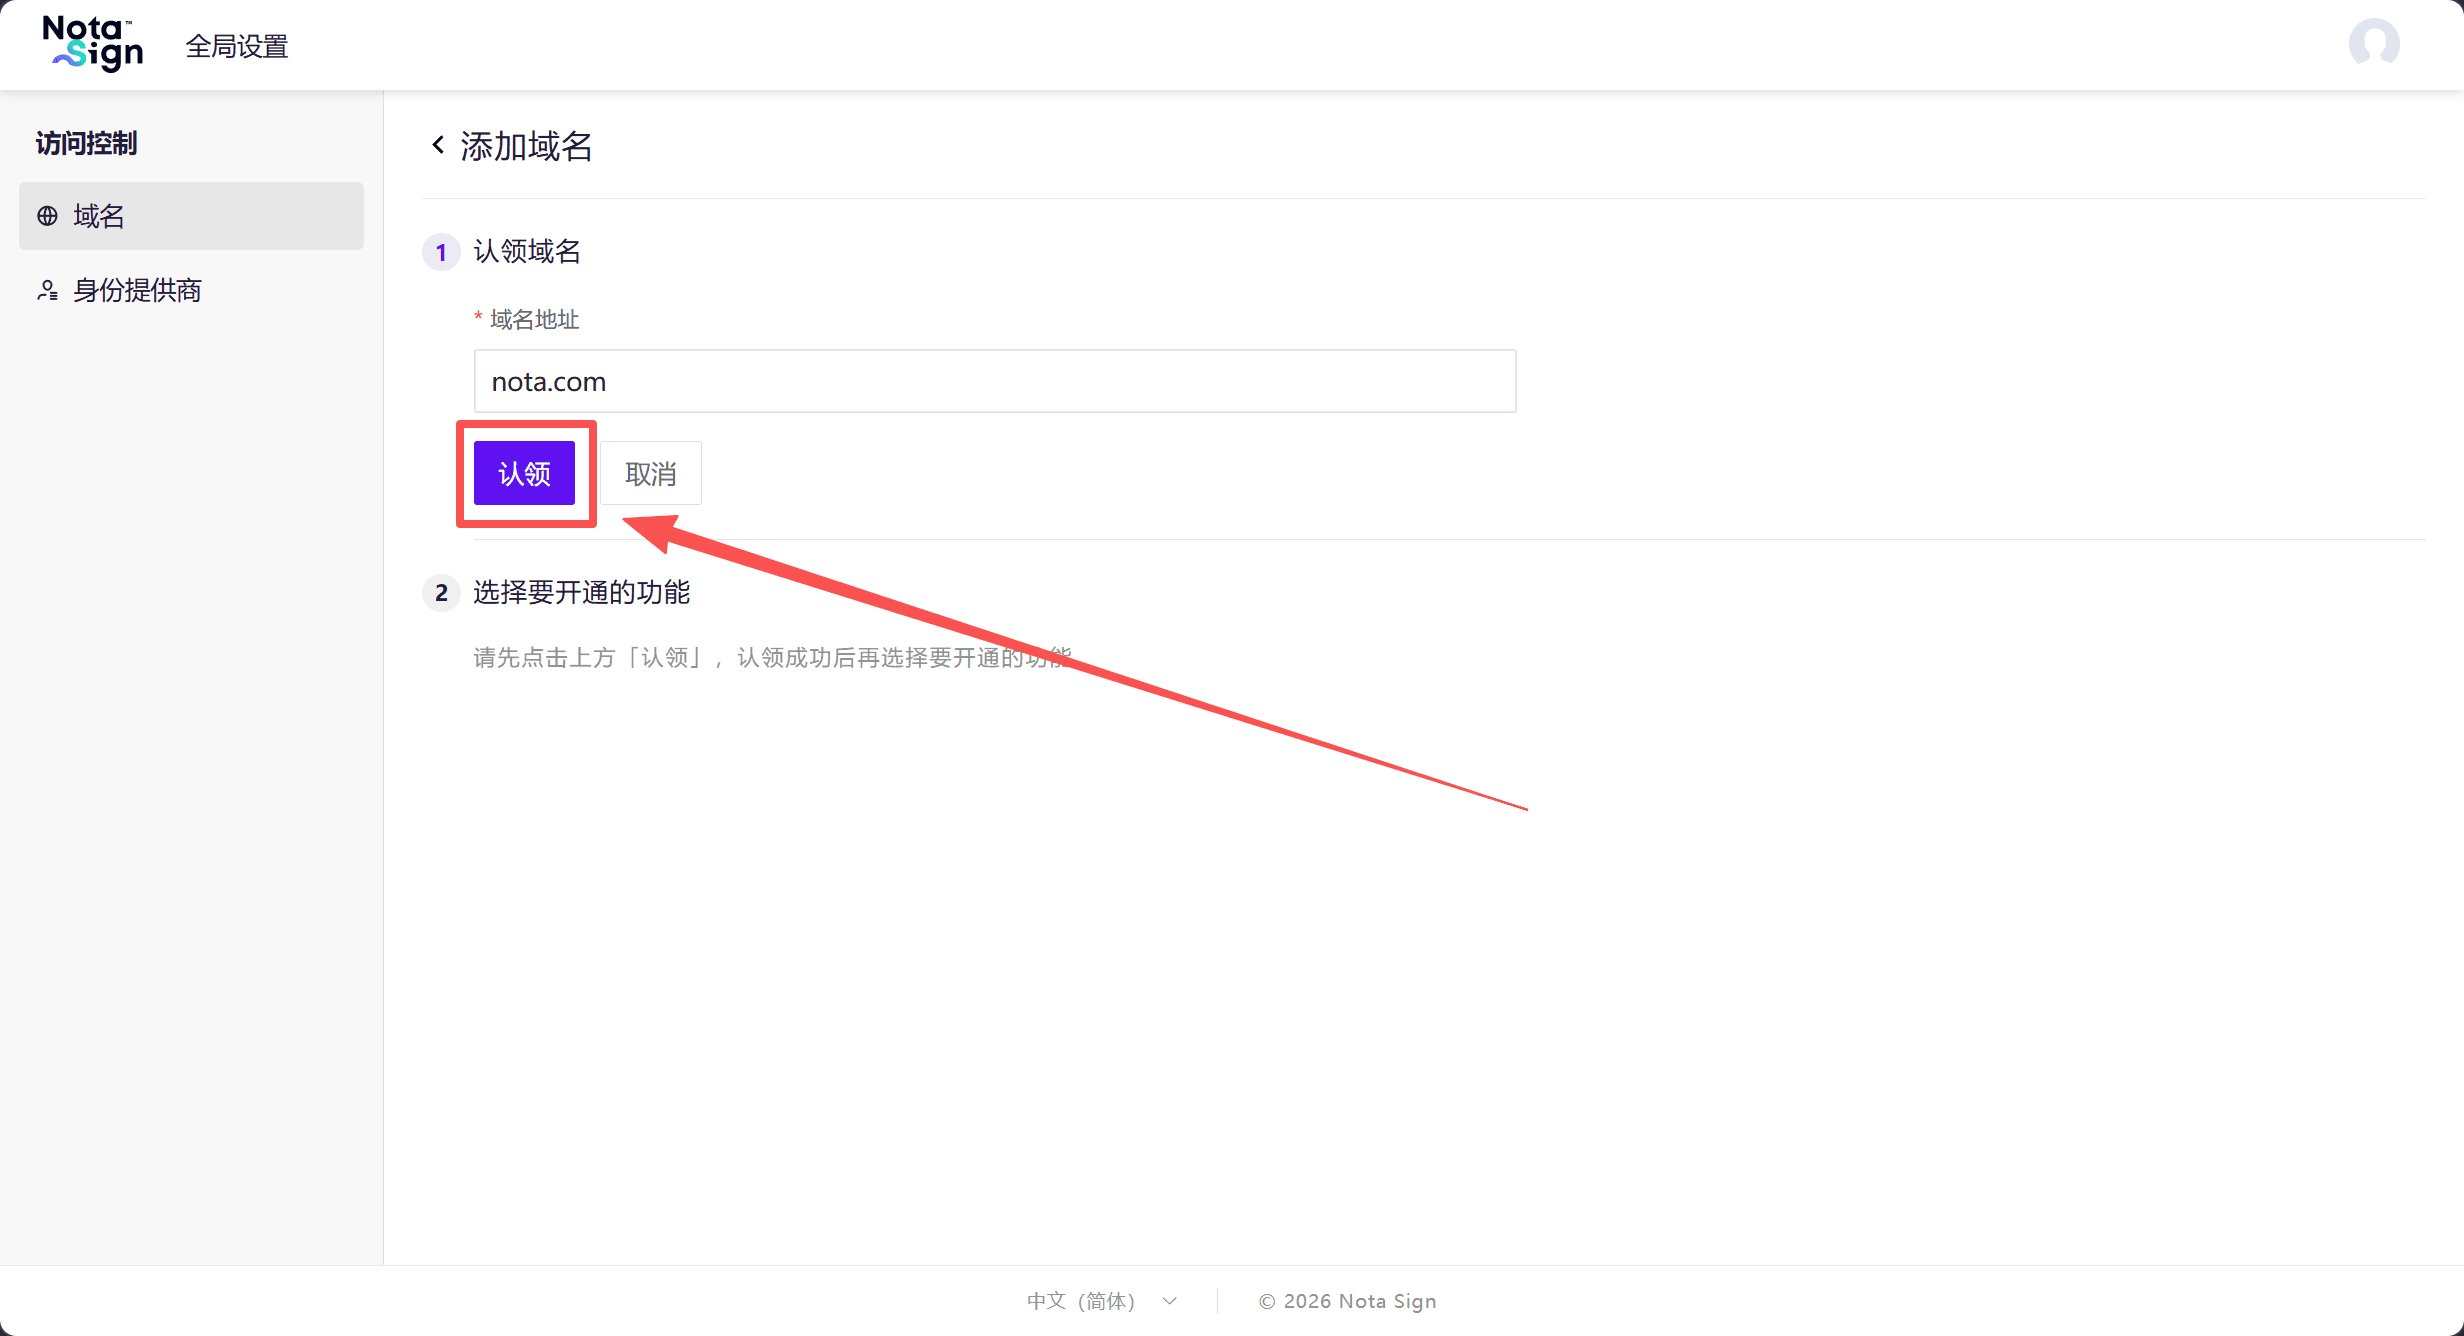
Note: Clicking [Claim] only submits the domain. You must still configure the DNS records and complete verification below.
- In the expanded “Select Features to Enable” section, switch to the [Custom Sender] tab.
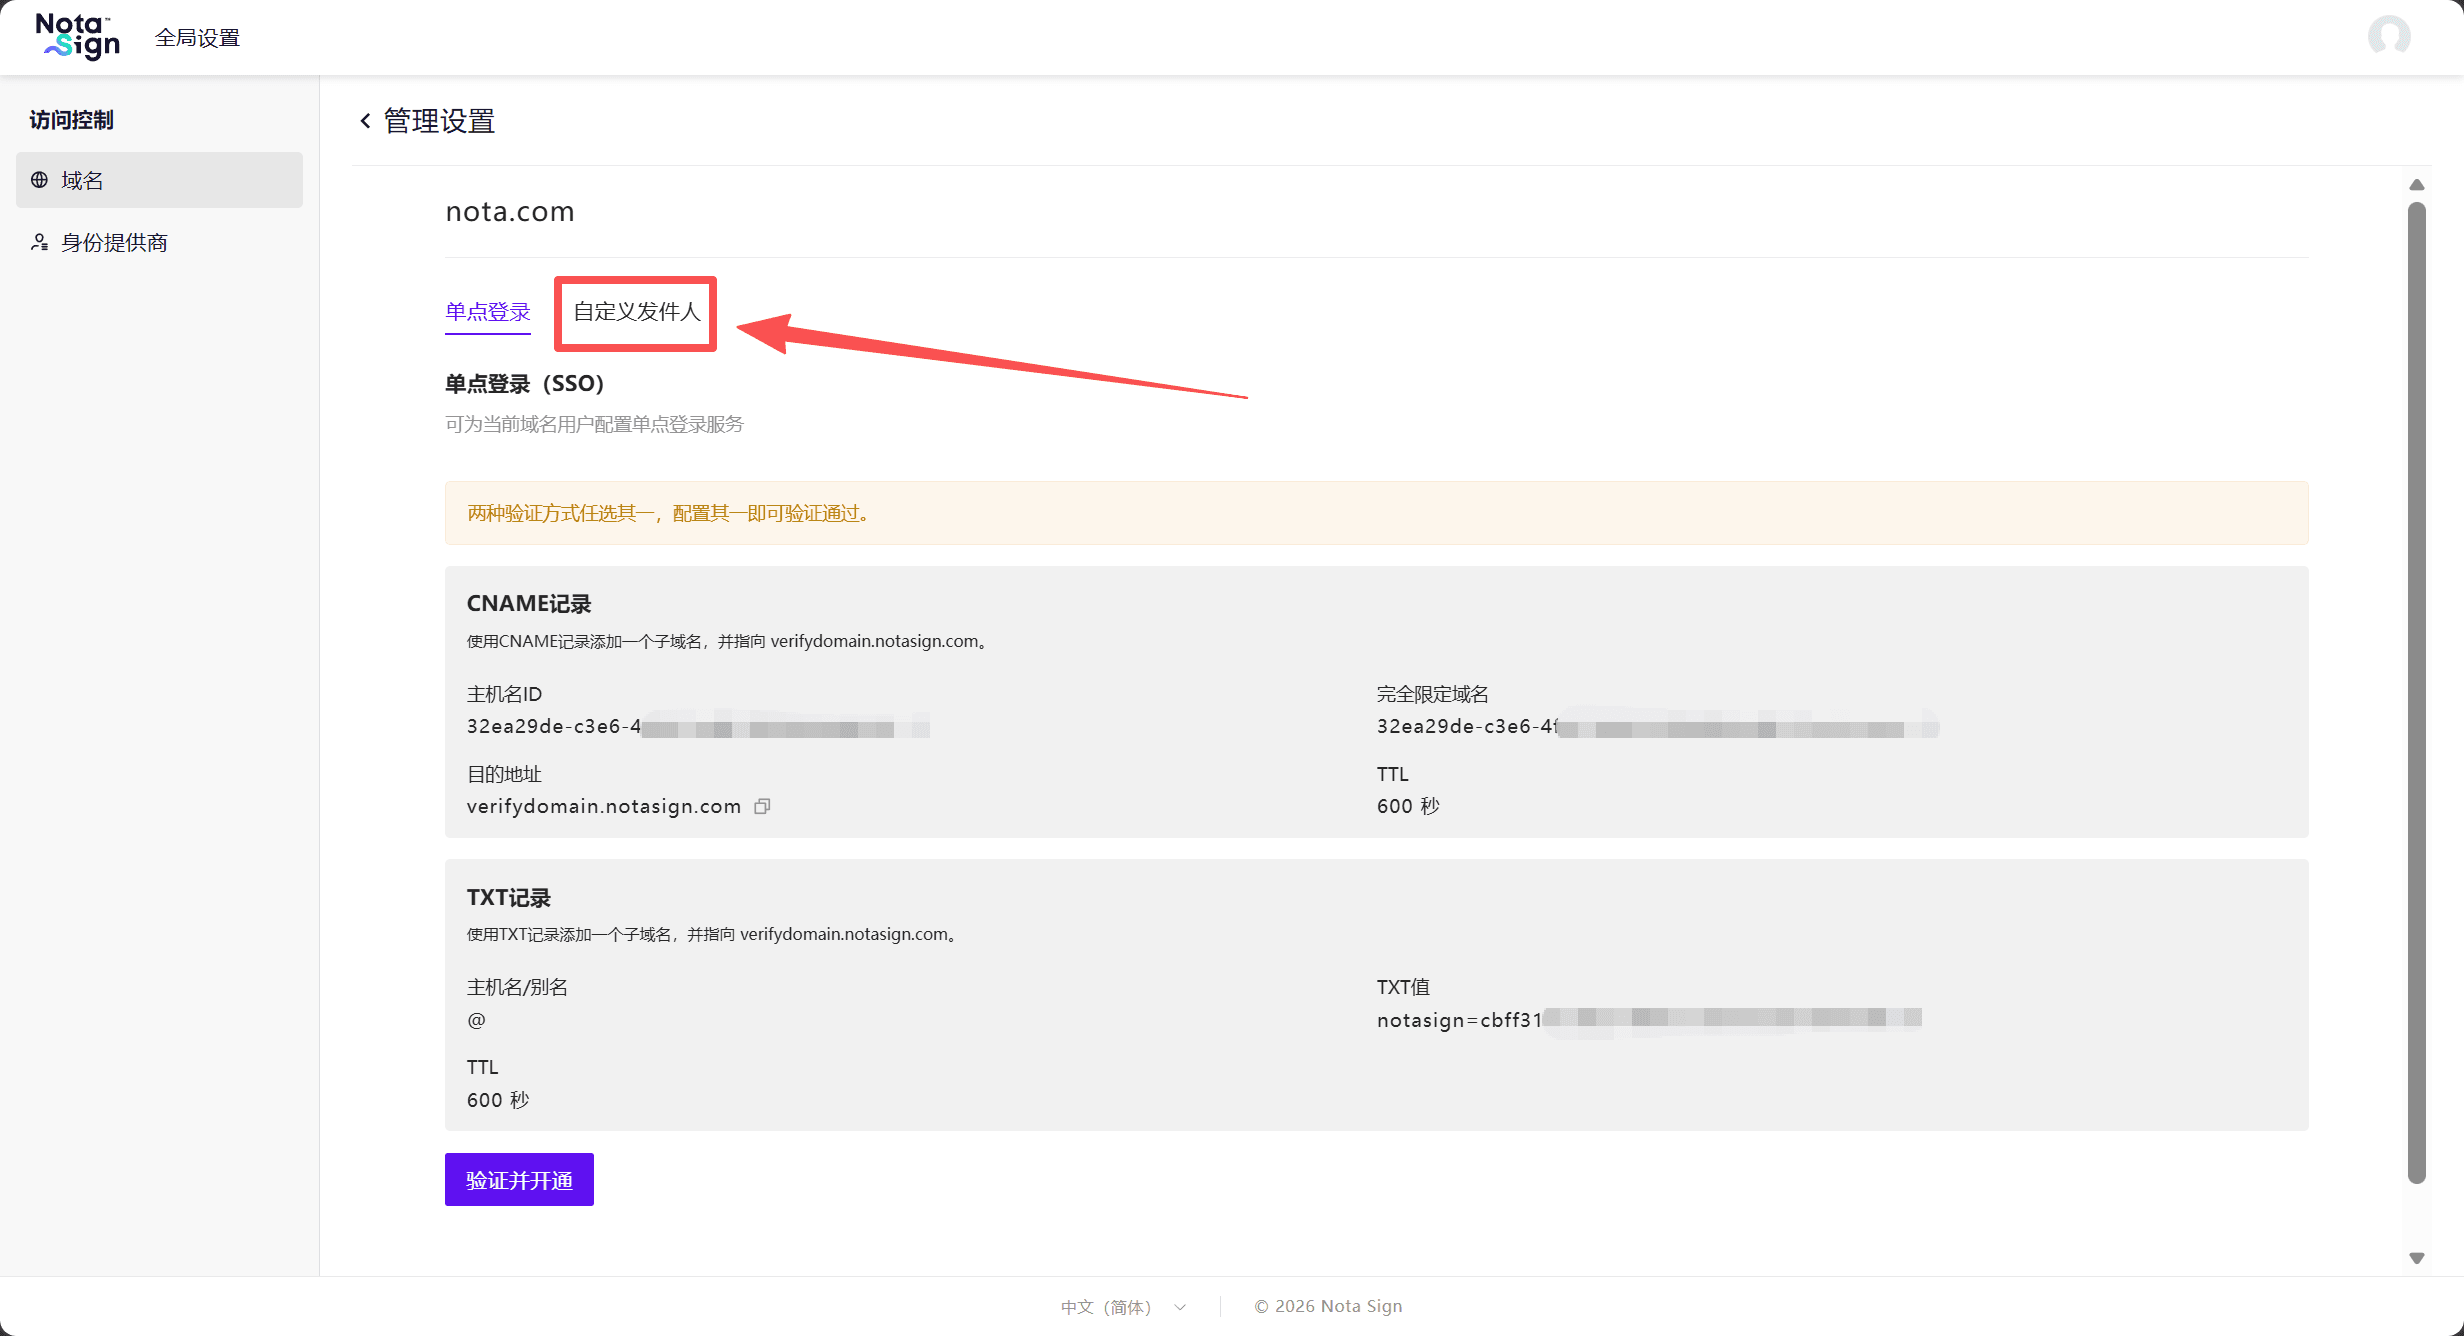
If the domain is already listed, you do not need to add it again. Click [Manage Settings] next to the domain and open the [Custom Sender] tab. If the domain is already enabled, you can configure the workspace toggles directly.
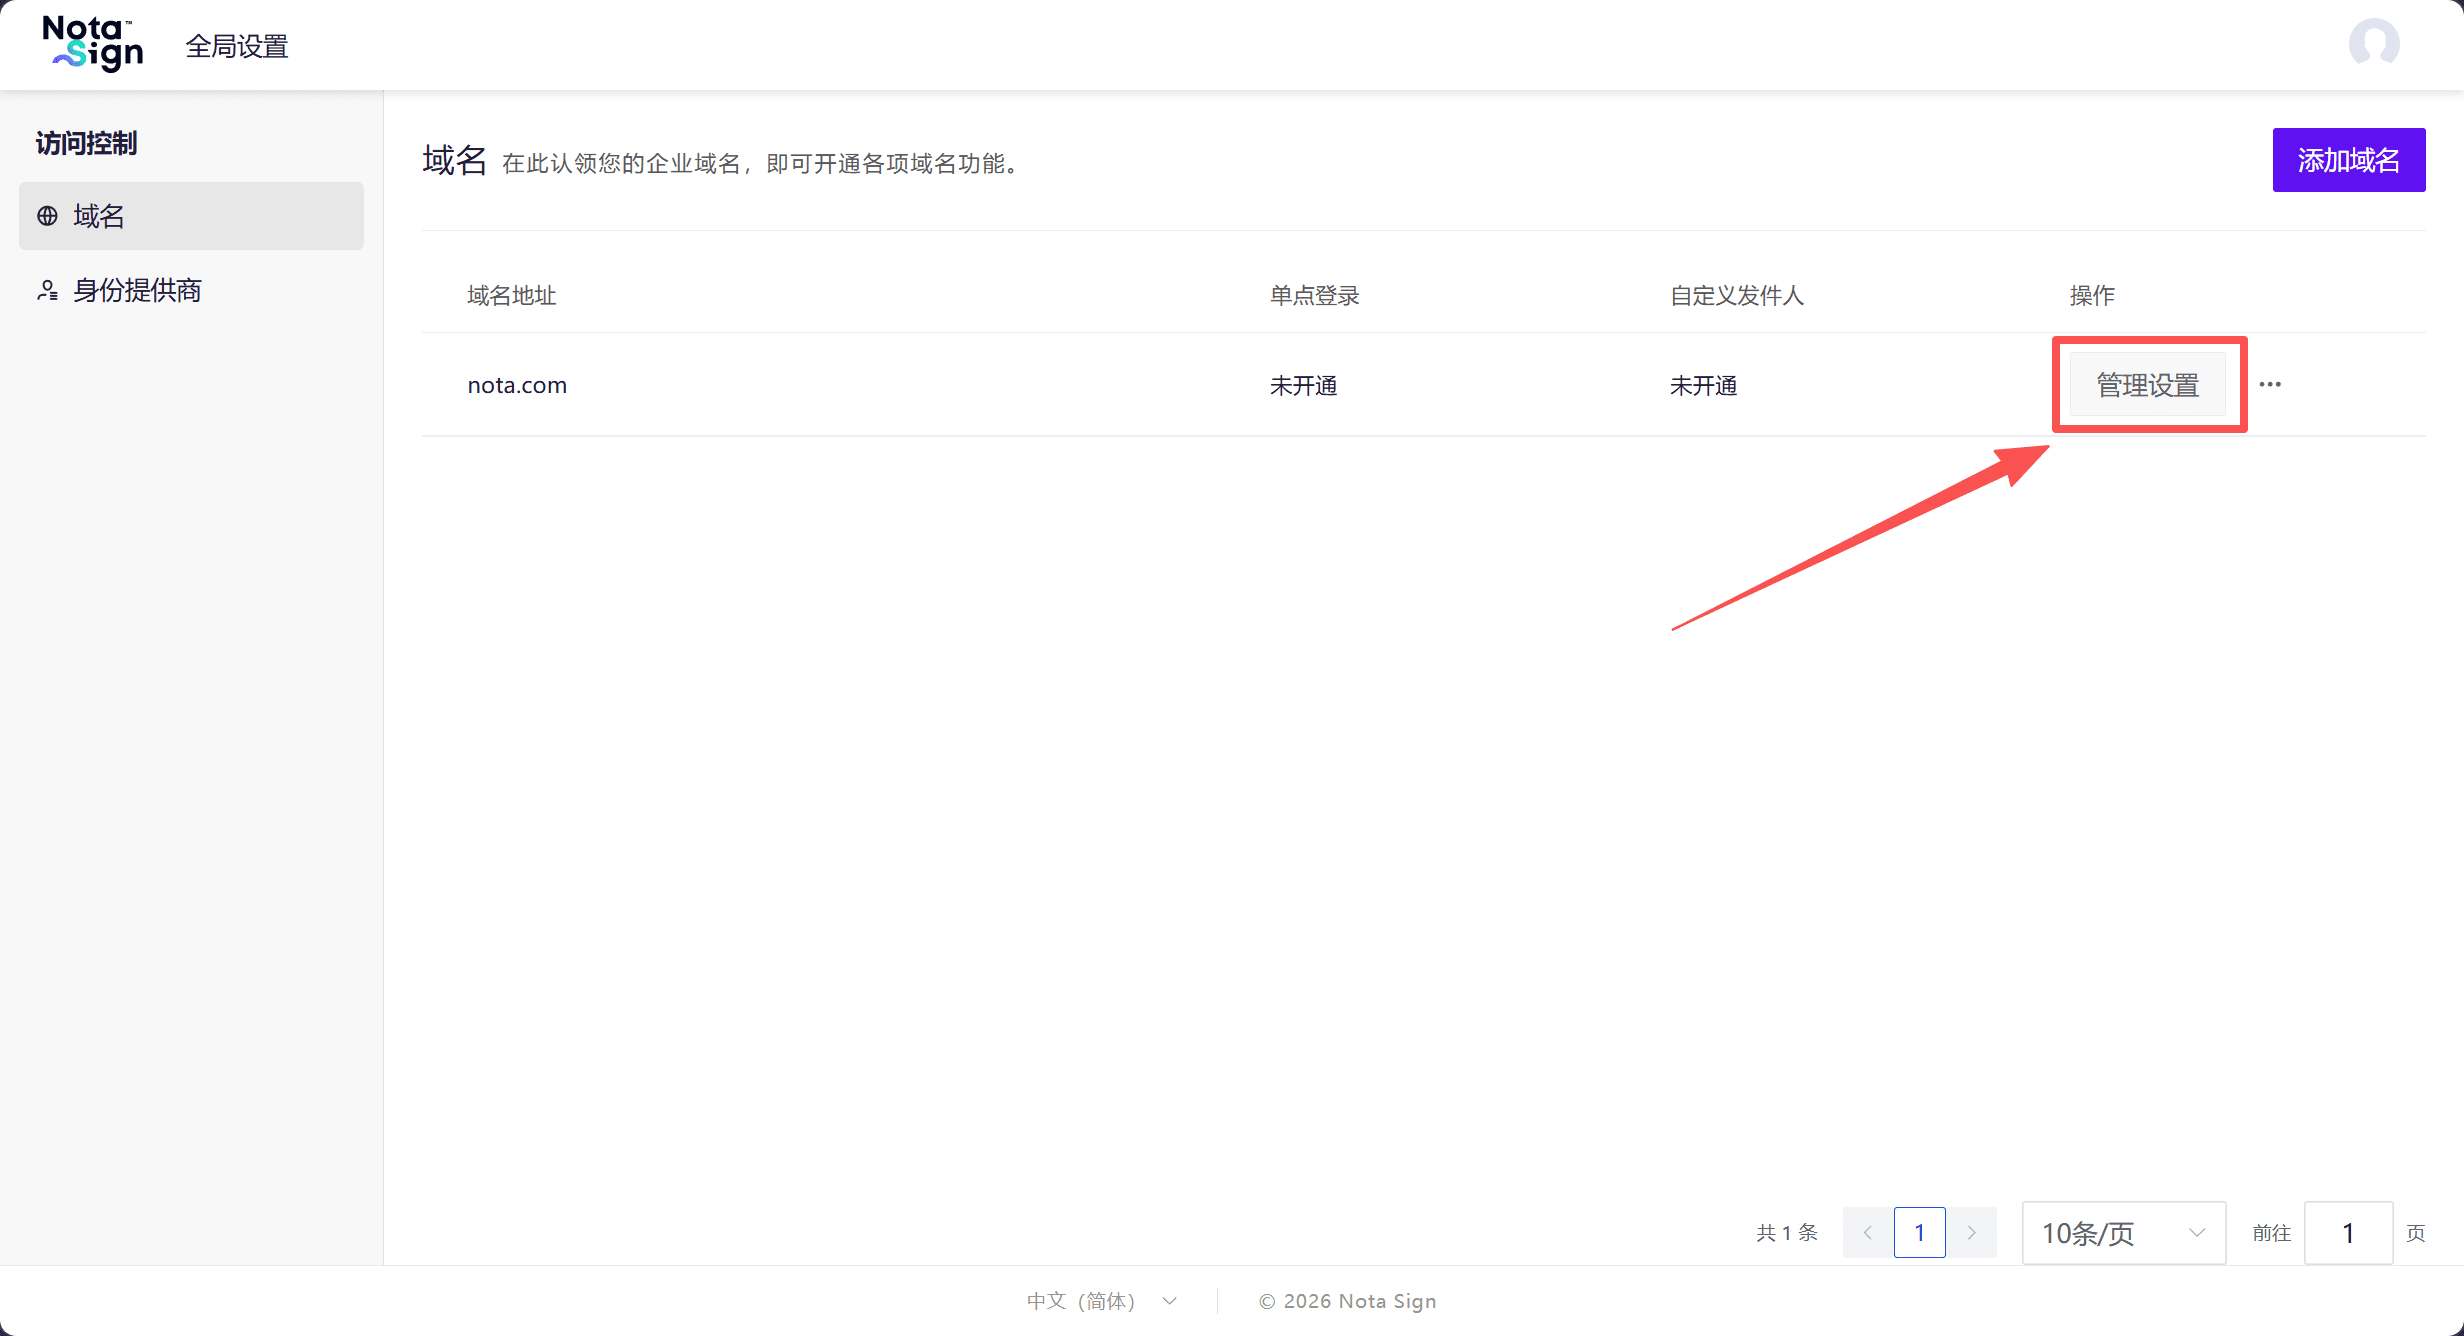
2. Configure DNS Records and Verify the Domain
- On the [Custom Sender] tab, locate the three DKIM records provided by Nota Sign.
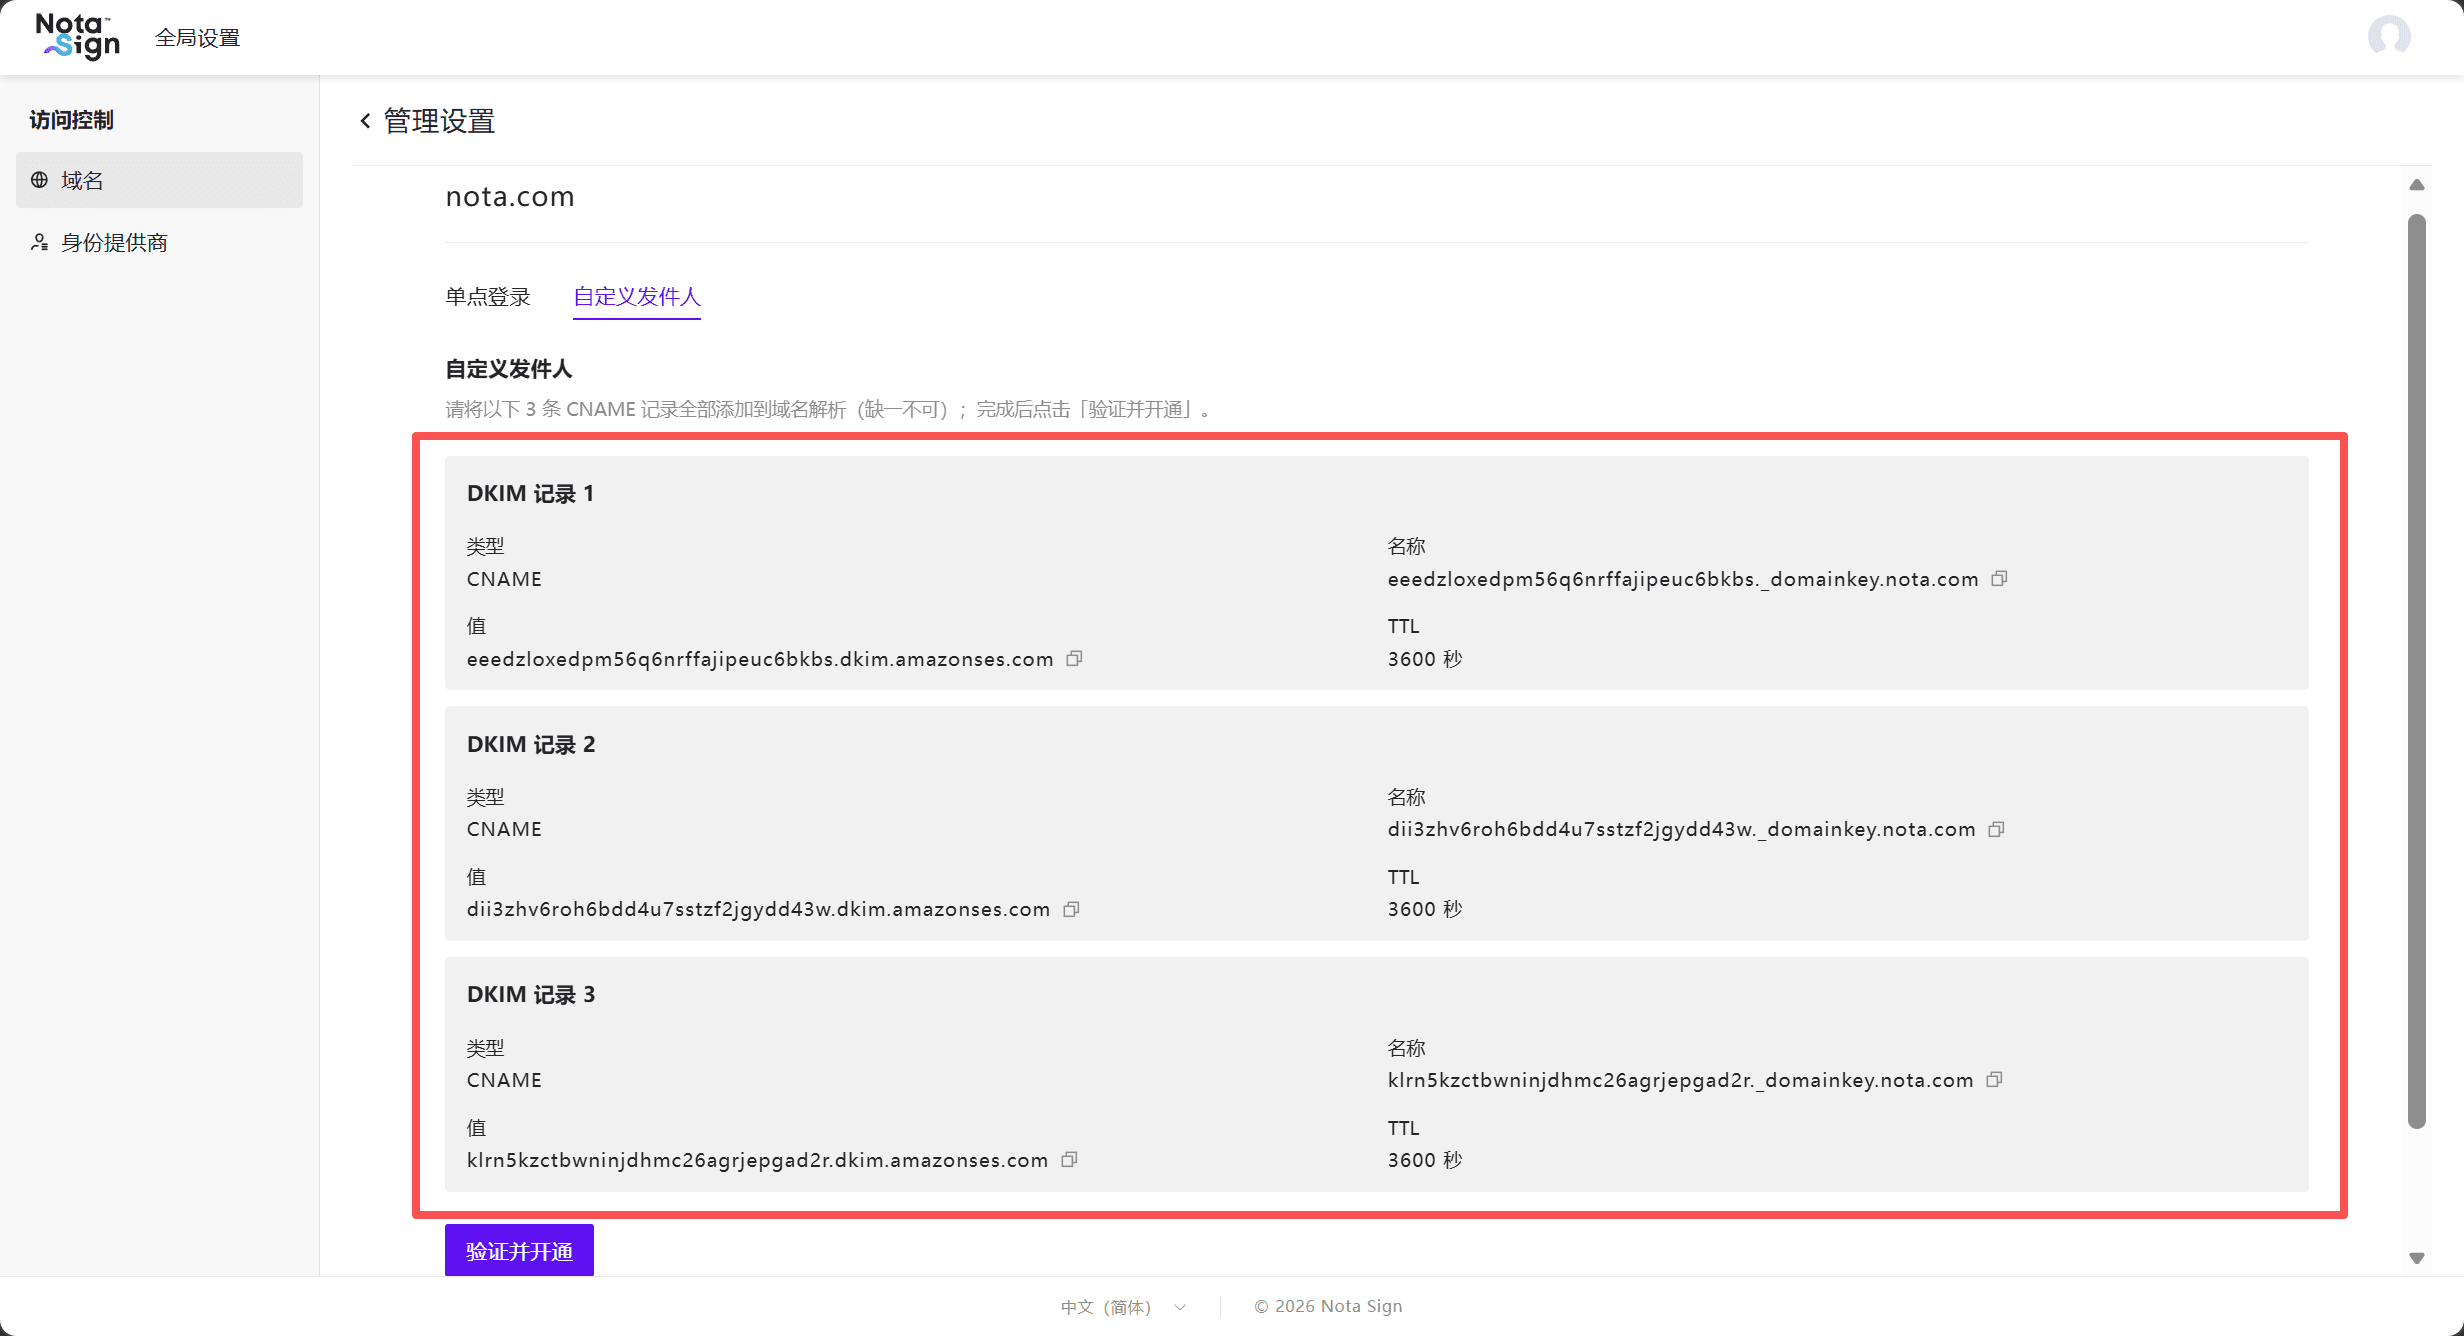
- Log in to your company’s domain administration console and open the DNS settings for the domain.
- Add each record using the information shown in Nota Sign:
| Setting | What to Enter |
|---|---|
| Type | CNAME |
| Name / Host | The [Name] of the corresponding DKIM record |
| Value / Record Value | The [Value] of the corresponding DKIM record |
| TTL | The value shown on the page |
- Return to Nota Sign and click [Verify and Enable].
Note: You must add all three records. Copy the records from your own page; do not use the examples in the screenshots. If verification fails, check that the records are correct and have taken effect, then try again.
3. Enable the Feature for a Workspace
- After verification succeeds, open [Manage Settings] → [Custom Sender] for the domain.
- Find the workspace in the list and turn on its [Enable] toggle.
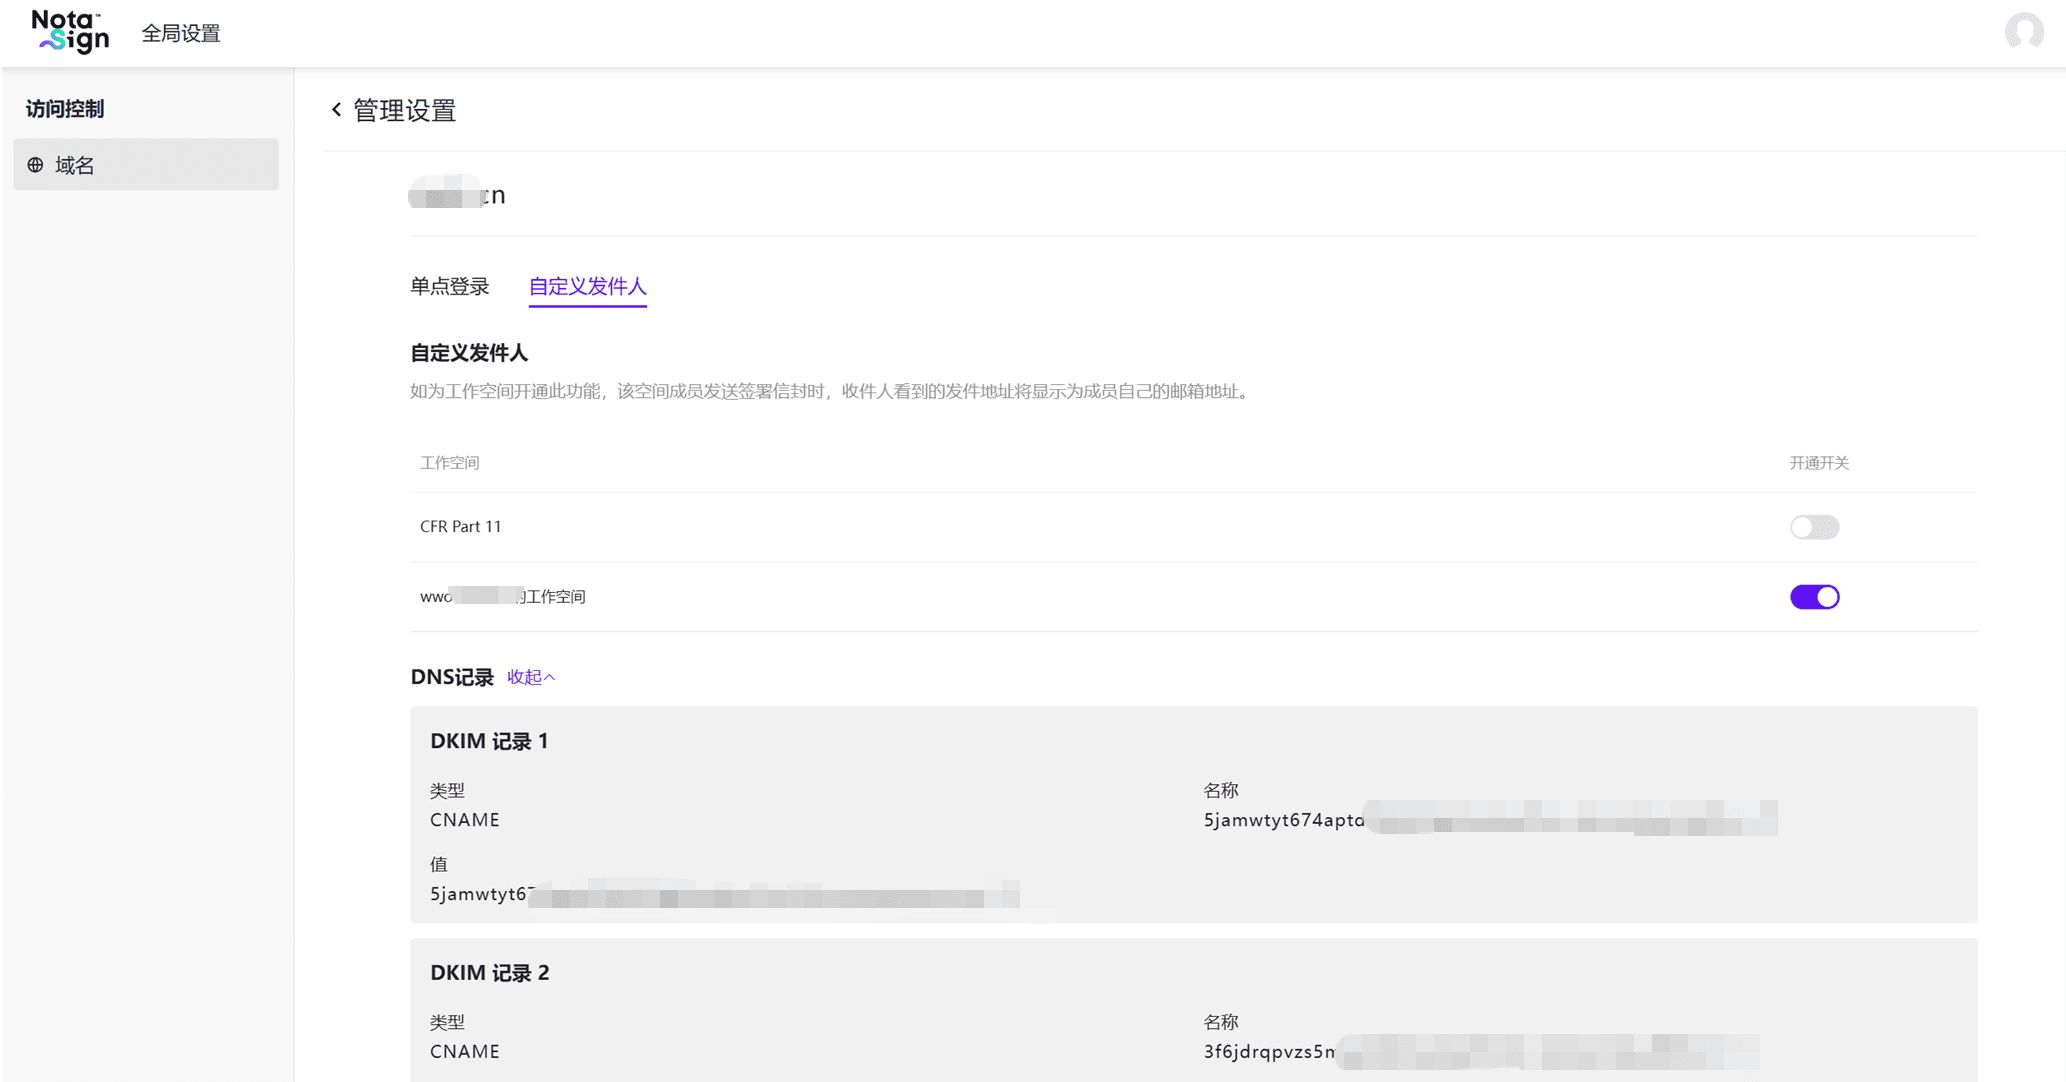
Note: Workspace toggles are off by default after the domain is enabled. Turn them on as needed. Each workspace is configured independently, and toggle changes are saved automatically.
IV. Check the Sender Address
- Use a member account with a matching email domain to access a workspace where the feature is enabled.
- Create and send a test envelope.
- Open the signing notification in the recipient’s inbox. Check the email details to confirm that the sender address matches the member’s account email address.
For example, if the enabled domain is
example.comand the initiating member’s account email isalice@example.com, eligible signing notifications will use that sender address. An address such asalice@team.example.comwill not match.
V. Important Notes
- This feature applies to initial signing notifications and signing reminders. Other notifications, including completion, bounce, expiration and revocation notifications, continue to use the platform’s sender address.
- The sender address is the account email address of the member who initiates signing. You cannot specify an arbitrary email address. The display name remains “Sender Name via Nota Sign”.
- Signing notifications use the platform’s sender address if the domain is not enabled, the originating workspace has not enabled the feature, or its Professional subscription has expired.
- The reply-to address is the initiating member’s account email address. It stays the same even if the sender address falls back to the platform address.
- To disable the feature, turn off the toggle for the relevant workspace. Emails already sent are not affected. Subsequent notifications use the configuration in effect when they are sent.