
You can configure sequential signing for multiple documents within an envelope. Recipients must complete signing document by document in order — first completing all signing fields in document 1, then proceeding to document 2, until all documents are completed before the envelope can be submitted.
1. Enabling Sequential Document Signing
- In Manage -> Send Settings, enable the [Enable Sequential Document Signing] switch;
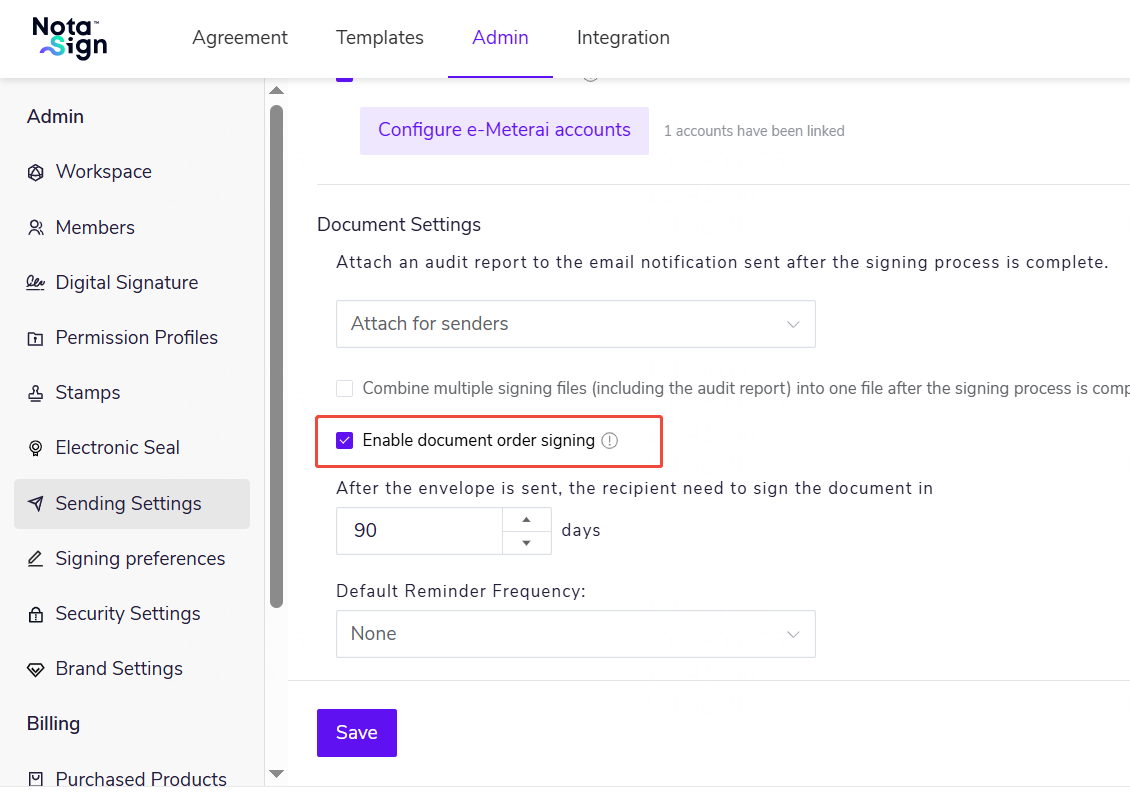
- Once enabled, the [Sign in Order] switch will appear in the document upload area when creating envelopes and templates;
- When disabled, new envelopes and templates will no longer show the switch, but existing sent envelopes are not affected.
💡 Note: Sequential document signing does not support FDA envelopes or Singpass dedicated signing flows.
2. Configuring Document Order
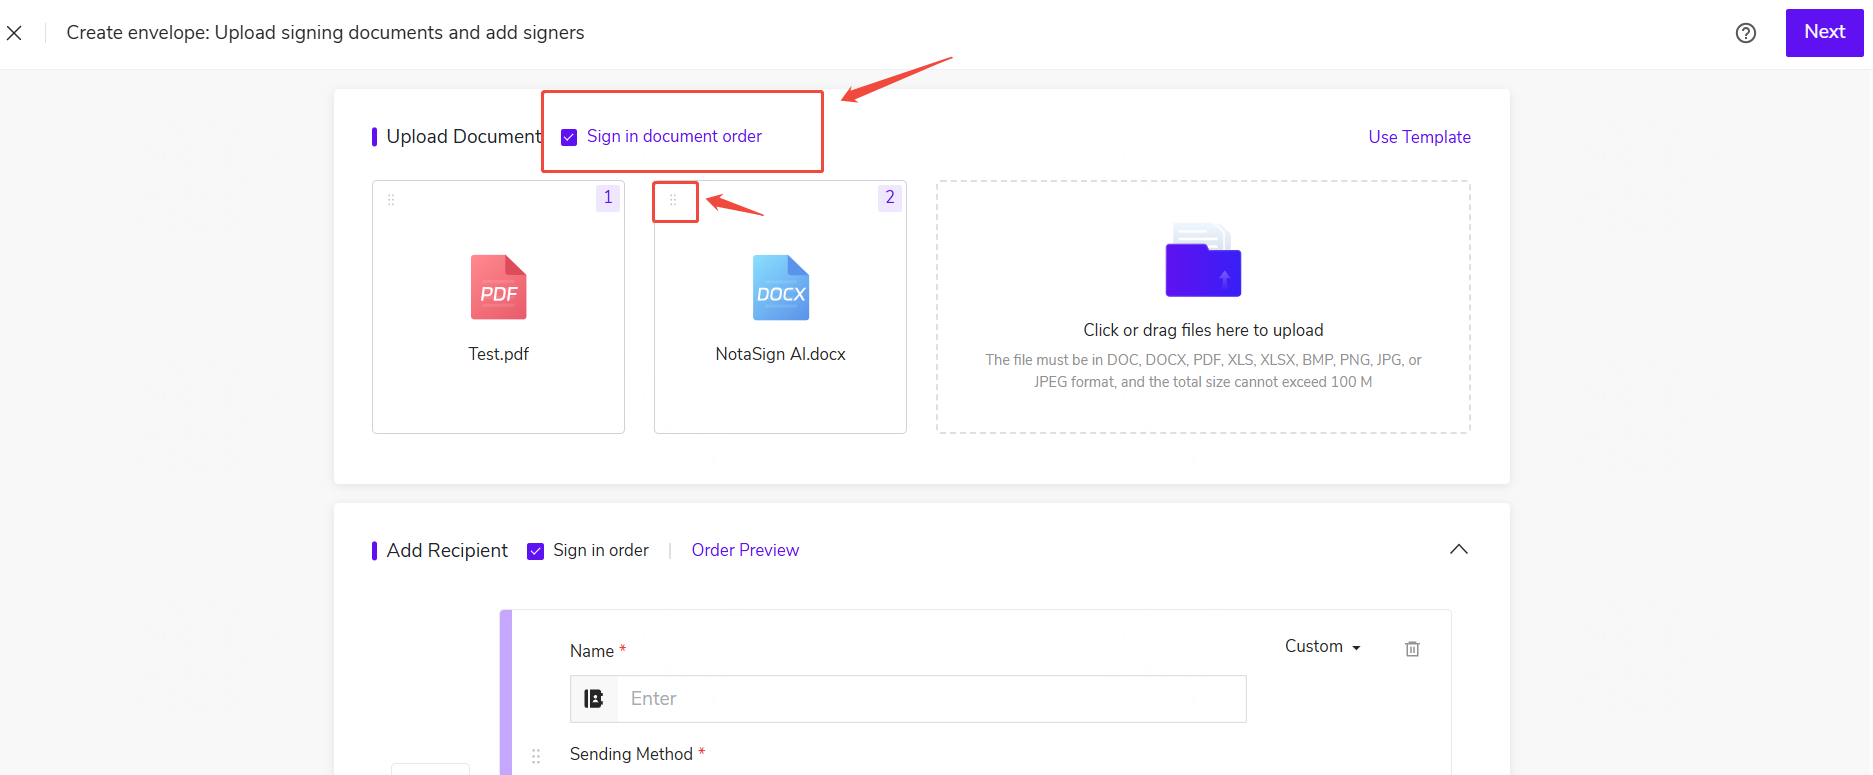
- In the document upload area when creating an envelope, check [Sign in Order];
- After checking, document cards display signing order numbers (e.g., 1, 2), generated by default in upload order;
- You can adjust the signing order by dragging document cards left or right; the order numbers update accordingly;
- This order is at the document level and does not affect recipient signing order.
💡 Note: Sequential document signing can be configured together with recipient signing order; both order controls take effect simultaneously without conflict.
3. Template Configuration
- In the document upload area of the template creation or editing page, you can also check [Sign in Order] and adjust the order by dragging;
- When creating an envelope from this template, the document sequential signing rules configured in the template are applied by default.
4. Signing the Envelope
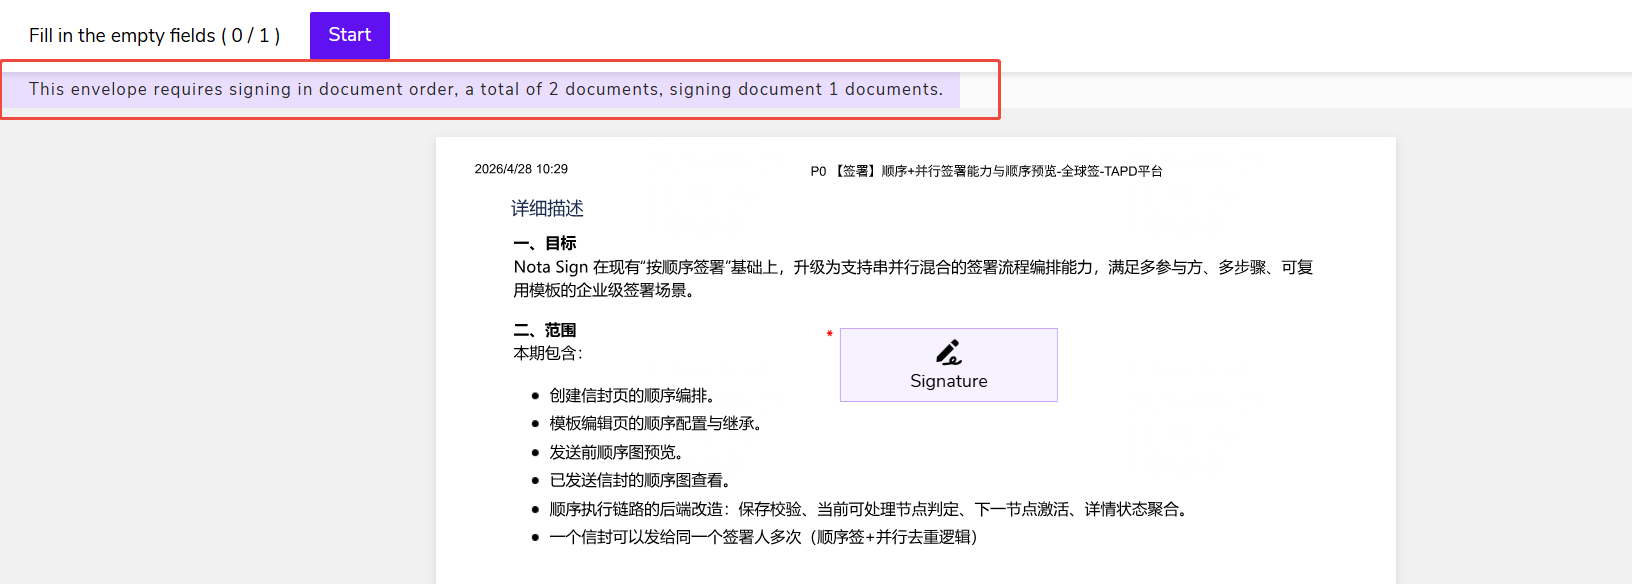
- After entering the signing page, recipients can preview all documents in the envelope but can only sign fields in the current document;
- When there are uncompleted signing fields in the current document, [Next] is used to locate the next uncompleted field within the current document;
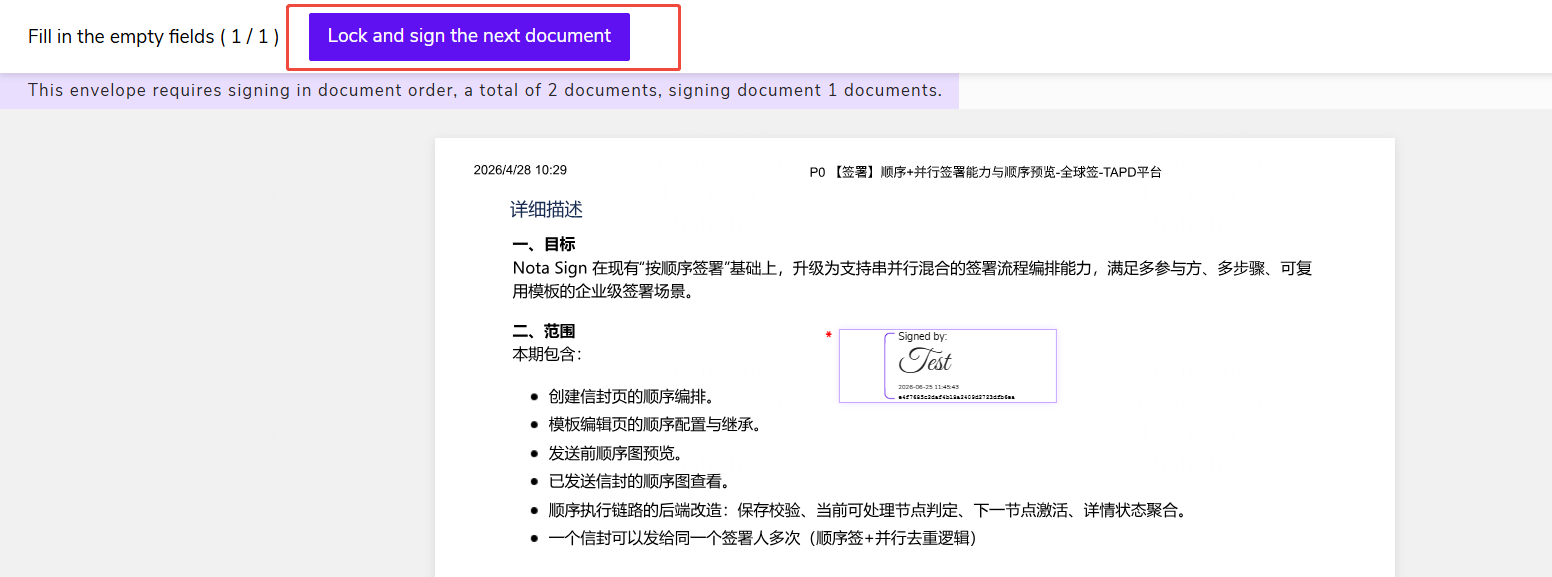
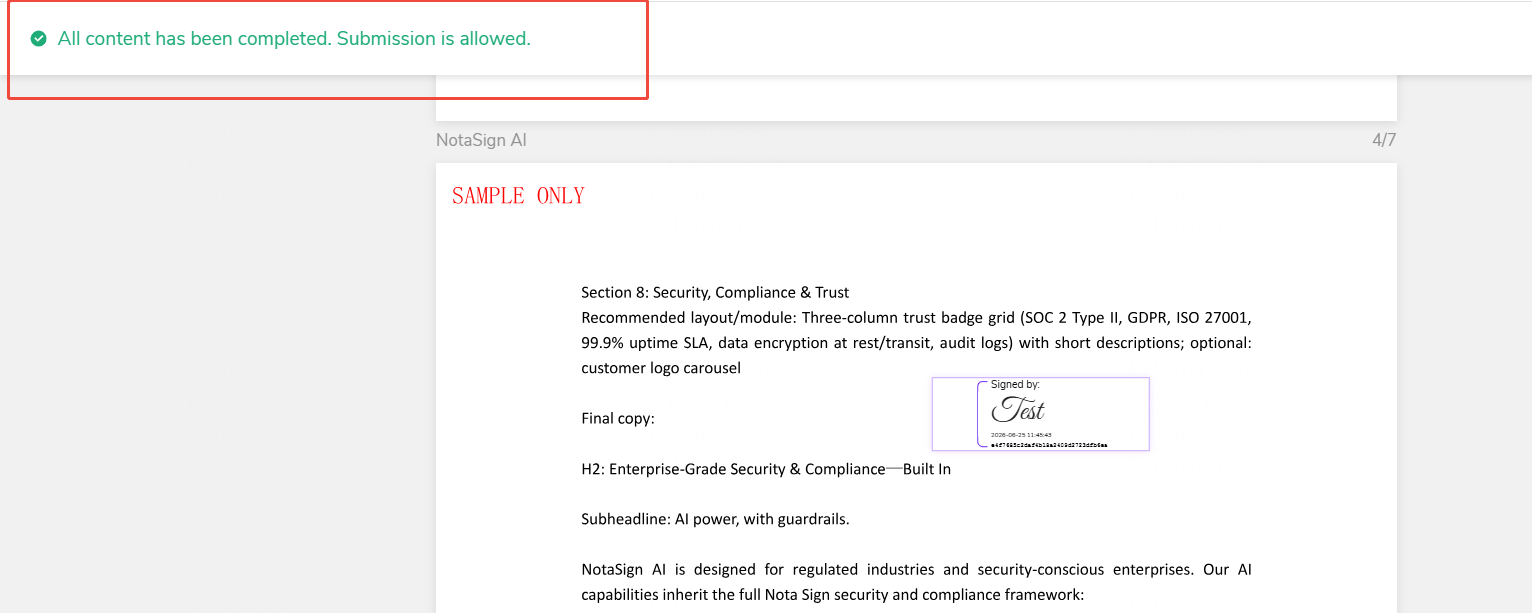
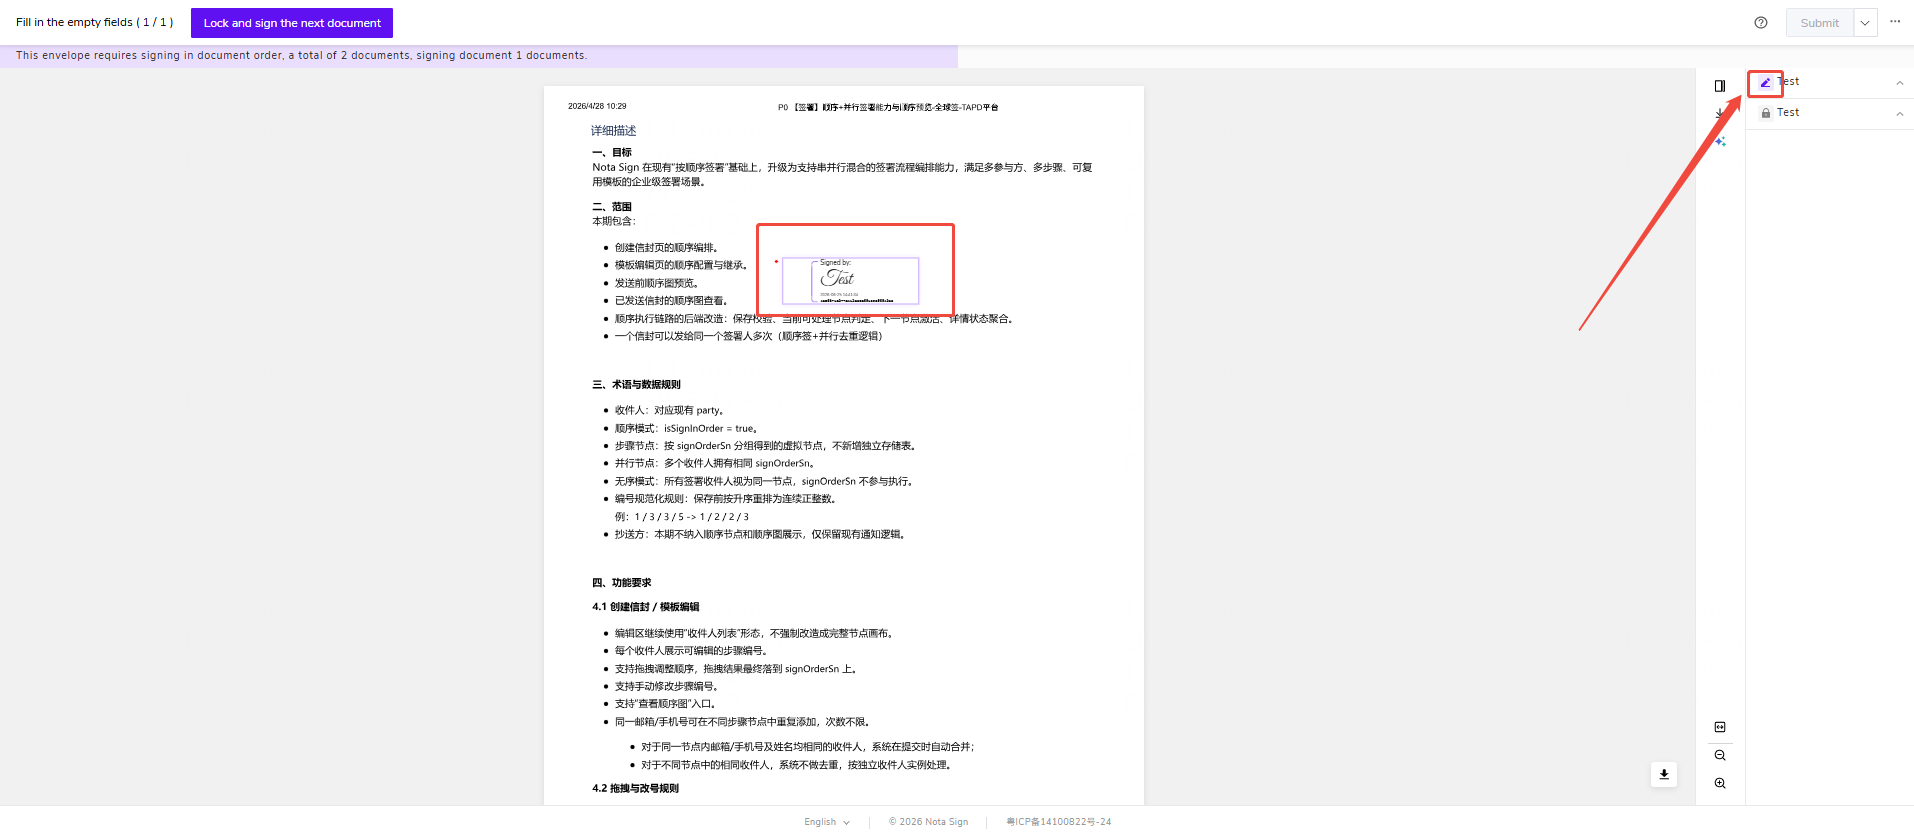
- After all fields in the current document are completed, click [Lock and Open Next] to lock the current document’s signature values and open the next document for signing;
- After all documents are completed, the [Submit] button in the top right corner is enabled for final submission.
5. Returning to Modify
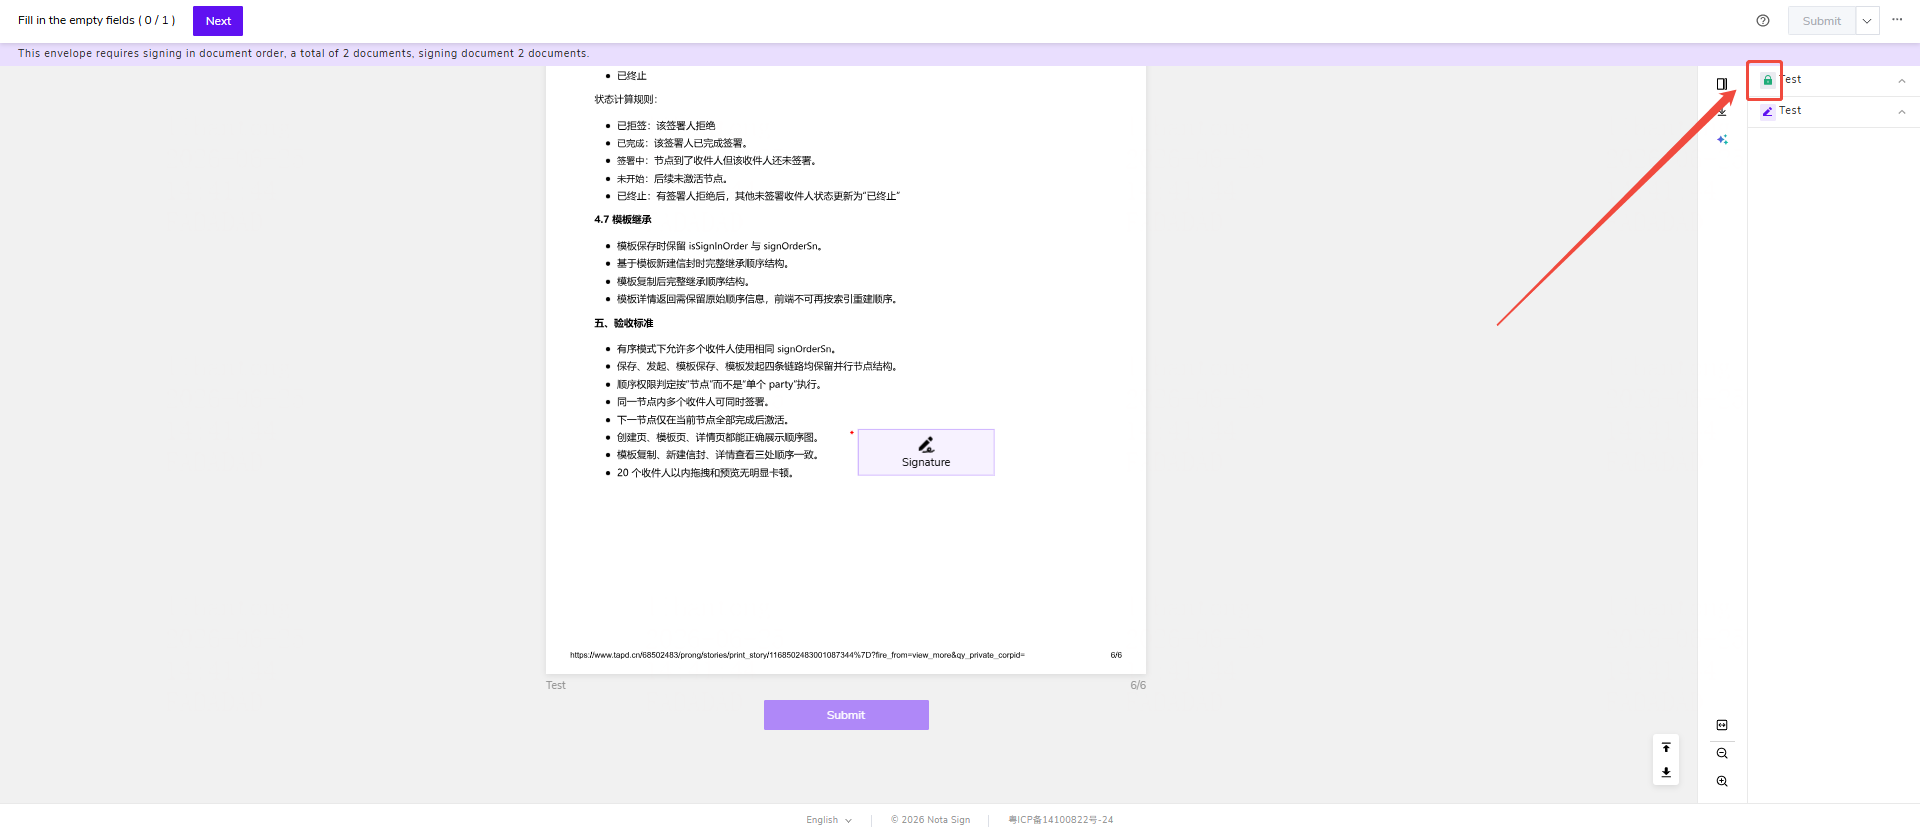
- During signing, you can return to a previously locked document to modify it; locked documents display a [Return to Modify] entry below;
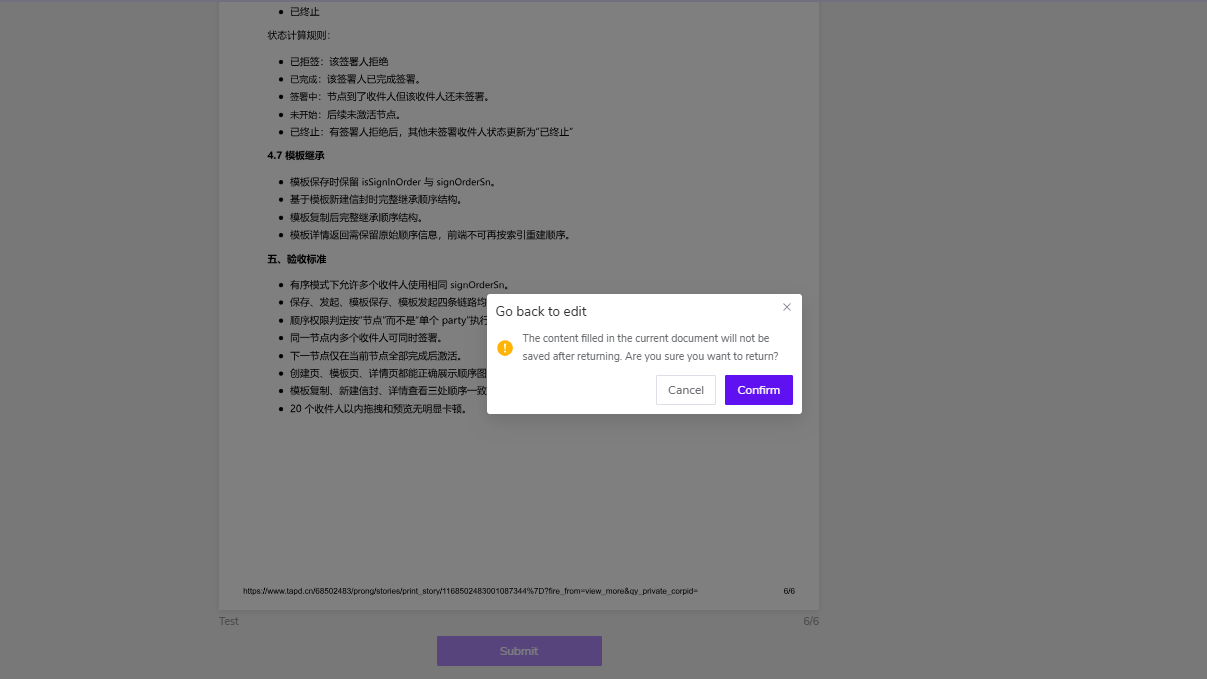
- After clicking [Return to Modify], a confirmation pop-up appears, warning that the signing status of the current and subsequent documents will be rolled back and filled content will be reset;
- After confirming the return, the current and subsequent documents change to “Not Started” status, and the target document changes to “Current Signing” status for re-editing;
- Canceling stays on the current document with content unchanged.
6. History and Audit
- Key events such as document signing started, document completed and locked, return to previous document for modification, and final submission are recorded in the envelope log;
- The audit report displays in a “Recipient → Document” hierarchy, showing Started, Completed, and Last Modified times for each document;
- Timestamps are based on the first operation time and do not change due to returning to modify; Last Modified records the last submission time;
- Envelopes without sequential document signing enabled use the original recipient-level layout without document layering.