
You can configure a Terms Confirmation pop-up for specific signers. When the signer completes signing and filling operations and clicks [Submit], the system will display a terms confirmation pop-up. The signer must check and confirm all terms before continuing to submit.
1. Enabling the Terms Confirmation Pop-up
- In Manage -> Send Settings, enable the [Enable Terms Confirmation Pop-up] switch;
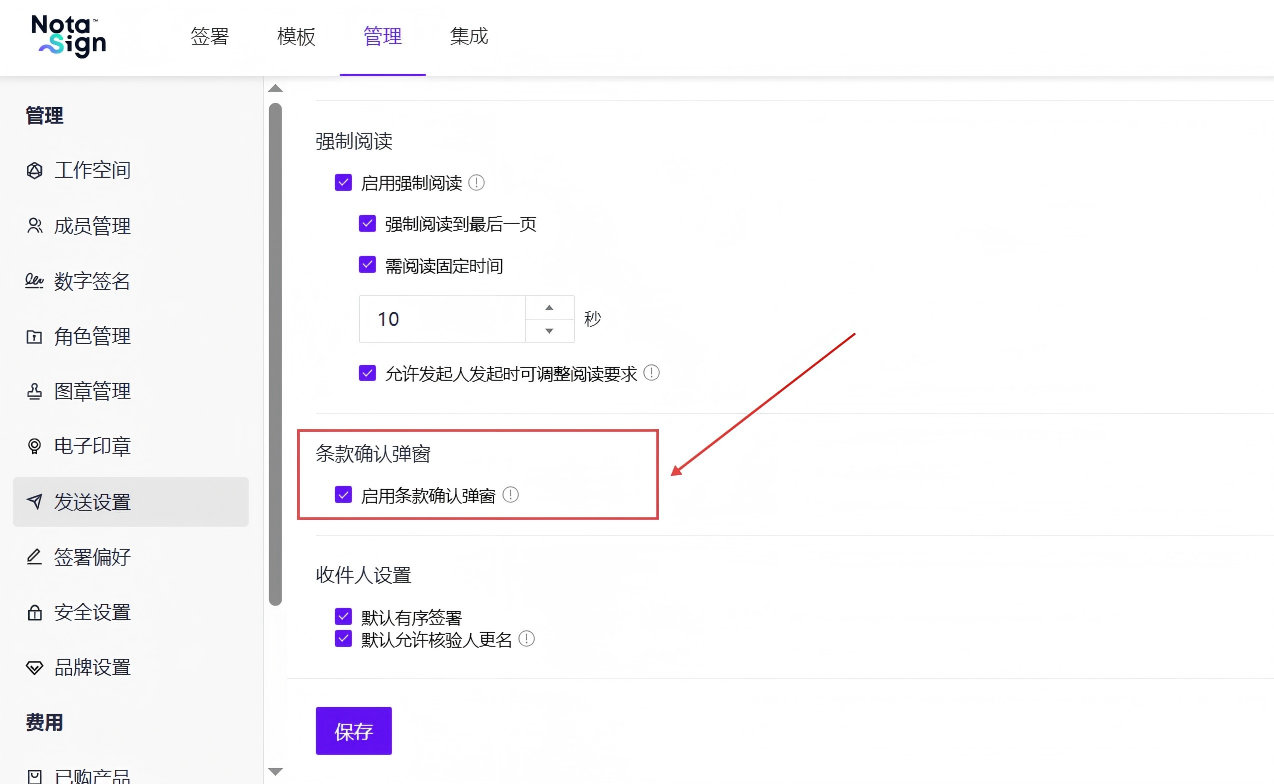
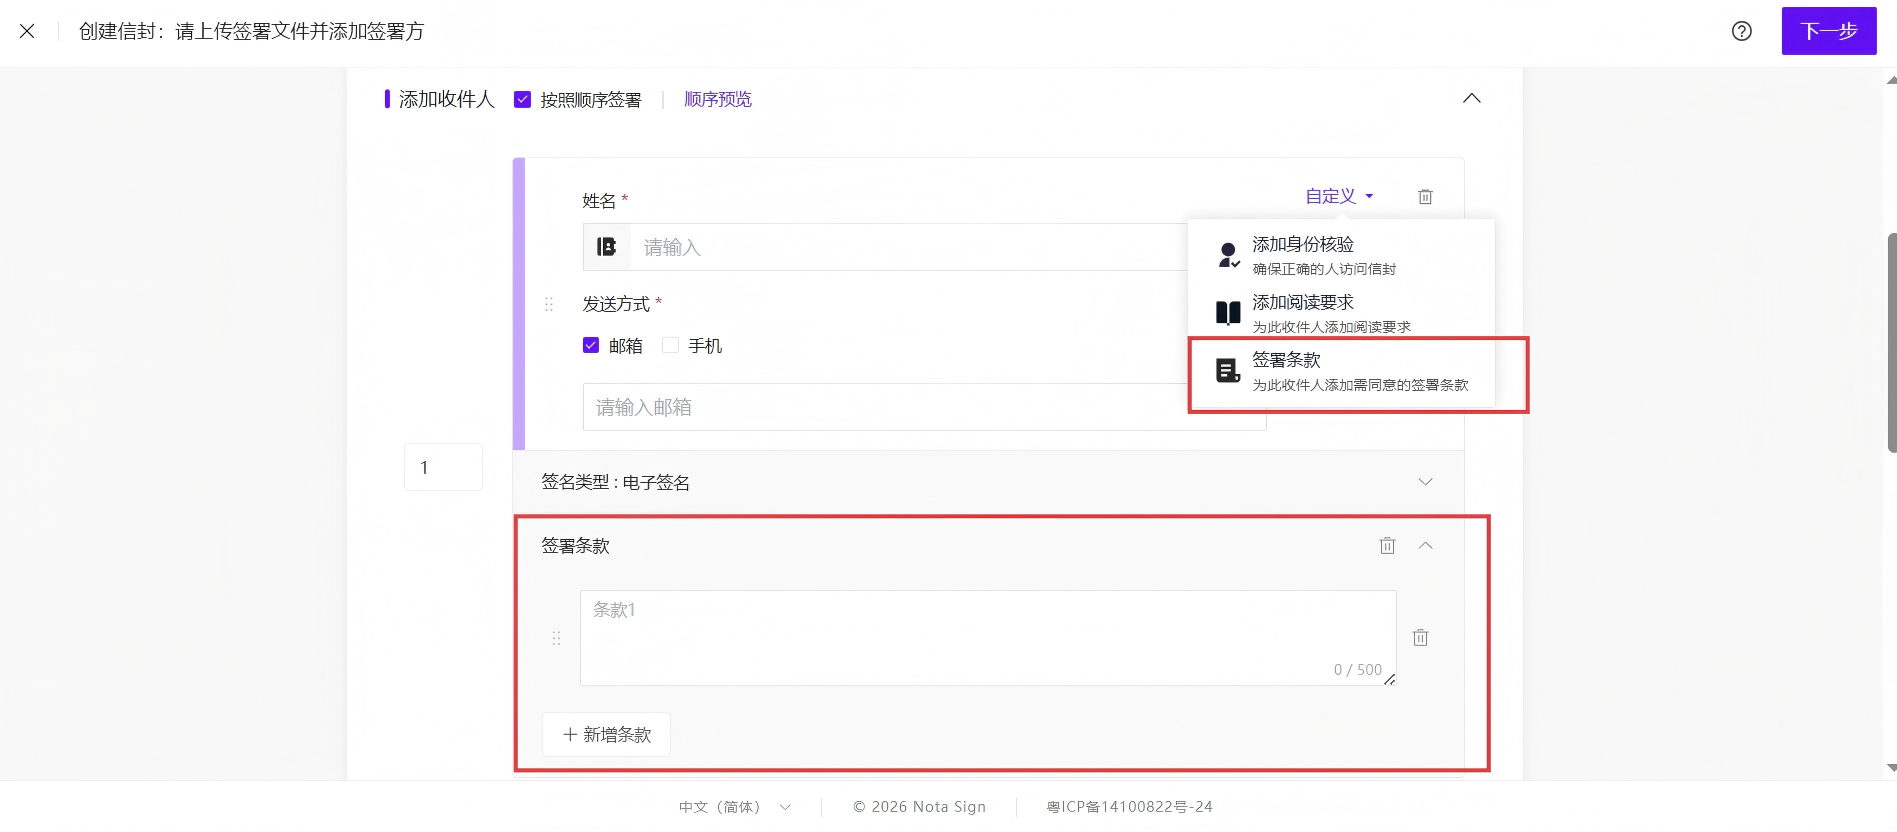
- Once enabled, the [Terms Confirmation Pop-up] entry will appear in the signer settings for envelope creation, templates, and bulk send;
- When disabled, new envelopes, templates, and bulk sends will no longer show the entry, but existing drafts, templates, and sent envelopes are not affected.
💡 Note: GxP spaces do not display this switch; Singpass dedicated signing flows do not support this feature.
2. Configuring Terms and Initiating an Envelope
-
In the signer settings when initiating an envelope, enable [Terms Confirmation Pop-up] for that signer;
-
In the terms configuration panel, click [Add Term] and enter the term content that the signer must confirm;
-
Each signer must have at least 1 valid term, up to 20 terms, with each term containing up to 500 characters;
-
You can add, edit, and delete terms; the term order is the display order in the signing-end pop-up;
-
Pure spaces, line breaks, or empty content do not count as valid terms; if enabled but no valid terms exist, saving or sending is not allowed.
💡 Note: Terms are configured per signer, not per signature field. If a signer has multiple signature fields, the pop-up appears only once before submission.
3. Configuring in Templates
-
You can configure [Terms Confirmation Pop-up] in the template’s role settings; the configuration will be correctly displayed when re-entering after saving;
-
When creating an envelope from a template, the configuration is inherited by the corresponding signer.
4. Configuring in Bulk Send Tasks
4.1. Configuring in Bulk Send
-
You can configure [Terms Confirmation Pop-up] in bulk send role settings;
-
The generated signing tasks will trigger the pop-up based on role configuration.
4.2. Configuring in Bulk Send Templates
-
You can configure [Terms Confirmation Pop-up] in the bulk send template’s role settings; the configuration will be correctly displayed when re-entering after saving;
-
When initiating a bulk send from this template, the configuration is inherited by the corresponding signing tasks.
5. Signing Confirmation
-
The signer completes signing and filling operations, then clicks [Submit];
-
The pop-up displays all terms configured for that signer, each with a checkbox;
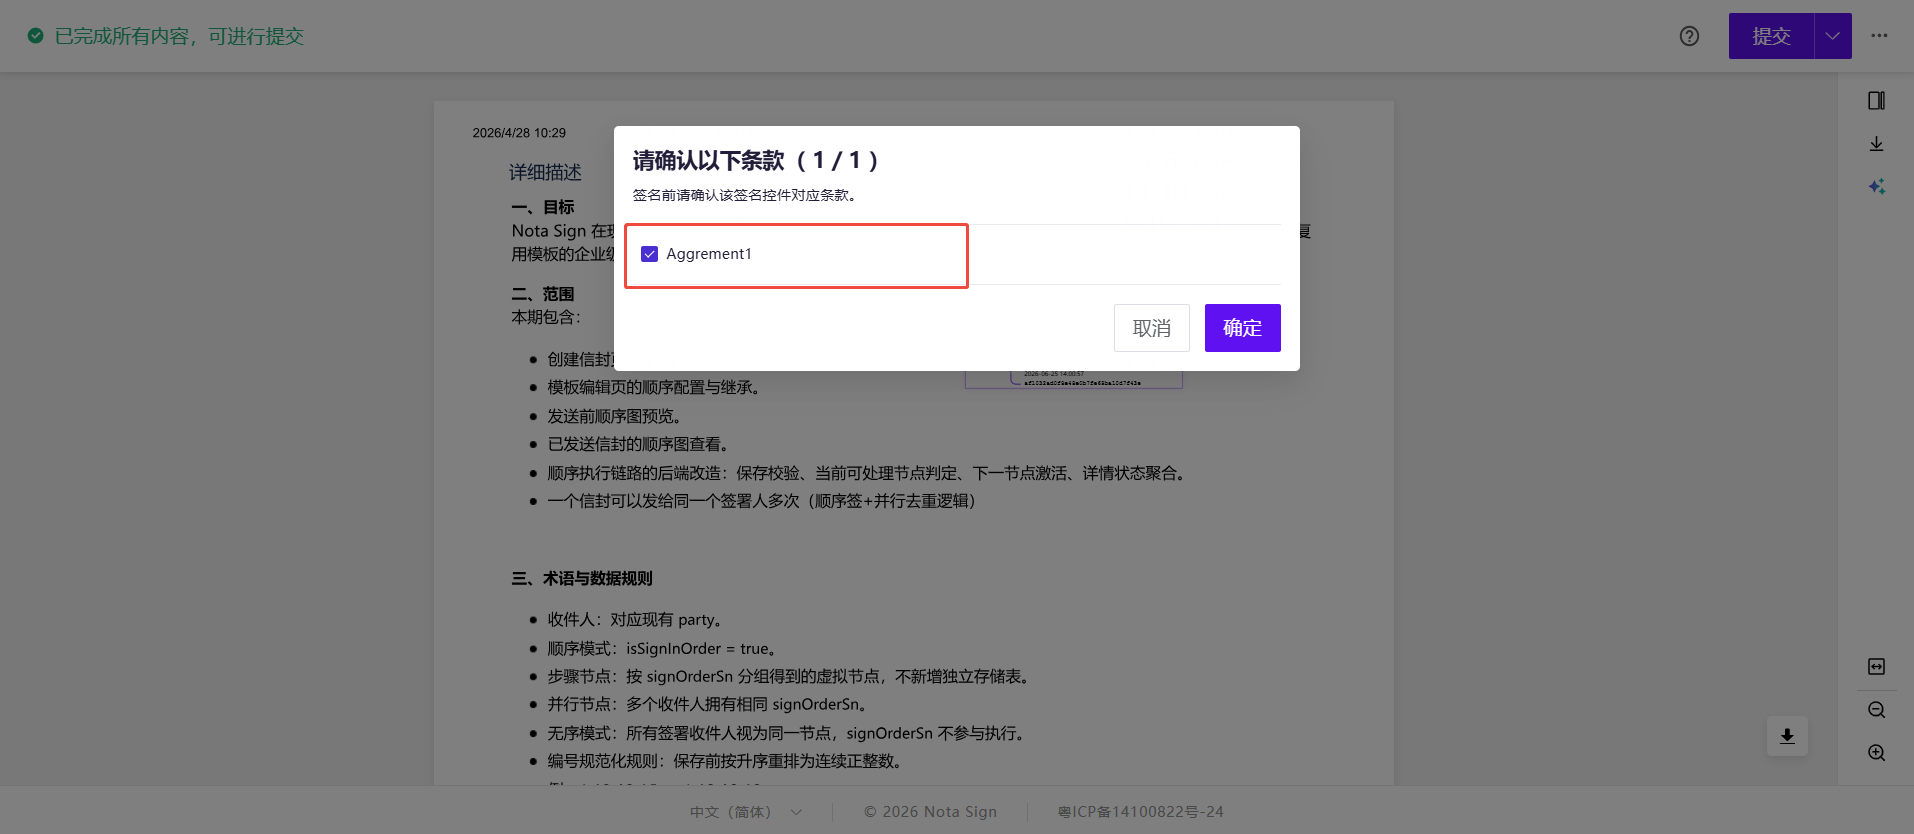
- The signer must check all terms and click [Confirm and Submit] to continue submitting;
6. History and Audit
-
After the signer checks all terms and submits successfully, an event “confirmed all terms before submission” is added to the envelope history;
-
The history fully displays all confirmed terms for that signer, not just the number of terms;
-
The audit report displays the signer, confirmation time, confirmation result, and complete terms snapshot;
-
The term order is consistent with the signing-end pop-up; signers without terms confirmation configured do not display related records.
💡 Note: The terms snapshot is fixed when the envelope is sent, when a template generates an envelope, or when a bulk task generates signing tasks. The signing-end display and history both use the snapshot content, which is not affected by subsequent configuration changes. The signed PDF does not include terms confirmation content.