iD-One is a personal digital signature certificate provided by Tradelink (Hong Kong), suitable for individual signing scenarios in Hong Kong. After binding your iD-One certificate through Nota Sign, you can use legally recognized digital signatures during signing.
1. Signing an Envelope
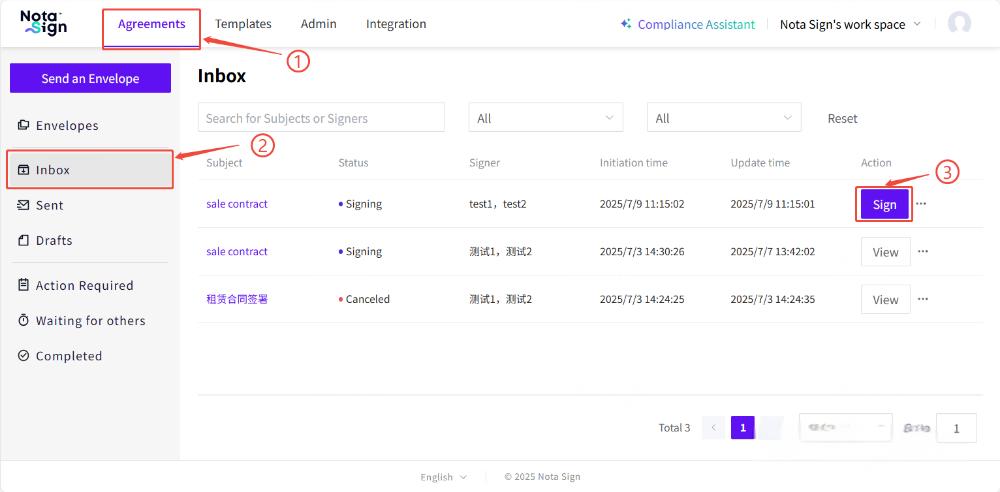
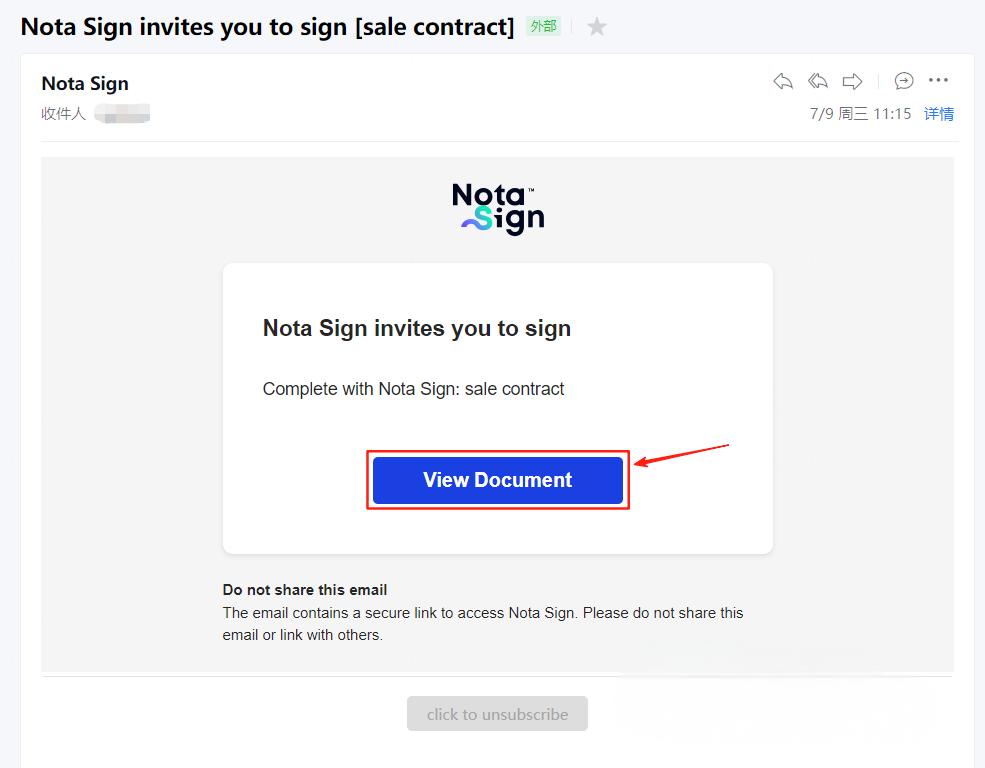
1.1 Recipient accesses the signing page via email link or inbox;
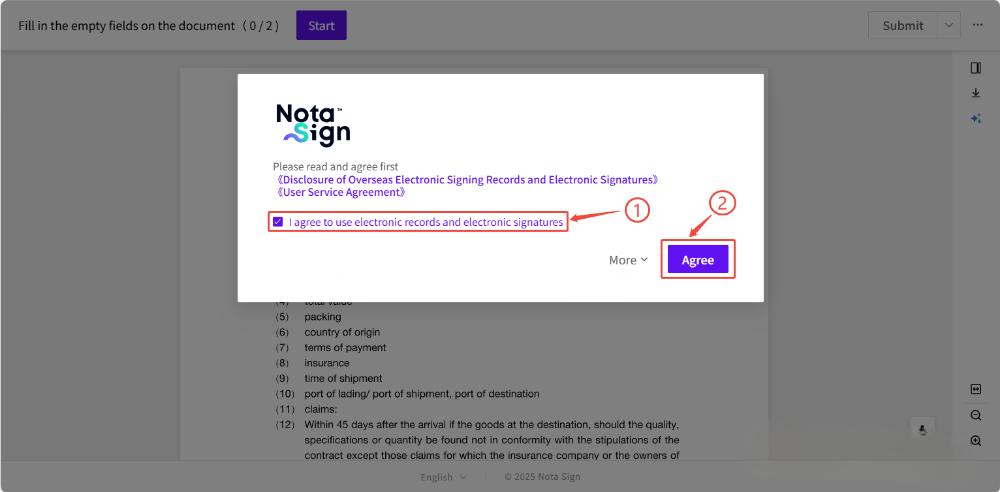
1.2 Agree to the terms of use to enter the signing process;
1.3 After completing all required fields, click [Submit];
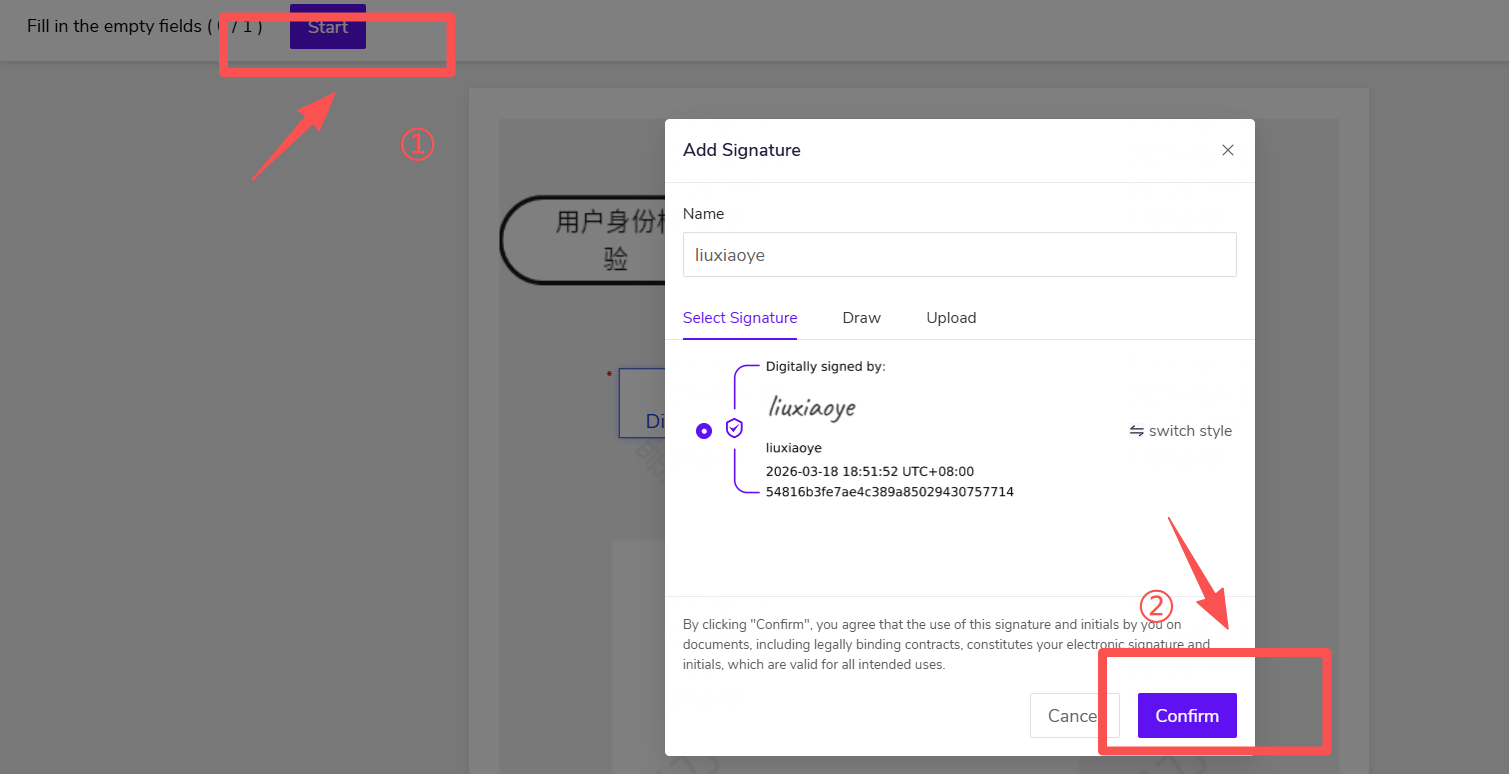
1.4 In the CA selection dialog, select the digital signature to use. If using this digital certificate for the first time, you will be redirected to the application page;
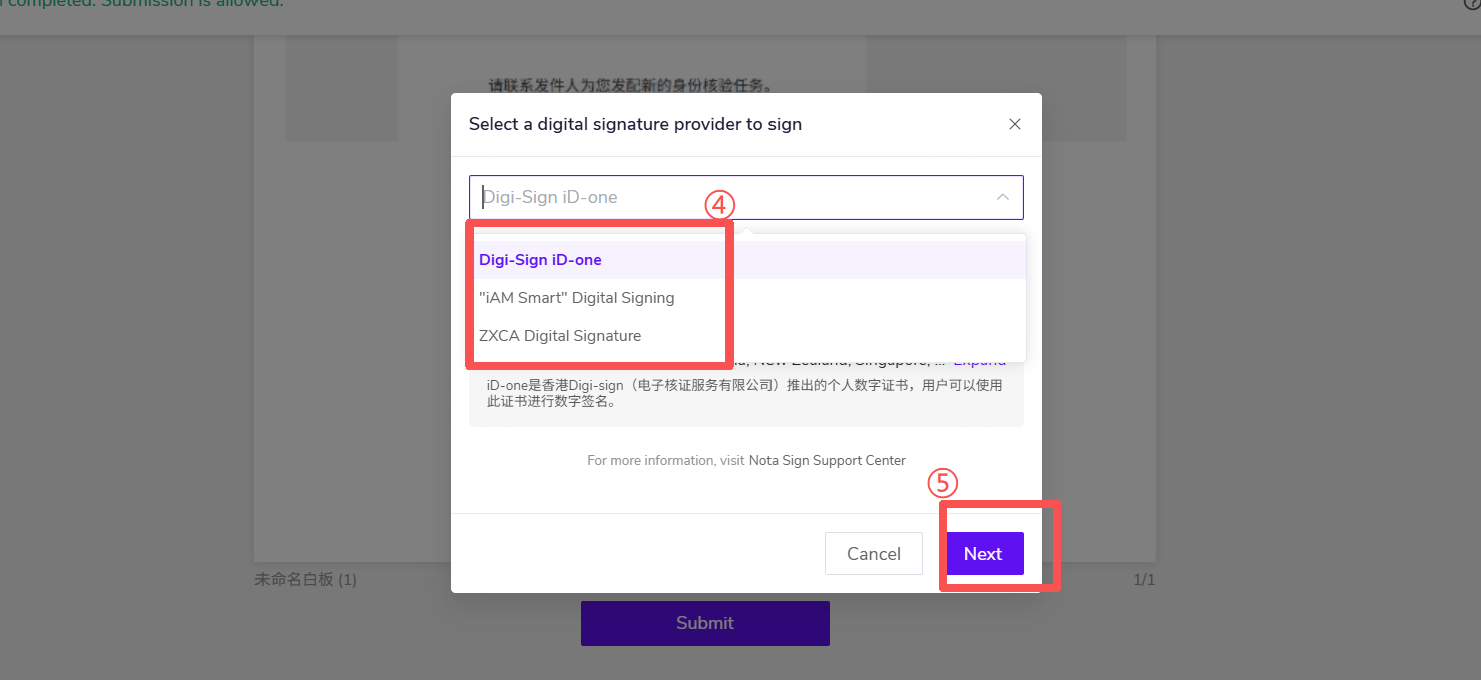
2. Apply for iD-One Digital Certificate
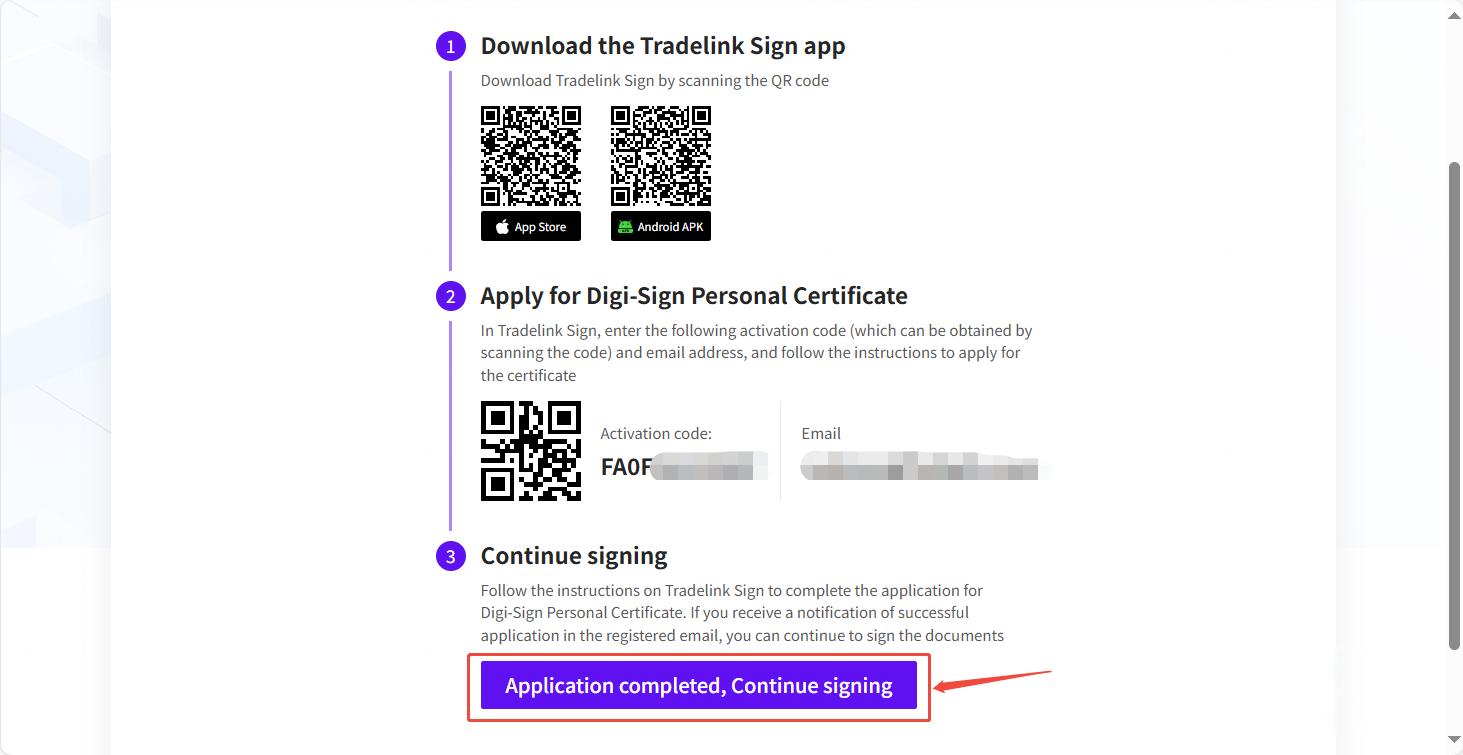
2.1 Download and install the Tradelink Sign app (Step ①);
- Production environment: scan the QR code to download the app (Step ②);
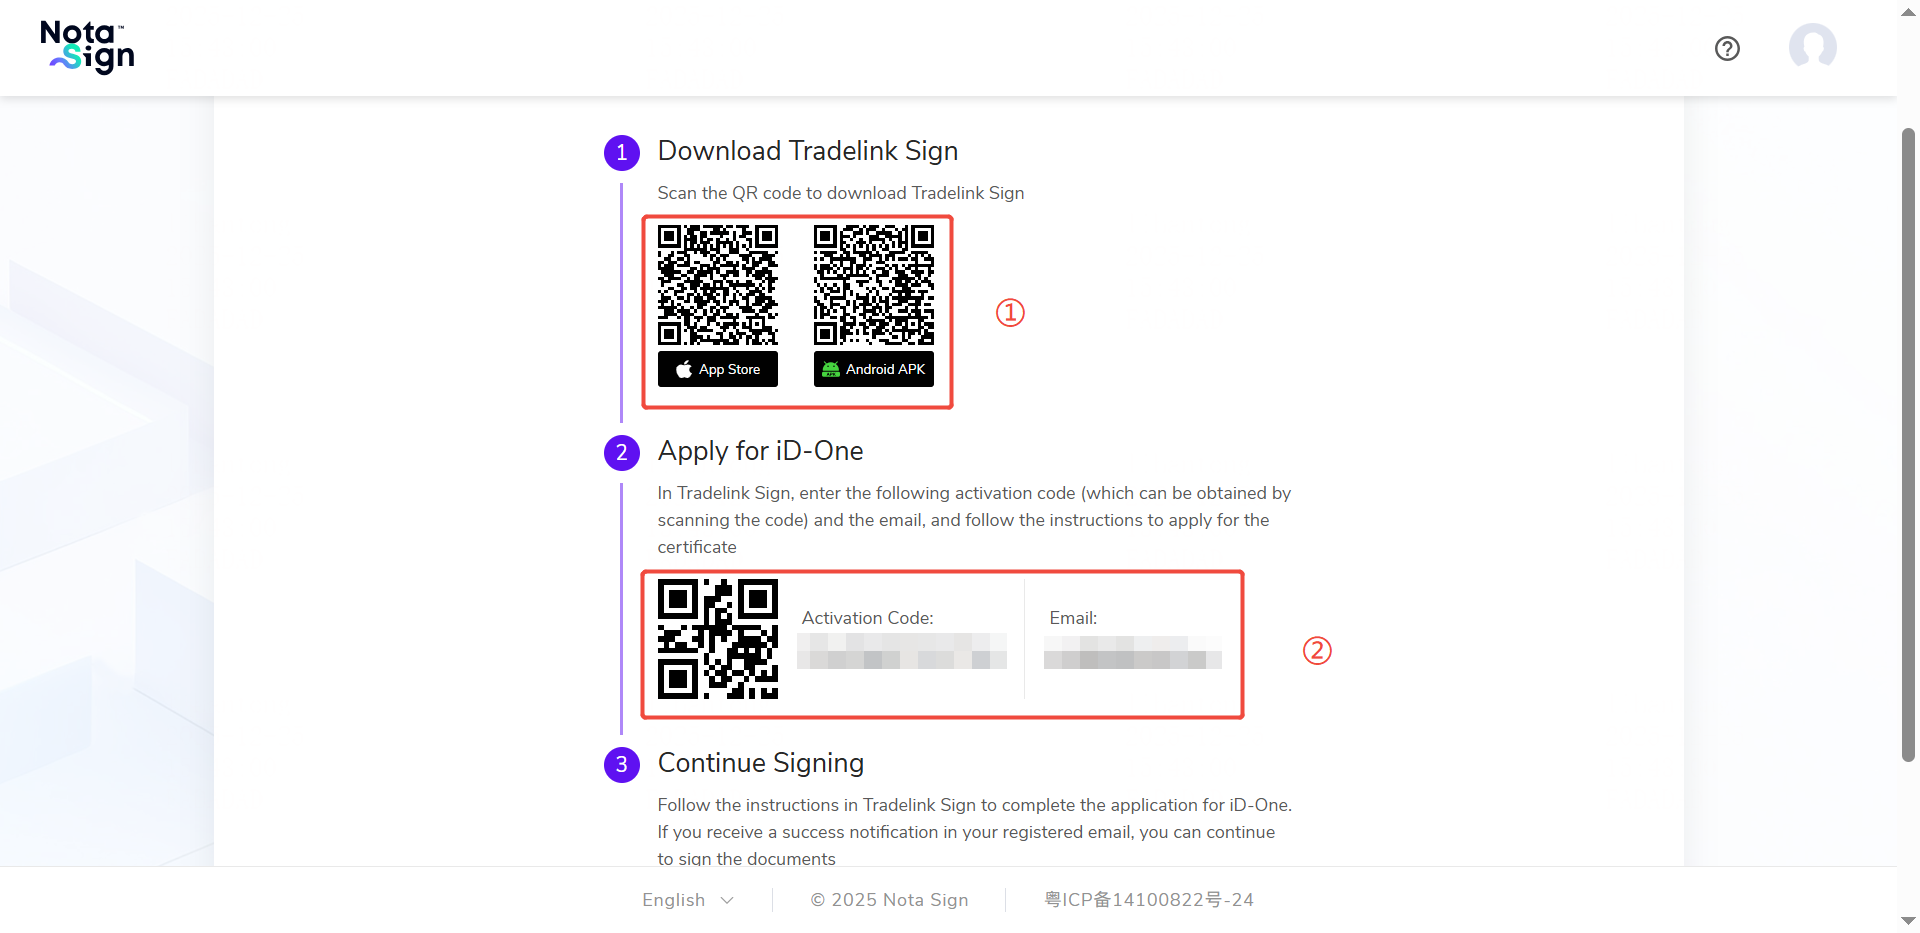
- Test environment: click the links below to install:
Android Tradelink Sign app (Test environment): https://rssp-test.tradelink.com.hk/tradelinksign/services/download/15/tdsign.apk
iOS Tradelink Sign app (Test environment): https://rssp-test.tradelink.com.hk/ios/tradelinkSign/index.html
💡 Note: After installing the Tradelink Sign app in the iOS test environment, go to Settings → General → VPN & Device Management and trust the app.
2.2 After launching the app, scan the activation code on the page or manually enter the activation code;
2.3 Follow the guidance to complete identity verification (please prepare your physical passport);
💡 Note: Please remove your glasses before verification to avoid affecting the results.
💡 Note: The Tradelink Sign App will prompt you to blink twice. When the prompt appears, please blink once immediately.
💡 Note: Please complete the entire process—from requesting the activation code to successful submission—within 30 minutes.
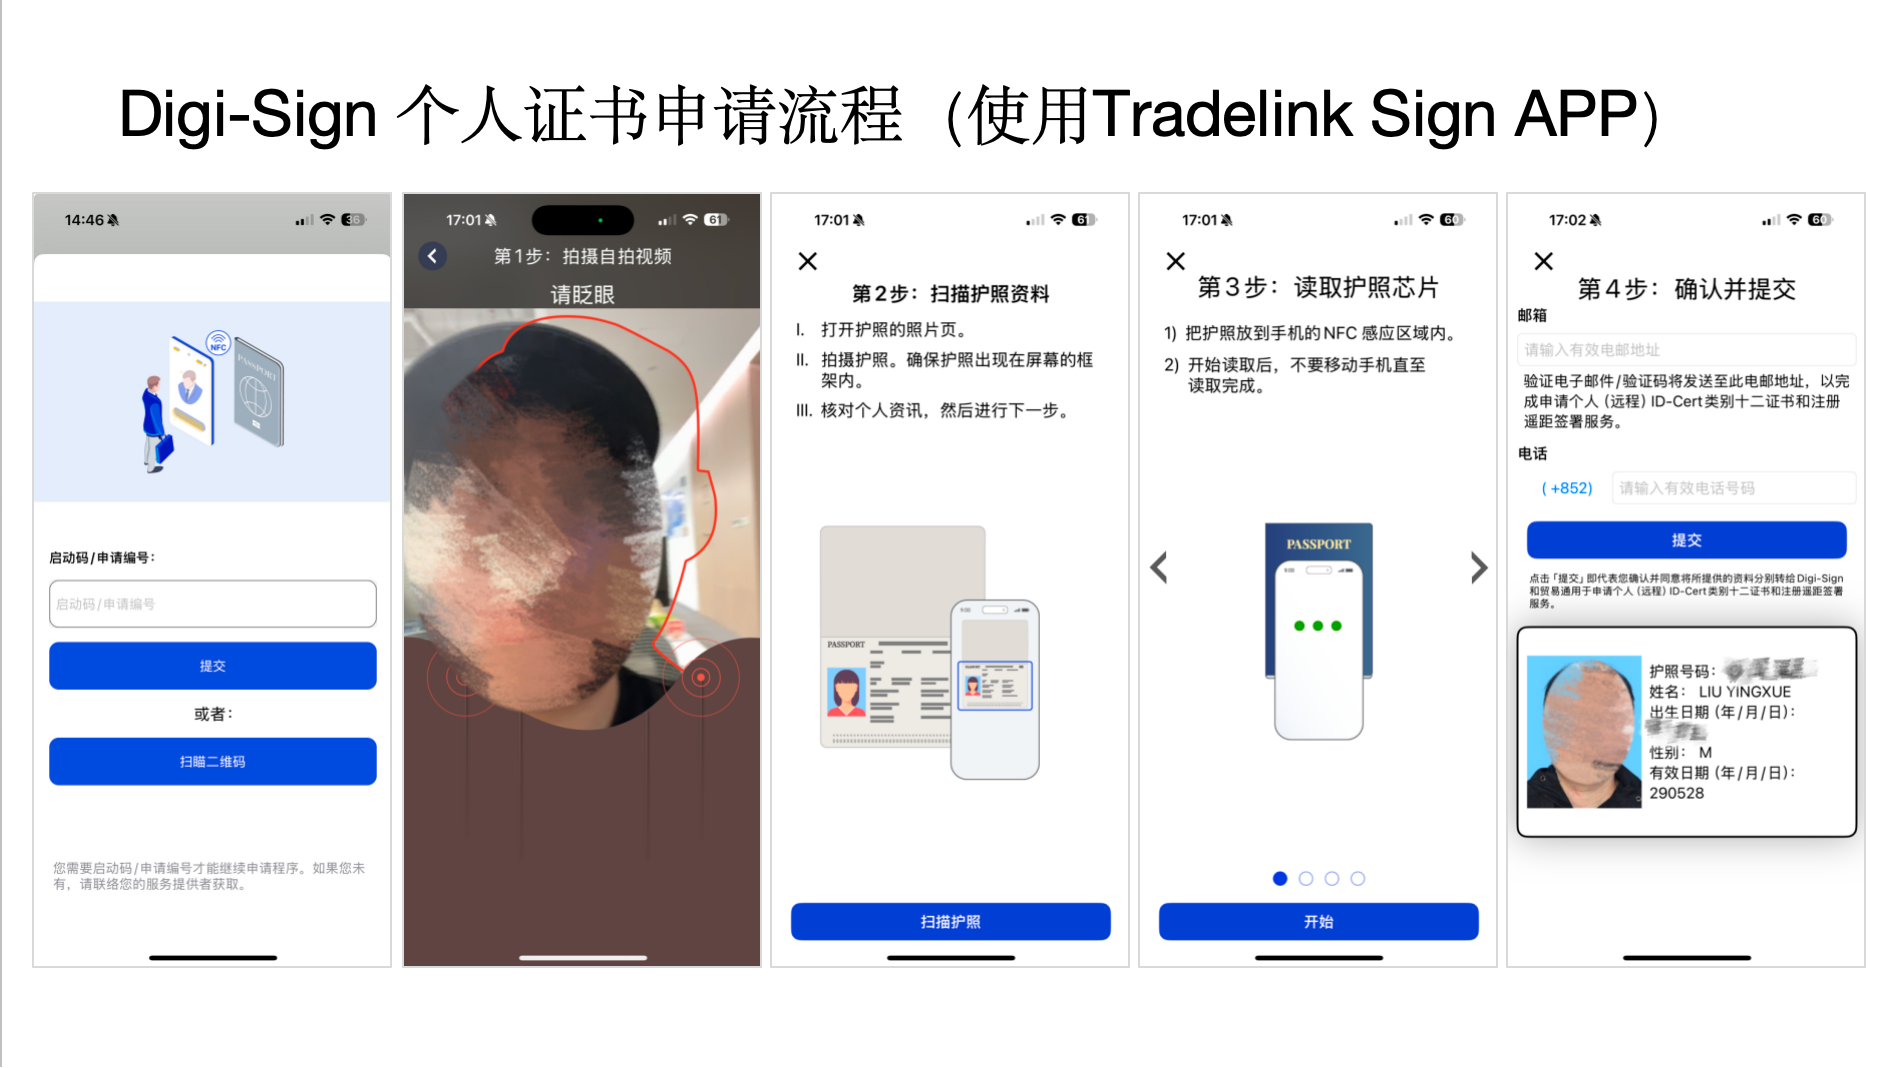
2.4 After submitting the application, please check for a verification email in your registered mailbox and complete the confirmation.
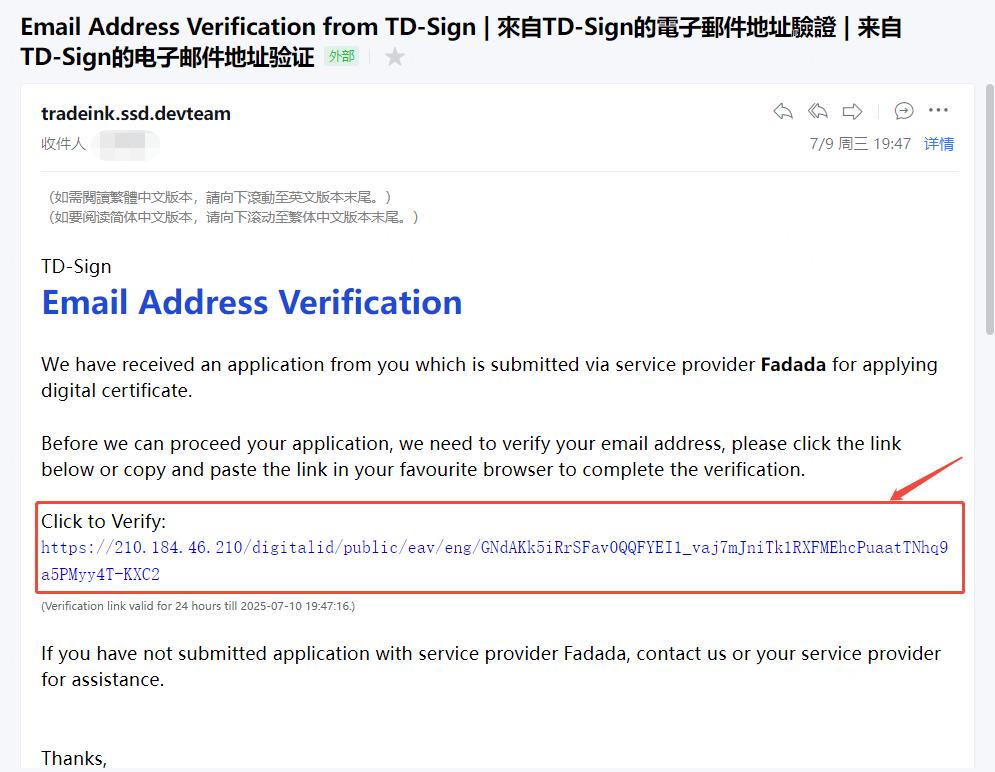
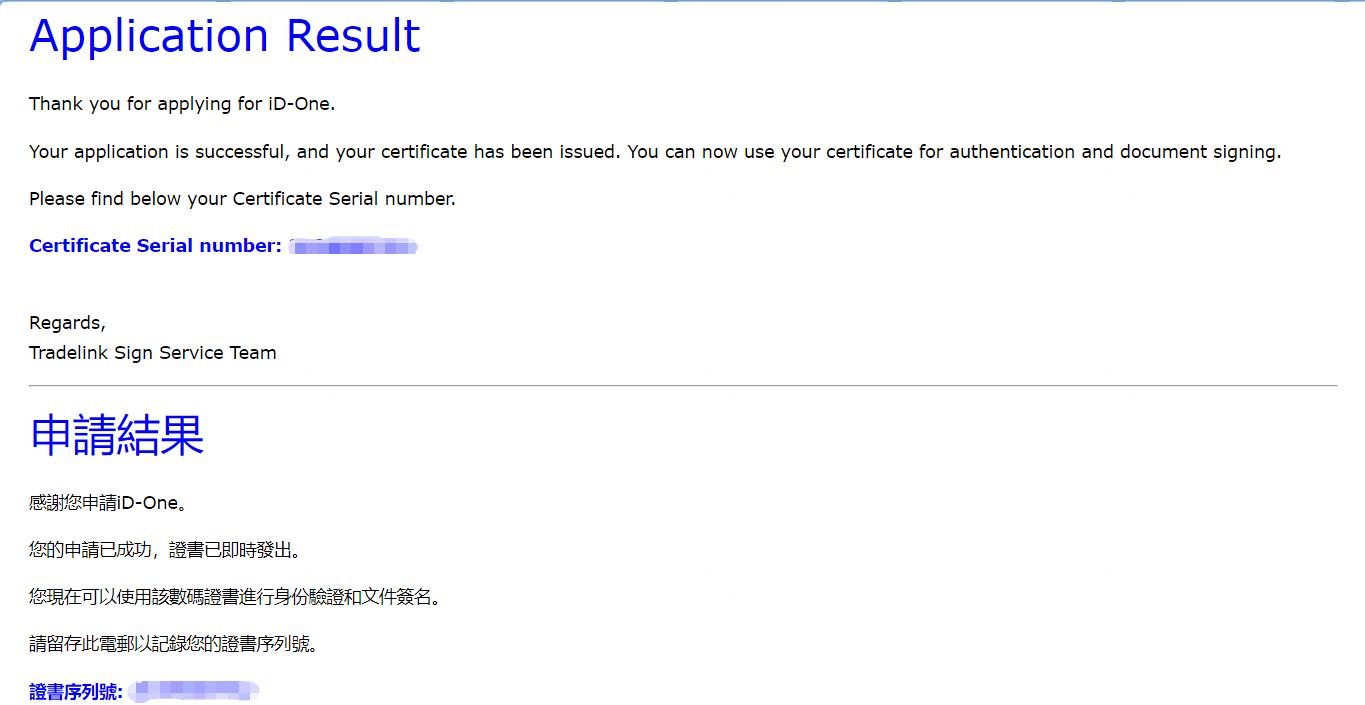
2.5 After completing the verification, click [Application complete, continue signing] in the email to return to the signing page.
3. Digital Signature Identity Verification (eKYC)
After enabling digital signature identity verification, recipients who already hold an iD-One certificate must complete Nota Sign eKYC identity verification before submitting, then proceed to CA email OTP verification, as a signing intent verification capability.
3.1. Enabling Digital Signature Identity Verification
- In Manage -> Signing Preferences -> Identity Verification, enable the [Digital Signature Identity Verification] switch;
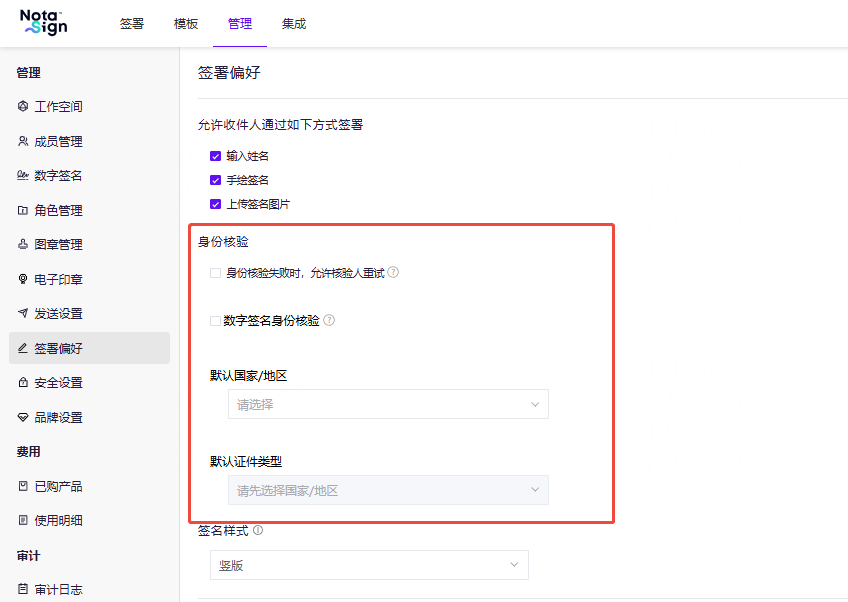
- Set the default country/region and default document type as the default values when recipients enter eKYC;
- When disabled, the digital signature flow follows the original logic without triggering identity verification; when enabled, it only applies to recipients who already hold the CA certificate.
💡 Note: Identity verification only applies to recipients with certificates; recipients without certificates follow the existing certificate application flow and will not undergo two verifications.
3.2. Sender Specifying CA
- When creating an envelope, if the recipient’s signing type is digital signature, the sender can configure CA restrictions;
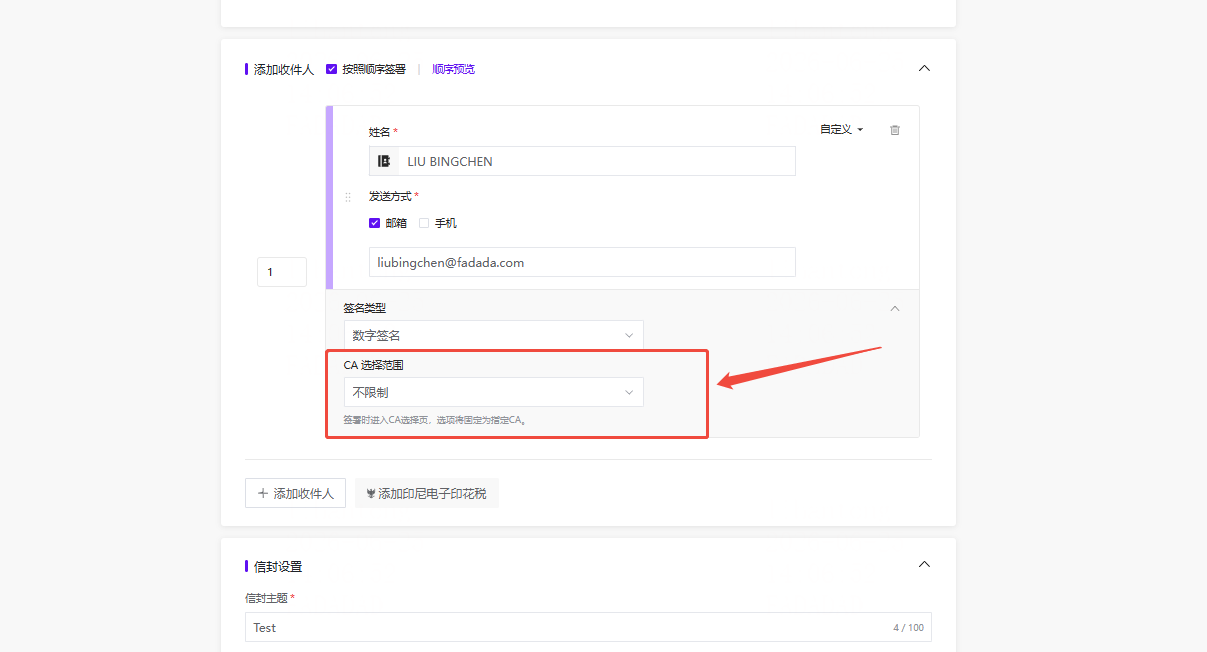
- Selecting [No CA Restriction] allows recipients to choose from available CAs during signing;
- Selecting [Specify CA] allows choosing 1 CA from the workspace’s subscribed CAs; recipients will see only that CA during signing and cannot switch.
3.3. Recipient Completing Identity Verification
- After completing document filling and signing, the recipient clicks [Submit] and selects or confirms the CA on the CA selection page;
- On desktop, the recipient confirms country/region, document type, and name, then completes third-party eKYC verification via mobile phone scanning;
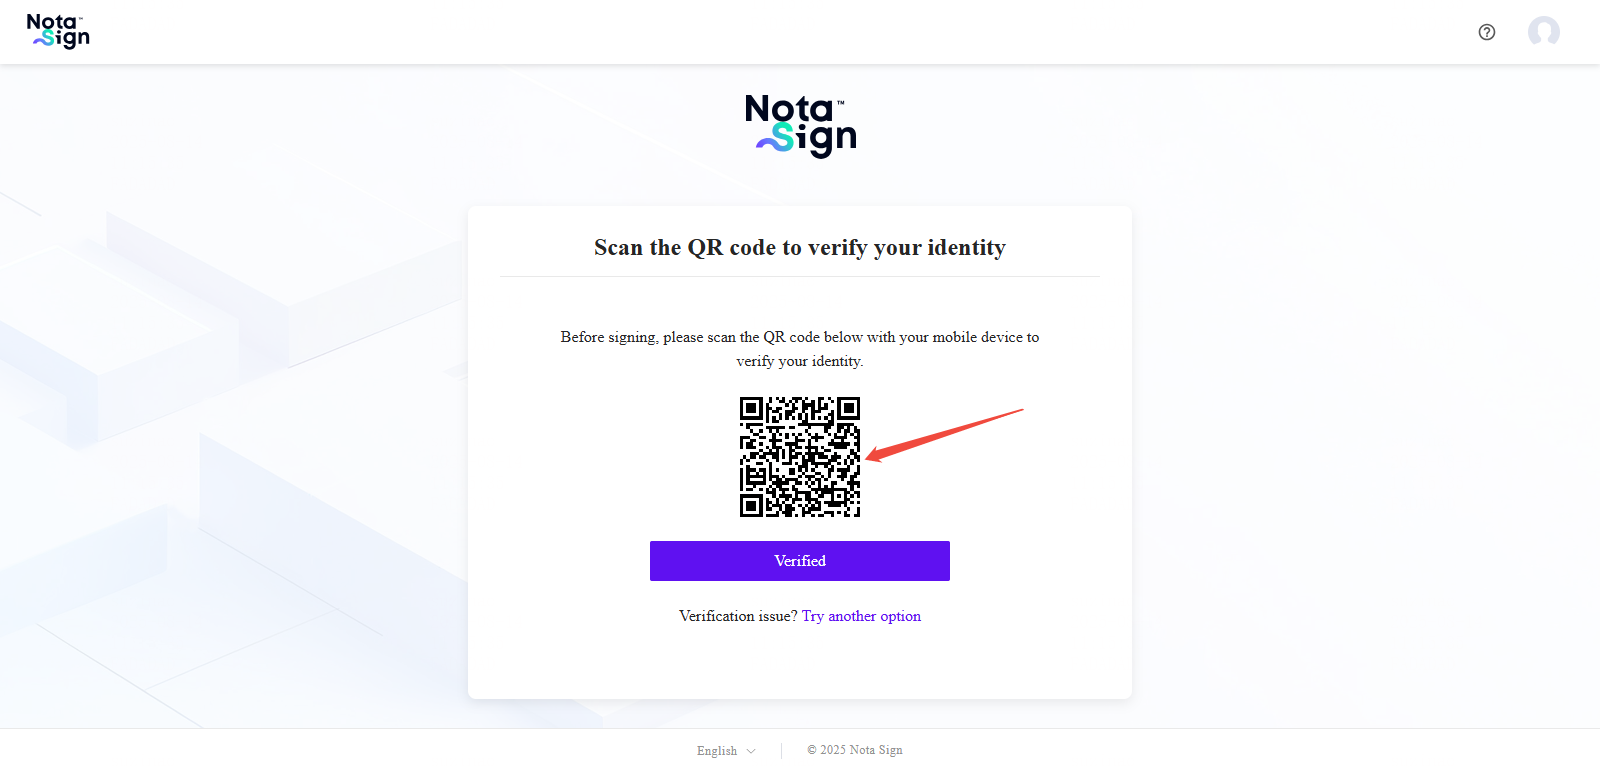
- On mobile, the recipient confirms information and is redirected to the third-party eKYC page to complete verification;
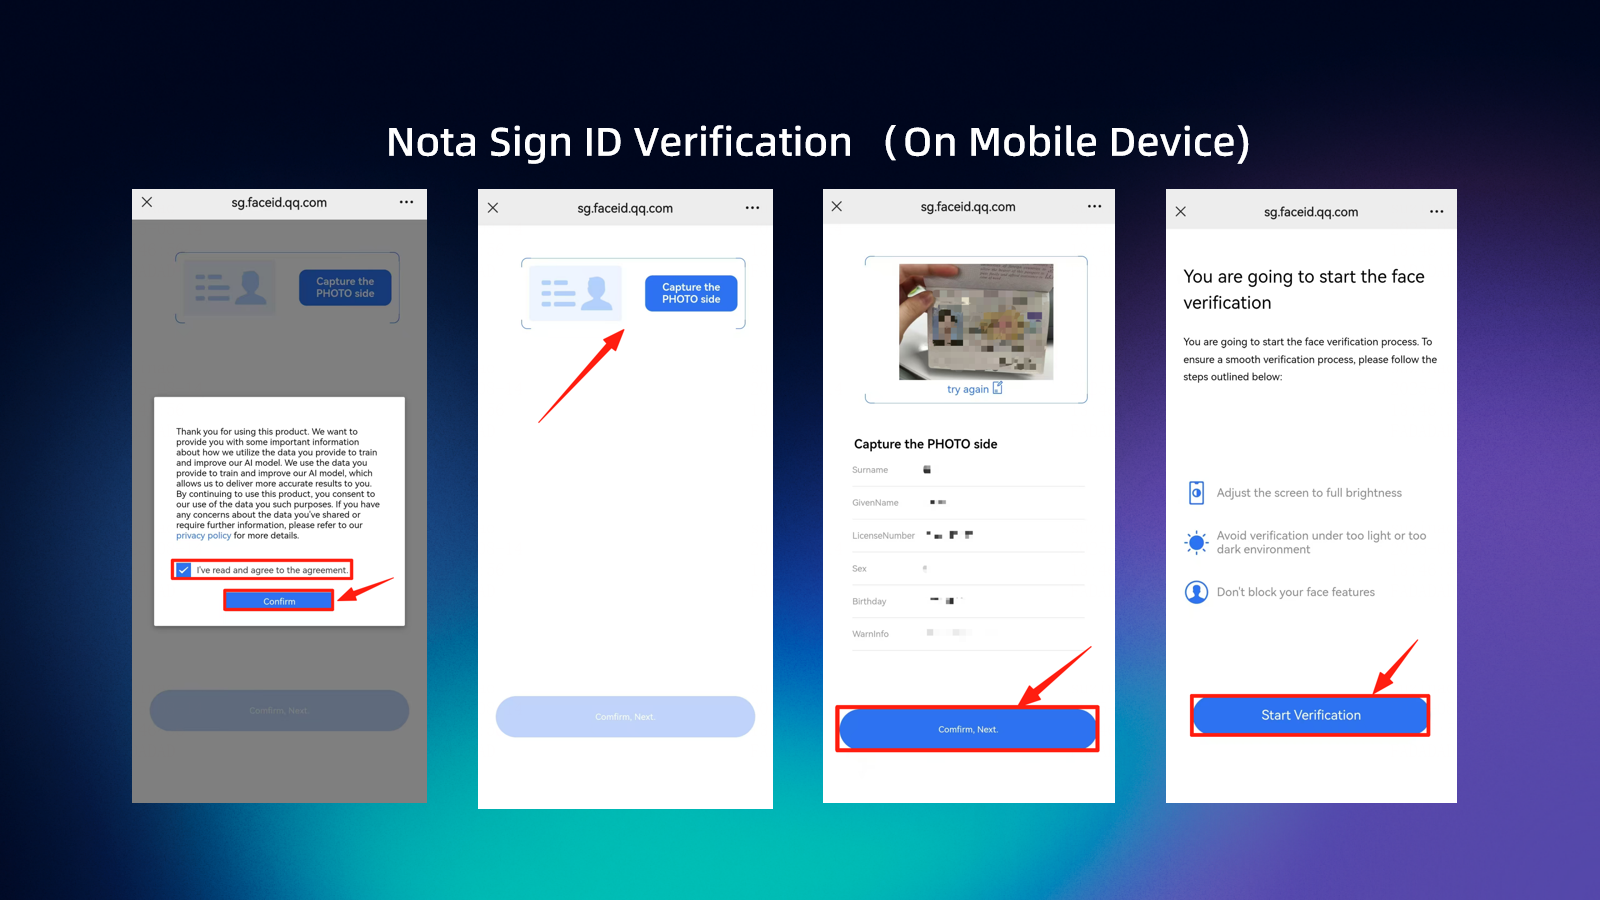
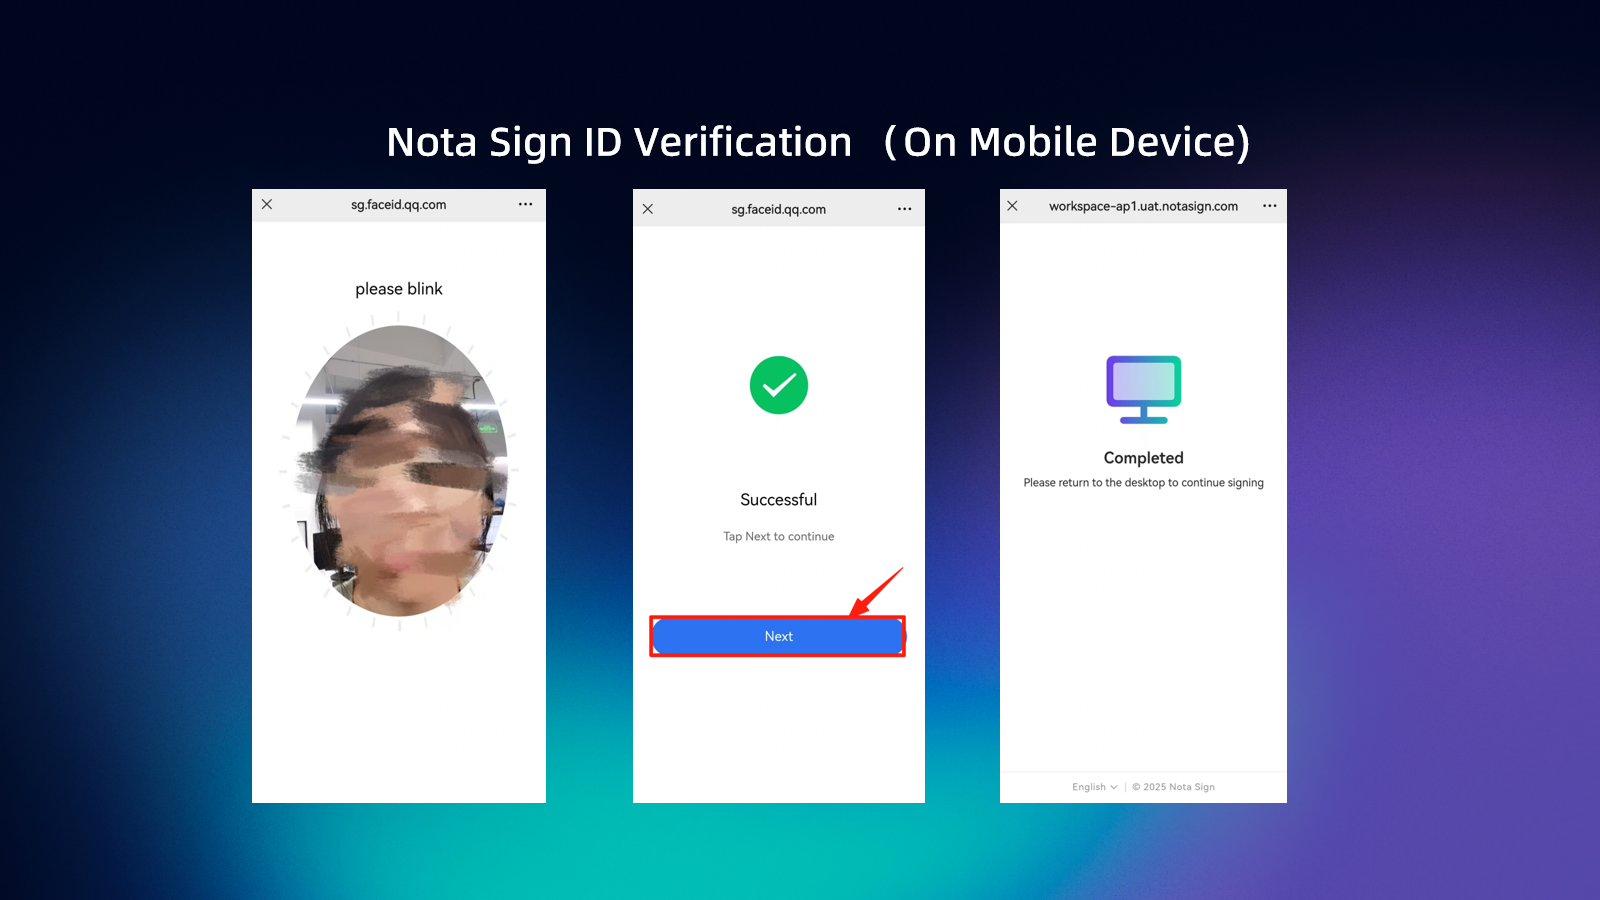
- After eKYC passes, the signing page automatically proceeds to CA email OTP verification;
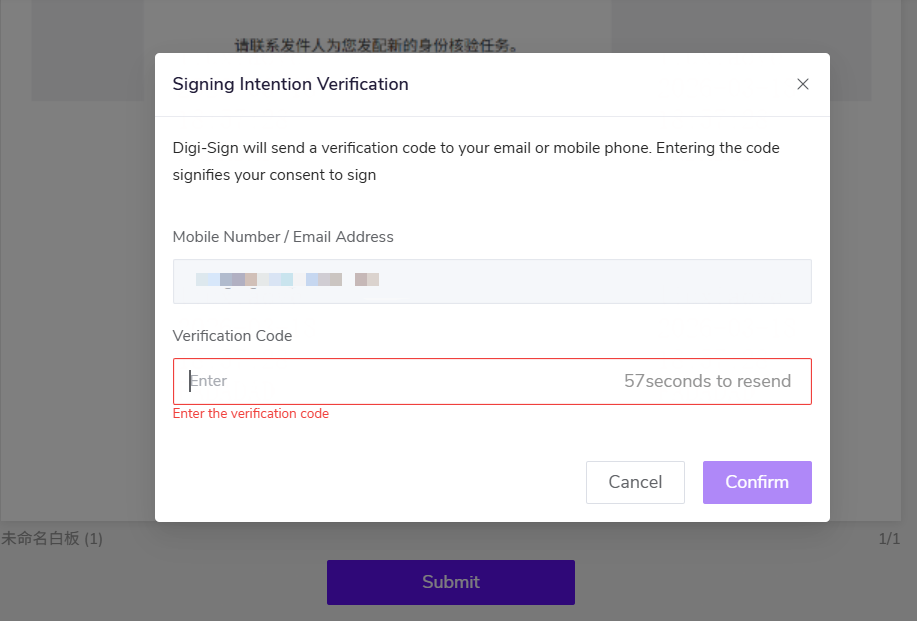
- After CA email OTP passes, the digital signature is complete.
3.4. Verification Failure and Retry
- When eKYC fails, the recipient enters the identity verification failure page and can view the failure reason;
- When the self-service retry limit is not reached, the recipient can click [Re-verify] to re-confirm information and initiate verification again;
- After reaching the self-service retry limit, the recipient needs to contact the sender to resend the verification task;
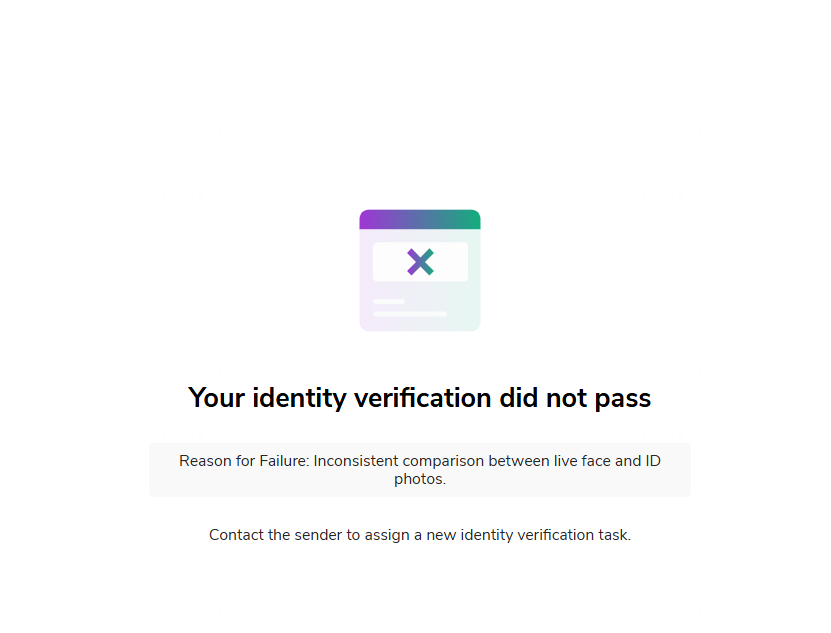
- The sender can resend the verification task or update the recipient’s name in the verification task details page, which does not consume the recipient’s self-service retry count.
3.5. Logs and Audit Report
- When the recipient enters identity verification, agrees to the verification agreement, and submits verification information, the envelope log records the corresponding events;
- When identity verification passes or fails, the envelope log records the corresponding result;
- When the sender resends the verification task, updates the recipient’s name and confirms the verification passes, the envelope log records the corresponding events;
- When the recipient completes CA email OTP and digital signature, the envelope log records the corresponding events;
- The audit report can display email verification results, Nota Sign identity verification results, verification task ID, document type, document issuing country/region, vendor name, third-party order number, verification completion time, CA/TSP name used, and CA certificate information summary.
4. Completing the Signing
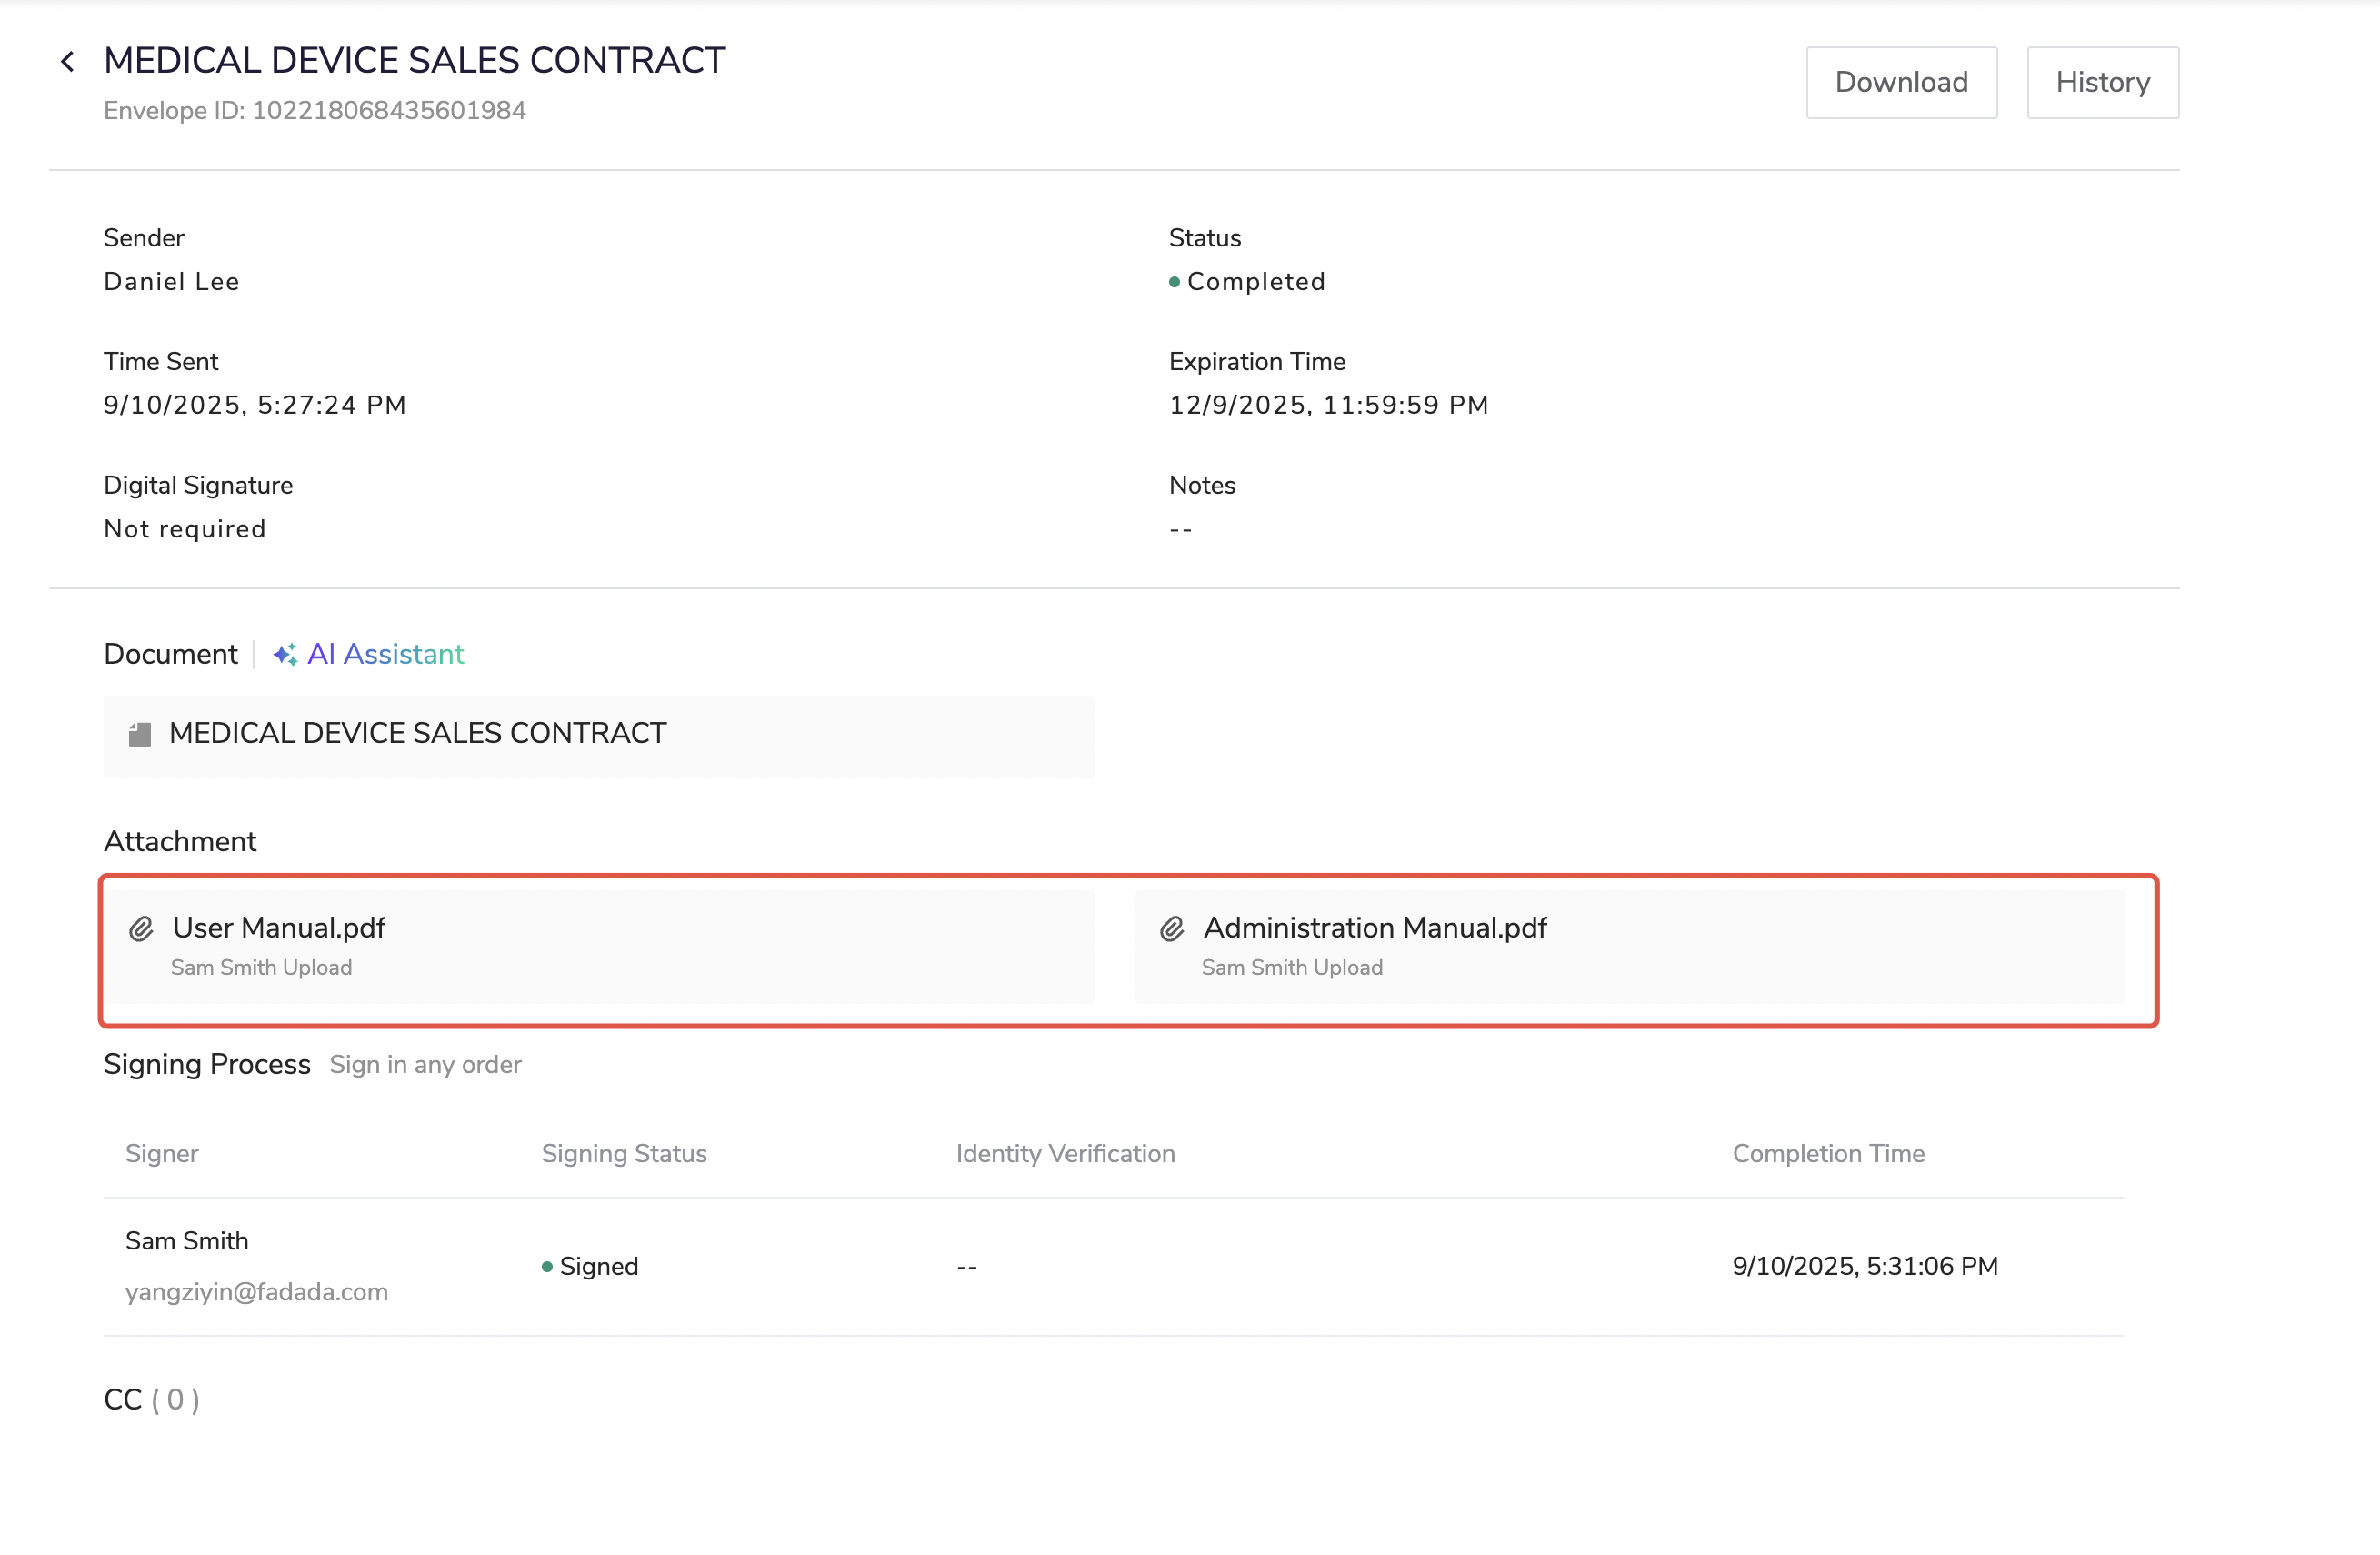
After the recipient completes signing, the sender can download attachments from the signing completion notification email.
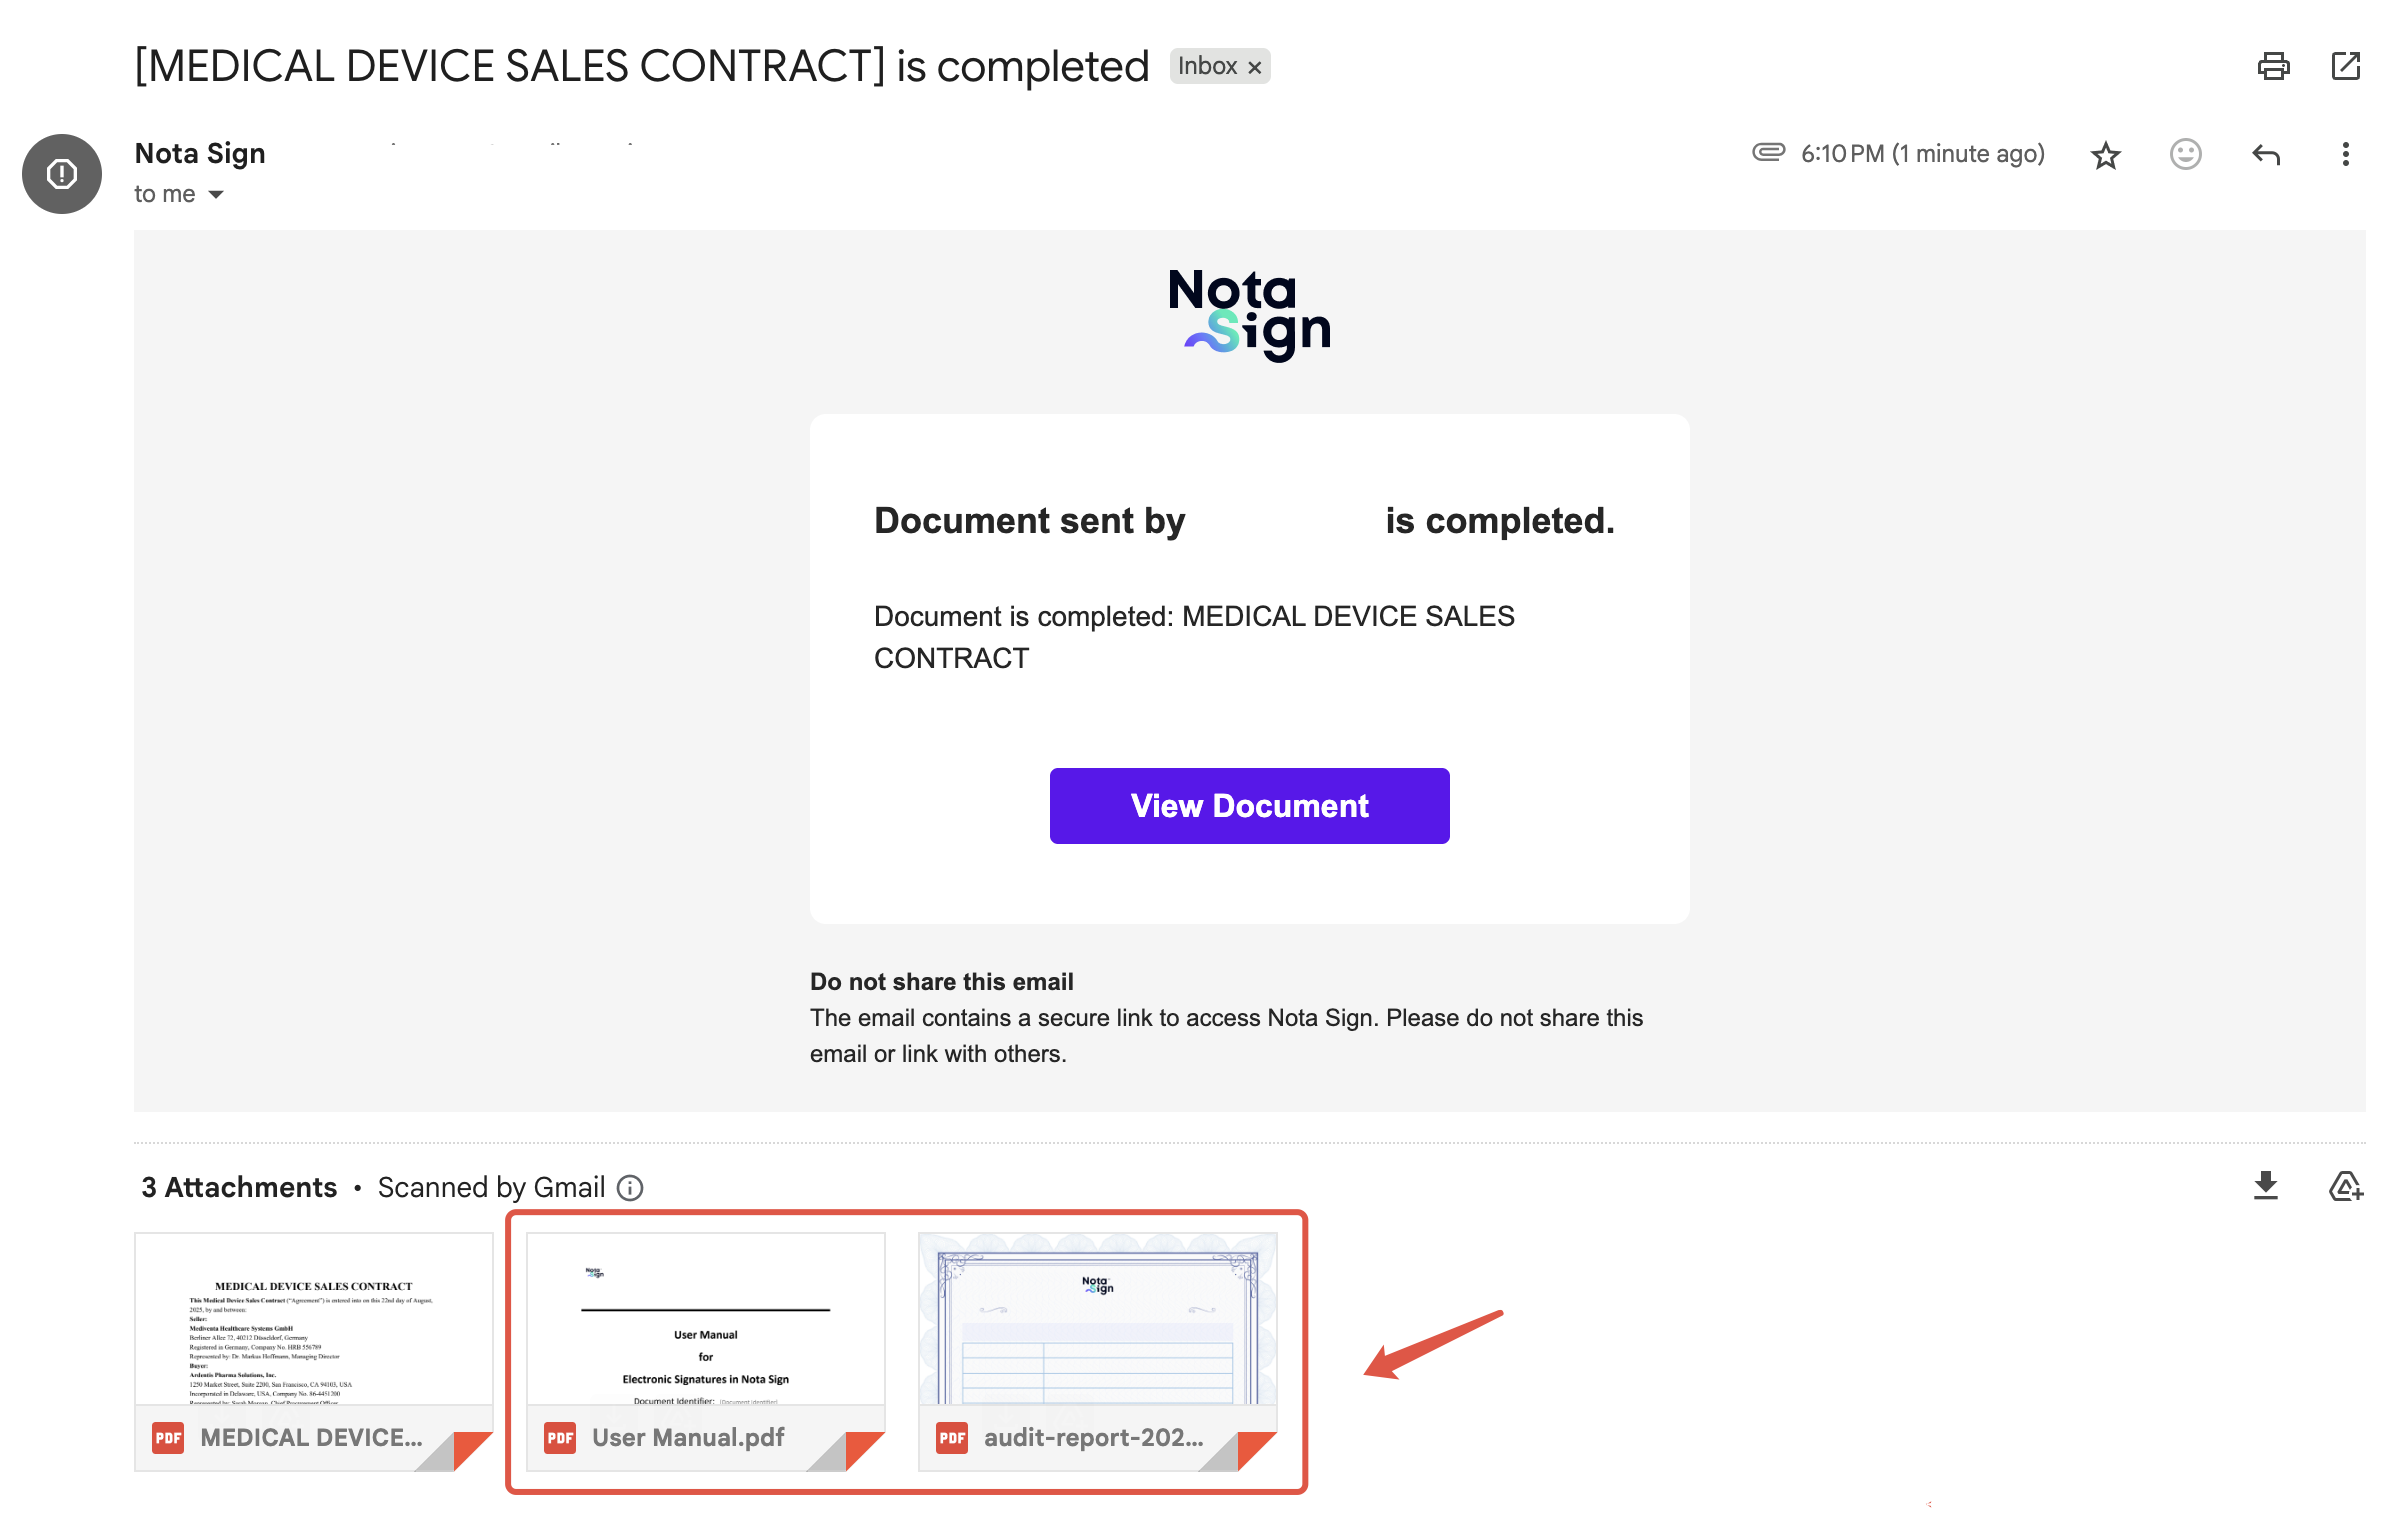
5. Download from Envelope Signing Records
5.1 Click [View];
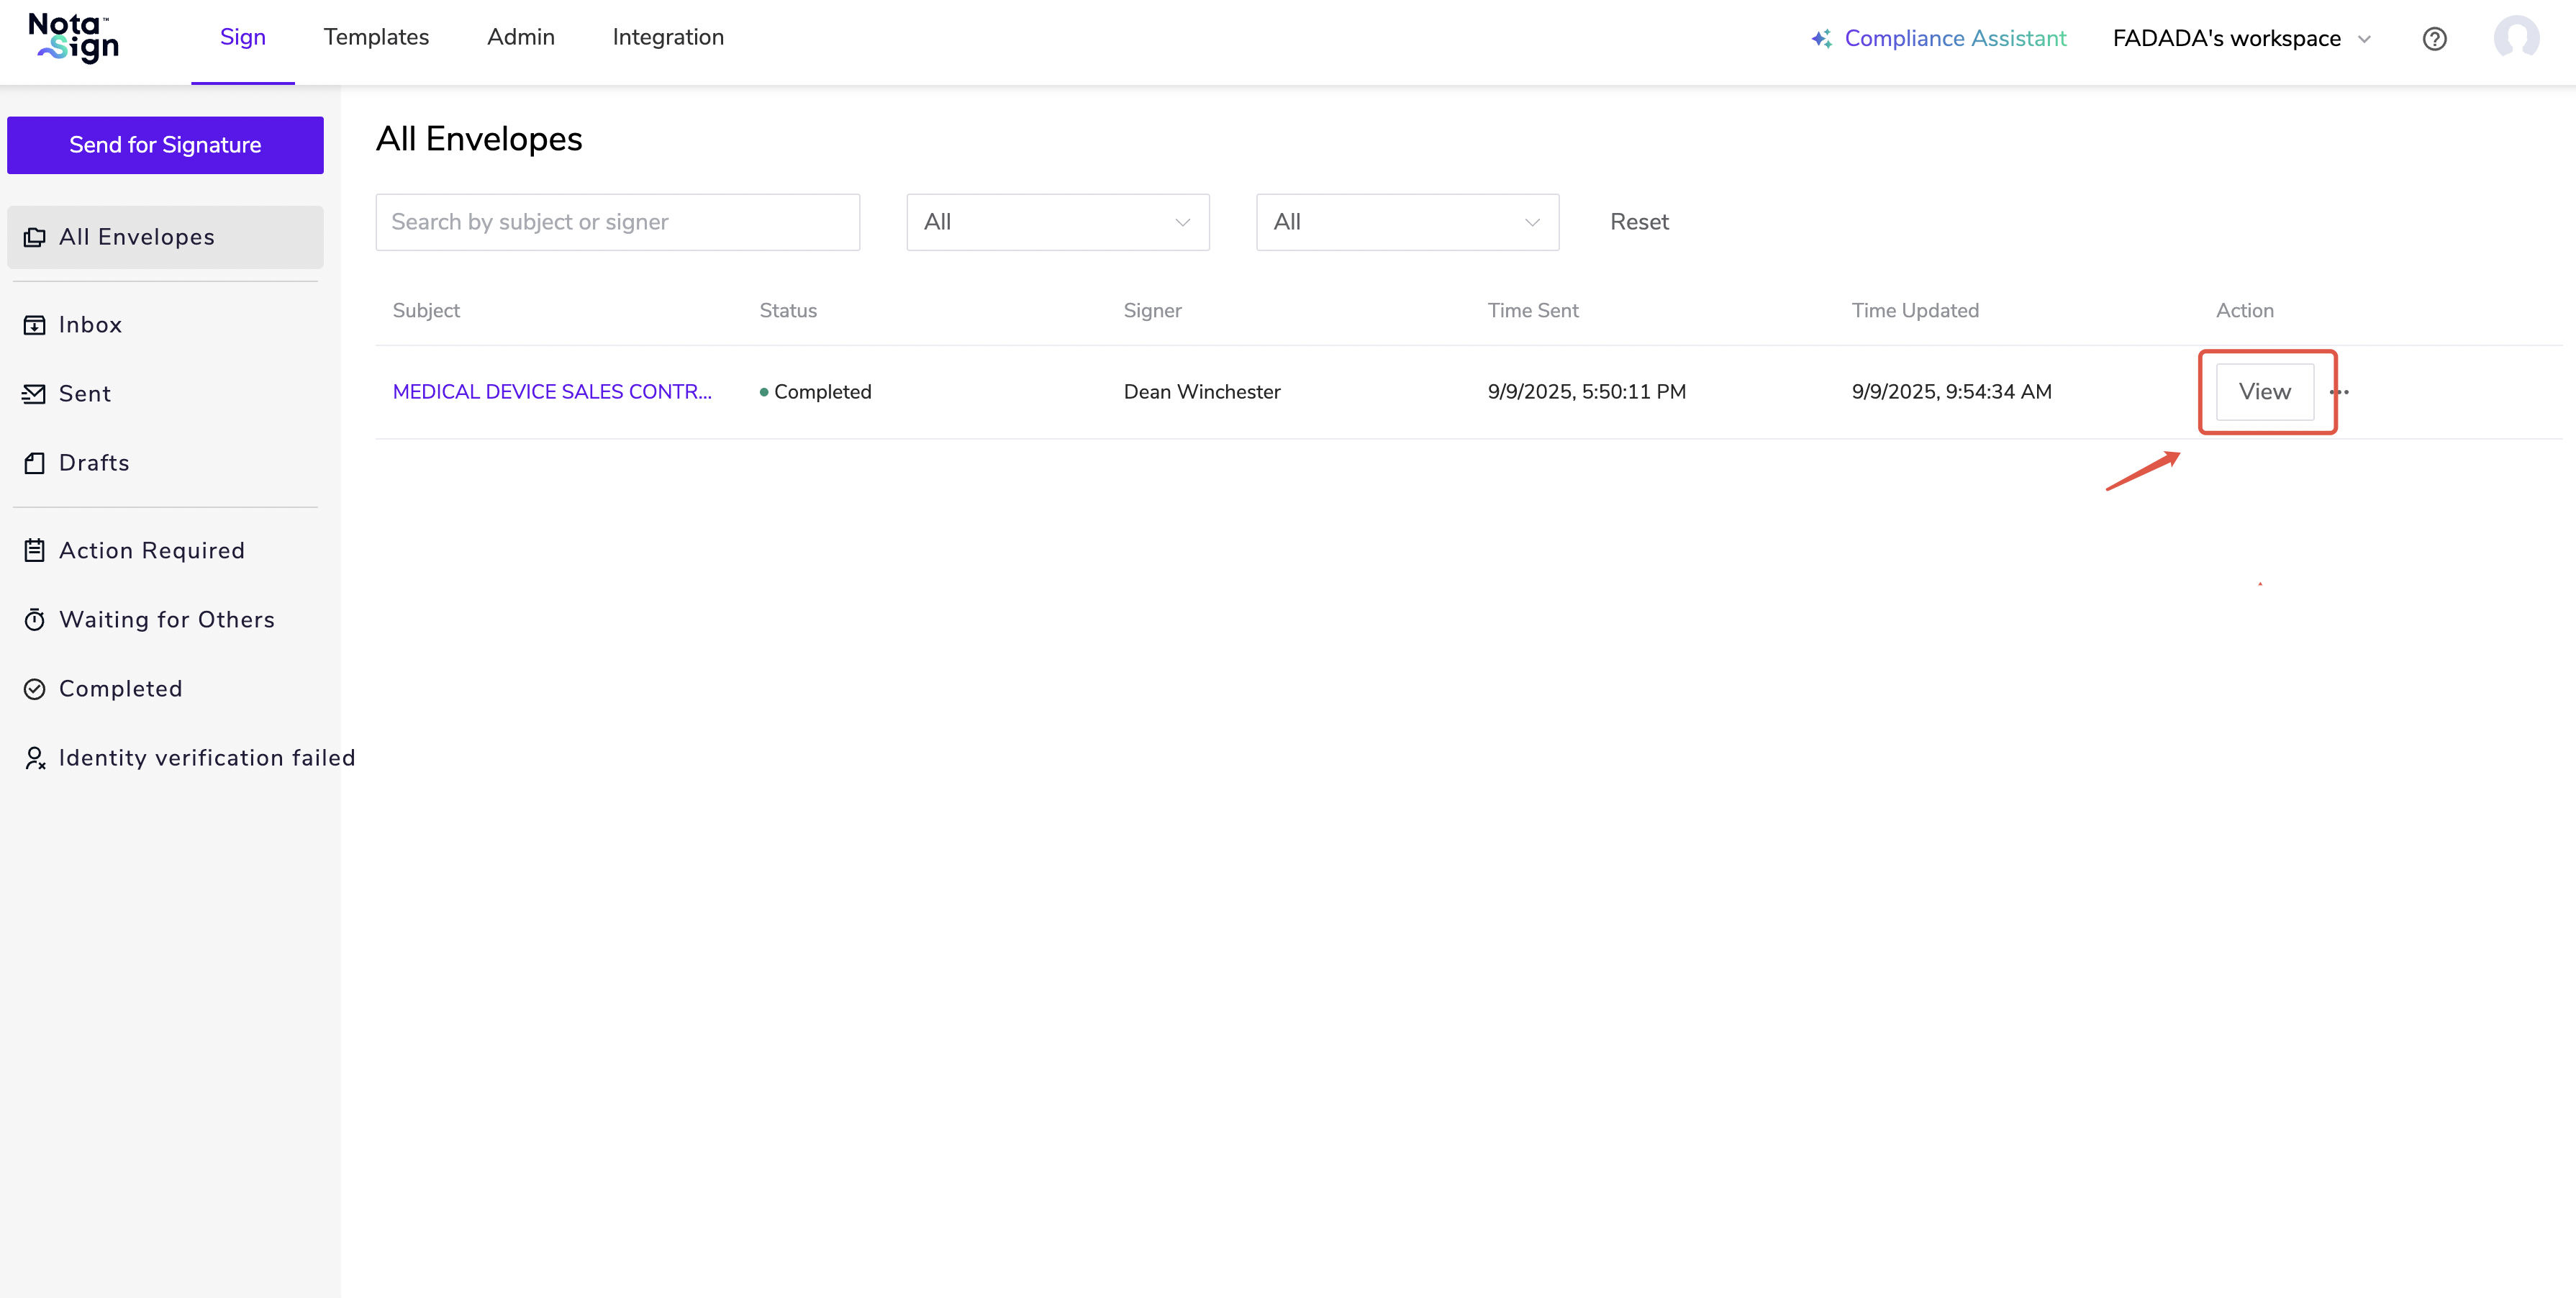
5.2 Download the attachments.