
Video Tutorial:
1. Subscribe to Indonesia e-Meterai
1.1. Place the Subscription
Subscribe to Indonesia e-Meterai.
💡 Note: The e-Meterai subscription is billed based on the number of e-Meterai sheets used.
💡 Note: Each e-Meterai control in an envelope will consume one e-Meterai usage.
2. Enable Indonesia e-Meterai
2.1. Enable the Option
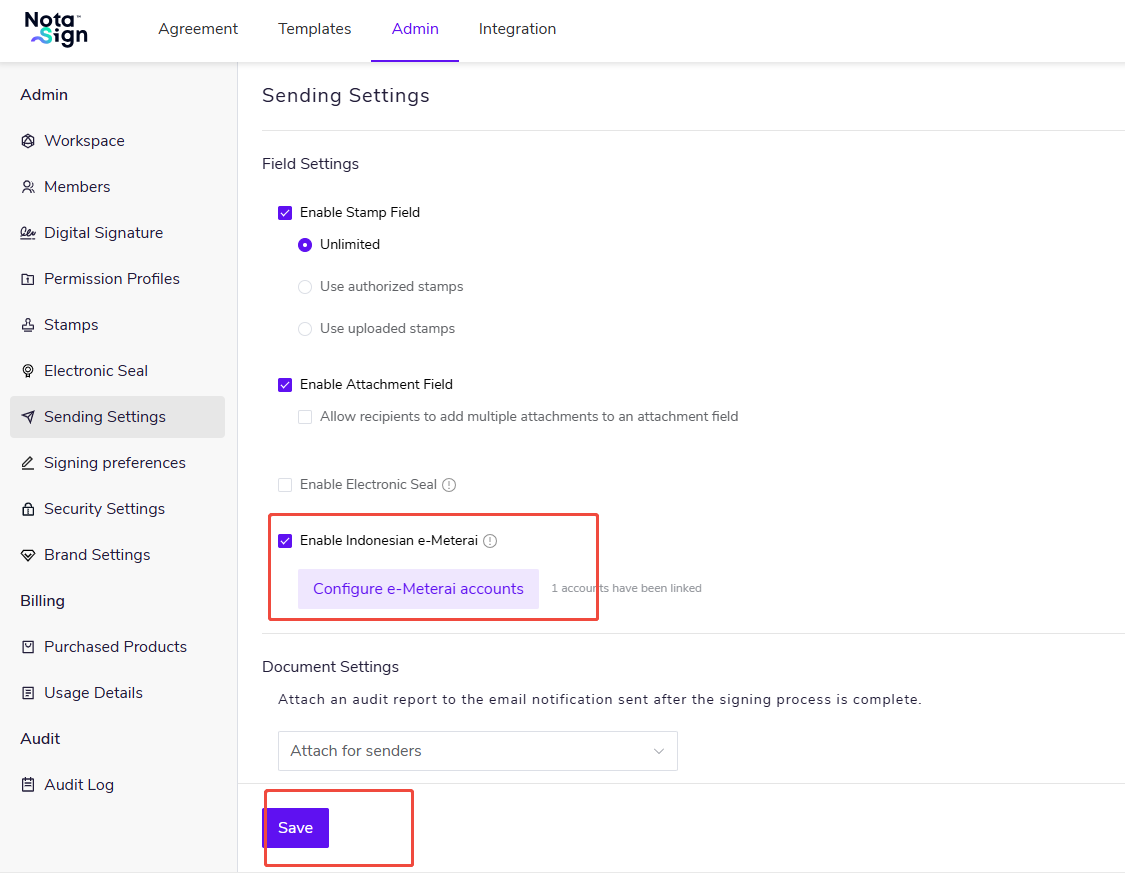
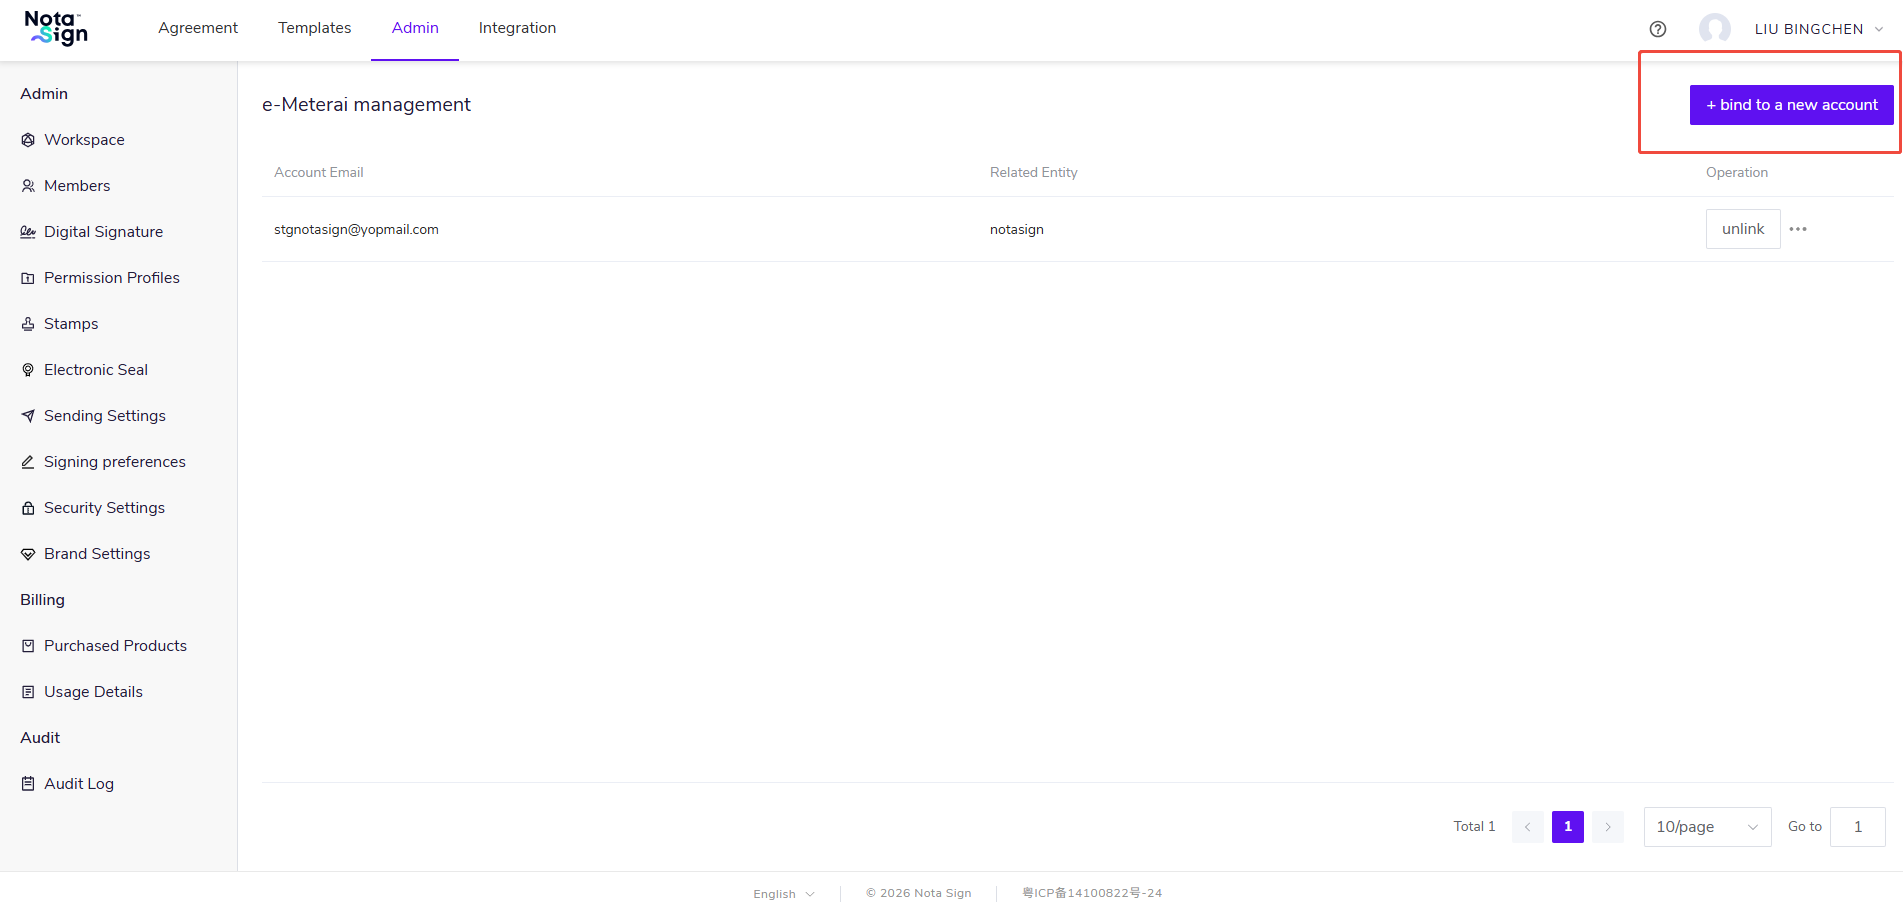
In the Sending Settings control configuration area, check: Enable Indonesia e-Meterai.
3. Add the e-Meterai Role
3.1. Add e-Meterai in the Recipient List
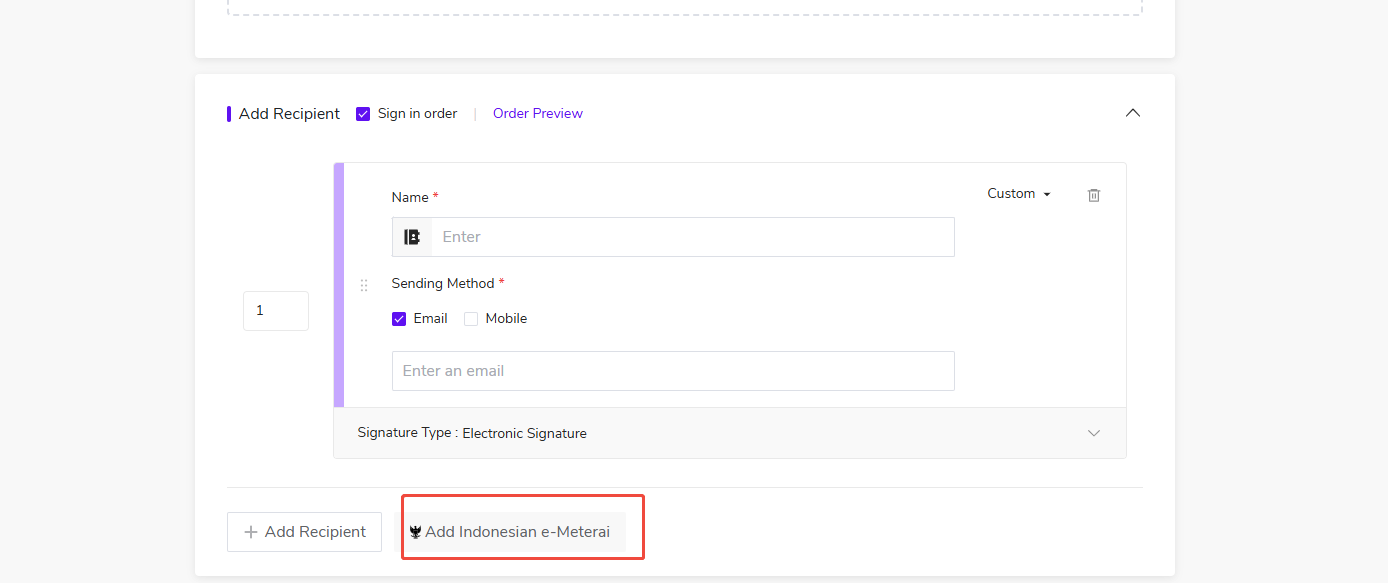
In Create Envelope -> Recipient List, click “Add e-Meterai”.
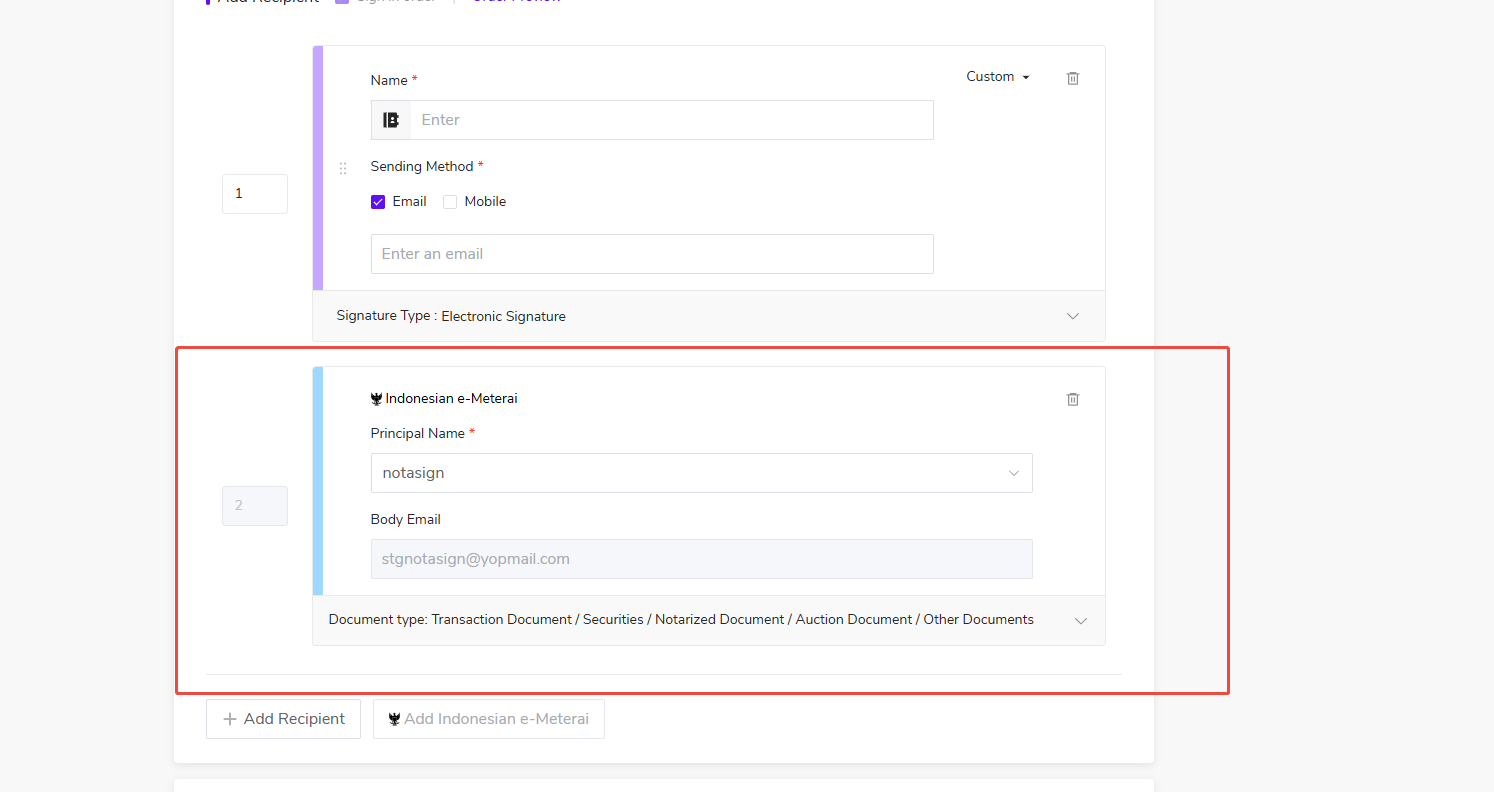
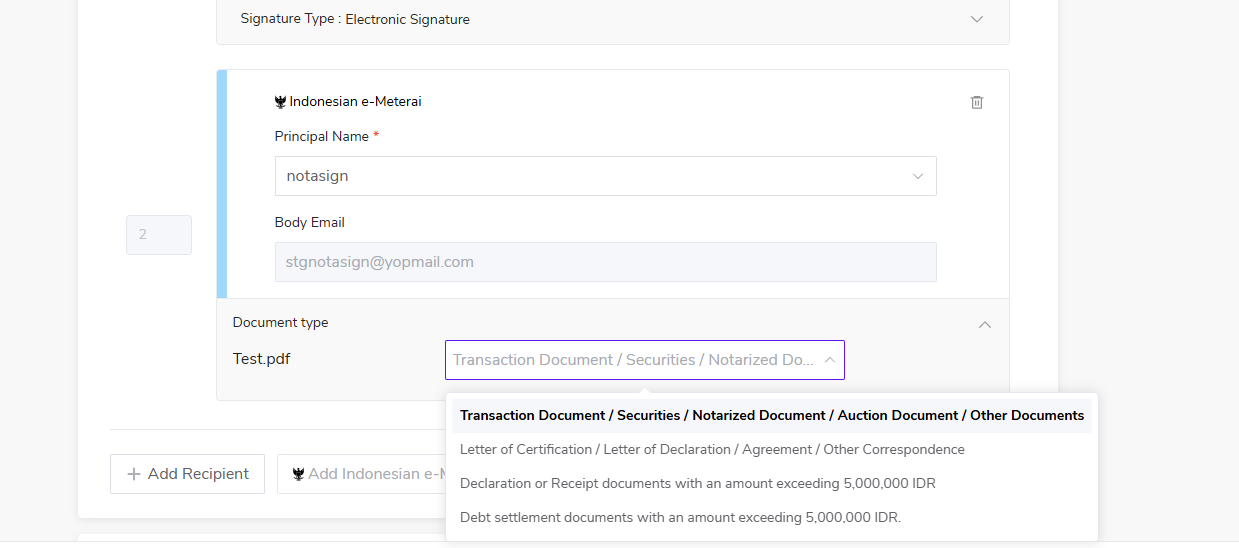
💡 Note: Only one e-Meterai role can be added per envelope.
💡 Note: When adding an e-Meterai role, you need to set the document type.
4. Configure the e-Meterai Control
4.1. Select the e-Meterai Control in Field Settings
In Create Envelope -> Control Settings page, select “e-Meterai” from the recipient dropdown in the top-left corner. Once selected, only one “e-Meterai” control will be displayed in the left control menu.
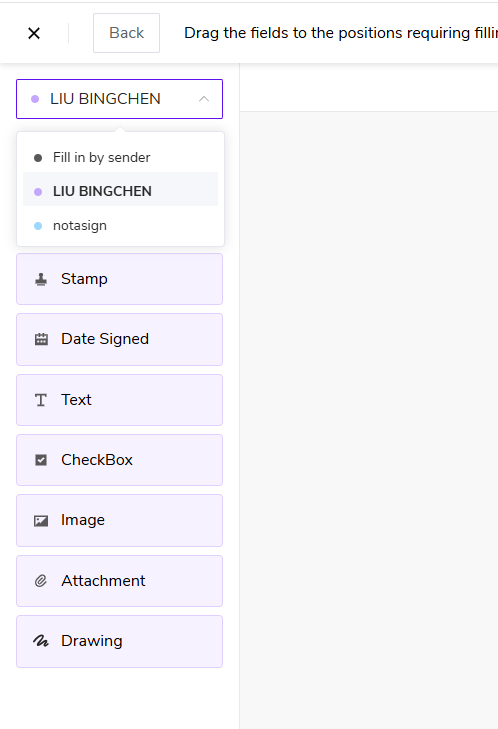
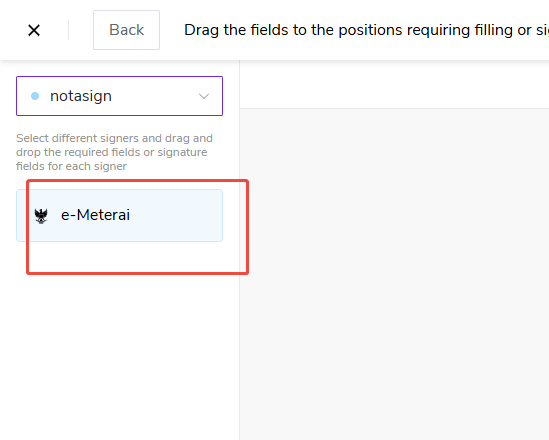
💡 Note: e-Meterai can only be stamped after all recipients have completed signing.
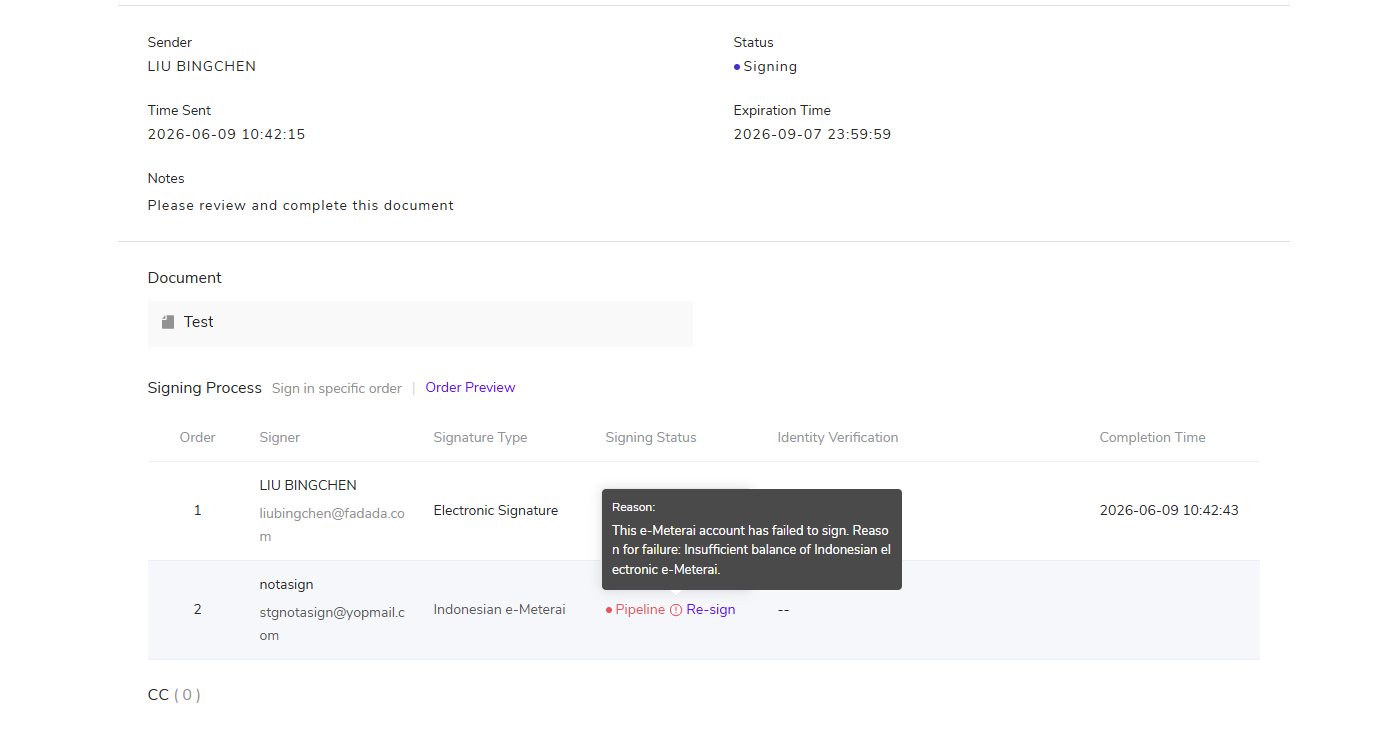
💡 Note: When it is the e-Meterai signing node’s turn, the system will automatically complete the e-Meterai stamping; no manual stamping is required.
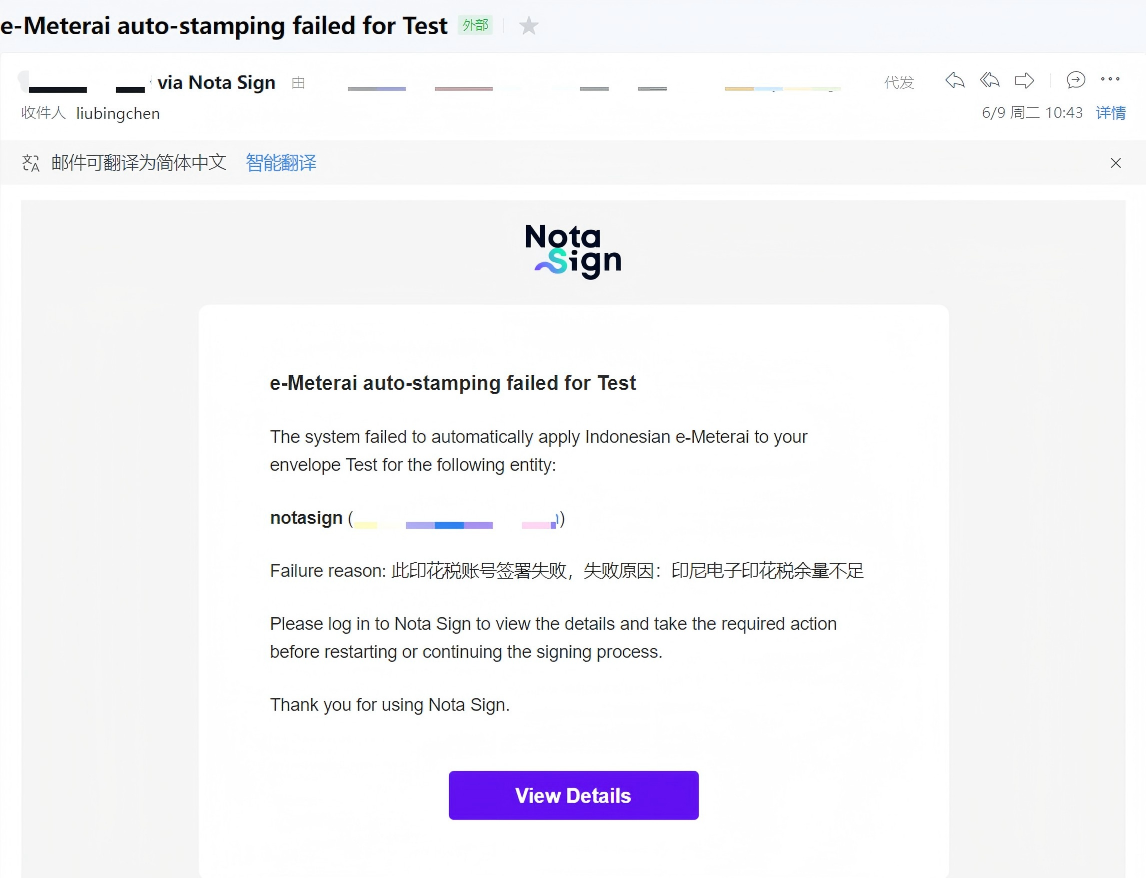
💡 Note: If the automatic e-Meterai stamping fails, the sender will receive an email notification. If the failure is due to insufficient balance, please contact the administrator to top up. After the administrator tops up and rebinds, the e-Meterai stamping will be completed automatically.