Configuring SSO Mapping
Notes:
Automatic mapping is based on domain recognition to assign users to the correct workspace and permissions.
When users log in via different SSO login URLs, they will access different workspaces.
For key roles (such as Super Administrator), it is recommended to configure them manually in the Nota Sign console.
Automatic Mapping Configuration:
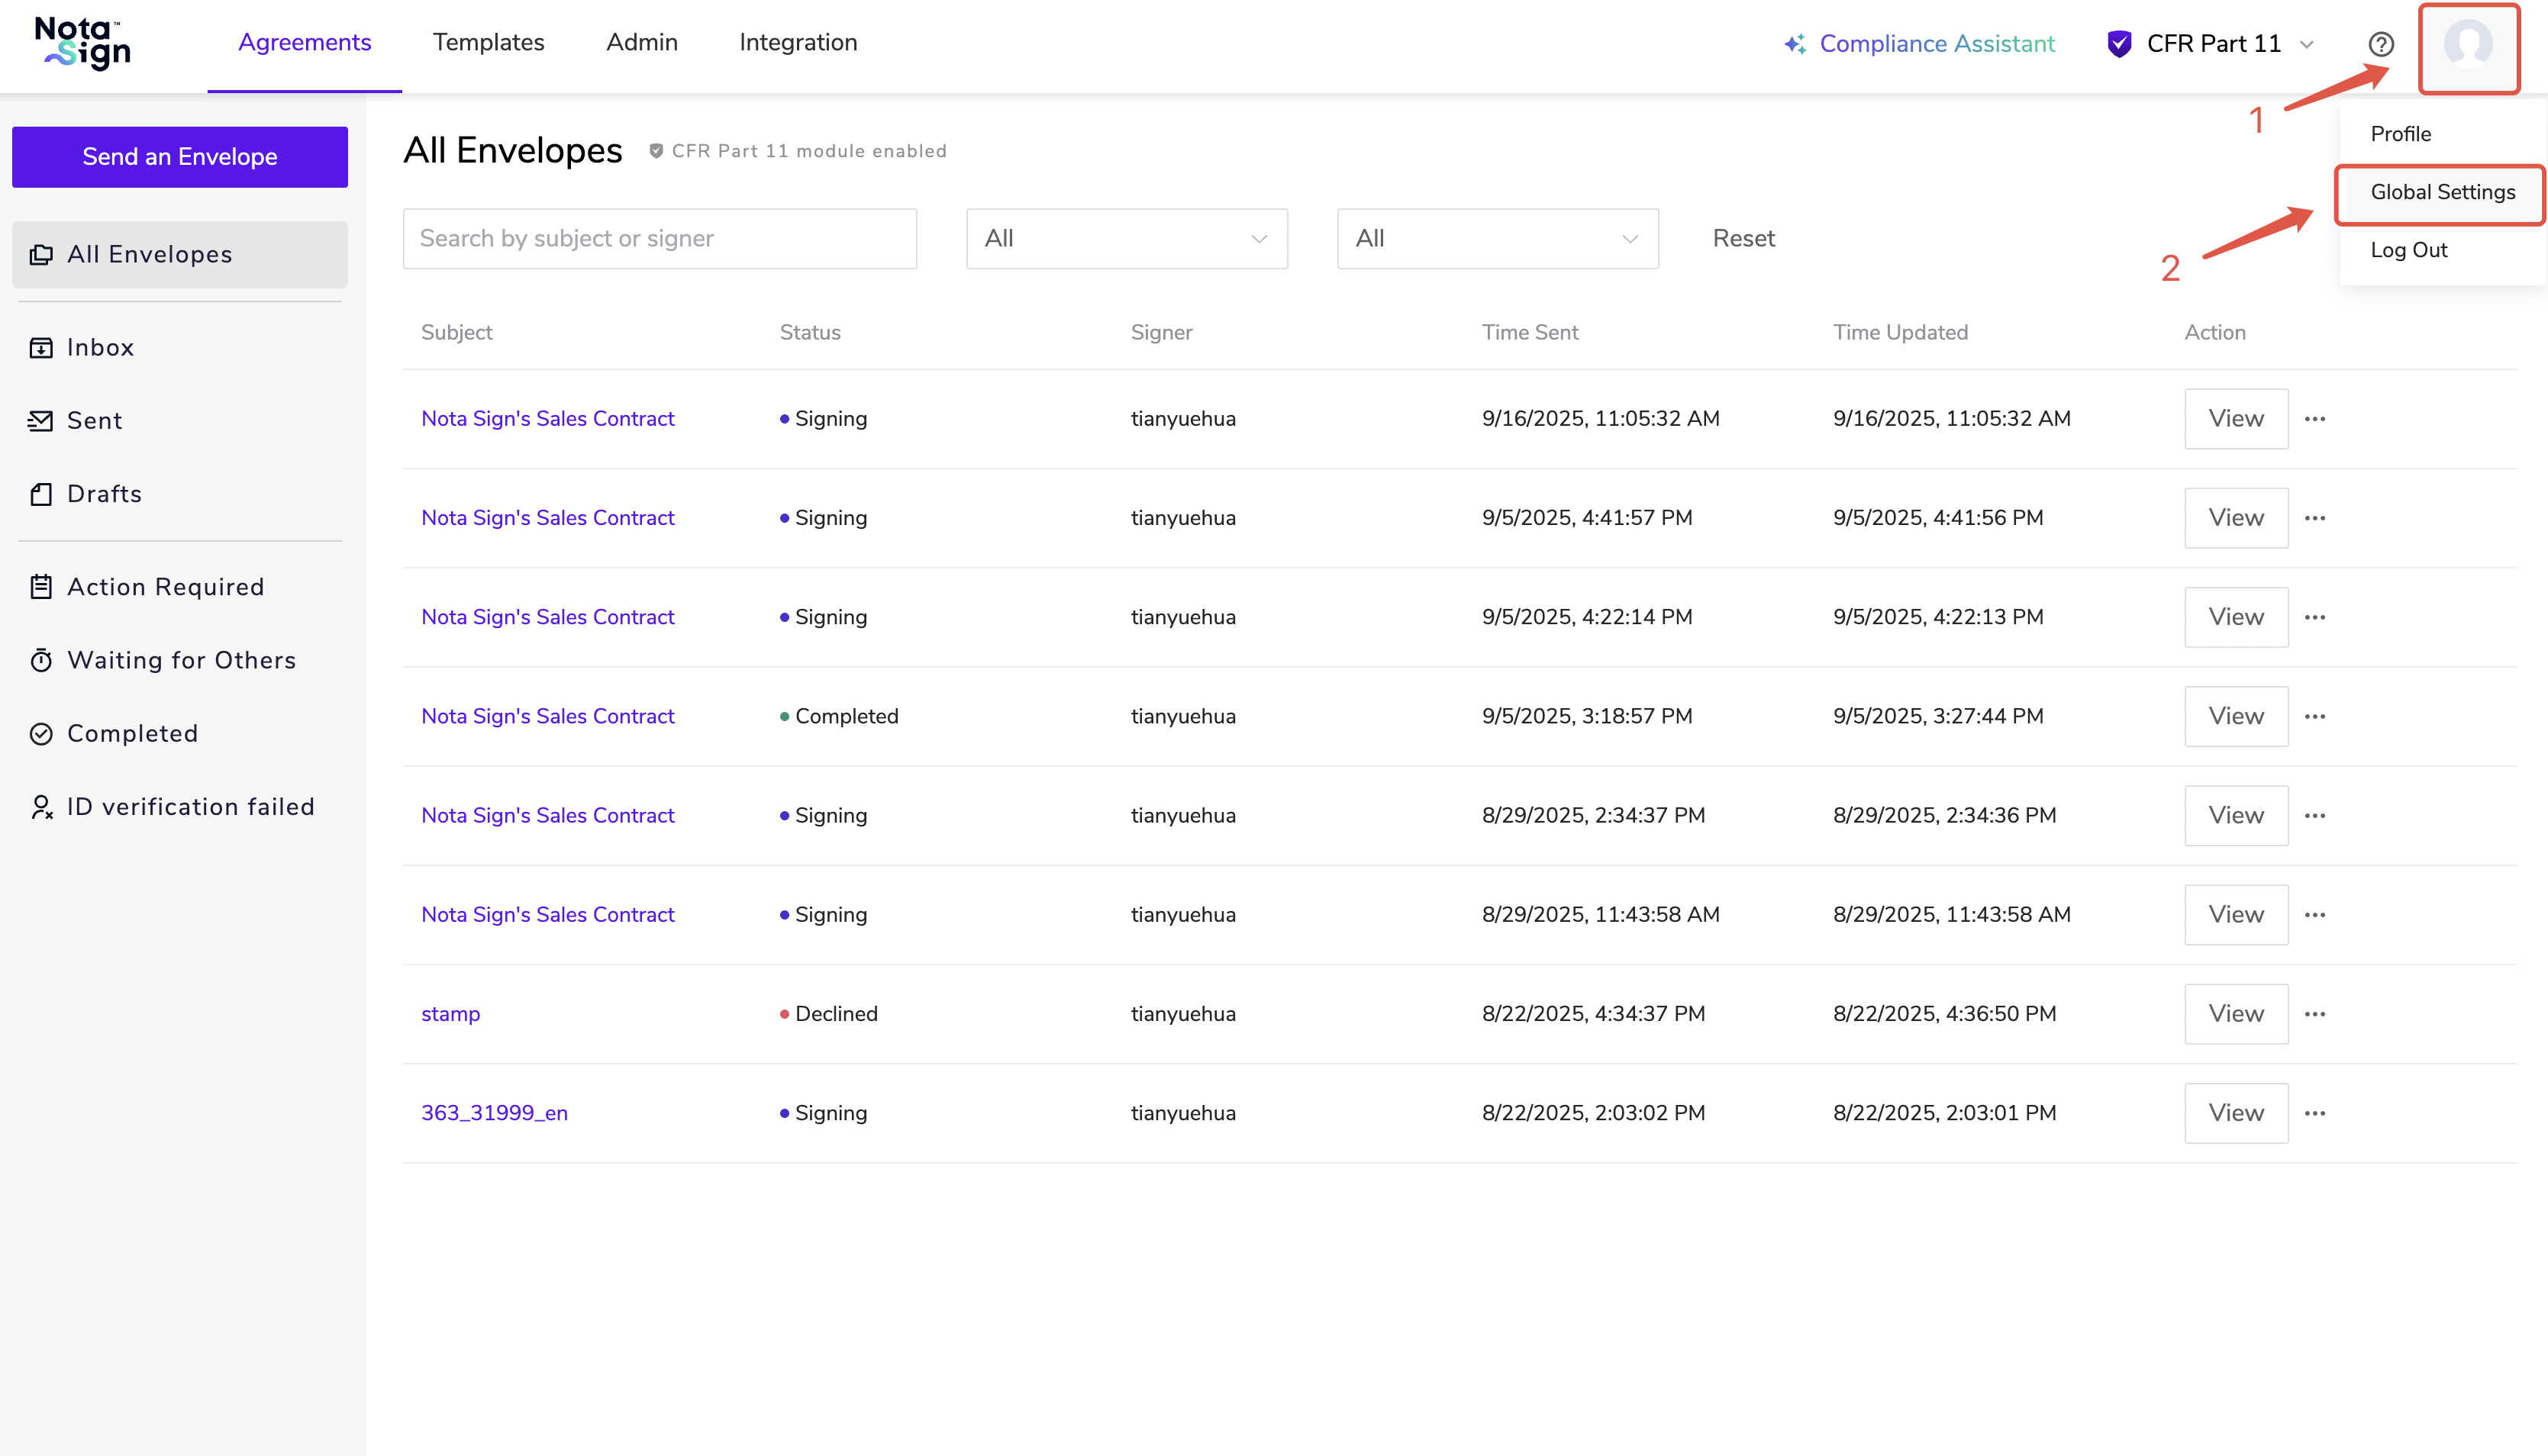
- Log in to your Nota Sign and click Global Settings;
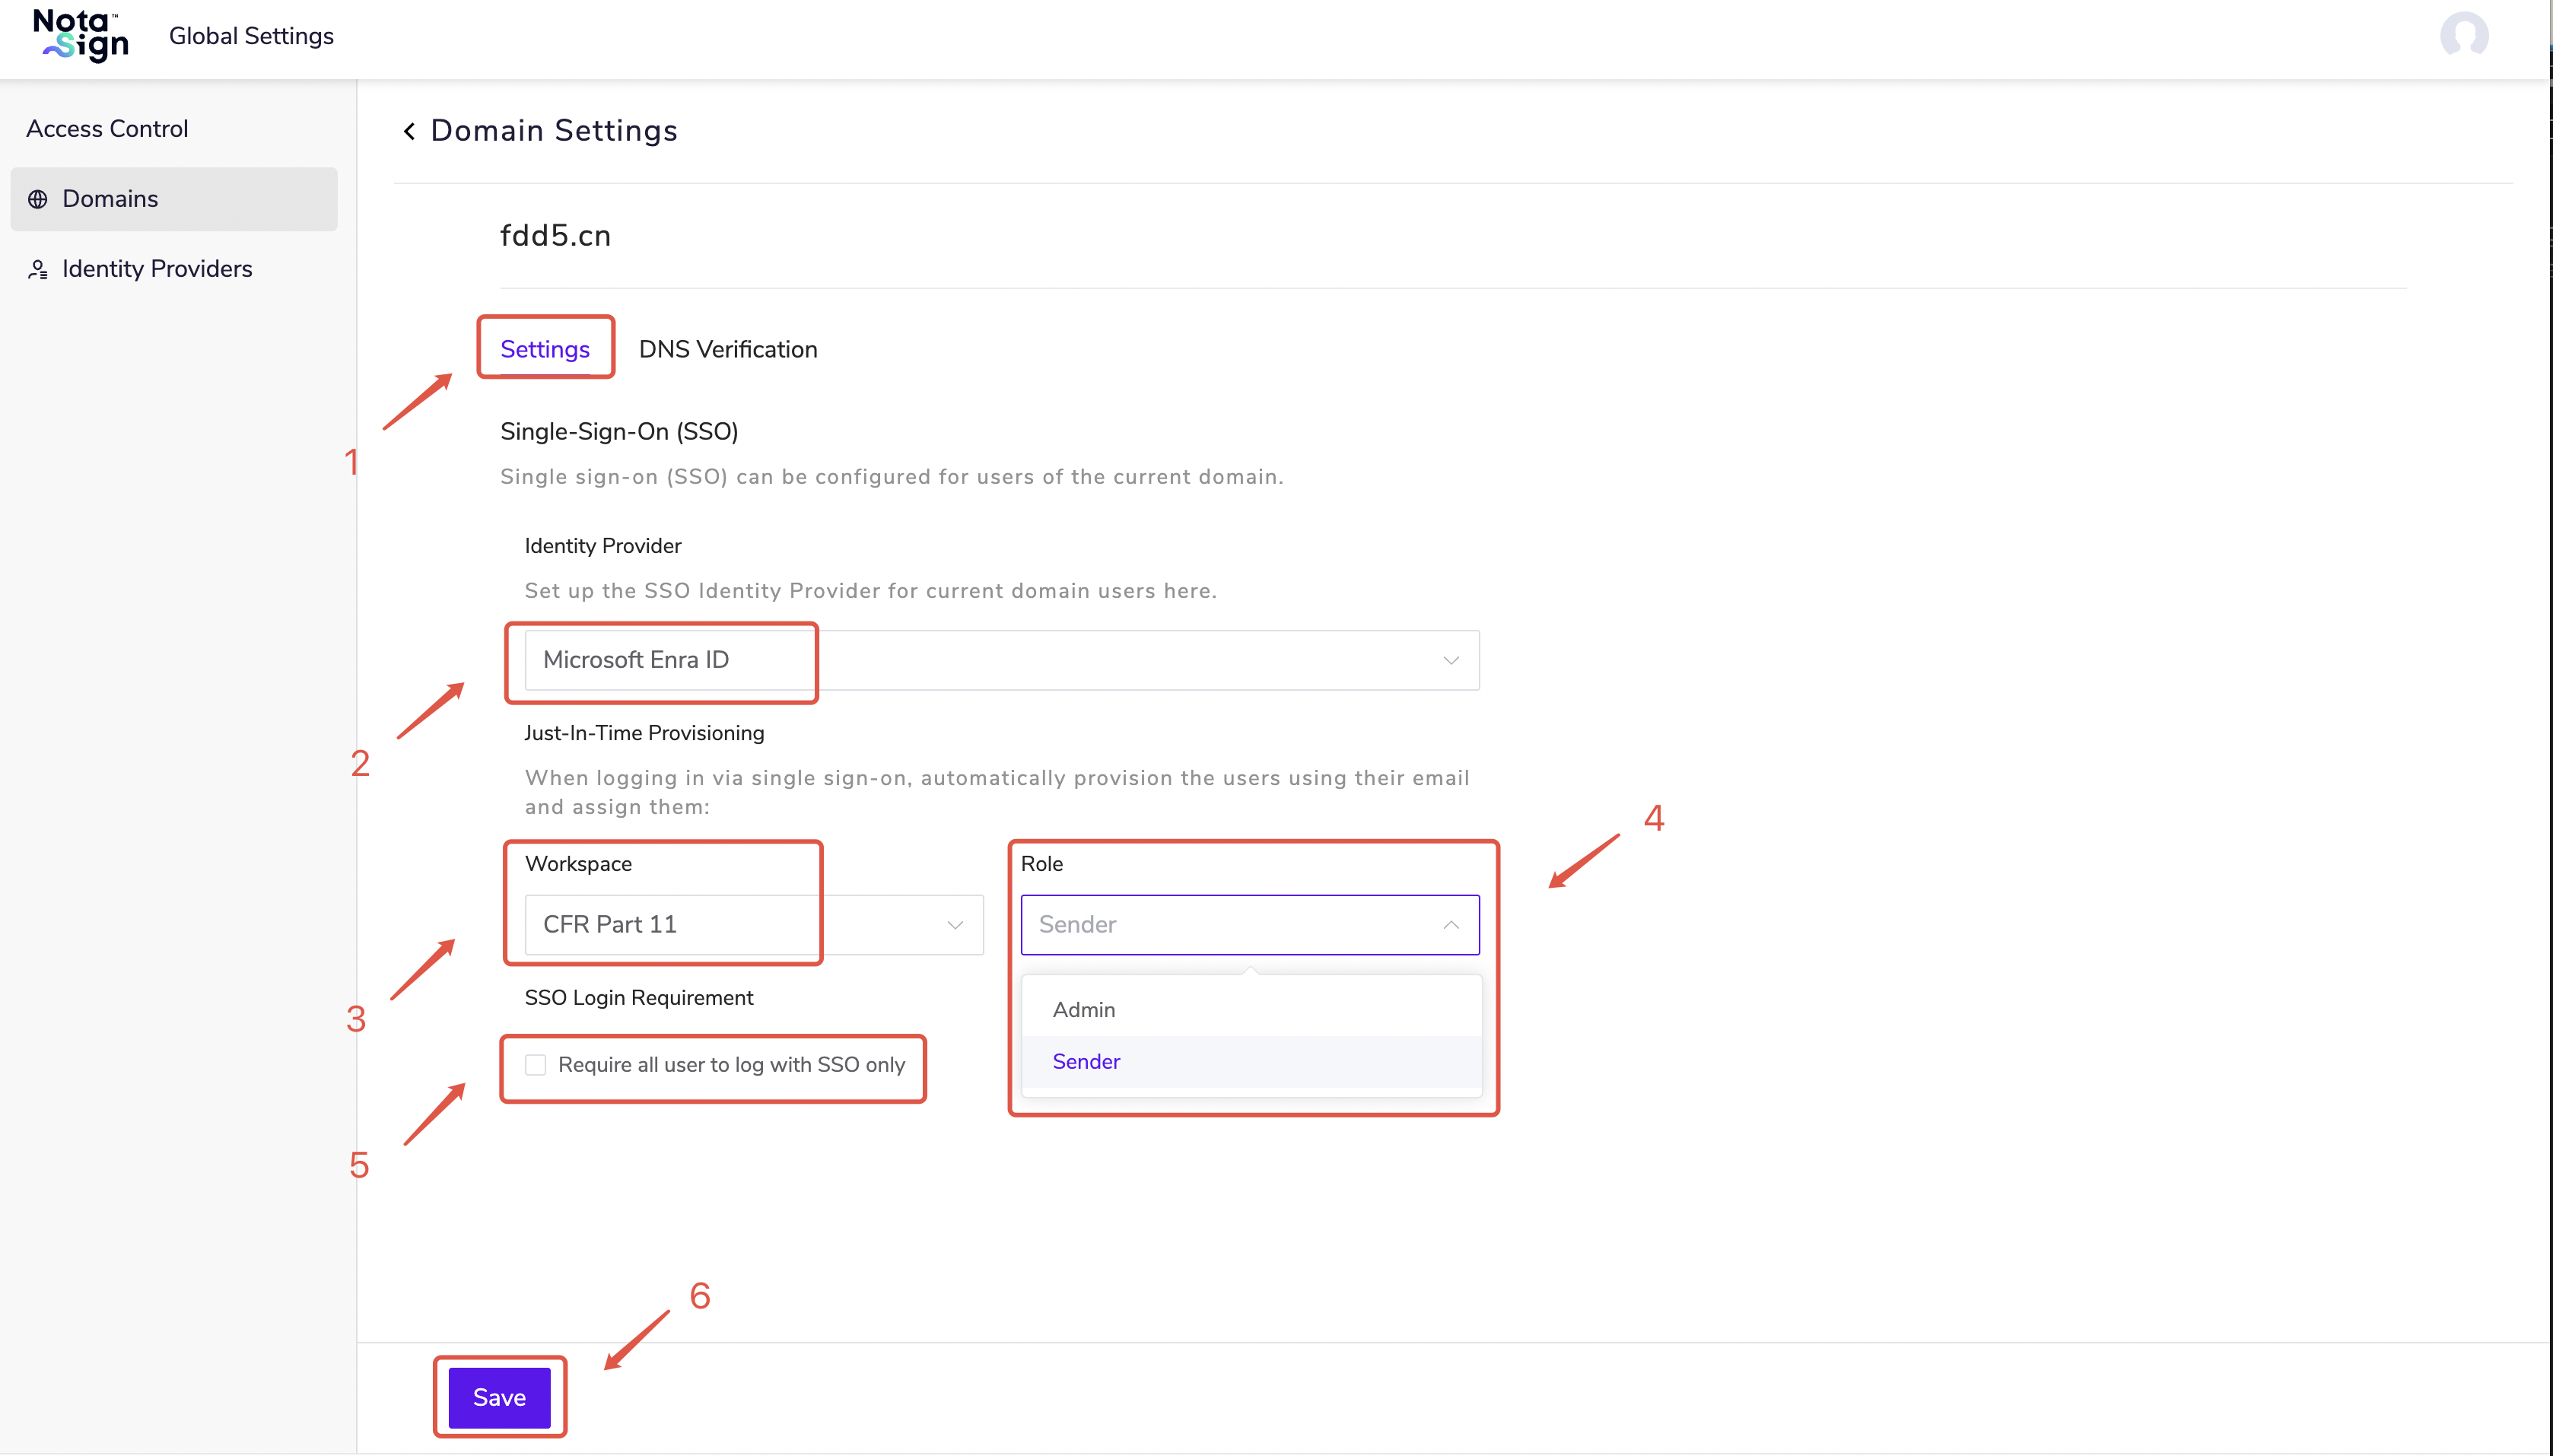
- On the Domains page, click Manage Settings;

On the Settings page, select Add SSO Mapping, and define the default workspace and permissions for members logging in under different IdP domains;
Based on your requirements, select whether to Require all members to log in with SSO only;
Click Add Whitelisted Users to configure login permissions for specific users under the IdP domain;
Click Save to complete the configuration.
- Adding SSO mapping means that, except for whitelisted users, all other users under the domain will log in via the IdP into the default workspace and obtain the corresponding permissions. -
- When users log in via SSO, the system will automatically create a Nota Sign account for them, and based on the mapping, assign them to the designated workspace with default roles (e.g., Administrator, Sender). -
- If Require all members to log in with SSO only is checked, members will no longer be able to log in to Nota Sign using username and password. -
Manual Configuration:
- In the IdP (using Microsoft Azure as an example), open the created SAML application and go to Users and Groups > Add User/Group;
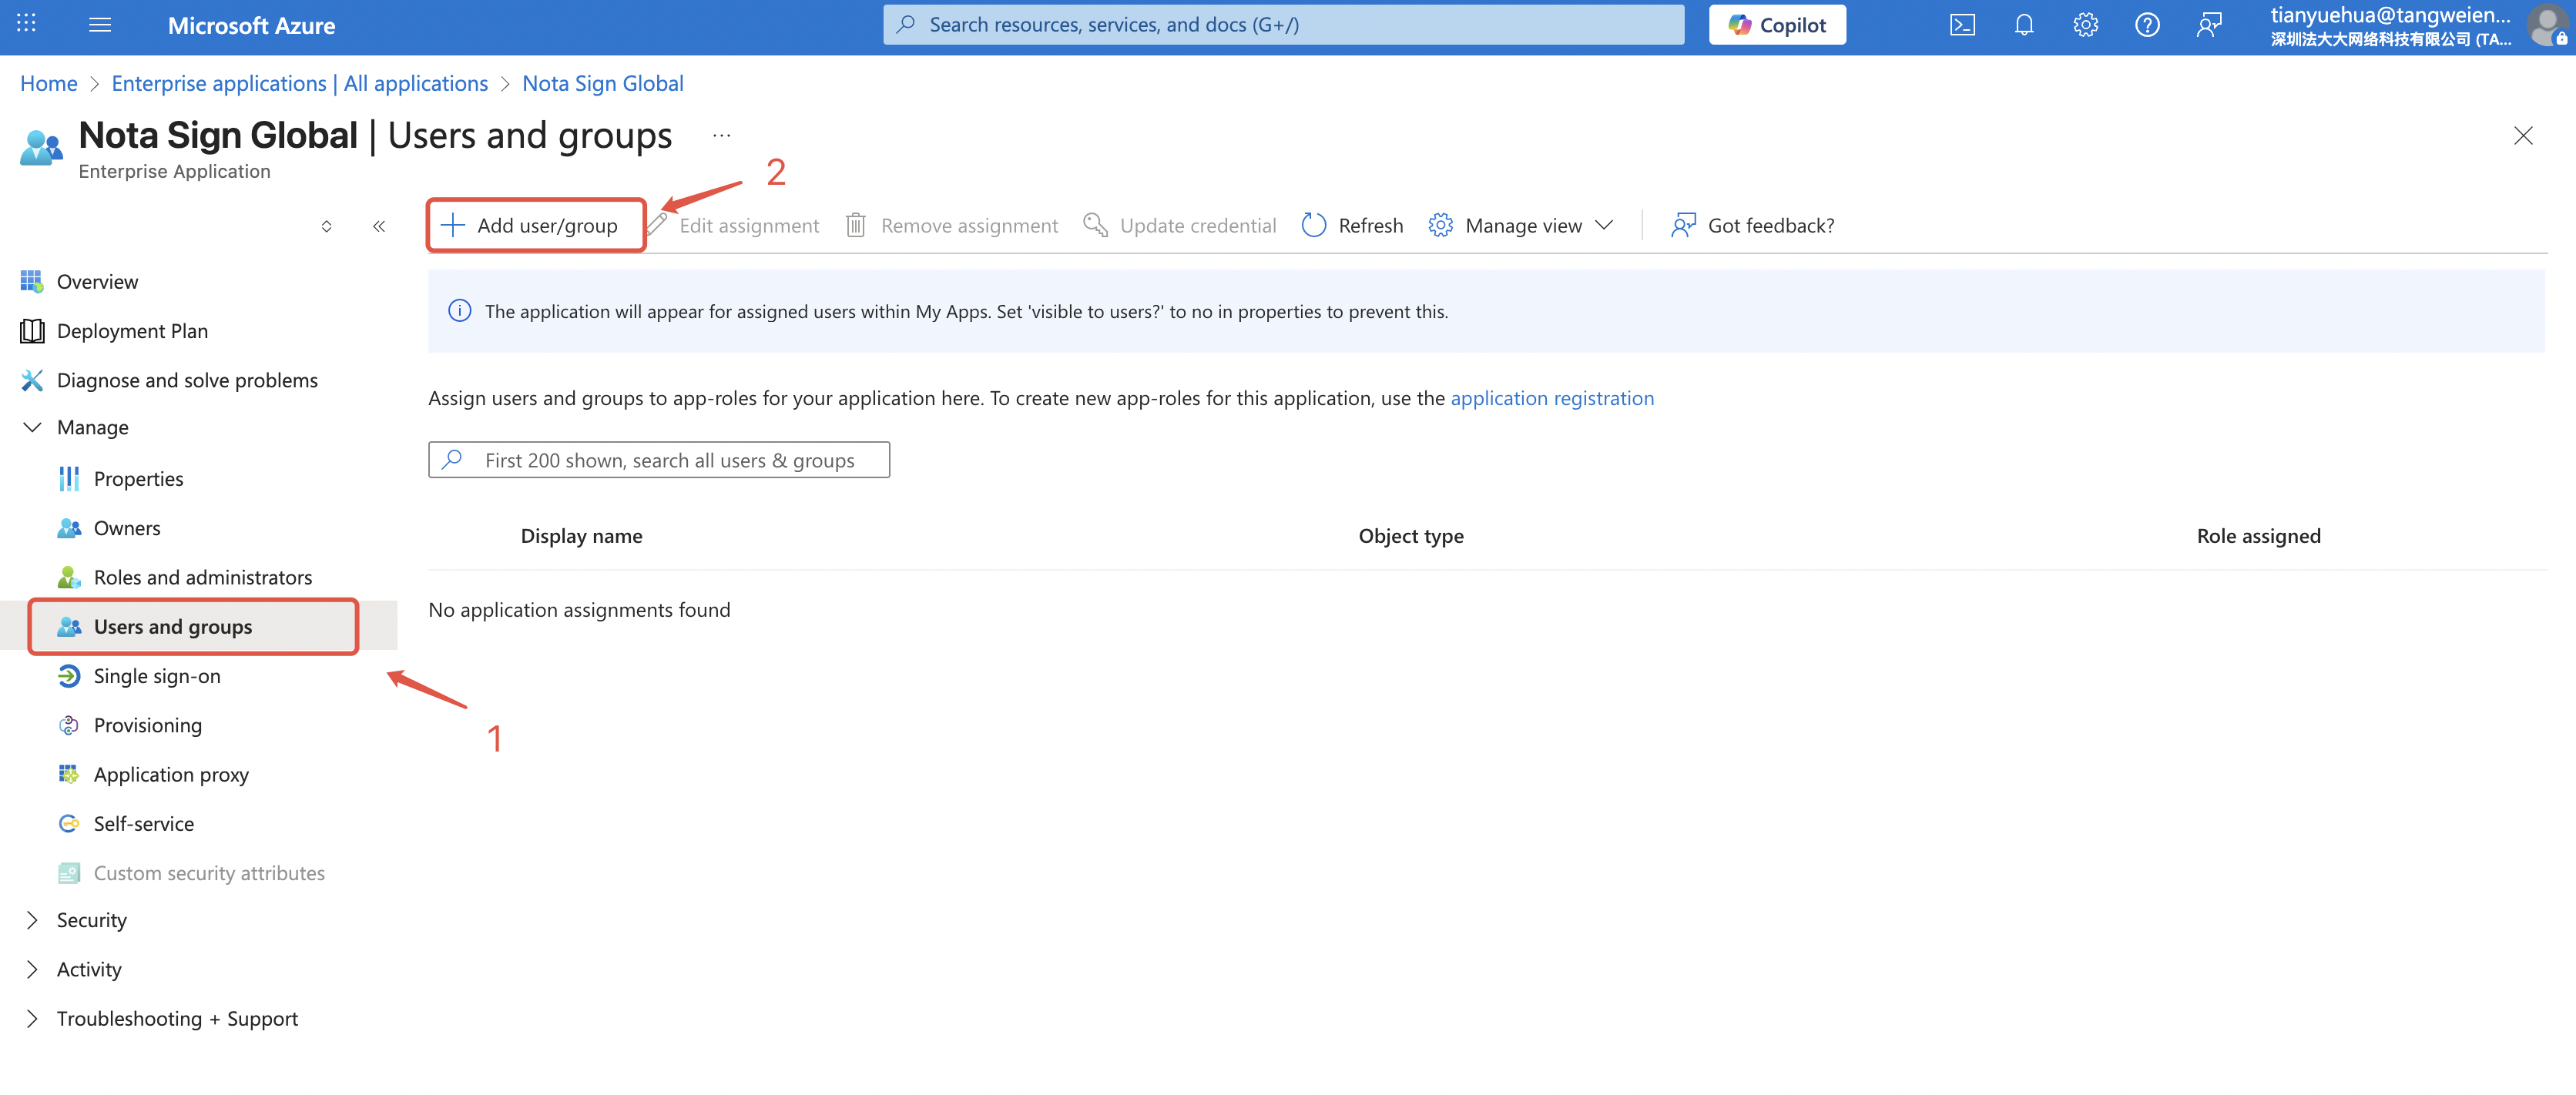
- Assign the user to the SAML application;
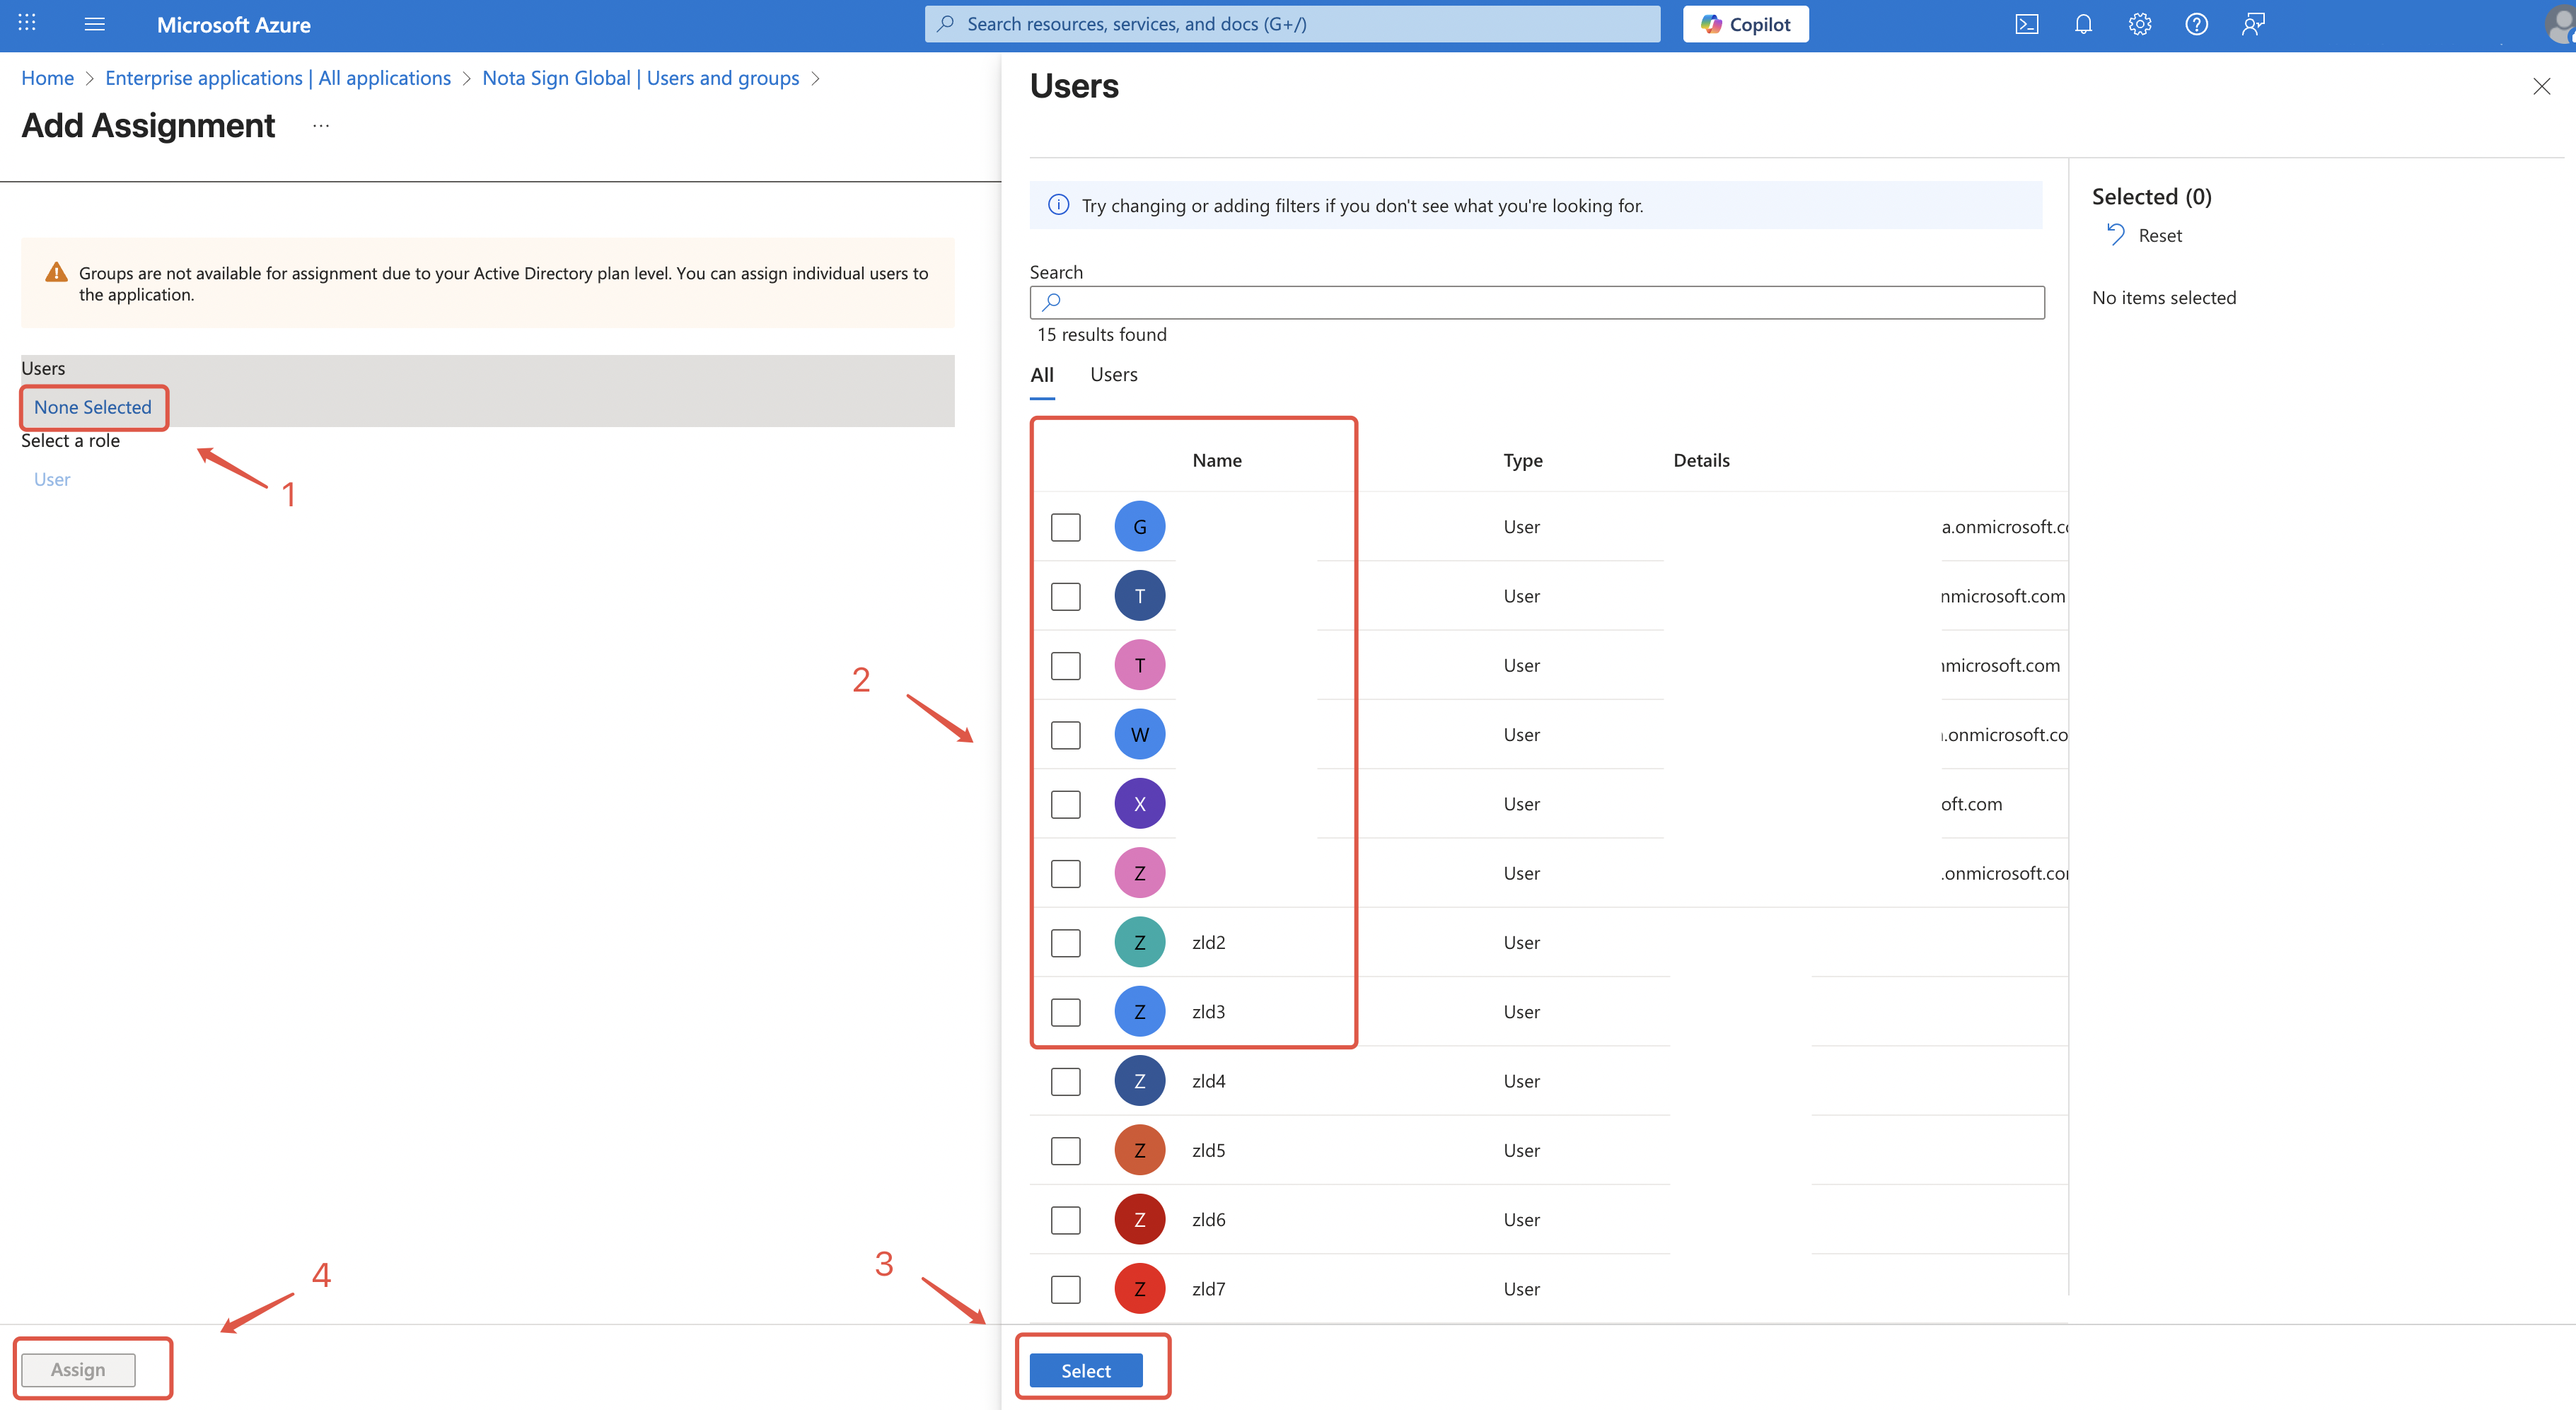
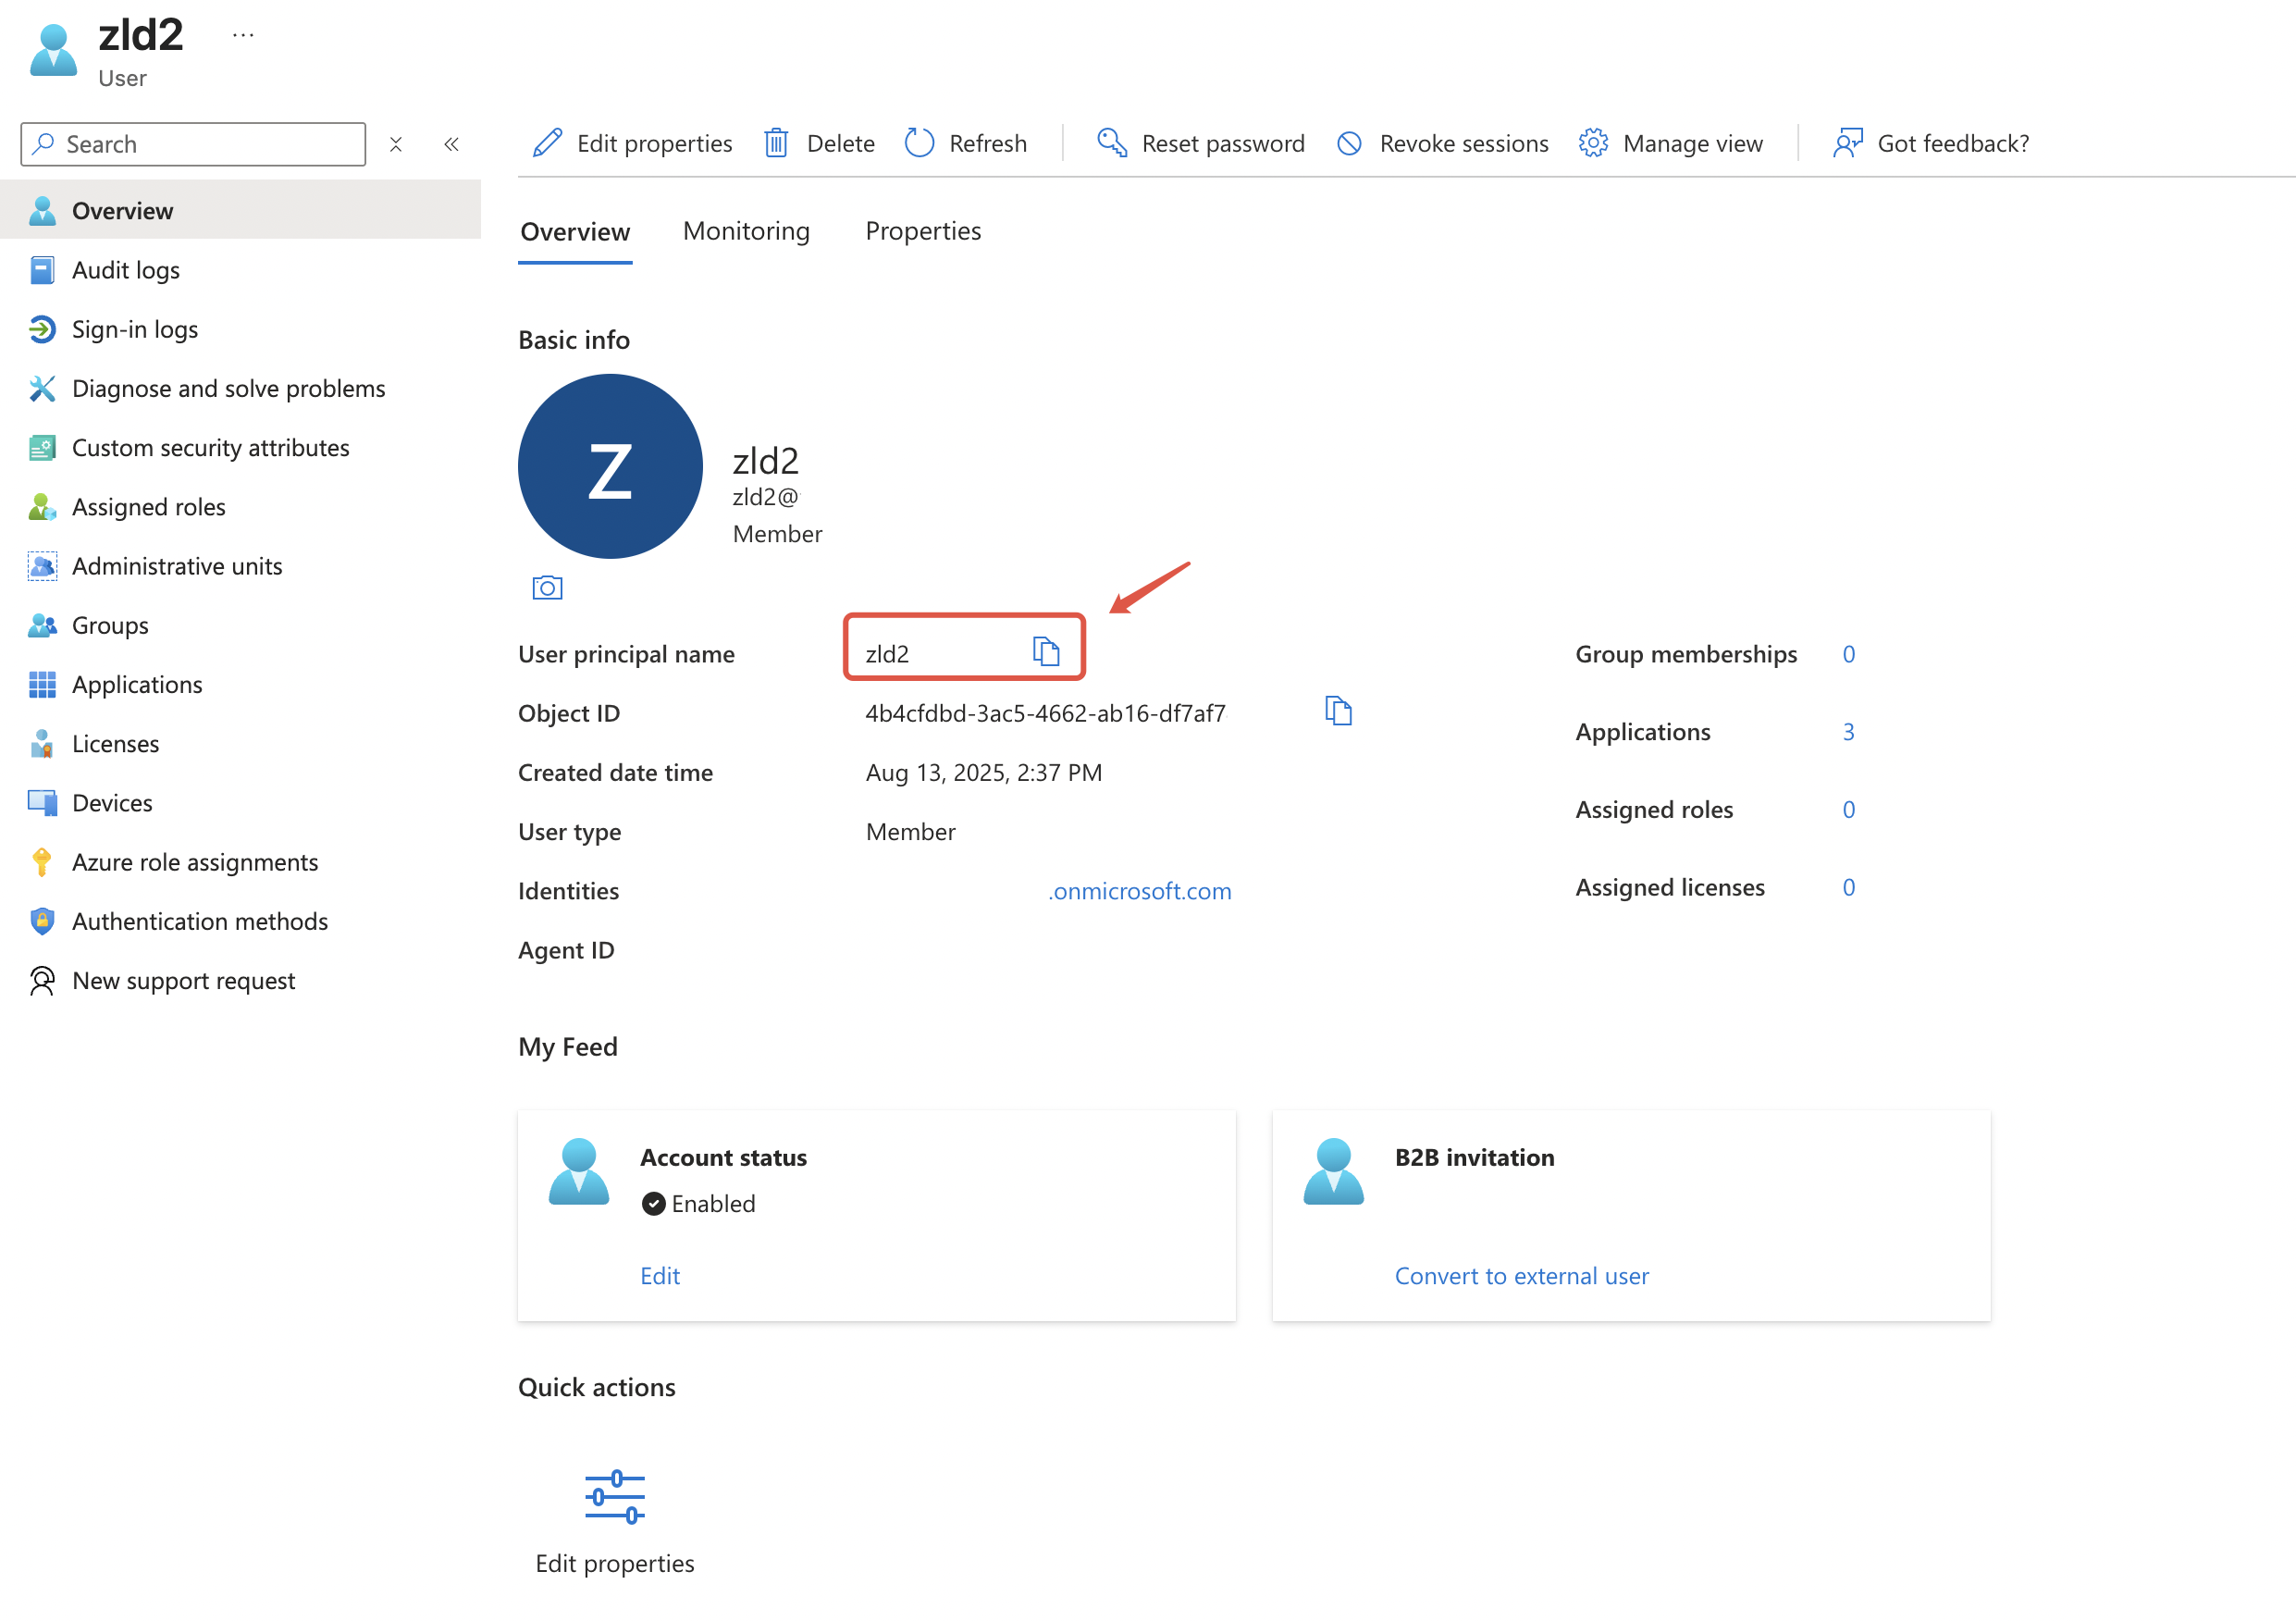
- Copy the user principal name (IdP identifier);
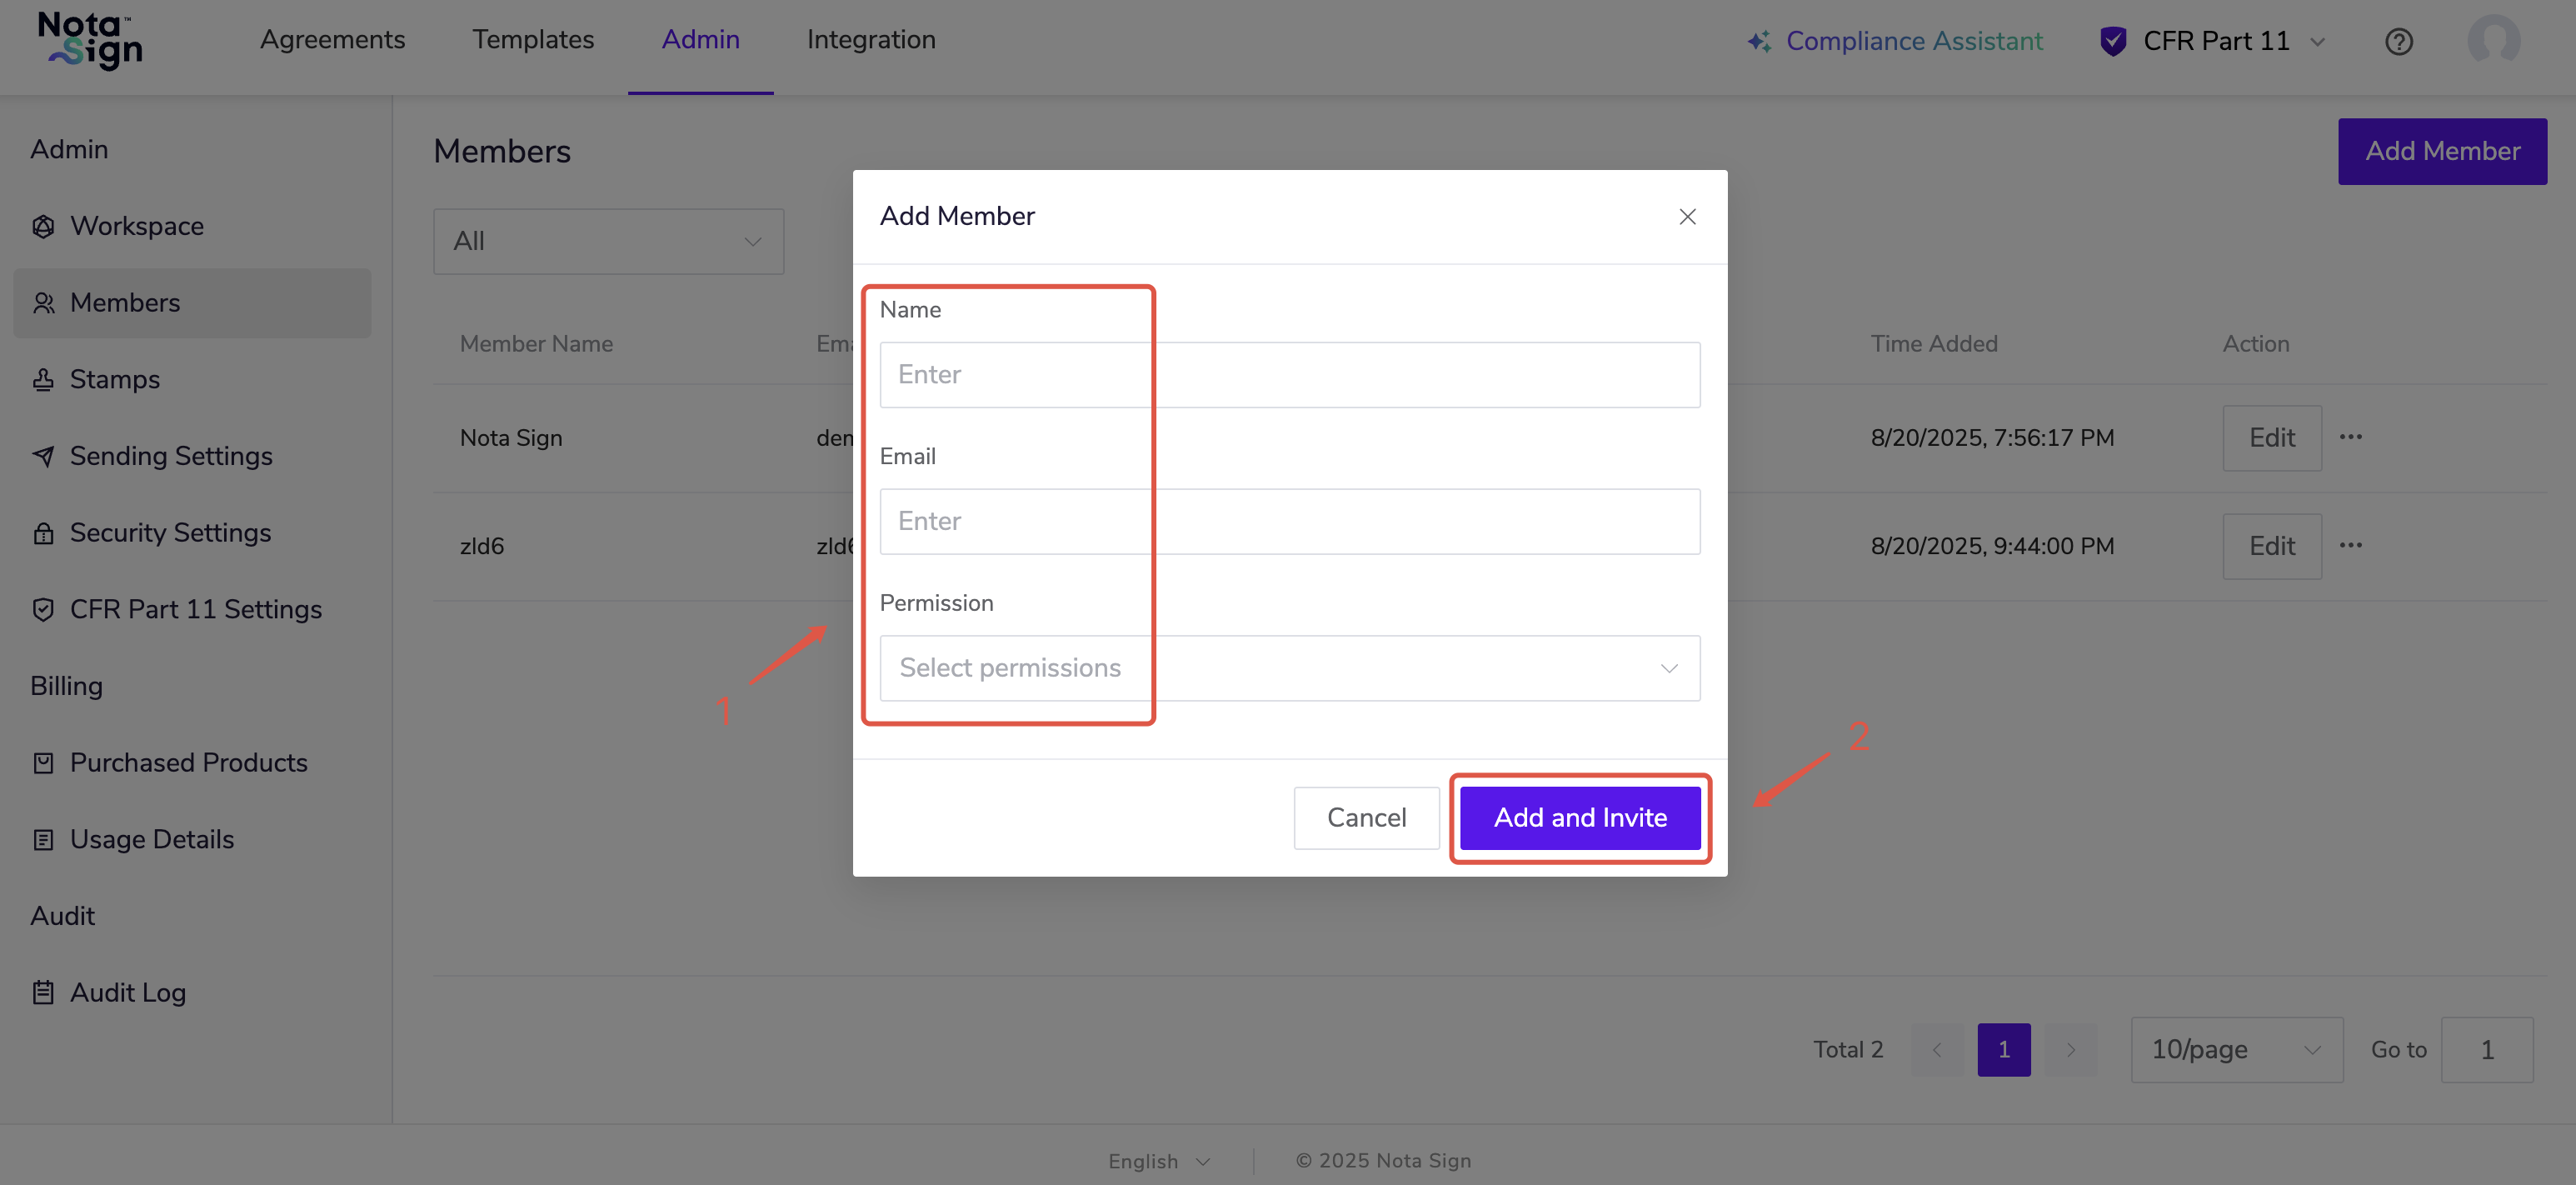
- Log in to the Nota Sign Console and go to Management > Member Management > Add Member;
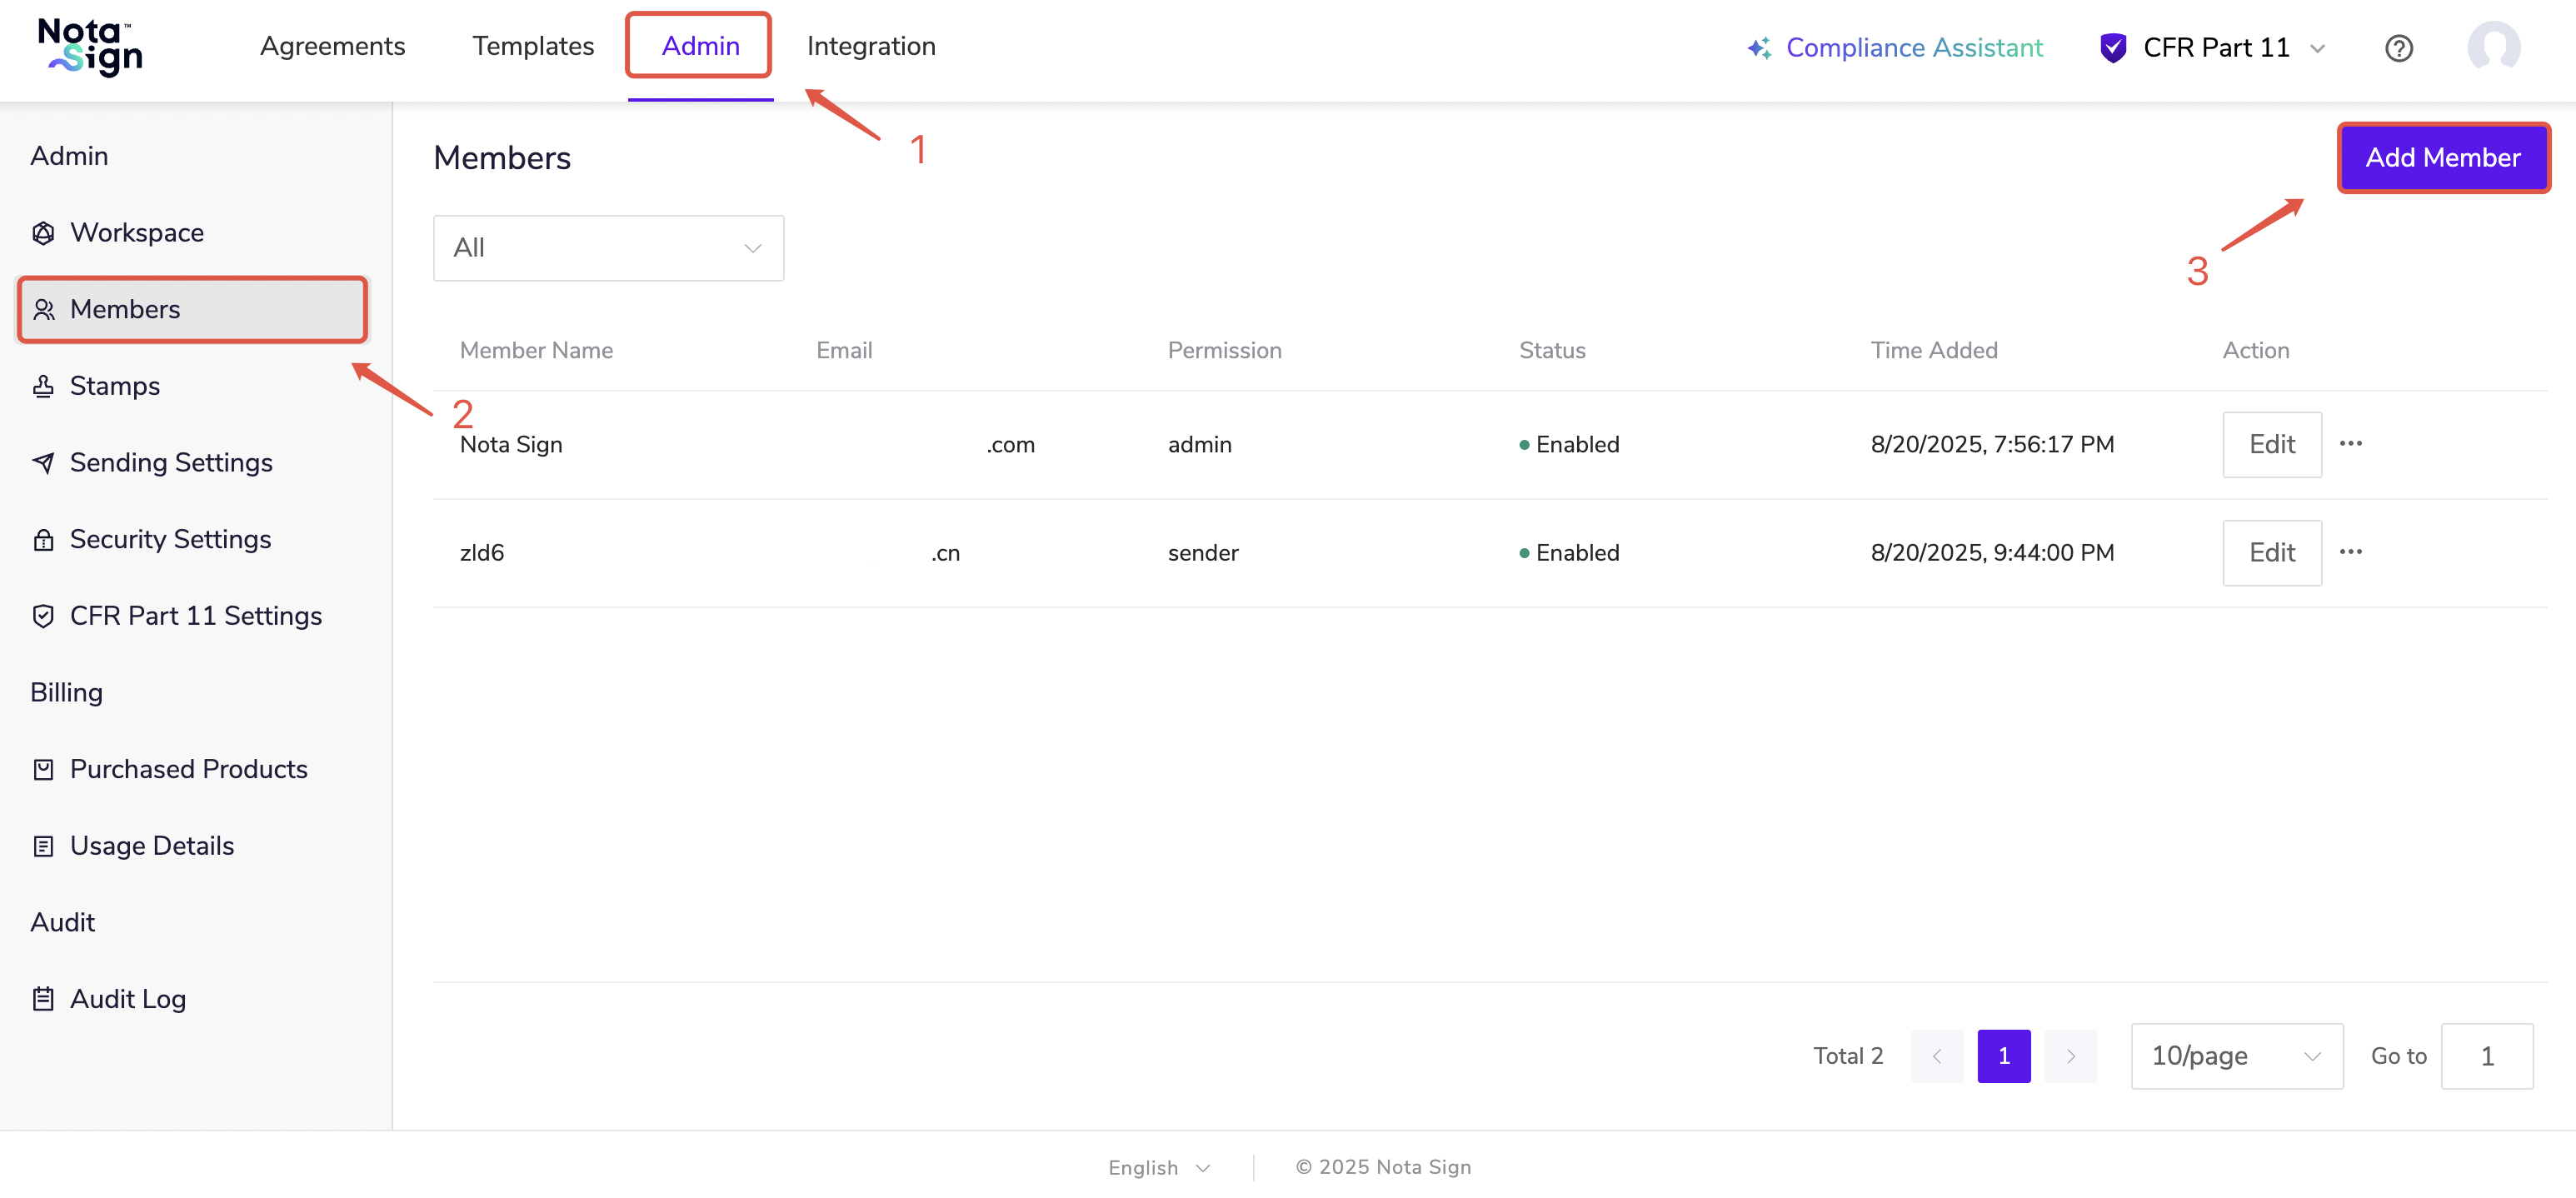
- Enter the member’s name, email (IdP identifier), assign permissions, and click Add and Invite to complete the process.