Configuring SSO on the Identity Provider (IdP) Side (Microsoft Example)
Notes:
Nota Sign supports integration based on the SAML 2.0 protocol.
Currently, login accounts cannot be automatically synchronized between the IdP and SP. You must manually add them in the Fadada SaaS Console.
You must have administrative permissions for your internal unified login system (IdP).
The following steps use Microsoft Azure as an example to demonstrate how to configure SSO:
Step 1. Create a SAML Application
Log in to the IdP.
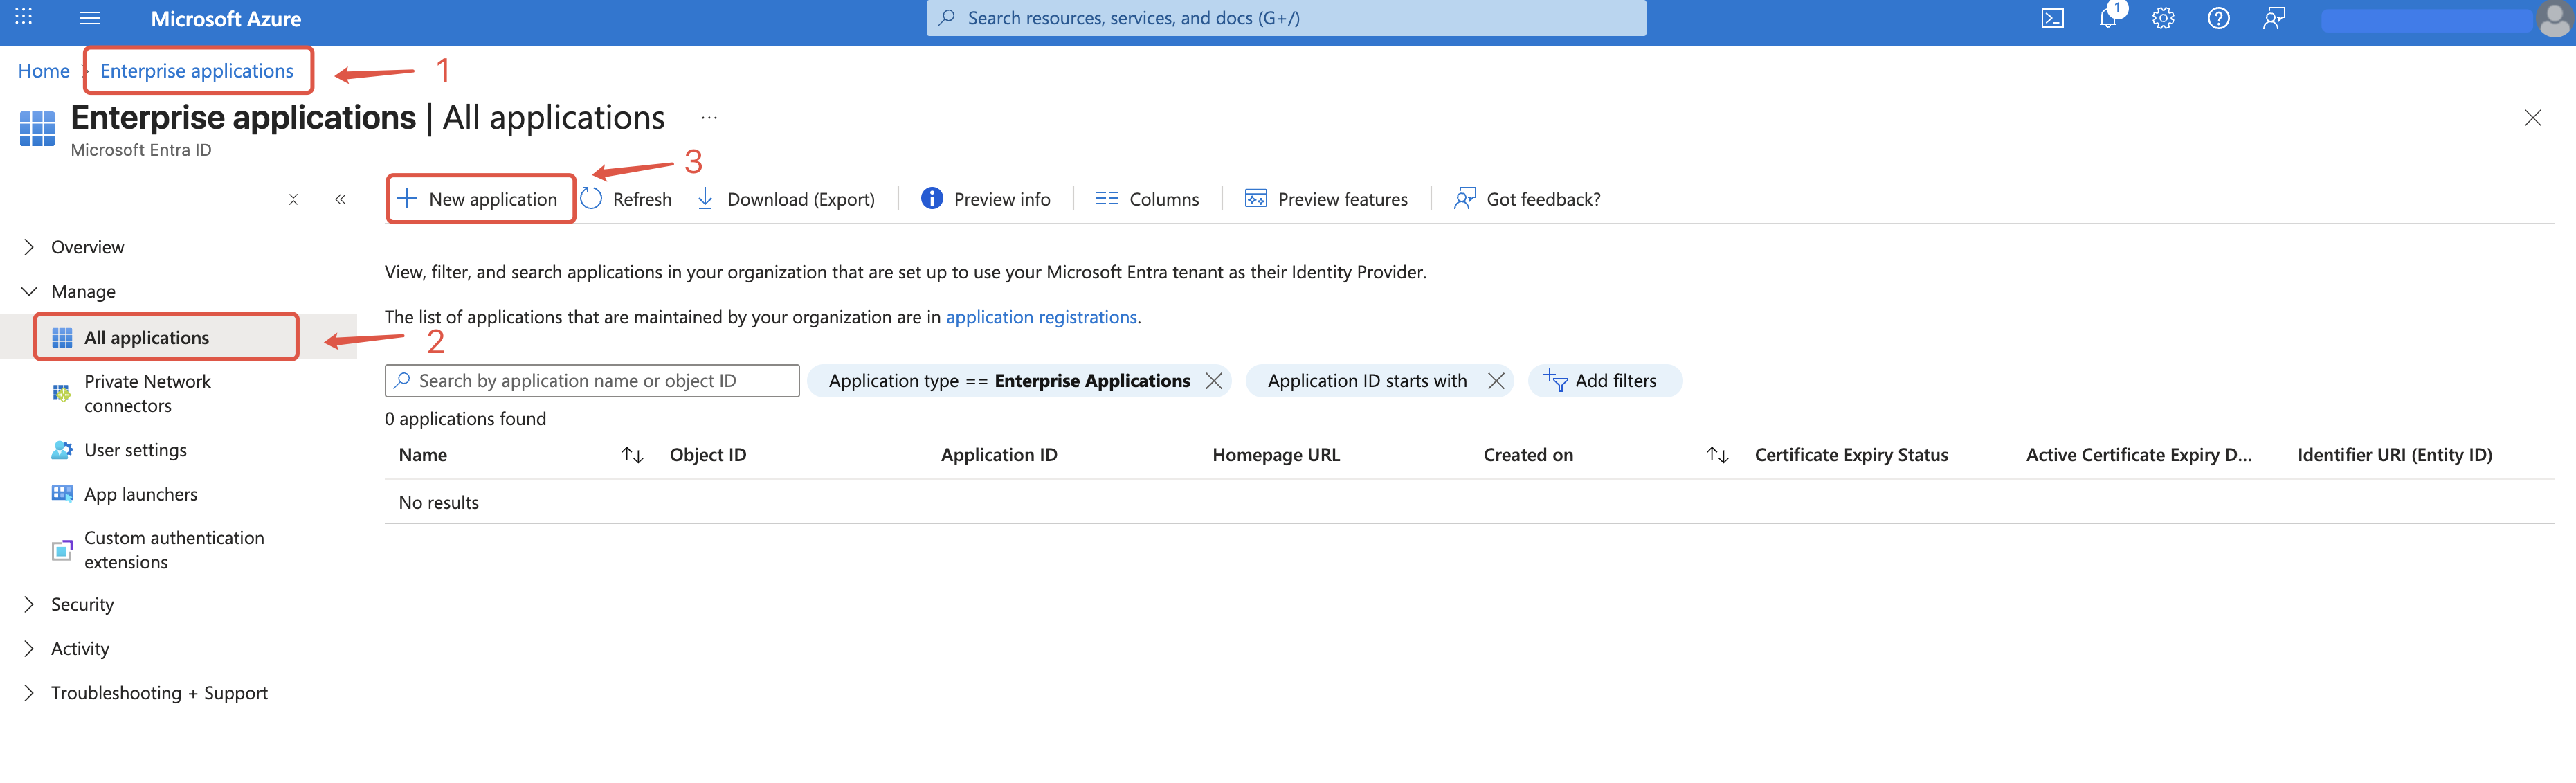
Go to Enterprise Applications and click New Application.
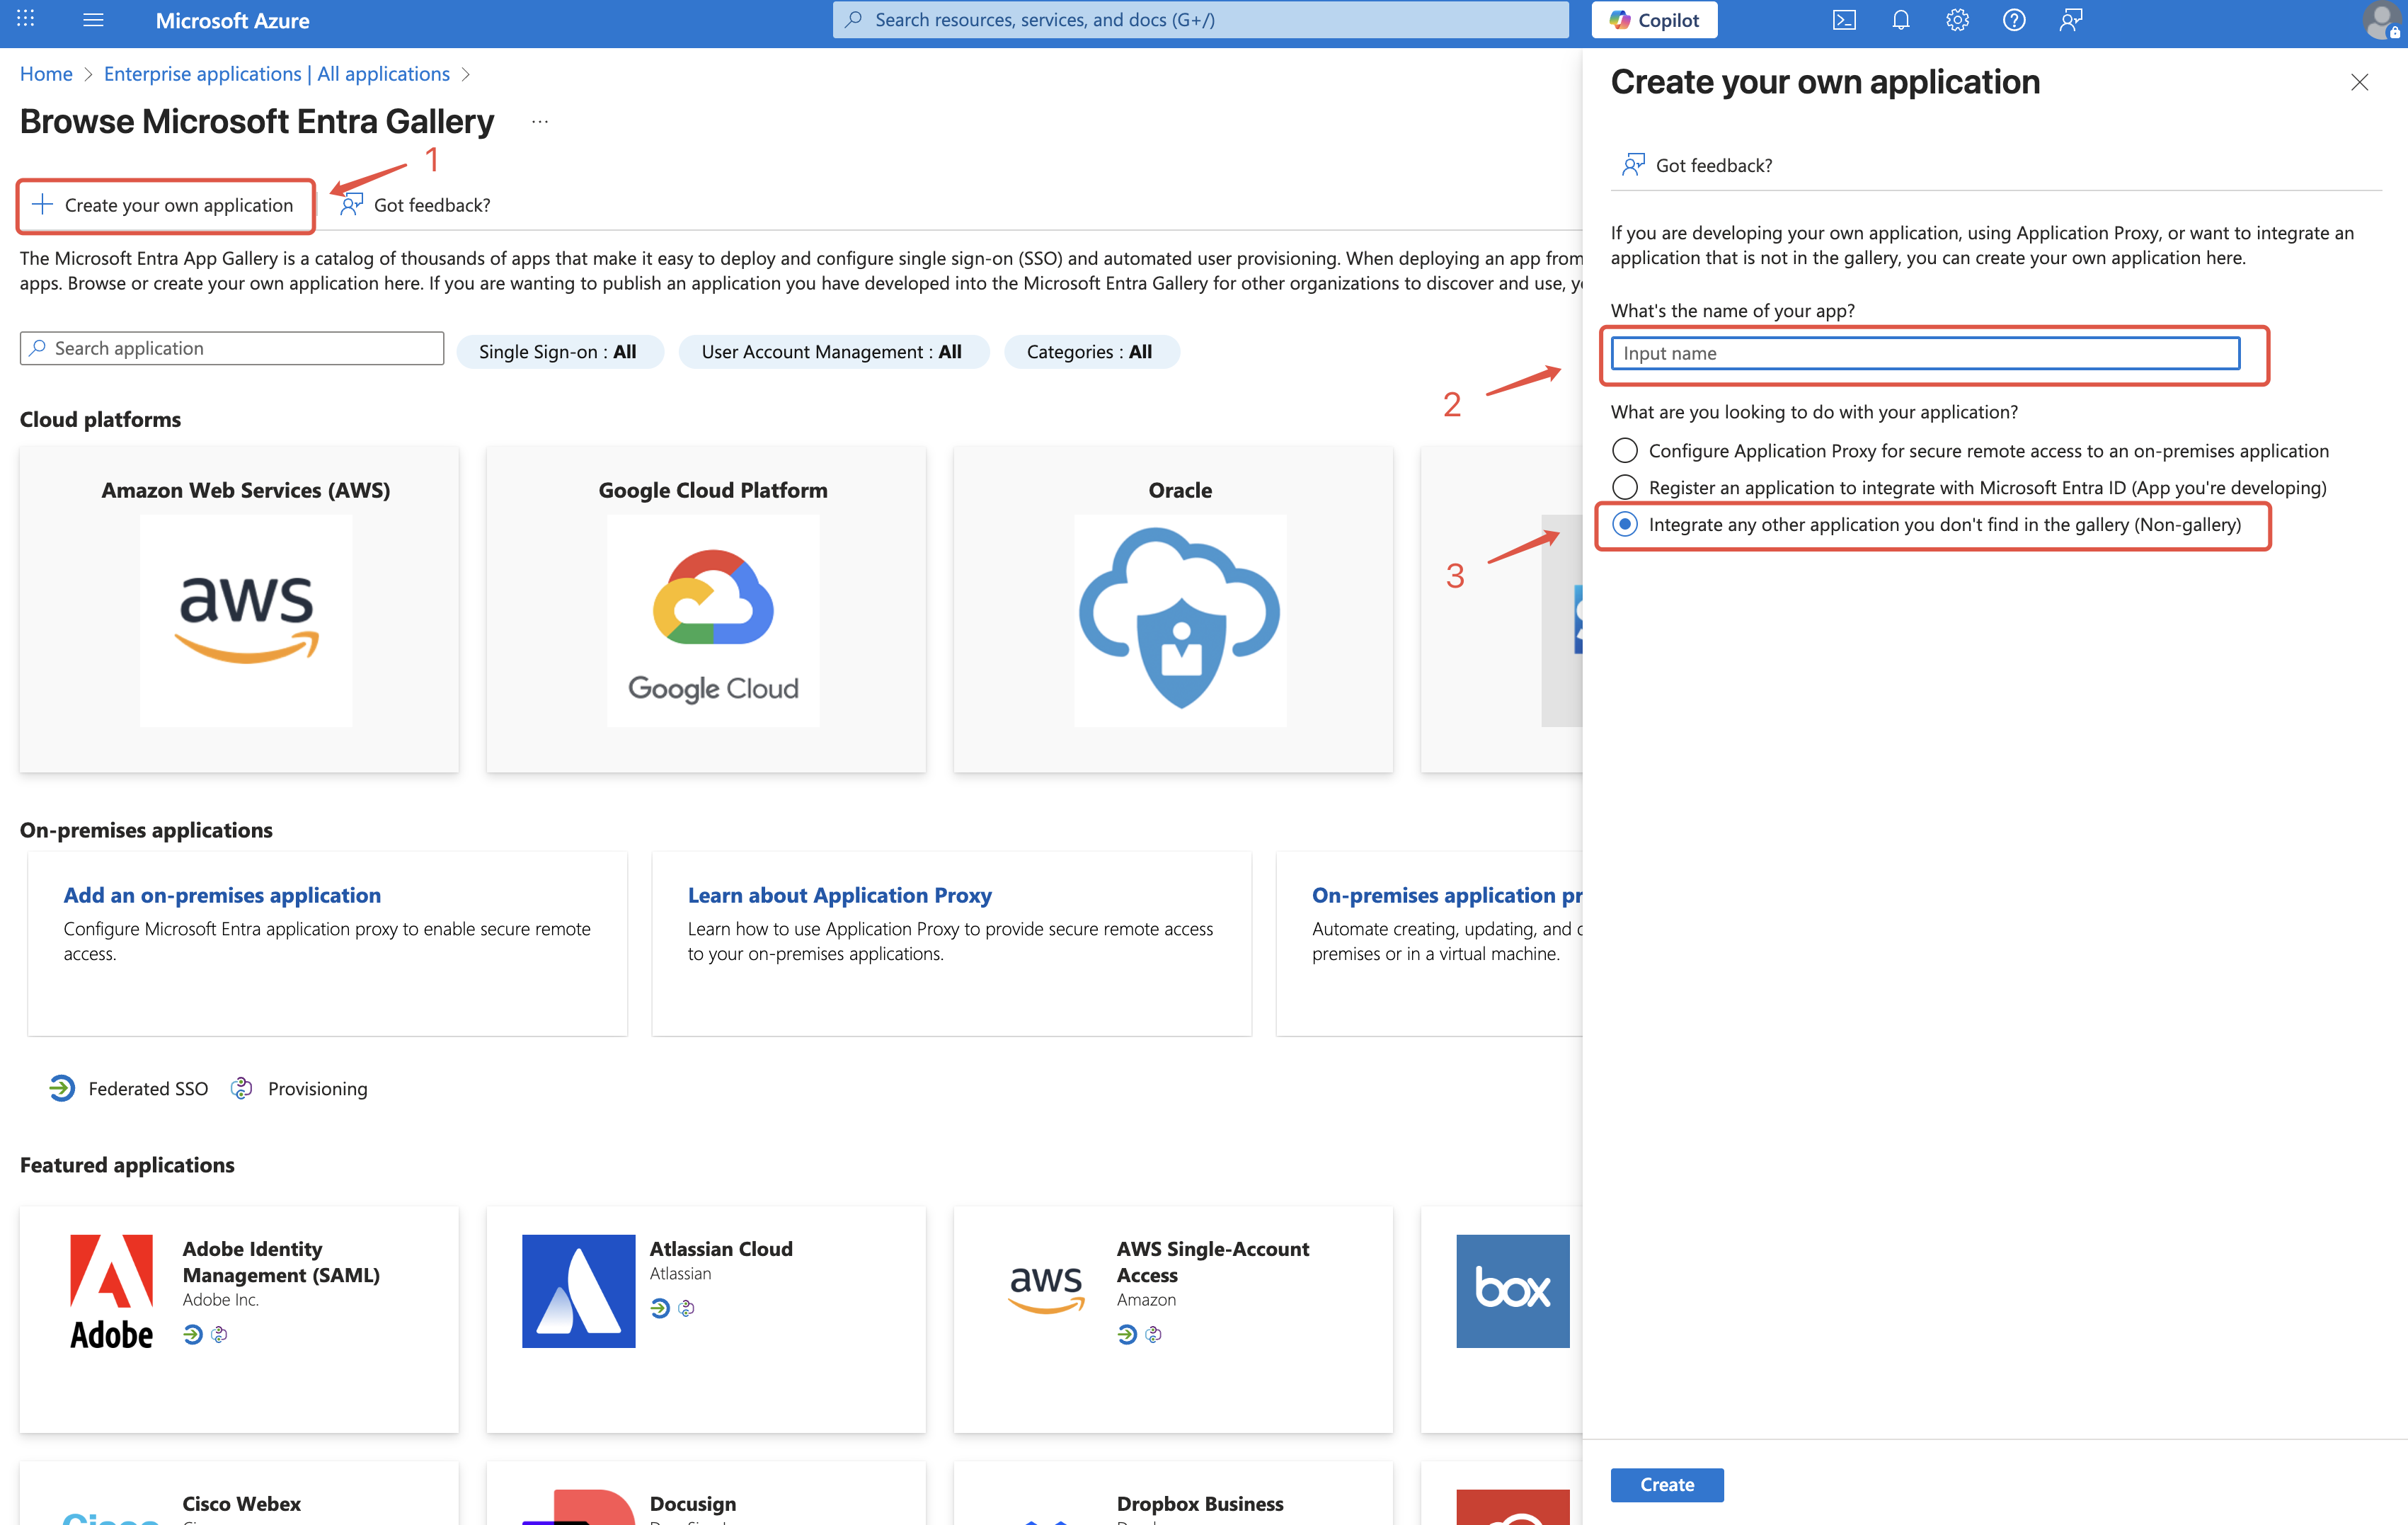
Click Create your own application.
Enter an application name. It is recommended to use the enterprise name for easier identification.
Check Integrate any other application you don’t find in the gallery (non-gallery).
Step 2. Obtain SAML Application Configuration
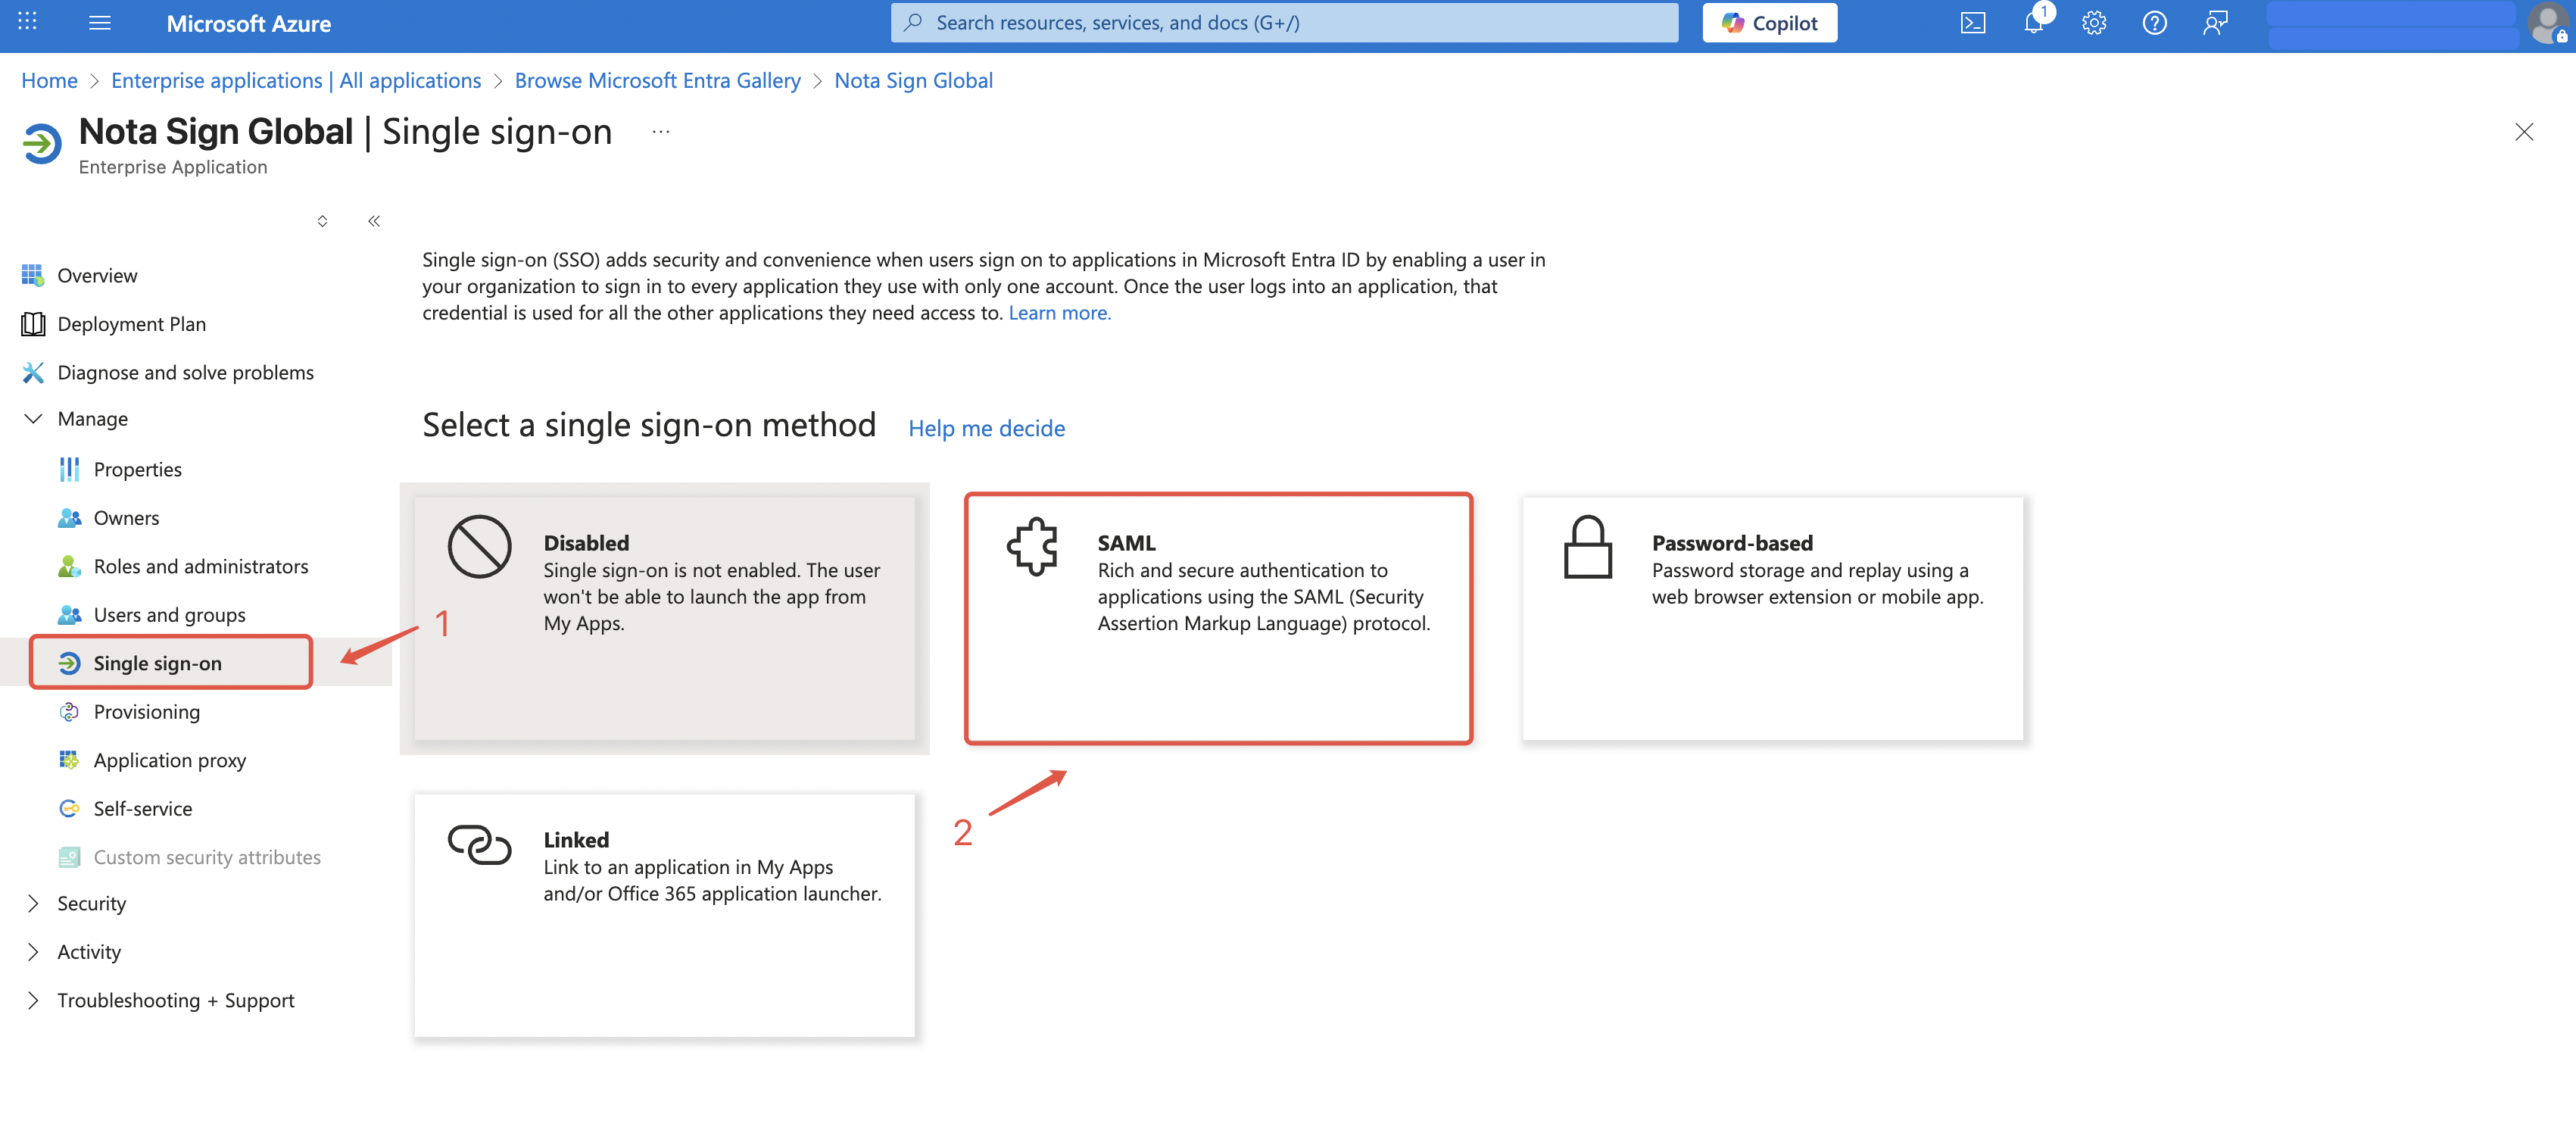
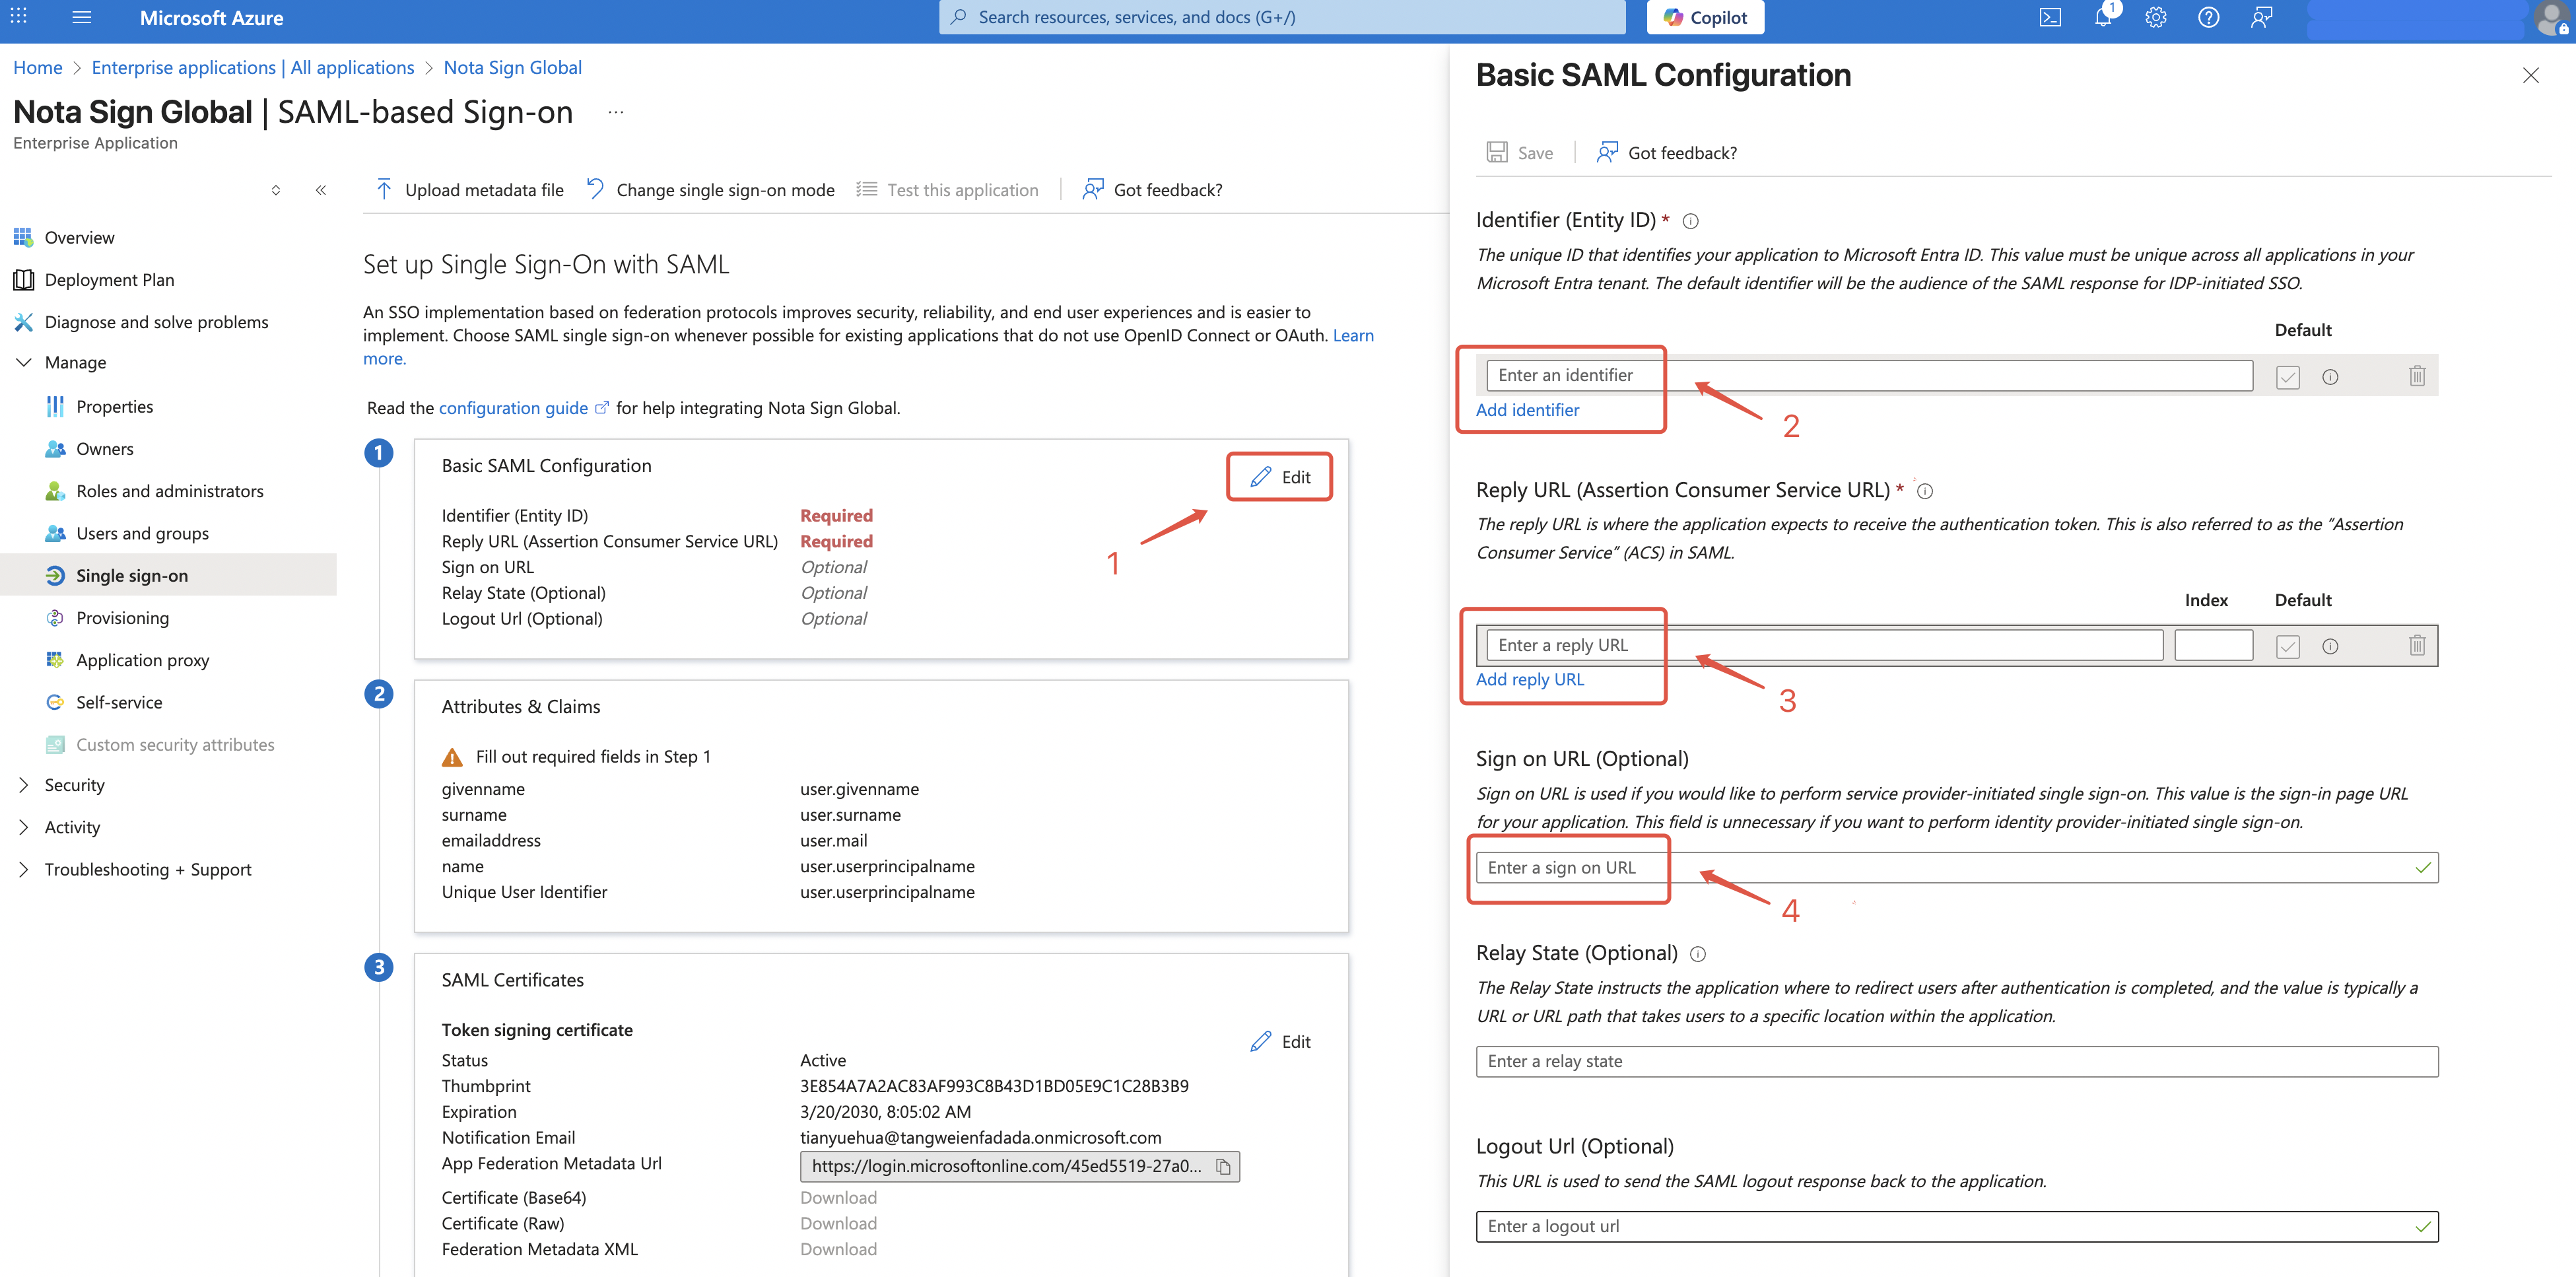
Open the created application and go to Single sign-on from the left menu.
Select SAML login.
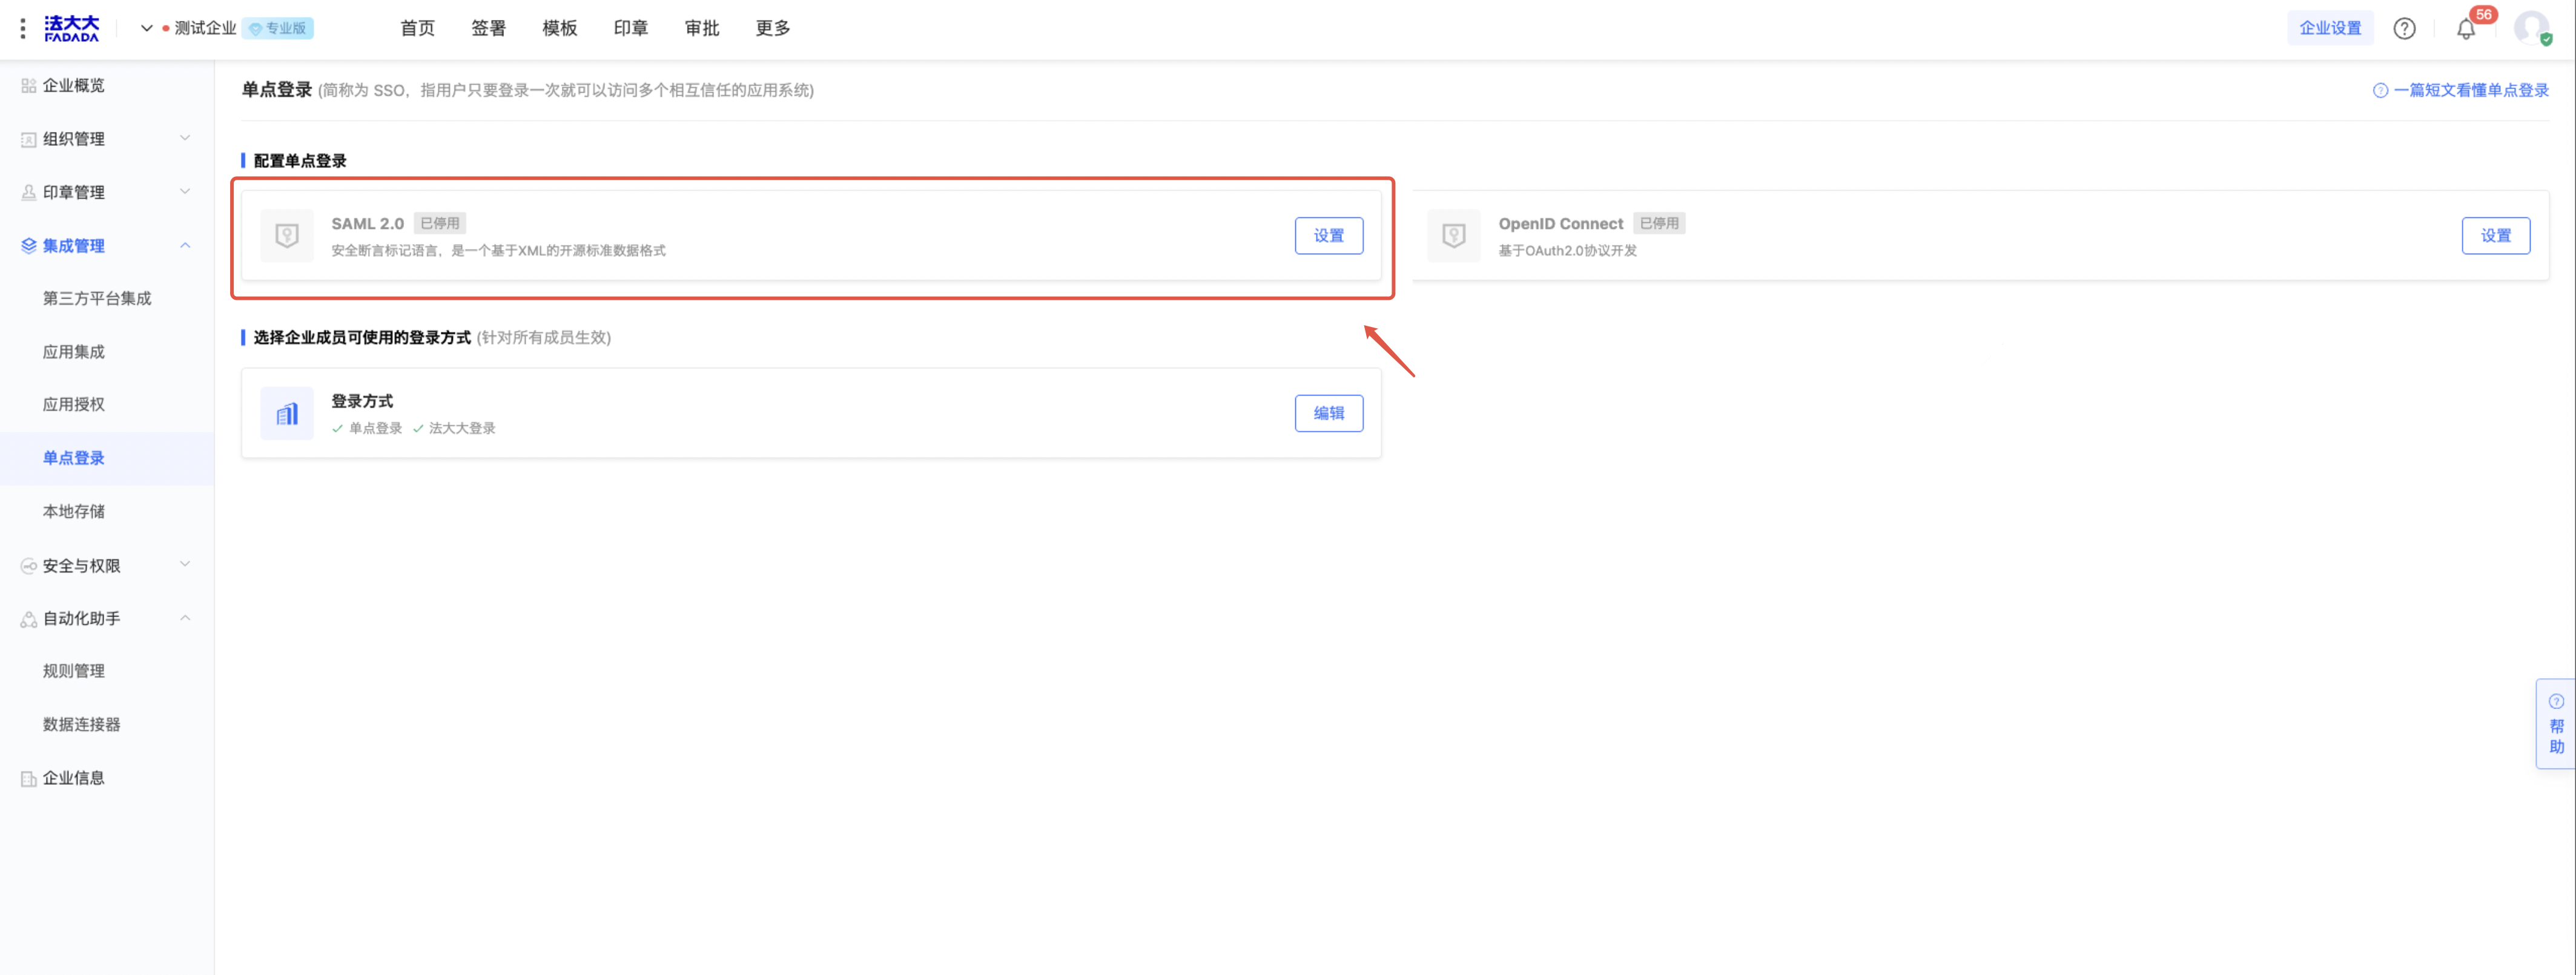
- Log in to the Fadada SaaS Service Platform, and navigate to Enterprise Settings > Integration Management > Single Sign-On.
- Copy the SP Entity ID, SP Callback URL (Reply URL/ACS URL), and Login URL back into the SAML application configuration.
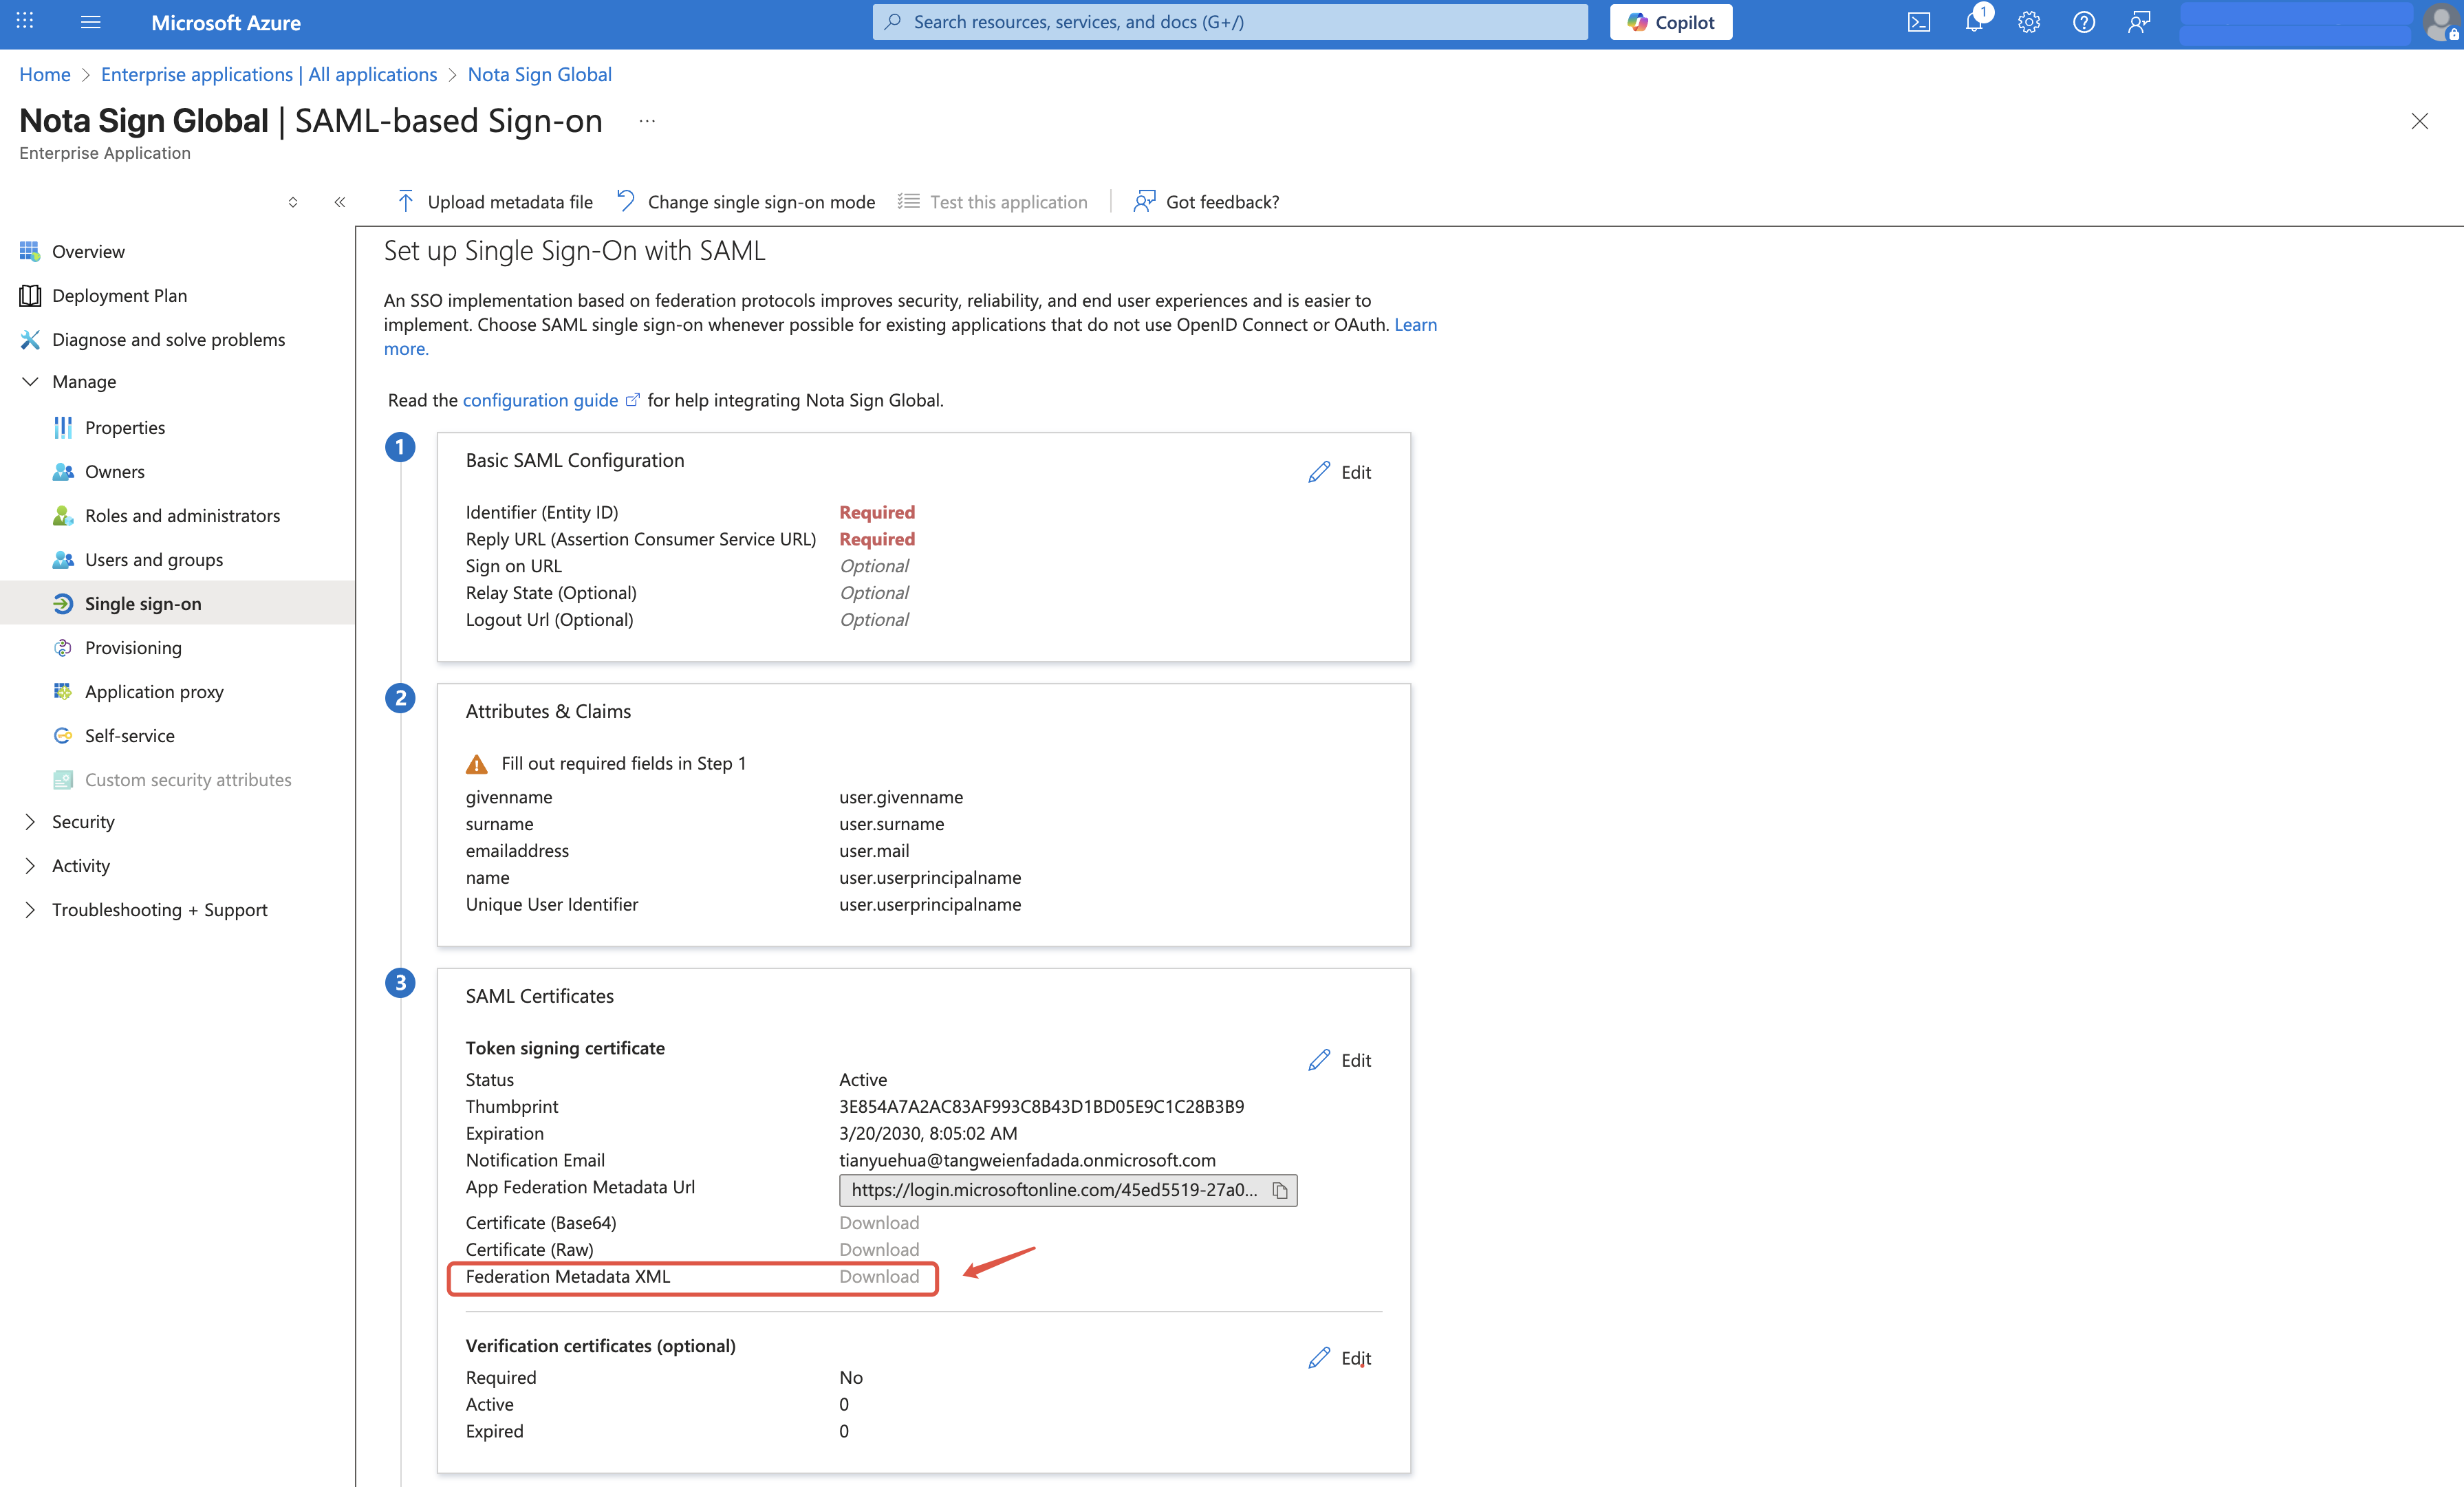
Step 3. Download Metadata File
Download the Federation Metadata XML file of the SAML application.