
Signing a Simple Electronic Signature Envelope with ID verification (SES+eKYC)
Video Tutorial:
1. Accessing the Envelope
You can access the envelope through two main methods:
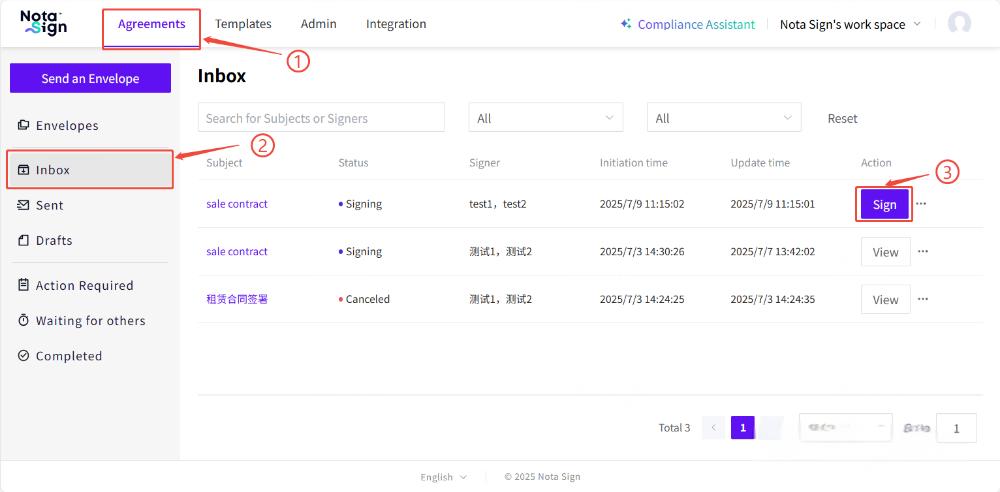
Option 1: From the Nota Sign Dashboard
Log in to your Nota Sign account.
Navigate to Agreements.
Click on the Inbox tab in the left sidebar.
Locate the envelope you need to sign and click Sign.
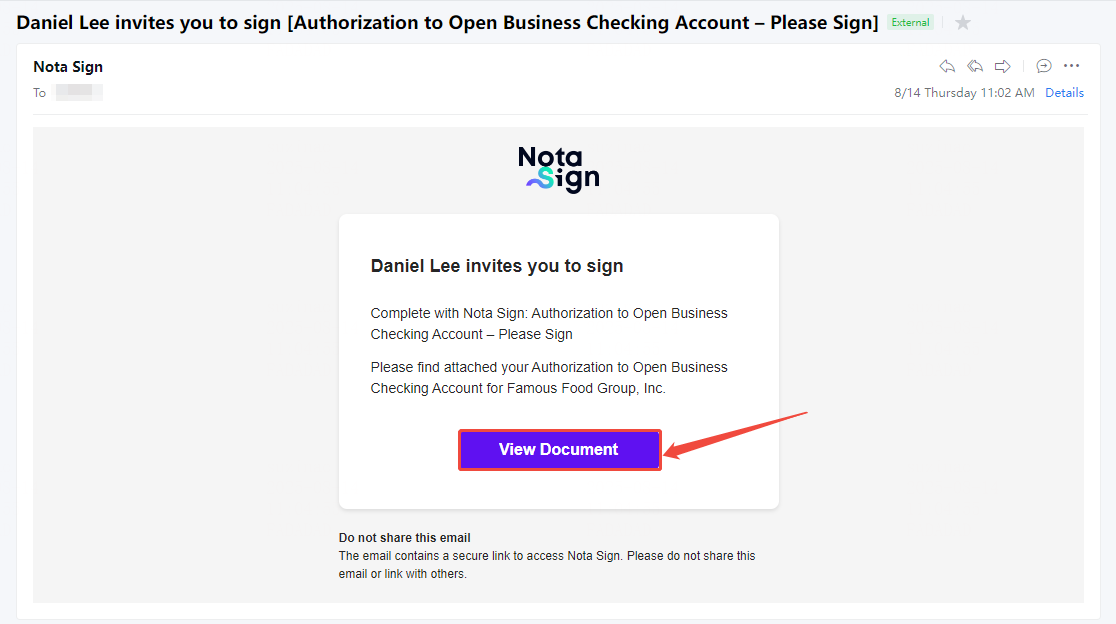
Option 2: From the Email Invitation
Open the signature request email sent by Nota Sign.
Click View Document to open the envelope directly in your browser.
2. Signing Process
Step 1: Select Verification Method (Desktop)
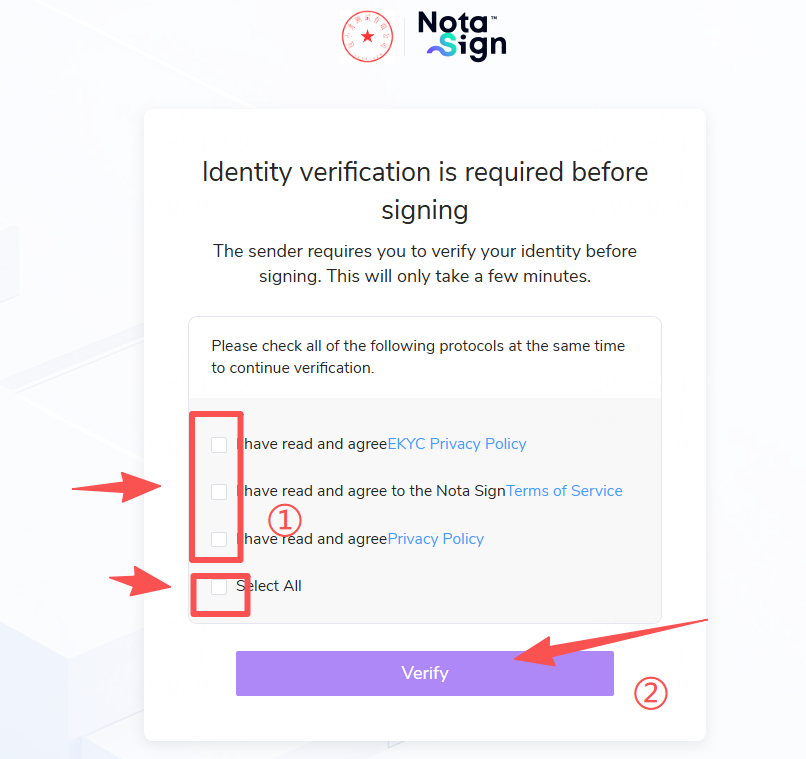
Carefully read and agree to the three relevant agreements separately, or directly click "Select All". Then click [Start Verification];.
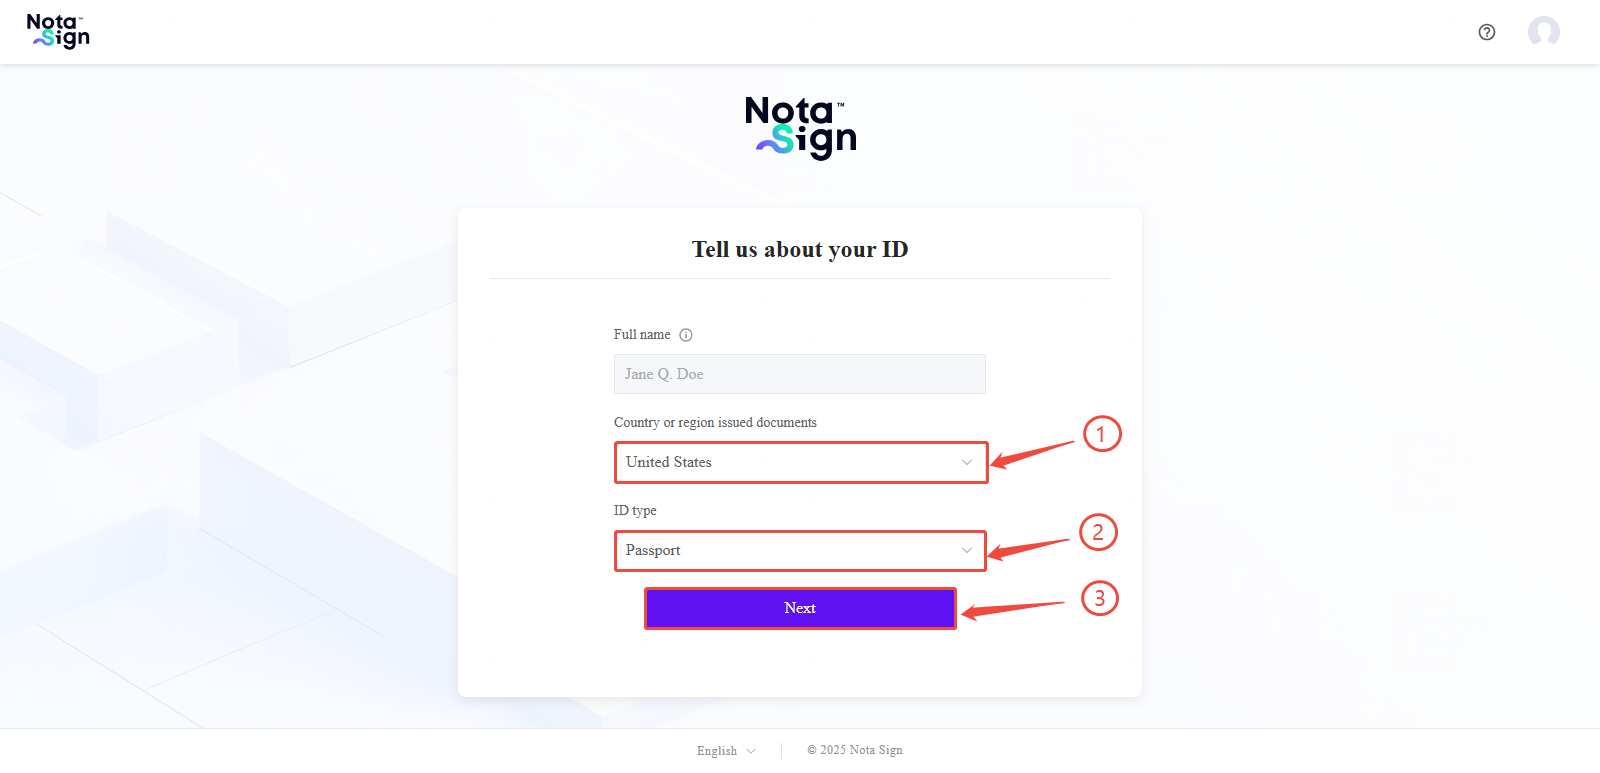
Select the country or region that issued your identification document.
Choose the document type.
Click Next to proceed to the verification process.
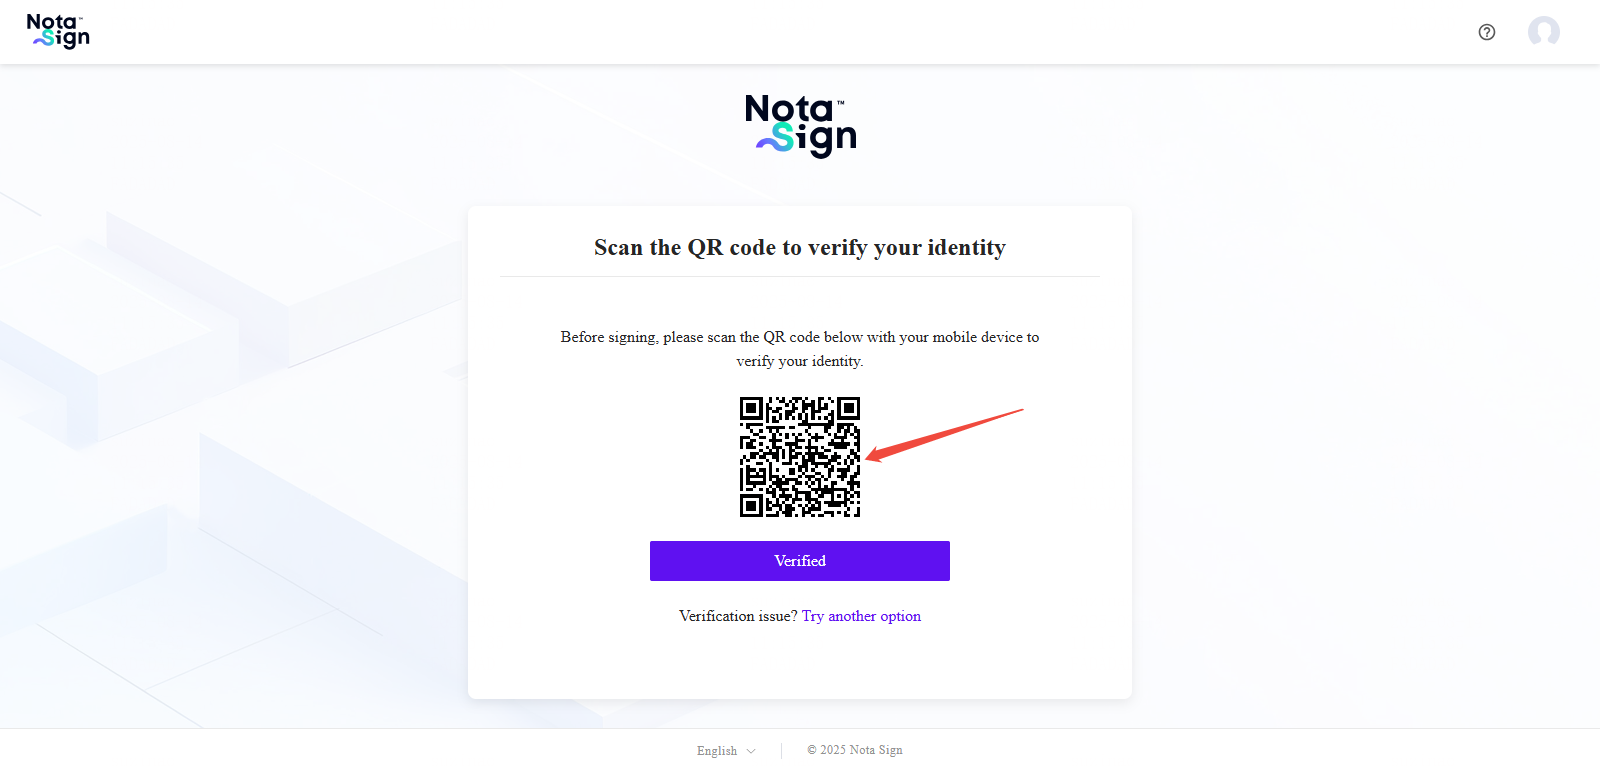
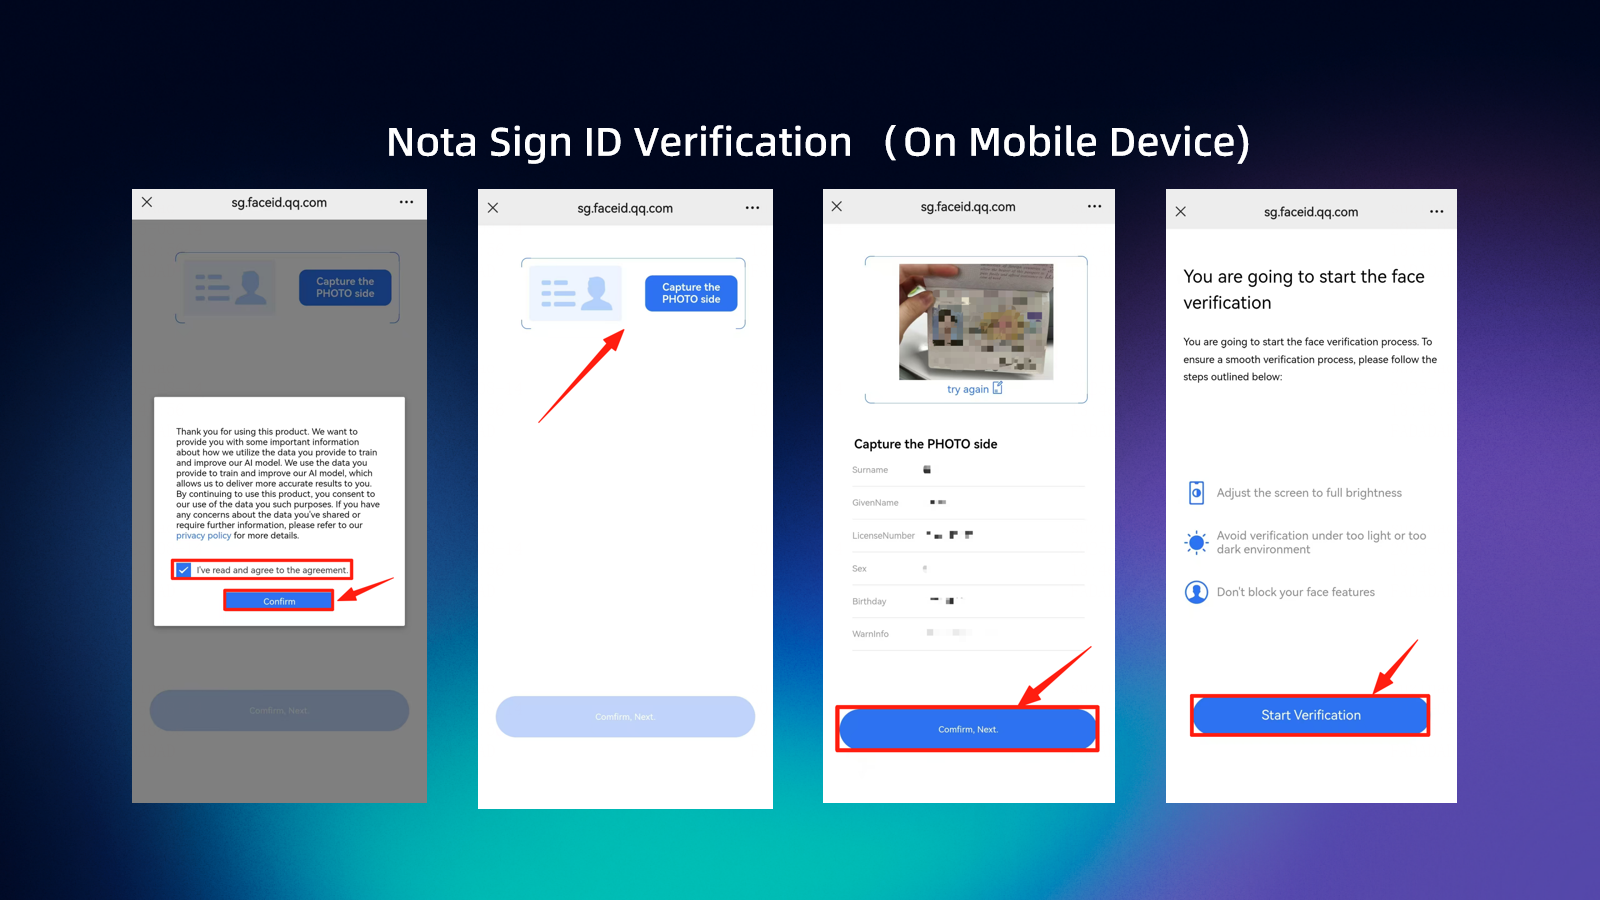
Step 2: Complete Identity Verification (Mobile)
Use your mobile device to scan the QR code displayed on your desktop.
Review the terms and conditions on your mobile device, check the box to agree, and click Confirm.
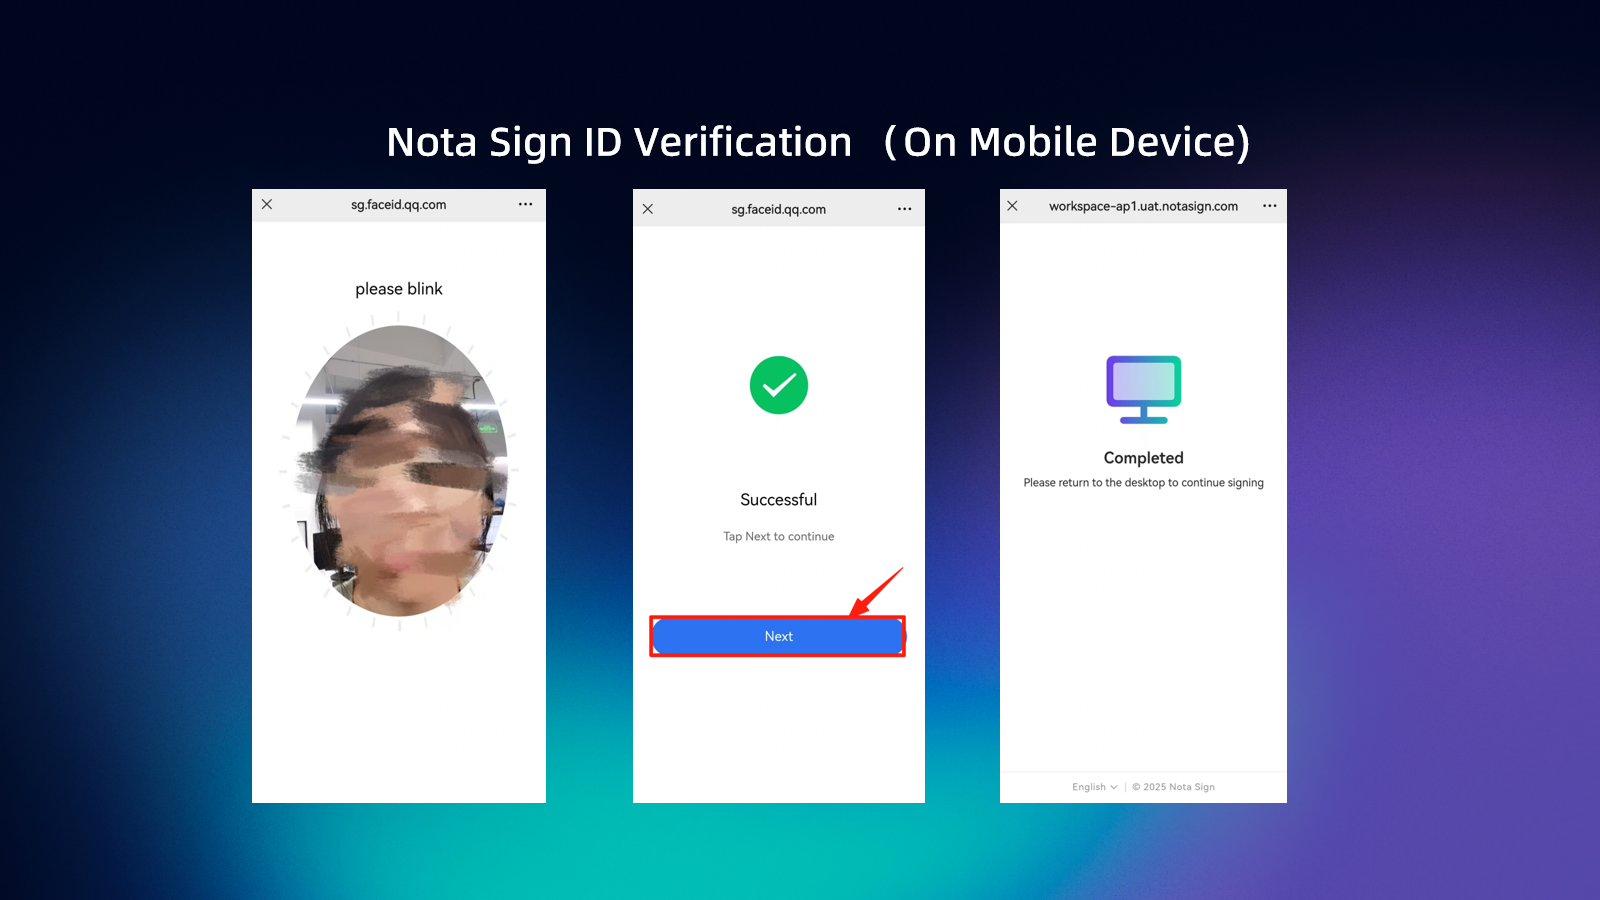
Follow the on-screen instructions to complete facial recognition and identity verification.
Once verification is complete, return to the signing page on your desktop.
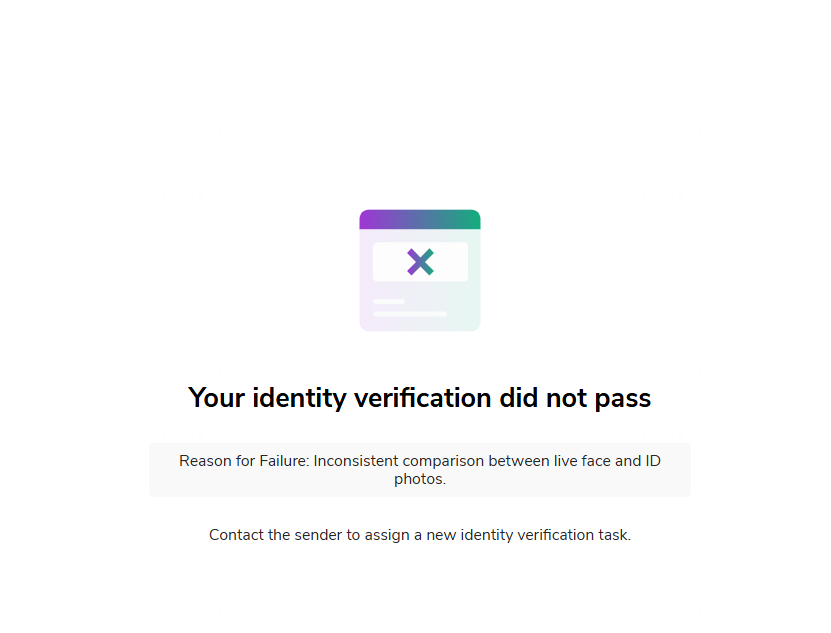
eKYC Verification Failure Scenario: The recipient has a certain maximum number of self-service retry attempts based on the sender's backend management settings. If the recipient successfully verifies within the retry limit, the PC will automatically redirect to the signing interface. If the recipient fails to verify after reaching the retry limit, the PC will display the following result page:
Scenario Where the Recipient Name Provided When Initiating Signing Does Not Match the Name on the ID Document: When the recipient name provided at the time of initiating signing does not match the name on the ID document, an email notifying the sender of the verification failure will be triggered simultaneously. If the sender has checked [Default Allow Verifier Rename] in the backend, and the recipient confirms that their own ID document name is correct, the recipient can click [Use ID Document Name]. The system will automatically complete the rename operation and update the recipient's name, then automatically redirect the page to the "Signing Page".  If the sender has not checked [Default Allow Verifier Rename] in the backend, the self-rename button will not be displayed.
 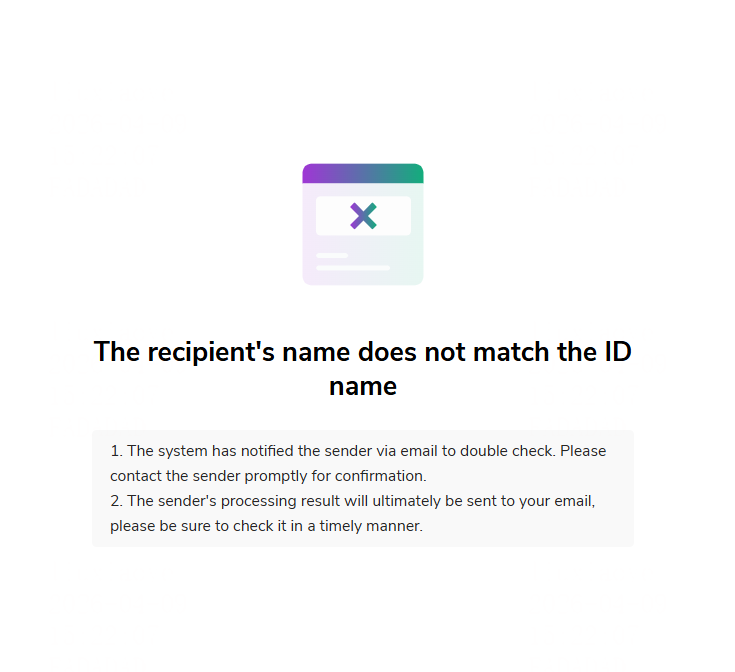 The signer has no further proactive action buttons on the current failure page and must wait for the sender to handle it in the backend (or via email). Alternatively, the signer can proactively contact the initiator to manually click "Approve" in the system. Steps:
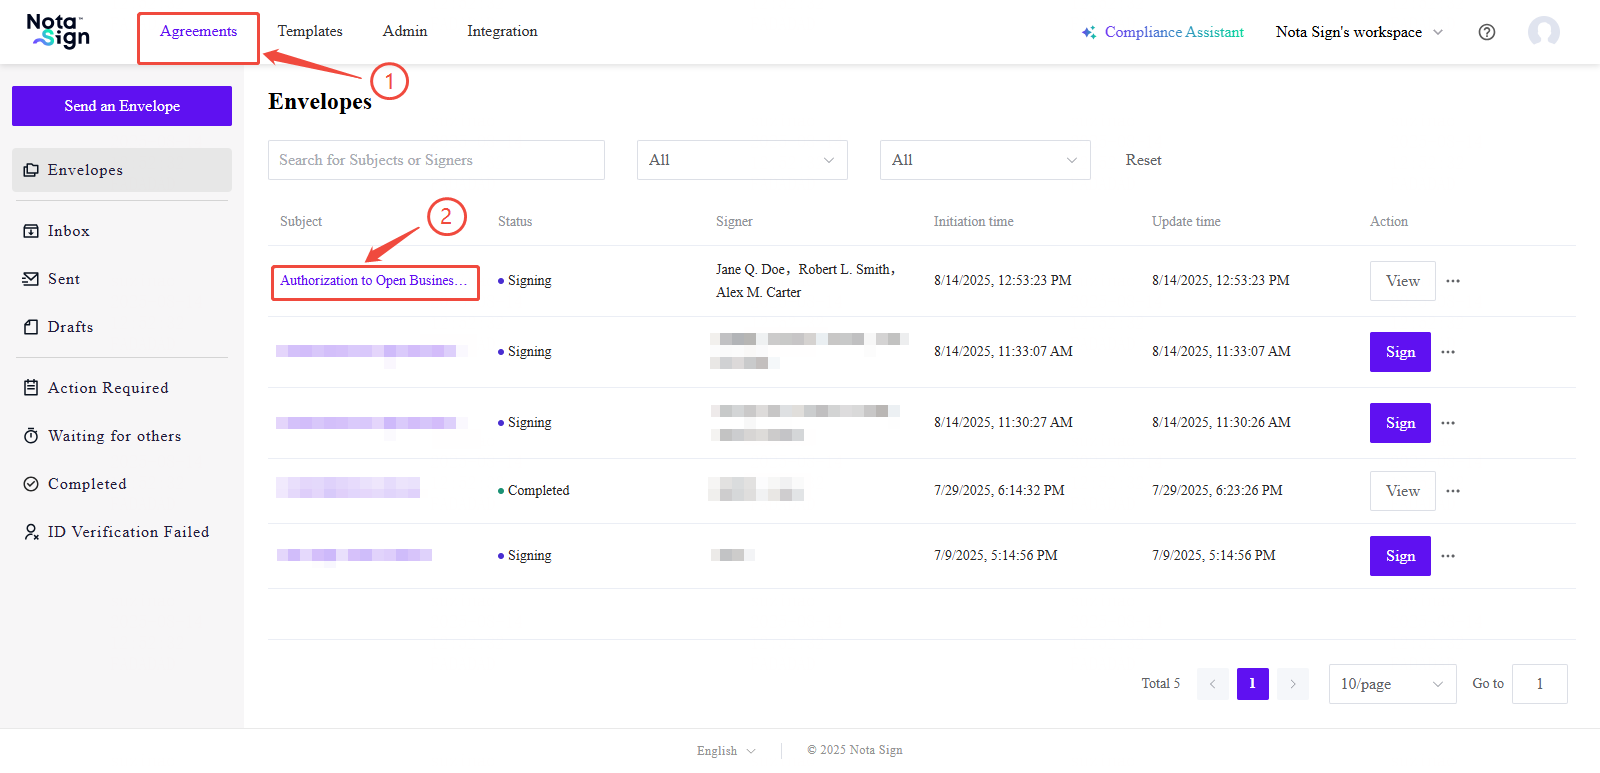
Sender’s Steps:
In the Nota Sign workspace, go to Agreements.
Open the envelope detail page by clicking the envelope subject.
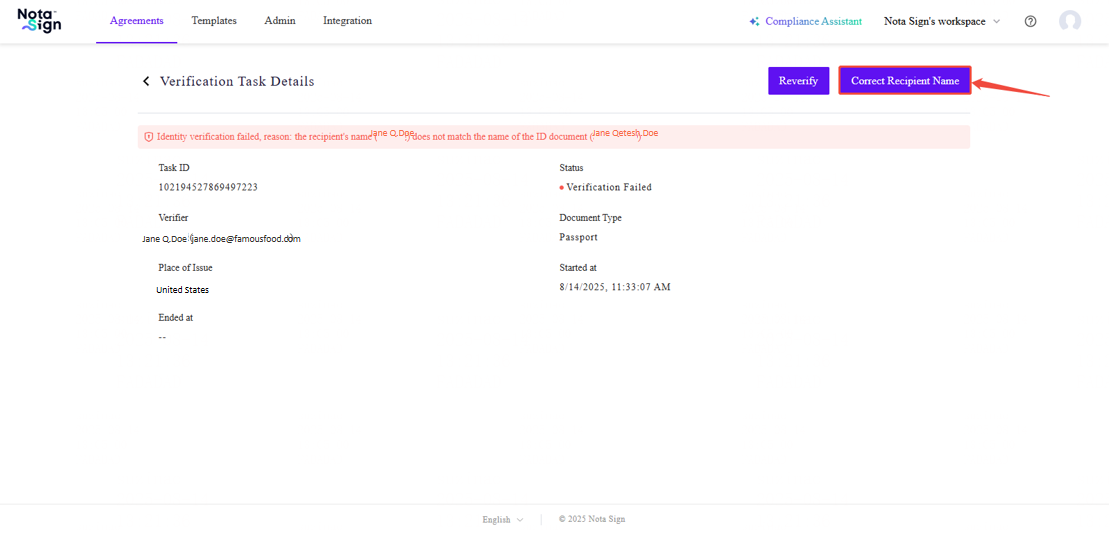
In the recipient list, locate the affected recipient and click View Detail.
Click Correct Recipient Name in the top-right corner to update the name.

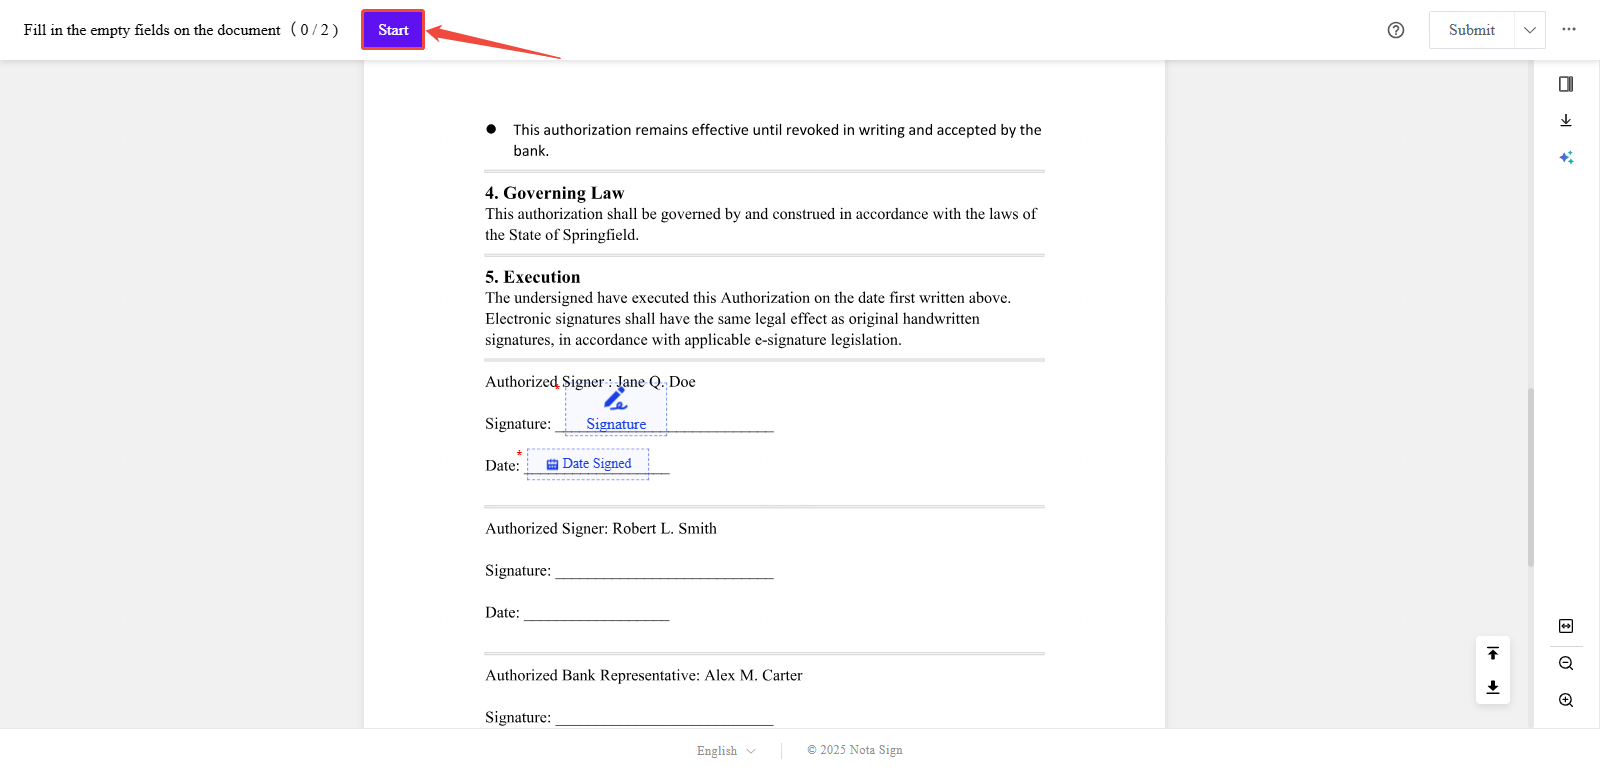
Step 3: Review and Start Signing
After certificate approval, click Application completed, Continue signing.
Review terms and click Agree.
Click Start to initiate the signing process.

Step 4: Complete Required Fields
Click on each highlighted field and complete it as required. Supported field types include:
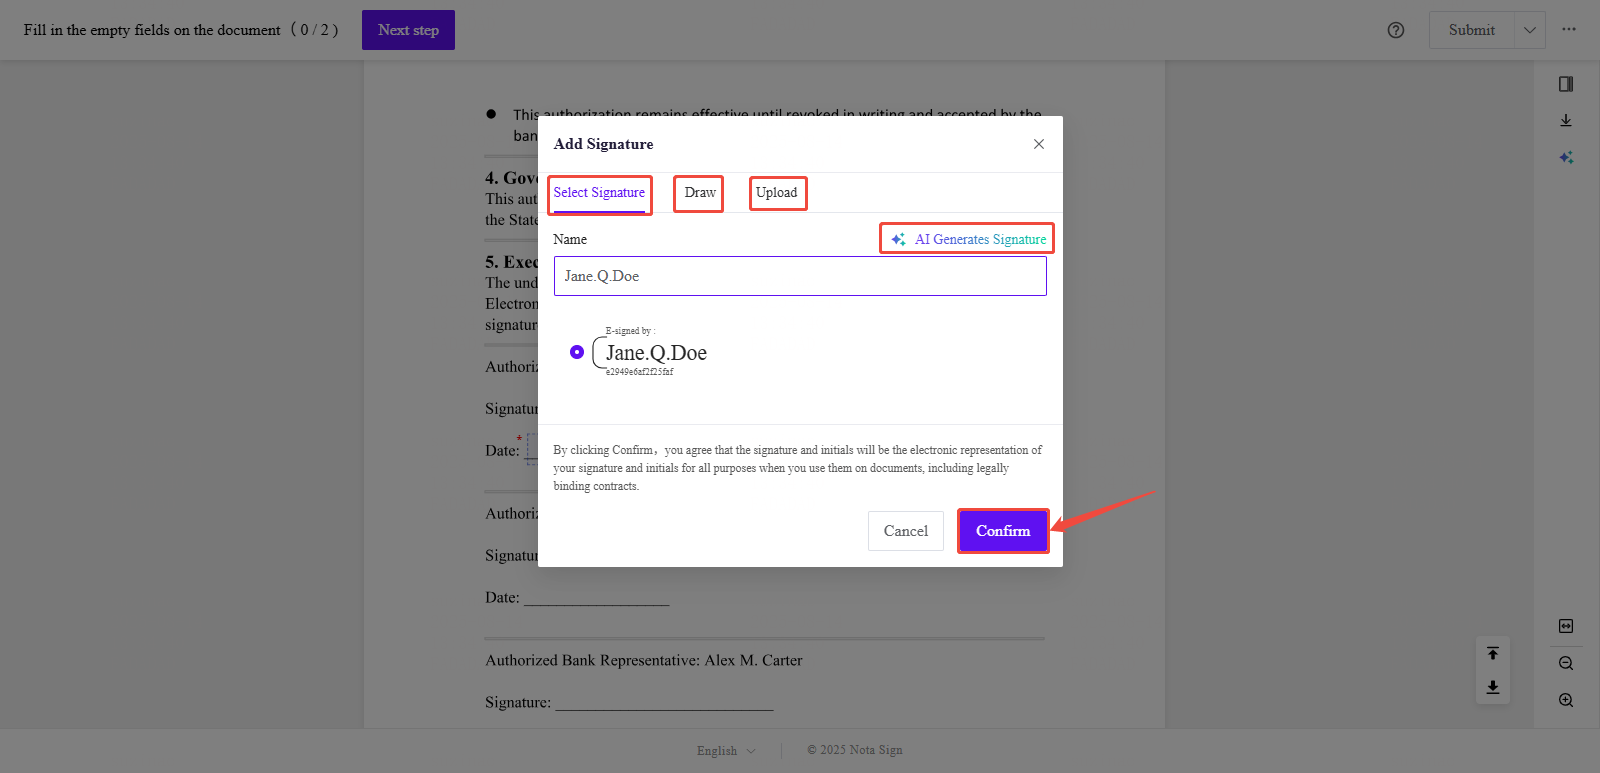
- Signature: Click the Signature field to insert your signature. You can choose from the following options:
Default Style, Drawn, Upload and AI-generated.
Date: When the sender pre-configures a "date field" for the recipient, the system will automatically populate it with the current date when the recipient accesses the signing page.
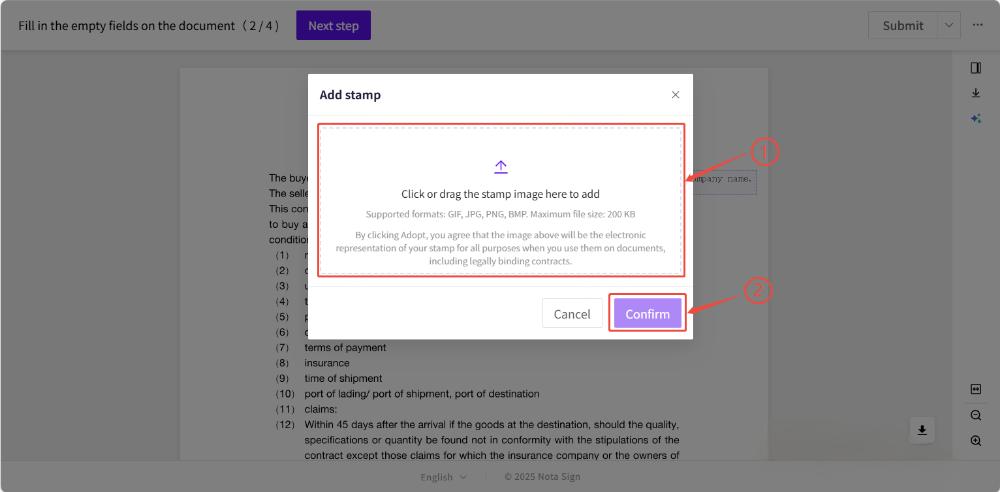
Stamp: Click the Stamp field to upload a compliant company or personal stamp.
Text Fields: Click into any Text field and type the requested information.
Checkbox: Click a Checkbox field to mark it as selected.
Image Upload: Use this field to upload required supporting images.
Attachment: Clike the Attachment to upload supplementary documents related to the envolope.
- When using a Text Field, the assigned recipient must complete the required field before the signing process can proceed. Please ensure that all required text fields are properly filled by each designated recipient to avoid delays in workflow progression.-
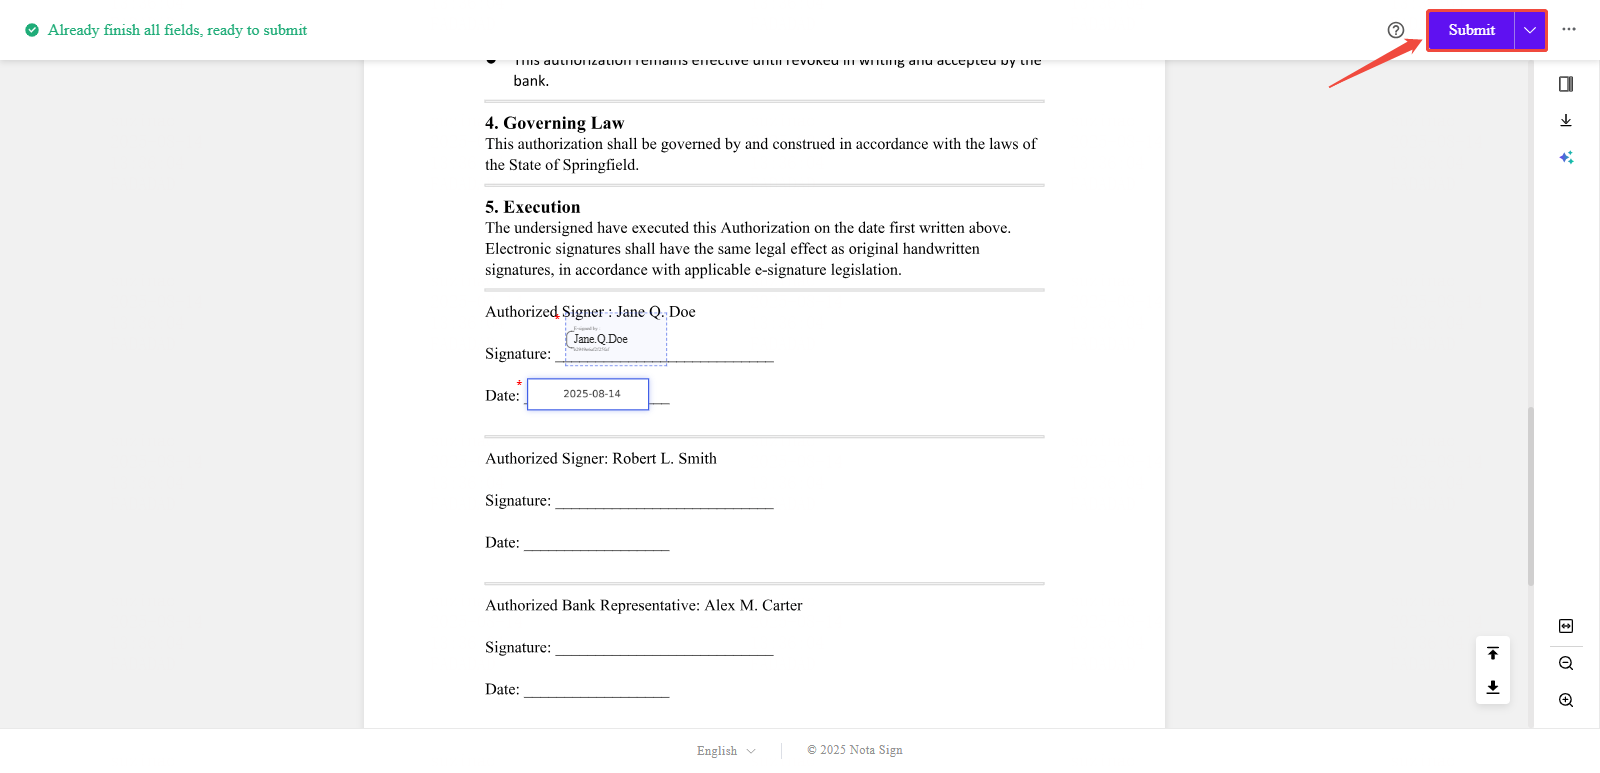
Step 5: Submit the Signed Document
Once all required fields are completed, click Submit in the upper-right corner to finalize the signing process.
You will receive a confirmation email once the document has been successfully signed.