
Signing a CFR Envelope
Step 1. Accessing the Envelope
You can access the envelope through two main methods:
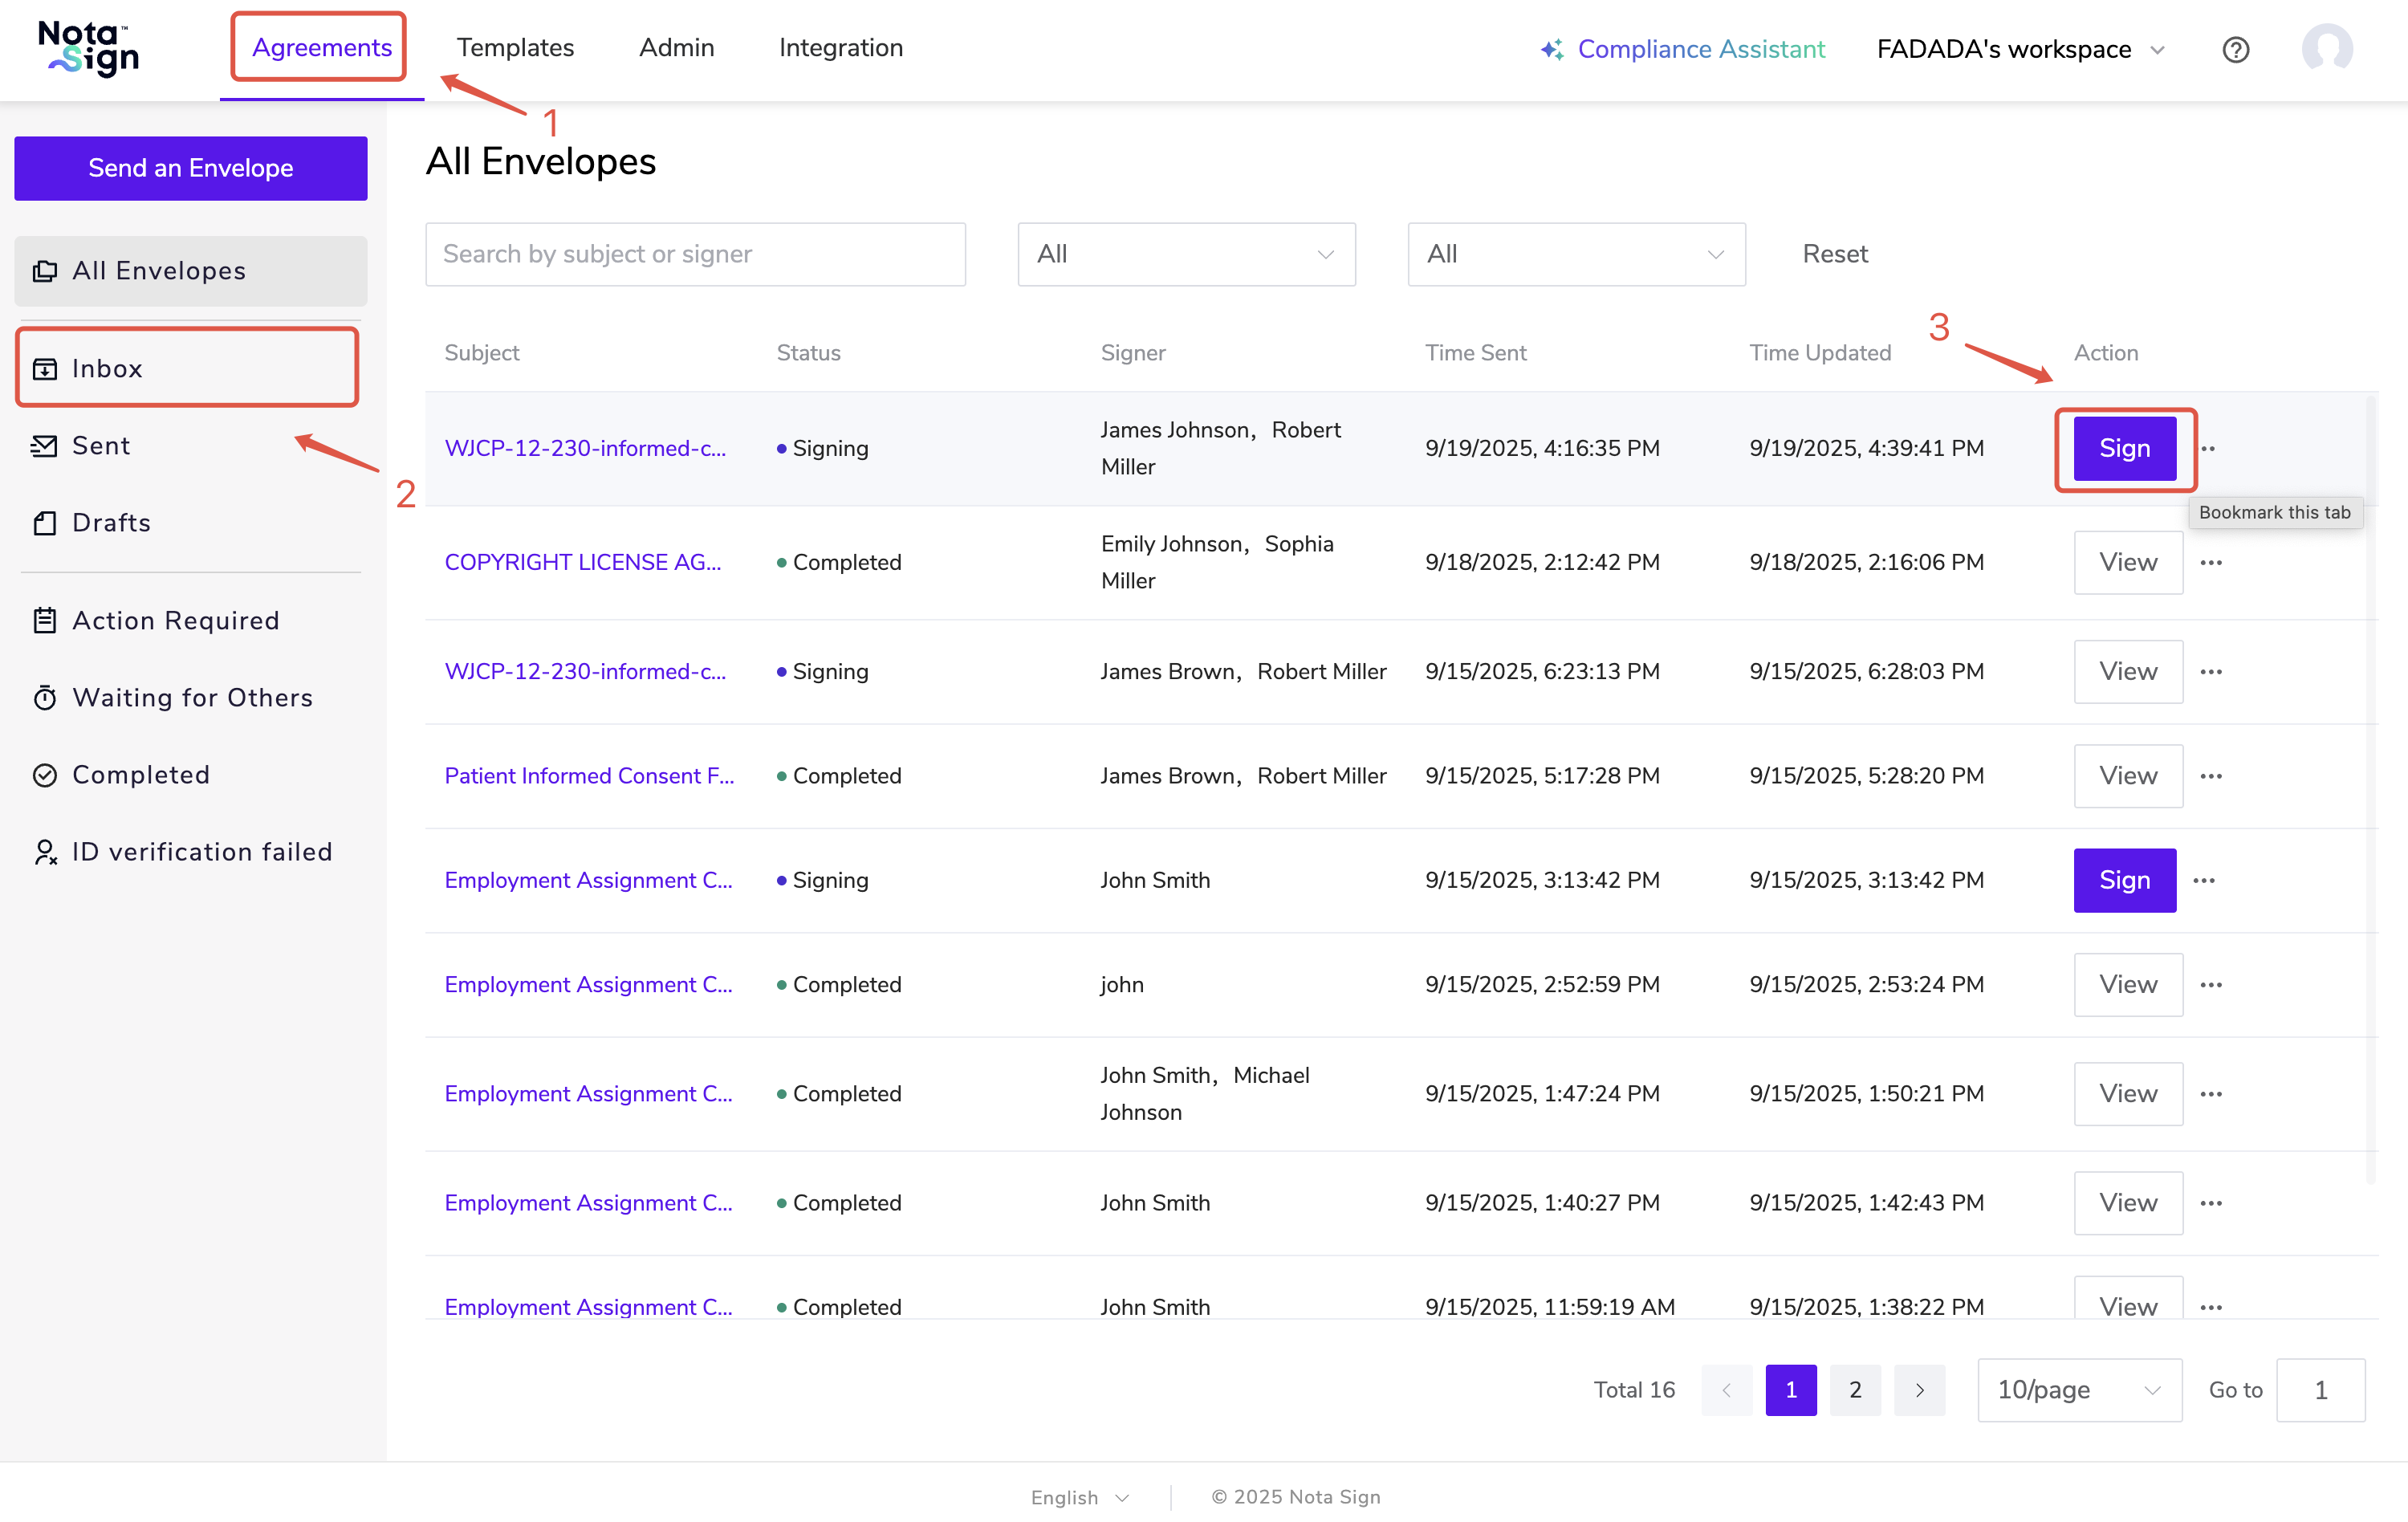
Option 1: From the Nota Sign Dashboard
Log in to your Nota Sign account.
Navigate to Agreements.
Click on the Inbox tab in the left sidebar.
Locate the envelope you need to sign and click Sign.
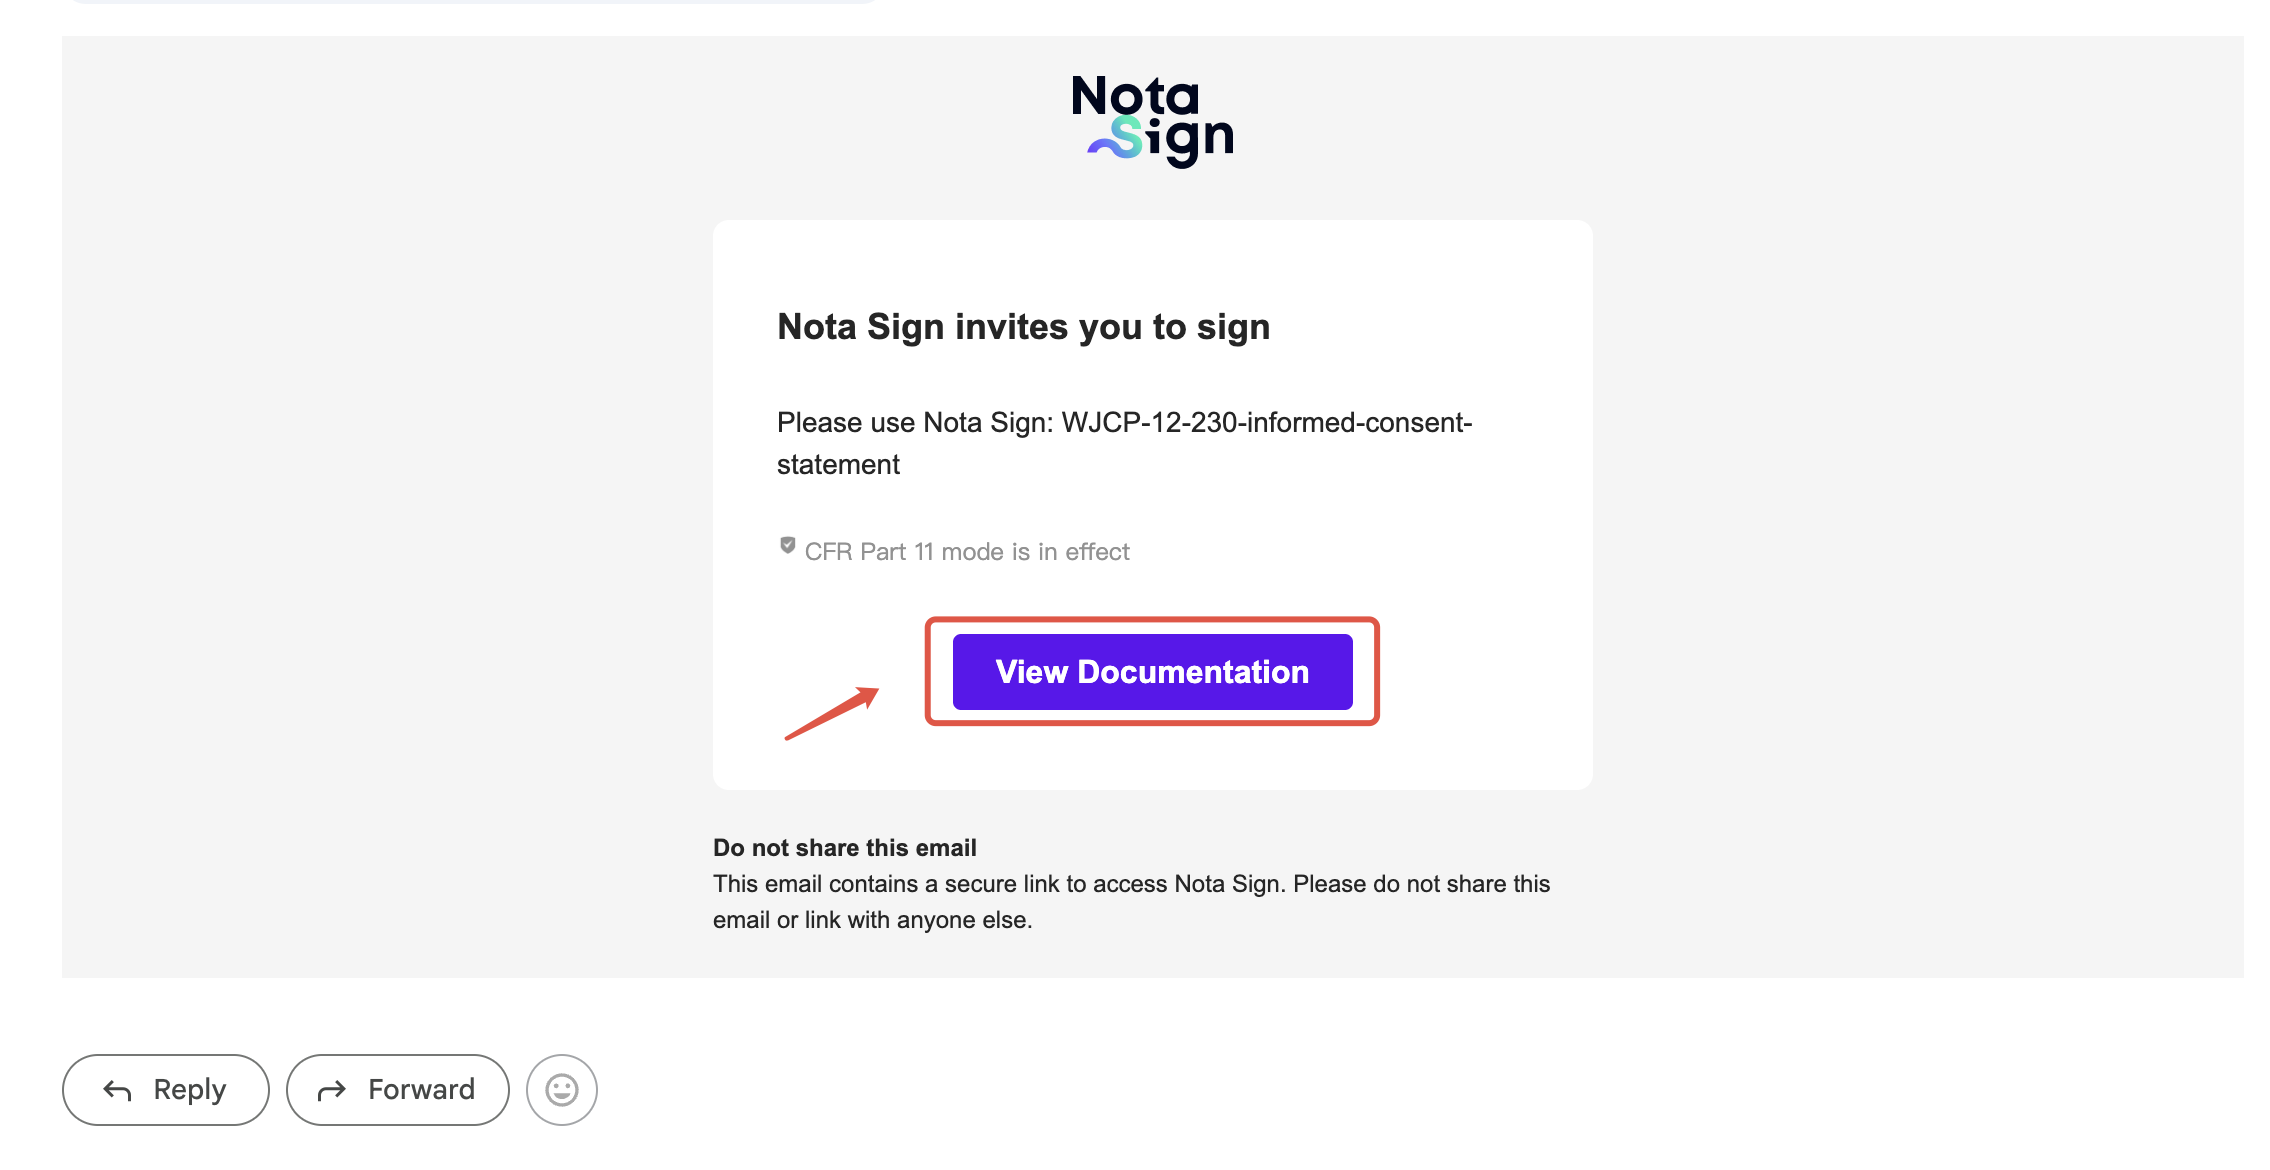
Option 2: From the Email Invitation
- Check your email inbox for a signing invitation email from Nota Sign and click View Documentation;
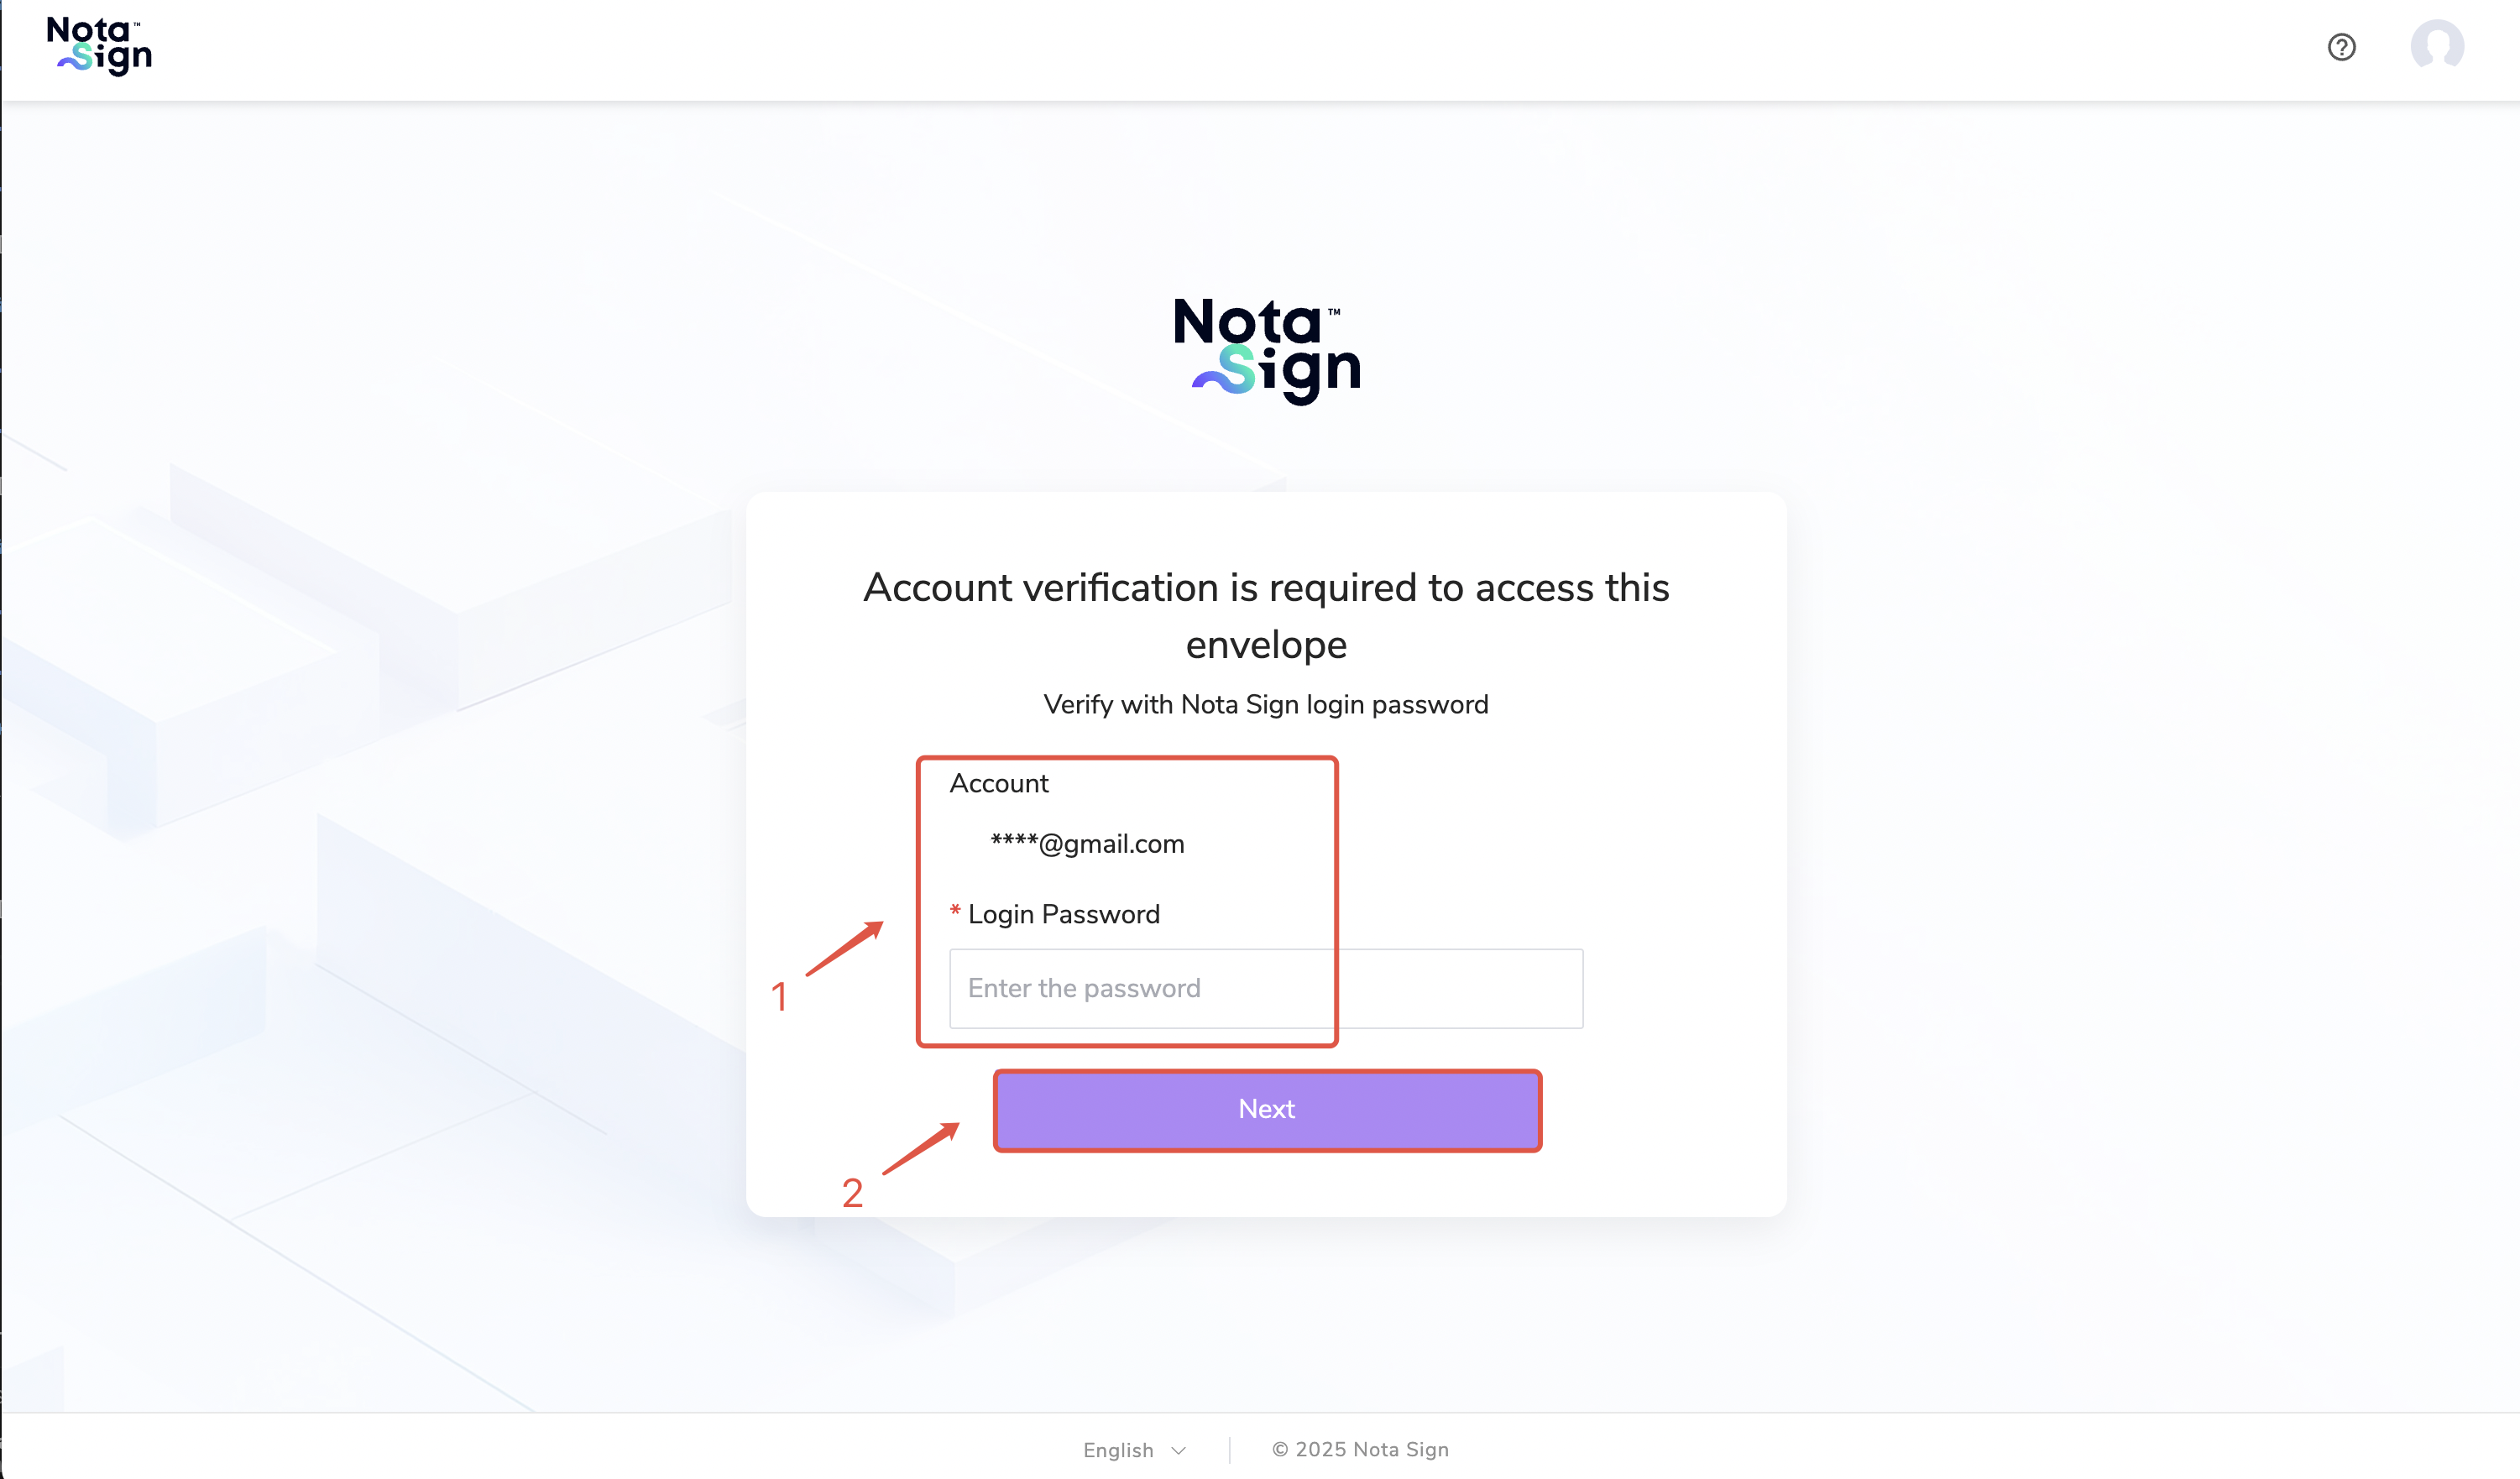
- Enter your account credentials and click Next;
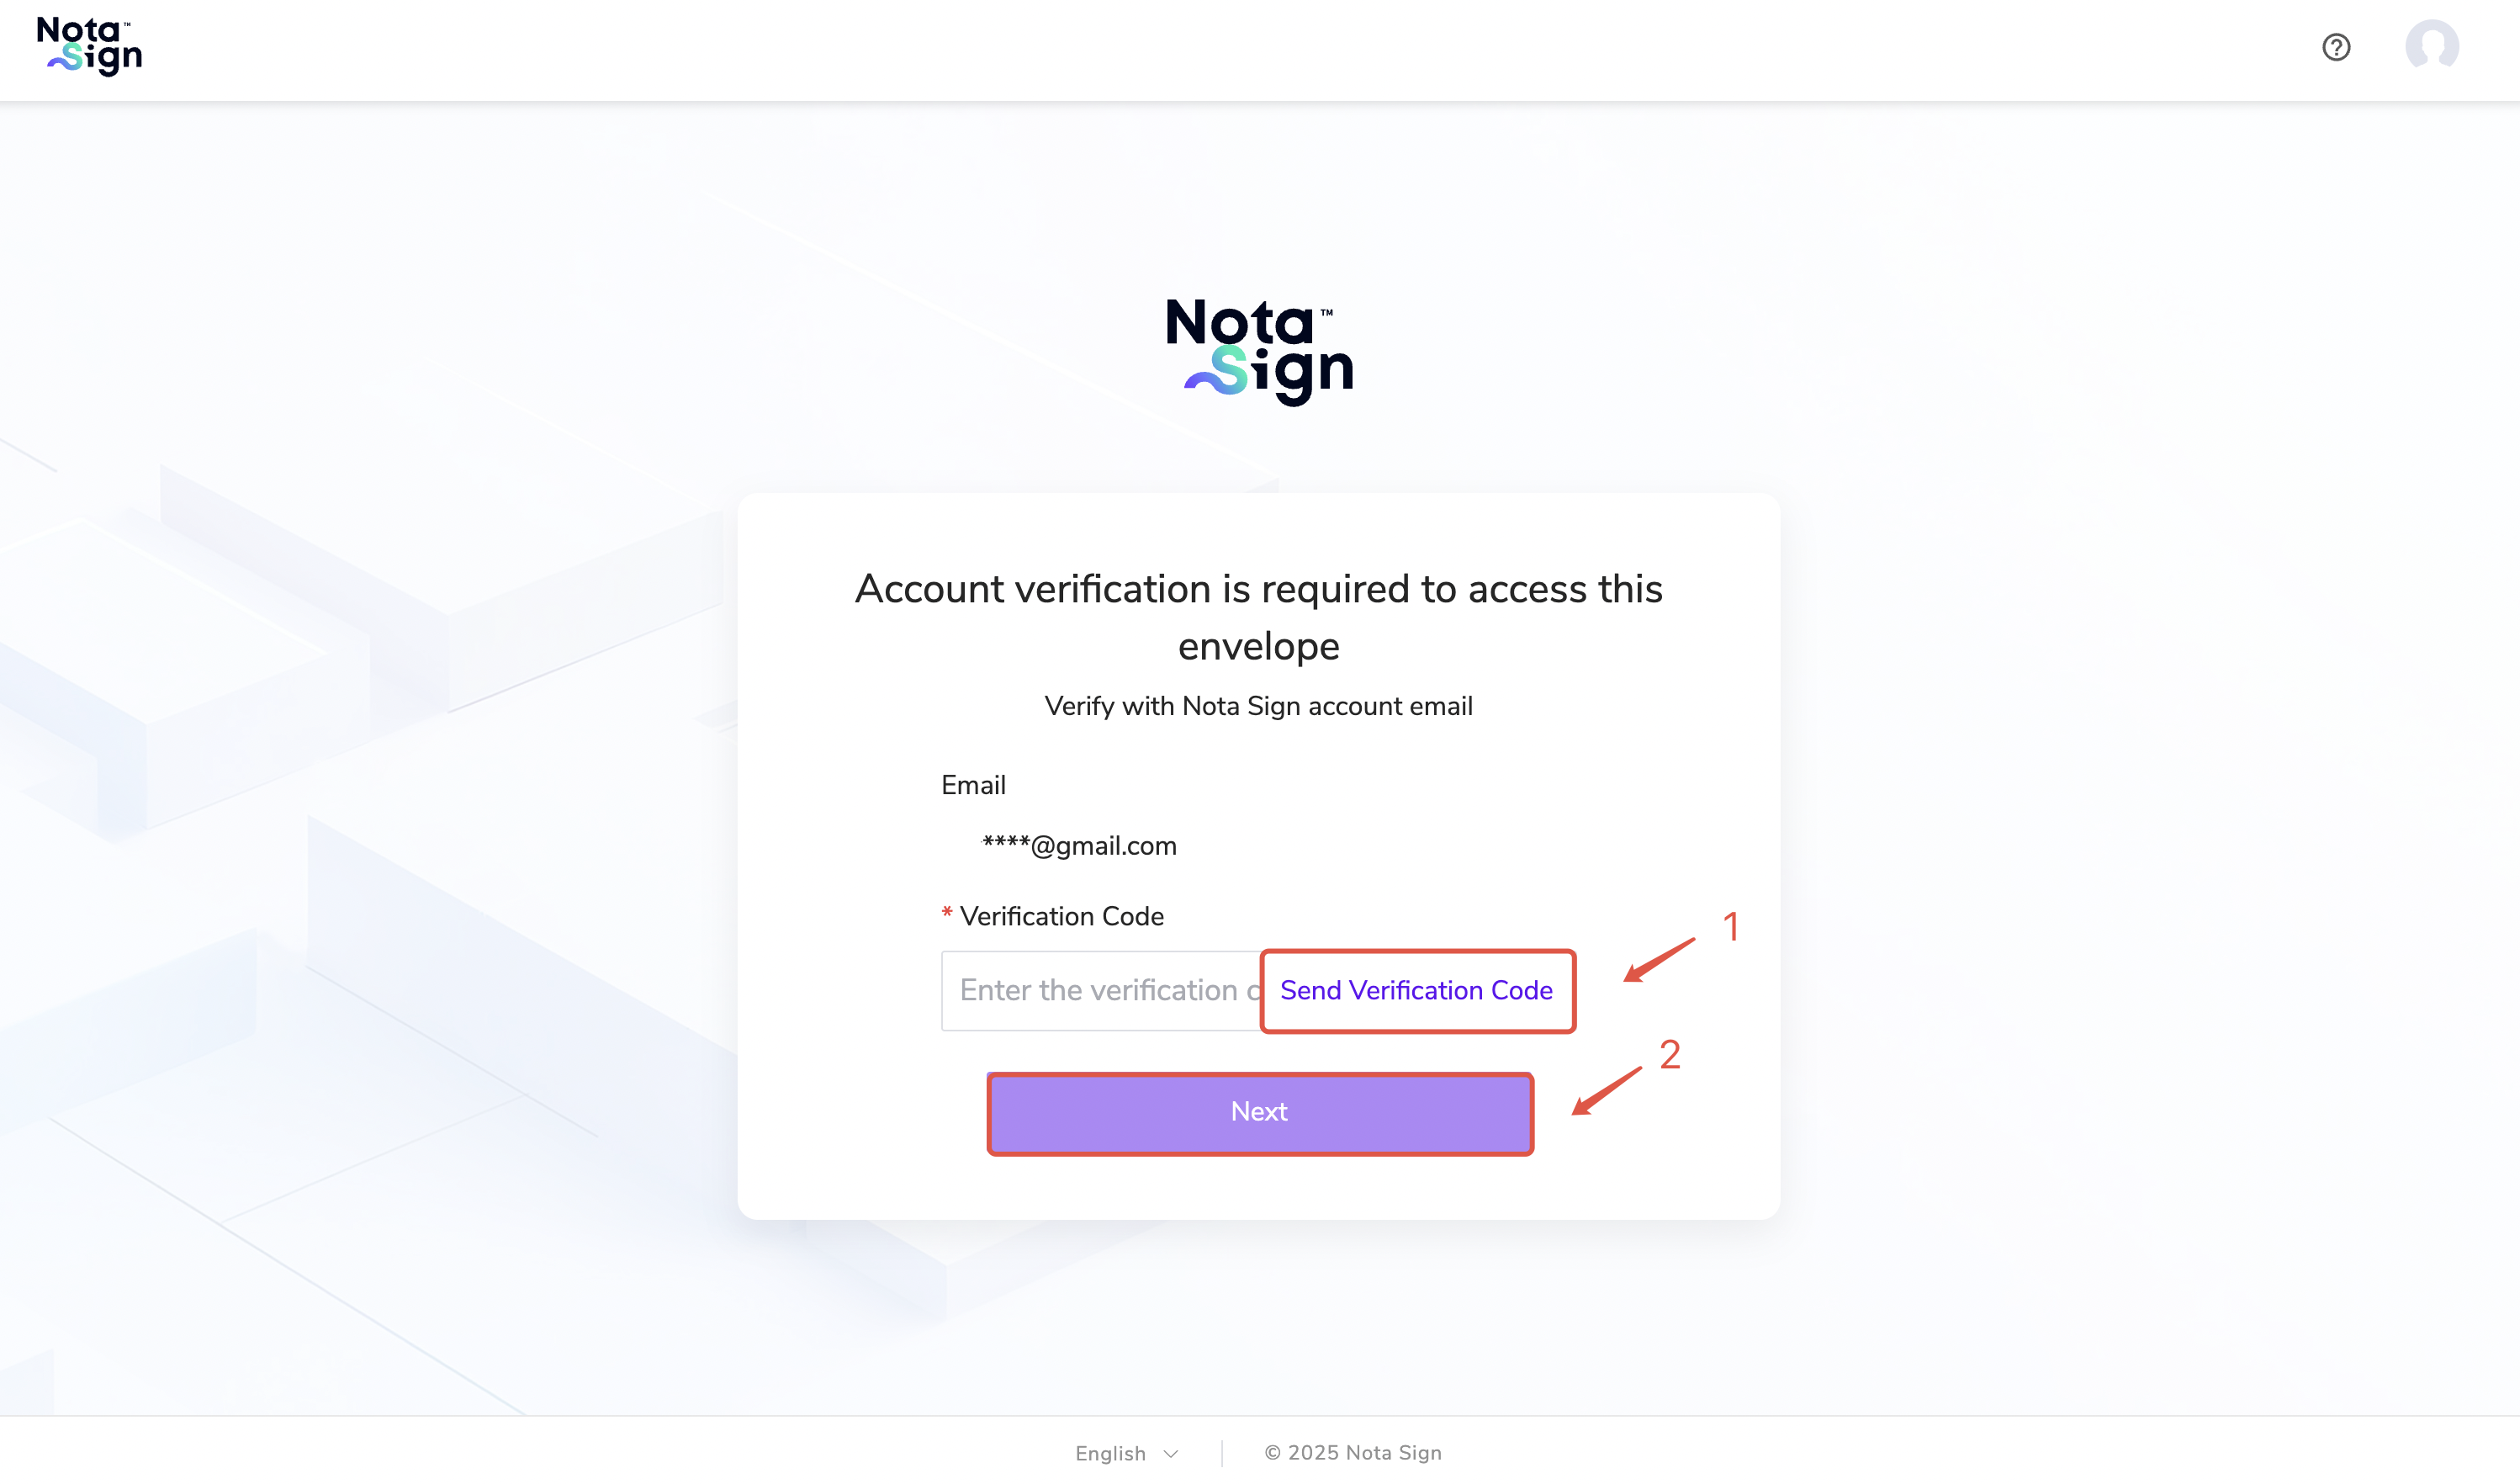
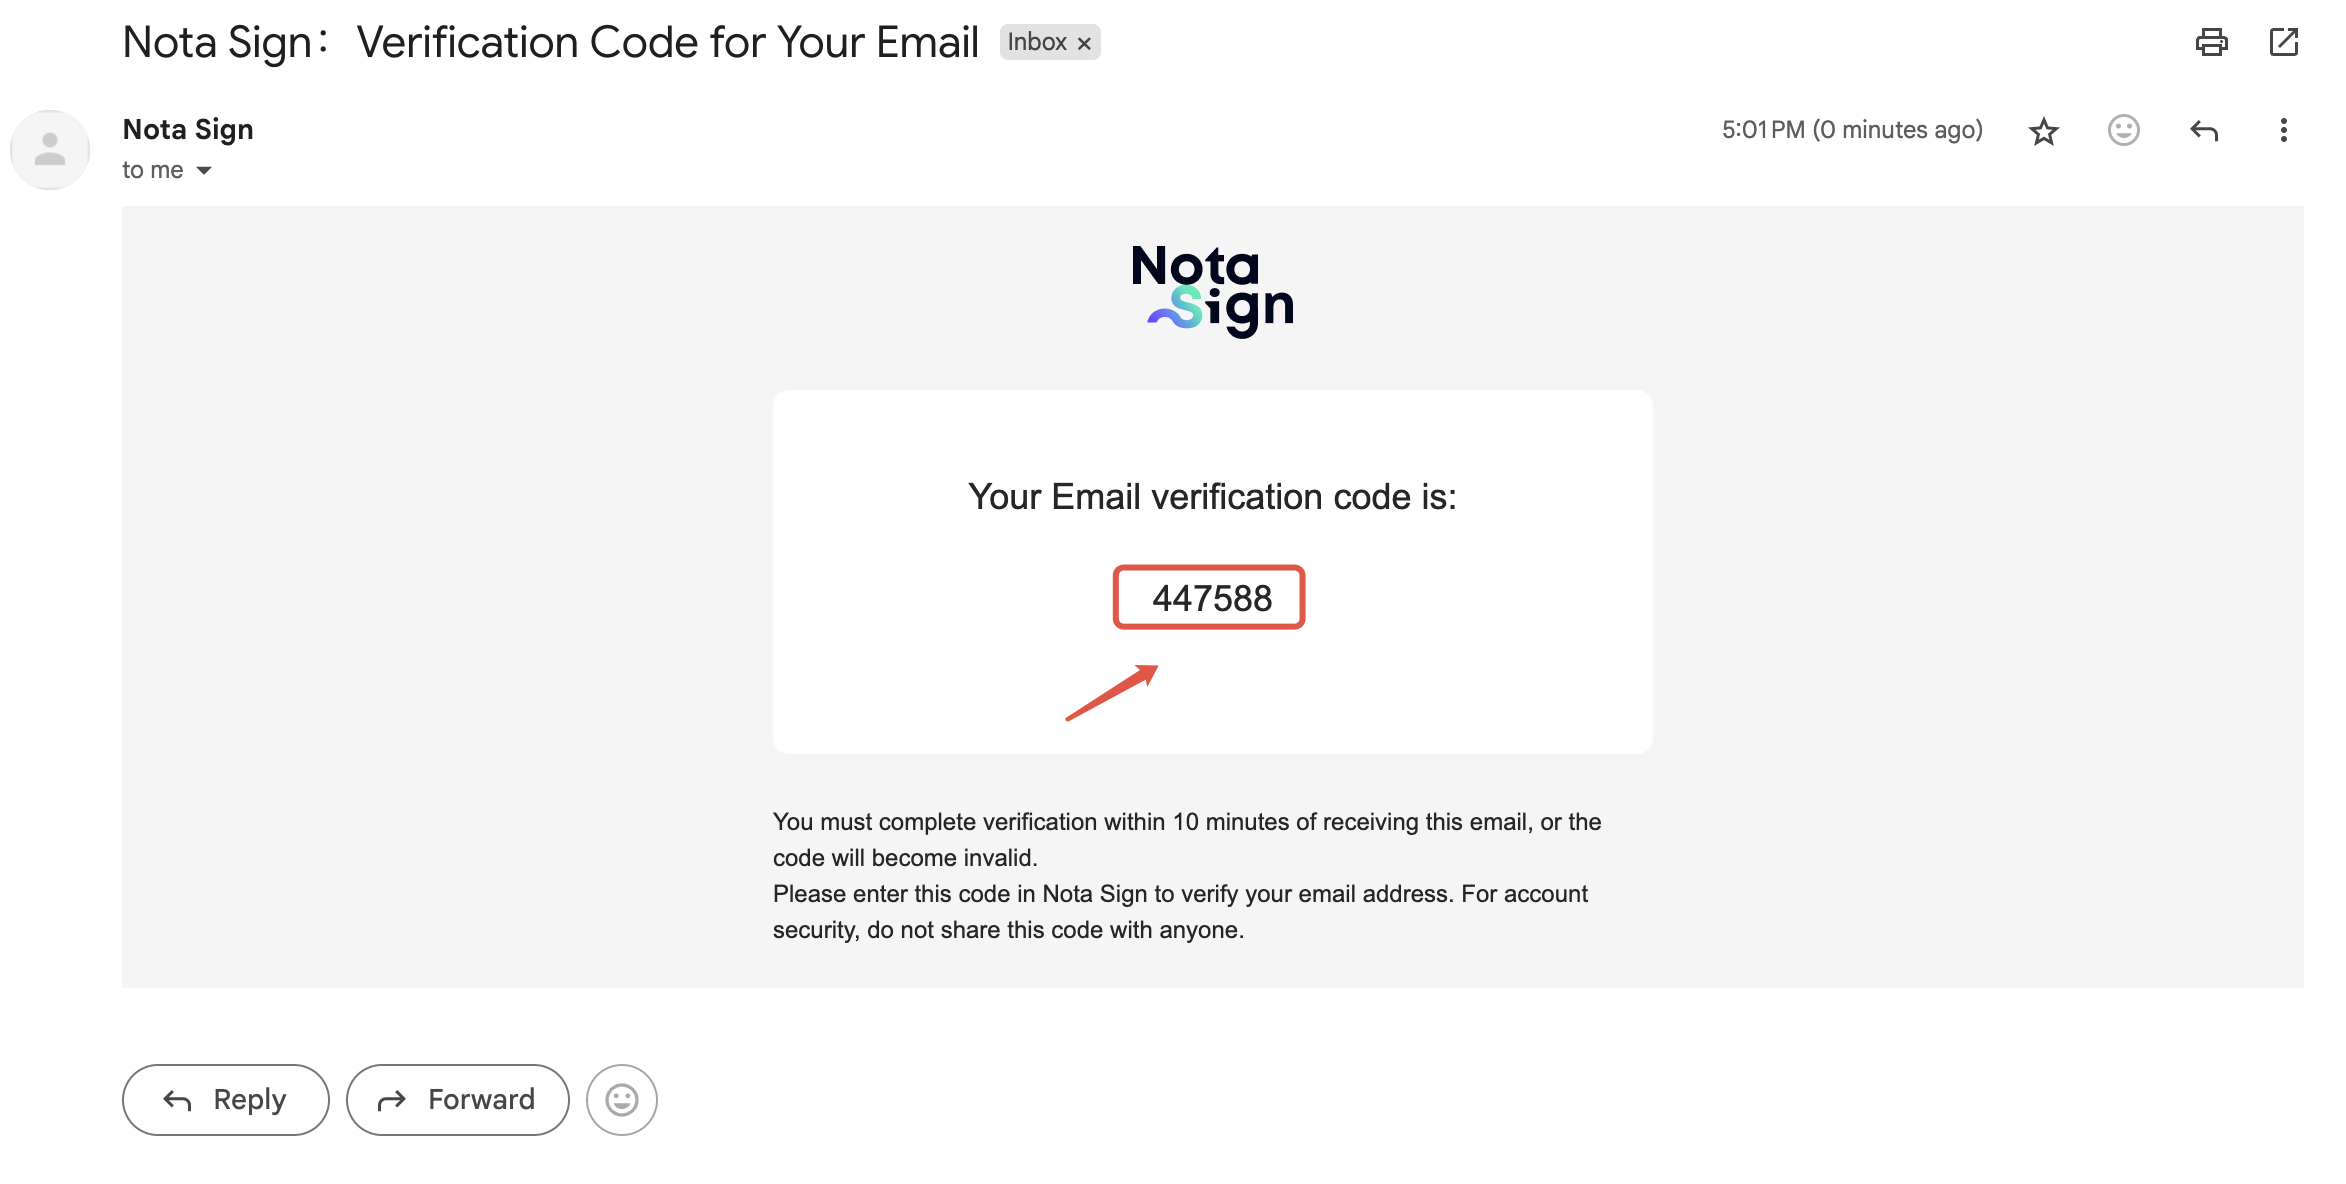
- Click Send Verification Code, enter the code received via email into the verification box, then click Next to proceed to the signing page.
Step 2: Signing Process
- Check the box to agree to use electronic records and electronic signatures, then click Agree;

- Review the contract and click Start to jump to the signing location;
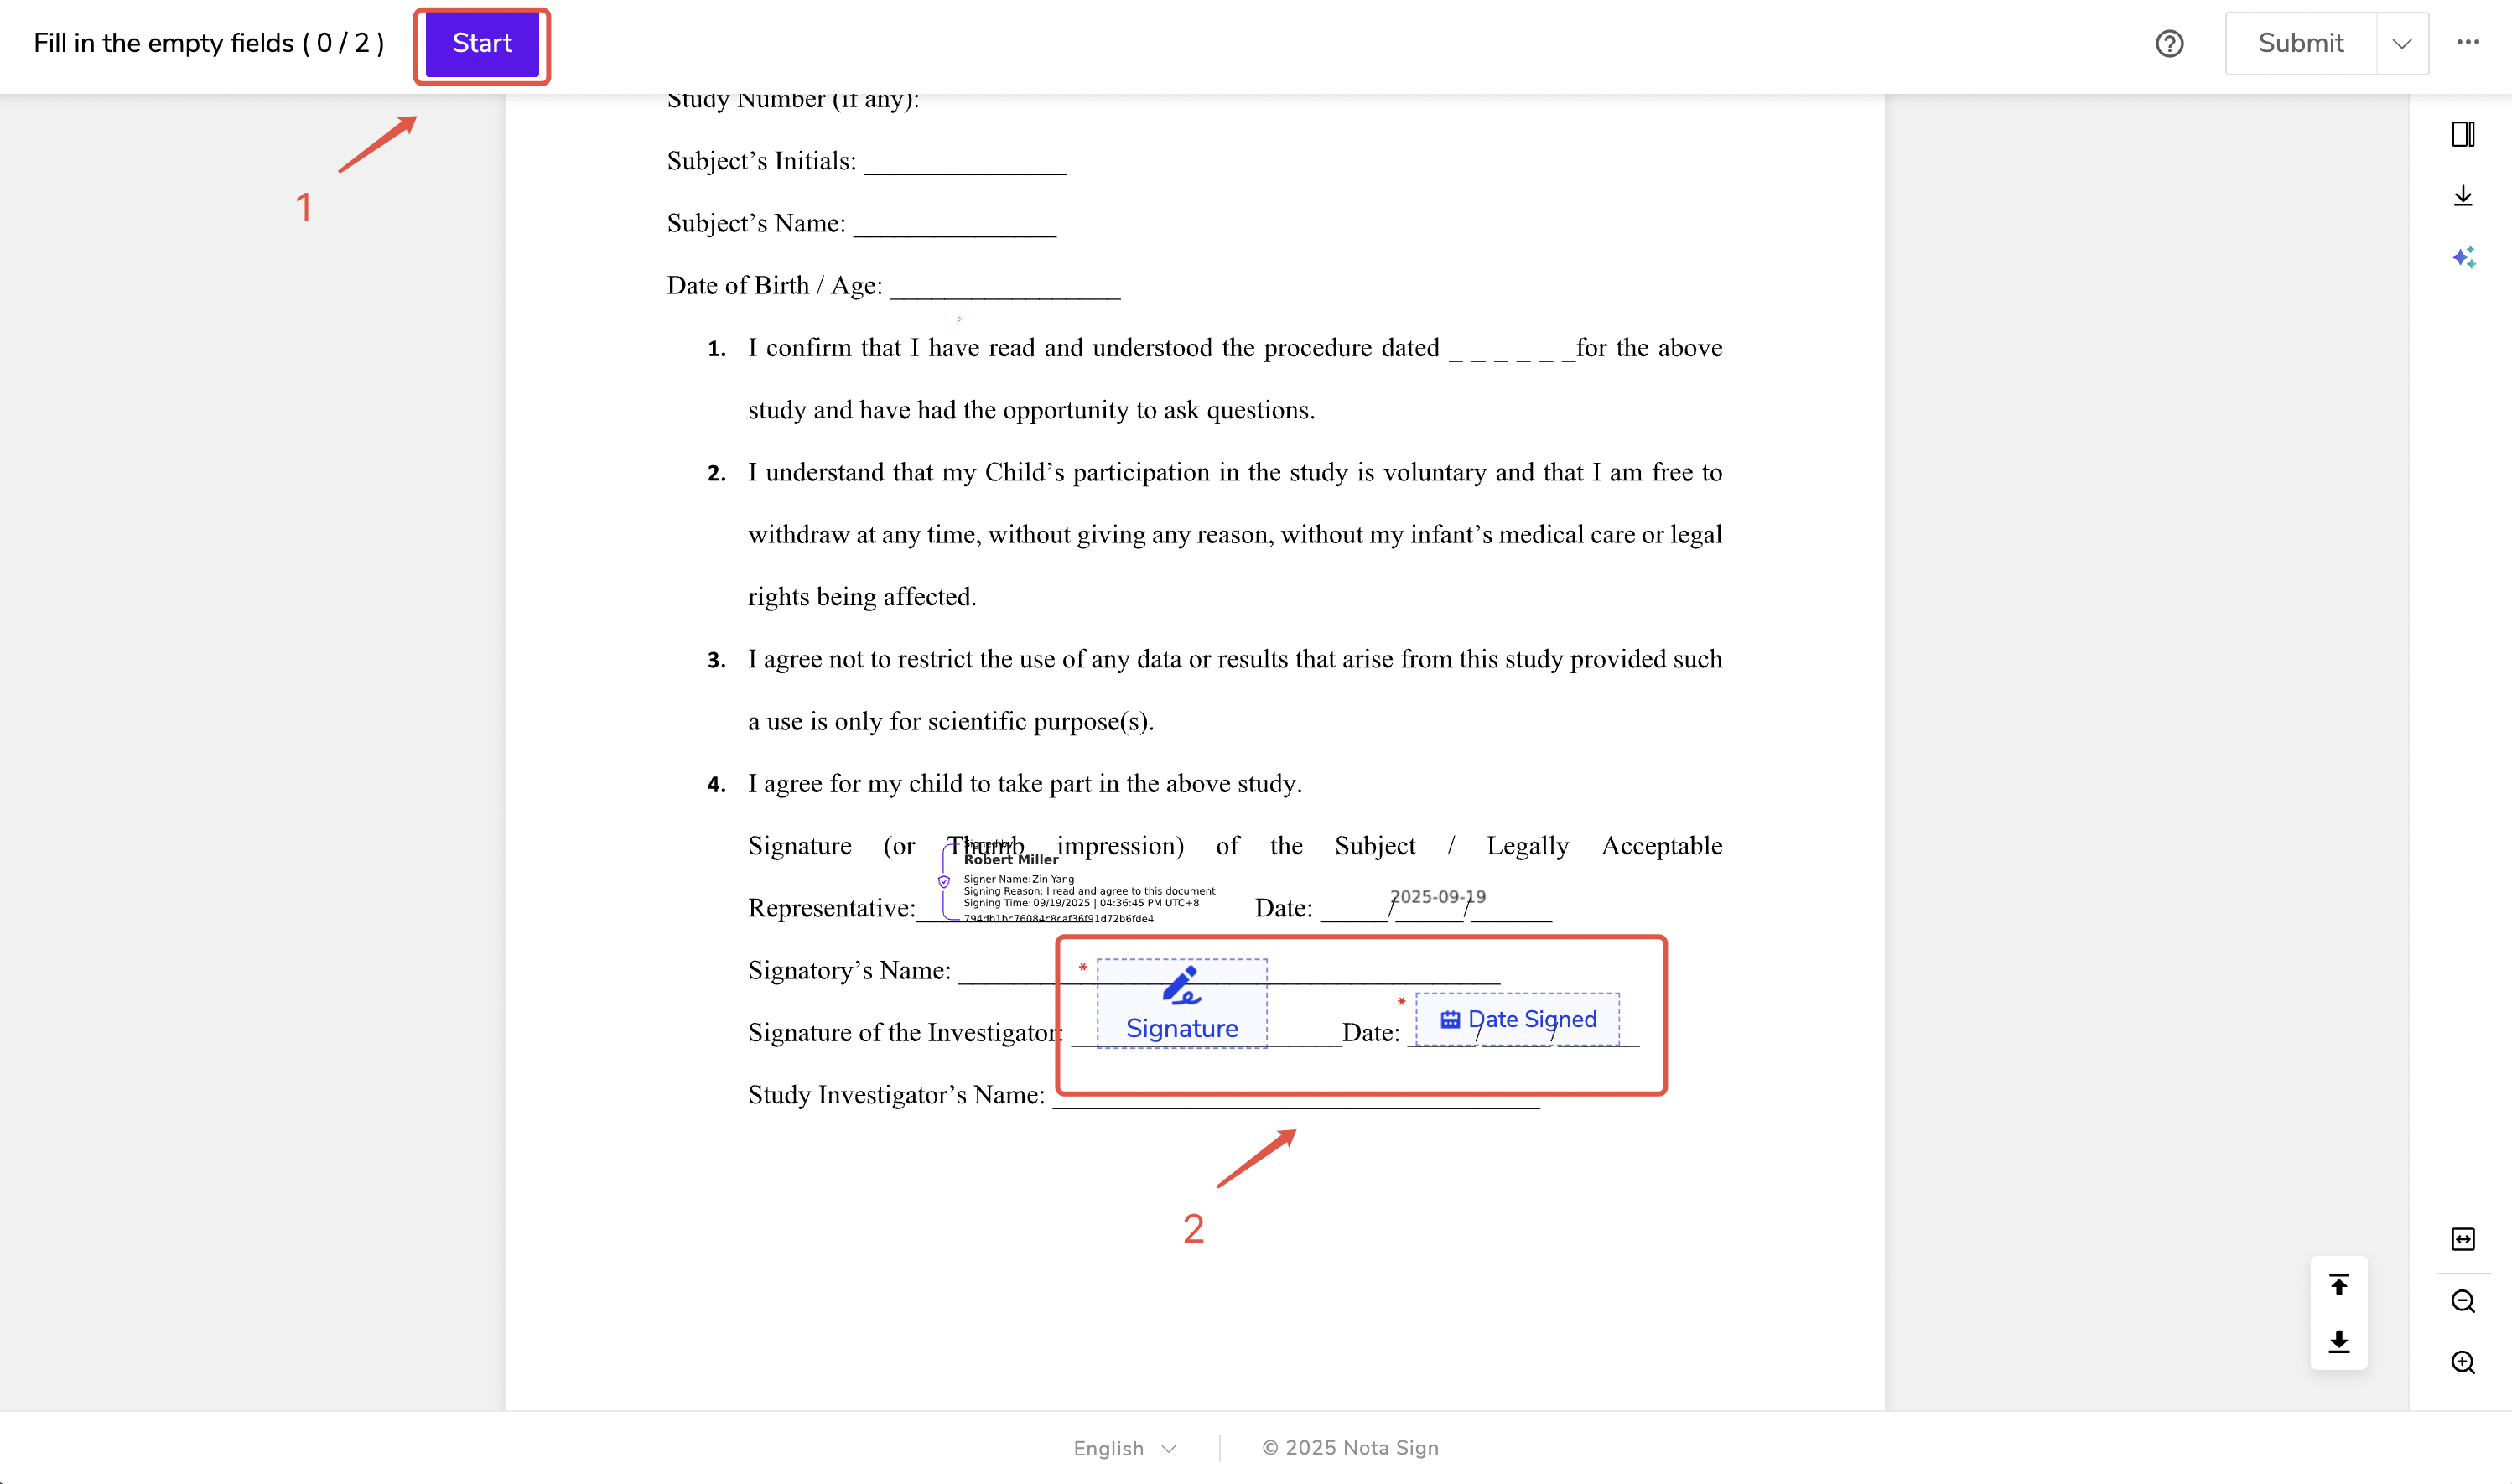
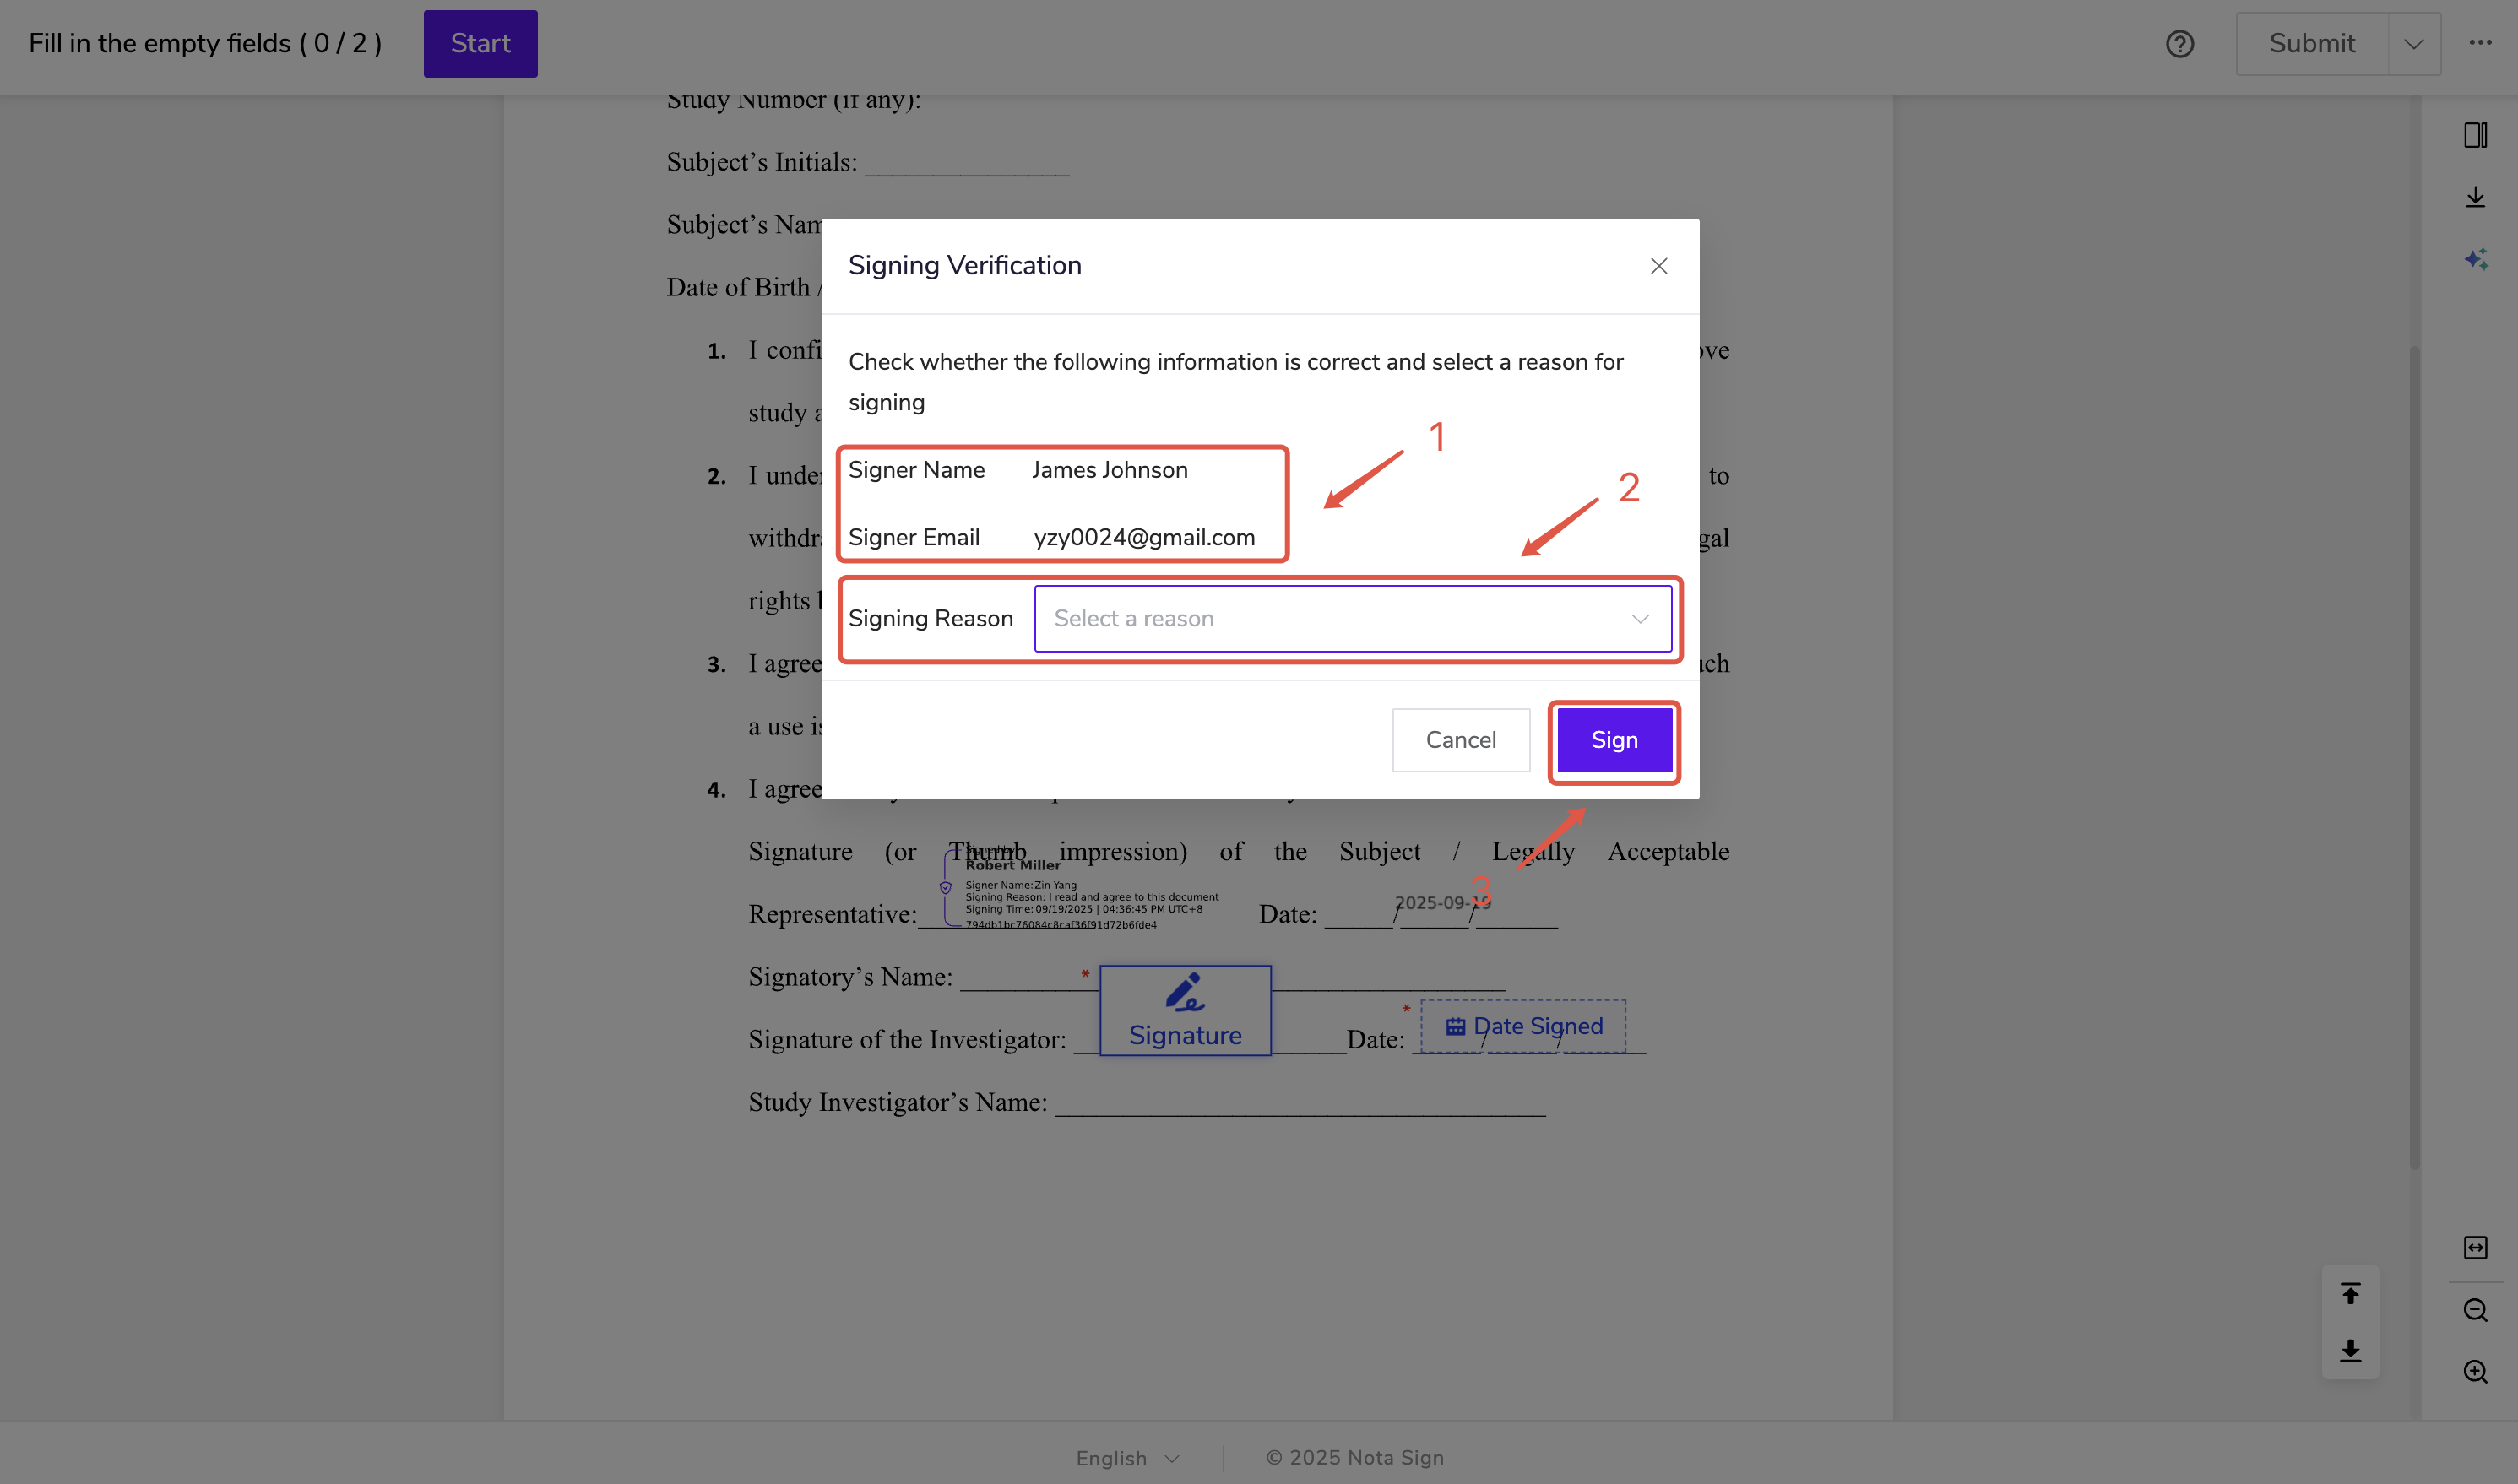
- Click the control, verify signer’s name and email, select signing reason, then click Sign;
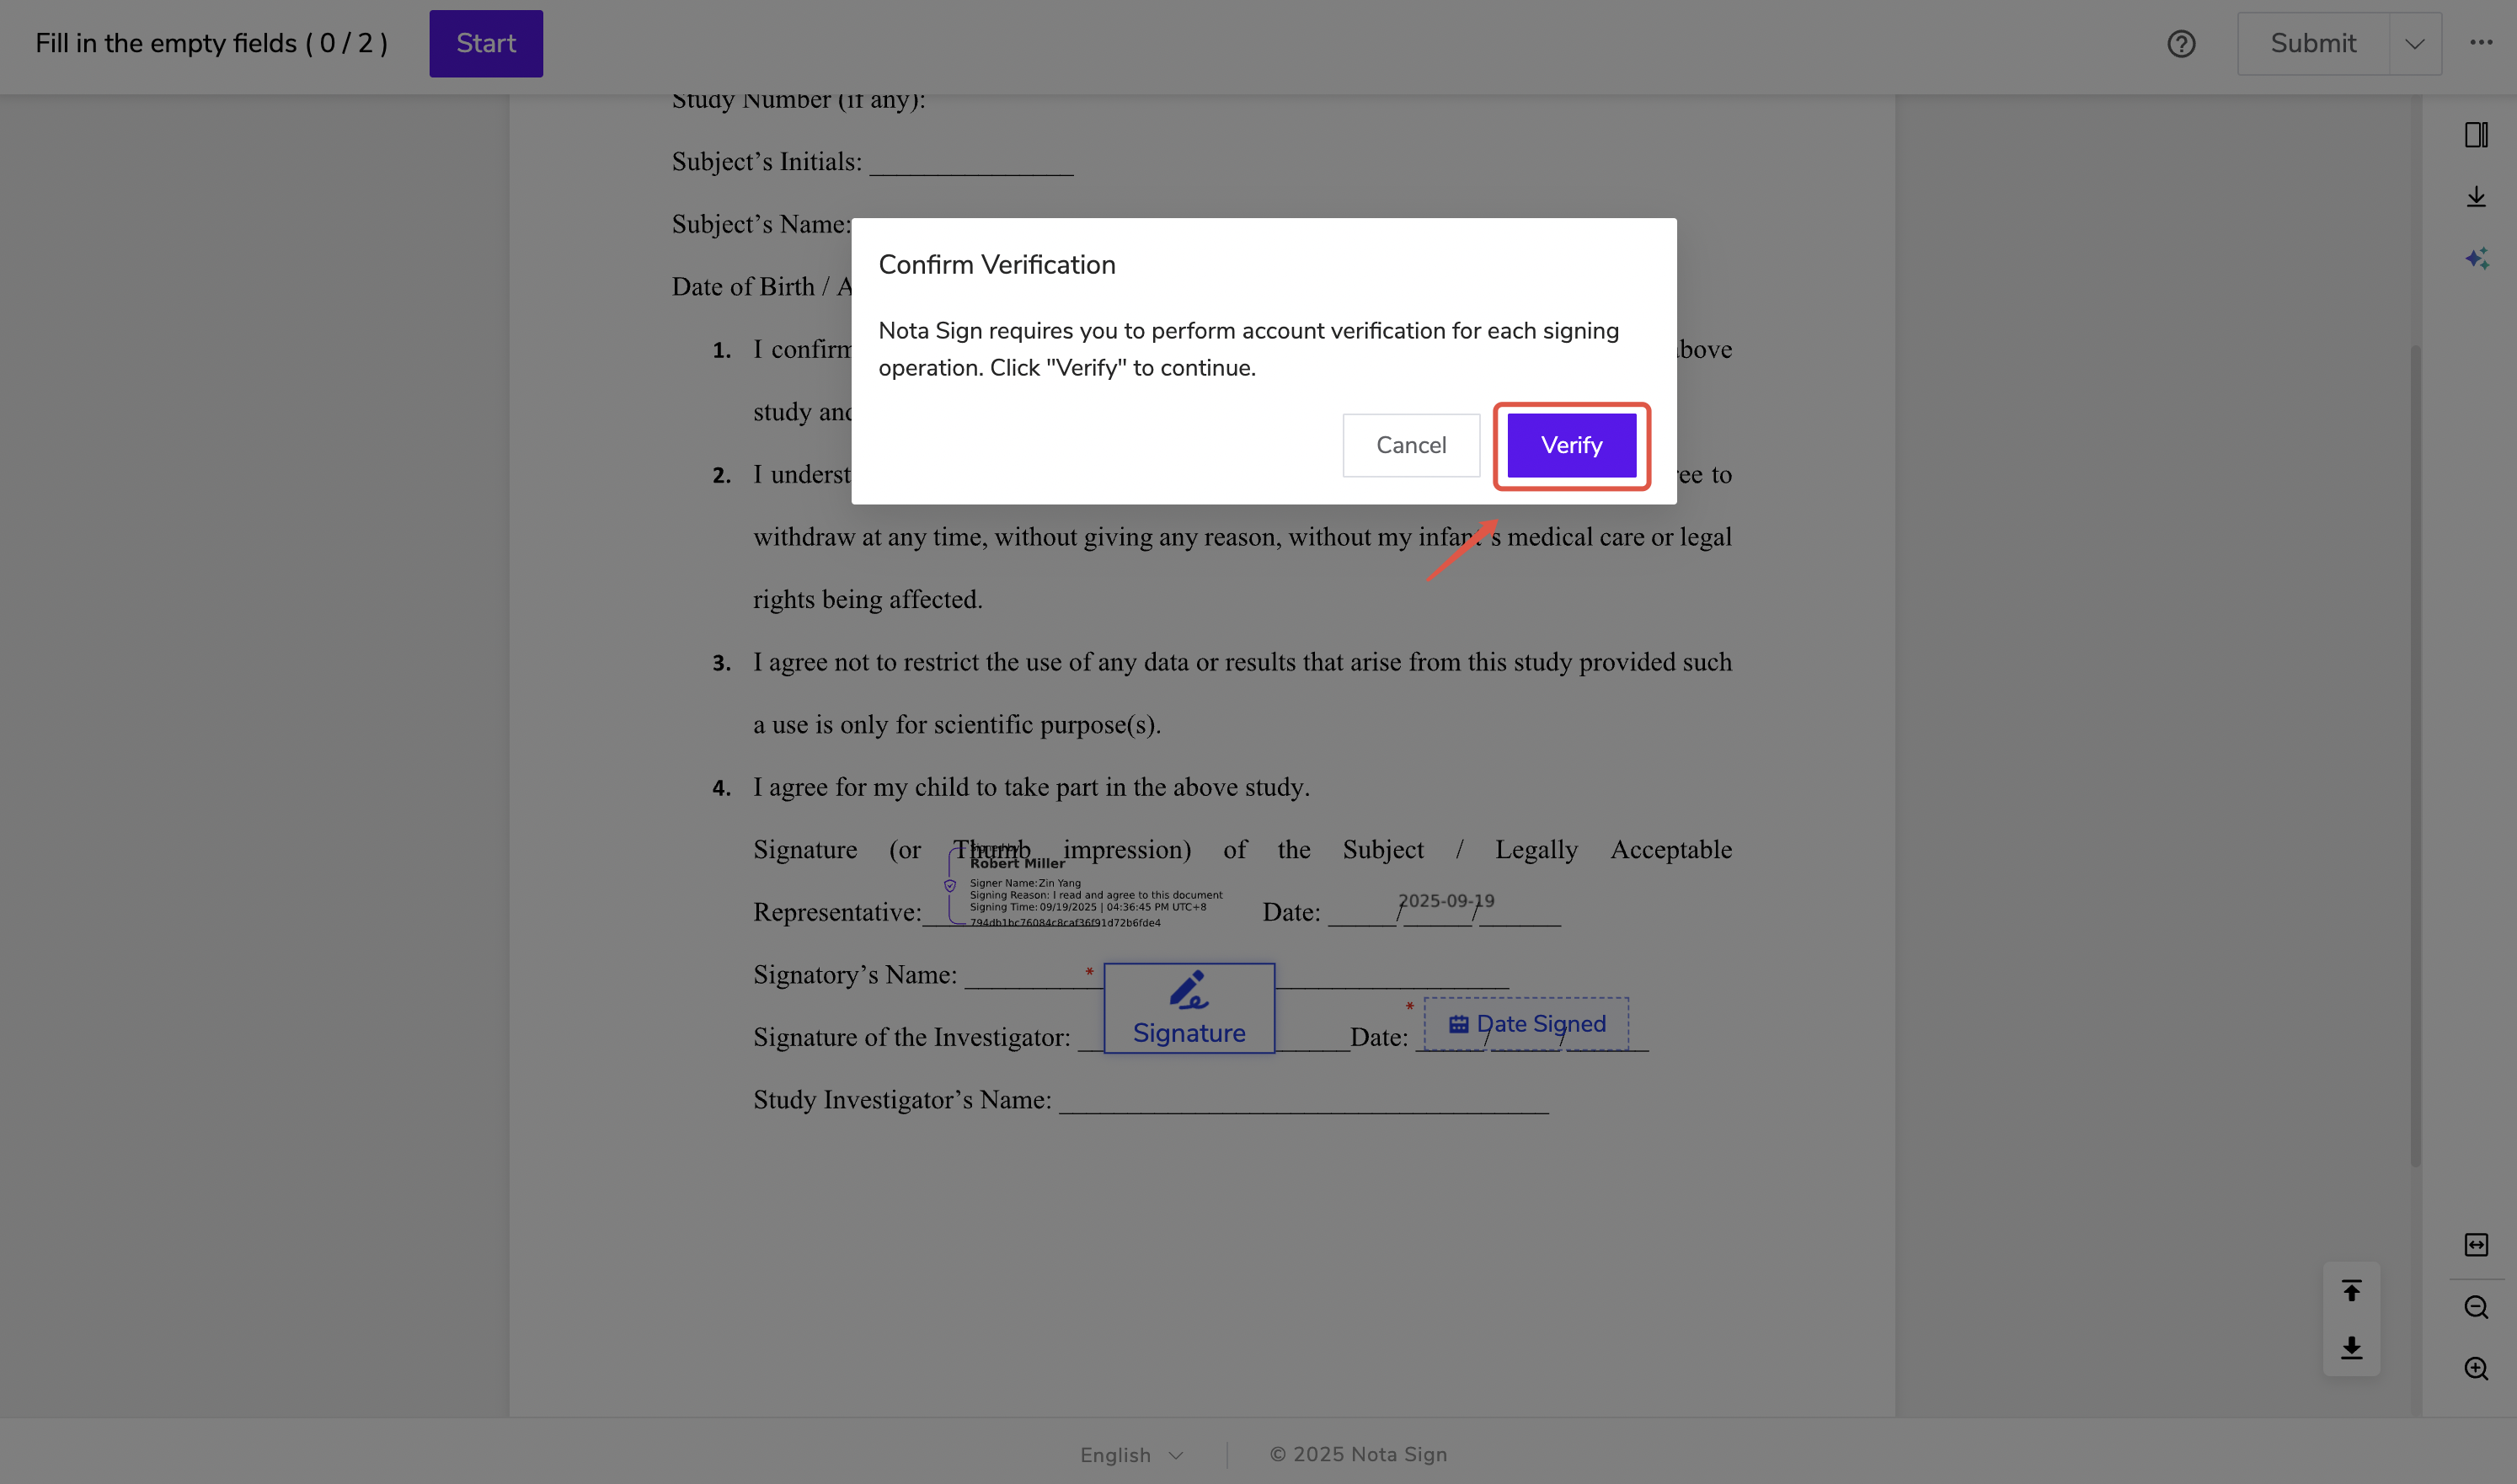
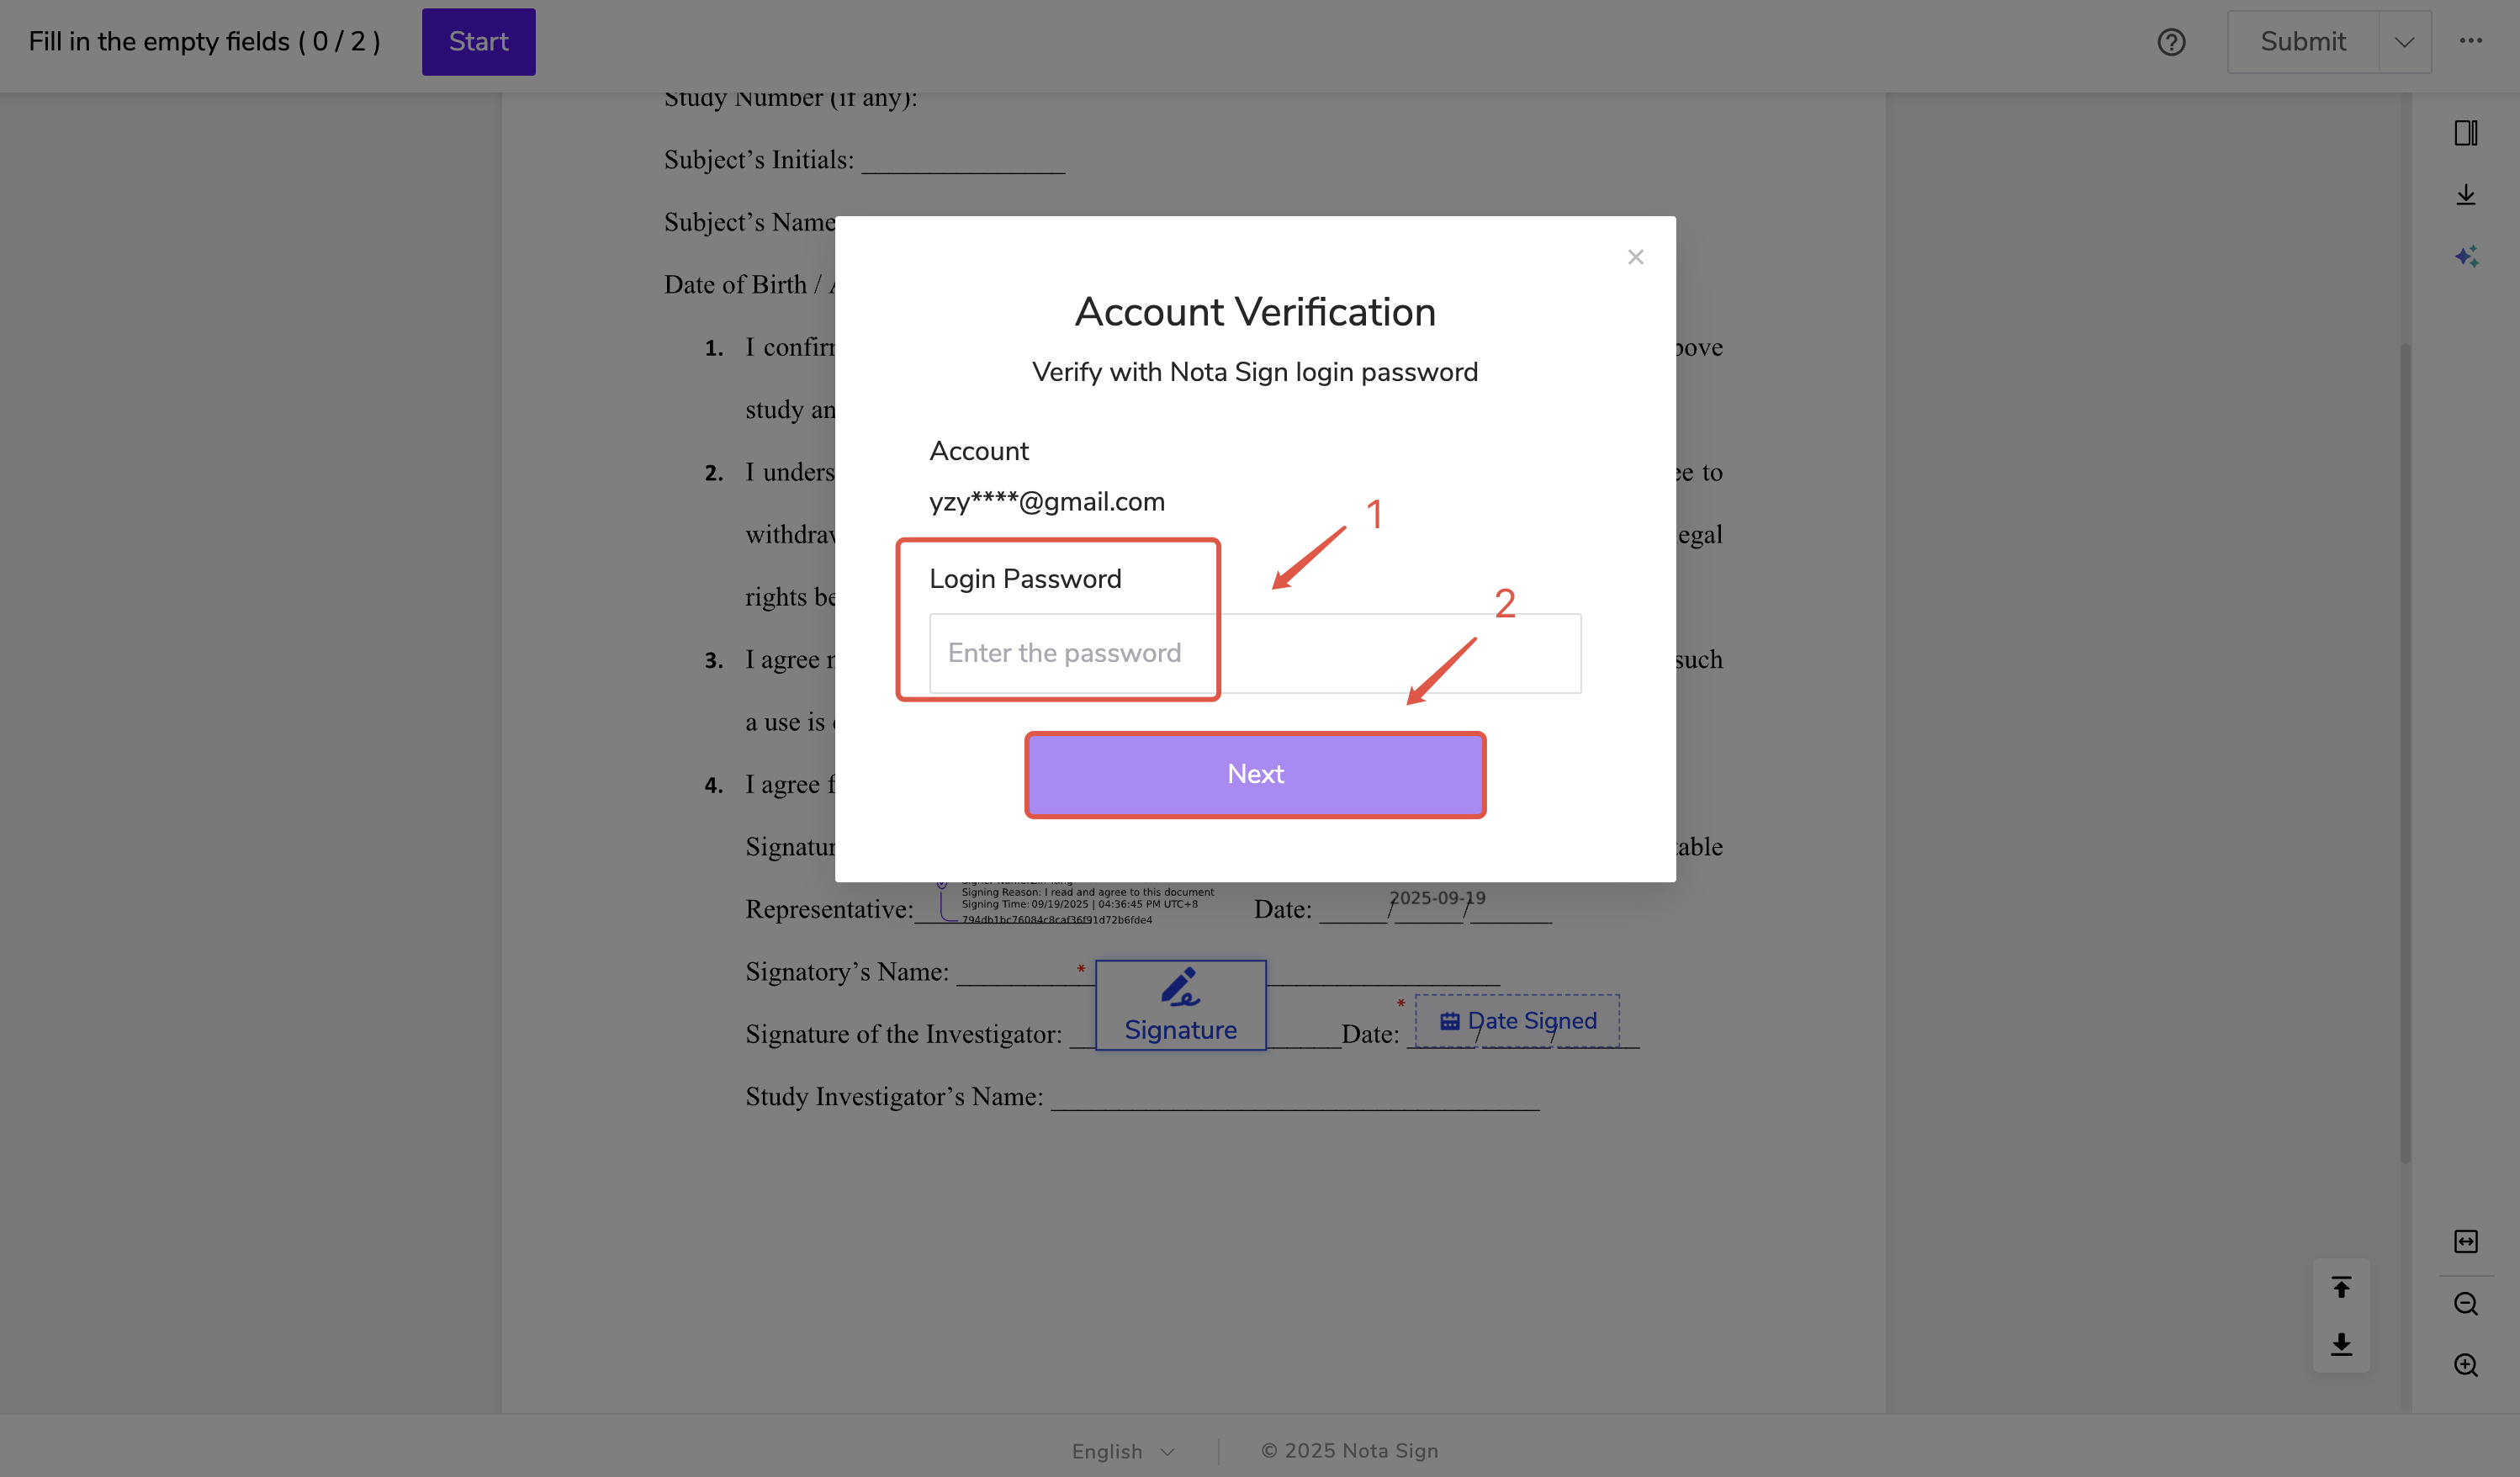
- Verify the signing account by clicking Verify Now;
- Confirm your Nota Sign account, enter your password, then click Next;
- Click Send Verification Code, enter the email verification code, and click Next;
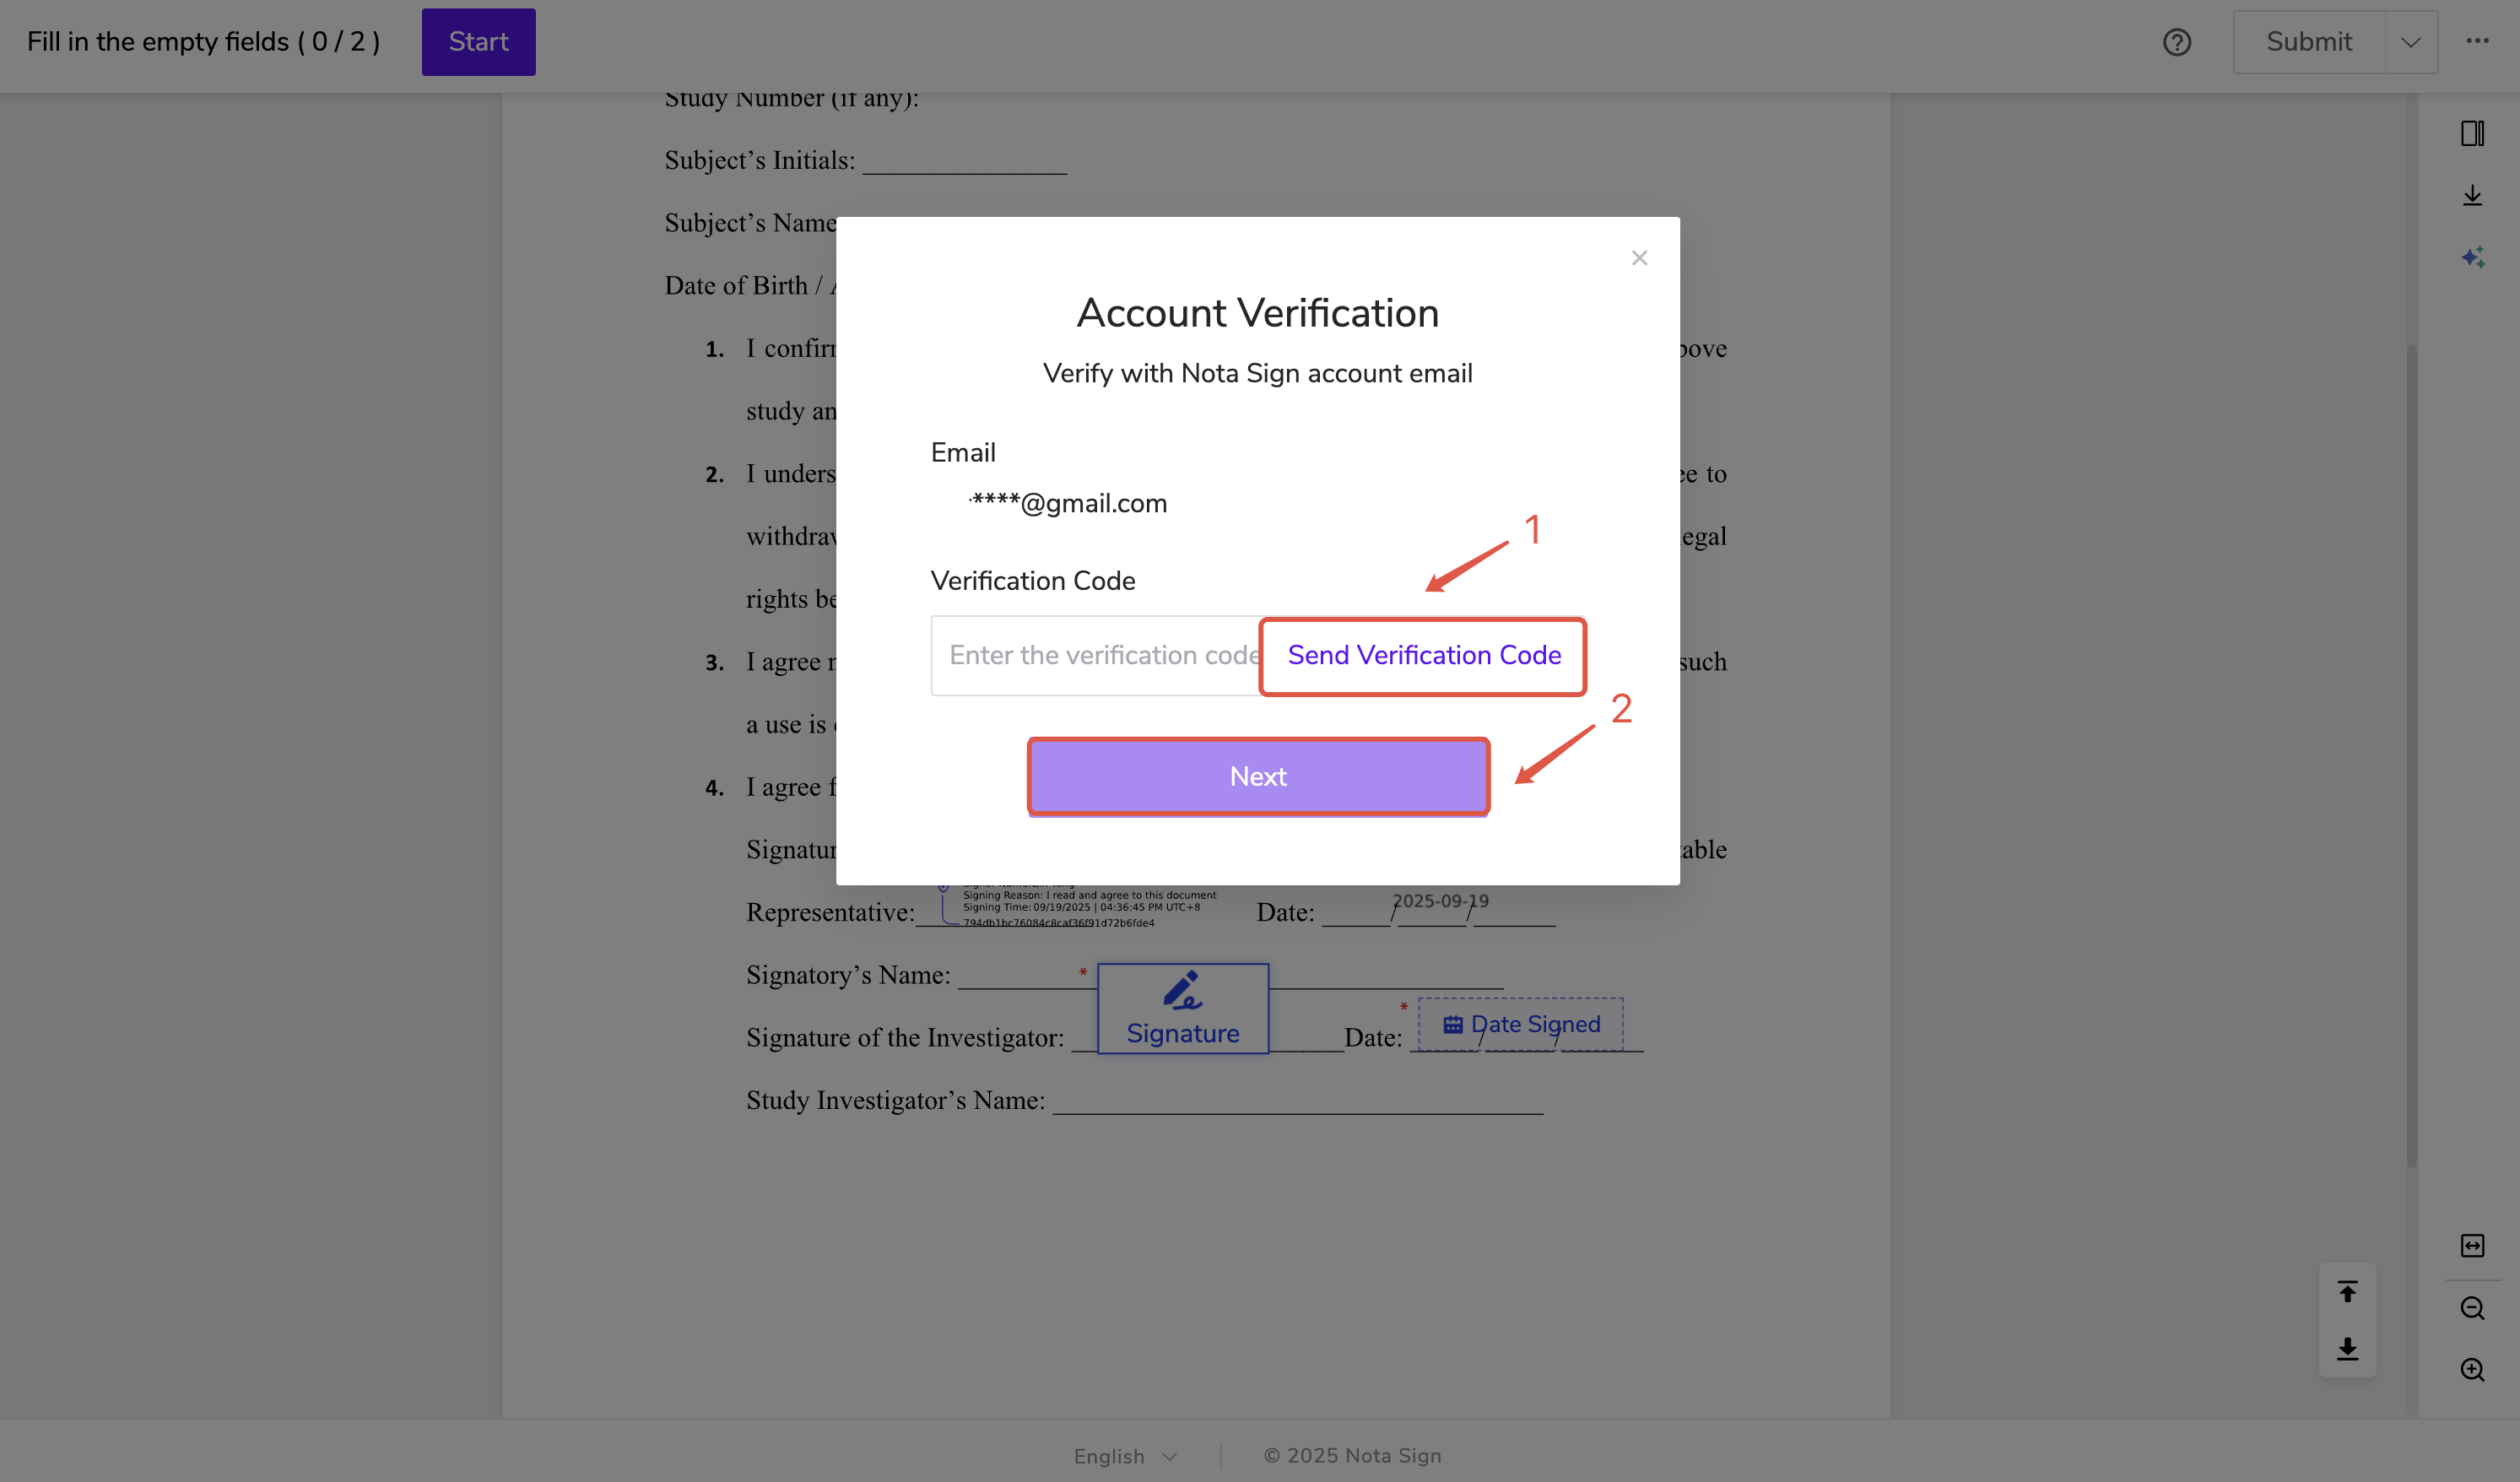
- Confirm your name and click Confirm;

In CFR Part 11 mode, the system requires account verification for every signing action.
Signing Controls Explanation
The system will guide you to complete the following controls:
Signature: Automatically generates the signer’s name, signing time, and signing reason.
Date: Automatically generates the current date for recordkeeping.
Stamp: Used to apply company or personal stamps. Choose an authorized stamp or upload a valid electronic stamp, then click Confirm.
Text: For filling in key information such as name, address, or ID number. Fill in as instructed by the sender.
Checkbox: For confirming or agreeing to a clause.
Image: Used for uploading IDs, business licenses, etc. After uploading.
Attachment: For uploading supplementary documents related to the contract.
- ⚠️ Note: When using a Text Field, the assigned recipient must complete the required field before the signing process can proceed. Please ensure that all required text fields are properly filled by each designated recipients to avoid delays in workflow progression -
Step 3: Submit the Signed Document
- Once all required fields are completed, click Submit to finalize the signing process.

Confirm your Nota Sign account again, enter your password, and click Next;
Click Send Verification Code, enter the email verification code, then click Next. The system will automatically submit and complete the signing process.
Once all recipients have completed signing, they will receive a completion notification and can view signing records anytime under Sign.