
How to Configure the Stamp Field When Creating an Envelope
When the sender creates an envelope and requires the recipient to sign with an electronic stamp, the sender has to define the stamp placement in the document by setting a stamp field.
Enable Stamp Field
After enabling the stamp field, the sender can grant recipients permission to use authorized stamps. If「Authorized Stamps Only」 is selected, recipients will not be able to upload their own stamps.
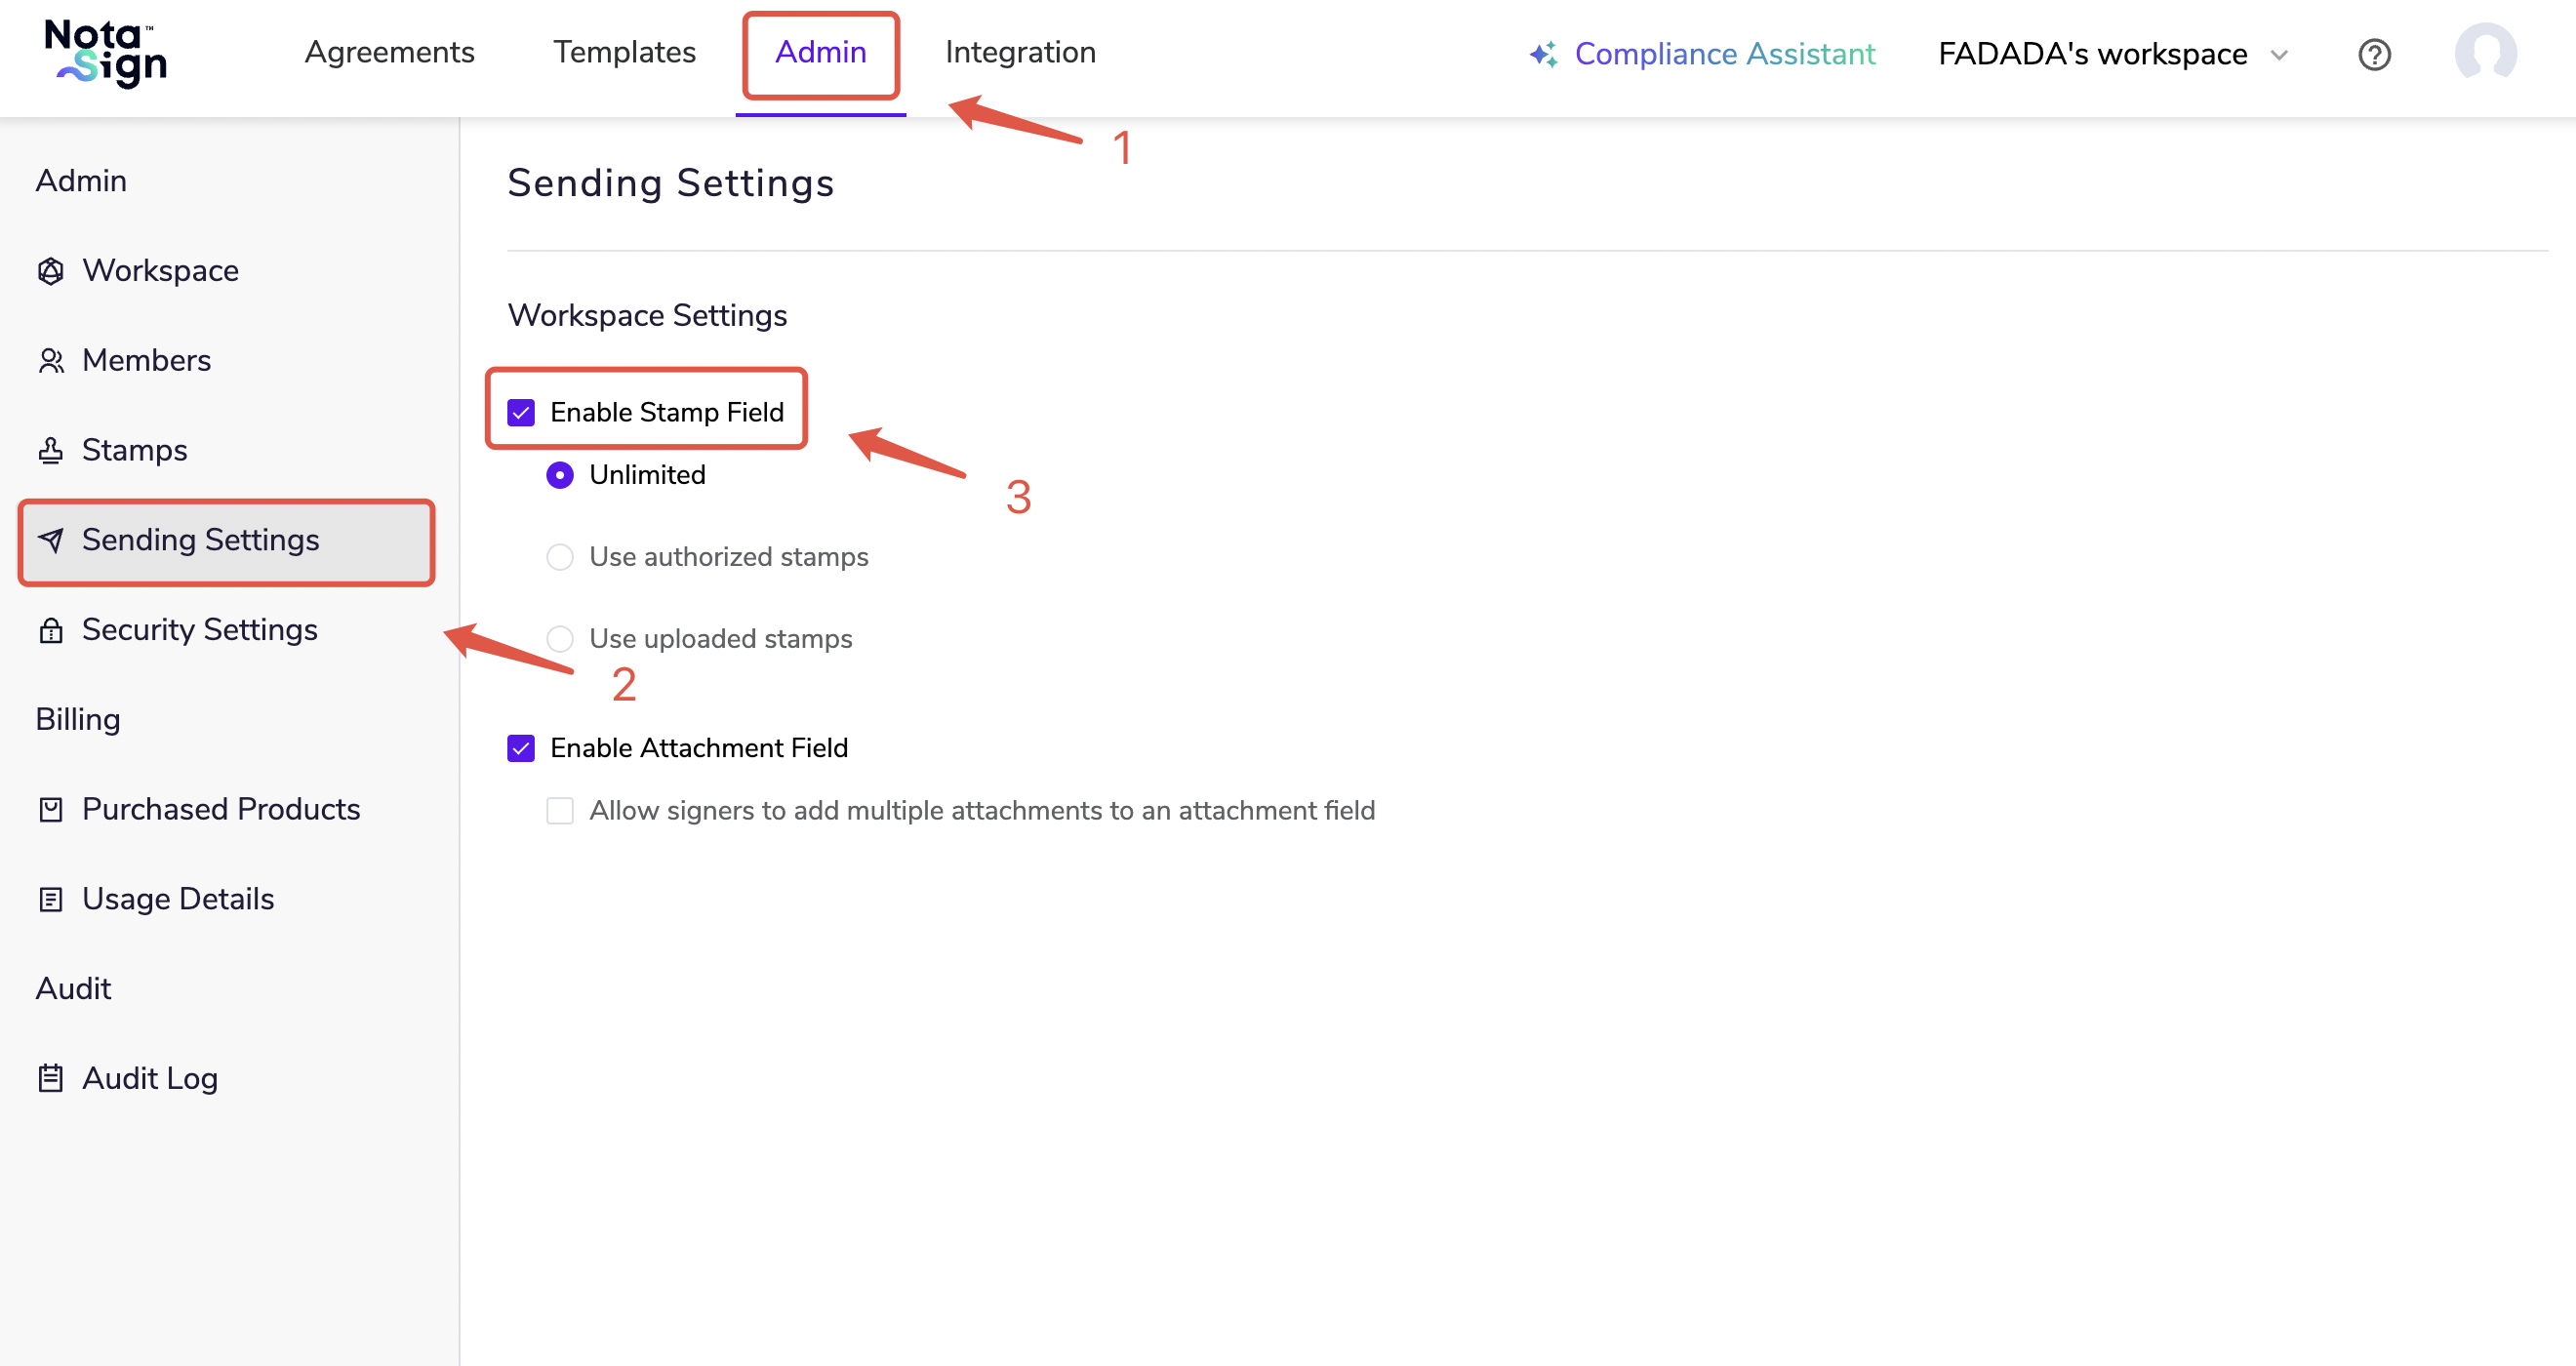
Log in to your Nota Sign workspace.
Click Admin in the top navigation bar.
In the left menu, click Sending Settings.
Check Enable Stamp Field, then select whether to use authorized stamps or allow uploading of other stamps according to your requirements.
Configure Stamp Field When Creating an Envelope
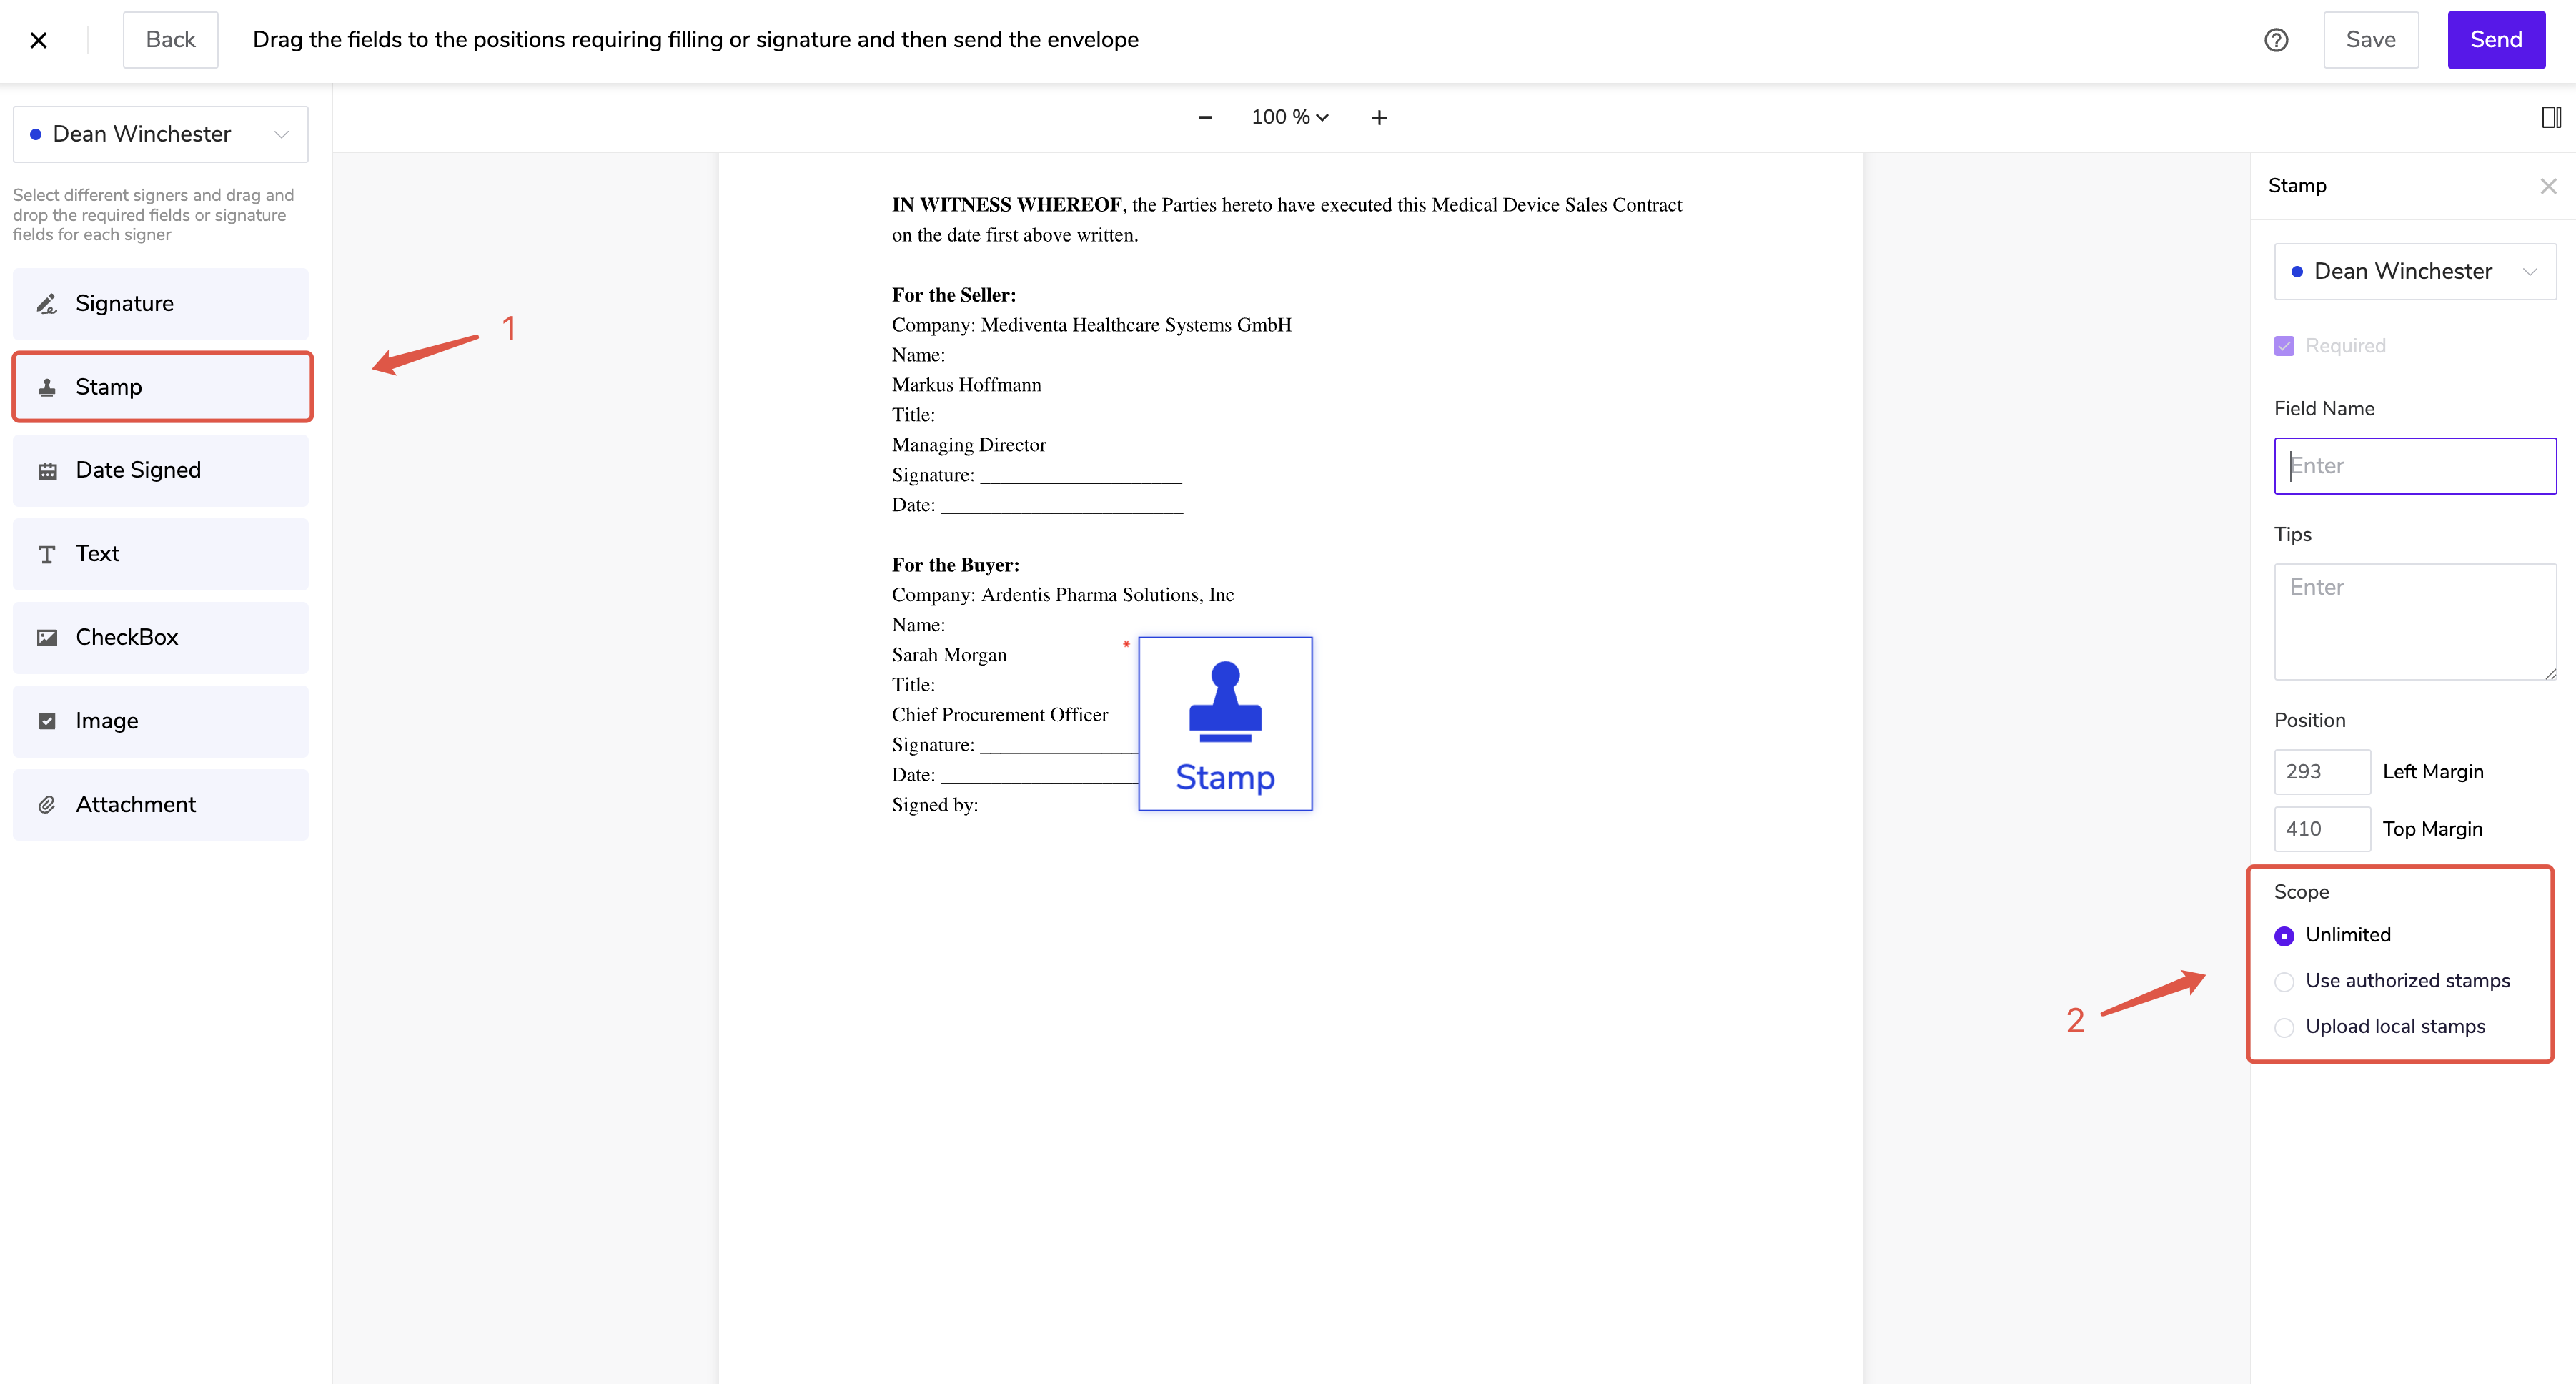
When creating an envelope, drag and drop the stamp field to specify the recipient’s stamp signing area.
Send an envelope (for detailed steps, please refer to Send an Envelope);
Drag Stamp to the designated signing area;
In the Scope section, you can adjust stamp usage permissions for recipients in this envelope.
- ⚠️ Note: Once configured, the stamp field will be applied as the default setting. You may also adjust individual recipients’ stamp permissions when creating an envelope.-