
Signing a Simple Electronic Signature (SES) Envelope
Video Tutorial:
1. Accessing the Envelope
You can access the envelope through two main methods:
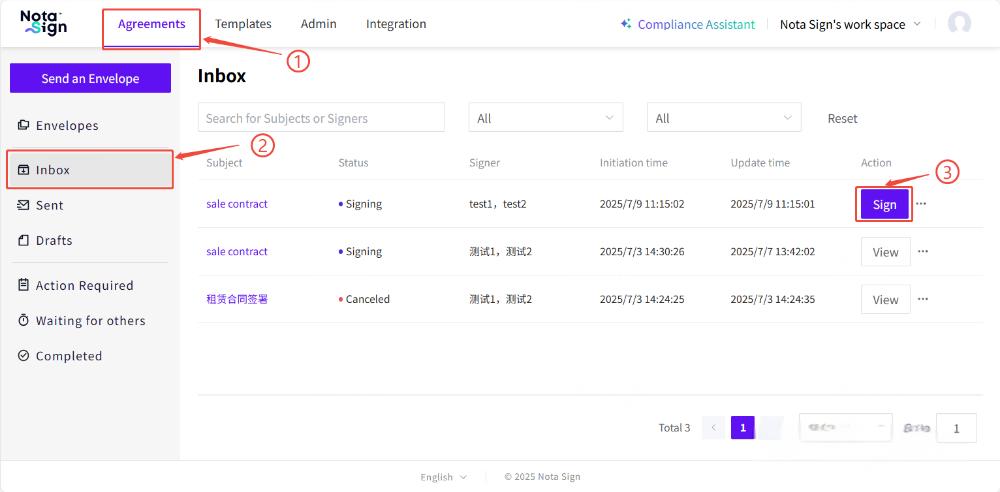
Option 1: From the Nota Sign Dashboard
Log in to your Nota Sign account.
Navigate to Agreements.
Click on the Inbox tab in the left sidebar.
Locate the envelope you need to sign and click Sign.
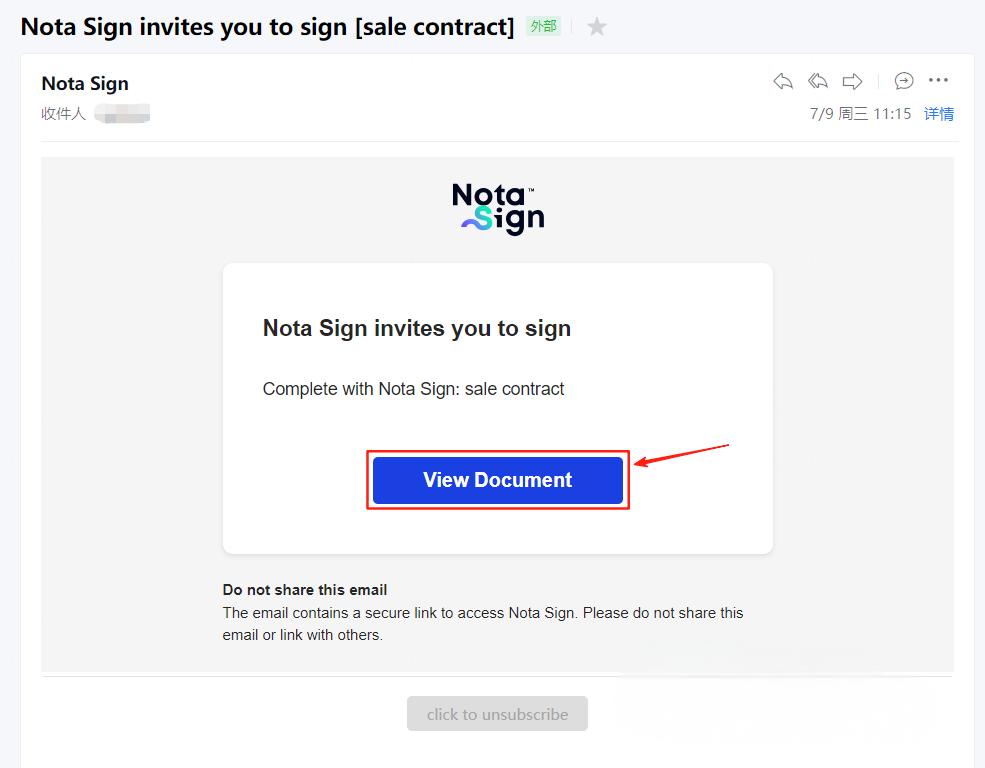
Option 2: From the Email Invitation
Open the signature request email sent by Nota Sign.
Click View Document to open the envelope directly in your browser.
2. Signing the Envelope
Step 1: Review the Document
Carefully read through the agreement content.
To proceed, click Agree after reviewing the terms.

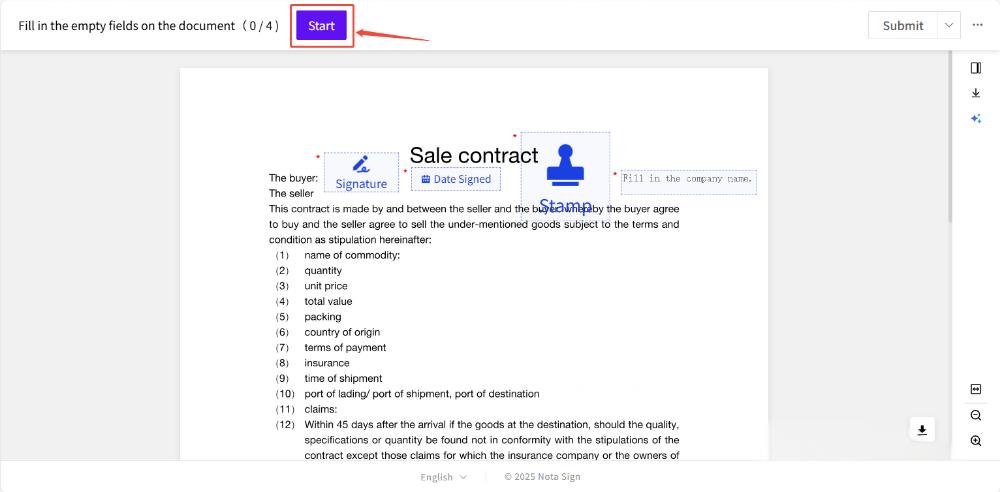
Step 2: Complete Required Fields
Click on each highlighted field and complete it as required. Supported field types include:
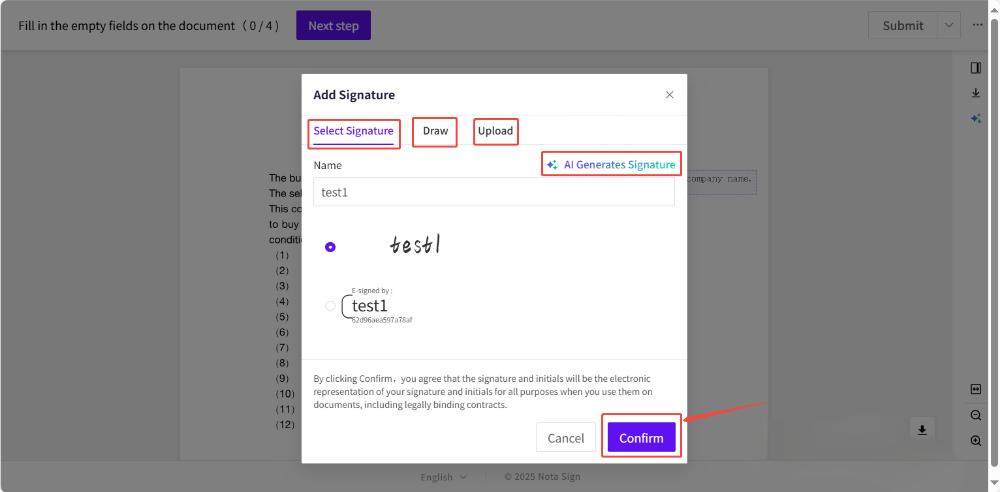
- Signature: Click the Signature field to insert your signature. You can choose from the following options:
Default Style, Drawn, Upload and AI-generated.
Date: Click the Date field to automatically insert the current date.
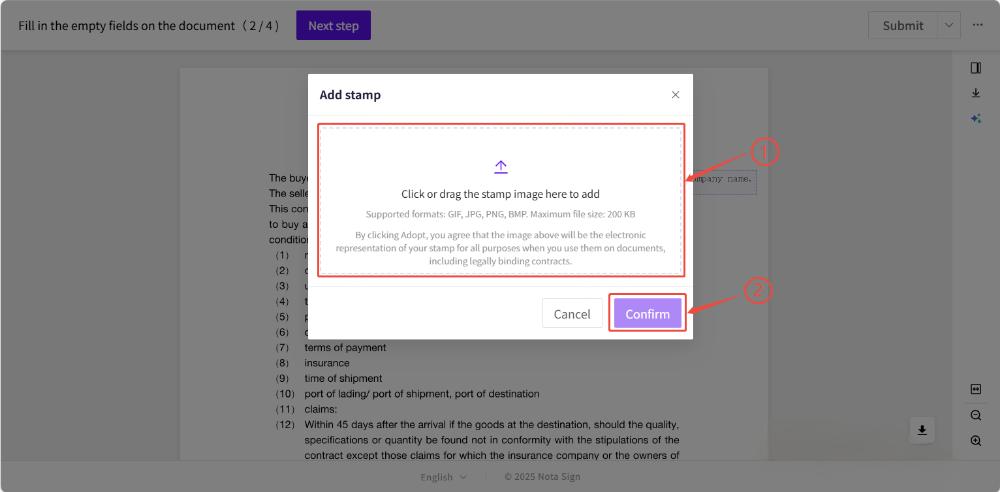
Stamp: Click the Stamp field to upload a compliant company or personal stamp.
Text Fields: Click into any Text field and type the requested information.
Checkbox: Click a Checkbox field to mark it as selected.
Image Upload: Use this field to upload required supporting images.
Attachment: Clike the Attachment to upload supplementary documents related to the envolope.
- When using a Text Field, the assigned recipient must complete the required field before the signing process can proceed. Please ensure that all required text fields are properly filled by each designated recipient to avoid delays in workflow progression.-
Step 4: Submit the Signed Document
Once all required fields are completed, click Submit in the upper-right corner to finalize the signing process.

You will receive a confirmation email once the document has been successfully signed.