
Manage Electronic Seals
Enable an Electronic Seal
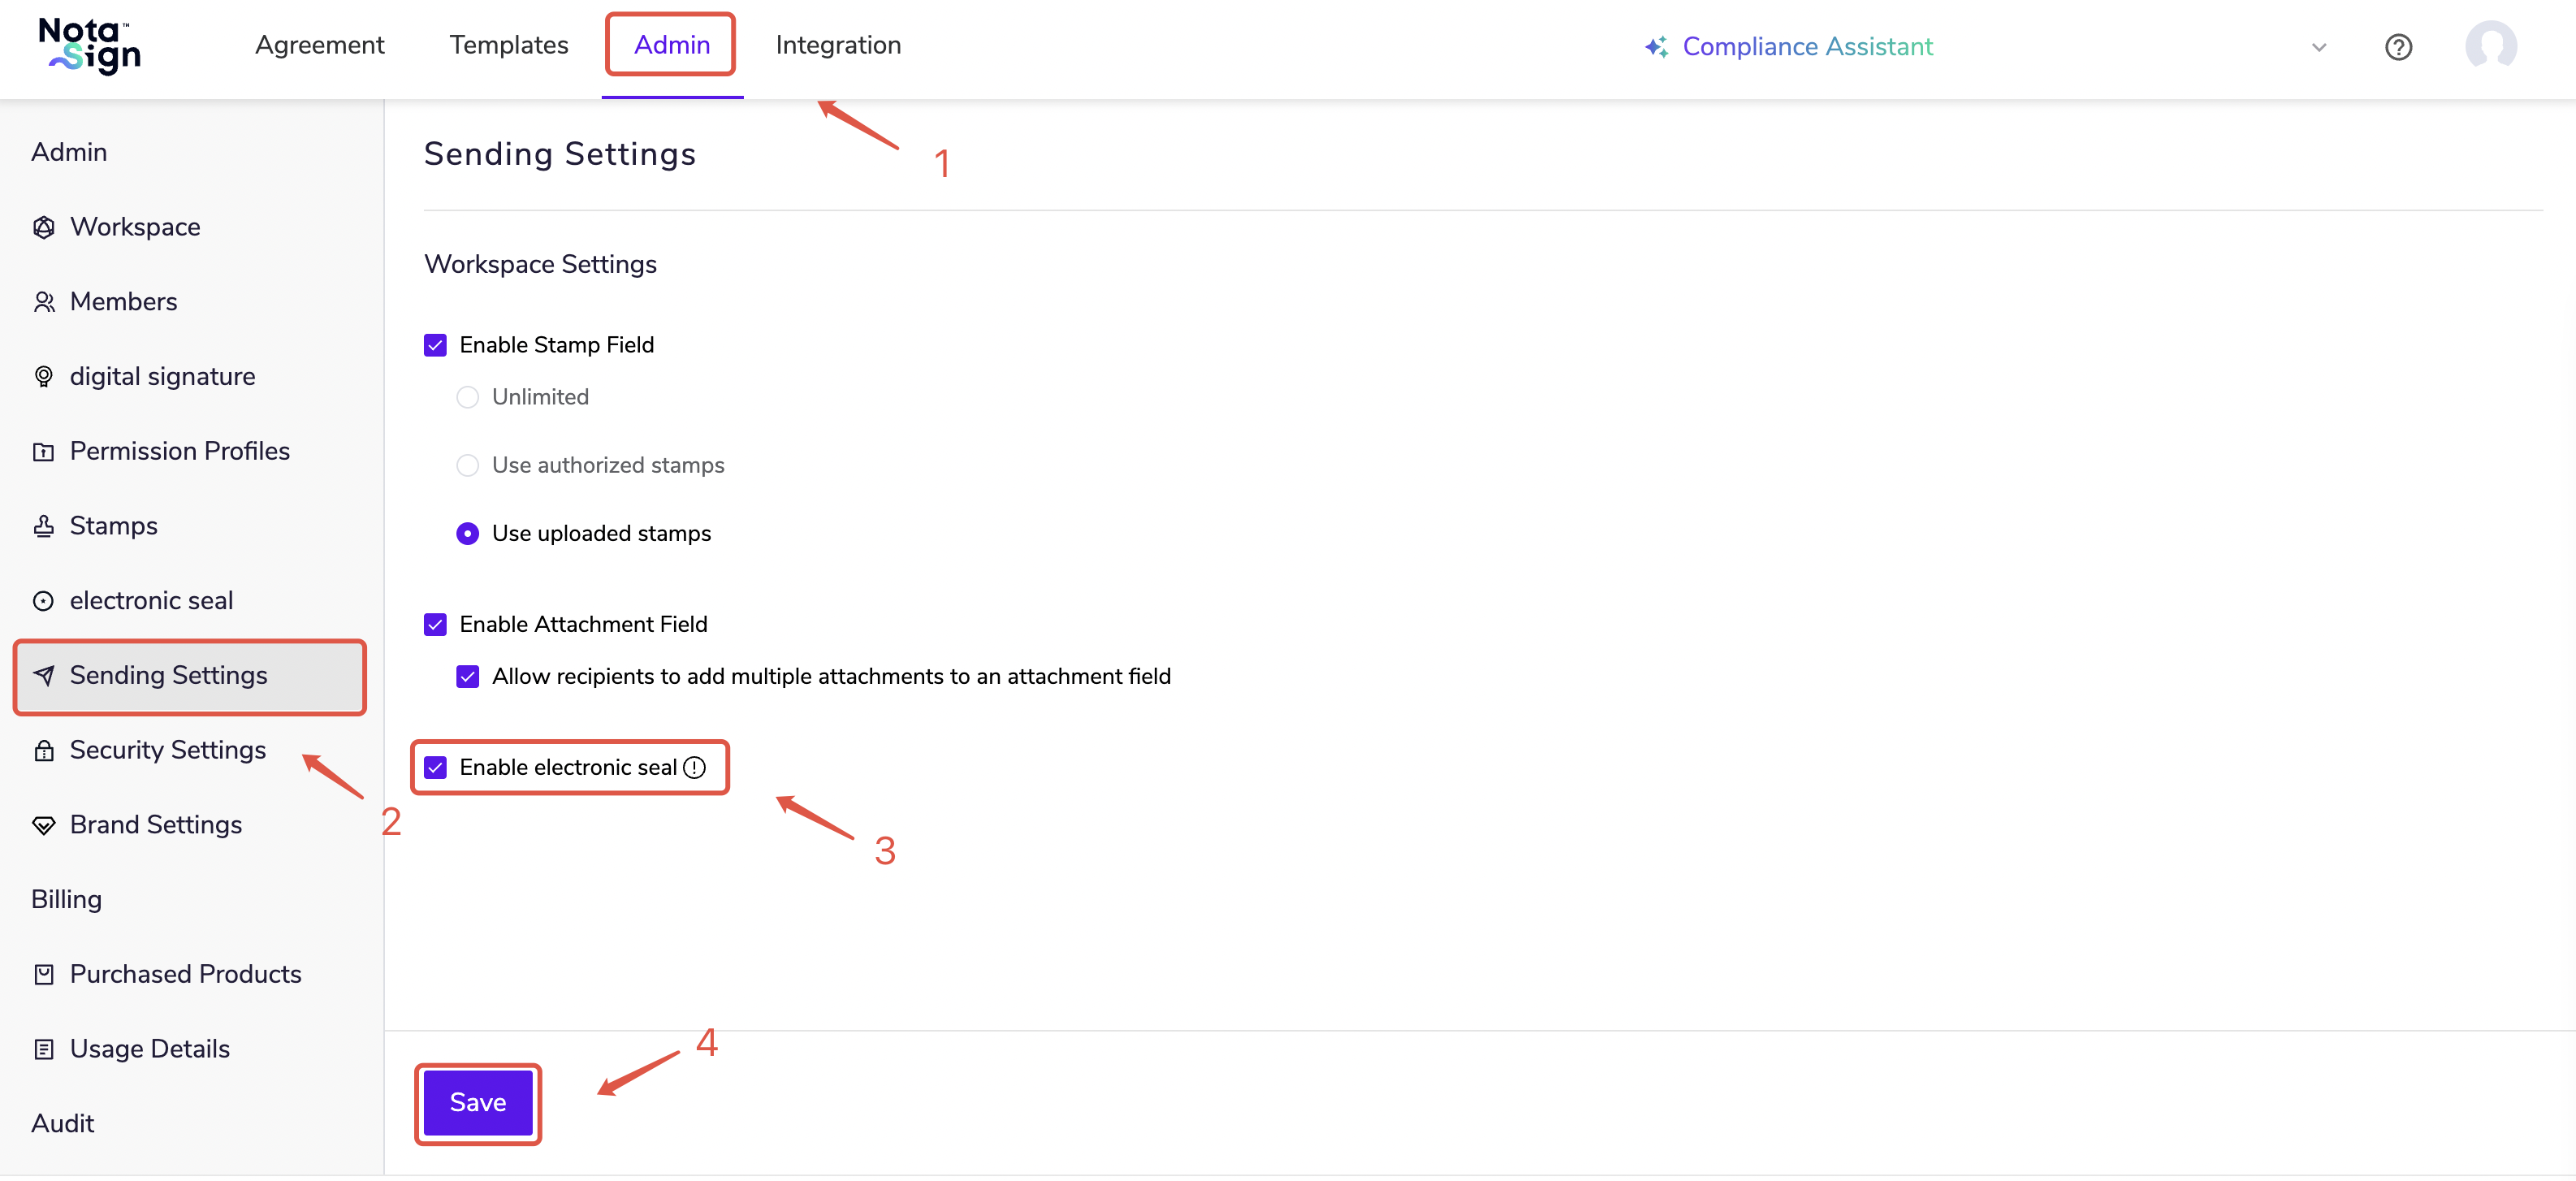
Log in to the Nota Sign workspace and click Admin > Sending Settings.
Check Enable Electronic Seal then click Save.
View Electronic Seal Details
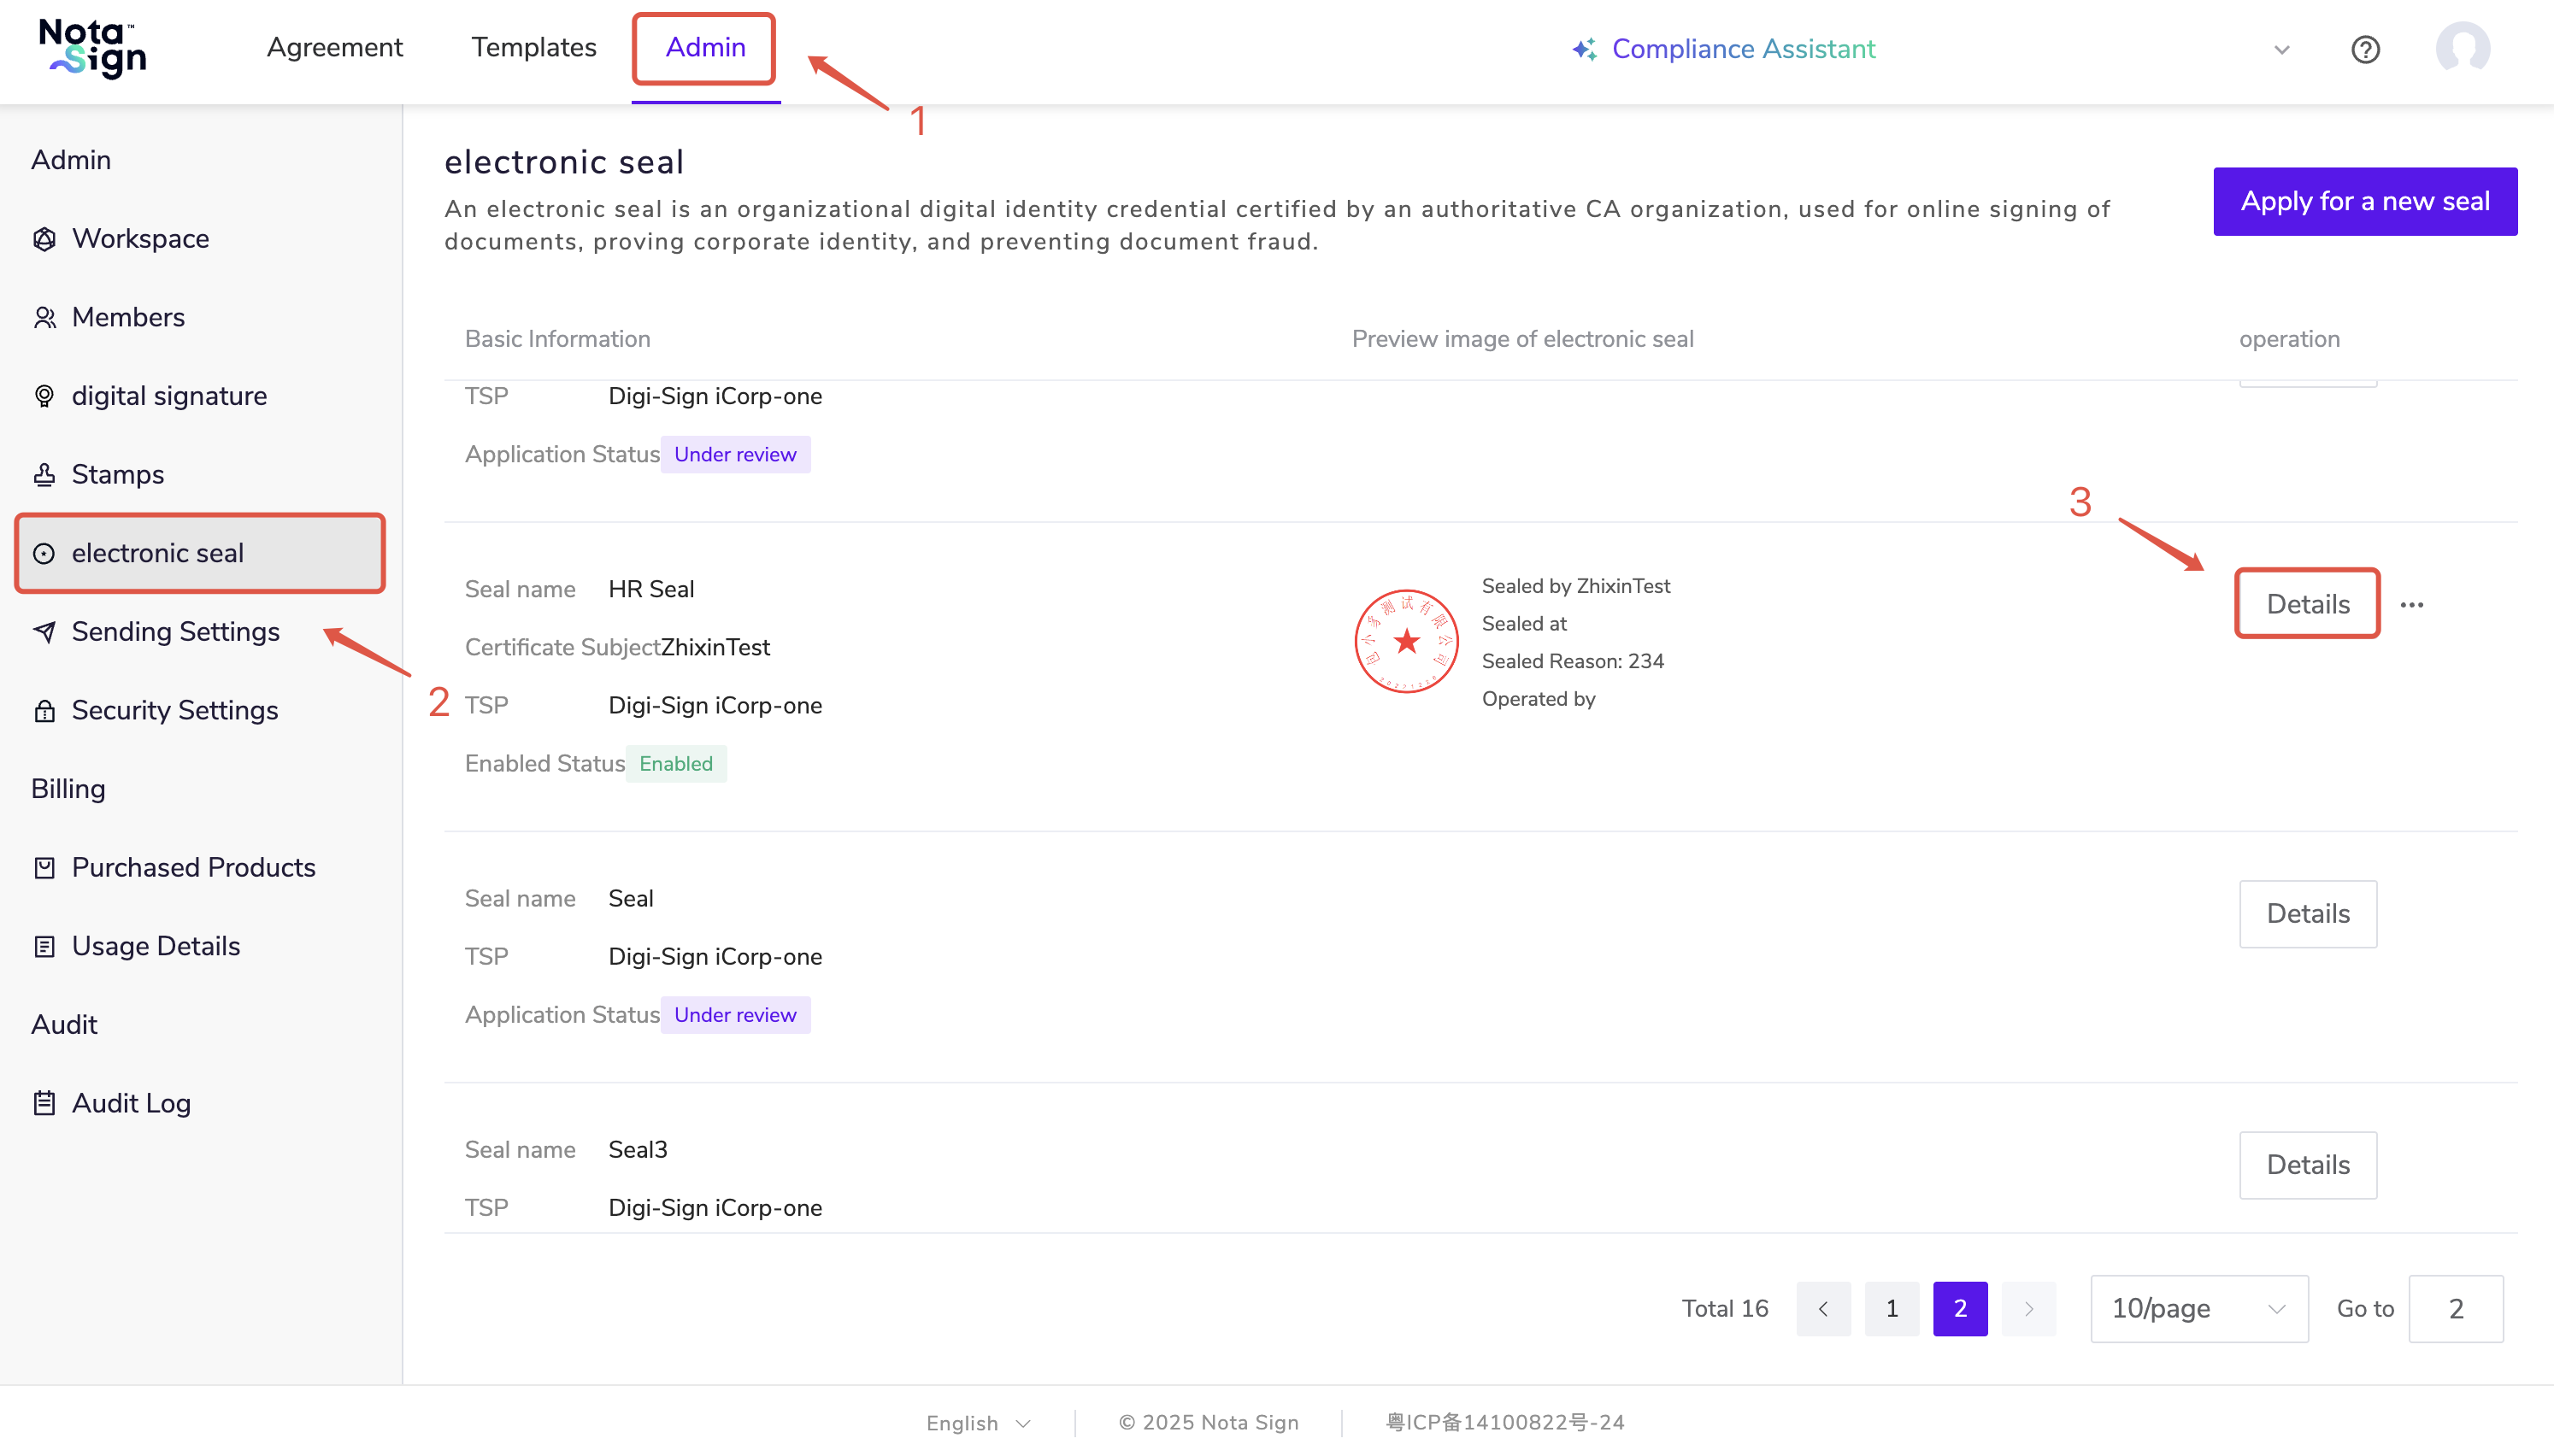
Click Admin > Electronic Seal.
On the Electronic Seal page, you can view all issued seals, including the seal name, seal type, and certificate validity period.
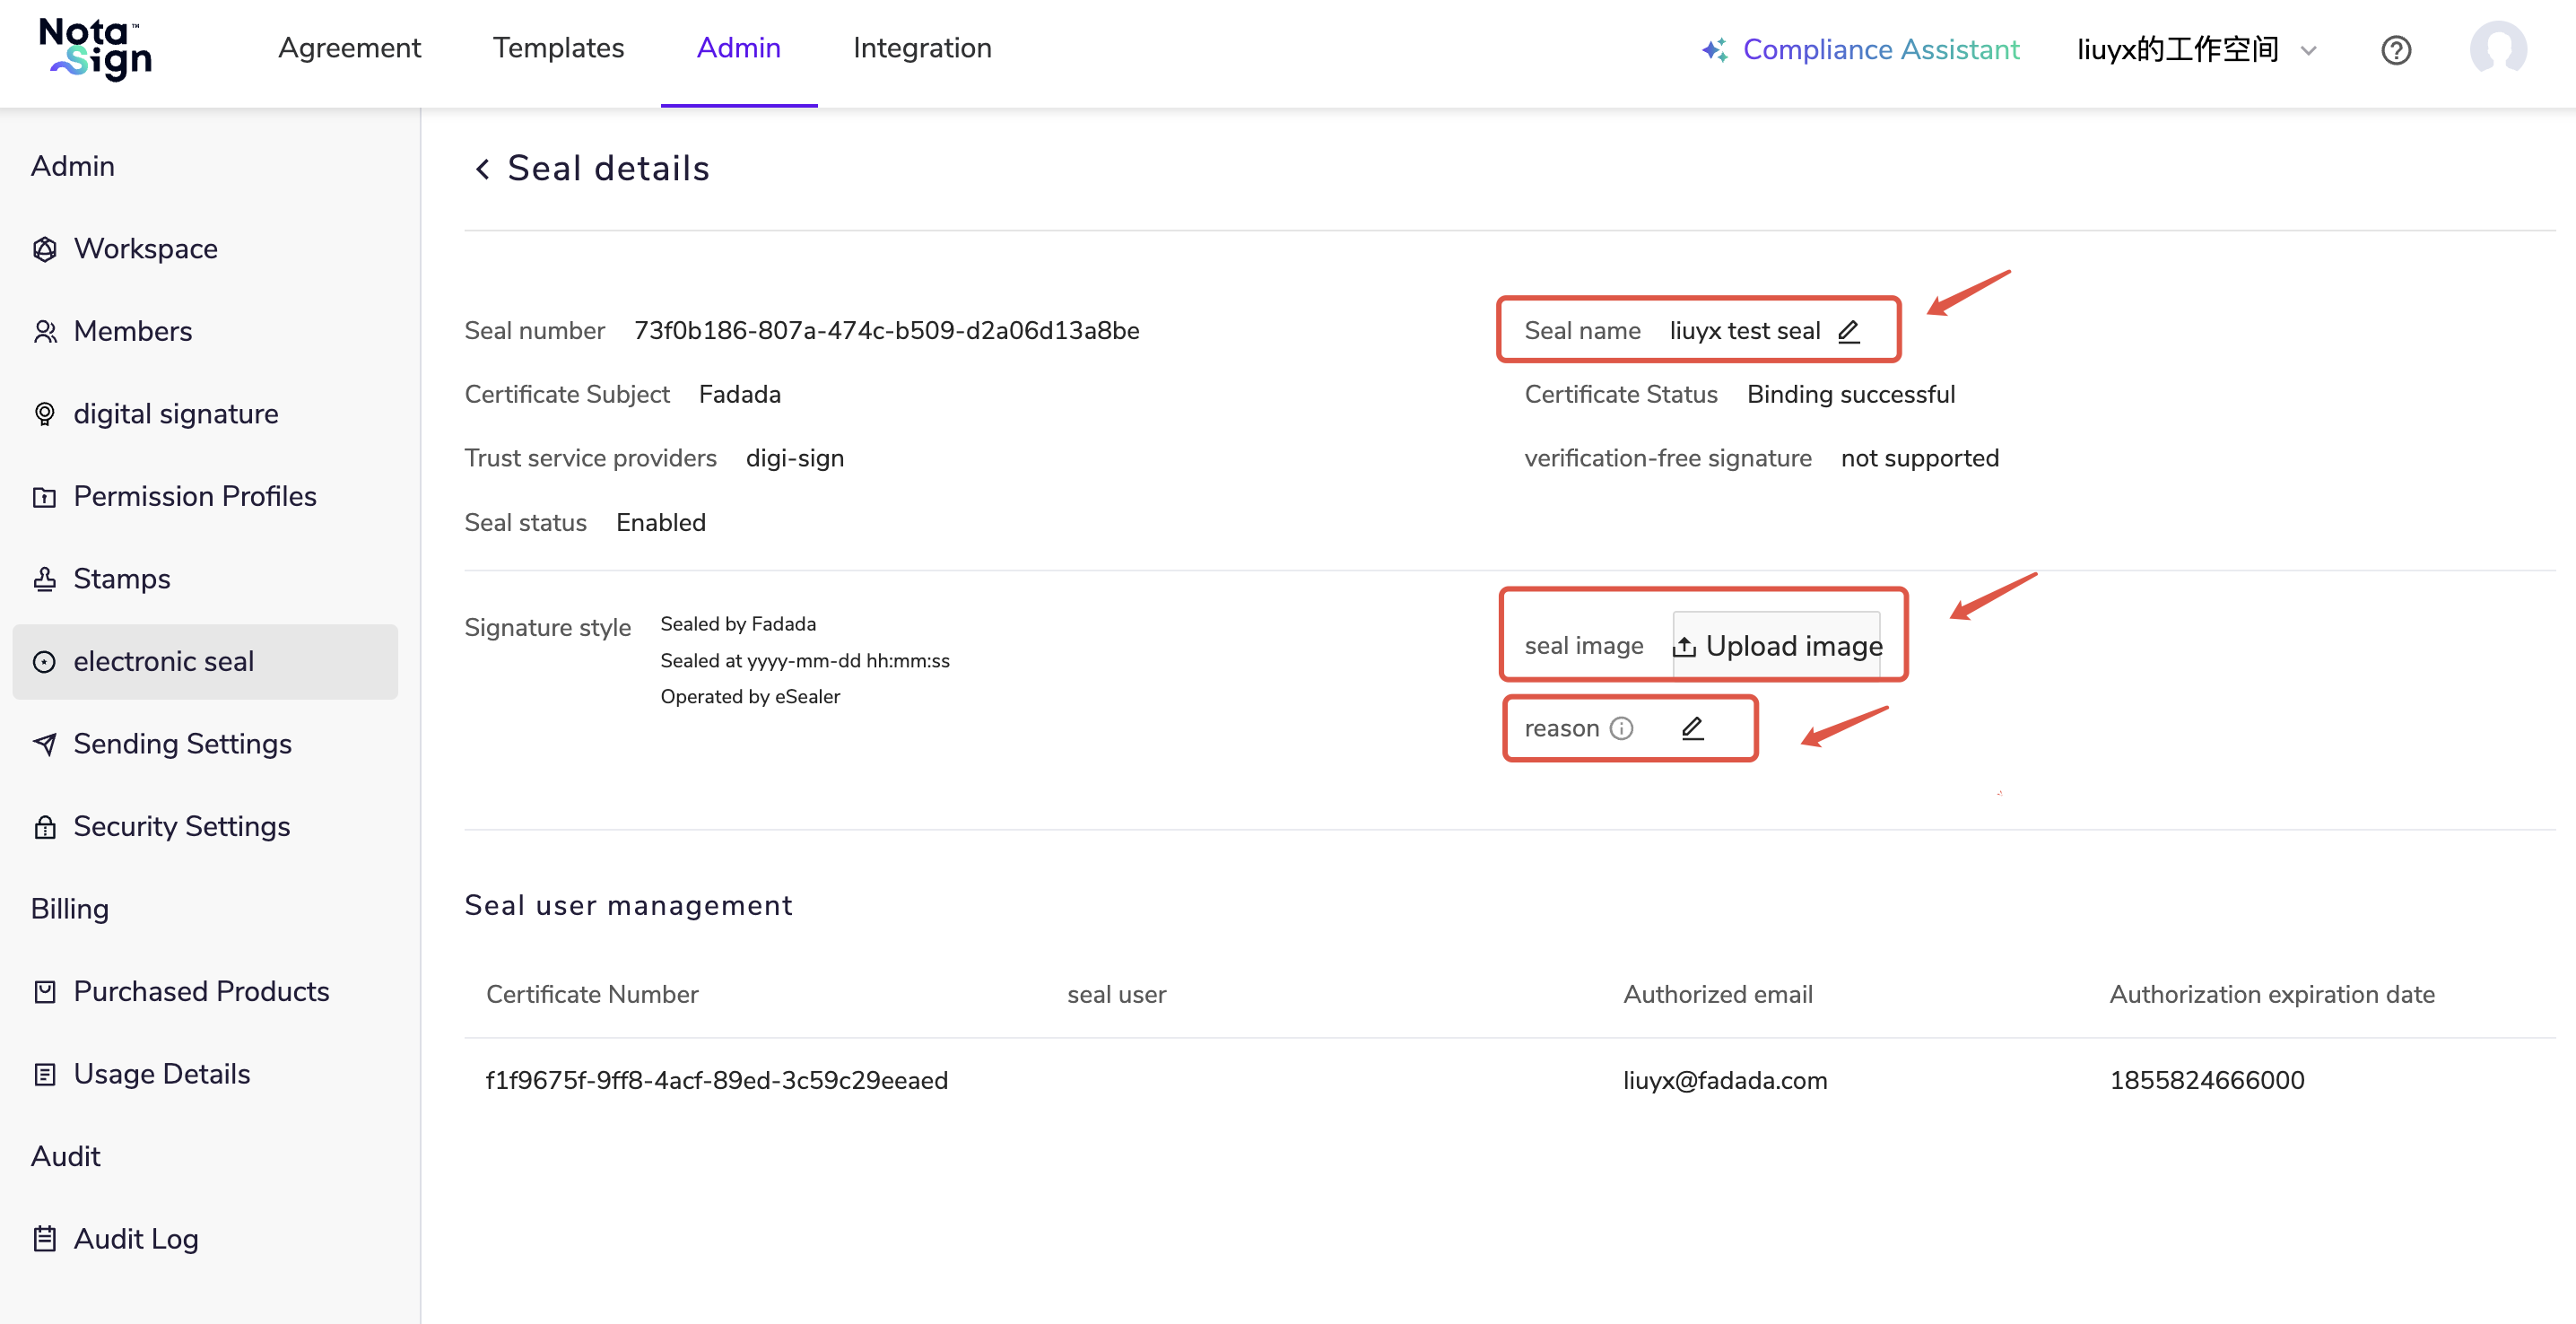
Click Details to view detailed information. The seal name can be modified, and you may upload a custom seal image and add remarks.
Disable an Electronic Seal
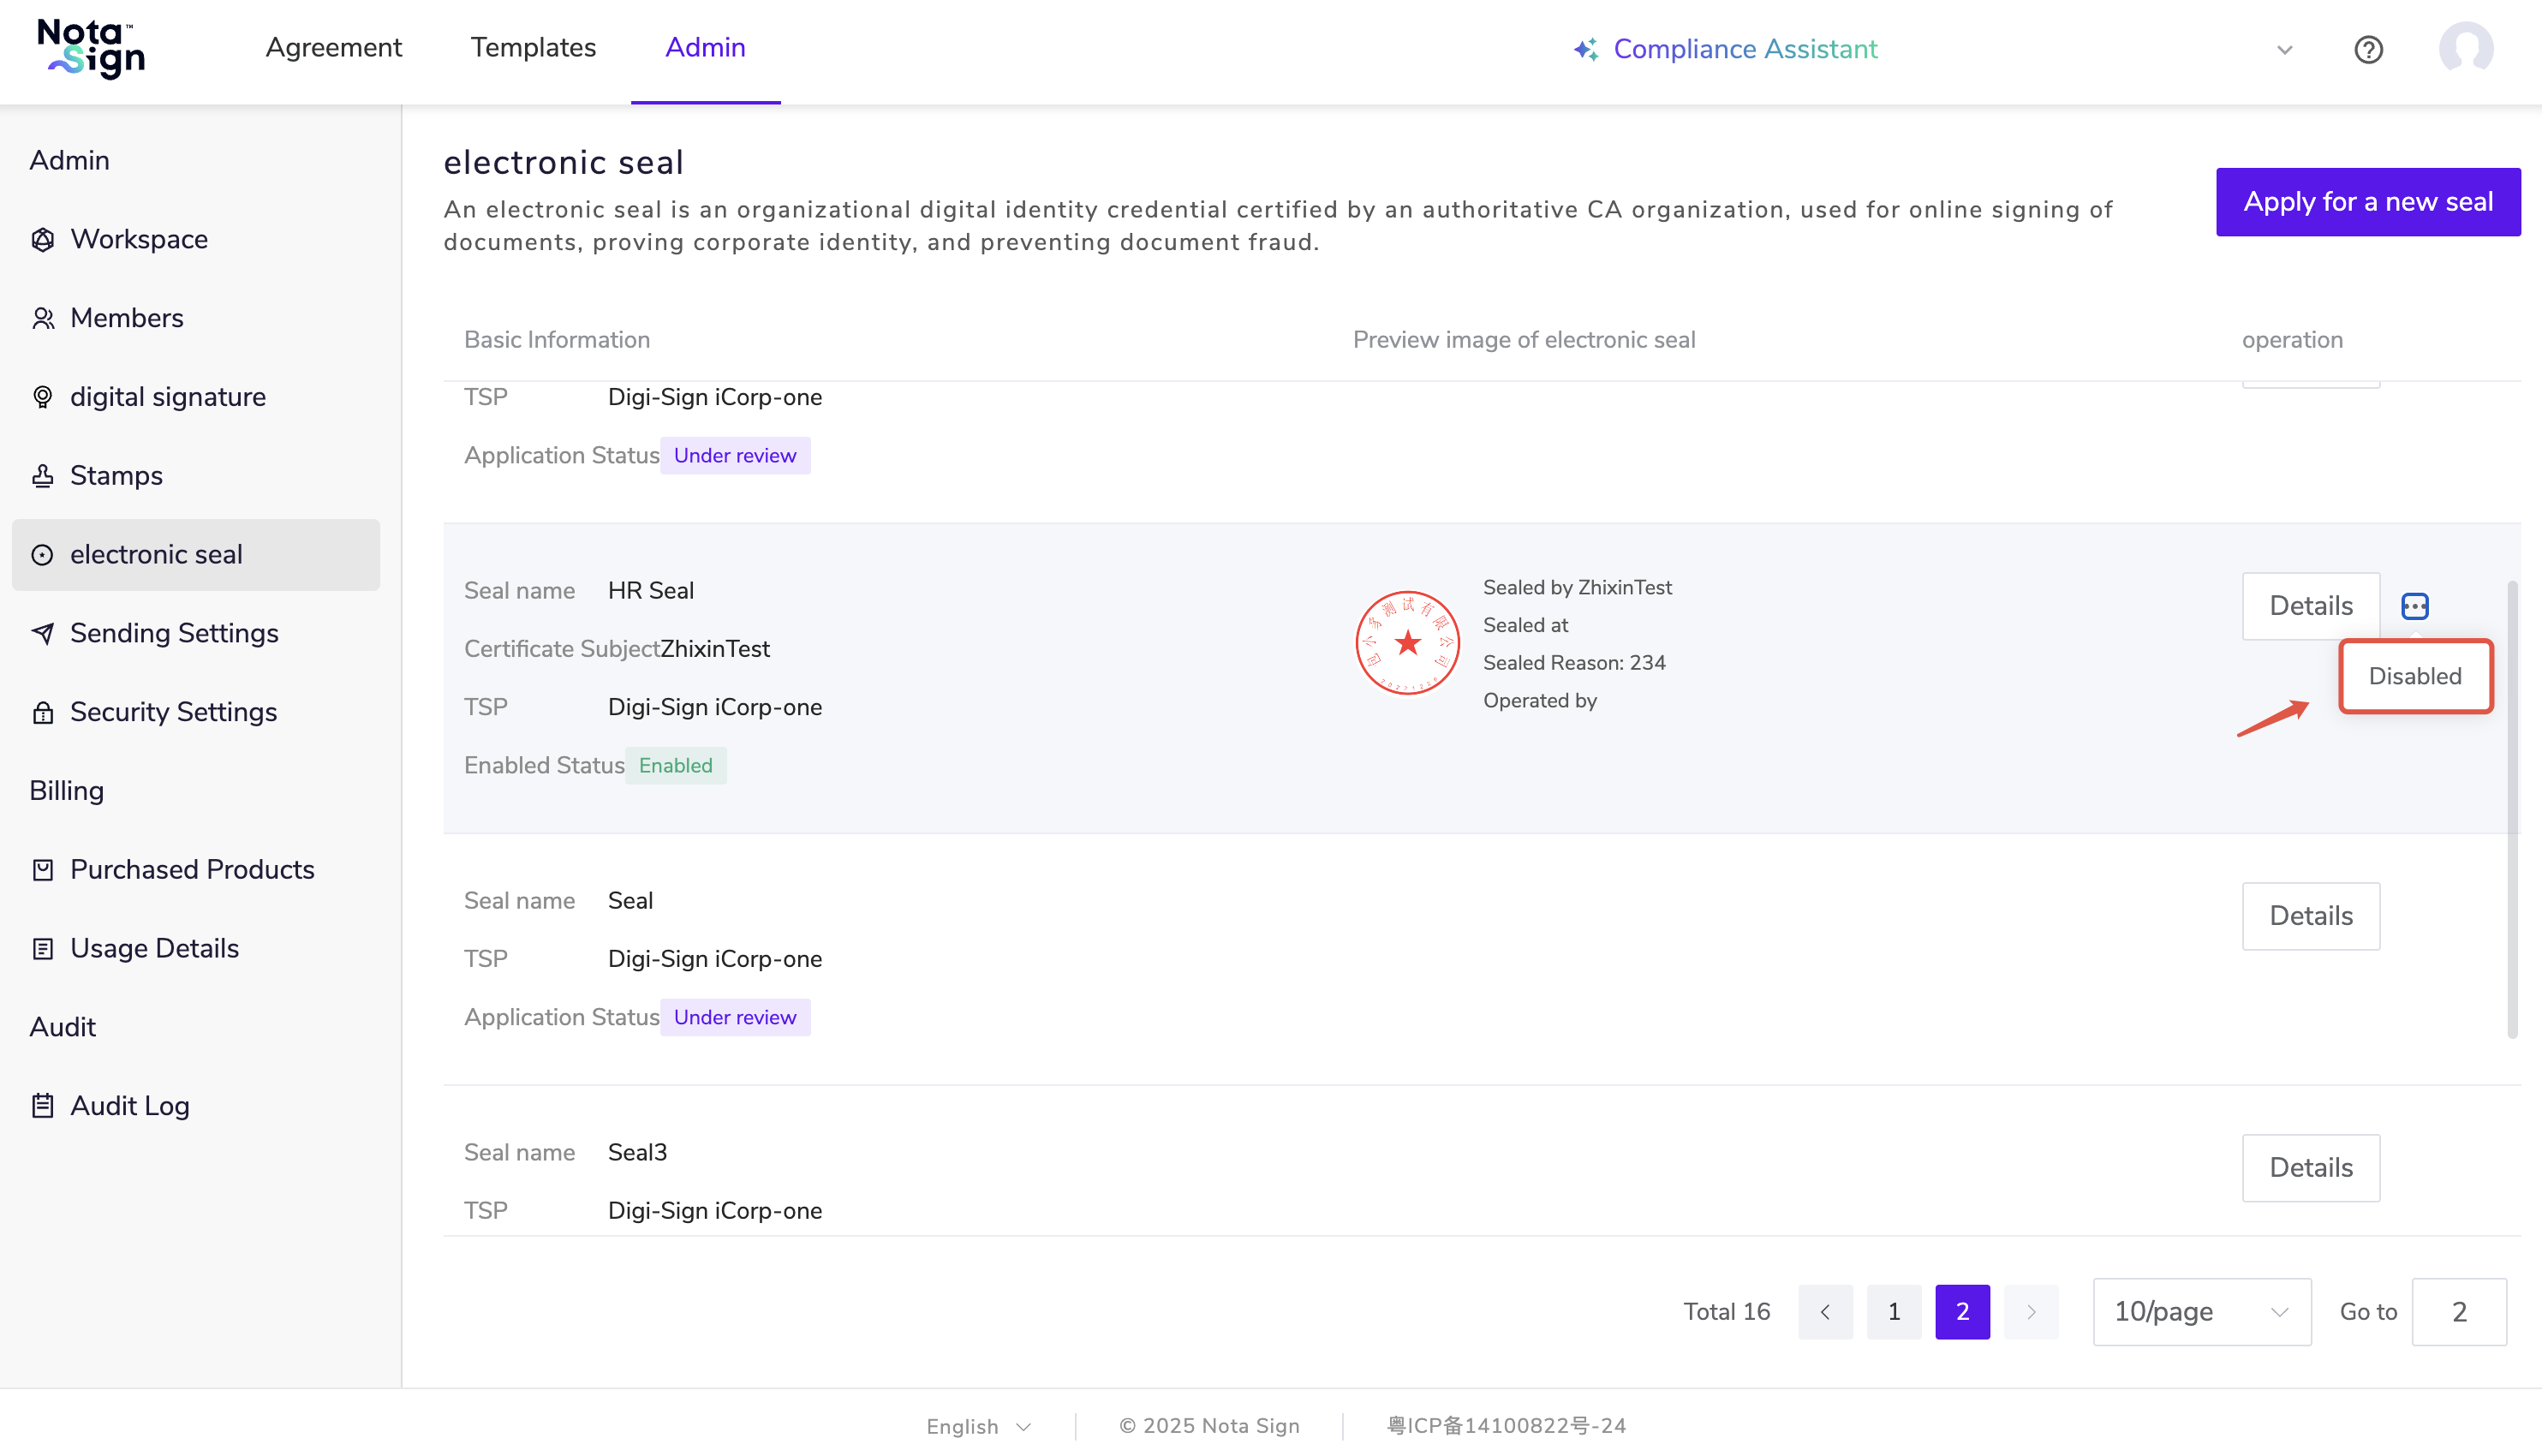
After a seal application is approved, it is enabled by default. Click Disabled to immediately revoke the usage rights of the seal.
Disabling Notes:
Once disabled, any ongoing signing processes using this seal will be immediately terminated and cannot be completed.
The seal will no longer appear in the selectable list when creating envelopes or initiating signing.
If a recipient attempts to use this seal during signing, it will no longer be selectable or usable.
Disabling only affects the seal’s signing functionality and does not delete historical signing records. Administrators may re-enable the seal at any time to restore its availability.